Hi-ltte Rambo 230 User manual
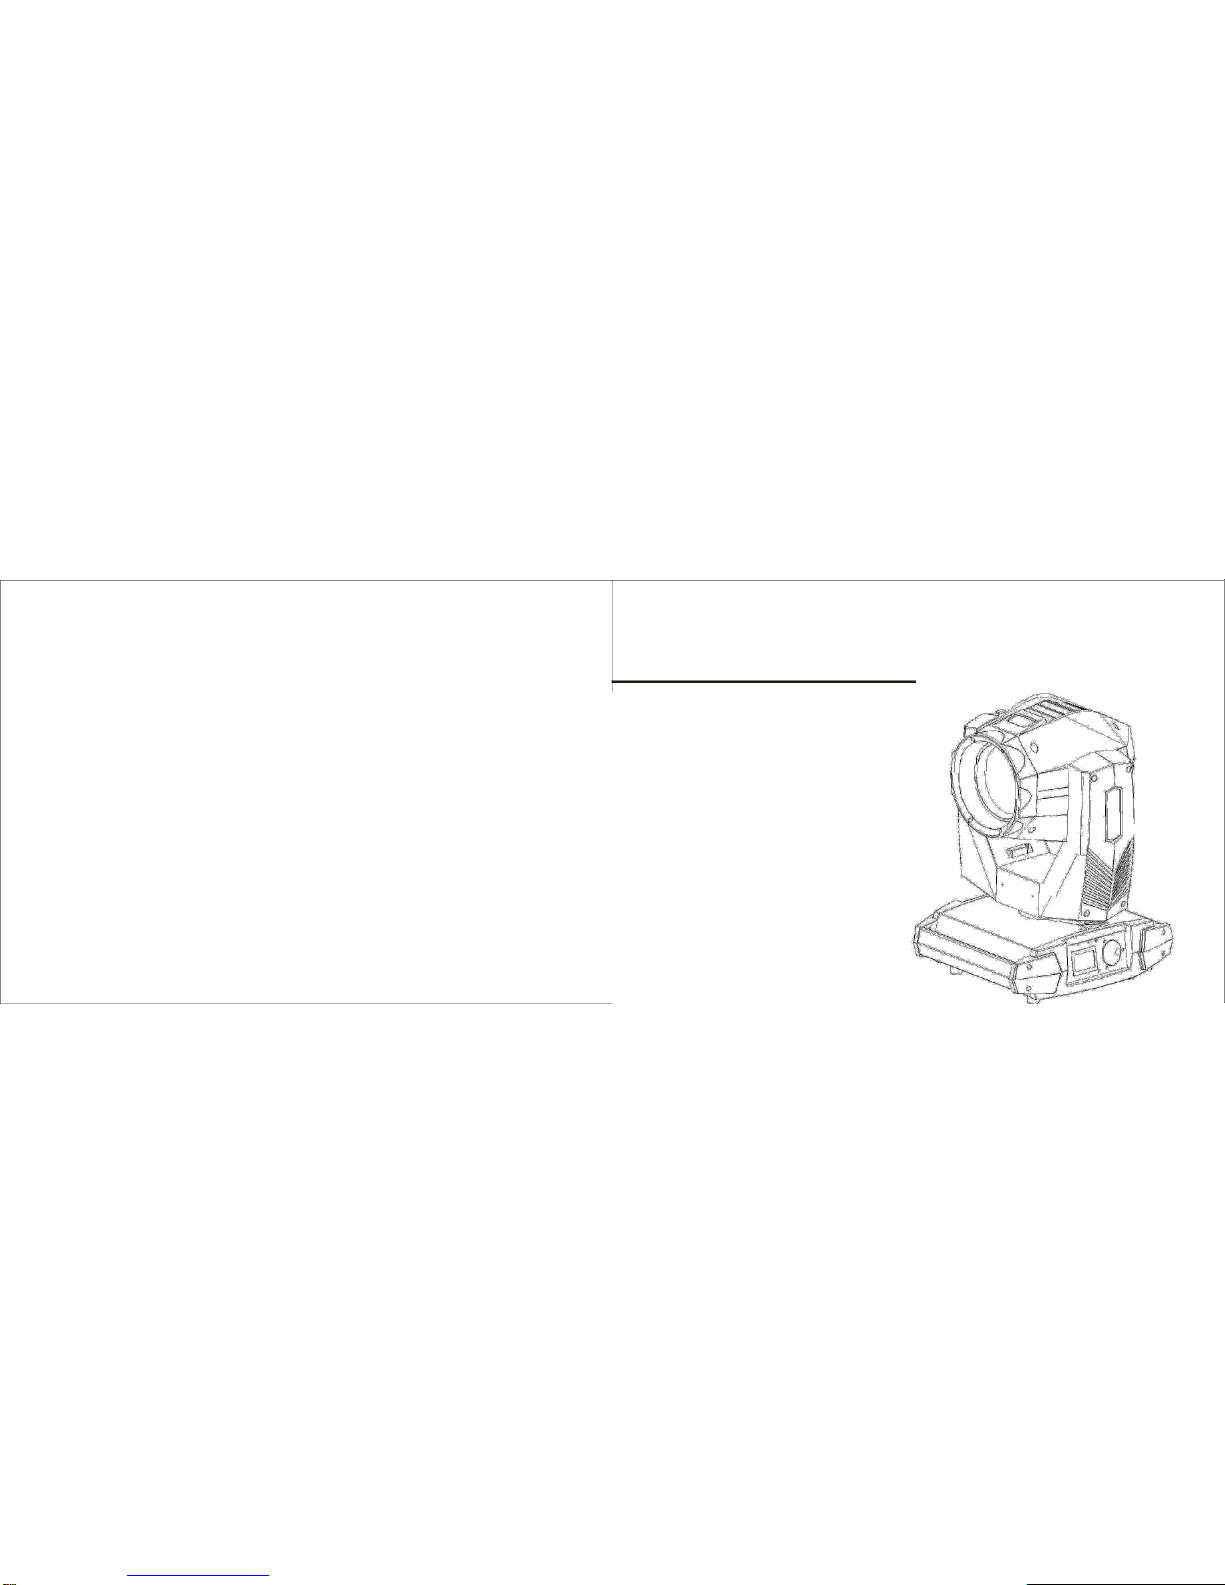
7R 230W Moving
Head Beam
User Manual

FORWORD
Thanks for choosing 230W 7R beam, it is our newest the
latest independent research and development of a high-grade
quality. Compared with other same power 7R lights, it's more
lightweight and convenient, and with perfect combination of
international advanced electronic control technology and excellent
human chemical. 230W beam is In full compliance with the CE
standard supports the international DMX512 signal control mode.
The newest moving head light used imported Yodn 230W light
source, strong light effect, clear pattern, fast and smooth pan&tilt
running, precise positioning and uniform pure color high standards of
color disc.
7R have a super high and super long distance range, also has
17 gobos with open circle aluminum gobo wheel, a frost lens, 14 color
with white color wheel, and a 8-facet prism.
230W 7R moving head beam lights are widely used in TV
station, large gymnasium, disco, dance halls, nightclubs, large-scale
performances and other professional occasion.
01
PRODUCT CATALOG
1
Safety Tips
3
2
Technical Parameters
4
3
Schematic lighting components
5
4
Packing and shipping
6
5
Safety Standards
7
6
Display Settings
8
7
Display settings (Menu control)
9-16
8
DMX Channels
16-20
9
Failure Analysis and Resolution
20-21
10
Clean lamps
21
11
Light Table
22
02
Please read the guide book, the guide book
1 SAFETY TIPS
that contains the installation, use and
maintenance of important information
◇Before using this product, please observe carefully theproduct is not unwrap or damage during transportation.
As a result of damage during transporting , please do not use the lights, and contact with the dealer ormanufacturer. ◇
Before running products, to ensure that the voltage and Hertz in accordance with the requirements of lights.
◇It’s very important, connecting ground wire to avoid the electric shock.
◇This product is for dry indoor environment.
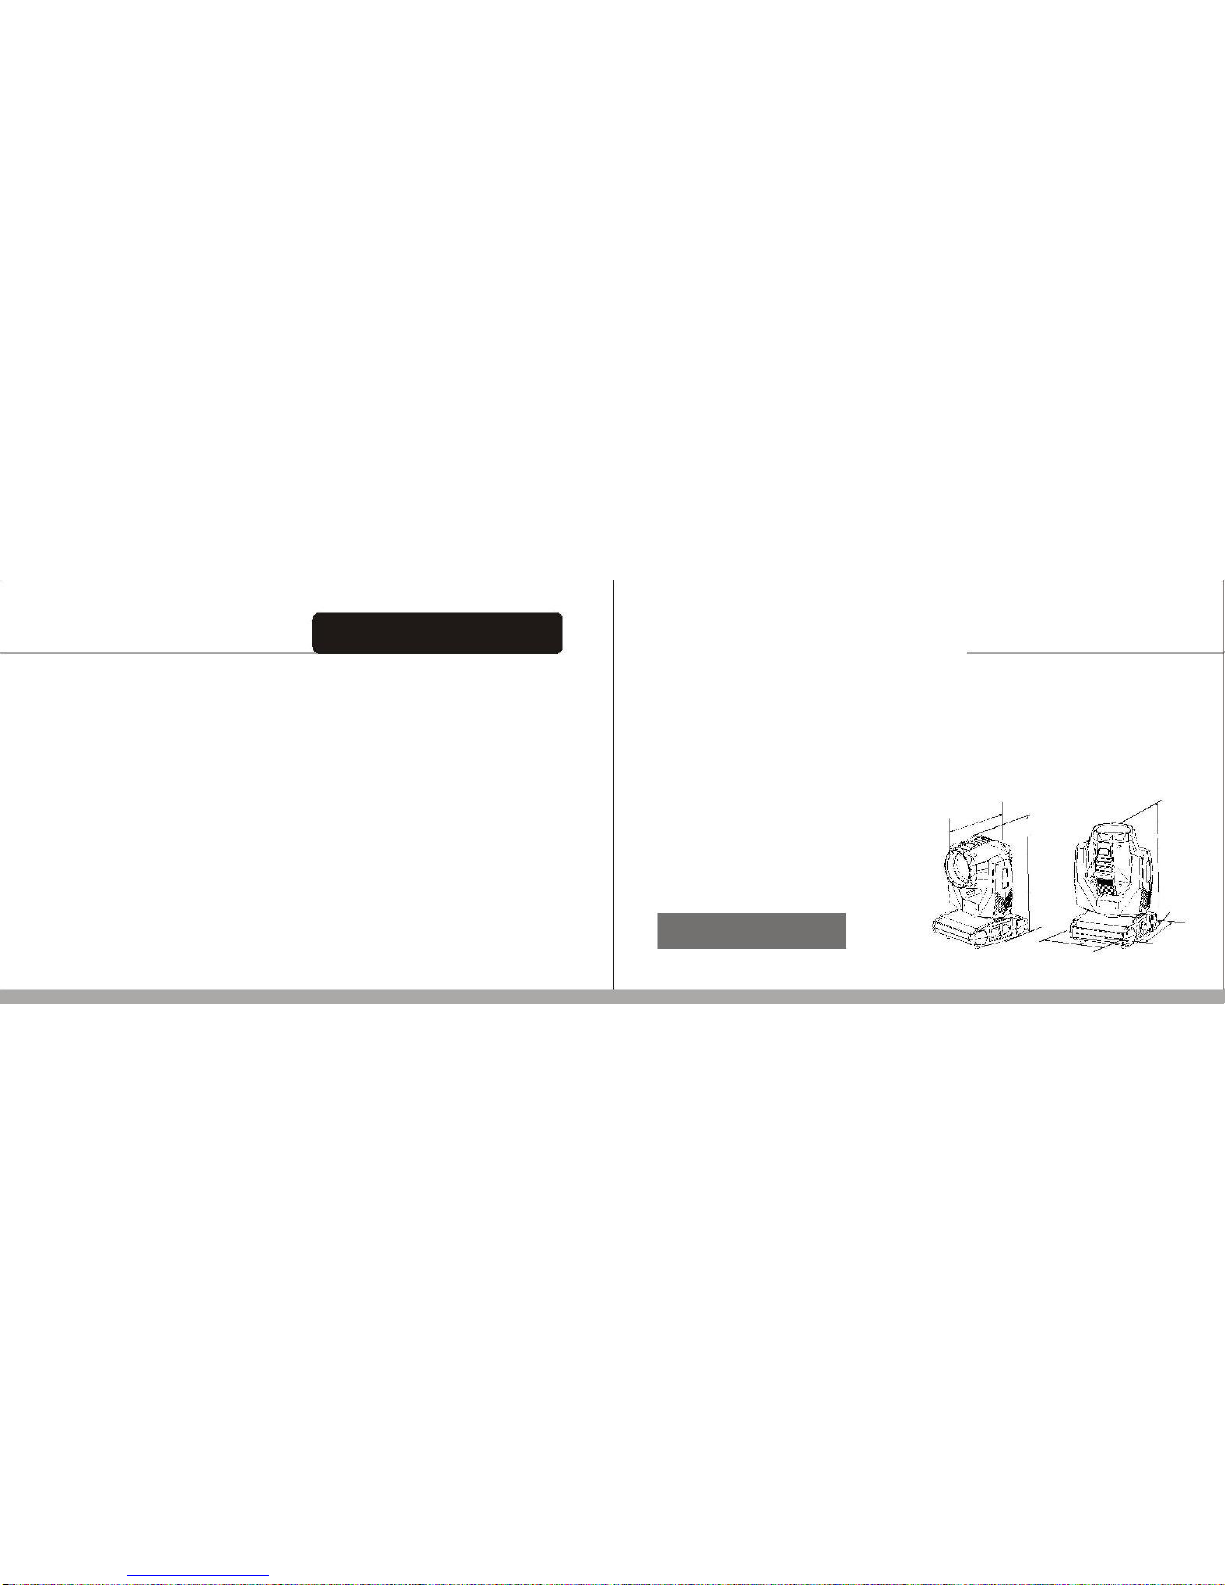
◇This product must be installed on the sufficient space, adjacent to interface the shortest distance of 50 cm, to ensure that
the lights will not crash each other.
◇Before moving or repairing the product , please unplug the power. ◇When it
working, ensure that no inflammable and explosive near objects.
◇When installing this product, please use the safety rope. When handling this product, lift the armrest base, rather than the
lamp body.
◇This product is suitable fora maximum temperature of 35 degrees Celsius, when the surrounding environment is higher than 35
degrees Celsius, please do not use this product.
◇Do not touch. When working, the product running very fast, to prevent bruising hands.
◇Problems happens when operating performances, should immediately stop using the lights. Do not carry out
maintenance, repair damage caused or likely to cause other problems.
Please contact the company's maintenance repair. During the repair process, use the same type of accessories.
◇Please read the instructions carefully, especially regarding the installation, using, maintenance parts. Important that the lighting in the
transport process, must be packed anti-shock protection carton or flight case
03
◇DMX Channels:16CHs
◇Control model:DMX512,auto models ◇Blue
LED LCD and rotating button control ◇
OSRAM SIRIUS HRI 230W ( 230 Beam )
◇XYmotos:Ultra-quiet andultra high-speed three-phase
motor
◇Color temperature is 8500K,span life time is
2000Hs ◇14 colors+white,half color effect
◇17 fixed gobo+open circle
◇8-facet prism:prism can be rotated counter-rotating,
beam effect can be opened andclosed
◇Optical lens:Precision cemented optical
lens ◇Frost effect:Adjustable soft spot angle
◇Fpcus:linear focus
◇Dimmer:0-100% linear dimmer
◇Beam angle:0-3.8°parallel beam
Extended features: support disconnecting the
power supply, the display panel set up address
code (had to pre-equipped with batteries).
2 TECHNICAL PARAMETERS
◇Strobe:Two pieces strobe(0.5-9F.P.S)
◇Motors:13 Ultra-quiet motors, two piece3-phase motors,16bit
◇Housing:high temperature alloy plastic with Die-cast handle
◇IP rate:IP20
◇N.W:15.2KG ◇
Size:355*300*484mm
m
m
0
0
3
4
4
5
8
7
4
m
mm m
m
m
1
36
278mm
04
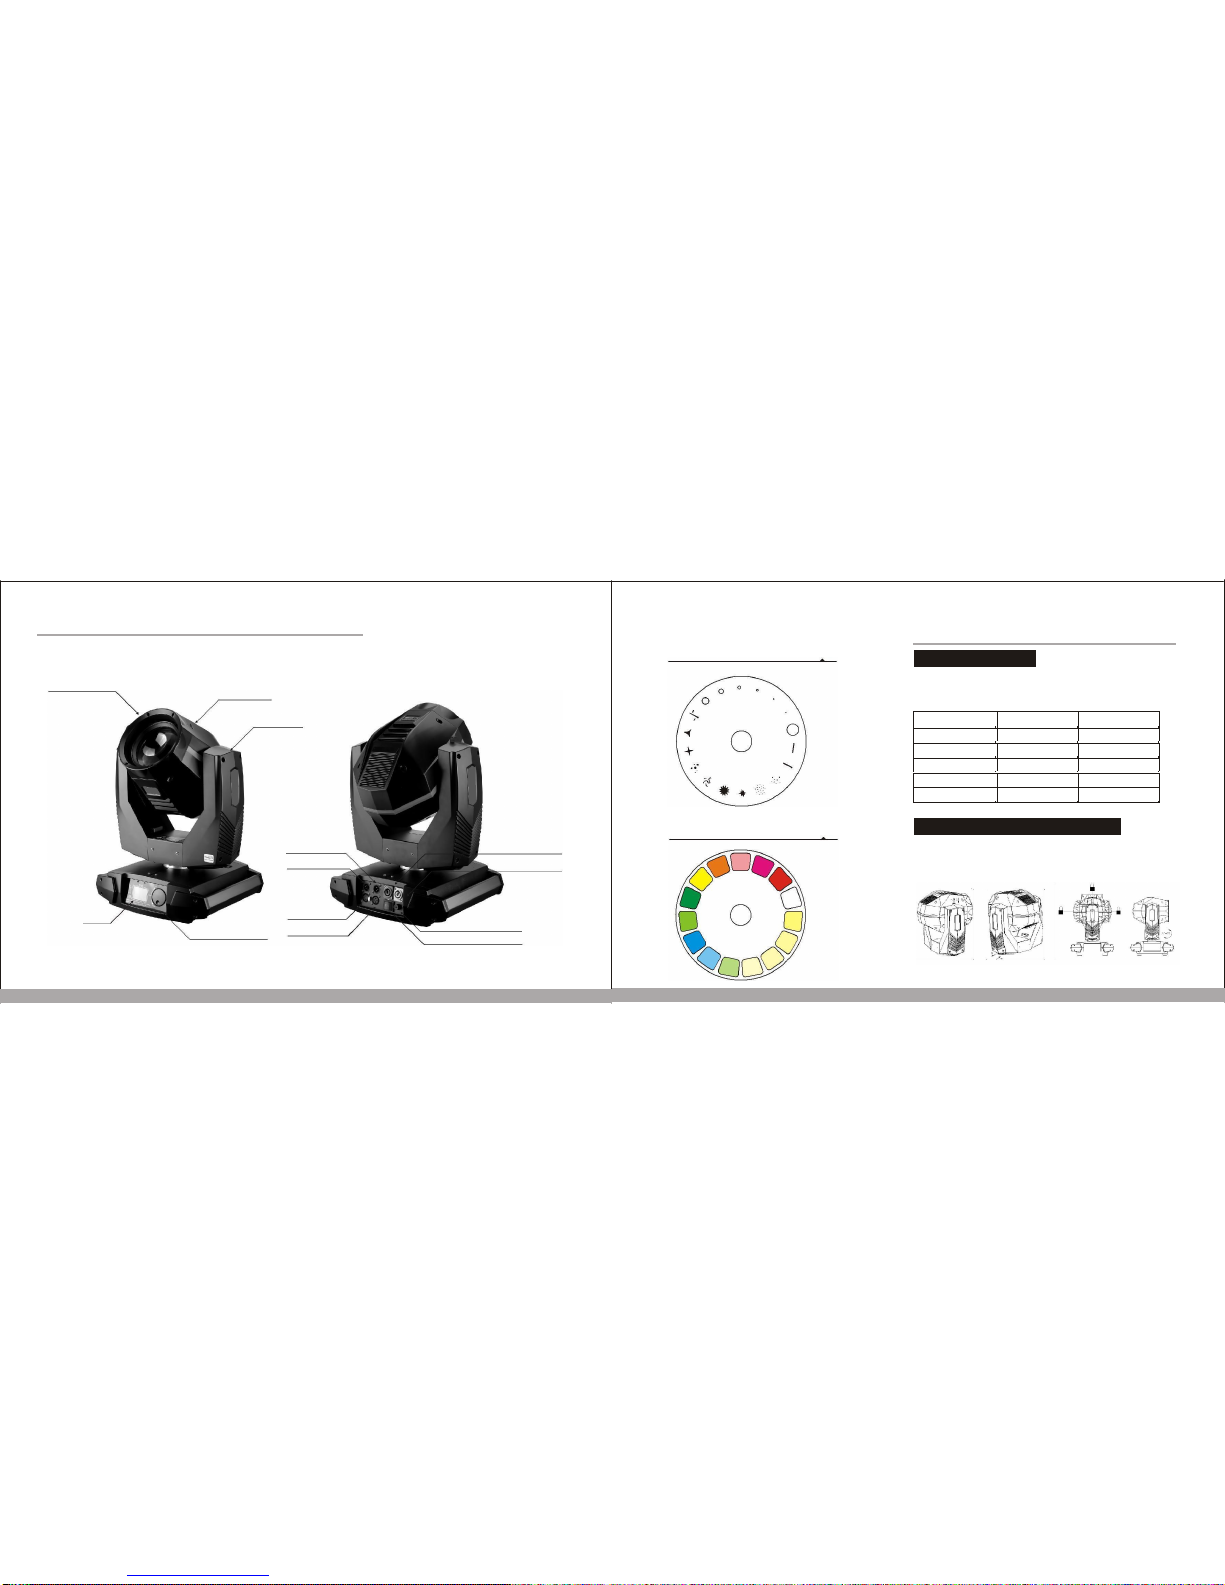
3 SCHEMATIC LIGHTING COMPONENTS
light head cover top cover
Arm cover
3-pin output
power input
5-pin output
power output
LCD
5-pin input
Insurance Block
3-pin input
control rotating
Power switch
button
05
Gobo:
Color wheel:
Pink
Orange
Rose red
Yellow
Red
Green
White
Light
Cooling
green
2
Blue
Cooling
1
Light
Heatingb
blue
2
Fluorescence
Heatingb
1
4 PACKING AND SHIPPING
4.1 Packing
Moving Head Beam light is packaged by carton or standard
2in1 flight case.(selectable 1in1 or 4in1), Random accessories
items shown below
Name
Quantity
Unit
User manual
1
piece
Signal line
1
piece
safe rope
1
piece
hook and fastener
2
piece
Power line
1
piece
4.2 Transport protection locks
In order to transport it easy to protect the lamp body has two locks (XY
axes each a lock), X-axis has four lock position, Y-axis
triple lock, lock locked in the center position in thetransport and light
a vertical position with the arm member
Pan protection lock Tilt protection lock Lock position sketch map 06
4 PACKING AND SHIPPING
4 . 3 P a c k i n g
1.Disconnect the power supply so that the lamp to cool completely before packaging equipment, at least 15minutes or
more. 2.Closing the light protect lock, when clean the surface of the light dust
3.Cover the light , seize the equipment both sides aluminum handles on to make it upside down and gently placedin the
box. 4.Add lighting accessories after placing the light in box.
5.Up to two crates stacked prohibited upside down.
4 . 4 U n p a c k i n g
1.Open the box and bag
2.Seizing the equipment handles, lifting and carrying away the light from the box .Or opening the flight case cover,placing lift
boom close to the light base, then equiping light hook on light base bottom.
tightening Quick Install locks. At last rising away boom to the top of the lamp from flight case, put the flight case
away. 3.Before turing on the light,should open the light protecting lock
Note: Upon receipt of lamps, please check if there is damage to the fold closure caused by transport, where there is
transportation damage, please do not use this fixture, and as soon as possible contact
07
5 INSTALLATION STANDARDS
Users should ensure that light and installation materials arechecked for regular safety checks, Unprofessional incorrect installation can lead
to dangerous, if the lack of working conditions and professional standards, please operate the light by professionals. Do not use the light if
the working temperature isn't 15°-40°.When the lighting installation, dismantling, moving, orservicing, do not stand directly beneath the
lamp. The operator must ensure that the fixtures aresecure connection, installing the light after professionals approving electrical
parameters,make sure that these installation must be checked at least once per year by experts
5 . 1 I n s t a l l a t i n g r i g g i
RAMBO-I beam moving head lights can be placed on thestage or on a stand in any direction,Quick lock system can quickly and easily
remove or install a light hook.
Note: must use two clamps fixed equipment, and are 1/4 buckle fastening jig, only fully rotated 90
degrees clockwise to lock fastener.
5 . 2 F i x e d e q u i p m e n t
safe rope
1. Before installing fixtures,must verified rigging equipments are not damaged, and can
bear at least 10 times of light's weight. Check the building can be beared at least 10 times of
total weights of light, fixture, and cable accessories
2. Insert the locked hook fastener into base mounting holes horizontally, grab the handle
clockwise 90 degrees fasteners, in the same way to install a second fastener, make sure
the fastener is fastened under the light base.
3. If truss can be lifted,the equipment can be directly clamped from flight case and locked
fixture base. Then hung onthe light and using safety rope fixed it.
Before rising the light to right height, connect the power cord and
signal cable.
Note: add a safety rope attachedthe light's base insurance shelf, do
not connect the device handle.
08
5 INSTALLATION
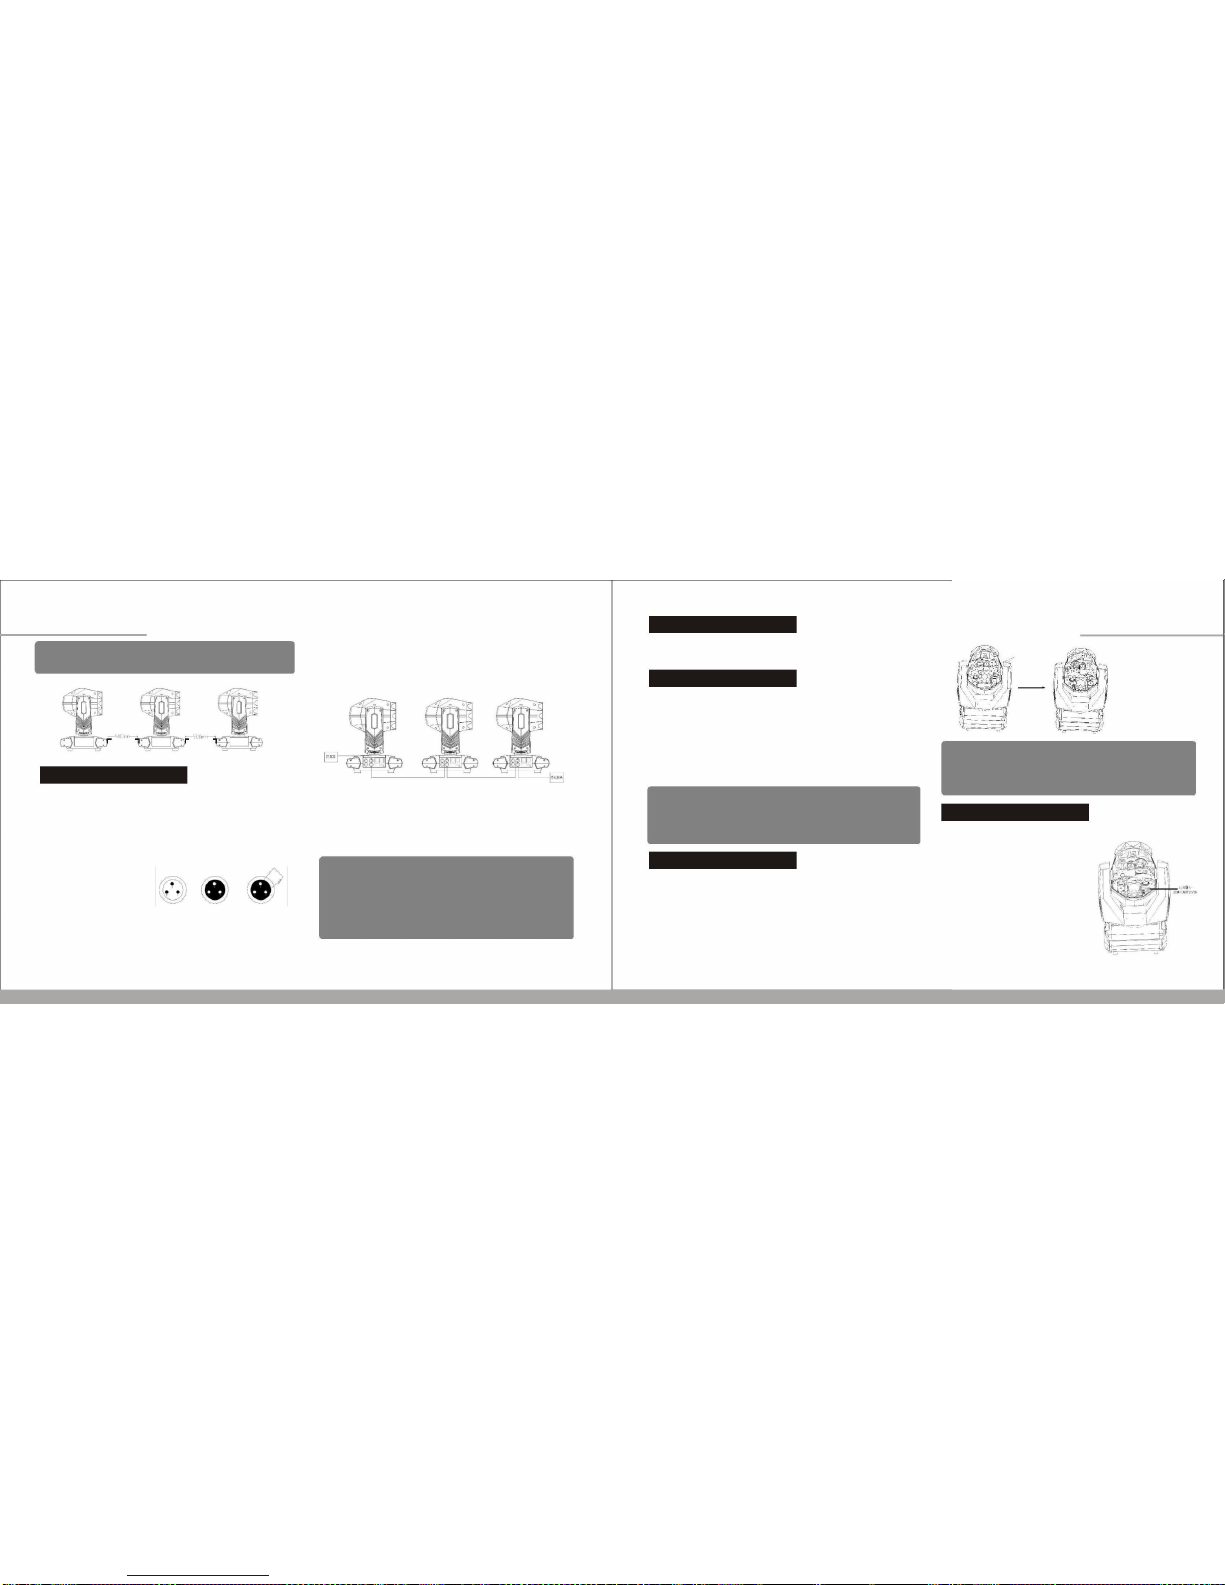
Note: Lights be placed vertically upward,the shortest distance between working
lights must be more than or equal 900mm, lighting installation layout as following
900mm 900mm
5.3 Data cable
Data cable is DMX512 signal
Note: Signal line connections is X-type connector。
controller is connects to the nearest input XLR 3-pin, then from the output of
the device connects to the input of the next device,continuous connection
one by one, the final output data cable terminal equipment plug one end
into the terminal.
If the signal transmission is long-distance , 512 signal amplifier must be
6.Fuse Size
Power :100-240v
Fuse: 8A 6 * 30 main fuse
6.2 Power Connection
If the external flexible cable or cord of this light is damaged, the line is
up to the manufacturer or its service agent or a similar qualified person
to replace, in order to avoid danger. Connect the power supply
personnel must have the appropriate qualifications before proceeding,
you must make sure you are using the power supply voltage matches
the voltage identified and have overload or leakage protection. Directly
connect the device to the power supply, do not connect to the silicon
box dimming system, otherwise damage to the equipment.
Note:
1 Do not install other similar bulbs, otherwise it will produce safety hazards
6 AC POWER
Fan side
screws
Note: when replacing a lightlamp does not touch the bulb with bare
hands at the ball, avoiding oil stained hands on the ball. 2 When
you install and dismantle the lamp into the lamp gently
put on, can not let the bulb hit hard objects around it to prevent
damage the bulbs.
X-type connector-----If the external flexible cable or cord of
thislight is damaged, please replace professional cable or cord
from the manufacture or its agent.Lights' DMX input and output
connects to a three-pin
XLR and five-pin XLR insert, first pin is
grounded, then negative signal is
second pin, third pin
connects to the positive
polarity signal, fourth and
fifth are empty.In order to prevent
reception reflection and
interference control signal,
a terminal plug must be installed on
the first branch of the connected
device last 3-pin output jack.
09
added. DMX512 signal controller connect to the input of the amplifier first,
then connect to the fixture from its output, couple with the terminal plug last.
1 Do not use two separate output connection, if connec t the
branch separating consecutive DMX512 signal amplifier must
be used to separate.
2 Please use the shielded twisted-pair cable, standard
microphone cable can not be reliably controlled long-
distance data.
or equipment damage.
2.To reduce the risk of damage to the light, replacing the lampbefore its life is
over 3.Mustn't use the banned scratched and damaged bulb
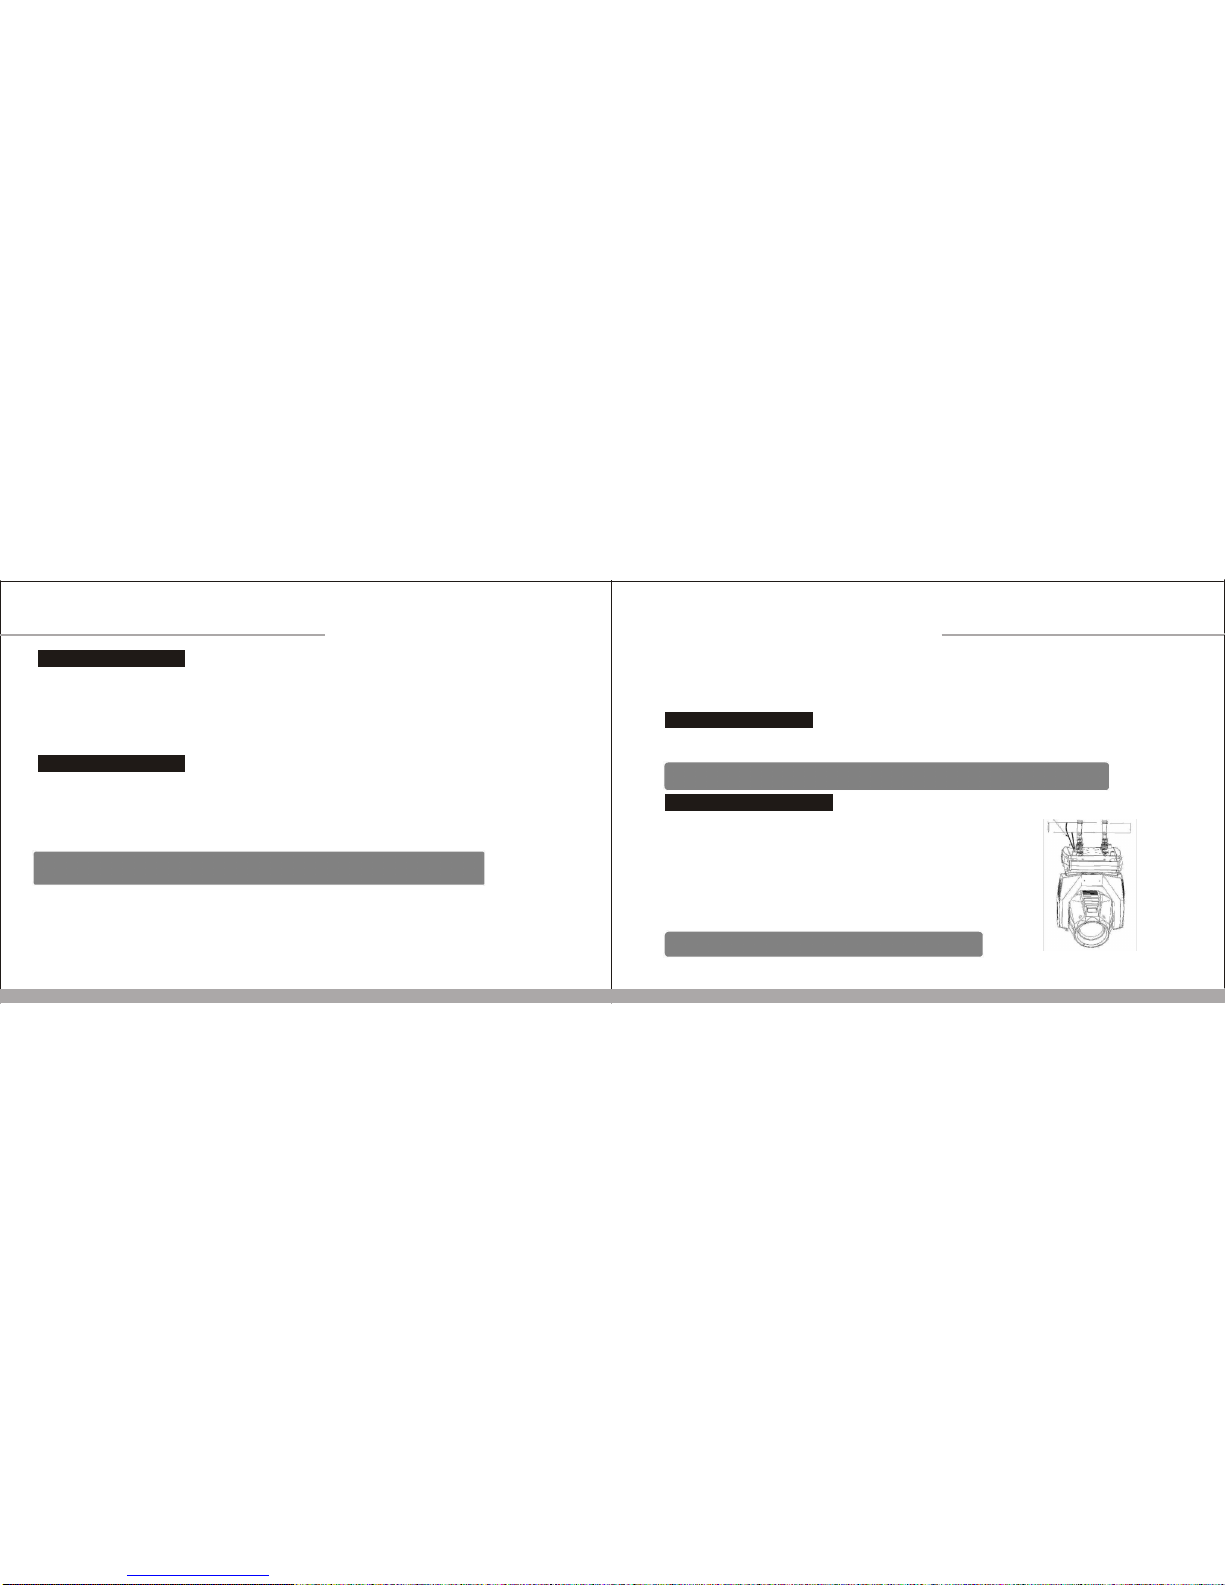
7.2 Changing lamp
1 Disconnect the power, so that the lamp cooling, the arm of the lamp
body lock locked in a horizontal position.
2 split bulbs:Remove thecover which is written “split this cover to replace
the lamp head cover”
3 Use a Phillips screwdriver to remove the fan two thumbscrews fixed
side.
4 with the appropriate forceto push down the bulb when the lamp cup
beyond the edge of the
stainless steel shrapnel, taking up the lamp.
5 Install the bulb is the opposite of the operation.
7.3 Correction bulbs
(lamp has been corrected before selling,
if the individual case happens when
changing the lamp, could following this
way. the light is reseted by turning on
the power,using the menu or console
light bulb to play a bunch of white beam.
2 Using Phillips screwdriver to open
the light body one bonnet side which is
printed “this cover to replace the lamp”
3 Using a flathead screwdriver to
adjust the lamp bracket adjustment
screw, turn the screw clockwise or
counter clockwise, and the lamp can
be right or left to adjust.
aUse
lamp
toscrewdriverPhill ips adjust the
screwadjustm ent
10
output jack
1.Grounding
2.Signal-
3.Signal+
plug second or third by a 0.25w
120ohm resistor, then connect
the resistor into last light's DMX
3XLR plug
Terminal plug connect with X LR
7 FUNCTION
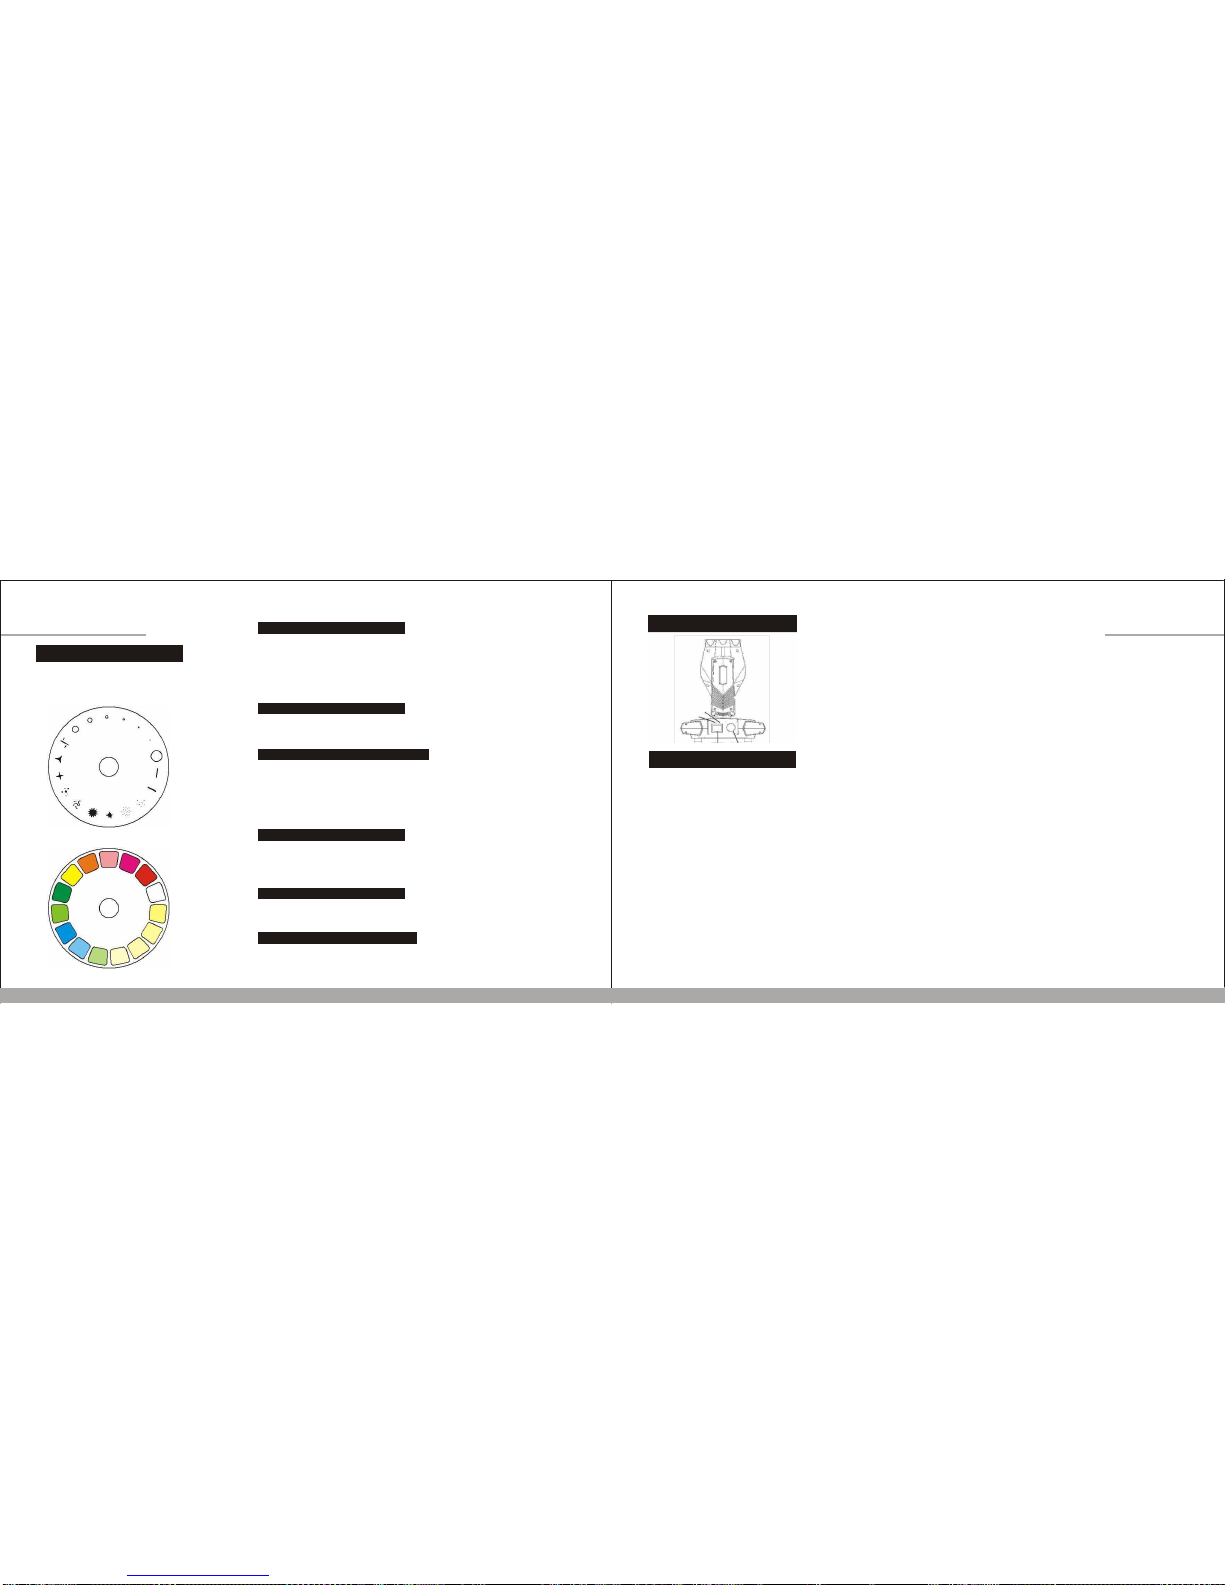
8.1Gobo wheel
Metal gobo wheel with 17
gobos. Customized is supported
Gobo wheel:
Color wheel:
Pink
Orange
Rose red
Yellow
Red
Green
White
Light
Cooling
green
2
Blue
Cooling
1
Light
Heatingb
blue
2
Fluore scen ce
Heatingb
1
11
8.2 Color wheel
Color wheel is made by14 high standard fixed color, the user can easily select
their own favorite color, tocreate a perfect lighting effect.
Use the gobo wheel at same time is better.It can be easily transformed
a colorful gobo effect. (According to customer needs may change at any
time own custom various color wheel).
8.3Optical lens focus
Useing two high-precision double-screw motor synchronization,
adjusting the optical lens to complete the pattern definition.
8.4 prism wheel and the prism enlarge
Prism wheel with a 8-facet prism, clockwise and counterclockwise rotating, speed
is adjustable.Prism wheel can be created a variety of brilliant lighting effects with
color wheel and gobo wheel. Prism wheel through two high-precision ultra-fast
eight-head screw motor spot size adjustment cut prisms,and creates a wonderful
prism dynamic effects.
8.5Dimming and strobe
0-100% mechanical dimmer, you can instantly switch freely adjustable strobe
speed up to 12 times / sec, along with random strobe special features.
8.6 Frost
Frost is a piece of atomizing lens, according to the actual control to
complete the frost effect as your want .
8.7 horizontal and vertical scanning
Pan:540°,Tilt 270°,With 16BIT precise positioningcapabilities.
Horizontal and vertical speed is adjustable.
Signal Indicator
Power Indicator
LED Display Controller wheel
8.1Menu operation
Main Menu
1.Setup DMX Address
Address: 001
Channel Mode
Standard(16ch)
Vector(20ch)
2.Option
Invert
Invert Pan
Off
On
Invert Tilt
Off
On
Display Reversal Off
On
BackLight
Open
Auto Close(15s)
3.Information System Version
XY: V3.10
MCU1: V1.01
MCU2: V1.01
MCU3: V1.00
Fixture Hours
Total:0000(hrs)
Cur.:0000(hrs)
Lamp Hours
Total:0000(hrs)
Cur.:0000(hrs)
Time Clear
Clear PWRON Time
Clear LAMP Time
Fans Monitor
Fan1:(0000)RPM
Fan2:(0000)RPM
Fan3:(0000)RPM
DMX Monitor 1.Color
(000) 2.Strobe (000)
3.Dimmer (000)
4.Gobo (000)
5.GoboRota.(000)
8 LCD SET
6.PrismIns.(000) Parameter
7.PrismRot.(000) Color Adjust
8.PrismMove(000) Value: 000
9.Frost (000) Gobo Adjust
10.Focus (000) Value: 000
11.Pan (000) Shutter Adjust
12.PanFine(000) Value: 000
13.Tilt (000) Pan Adjust
14.TiltFine(000) Value: 000
15.Function(000) Tilt Adjust
16.Lamp (000) Value: 000
17.P/T Time(000) Fan MaxSP Adjust
18.Col.Time(000) Value: 000
19.BeamTime(000)
20.GoboTime(000)
4.Manual Control
Lamp: Off / On
5.Reset
System Reset
Pan/Tilt Reset
Effect Reset
6.Factory default
Input:0000
(Enter 2121 into the
parameter adjustment)
12
9CHANNEL
Channel
3 0-255:From dark to light dimming
DIMMER
Channel 7: 0-255:
ZOOM
Channel 8:
10 FAILURE SCOREBOARD AND SOLUTIONS 11CLEAN LIGHTS
0-3:white
4-7:white/color1
8-11:color1
12-16:color1/color2
17-20:color2
21-24:color2/color3
25-28:color3
29-33:color3/color4
34-37:color4
38-41:color4/color5
42-45:color5
46-50:color5/color6
51-54:color6
55-58:color6/color7
Channel 1
59-63:color7
64-67:color7/color8
COLOR
68-71:color8
72-75:color8/color9
76-80:color9
81-84:color9/color10
85-88:color10
89-92:color10/color11
93-97:color11
98-101:color11/color12
102-105:color12
106-109:color12/color13
110-114:color13
115-118:color13/color14
119-122:color14
123-127:color14/white
128-255:Rainbow colors from slow to fast
0-3:close beam
4-7:open beam
8-97:Strobe from fast to slow
98-101:close beam
102-126:Strobe from fast to slow pulse open
Channels
127-151:close the from fast to slow pulse strobe
2
SHUTTER
156-180:Random open the pulse strobe from fast to slow
181-205:Random close the pulse strobe from fast to slow
206-209:open beam
210-249:Random strobe from fast to slow
250-255:open beam
0-3:white
4-7:From slow to fast swing1
8-11:gobo2
12-15:gobo3
16-19:gobo4
20-23:gobo5
24-27:gobo6
28-31:gobo7
32-35:gobo8
36-39:gobo9
40-43:gobo10
44-47:gobo11
48-51:gobo12
52-55:gobo13
56-59:gobo14
60-63:gobo15
Channel 4 64-67:gobo16 GOBO
68-71:gobo17
72-115:Clockwise from fast to slow rainbow pattern
116-159:Counterclockwise pattern from slow to f ast rainbow
160-165:gobo1 From slow to fast swing
166-171:gobo2 From slow to fast swing
172-178:gobo3 From slow to fast swing
179-184:gobo4 From slow to fast swing
185-191:gobo5 From slow to fast swing
192-197:gobo6 From slow to fast swing
198-203:gobo7 From slow to fast swing
204-210:gobo8 From slow to fast swing
211-216:gobo9 From slow to fast swing
217-222:gobo10 From slow to fast swing
223-239:gobo11 From slow to fast swing
240-245:gobo12 From slow to fast swing
246-251:gobo13 From slow to fast swing
252-255:gobo14 From slow to fast swing
Channel5
0-127:without prism
PRISM
128-255:with prsim
0-63:0 to 360 degrees positioning
64-127:Clockwise rotation from fast to slow
128-191:Counterclockwise rotation from slow to fast
Channel6
PROTA
192-207:90Degree swing from slow to fast
208-223:180Degree swing from slow to fast
224-239:270Degree swing from slowto fast
240-255:360Degree swing from slowto fast
FROST
0-255:
Channel 9:
0-255:
FOCUS
Channel 10:
0-255:
PAN
Channel 11:
0-255:
PANFINE
Channel12:
0-255:
TILT
Channel 13:
0-255:
TILTFINE
Channel14:
PTTIME
0-255:From fast to slow speed
0-13:No function
14-24:Pan/Tilt moves exchange light
25-35:Gobo moves exchange light
36-46:Color changes exchange light
47-57:Prism selects exchange light
58-68:Frost selects exchange light
69-79:XY、GOBO、color、focus、
FROST changes exchange light
Channel 15
80-90:GOBO、color、focus、FROST head
FUNCTION
function transfers exchange light
91-123:No function
124-134:Display Reverse (5 seconds)
135-145:Forward screen (5 seconds)
146-155:No function
156-165: Internal motor reset, except pan&tilt
166-167 No function
168-189 All function reset
191-255 No function
0-31:No function
32-63:Lamp down power (immediate action)
Channel 16
64-159:No function
LAMP
160-191:Turn off lamp(5's)
function
192-223:no function
224-255turn on lamp(5's)
Listed below is a common approach in the operation of a
few common problems.
◇Fault A: The lamp is not working, the bulb is not lit, the fan
does not work
Solving 1: Check the power supply or the fuse is burned Solve 2: The
main power connector on thevoltage detector ◇Fault B: connect control
units, lighting does not respond Solving 1: After connecting control units,
lighting should be working. If it is not working properly, check the signal
cable plugs and wires are connected correctly.
Solve 2: If the lamp is lit display, but the channel does not
respond, check the address code is set correctly and DMX
output voltage polarity.
Solve 3: DMX signal problems if your lighting is off,
check the input terminal andthe circuit board Solve 4:
Please change another one DMX controller
Solve 5: Check whether thesignal cable near high voltage power
lines caused DMX display board inside the wire damage.
◇Fault C: some channel is not working Solving 1:
stepper motor may be damaged,
or the line connecting the motherboard burned out Solve 2:
IC driver board on the motherboard may be damaged
Must regularly clean the outside of
the optical lens focusing the dust。
Based on the number of lamps use a
clean environment to determine: deaner Are moist, smoked or the
surrounding
environment is particularly dirty, which
can cause dust deposition lamps. Please
use a glass cleaning solution and a soft
cloth to wipe the focusing
optical lens. Carefully Qi dry each
part. At least 20 days to clean the
dust outside a lens, the lens inside
30-60 days to clean up the dust once.
Regular inspection lamp fan and bottom case fan, a fan of at least 20\days
to clean up dust deposition. Above cleaning must be executed in case of
power failure.
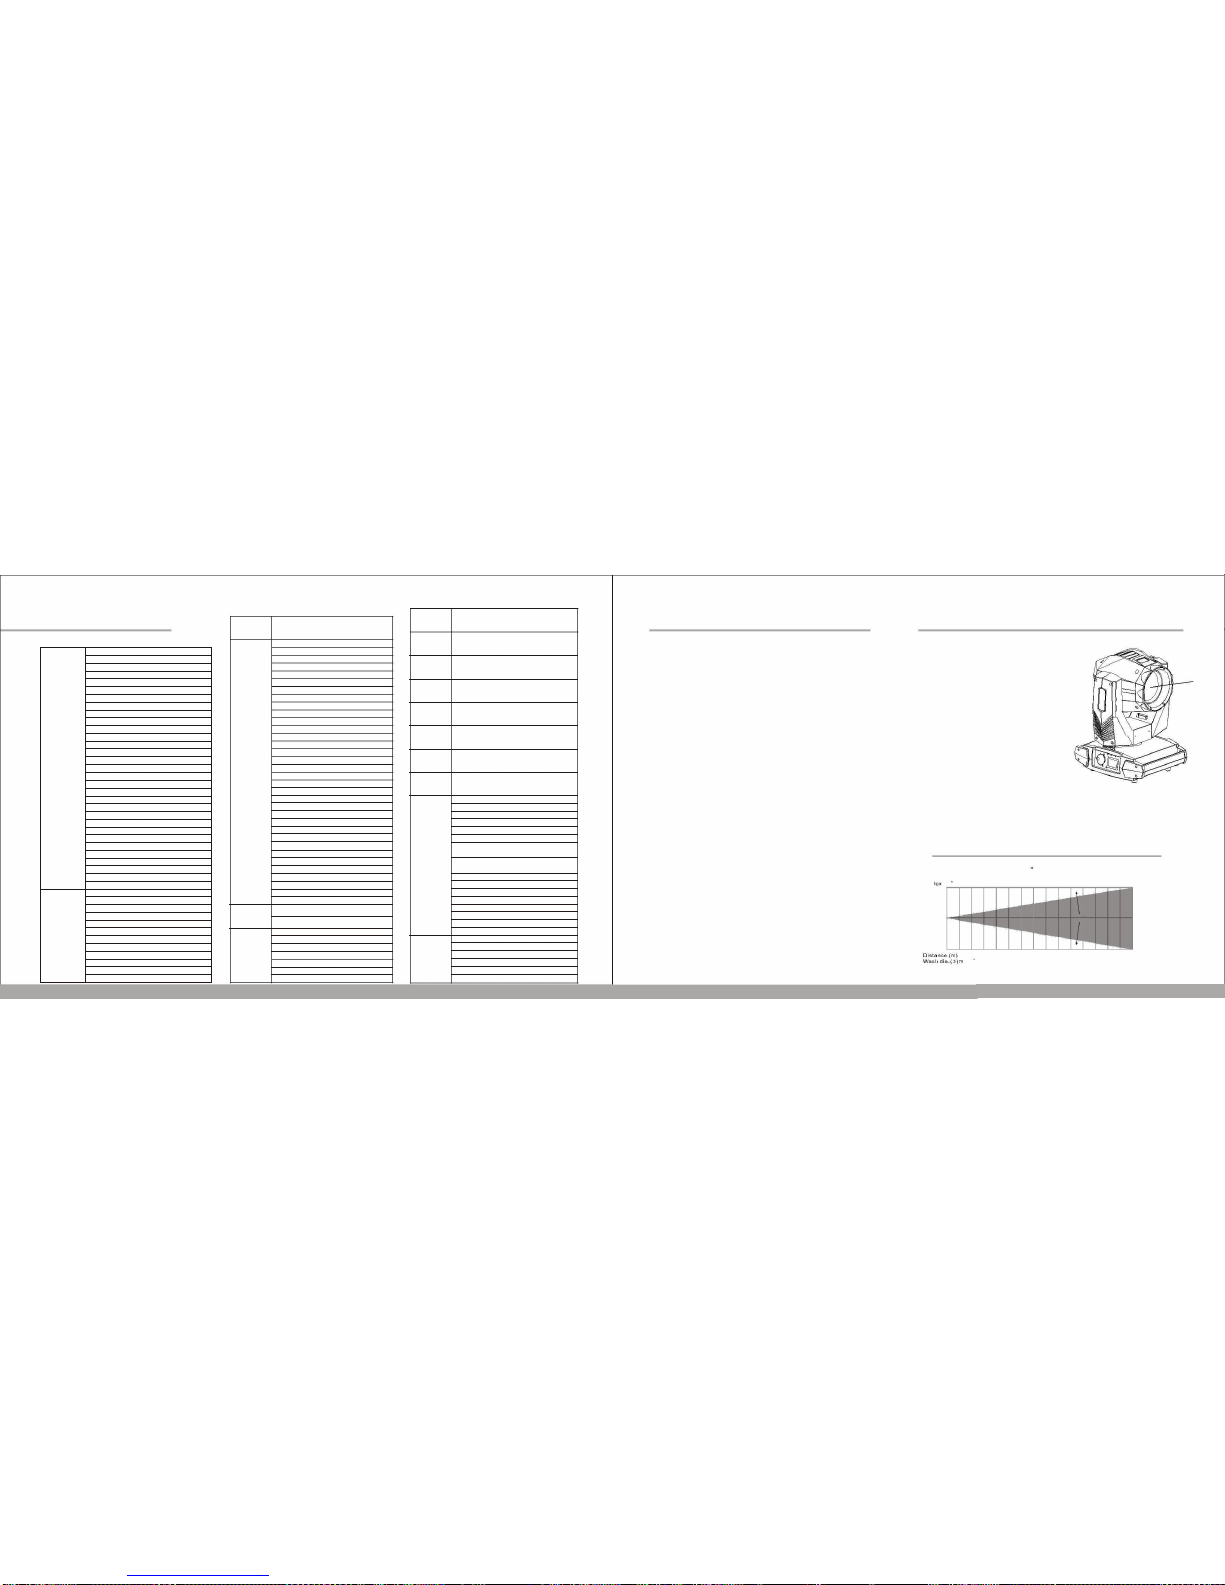
12 230W MOVING HEAD BEAM LIGHT SHINES TABLE
PHOTOMETRICS DIAGRAM 3.8
3.8 540000 150000 64000 35000 14000
3.8
5
10
15
20
25
3.8
42
82
122
165
250
14

Table of contents
Other Hi-ltte Light Fixture manuals

Popular Light Fixture manuals by other brands

Party Light & Sound
Party Light & Sound PARTY-WASH7 user manual

Lightolier
Lightolier ProSpec 26383W specification

Whelen Engineering Company
Whelen Engineering Company Delta Independence installation guide

MiLAN
MiLAN Wire Series Assembly instructions

Lightolier
Lightolier LL4MF8LR232 specification

Lightronics
Lightronics FXLD354WAI owner's manual


