HI-POD Super-Lite User guide
© 2020 HI-POD INC. (PAGE 1)
HI-POD Super-Lite Setup Manual

© 2020 HI-POD INC. (PAGE 2)
Manual Index:
• Page 6 - Take Tower Out Of Bag
• Page 7 - Set Legs and Weight Bags
• Page 11 - Hi-Pod Head
• Page 13 - LCD Mounting Rod
• Page 14 - Attach LCD
• Page 15 - Sony Remote
• Page 16 - Hi-Pod Handle
• Page 19 - Cable Setup
• Page 31 - Camera Battery
• Page 38 - Finish LCD Setup
• Page 41 - Finish Remote Setup
• Page 45 - Text (REC) On Screen (Optional)
• Page 51 - Raingear
• Page 56 - Elevating Tubes
• Page 58 - Complete Handle Setup
• Page 59 - Lowering Tubes
• Page 59 - Velcro Cables to Tubes
• Page 60 - Putting The Tower Away

© 2020 HI-POD INC. (PAGE 3)
Congratulations on Your New Hi-Pod!
Now you can begin to elevate your game.
~
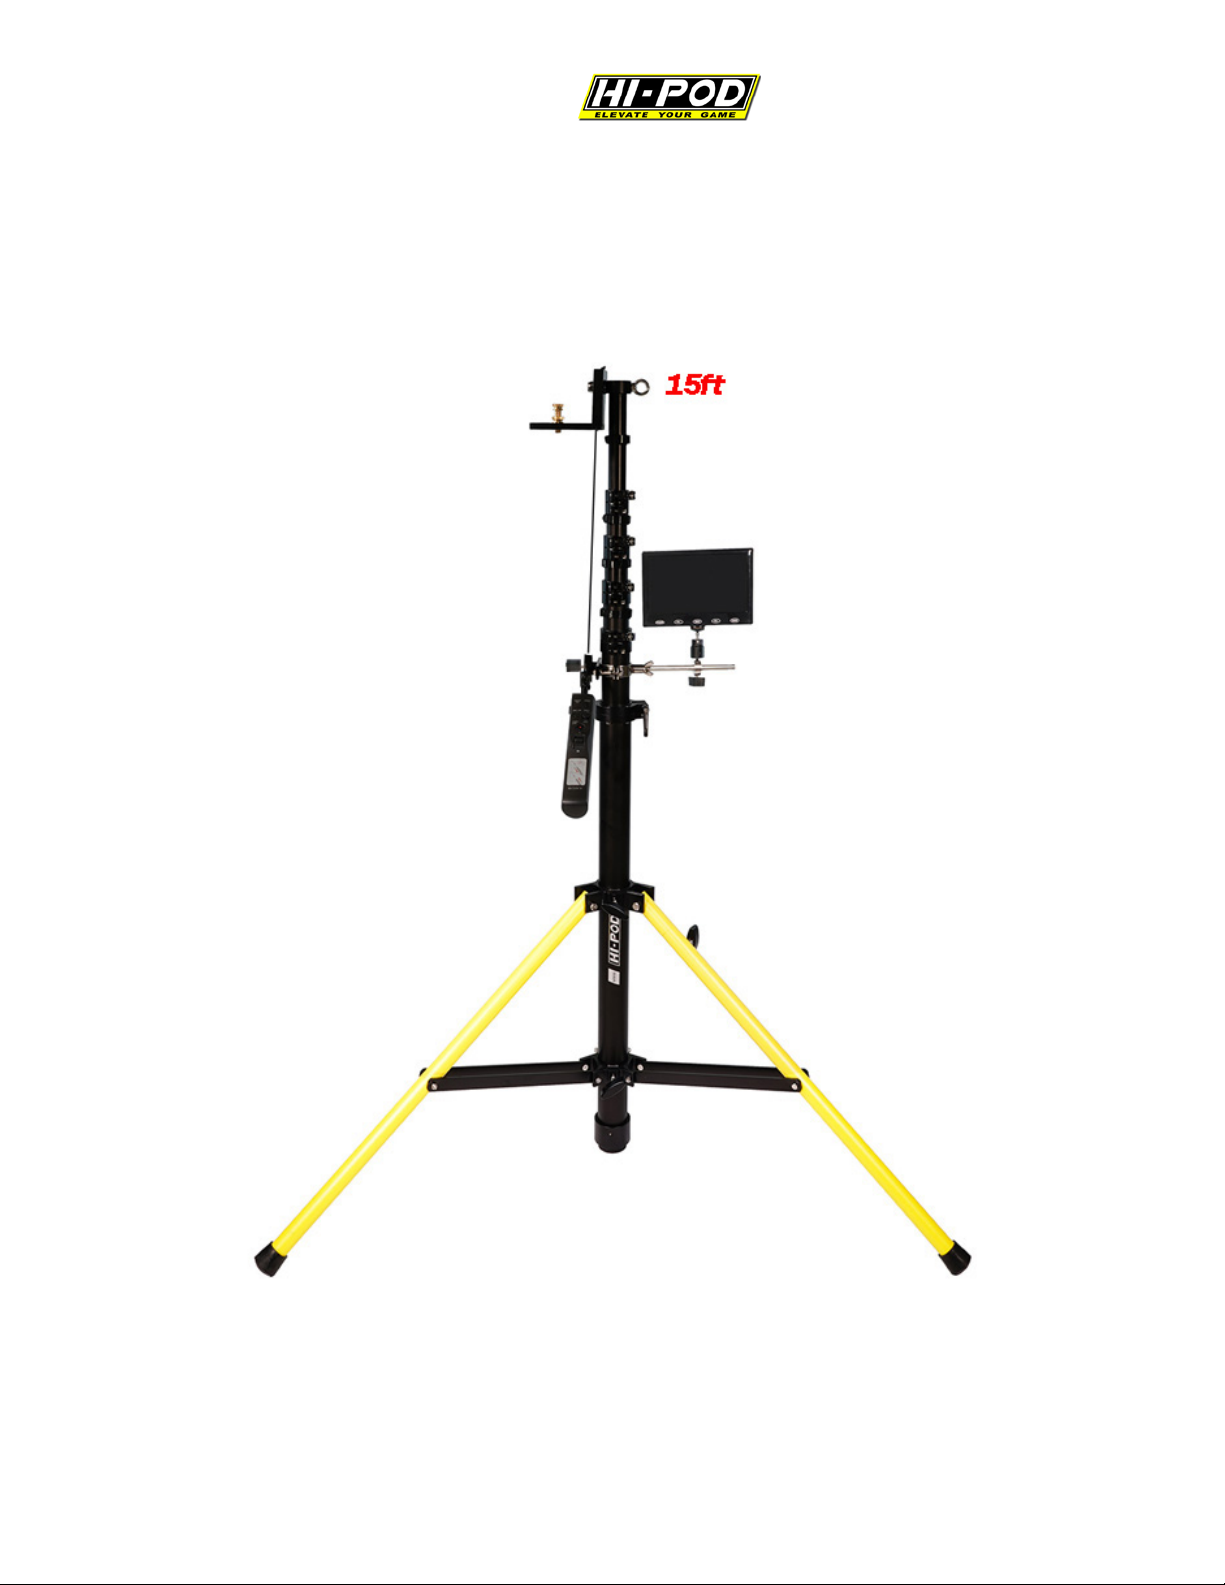
LX - The HI-POD Super-Lite gives the operator maximum ease of use
and transportation. It's a 25 lbs tower that will fit into the trunk of an
economy car . Once you are familiar with the setup procedures it
should take 10-15 mins to fully configure a unit.
*Note: Within 2 weeks of delivery, product must be checked and
confirmed by the client to have arrived in good order and in its entirety.
After that time, clients will be responsible for any and all lost parts
(which are not covered under the warranty).
*Confirm your inventory with the sheet on the following page.

© 2020 HI-POD INC. (PAGE 4)
Super-Lite CHECKLIST
Handle
Head
Monitor Bracket
3 Piece Raingear
3 Sandbags
LCD
LCD Visor
LCD Battery / 5-9 Volt Adapter Cable
HDMI Cable
Lanc Cable
Gold Screw for Power Bank
Camera Remote
Camera
Camera Power Bank
16GB SD Card
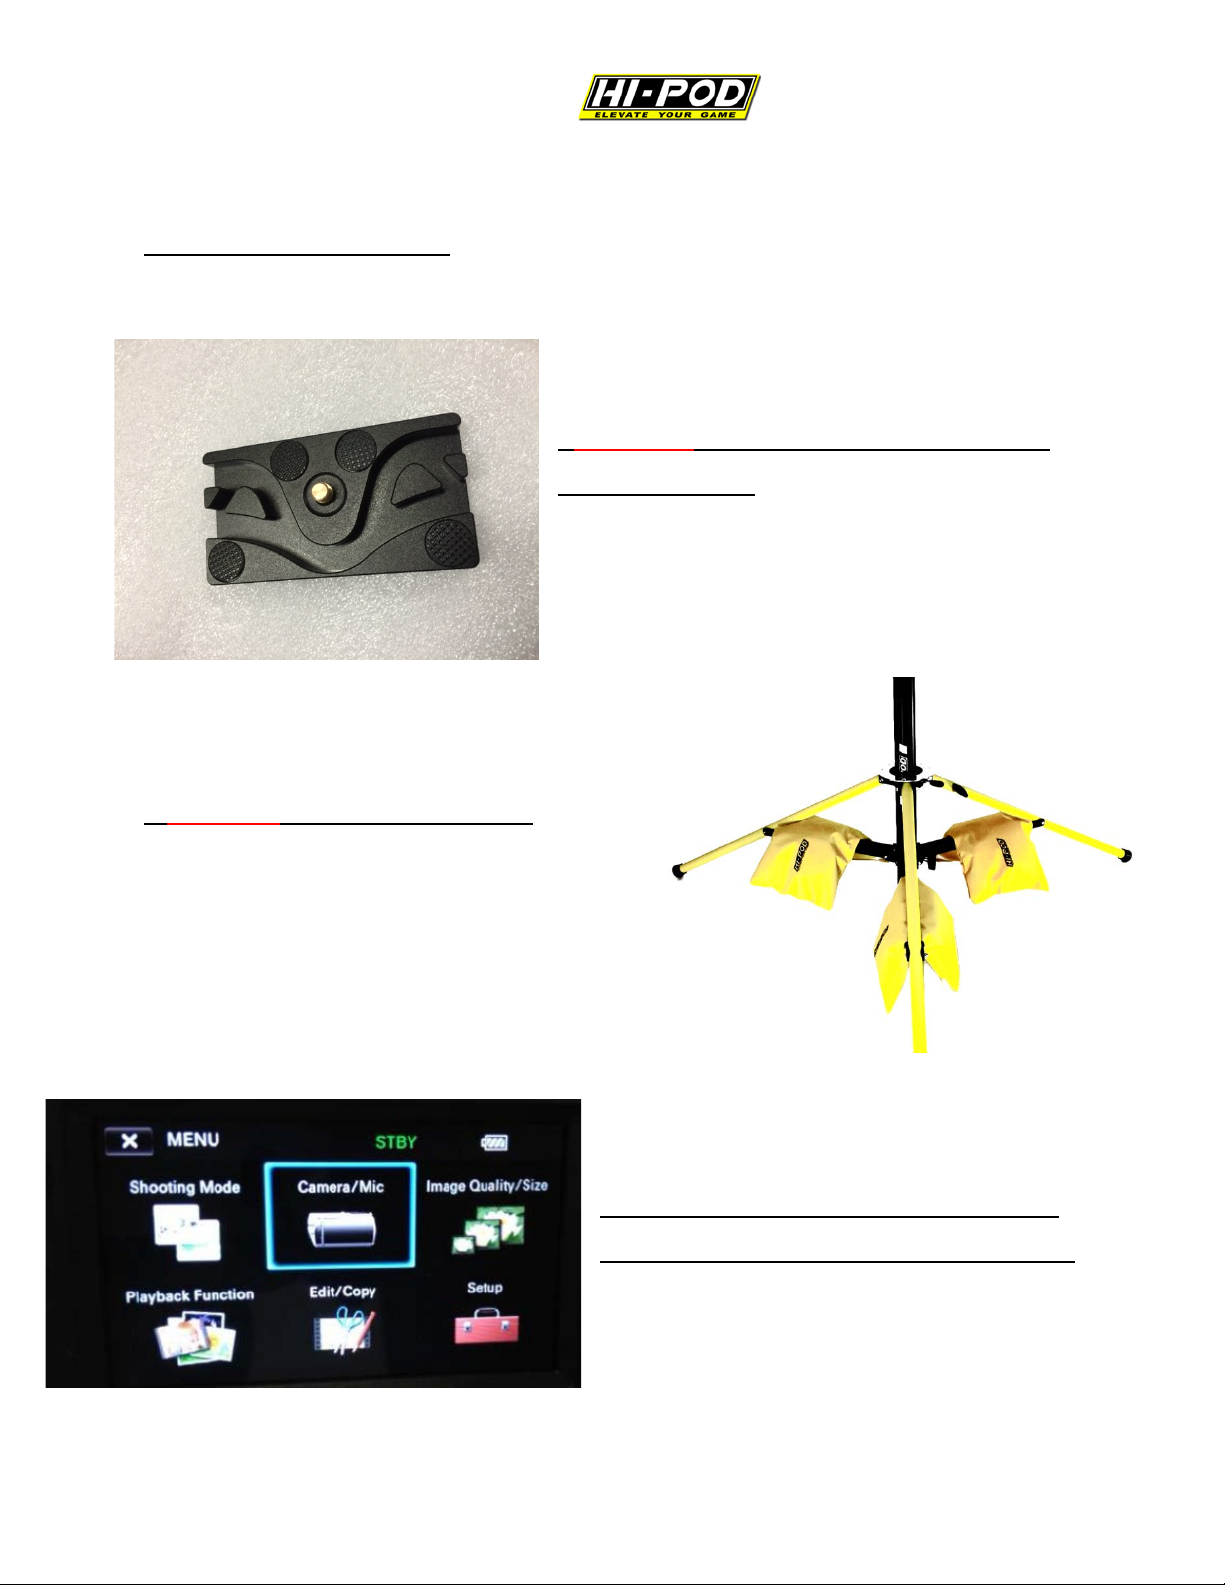
Cable Stress Relief Plate / Quick Release Plate
Hi-Pod Quick Notes Insert
© 2020 HI-POD INC. (PAGE 5)
3 IMPORTANT THINGS:
•ALWAYS use the Strain Relief Plate
for your cables
• ALWAYS use your sandbags
• Take note of the 'Text on Screen'
instructions to display record status
...and other camera settings - (page 47)
© 2020 HI-POD INC. (PAGE 6)
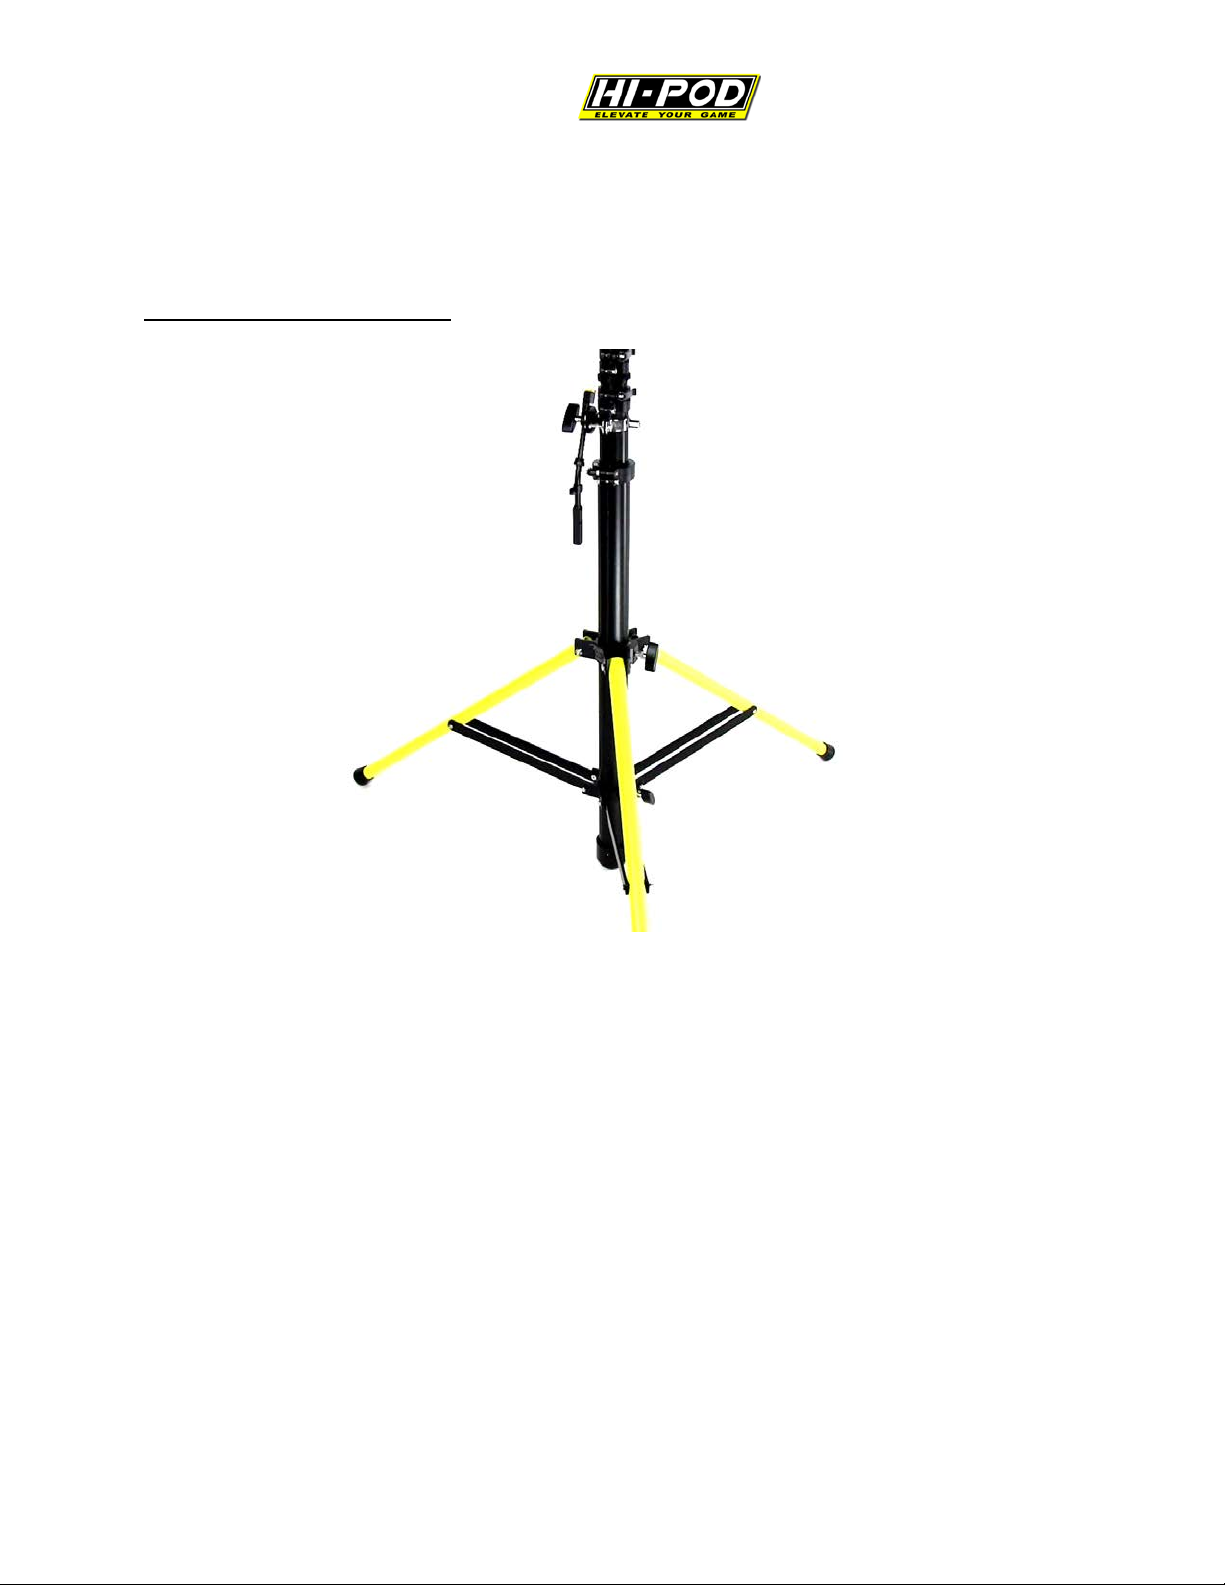
Take Tower Out Of Bag
Take the tower out of your case, and place it on the ground. There are
two black twist knobs on the base of the tower, and you will need to
unlock these to allow for the tower legs to expand.

© 2020 HI-POD INC. (PAGE 7)
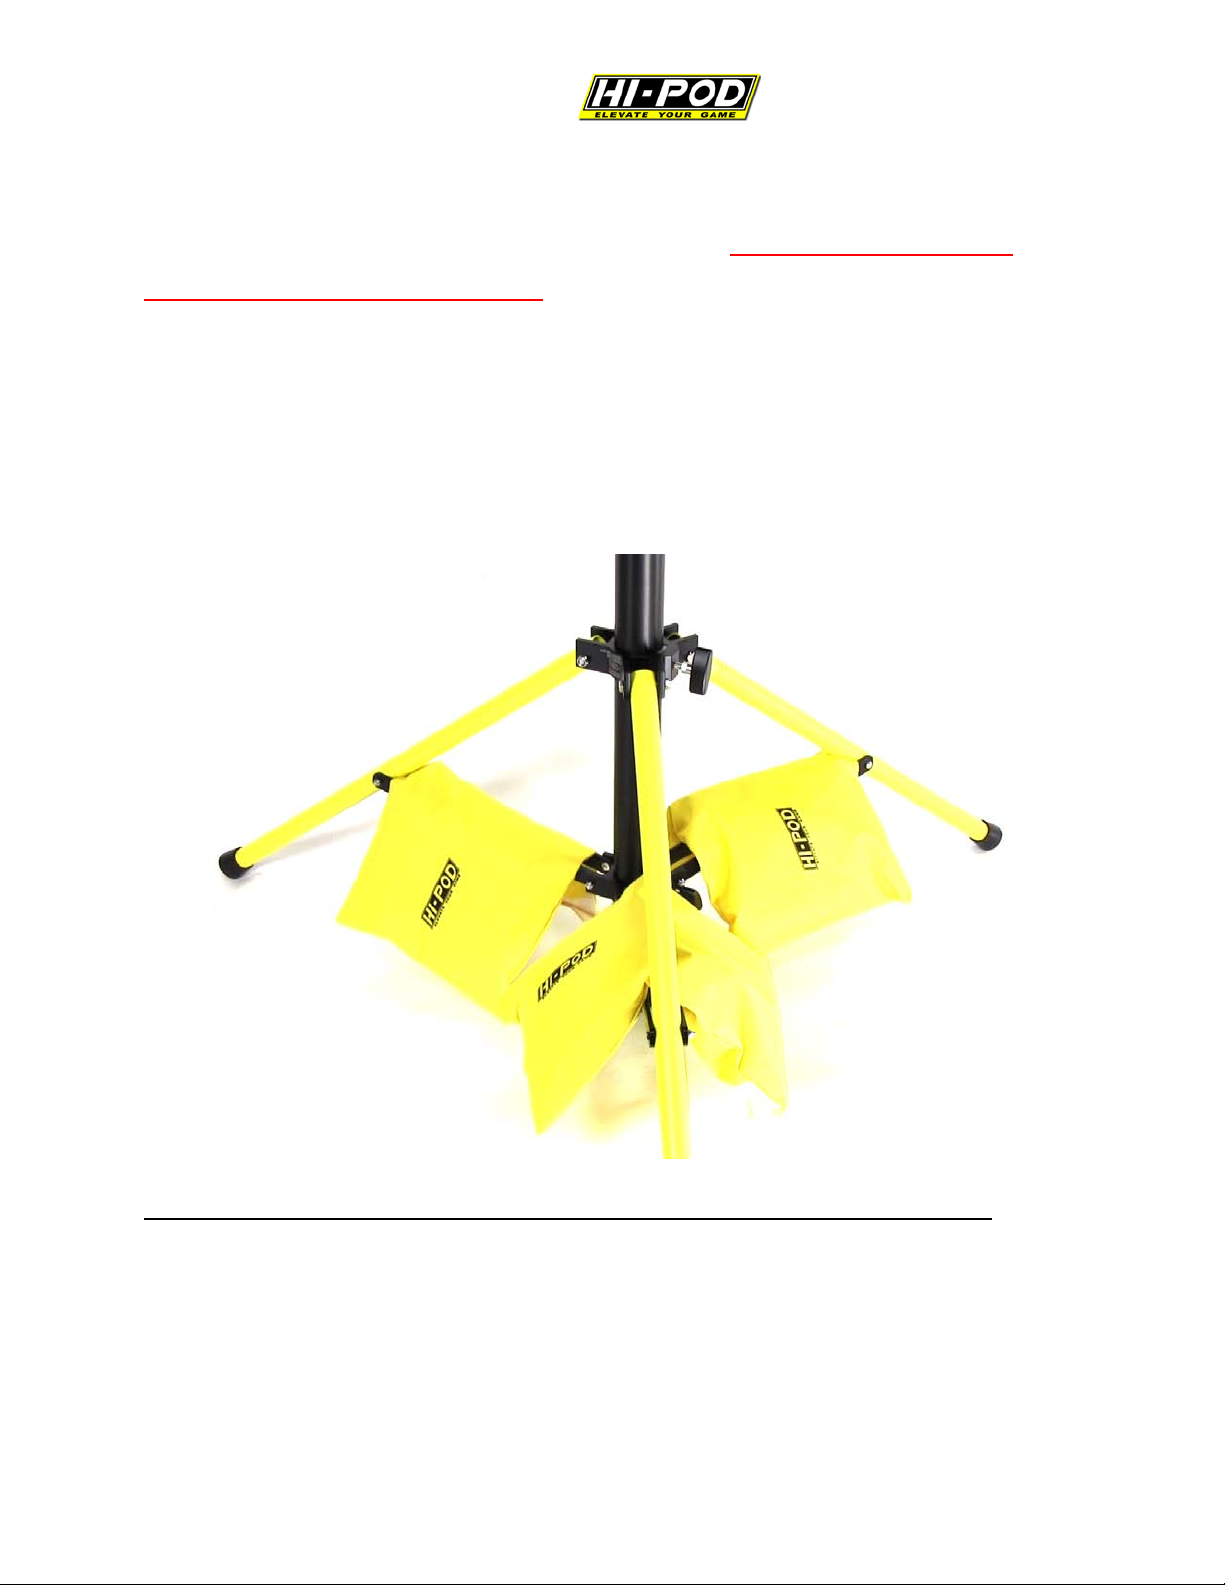
Set Legs and Weight Bags
You will want to setup the base of the tower with the black slats
between the yellow legs as even/level with the ground as possible. This
will give you maximum stability during operation.
Once the black slats are level, turn the two knobs (shown in the above
picture with red arrows) to lock the legs in place.
© 2020 HI-POD INC. (PAGE 8)
The included weight-bags are NOT optional. You must apply them
every time you use the tower. This is intended to provide your safety
weight. With a tower of 25lbs, and an approximate extra 35 lbs in the
bags, this gets you to ~ 60 lbs in total. This approach works in the vast
majority of situations. Also, it's better not to actually fill the bags with
sand (it can be a mess). Rocks, gravel, bricks, weights from the gym, or
something else is preferred.
You are welcome to go beyond the three bags should you want. Add
cables through the legs which then connect to stakes (if not on a turf
field), add more weight bags, whatever you like. The three bags we
include are sufficient, but there is no harm in going beyond them if you
prefer, and also if you are dealing with extreme conditions.

© 2020 HI-POD INC. (PAGE 9)
USE
YOUR
WEIGHT BAGS!

© 2020 HI-POD INC. (PAGE 10)
NEVER WALK AWAY
FROM AN ELEVATED
TOWER.
NEVER.
When a tower is elevated you must manage it at all times. Anything
can happen at any time - unexpected windscan pop up, rain can
surprise you, someone could mess with your setup, or there could be
lightning - who knows?!
• If you ever need to walk away from the unit, bring it completely
down so the tubes are fully compressed. Then you can take a break.
Table of contents
Other HI-POD Camera Accessories manuals


Popular Camera Accessories manuals by other brands

Viltrox
Viltrox EF-NEX Mount instructions

Calumet
Calumet 7100 Series CK7114 operating instructions

Ropox
Ropox 4Single Series User manual and installation instructions

Cambo
Cambo Wide DS Digital Series Main operating instructions

Samsung
Samsung SHG-120 Specification sheet

Ryobi
Ryobi BPL-1820 Owner's operating manual


