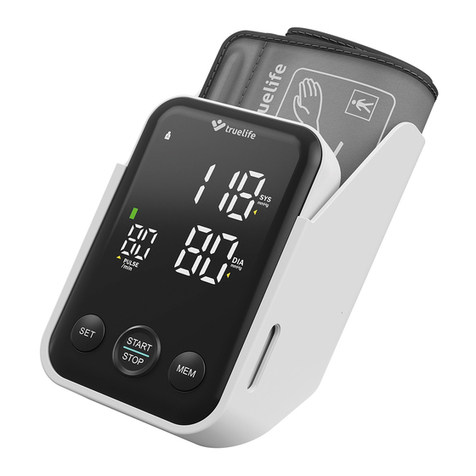
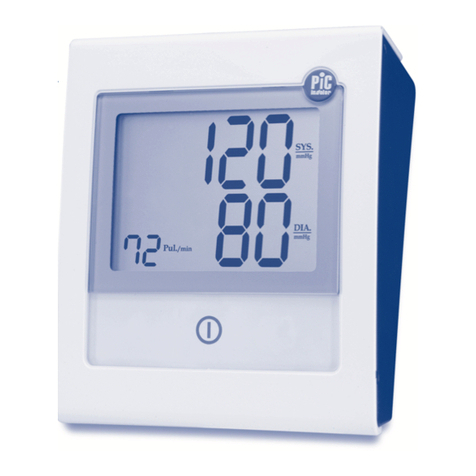
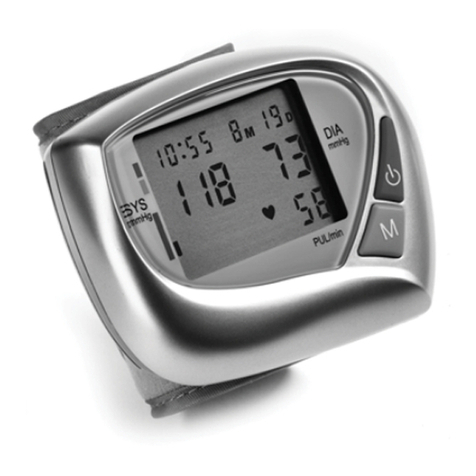
Hi-Tech Trading HB-ZA310V User manual

Instruction Manual
Automatic Blood Pressure Monitor
for Arm - Voice Prompt Function
Announces Measured Values
HB-ZA310V

2
Contents
Introduction..…………………………………………….… 3
Warning Signs/Safety Statements ……………………… 3
Health and Blood Pressure Values …………………….. 4
What is Blood Pressure …………………………………. 4
Important Information ……………………………………. 6
Precautions ………………………………………………. 6
Contraindications ………………………………….. 7
Warning …………………………………………………… 8
Suggestions before Measuring Blood Pressure ……… 8
Device Description ……………………………………… 9
Description of Control Buttons …………………………. 10
Description of LCD Display Symbols ………………….. 10
Replacing Batteries …………………………………………11
Voice Prompt Function……………………………………. 13
Set the Language of Voice Prompt ……………………. 13
Program Date and Time ...……………………..………… 14
How to Apply the Arm Cuff ………….…………………… 15
Correct Measurement Position ………….……………….. 16
How to Take A Measurement ……………………………. 17
How to Use the Memory Features ……………………… 19
How to Delete Single or All Memories ……………….…. 20
Maintenance ……………………………………………….. 21
Error Message and Troubleshooting ……………………. 22
Specifications ……………………………………………… 26
Personal Blood Pressure’s Record ……………………… 27
Warranty Information ……………………………………… 29

3
Introduction
Thank you for purchasing the ZOpid HB-ZA310V Automatic
Blood Pressure Monitor.
For your safety, please be sure to read this Instruction
Manual thoroughly before using the Blood Pressure
Monitor. For other specific information about your own
blood pressure, CONTACT YOUR PHYSICIAN.
Measures Blood Pressure (SYS. & DIA.) & Pulse.
Fuzzy logic measurement system with fully automatic
inflation and deflation to provide home blood pressure
monitoring convenience.
Voice prompt function announces measured values.
80 sets of memory with Date/Time
Easy to wrap arm cuff suitable for arm sizes 8.7” to
12.6” (Large cuff sold separately fits arms 12.6” to 16.6”
in circumference)
Automatic turn-off after 1 minute.
Low Battery icon and intelligent error detection.
Operates on four “AA” alkaline batteries.
Recall and Scan functions.
Delete single or all measurements.
Warning Signs & Safety Statements
*ATTENTION!!
Read instruction manual before use.
*Type BF applied part
*Double insulated

4
Health and Blood Pressure Values
Blood pressure of the human body inclines to increase
naturally from middle age. This symptom is due to the
continuous aging of the blood vessel. Further causes from
obesity, lack of exercise, cholesterol (LDL) adhered to the
blood vessels will cause the same symptom and let the
vessel lose their elasticity. Higher blood pressure will
accelerate the hardening of the arteries, and the body
becomes more susceptible to apoplexy and coronary heart
disease. This is the reason we need to know the routine
blood pressure trend in order to see whether our body
condition is healthy or not. The blood pressure fluctuates
constantly throughout our daily life and is an essential
element for our daily health management.
What is Blood Pressure
Blood is pumped to artery by the beat (contraction and
expansion) of a pump called the heart. The pressure of the
pumped-out blood is called the “blood pressure”. Blood
pressure heaves with each beat of the heart. The raised
pressure when the heart contract is called the “systolic
blood pressure” and the lowered pressure when the heart
expands are called the “diastolic pressure”.
Blood pressure is typically low in the morning and
increases from the afternoon to the evening. It is lower in
the summer and higher in the winter. The blood pressure
naturally varies from time to time through out the day.
Many factors that may cause the blood pressure to
fluctuate: Breathing, Exercise, Mental stress, Smoking,
Eating, Concern, Environmental and/or temperature
change, the Time of day, Urination and bowel movement,
Conversation, Taking bath, Drinking alcohol, Medicament
and Physical activity, etc.

5
Variations in Blood Pressure:
The variations in blood pressure over a whole day with
measurement taken every five minutes as shown below.
Classification of Blood Pressure by the WHO:
The World Health Organization (WHO) and the
Inter-national Society of Hypertension (ISH) developed
the Blood Pressure Classification shown as below.

6
Important Information
Blood pressure values measured at home tend to be
lower than those measured in the hospital. This is
caused by the fact that you are nervous when you have
your blood pressure measured in the hospital, but you
feel relaxed at home. It is important to know your stable
normal blood pressure measured at home.
It is recommend that persons has one of the diseases
as heart troubles, kidney trouble, hyper-tension,
diabetes, arteriosclerosis or frustration problem of blood
vessel, please consult your physician before and during
using the blood pressure monitor to determine if your
arm blood pressure accurately reflects your actual
blood pressure.
Blood pressure fluctuates even by 30 to 50 mmHg
depending on whether you are nervous or relaxed,
exercise or the environment (temperature or mental
state) without being noticed.
The device may show some reading error in the
presence of common arrhythmia such as arterial or
ventricular premature beats or arterial fibrillation.
Precautions
This unit will not serve as a cure of any symptoms of
your cardiovascular diseases or other diseases. The
data measured is only for reference. Always consult
your physician if any abnormal results measured.
Always follow the operation procedures described in
the manual when you expect to measure your correct
blood pressure.
Be sure to store this manual well for future reference.
Diseases such as diabetes and hyper lipid accelerate

7
hardening of the arteries. If such conditions continue,
there is an increased danger of apoplexy and coronary
infarction, arterial stenosis and disorder in peripheral
blood circulation. In such cases, there will be a large
difference between blood pressure values taken at the
wrist and upper arm. (Since even healthy persons may
show a difference of 20 mmHg if the conditions of the
measurement status are not suitable. Do not rely on the
self-diagnosis or just one measurement, and always
follow the advice of a physician.) Physiological
conditions may have varying degrees of effect, but
generally blood pressure values at the wrist and upper
arm should display the same pattern of change.
Consequently, it is possible to monitor trends in change
by measuring blood pressure at the wrist.
Contraindications
Do not use the device on infants and persons who
cannot express his/her own will, which may lead to
serious accidents.
Do not use the device for purposes other than
measuring blood pressure.
Do not use this device near any mobile phone or
microwave oven in use, or reading error may occur.
Do not try to disassemble or modify the unit or wrist cuff,
which may damage the unit or cause permanent
reading error.
Do not start the inflation when the wrist cuff is not
wrapped around the wrist.
Do not drop this unit and avoid the device from strong
impact.

8
Warning
If the inflation continues and doesn’t stop, please untie
the cuff immediately or turn off the unit by pressing the
POWER button.
Do not measure repeatedly for a long period of time.
This device is not supposed to be used if your wrist has
any wound or injury.
Remove batteries if not using the device for a long time.
Do not use batteries in different type or brand for this
may lead to an incorrect reading and possibly cause
battery explosion (mix using alkaline and heavy duty
batteries).
Leaving the batteries in the blood pressure monitor for
over 3 months and not using the device may damage
the device by battery leakage. Please read the
Installing/Replacing Batteries section in this manual.
The device might not meet its normal performance if
stored or used beyond the temperature and humidity
ranges specified below.
Operating conditions: 10℃~40℃, 40%~85% R.H.
Conditions for storage: -20℃~50℃, 15%~85% R.H.
Suggestions before Measuring Blood Pressure
1. Please relax yourself physically and mentally for at
least 5-10 minutes before measurement.
2. Avoid eating, smoking, exercising, bathing and drinking
(alcohol/coffee/tea) for at least 20-30 minutes before
measuring your blood pressure.
3. Be sure the wrist cuff is at the same level as your heart.
4. Stress raises blood pressure. Keep calm and relaxing
during measurement.
5. Please DO NOT talk or speak during measurement.

9
6. Avoid urination or bowel movement before taking a
measurement.
7. Wait at least 3 minutes before you take another blood
pressure measurement.
8. Keep the records for your physician as reference.
Reminded that one measurement can’t conclude the
health of your blood pressure, only recording long-term
measuring results will reveal the long-term trend of your
blood pressure. Try to measure your blood pressure at
the same time each day for consistency.
Device Description

10
Description of Control Buttons
POWER: To turn on or turn off the unit
START: Start inflating to measure blood pressure and
pulse. To set the language of voice prompt or voice
on/off.
TIME: To set the Date/Time.
MEMO/▲: To review the measured record(s) by manual.
To select the digit of the Date/Time.
SCAN/▼: Automatically review all previously
memorized record(s) / To select the digit of Date/Time /
To delete memorized record(s).
Description of LCD Display Symbols

11
Installing/Replacing Batteries
Be sure the unit turned off before installing/replacing
batteries, or the memories & Date/Time setting will be
erased. If the batteries are removed for more than 30
seconds, the memories and the Date/Time setting will
be erased. Then, you must reset the Date/Time.
1. Slide the battery compartment to remove it.
2. Place the batteries (4 “AA” Alkaline batteries) in the
compartment as indicated by the polarity symbols (+
and -) marked inside. All the display symbols appear
for 1 seconds and then return to standby mode.
3. Replace the battery compartment cover.
Note: When (Low Battery indicator) appears on the
display, the batteries are weak.

12
Warning:
a. Be sure to follow the instruction above when plugging
the adapter and installing or replacing the batteries.
b. We recommend you to use the ALKALINE batteries for
the best performance and the longest device life.
c. Use only brand new batteries of the required size and
DO NOT mix using old and new or different type of
batteries together.
d. Remove the batteries if not using the blood pressure
monitor for an extended period (i.e., 3 months). The
batteries can leak chemicals then damage the
electronic parts.
e. Immediately replace run-down batteries with new ones.
f. Check the batteries periodically and replace them when
necessary.
g. When using the adapter alone without battery, the
memories and the Date/Time setting won’t be kept
during the power failure.

13
Voice Prompt Function
When first plugging the adapter or installing the battery, the
initial mode is voice prompt mode. While starting the unit
and operating each time, there is a voice prompt to remind
you. It’s especially useful to the elder or sightless man. You
can turn off this function if you don’t want to hear any
reminder.
Set the Language of Voice Prompt
There are four languages of voice prompt (English,
Deutsche, French, Espanol) can be set. Make sure you
have turned off the unit before you want to set the voice
prompt function.
1. Press START button, the unit will show “Eng 1”
(default) and speak a demo voice in English “Memory
number 3, Systolic pressure 160 high, Diastolic
pressure 66 normal, Pulse rate 62”
2. Press MEMO/▲button or SCAN/▼button to set the
number representing the language.
3. Press START button to confirm and the unit will show
“UoC On” (default)
4. Press MEMO/▲button or SCAN/▼button to set the
voice prompt on or off.
5. Press START button to confirm and the unit will go to
standby mode

14
Note:
When using Voice Prompt Function, it increase the power
consumption, it also reduce the life of the battery.
Program Date and Time
1. Press and hold TIME button for 2 seconds until “2007”
shown on the screen and starts to flash.
2. Press MEMO/▲button or SCAN/▼button to set the
number representing the Year.
3. (You can press and hold MEMO/▲or SCAN/▼buttons
for about 2 seconds, the number of the Year will be
displayed in the faster speed.)
4. Press TIME button to confirm the Year setting. Then the
number representing the Date will flash.

15
5. In the same manner, set the Month, Date, Hour and
Minute.
Note: After replacing batteries, always check the Date/Time
is properly set or not first, then use the blood pressure
monitor. If the batteries are removed for more than 30
seconds, you must reset the Date/Time.
How to Apply the Arm Cuff
1. Insert the air plug of the arm cuff into the air jack of the
blood pressure monitor.
2. The cuff should be assembled correctly when it is
removed from the box. If it is not, pass the end of the
cuff furthest from the tubing through the metal D-ring to
form a loop. The smooth cloth should be on the inside
of the cuff loop.
3. If the cuff is assembled correctly, the sewn hook
material will be on the outside of the cuff loop and the
metal D-ring will not touch your skin.
4. Put your left arm through the cuff loop. The bottom of
the cuff should be approximately 1/2” above the elbow.
The cuff tubing should be positioned along the middle of
the inside of your arm as shown.

16
5. Pull the cuff so that the top and bottom edges are
tightened evenly around your arm.
6. When the cuff is positioned correctly, press the sewn
hook material firmly against the pile side of the cuff.
7. The cuff should be wrapped so that it fits snugly and
stays in place. You should be able to fit one finger
between the cuff and your arm.
Correct Measurement Position
It is extremely important for accurate measurements that
the cuff is at the heart level. Higher or lower position will
give deviations from the true value.

17
Measurement while sitting down
1. Sit in a chair with your feet flat on the floor and rest your
arm on a table so that the cuff is at the same level as
your heart.
2. Relax your arm and turn your palm upward.
3. Make sure there are no kinks in the air tubing.
4. After taking deep breaths for several times before
measurement, take a natural breath, and then relax
your body.
How to Take a Measurement
Please read and follow directions in the section
“Suggestions before Measuring Blood Pressure” and “How
to Apply the Arm Cuff” before taking a measurement.
1. Press POWER button to turn on the unit.
All the symbols displayed for a couple seconds then the
number 0. The unit says “measurement ready”
2. Press START button, the cuff automatically inflates to
approximately 170mmHg. (50mmHg higher than the
average systolic blood pressure reading.)
3. When the cuff reaches your correct inflation level, it
begins to deflate automatically with decreasing
numbers shown on the display. The Heart Symbol
flashes as the onset of oscillation signals.

18
* If during deflation the blood pressure monitor senses
that higher pressure is required to measure the user’s
blood pressure, the device will stop deflation and pump
again to reach the workable pressure (up to the max.
280 mmHg). If the inflation continues and doesn’t stop,
please untie the cuff immediately or turn off the unit by
pressing the POWER.
4. The monitor exhausts the residual air when the
measurement is completed. The Heart Symbol
stops flashing and your blood pressure and pulse will
appear on the display. In the mean time, the unit
announces the measured value of Systolic, Diastolic
and Pulse twice. After taking the measurement, the
latest measured readings will always be displayed
before the power is turned off.
Note:
Wait for at least 3 minutes if you want to take another
measurement. Waiting allows your blood vessels to
bounce back to normal status. More rest time may be
required between measurements depending on
individual physiological conditions.
While starting the unit each time, it will give a voice
prompt “Power on”. If you don’t need it, please turn off
the announcement.

19
How to Use the Memory Features
The blood pressure and pulse measured and displayed are
automatically stored in the memory. The blood pressure
monitor can store up to 80 measurements. If more than 80
measurements have been taken, the earliest measurement
will be erased and replaced by the most recent
measurement.
1. Review the Average Value and previously
measurements:
Press MEMO/▲button, the unit first display the
average values of Systolic, Diastolic and Pulse with
voice prompt. (Averaged from all memorized readings.)
Press MEMO/▲button again to review the
measurement from the latest to the earliest with voice
prompt.
The latest measurement (M 01) appears when you
press MEMO/▲button. M 01 is the latest reading
measured. The Systolic, Diastolic, Pulse and Date/Time
of the measurement will be displayed. Press MEMO/▲
button to repeatedly review other memorized readings.
The readings will be displayed as M 02, M 03, M 04 …
etc. You can press SCAN/▼button to switch to the
automatic display mode.
2. Scan all previous measurements:
Press SCAN/▼button, the unit will display all
measurements one by one in one in one second
interval. In the automatic display mode, it doesn’t have
voice prompt function. You can press MEMO/▲button
to switch to the single display mode.

20
3. The 3 colors LED warning lights:
It will indicate the status of each blood pressure
measurement is Normal (green), Higher (yellow) or
Abnormal High (reddish).
How to delete Single or All Memories
1. Delete single measurement:
You can delete the single memory just after taking the
measurement. Press SCAN/▼button then “dEL” will
appear and flash and says “delete”. Press SCAN/▼
button again to confirm the delete function.
2. Delete all measurements:
Turned off the unit first then press and hold SCAN/▼
button until “dEL ALL”displayed and says “delete all”.
Press SCAN/▼button again and all memories will be
deleted when “00 ALL”shown on the screen and says
“deleted”.
Table of contents
