Hickory 5.5G User manual
Hickory Industries, Inc.
4900 Westside Avenue, North Bergen, New Jersey 07047
Tel: [201] 223-0050 Fax: [201] 223-0950
5.5G Manual 12/2007
Page 1 of 28
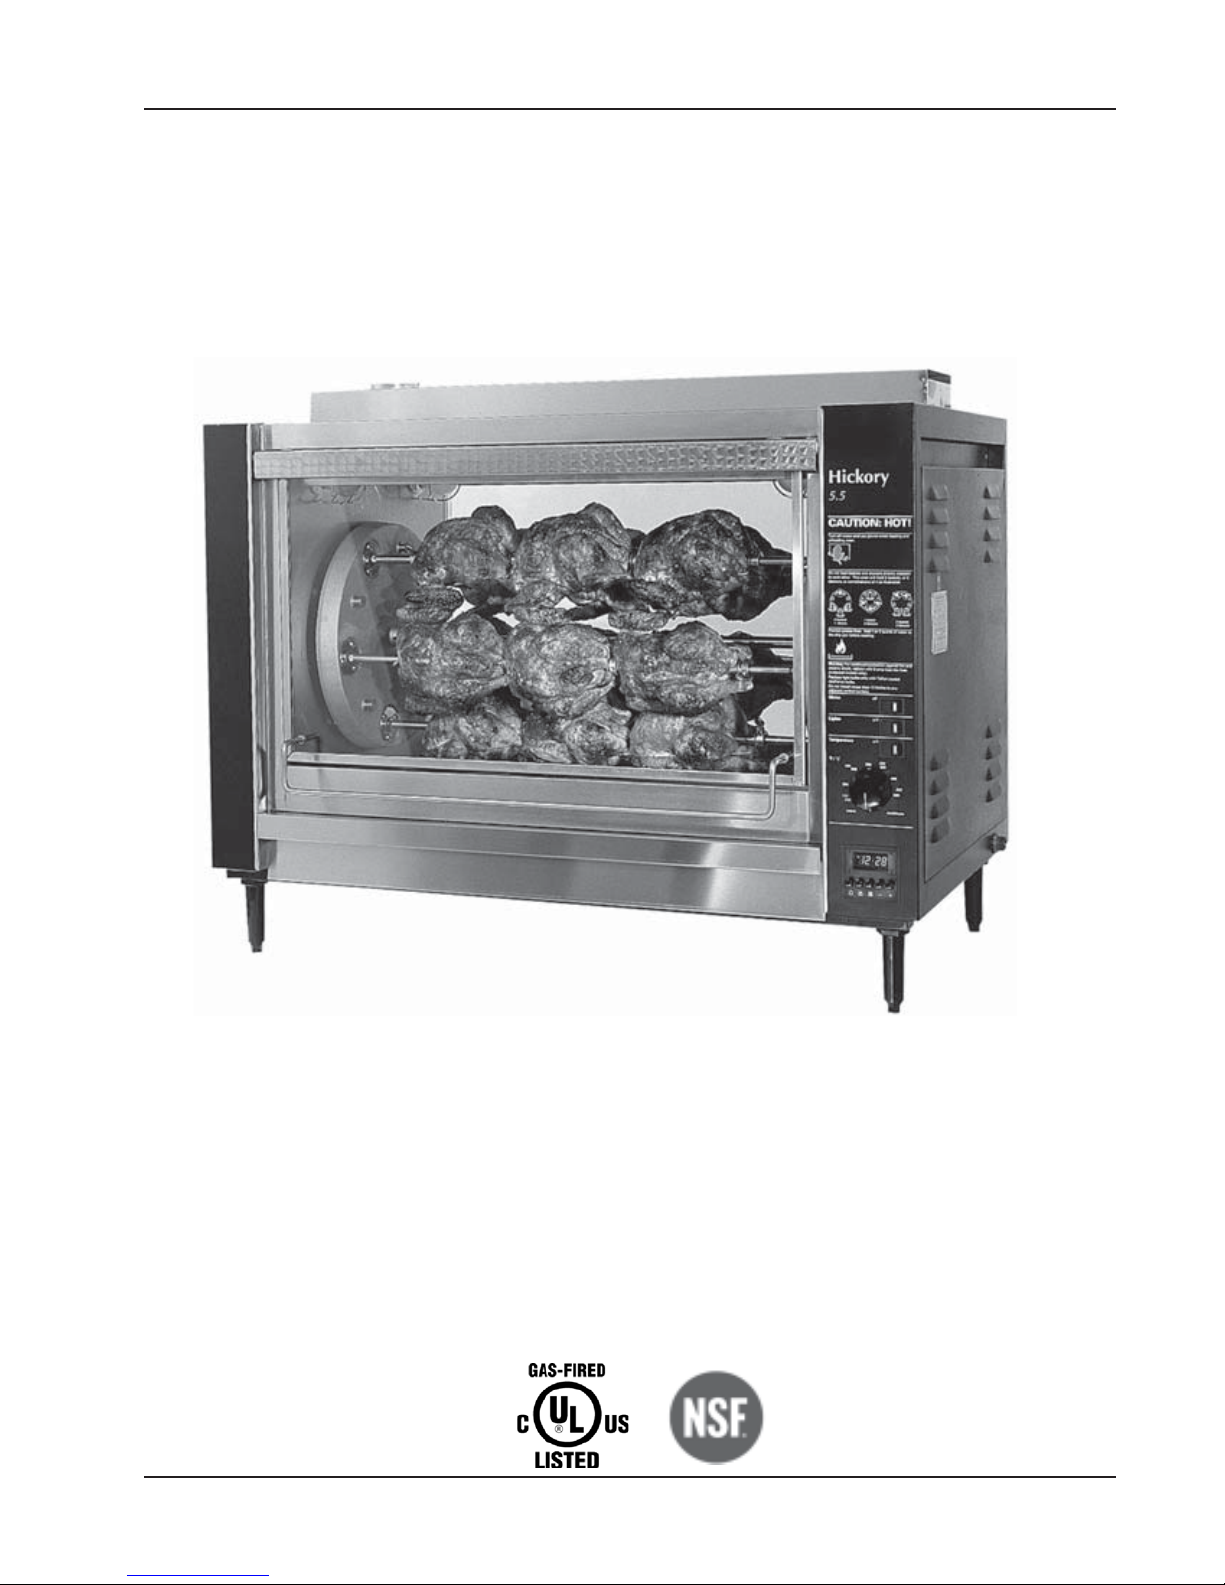
INSTALLATION AND OPERATING INSTRUCTIONS
HICKORY MODEL 5.5G ROTISSERIE
READ THIS ENTIRE MANUAL
BEFORE OPERATING THIS UNIT
Hickory Industries, Inc.
4900 Westside Avenue, North Bergen, New Jersey 07047
Tel: [201] 223-0050 Fax: [201] 223-0950
5.5G Manual 12/2007
Page 2 of 28
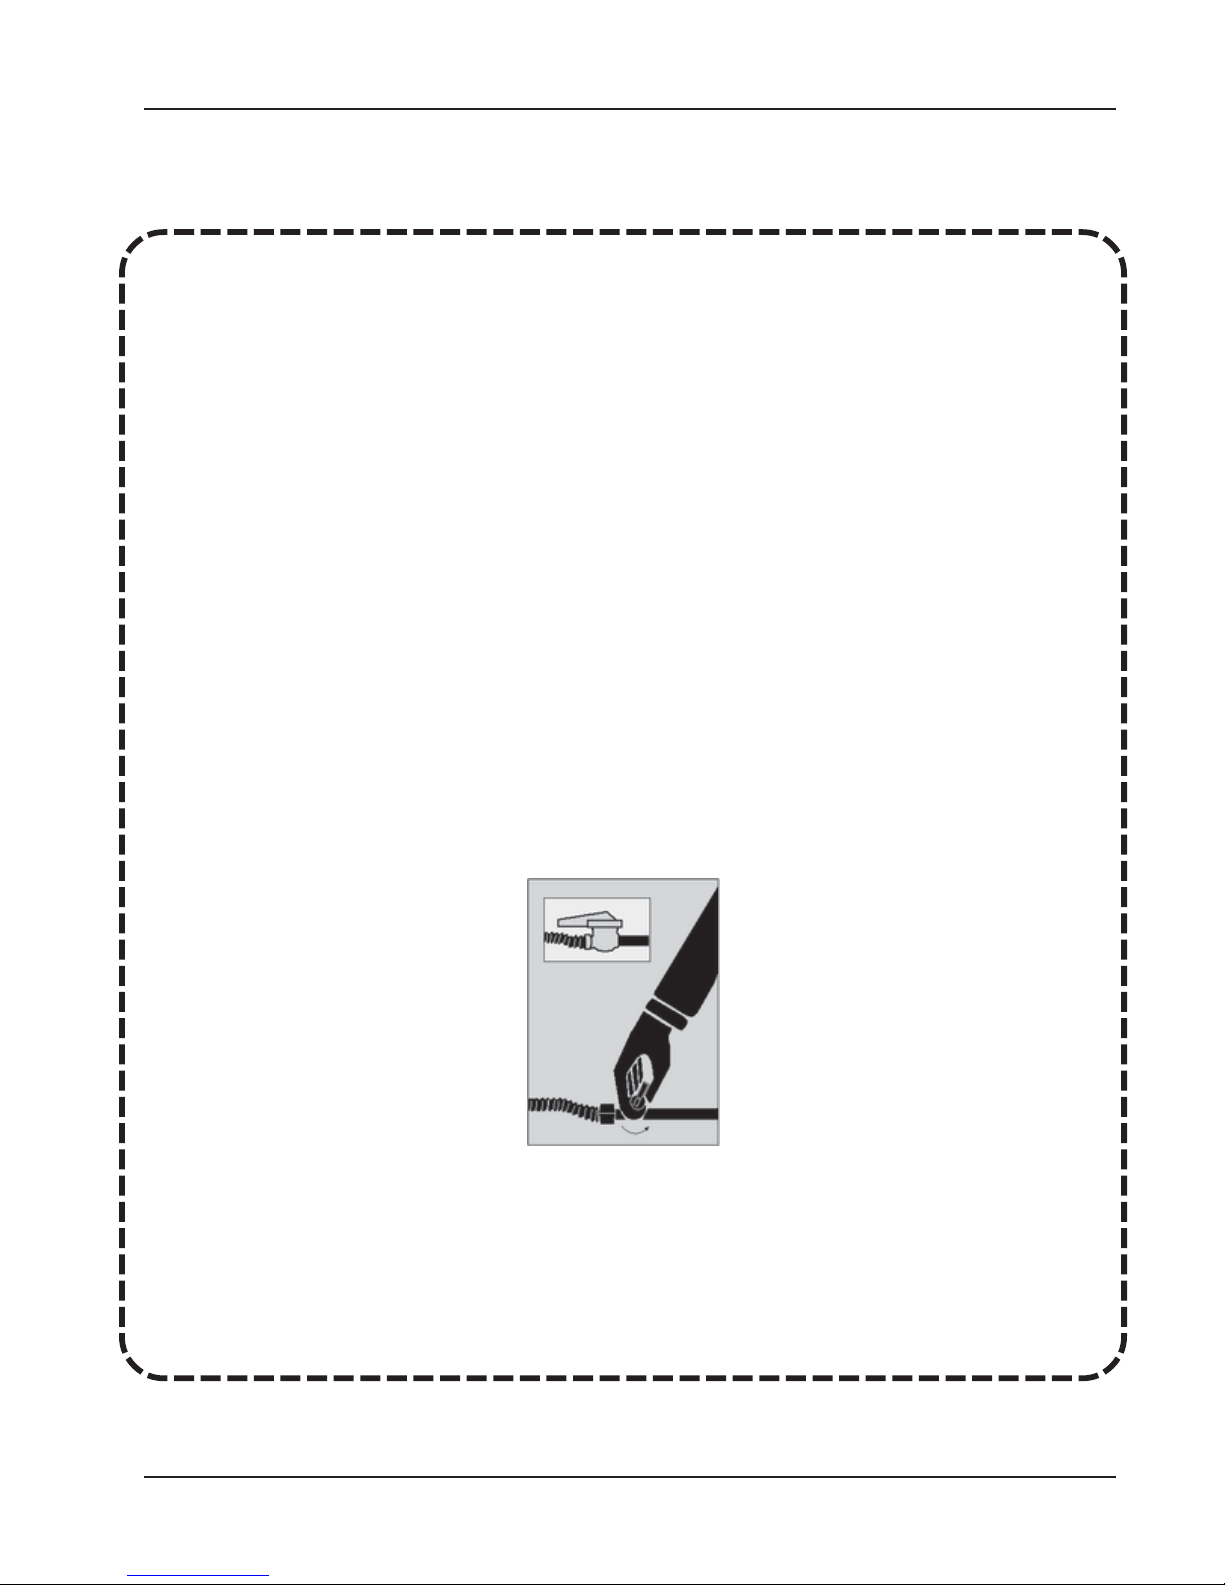
Please copy, cutout and place in a prominent location.
What To Do If You Smell A Gas Odor
Natural gas is lighter than air, and it has a very high ignition
temperature. For your protection, The Gas Company adds a distinctive
odor to natural gas, so leaks are easily detected.
If you smell a Natural gas or a Propane gas odor:
DON’T panic.
DON’T light a match, candle or cigarette.
DON’T turn electrical appliances or lights on or off.
For safety, a shut-off valve was installed on this appliance. If a leak
occurs at this appliance, the valve will permit you to turn off the gas at the
appliance rather than shutting off all gas service at the meter.
SHUT off the appliance shut-off valve.
· From a safe location, call your local Gas Company 24 hours a day,
seven days a week; or call 9-1-1.
Hickory Industries, Inc.
4900 Westside Avenue, North Bergen, New Jersey 07047
Tel: [201] 223-0050 Fax: [201] 223-0950
5.5G Manual 12/2007
Page 3 of 28
INTENDED FOR OTHER THAN HOUSEHOLD USE
OVEN MUST BE KEPT CLEAR OF COMBUSTIBLES AT ALL TIMES
IMPORIMPOR
IMPORIMPOR
IMPORTT
TT
TANT INSTRANT INSTR
ANT INSTRANT INSTR
ANT INSTRUCTIONSUCTIONS
UCTIONSUCTIONS
UCTIONS
After the gas supply has been connected to your unit, it is extremely important to check piping
for possible leaks. To do this, use soap and water solutions, or solutions which are expressly
made for this purpose. DO NOT USE matches, candles, flames, or other sources of ignitions
since these methods are extremely dangerous.
In a prominent location post instructions to be followed in the event you smell gas. Obtain these
instructions from your local gas supplier.
FORFOR
FORFOR
FOR YY
YY
YOUR SAFETYOUR SAFETY
OUR SAFETYOUR SAFETY
OUR SAFETY
Do not store or use gasoline or other flammable vapors
and liquids in the vicinity of this or any other appliance.
WARNINGWARNING
WARNINGWARNING
WARNING
Improper installation, adjustment, alteration, service or maintenance can cause property damage,
injury or death. Read the Installation, Operating and Maintenance Instructions thoroughly before
installing or servicing this equipment. Initial heating of oven may generate smoke or fumes and
must be done in a well ventilated area. Overexposure to smoke or fumes may cause nausea or
dizziness.
As a safety precaution, disconnect the power supply to
the appliance before cleaning or servicing this appliance.
Instruction Plate:
Before lighting this piece of equipment, ensure
that the ventilation hood is turned on
.
1. Turn on Lights, Motor and Temperature switches. 2. Press
"Read" and toggle the "Up" and "Down" keys to recipe 1
3. Press the "Start Stop" button 4. Infra-Red gas burner will turn
on. In case of flame failure, turn Temperature switch off. Wait
five minutes before relighting the appliance.

Hickory Industries, Inc.
4900 Westside Avenue, North Bergen, New Jersey 07047
Tel: [201] 223-0050 Fax: [201] 223-0950
5.5G Manual 12/2007
Page 4 of 28
INSTALLATION GUIDELINES
GAS
Gas installation must conform with local codes, or in the absence of local codes, with the National
Fuel Cas Code, ANSI 2223.1 /NFPA 54, or the Natural Gas and Propane Installation Code,
CSA B749.1
ELECTRICAL INSTALLATION
This appliance, when installed, must be electrically grounded in accordance with local codes, or in
the absence of local codes, with the National Electrical Code, ANSI/NFPA 70, or the Canadian
Electrical Code, CSA C22.2, as applicable. For your convenience, this appliance has been wired
with a NEMA 5-15 cord and plug and should be plugged in to a corresponding NEMA 5-15 receptacle.
The grounding prong SHOULD NOT BE CUT. Cutting the grounding prong will void the
manufacturers warranty
PRESSURE TEST
The appliance and its individual shut off valve must be disconnected from the gas supply piping
system during any pressure testing of that system at test pressures in excess of 1/2psi (3.5 kpa).
The appliance must be isolated from the gas supply piping system by closing its individual manual
shut off valve during any pressure testing of the gas supply piping system at test pressures equal
to or less than 1/2psi (3.5 kpa).
READ THIS ENTIRE MANUAL
BEFORE OPERATING THIS UNIT
Electrical diagrams for this appliance are located
behind the right side cover as well as in this
manual.
ENSURE YOU DISCONNECT THE POWER
BEFORE OPENING SIDE ENCLOSURE!

Hickory Industries, Inc.
4900 Westside Avenue, North Bergen, New Jersey 07047
Tel: [201] 223-0050 Fax: [201] 223-0950
5.5G Manual 12/2007
Page 5 of 28
INDEX
I. INITIAL STEPS 6
A. Placing the Machine 6
B. Assembling the Machine 6
C. Electrical Connection 6
D. Gas Connection 6
E. Venting 6
II. OPERATING INSTRUCTIONS
1.0 Switches 7
2.0 Timer 7
3.0 Gas Units 7
4.0 GeneralInformation 8
5.0 Spitting Chickens
A. Using Angle Spits 9
B. Using Regular Spits 14
6.0 Loading and Unloading Spits 19
7.0 Checking Chickens for Doneness 19
8.0 Cooking other Products 19
9.0 Limitations 20
10.0 Cleaning 20
10.1 At The End Of Day 21
11.0 Pointers on How to Care for Glass 28
12.0 Removal of the Interior Disks (N/5.5 and N/10.10 only) 29
A. Removing the Interior Disks
B. Cleaning the Disks
13.0 Using the Center Spit for Large Products (N/5.5 and N/10.10 only) 30
14.0 Placing the Disks Back in the Machine (N/5.5 and N/10.10 only) 30
III. CRITICAL CONTROL STEPS FOR PREPARATION AND COOKING 32
OF BARBECUE CHICKENS
IV MAINTENANCE PROCEDURES 5.7, 7.7 & 10.10
V. WARRANTY 27
VI ELECTRICAL DIAGRAM 28
Page

Hickory Industries, Inc.
4900 Westside Avenue, North Bergen, New Jersey 07047
Tel: [201] 223-0050 Fax: [201] 223-0950
5.5G Manual 12/2007
Page 6 of 28
I. INITIAL STEPS
A. Placing the Machine
Barbecue products are often bought on impulse. The 5.5G rotisserie model has been designed for
maximum viewing by both the customers as well as the operator. The unit usually has a front and
back glass surface and should be placed where it will get the best and most exposure. Wherever
the unit is placed, remember that the operator will need continual access through the glass doors.
If placed on a counter, table, or case, care should be taken to secure the unit so that it cannot be
dislodged.
WARNING: THESE MACHINES ARE OVENS AND SHOULD NEVER BE PLACED
WITHIN PUBLIC ACCESS FOLLOW MINIMUM CLEARANCE REQUIREMENTS
FOR ALL UNITS AS PER SPECIFICATION GUIDES.
B. Assembling the Machine
The unit comes with a gas shut-off valve and gas regulator. It is set at the factory. The gas shut off
valve must be installed on the rotisserie first and then the pressure regulator. If these are not installed,
it will void the warranty. The spits, skewers, baskets, thumb screws or any other cooking accessory
ordered, are individually packed and should be cleaned and sanitized. Check all parts and accessories
match with your packing list. Remove all tape on glass and vinyl coating on stainless steel before
operating the machine.
C. Electrical Connection
The unit must be connected to a properly grounded 120V NEMA 5-15 outlet. Removing the grounding
prong on the cord will void the warranty. WARNING: The outlet must be properly polarized due to the
flame safety monitoring module on the unit. Connecting the unit to an improper outlet will cause flame
failures.
D. Gas Connection
Gas connections must be performed by a licensed gas fitter. The unit is supplied with a main shut
off valve (gas cock) and a pressure regulator preset at the factory. The gas shut off valve must be
installed on the rotisserie first and then the pressure regulator. If these are not installed, it will
void the warranty. Maximum inlet pressure to the unit must be 7". The units regulator is set at the
factory for proper operation at 5.5" of pressure .
E. Venting
All gas units require venting and should be vented under a hood. The installer must check with
local and state agencies for proper venting. The model 5.5G should be placed under a filtered
hood.

Hickory Industries, Inc.
4900 Westside Avenue, North Bergen, New Jersey 07047
Tel: [201] 223-0050 Fax: [201] 223-0950
5.5G Manual 12/2007
Page 7 of 28
II. OPERATING INSTRUCTIONS
1.0 Switches
There are three switches on the operating panel.
1. The light switch will activate the interior lighting of the machines.
2. The motor switch will activate the motor that turns the spits.
3. The temperature switch supplies power gas monitoring circuit. With this switch
off, the infra-red gas generator will never light up. This switch will illuminate when
the unit is calling for heat and will shut off when the unit has reached temperature.
2.0 Timer
The time and temperature controller controls the duration the unit cooks and temperature. It has a
hold feature and also has 12 pre-programmed recipes from the factory. These recipes can be
changed to fit your needs. Instructions on the timer were included with the unit. You can also view
them on-line at www.hickorybbq.com.
3.0 Gas Units
The gas units are shipped "ready to ignite" once they are connected to a gas line by a licensed
plumber or gas fitter. See electrical connection on page 6.
WARNING: THE UNIT IS EQUIPPED WITH THREE PRONGED (GROUNDING) PLUGS FOR
YOUR PROTECTION AGAINST SHOCK AND HAZARD AND SHOULD BE
PLUGGED DIRECTLY INTO A THREE-PRONG RECEPTACLE. DO NOT CUT OR
REMOVE THE GROUNDING PRONG FROM THIS PLUG.

Hickory Industries, Inc.
4900 Westside Avenue, North Bergen, New Jersey 07047
Tel: [201] 223-0050 Fax: [201] 223-0950
5.5G Manual 12/2007
Page 8 of 28
4.0 General Information
Fill the drip pan at least 1/2full with water and replenish as required. The water evaporates and
creates a moist environment for your product to cook in. Allow all models to preheat for 15 min-
utes.
5.0 Spitting Chickens
The most important part in getting started with a rotisserie is knowing how to properly spit the
product. This is quite easy, but it must be learned! As an operator, you will become an expert in
spitting chickens within half an hour! There are two types of commonly used spits: the angle spit
and the regular spit. The following pages describe and show how spitting is done with both these
types of spits.
3.0 Gas Units (continued)
Preheat the oven before cooking. Turn the motor and temperature switches on. On the time and
temperature controller, press the "Read" button and locate recipe #12 with the "Up" and "Down"
arrow keys; hit the "Start Stop" button. Recipe #12 is set to cook at 575F for 15 minutes.
WARNING: If the burner "locks out" (shut off), simply turn off the temperature switch Off and
then On again. This action will reset the ignition system.
CAUTION: The are fragile. Make sure you wipe them down weekly to prevent cleaning residue
or carbon from adhering to the ignitors. In case of a "lock out", wipe the ignitors with scotch
brite for better sensing. Do Not spray chemicals on the burner or ignitor. Chemicals on the
ignitor will weaken the ignitor and cause failures. Chemicals on the ignitor will penetrate the
burner and breakdown the burner.
After preheating the oven, you can use the oven. Set your cooking time by pressing the "Cook
Time" button and set your cooking time with the "Up and Down" buttons. Set your cooking tem-
perature by pressing the "Cook Temp" button and set your cooking temperature with the "Up and
Down" buttons. When you loaded your product and are ready to cook, simply press the "Start Stop"
button. The unit will cook for the time entered and will beep at the end. Pressing the "Time"
button will add five minutes to the cook. Pressing the "Hold" button will put the unit in hold if the
hold temperature has been set. Setting the hold temperature to OFF defeats the hold cycle. To set
a hold temperature, press the "Hold" button and set your holding temperature with the "Up and
Down"buttons.

Hickory Industries, Inc.
4900 Westside Avenue, North Bergen, New Jersey 07047
Tel: [201] 223-0050 Fax: [201] 223-0950
5.5G Manual 12/2007
Page 9 of 28
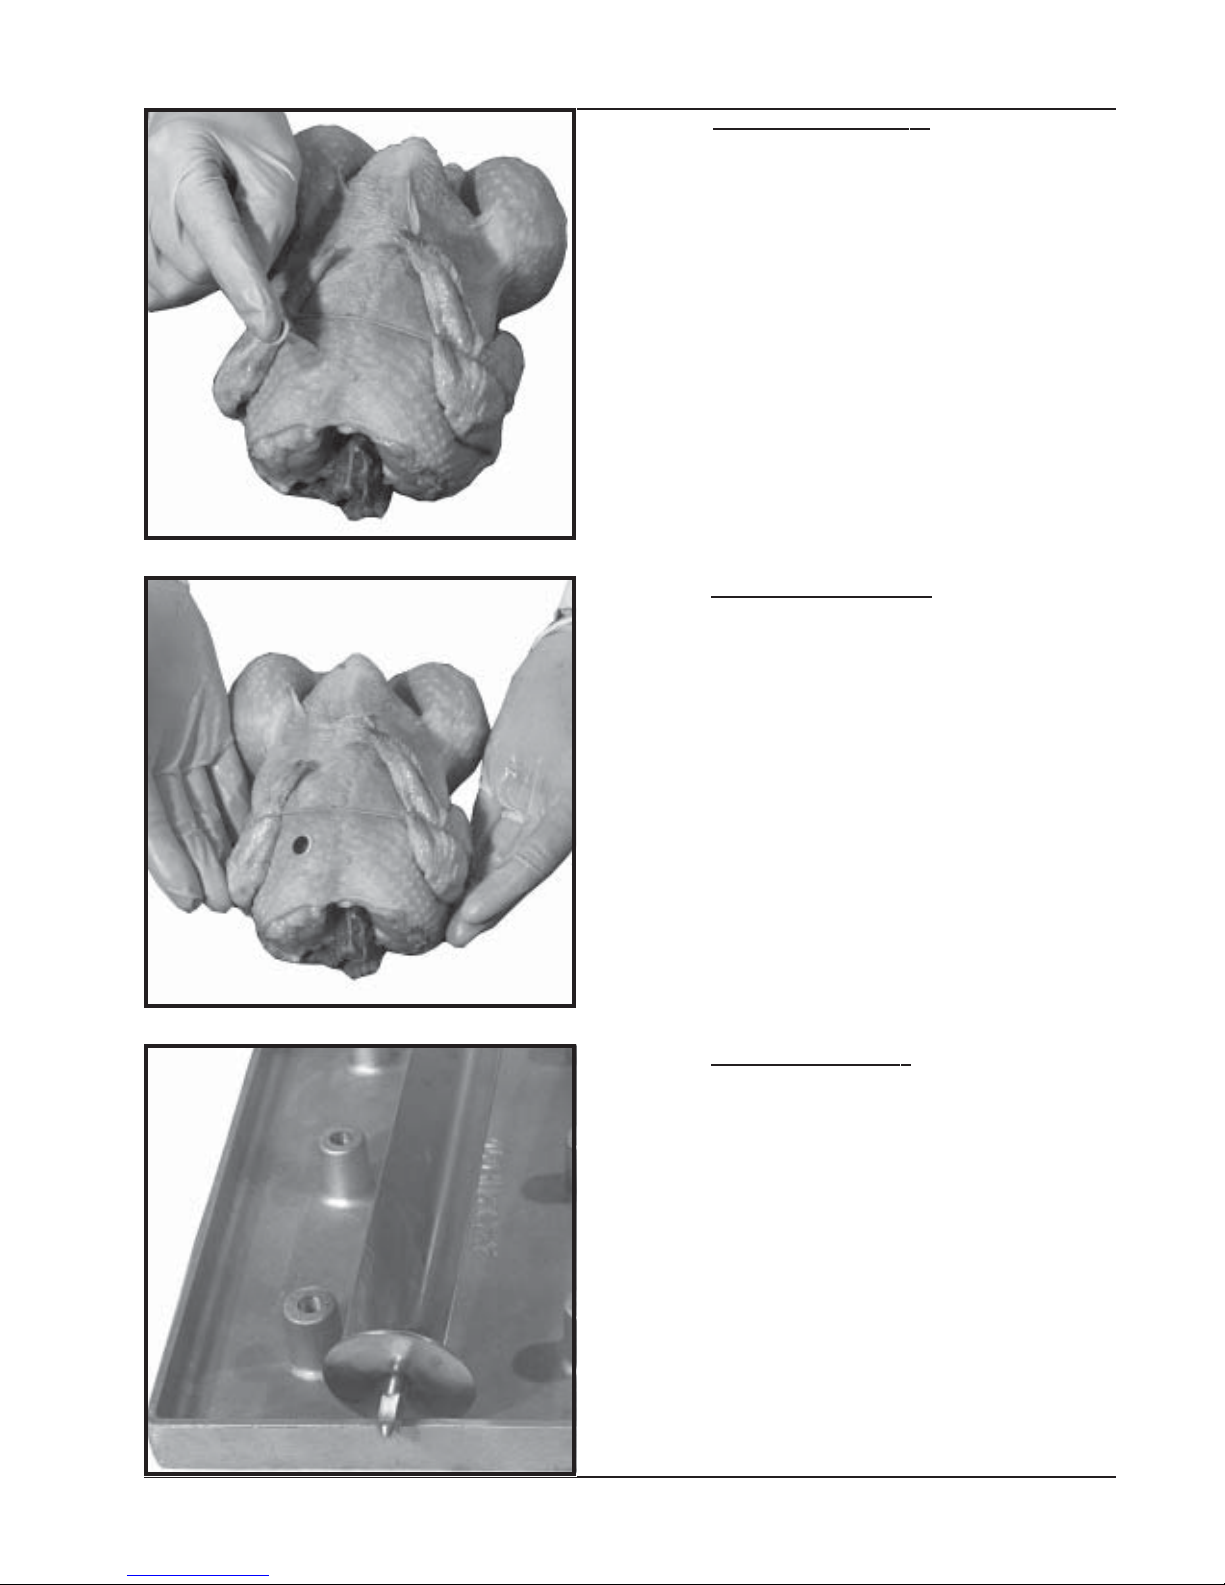
Figure 1. Chickens Ties
When using a “V” or angle spit, it is very important
to tie or truss the product being cooked. This
prevents the product from moving around the spit
and also prevents damage by preventing the legs
and wings from flopping. In this section, we will
show how to properly truss a chicken. It is impor-
tant to use a tie to fit the size of the product. In this
case, we are tieing a 2 3/4lb. chicken with a 6” tie.
Figure 2. Trussing Wings
With the back of the chicken facing up, take the tie
and wrap it around the breast, making sure to tuck
the wings against the breast. Pull on the tie as
pictured. You will also need to hold the chicken
with your other hand.
Figure 3. Trussing Across Back
While pulling on the tie, cross the strings so that
you make an “X” across the back of the chicken.
With the “loop” in your hand, you will now need to
tie the legs of the chicken.
A. Using Angle Spits

Hickory Industries, Inc.
4900 Westside Avenue, North Bergen, New Jersey 07047
Tel: [201] 223-0050 Fax: [201] 223-0950
5.5G Manual 12/2007
Page 10 of 28
Figure 4. Trussing Legs
While pulling on the tie, loop the strings over the
legs of the chicken.
Figure 5. Trussed Legs
Make sure that both legs are securely held by the
tie.
Figure 6. Trussed wings
Make sure that both wings are securely held by the
tie against the breast of the chicken.
Hickory Industries, Inc.
4900 Westside Avenue, North Bergen, New Jersey 07047
Tel: [201] 223-0050 Fax: [201] 223-0950
5.5G Manual 12/2007
Page 11 of 28
Figure 7. Pop-up Thermometer
The only way to tell if a chicken is done is take the
internal temperature. Since it can be difficult to
probe the chickens while they are in the rotisserie,
we recommend the use of pop-up thermometer.
These inexpensive items should be place in the
thickest part of the chicken, which is the breast.
The thermostat will “pop-out” when the internal
temperature reaches 185º F.
Figure 8. Chicken Ready to Spit
With the chicken trussed and the pop-up thermom-
eter in place, the chicken is ready to be spitted with
an angle spit.
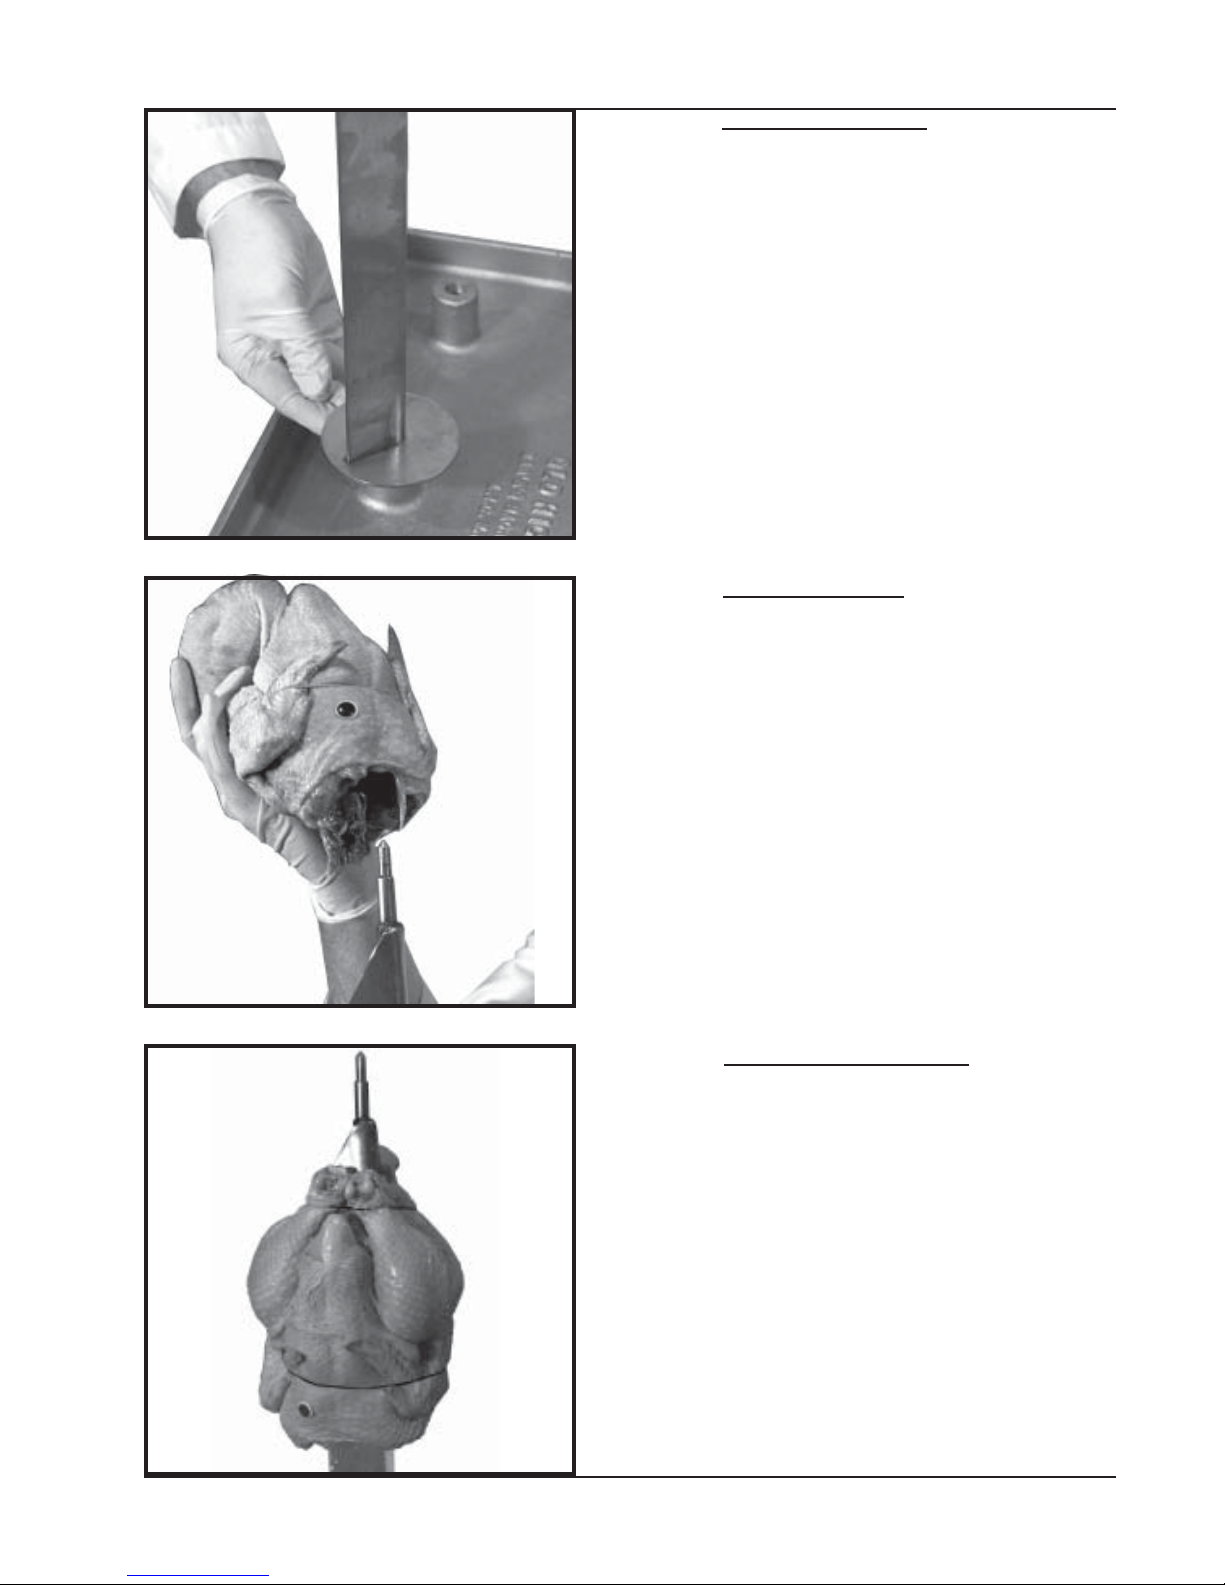
Figure 9. Spitting Accessories
In order to make the use of the angle spits fast and
easy, we offer an accessory called a Spit Holder
(Hickory Part 195). This aluminum plate offers six
holes where the base (square-end) of the angle spit
can be inserted.
Hickory Industries, Inc.
4900 Westside Avenue, North Bergen, New Jersey 07047
Tel: [201] 223-0050 Fax: [201] 223-0950
5.5G Manual 12/2007
Page 12 of 28
Figure 10. Using the Angle Spit
Insert the bottom (square-end) of the spit into one
of the holes in the Spit Holder.
Figure 12. Chicken Position on Spit
When spitting the chicken, make sure that the
breast is sitting on the flat, exterior side of the spit.
Notice on the picture how the breast is not directly
on the rounded corner of the spit, but above one of
the flat parts of the “V”. It is also important to note
that the legs (and the tie) must sit on the same flat
side of the spit. This picture shows exactly how the
chicken should look when spitted.
Figure 11. Spitting a Chicken
Spit the chicken through the cavity. The chicken
should be inserted through the “head” (or at least
where the head used to be) first.

Hickory Industries, Inc.
4900 Westside Avenue, North Bergen, New Jersey 07047
Tel: [201] 223-0050 Fax: [201] 223-0950
5.5G Manual 12/2007
Page 13 of 28
Figure 13. Incorrectly Spitted Chicken
This picture shows a chicken with the legs improp-
erly placed. Note how the chicken seems to hang to
one side. When spitted this way, the chickens will
tend to “bounce” up and down causing the chicken
to breakup.
Figure 14. Complete Spit
After inserting the first chicken, push it all the way
to the bottom of the spit and add the next chicken.
Depending on the size of the birds and on the
rotisserie model, each spit will accommodate three
to four 2 3/4lb. chickens. Once completed, the spit
is ready to be placed in the rotisserie.
Hickory Industries, Inc.
4900 Westside Avenue, North Bergen, New Jersey 07047
Tel: [201] 223-0050 Fax: [201] 223-0950
5.5G Manual 12/2007
Page 14 of 28
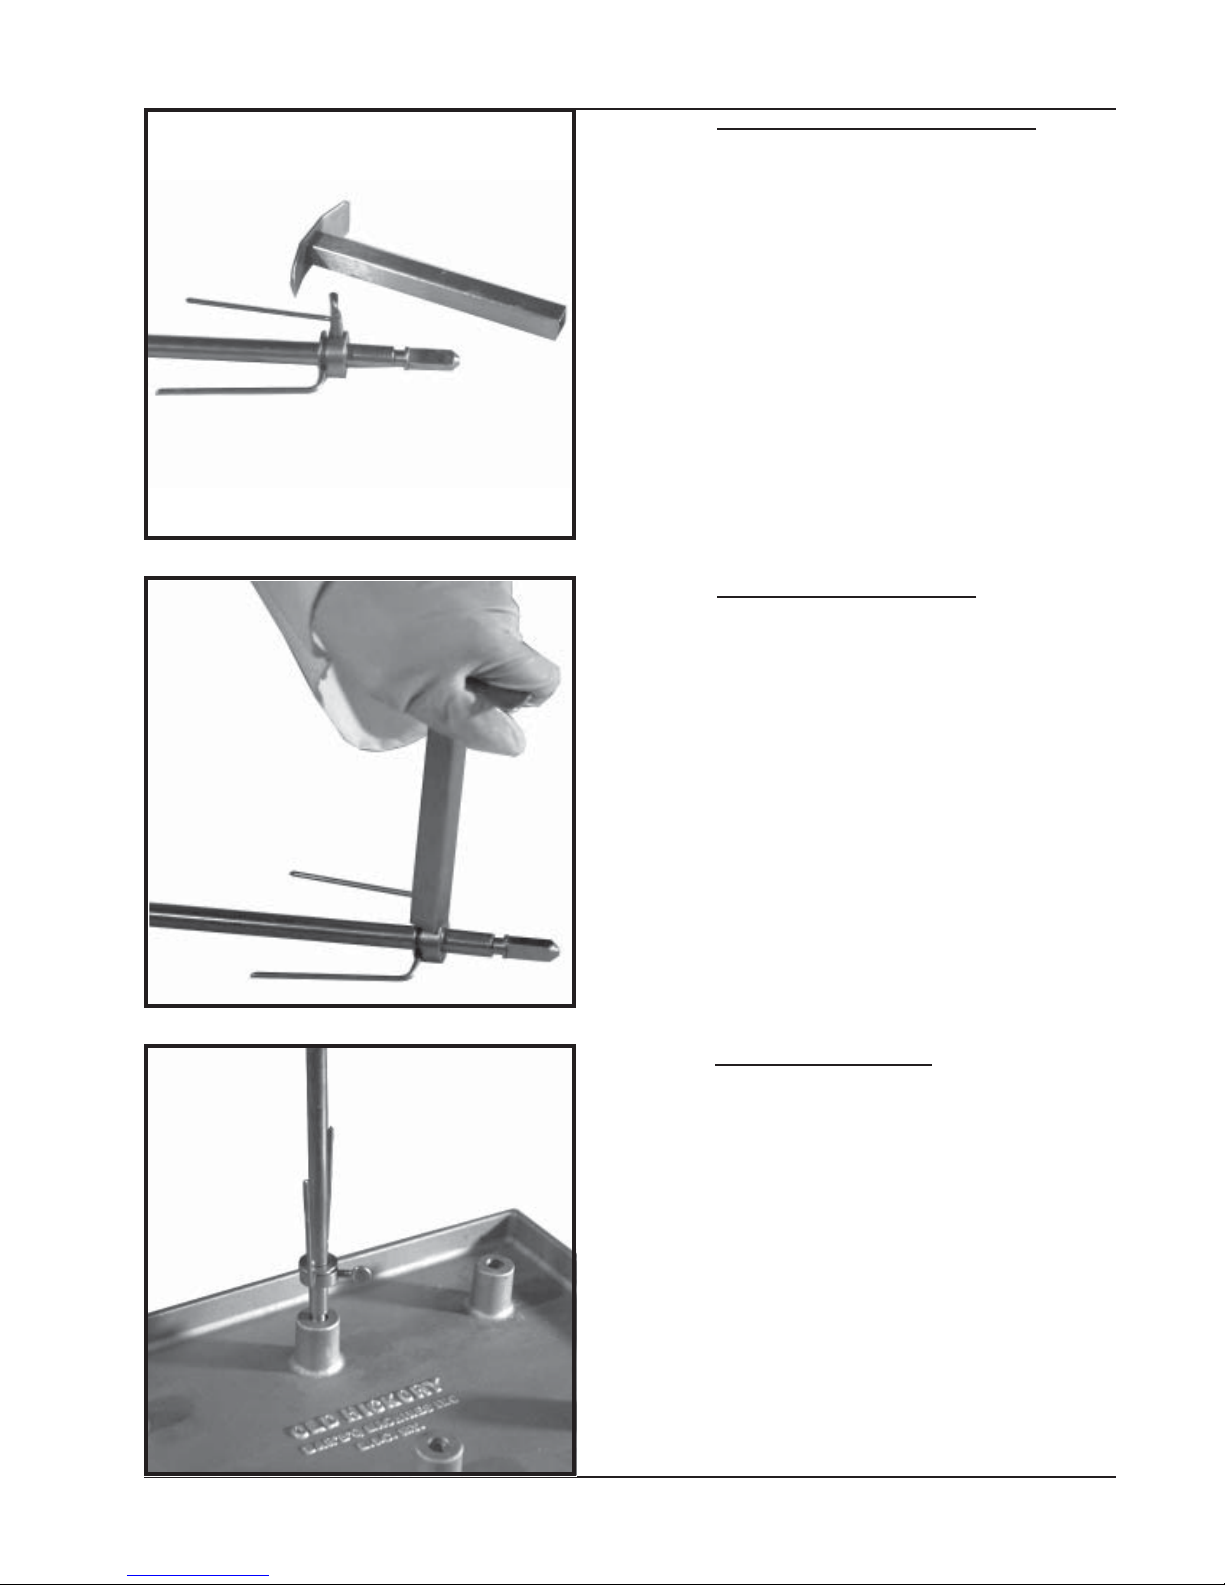
Figure 15. Inserting Single Bottom Skewer
Attach a single skewer with a thumb screw at least 1/
2" from the square end of the spit. The skewer must
be on the round section of the spit.
Figure 16. Fastening Bottom Skewer
Use the "T" shaped tool supplied with the unit to
tighten the thumb screw. This will prevent the bottom
skewer from sliding off the screw.
Figure 17. Using the Spit Holder
Even though the chickens can be spitted on a work
table, the use of the Spit Holder (Hickory Part 195) will
make the spitting process much easier.

Hickory Industries, Inc.
4900 Westside Avenue, North Bergen, New Jersey 07047
Tel: [201] 223-0050 Fax: [201] 223-0950
5.5G Manual 12/2007
Page 15 of 28
Figure 19. Tucking the Legs
The legs must be tucked between the skewer prongs
and the center spit. Note that the bottom of the
drum-
stick is what is being locked in place.
Figure 20. Pressing Chicken Towards Skewer
When viewed from the breast side of the chicken,
the bottom of the drumstick is being pushed back
while the meaty part of the leg is “puffed up” for
better presentation. Note that the skewer is not
going straight through the drumstick!
Figure 18. Inserting Chicken
Take the chicken, with the drumsticks in the direction
of the attached skewer, and slide the spit through the
cavity of the chicken.

Hickory Industries, Inc.
4900 Westside Avenue, North Bergen, New Jersey 07047
Tel: [201] 223-0050 Fax: [201] 223-0950
5.5G Manual 12/2007
Page 16 of 28
Figure 21. Locking Wings
The wings must be locked or tucked in place.
When using the models N/5.5 and N/10.10, the
locking method (pictured here) is only recom-
mended with birds up to 2¾lbs! With larger
birds, the wings must be tucked under the breast,
with elastic ties or “wing tuckers”. If the wings are
locked on large birds, the wings on the adjacent
spits will rub or catch, preventing the spits from
rotating freely. This will cause the wings to break
off or the gear mechanism to jam.
Figure 22. Tucking Wings
With larger birds, the wings must be tucked under
the breast, with elastic ties or “wing tuckers”.
Figure 23. Tucked Wings
Notice how the wings are tucked against the breast.
By “tucking” instead of “locking” the wings, the
working or rotating diameter of the chicken has
been reduced.

Hickory Industries, Inc.
4900 Westside Avenue, North Bergen, New Jersey 07047
Tel: [201] 223-0050 Fax: [201] 223-0950
5.5G Manual 12/2007
Page 17 of 28
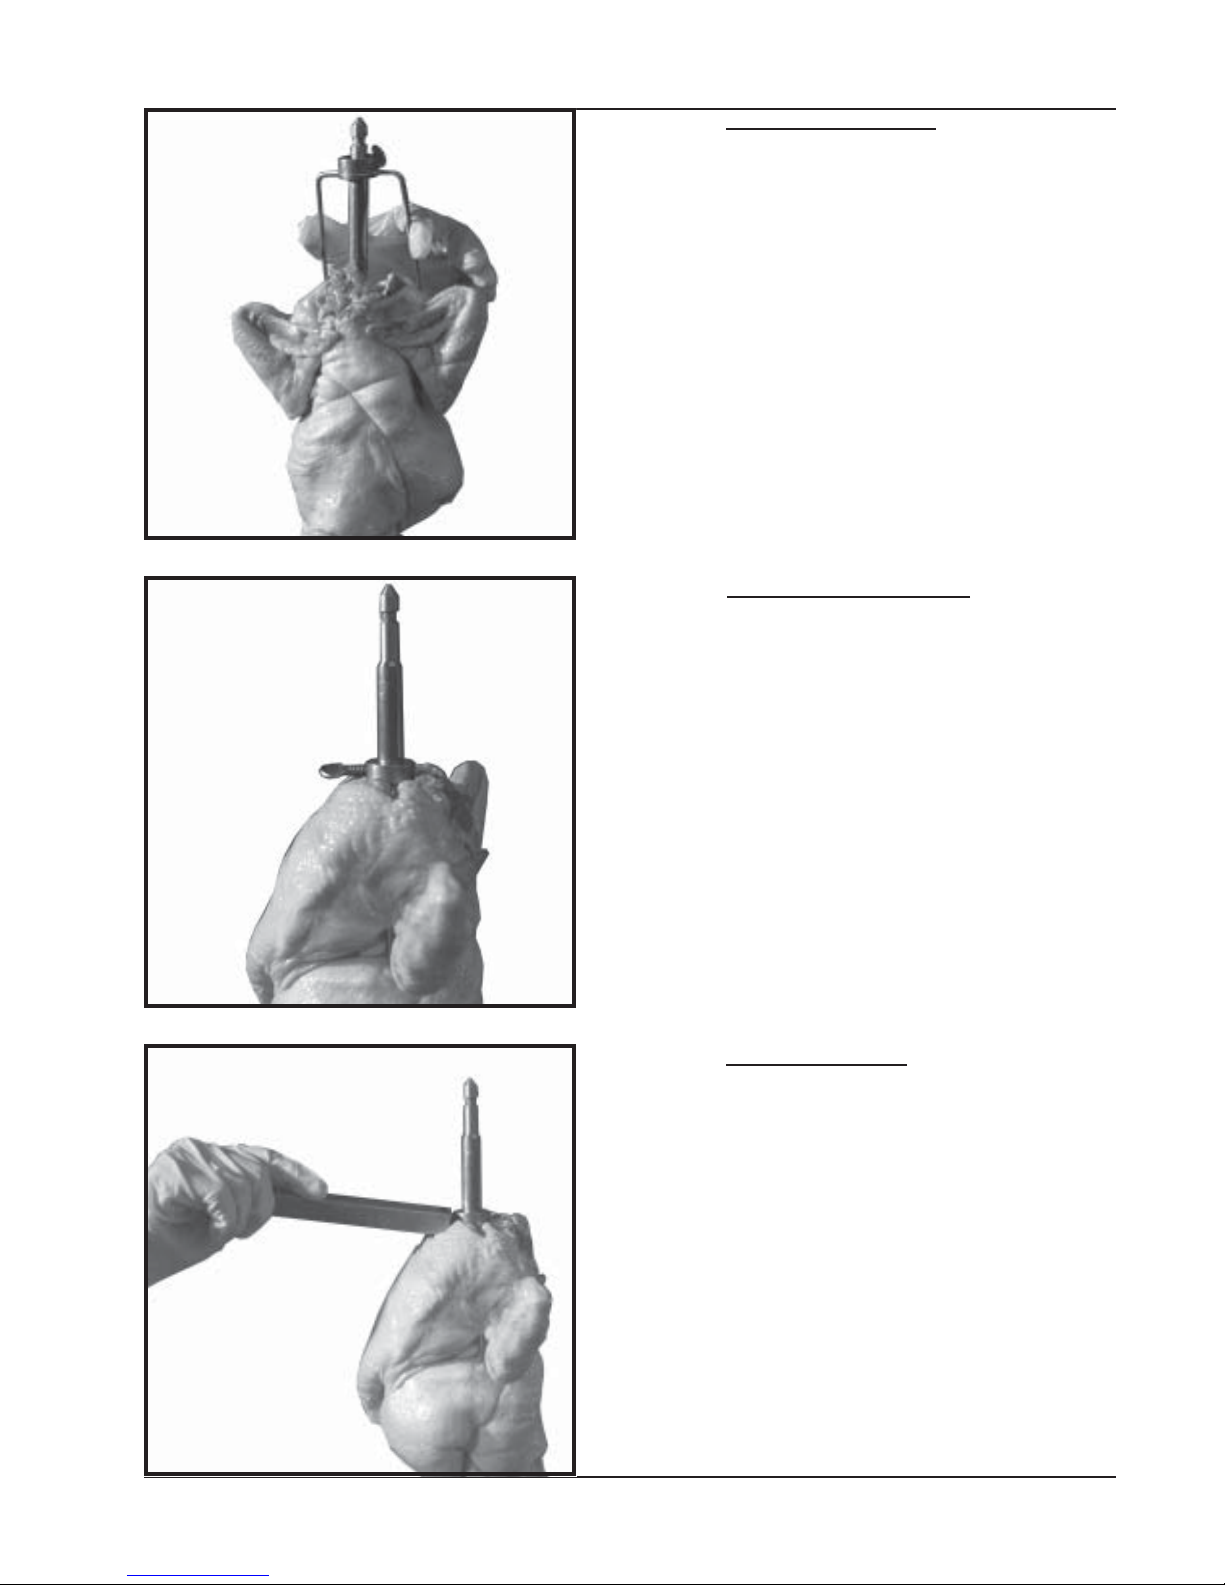
Figure 24. Inserting Double Skewers
With the first chicken in place, insert a double skewer
down the length of the spit into the shoulders of the
first chicken. No thumb screw is required for the
double skewers!
WARNING! When driving the double skewer
into the chicken, do not exert pressure from the
end of the prongs! These are sharp and will
pierce a finger or hand if not careful. Only apply
pressure at the bottom of the "U" shaped half of
the skewer!
Figure 25. Double Skewer in Place
With the double skewer in place, insert the next
chicken down the length of the spit and position the
chicken as previously described.
Figure 26. Loaded Spit
When the loading of the chickens is complete, the
end of the spit must be locked in place with another
single skewer.
Hickory Industries, Inc.
4900 Westside Avenue, North Bergen, New Jersey 07047
Tel: [201] 223-0050 Fax: [201] 223-0950
5.5G Manual 12/2007
Page 18 of 28
Figure 13. Completing the Load
Slide a single skewer with a thumb screw into place
from the top,
Figure 14. Tightening Final Skewer
Compress the chickens by exerting pressure on this
last skewer, and tighten the thumb screw securely.
Figure 15. Securing the Load
Tighten the thumb screws with Hickory's thumb-
screw tightening tool. This will prevent the chick-
ens from coming loose.
Hickory Industries, Inc.
4900 Westside Avenue, North Bergen, New Jersey 07047
Tel: [201] 223-0050 Fax: [201] 223-0950
5.5G Manual 12/2007
Page 19 of 28
7. Checking Chickens for Doneness
2 1/4pound chickens will take between 50 minutes to an hour and 10 minutes to cook in a preheated
oven when the temperature is set 575F. By using a stem type thermometer, the operator MUST
determinethe interiortemperature ofthe chickento testfor doneness. Chickenis doneat 185°F. MAKE
SURE TO REMOVE THE SKEWERS FROM BETWEEN THE CHICKENS PRIOR TO SERVING IT TO
CUSTOMERS.
8. Cooking other Products
The unit comes equipped with a set of spits to cook chickens. Additional accessories as rotating
baskets, and turkey spits are available. Contact your supplier or call Hickory direct at 201-223-0050.
These units can be used to cook anything from quail to turkeys, suckling pigs, vegetables, potatoes, fish
and much more. Please consult the factory for a complete list of cooking accessories.
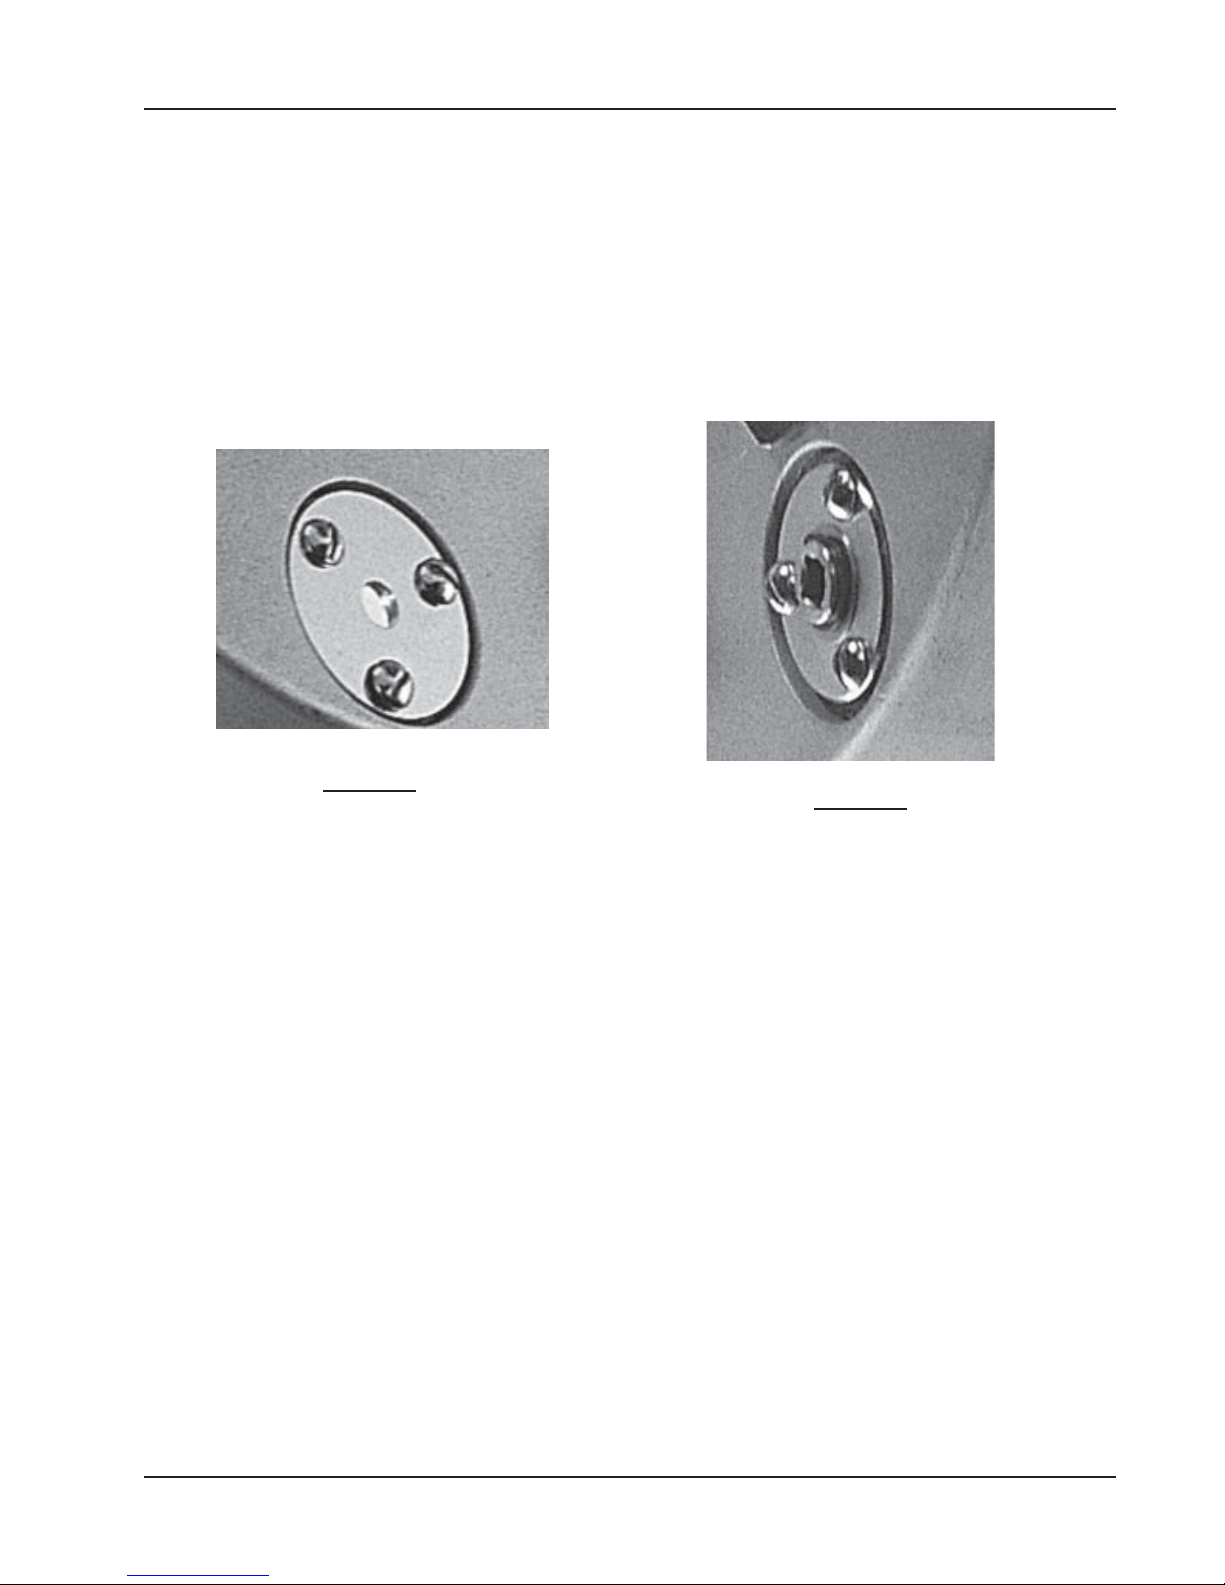
6. Loading and Unloading Spits
Open the glass door. Using two barbecue forks grab a spit at each end, inside the single skewers.
You can also use your hands to fasten the spit or chickens as long as your hands are protected with
gloves - this prevents cross contamination. With the motor switch off (, first insert the round end
of the spit and position it in a round hole on the slave disk (see Figure 27). Position the square end
of the spit to the corresponding square hole on the drive disk (see Figure 28). Shift the spit from
side to side so that the square end is in place and the round end of the spit falls into the slot on the
spit. Reverse procedure to unload.
WARNING! DO NOT ATTEMPT TO LOAD OR UNLOAD SPITS WHILE THE MOTOR
AND SPIT DRIVE ARE TURNING! THIS COULD RESULT IN THE
DRIVE GEAR MECHANISM BEING JAMMED AND CAUSING SERIOUS
DAMAGE TO THE SPIT DRIVE SYSTEM!
Figure 27 Figure 28

Hickory Industries, Inc.
4900 Westside Avenue, North Bergen, New Jersey 07047
Tel: [201] 223-0050 Fax: [201] 223-0950
5.5G Manual 12/2007
Page 20 of 28
CAUTION: BE CAREFUL! GLASS MARRING, CHIPPING OR BREAKAGE OCCURS. ONCE THE
GLASS IS CHIPPED OR SCRATCHED, IT CAN AND WILL BREAK. ANY TEFLON SURFACES MUST BE
CLEANED WITH SOAP AND WATER ONLY. REMEMBER, IF YOU KEEP YOUR ROTISSERIE CLEAN,
YOUR CUSTOMERS MAY NOT NOTICE. THEY WILL NOTICE IF YOU KEEP IT DIRTY.
9. Limitations
The 5.5G is tremendously versatile, but cannot cook large diameter product with the standard disks in
place. It is difficult for items larger than six inches in diameter to rotate freely due to contact with the
adjacent spits. There is a 4 spit drum available which will allow cook product with a diameter of up to
seven inches. To cook turkeys or large roasts, remove the standard disks, as described in page 19, and
install the single center spit supplied with the unit. Also included are two single turkey skewers.
10. Cleaning
Please refer to the "Quick Operating Procedures" page supplied with the oven. KOTE is a protective
barrier that will protect the metal surfaces and allow easy cleanups. It is USDA & FDA approved - best
of all it is not an acid and will not burn your eyes or your skin.
The machine should be thoroughly cleaned after each day's use. Any aluminum and stainless steel safe
commercial grade grill and oven cleaner may be used. The operator should follow the manufacturer's
instructions. Avoid using steel wool or abrasives. If carbon has built up, use a nylon "Scotch Brite" pad
to repolish the surface. Do not use Scotch Brite on glass or any control panel surface (because lettering
may be removed). For polishing the exterior surface, use a commercial grade stainless cleaner and
polisher. For the glass panels, use a glass cleaner. HINT: Clean the glass between batches for easier
cleaning. This will reduce the amount of fat that will adhere to the glass.
Table of contents
Other Hickory Kitchen Appliance manuals


Popular Kitchen Appliance manuals by other brands


Beem
Beem Pita King instruction manual

Küppersbusch
Küppersbusch EEH 6350.1 Instructions for use and installation instructions

Hamilton Beach
Hamilton Beach Breakfast manual

Frigidaire
Frigidaire EPM111 use & care

Commercial CHEF
Commercial CHEF CHGSPZOV manual

Heritage
Heritage 023210 Instructions for use and care