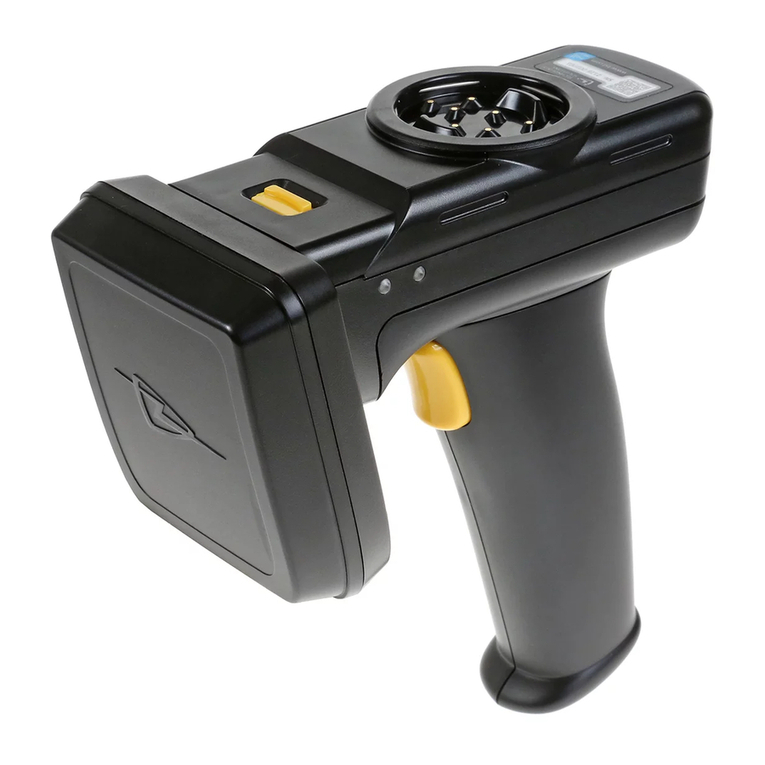
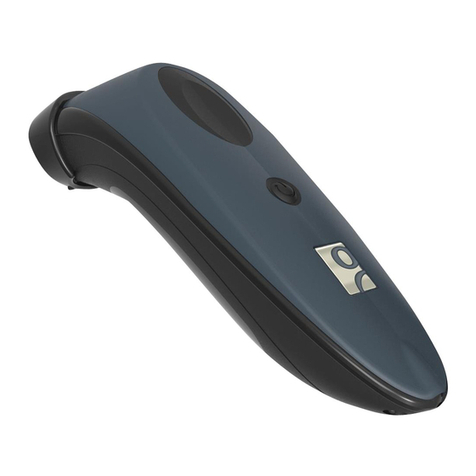
HID Technology Solutions 1062 User manual

USER GUIDE:
1062 HANDSCANNER
www.tsl.com
Design • Development • Manufacture
TECHNOLOGY
SOLUTIONSUK LTD

1062 Handscanner User Guide V1.41Copyright © 2021 Technology Solutions (UK) Ltd 2
TERMS & CONDITIONS
Copyright © 2021 Technology Solutions (UK) Ltd. All rights reserved.
No part of this publication may be reproduced or used in any form, or by any electrical or mechanical means,
without permission in writing from Technology Solutions (UK) Ltd. This includes electronic or mechanical means,
such as photocopying, recording, or information storage and retrieval systems. The material in this manual is
subject to change without notice.
Technology Solutions (UK) Ltd (TSL) reserves the right to make changes to any product to improve reliability,
function, or design. TSL does not assume any product liability arising out of, or in connection with, the application
or use of any product, circuit, or application described herein. No license is granted, either expressly or by
implication, estoppel, or otherwise under any patent right or patent, covering or relating to any combination,
system, apparatus, machine, material, method, or process in which TSL products might be used. An implied
license exists only for equipment, circuits, and subsystems contained in TSL products. TSL and the TSL logo are
registered trademarks of TSL. Other product names mentioned in this manual may be trademarks or registered
trademarks of their respective companies and are hereby acknowledged.
All software is provided strictly on an “as is” basis. All software, including firmware, furnished to the user is on
a licensed basis. TSL grants to the user a non-transferable and non-exclusive license to use each software or
firmware program delivered hereunder (licensed program). Except as noted below, such license may not be
assigned, sublicensed, or otherwise transferred by the user without prior written consent of TSL. No right to
copy a licensed program in whole or in part is granted, except as permitted under copyright law. The user shall
not modify, merge, or incorporate any form or portion of a licensed program with other program material, create
a derivative work from a licensed program, or use a licensed program in a network without written permission
from TSL. The user agrees to maintain TSL’s copyright notice on the licensed programs delivered hereunder, and
to include the same on any authorized copies it makes, in whole or in part. The user agrees not to decompile,
disassemble, decode, or reverse engineer any licensed program delivered to the user or any portion thereof.
TSL reserves the right to make changes to any software or product to improve reliability, function, or design.
TSL does not assume any product liability arising out of, or in connection with, the application or use of any
product, circuit, or application described herein.
The
Bluetooth
®word mark and logos are registered trademarks owned by
Bluetooth
SIG, Inc. and any use of
such marks by Technology Solutions (UK) Ltd is under license. Other trademarks and trade names are those of
their respective owners.
www.tsl.com

1062 Handscanner User Guide V1.41Copyright © 2021 Technology Solutions (UK) Ltd 3
CONTENT
Main parts of the Handscanner 5
Handscanner 5
Cradle 6
Using the Handscanner 7
Charging the Handscanner 7
Removing the Handscanner battery 7
Handscanner Readzones 8
Operating modes 9
Configurable features 10
Introduction 10
Bluetooth®
settings 10
Functionality 10
Prefix 10
Buzzer 10
Vibrator 10
RFID multiblock read 10
Batch mode 10
Scan time 11
Power down time 11
Firmware update 11
Application Examples – PC 12
Introduction 12
Setting up the
Bluetooth®
connection 12
Using SmartWedge Basic 14
Introduction 14
Installation 14
Operation 14
HyperTerminal 16
Introduction 16
Configuring HyperTerminal 16
Application Examples – Pocket PC 18
Introduction 18
Setting up a
Bluetooth®
connection – Symbol MC70 18
Configuring HyperTerminal 18
Using BTExplorer 19
Setting up a
Bluetooth®
Connection – Intermec CN3 22
Using SmartWedge Basic 28
Introduction 28
Installation 28
Operation 28
Using mToken 32
Introduction 32
Installation 32
Operation 32
Regulatory 36
Safety 36
FCC Statement 37
Bluetooth®
37
Troubleshooting 38
Waste Electrical and Electronic Equipment (WEEE) 39
www.tsl.com

1062 Handscanner User Guide V1.41Copyright © 2021 Technology Solutions (UK) Ltd 4
CONTENT
Overview
This document provides general usage instructions for the Handscanner and is applicable for both the 1D laser
scanner and 2D imager versions.
History
Version Date Modifications
1.0 15/02/2007 Document creation
1.1 13/06/2007 Updates to Regulatory section
1.2 06/07/2007 Added new FCC ID information
1.3 16/05/2008 Updated with new document template
1.4 23/07/2008 Added reference to Pairing Wizard for use with Motorola terminals
Warranty 39
About TSL 41
About 41
Contact 41
www.tsl.com

1062 Handscanner User Guide V1.41Copyright © 2021 Technology Solutions (UK) Ltd 5
MAIN PARTS OF THE HANDSCANNER
HANDSCANNER
The status LEDs on the top of the Handscanner provide an indication of the operating status of the unit.
LED Colour Status
Off The Handscanner is off.
Blue flashing The Handscanner is powered on and waiting for a
Bluetooth
®connection.
Continuous Blue The Handscanner is powered on and connected via
Bluetooth
®.
Red The Handscanner is charging.
Green The Handscanner is fully charged.
Red and Green The battery in the Handscanner has a fault, or it is
being charged outside the recommended temperature
range (0°C to 45°C).
Status LEDs
Trigger Button
Adjustable finger strap
Docking connector
Battery cover release.
WARNING
LASER LIGHT.
DO NOT STARE INTO BEAM.
CLASS 2 LASER
PRODUCT.
LASERSTRAHLUNG
NICHT IN DEN STRAHL BLICKEN.
LASER KLASSE 2.
LUMIÈRE
LASER NE PAS REGARDER
DANS LE FAISCEAU. APPAREIL
À LASER DE CLASSE 2.
630-670nm 1mW
www.tsl.com

1062 Handscanner User Guide V1.41Copyright © 2021 Technology Solutions (UK) Ltd 6
The Charge Status LEDs indicate the state of the spare battery. The spare battery charge feature is independent of
the charging of the battery inside the Handscanner.
LED Charge Status
Red on The spare battery is charging.
Green on The spare battery is fully charged.
Both red and green on. No spare battery is present, the spare battery has a
fault, or the spare battery is being charged outside the
recommended temperature range (0°C to 45°C).
MAIN PARTS OF THE HANDSCANNER
CRADLE
Charging slot for spare battery
Docking port for Handscanner
Charge Status LEDs
Communications port connector
Input from power supply
www.tsl.com

1062 Handscanner User Guide V1.41Copyright © 2021 Technology Solutions (UK) Ltd 7
USING THE HANDSCANNER
CHARGING THE HANDSCANNER
The Handscanner is charged by docking it in the cradle. Plug the power supply provided with the cradle in to
the power in socket on the back of the cradle. The charge time will depend on how discharged the Handscanner
battery is. Typically a fully discharged battery will take 3-4 hours to fully charge. The LEDs on the top of the
Handscanner indicate the charge status; Red for charge in progress, Green for charge complete. Both LEDs on
simultaneously indicates a fault condition. This will happen if the battery is outside the recommended charging
temperature (0°C to 45°C), or if the battery has a fault.
The cradle is also capable of charging a spare battery at the same time as a Handscanner. The spare battery
drops into the holder at the back of the cradle. The charge time in the cradle is the same as the Handscanner.
Charge status is indicated by the LEDs on the cradle. Red indicates charge in progress, Green charge
complete and Red and Green for fault (or battery not present). Note that the charge status of the spare battery is
independent of the Handscanner.
REMOVING THE HANDSCANNER BATTERY
The battery can then be lifted out and replaced. Refit the cover by sliding it back up until the button clicks in place.
1) Press in the yellow button 2) Slide the battery cover down and lift it off.
www.tsl.com

1062 Handscanner User Guide V1.41Copyright © 2021 Technology Solutions (UK) Ltd 8
USING THE HANDSCANNER
HANDSCANNER READZONES
Both transponders and barcodes are read in front of the Handscanner as shown above. The barcode is read when
the red laser line completely scans over it (1D) or it is enclosed in the projected red outline (2D). RFID transponders
are read in the same plane as barcodes. The RFID read range is far less than the barcode. Typically an RFID
device will be read at less than 10cm (dependent on the size and type of the RFID device). A barcode may be read
between 5cm and 1m depending on the scanner type, barcode symbology, size and condition.
The Handscanner functionality depends on the software running on the host device. Generally pressing the button
on the Handscanner triggers a barcode and/or RFID read. The RFID read zone is in front of the window on the
Handscanner.
www.tsl.com

1062 Handscanner User Guide V1.41Copyright © 2021 Technology Solutions (UK) Ltd 9
USING THE HANDSCANNER
OPERATING MODES
The Handscanner has two fundamental operating modes; Host Command Mode and Button Press mode. Both
modes may be combined in an actual deployed application.
Host Command Mode requires custom software to be developed and deployed to the host. All of the functionality
and features of the Handscanner can be remotely controlled in Host Command Mode. The full command set
is documented in the ‘Handscanner Programming Guide’. To simplify custom application development an API
is available; this is documented in the ‘Handscanner API’ document. Both documents are available from the
Technology Solutions’ website (www.tsl.uk.com/1062-downloads). Source code examples are provided in the
Software Development Kit available from Technology Solutions (1062-0x-BT-HSCAN-KIT).
In Button Press Mode the Handscanner is initially configured to operate in a particular way each time the
button is pressed. A PC application; Desktop Configuration is provided by Technology Solutions for configuring
Handscanners. An overview of the configurable features is given in ‘Configurable features’.
Host Command Mode requires that the Handscanner has a
Bluetooth
®link to the host. Button Press Mode usually
operates with a
Bluetooth
®link, but it is possible to configure the Handscanner to store scan data locally and
download it later. This is Batch Mode and is described in ‘Batch mode’.
The method of establishing the
Bluetooth
®link varies between different host platforms. The Handscanner appears
as a serial device (
Bluetooth
®Serial Port Profile) and so in some cases will be accessed over a virtual comm.
port. The Handscanner establishes a secure
Bluetooth
®connection and therefore a PIN will be required during
the pairing process. The default PIN is ‘0000’, but this can be changed using the Desktop Configuration software.
When discovering devices the
Bluetooth
®Friendly Name of the Handscanner is set to be the same as the serial
number printed on the side of the Handscanner. Again, this may be changed. Refer to the operating instructions of
the host platform for further information on establishing a
Bluetooth
®link.
www.tsl.com

1062 Handscanner User Guide V1.41Copyright © 2021 Technology Solutions (UK) Ltd 10
USING THE HANDSCANNER
CONFIGURABLE FEATURES
The Desktop Configuration application supplied by Technology Solutions is required for configuring Button Press
Mode on a Handscanner. This application is available for download from the Technology Solutions website (www.
tsl.uk.com/1062-downloads/) along with a full user guide. Configuration of the Handscanner is only possible over
the wired serial connection. A cradle and serial data lead are therefore required. If the host PC does not have a
serial port it is possible to use a USB to serial converter lead.
The following sections provide an overview of the configuration options.
INTRODUCTION
The
Bluetooth
®Friendly Name, the PIN and the
Bluetooth
®RF power can be modified.
BLUETOOTH
®SETTINGS
The RFID functionality can be enabled and disabled for each transponder type. Barcode scanning, and the various
symbologies included in a barcode scan can be enabled and disabled.
FUNCTIONALITY
A prefix can be added to the scanned data to indicate whether it came from a barcode, or from a particular RFID
transponder type. A prefix can also be added to all scanned data to indicate which Handscanner the data came
from.
PREFIX
The buzz on successful read function can be enabled or disabled.
BUZZER
Vibrate on successful read can be enabled or disabled.
VIBRATOR
An RFID transponder may contain multiple blocks of data in addition to the unique serial number. The start block
and number of subsequent blocks to read when a transponder is present can be configured.
RFID MULTIBLOCK READ
Batch mode allows the Handscanner to store all scanned data locally if there is not a
Bluetooth
®link to the host.
With Batch mode enabled the Handscanner continues to operate as normal, but stores scan data locally. This
data can then be downloaded from the Handscanner memory subsequently. If Batch mode is not enabled the
Handscanner will not respond to button presses when a
Bluetooth
®link is not established.
BATCH MODE
www.tsl.com

1062 Handscanner User Guide V1.41Copyright © 2021 Technology Solutions (UK) Ltd 11
USING THE HANDSCANNER
The maximum duration in seconds of a scan can be configured. The barcode reader has an independent maximum
scan duration (4s for 1D, 10s for 2D). Setting the Scan Time to shorter than these times results in barcode and RFID
scanning stopping at the specified time, setting the Scan Time to longer times results in the barcode scanning
stopping before the RFID.
SCAN TIME
Batch mode is a useful feature in help to avoid data loss if the
Bluetooth
®link drops because the Handscanner
has moved out of range of the host. There is a risk of a short period of data loss because the
Bluetooth
®link failure
indication is not immediate. Scan data obtained during the period between moving out of range and the
Bluetooth
®
link indicating failure may not be preserved.
The time in seconds that the Handscanner stays powered on after the
Bluetooth
®link has dropped or the button
has been pressed can be changed from the default value of 120 seconds.
POWER DOWN TIME
The Desktop Configuration application includes a firmware loader for updating the Handscanner firmware.
FIRMWARE UPDATE
www.tsl.com

1062 Handscanner User Guide V1.41Copyright © 2021 Technology Solutions (UK) Ltd 12
APPLICATION EXAMPLES – PC
INTRODUCTION
These examples assume that the Handscanner is in its factory default state and that it is being used on a PC
running Windows XP. The same approach can be taken with any other platform.
SETTING UP THE
BLUETOOTH
®CONNECTION
Establishing a
Bluetooth
®connection requires the stages of Discovery and Pairing. The Handscanner conforms to
the
Bluetooth
®Serial Port Profile and therefore a Virtual Comm port will be created as part of the
Bluetooth
®setup
process.
Launch the
Bluetooth
®Device window (Start>Control Panel>
Bluetooth
®Devices). Click the ‘Add’ button, switch on
the Handscanner by pressing the yellow button. The Blue LED will start to flash slowly. Tick the ‘My device is set up
and ready to be found.’ box and click the ‘Next’ button. This starts the Discovery process. When this is complete a
list of devices will be shown, including the Handscanner as shown below:
The Handscanner will be identified by its
Bluetooth
®Friendly name which by default is the serial number printed on
the side of the Handscanner. Click on the Handscanner and then on ‘Next’ to start Pairing. Enter the default PIN of
‘0000’ as shown below and then click ‘Next’.
www.tsl.com

1062 Handscanner User Guide V1.41Copyright © 2021 Technology Solutions (UK) Ltd 13
The installation of the Handscanner will then continue. At this point the Virtual COM port will be created. When this
has successfully completed the window shown below will be displayed.
Record the ‘Outgoing COM port’ number. This is the Virtual COM port that will be used by any application that
needs to connect to the Handscanner.
APPLICATION EXAMPLES – PC www.tsl.com

1062 Handscanner User Guide V1.41Copyright © 2021 Technology Solutions (UK) Ltd 14
APPLICATION EXAMPLES – PC
USING SMARTWEDGE BASIC
SmartWedge Basic is an application for Windows XP which allows scanned data to be directly entered into another
Application as though it had been typed on the keyboard. The data is inserted at the cursor of whichever window
has focus. This allows the Handscanner to be immediately used in existing systems with no software development.
The Handscanner can be configured (see “Configurable features” on page 10) to provide a certain set of
actions on button press so that the correct data is read and prefixed ready for use by the existing software. A more
advanced version of the SmartWedge software is available from Technology Solutions which includes additional
functionality such as data filtering and formatting.
INTRODUCTION
SmartWedge Basic for the PC is provided in a standard Windows Installer (.msi) package. Double click to install the
application.
INSTALLATION
Start SmartWedge from ‘Start > All Programs > Technology Solutions > SmartWedge Basic’. When the application
starts it shows the configuration window as below:
OPERATION
Before using SmartWedge Basic the Handscanner must be associated with a virtual comm. port (see “Setting up
the
Bluetooth
®connection” on page 36). Select the appropriate port number from the ‘COM Port selector’, ensure
the Handscanner is powered on and tap the ‘Connect’ button. If the correct virtual comm. port is not shown in the
‘COM Port selector’ then it is possible to directly type in the port number.
www.tsl.com

1062 Handscanner User Guide V1.41Copyright © 2021 Technology Solutions (UK) Ltd 15
Any RFID or barcode data scanned by the Handscanner will then appear at the top of the window and also in
the ‘Default text window’ whilst SmartWedge Basic has focus (the cursor is flashing in the ‘Default text window’).
Launch the application that is to receive the data, for example Excel, and position the cursor at the data entry point.
Scan data will then be entered into the target application. By default all scanned data is terminated with CR LF
characters to automate data entry. A typical screenshot is shown below:
Note that if CAPS lock is selected on the PC keyboard all of the alphabetical characters will have their case
reversed so a lower case character from a barcode will appear as an upper case character in the receiving
application and vice versa.
Minimise SmartWedge Basic using the cross in the top right hand corner of the window. SmartWedge Basic
minimises to the System Tray. Hover the mouse over the icon to see the current status, double click to restore
the main window or right click to restore, disconnect or exit the application. Even when SmartWedge Basic is
minimised the ‘Most recent scan data’ entry is always updated with the most recently received text.
When SmartWedge Basic is no longer required, click ‘Disconnect’ to close the link to the Handscanner and exit
SmartWedge Basic from ‘File > Exit’.
APPLICATION EXAMPLES – PC www.tsl.com

1062 Handscanner User Guide V1.41Copyright © 2021 Technology Solutions (UK) Ltd 16
APPLICATION EXAMPLES – PC
HYPERTERMINAL
HyperTerminal provides a simple way to display the data received from a Handscanner for demonstration or test
purposes.
INTRODUCTION
Launch HyperTerminal from ‘Start > All Programs > Accessories > Communications > Hyperterminal.’ Name the
new connection ‘Handscanner’ or something similar:
CONFIGURING HYPERTERMINAL
Click ‘OK’ and then chose the COM port that was displayed during the
Bluetooth
®setup (See “Setting up the
Bluetooth
®connection” on page 36):
www.tsl.com

1062 Handscanner User Guide V1.41Copyright © 2021 Technology Solutions (UK) Ltd 17
Check that the Handscanner is switched on, click ‘OK’ and the
Bluetooth
®connection will be established. Any
barcodes or transponders read by the Handscanner will be displayed by HyperTerminal. Note that the virtual
comm. port is opened at the default setting of 2400 baud. This does not affect performance because only small
amounts of data are being transferred. It is possible to modify the baud rate and other connection settings by
closing the connection and using ‘File>Properties’.
APPLICATION EXAMPLES – PC www.tsl.com

1062 Handscanner User Guide V1.41Copyright © 2021 Technology Solutions (UK) Ltd 18
APPLICATION EXAMPLES – POCKET PC
INTRODUCTION
These examples assume that the Handscanner is in its default state. Pocket PC devices have a range of different
Bluetooth
®Managers. The two examples provided should cover the majority of devices. The fundamental approach
will be the same on all devices; discover the Handscanner and then pair to it. In most cases it will also be
necessary to define a virtual comm. port for use with the Handscanner.
SETTING UP A
BLUETOOTH
®CONNECTION – SYMBOL MC70
The process of discovery and pairing can be performed directly using the
Bluetooth
®Manager on the host,
BTExplorer. This method is described in ‘Using BTExplorer’. For many end users BTExplorer is over complex.
Technology Solutions have developed a Pairing Wizard application available for free download from the website
(www.tsl.uk.com/1062-downloads).
It is recommended that the Pairing Wizard should be used whenever possible. It provides a straightforward way of
discovering Handscanners and then performs the pairing without further user interaction. The chosen Handscanner
is set up for use on COM 4 ready for use by any application. Detailed instructions for installing and using the
Bluetooth
®Pairing Wizard are provided on the website.
A screenshot of the Pairing Wizard is shown below:
CONFIGURING HYPERTERMINAL
www.tsl.com

1062 Handscanner User Guide V1.41Copyright © 2021 Technology Solutions (UK) Ltd 19
APPLICATION EXAMPLES – PCAPPLICATION EXAMPLES – POCKET PC
It is recommended that Technology Solutions’ Pairing Wizard application is used to set up the connection to the
Handscanner whenever possible. This provides a simple user interface requiring minimal interaction. If special
applications require the use of BTExplorer (the inbuilt
Bluetooth
®Manager) then this section provides instructions
for using BTExplorer.
Ensure that
Bluetooth
®is enabled and start BTExplorer (Start>Programs>BTExplorer). If necessary tap
‘View>Explorer Mode’ to exit the Wizard.
Tap ‘Tools>Discover Devices’ to start the
Bluetooth
®Discovery. The screen will look similar to the one below:
USING BTEXPLORER
Once the
Bluetooth
®Discovery is complete the Handscanner will appear in the Untrusted Devices list. The
Handscanner will be identified by its
Bluetooth
®Friendly name which by default is the serial number printed on the
side of the Handscanner:
www.tsl.com

1062 Handscanner User Guide V1.41Copyright © 2021 Technology Solutions (UK) Ltd 20
APPLICATION EXAMPLES – PCAPPLICATION EXAMPLES – POCKET PC
Tap and hold the Handscanner and then select ‘Pair’ from the menu. Enter the default PIN of ‘0000’ and tap ‘OK’:
www.tsl.com
Other manuals for Technology Solutions 1062
2
Table of contents
Other HID Barcode Reader manuals
