hidealite Moon Slim User manual

Moon Slim Emergency Light Module
Artnr: IM00561 Version: 2022/05
We reserve the right to change specifications at any time.
+
-
1.5h
For explanation of symbols see www.hidealite.se
E-nr Snro El.nr GTIN Name
7508558 4143833 3207135 7392971145631 Moon Slim Emergency light module
7508559 7112601 3207136 7392971145648 Moon Slim Emergency light battery
+40ºC
-0ºC
SAFETY INSTRUCTIONS
Read these instructions carefully before commencing installation and retain for future reference. The luminaire should be installed by a licensed electrician
and in accordance with local regulations. Make sure that the power is o before installation or maintenance.
en
Läs dessa instruktioner före installationen påbörjas och lämna den vidare till brukaren av anläggningen. Armaturen skall installeras av behörig installatör
och enligt gällande föreskrifter. Se till att spänningen är frånslagen före installation eller underhåll.
sv
Lue nämä ohjeet ennen asentamista ja luovuta ohjeet valaisimen seuraavalle käyttäjälle. Valaisimen saa asentaa valtuutettu asentaja voimassa olevien
määräysten mukaisesti. Varmista, että jännite on kytketty päältä ennen asennusta ja huoltoa.
fi
da
Læs denne vejledning omhyggeligt, før installationen udføres og gem den til fremtidig brug. Armaturet skal installeres af en autoriseret installatør i henhold
til gældende love og regler. Sørg strømmen er afbrudt før installation og vedligeholdelse.
de
Lesen Sie diese Anweisungen sorgfältig, bevor Sie mit der Installation beginnen, und bewahren Sie sie für späteres Nachschlagen auf. Dieses Leuchtmittel
muss durch einen lizenzierten Elektriker im Einklang mit den örtlichen Vorschriften installiert werden. Stellen Sie vor Installations- oder Wartungsarbeiten
sicher, dass keine Spannung mehr anliegt.
pl
Przed przystąpieniem do instalacji należy się uważnie zapoznać z instrukcją i zachować ją na przyszłość. Oprawę oświetleniową powinien
zainstalować uprawniony elektryk zgodnie z miejscowymi przepisami. Przed instalacją lub konserwacją wyłączyć zasilanie.
fr
Lisez attentivement ces consignes avant de commencer l’installation. Pensez également à vous y reporter ultérieurement. Le luminaire doit être installé par un
électricien agréé, conformément à la réglementation locale. Veillez à couper le courant avant l’installation et toute opération de maintenance.
Les disse instruksjonene før du starter installeringen, og gi den deretter videre til anleggets bruker. Armaturen skal installeres av en godkjent installatør og i
henhold til gjeldende lover og regler. Sørg for at strømmen er koblet fra før installering og ved vedlikehold.
no
Installation
OFF
I
0
Battery
INSTALLED
DATE
SIGN
NL
XX
L’
Emergency light 1,5 hour
x2
1
4
2
5
3

NL
XX
L’
N
L
Constant
Current to EM
Constant
Current to EM
Neutral to EM
NL
XX
L1
L
Test switch
Output LED
Battery
N
1
2
L
Test switch
Output LED
Battery
N
5
10
60
30
35
15
20
25
45
50
55
40
Press down for 10sec
L
Test switch
Output LED
Battery
N
5
10
60
30
35
15
20
25
45
50
55
40
Press down for 1-5sec
TroubleshootingSuggestion6 8 i7
i9
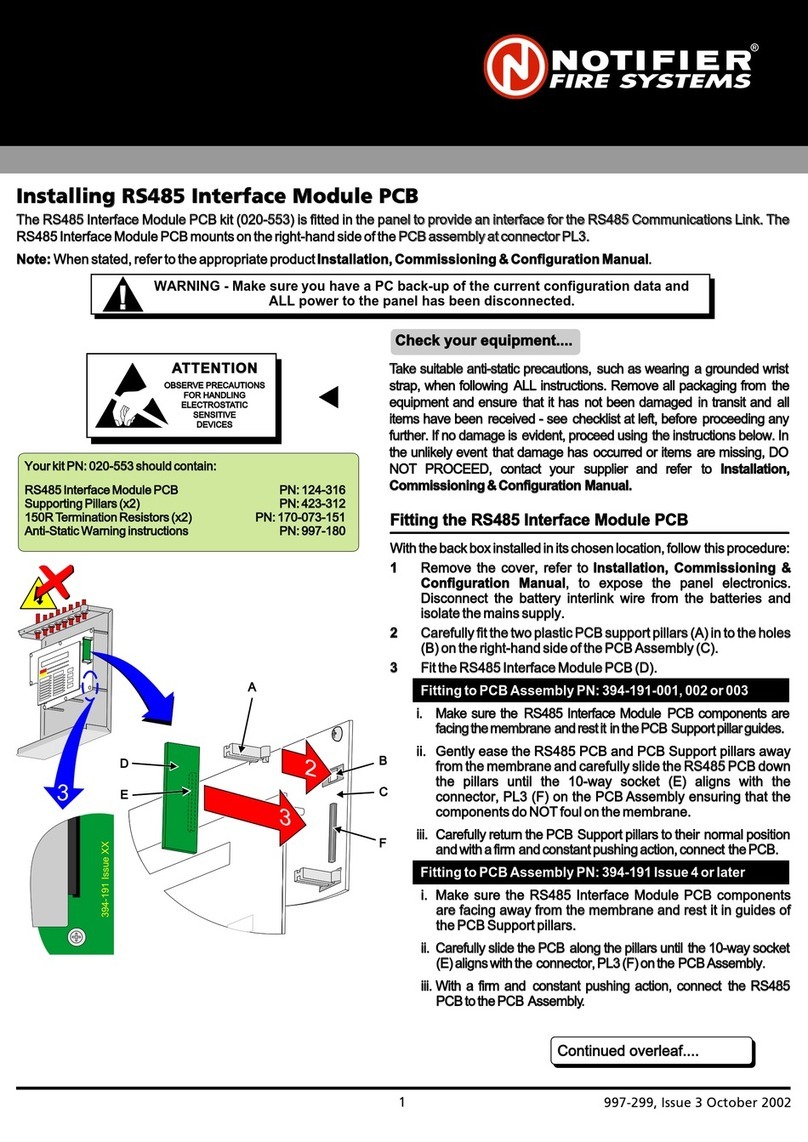
NOTE! Installation example, the emergency light module
requires connection to neutral and constant current.
OBS! Installationsexempel,nödljusmodulen kräver anslutning
till neutral och konstantström.
230V
LED
Replaceable control gear by a professional
LEDLED
Replaceable (LED only) light source by a professional
Elektro Elco AB, Tallvägen 5, SE-56435 Bankeryd, Sweden | inf[email protected] | www.hidealite.se | www.hidealite.uk | www.hidealite.fi | www.hidealite.no | www.hidealite.dk
Flashing red light
1. Check the connection cable between the battery and the
module.
2. Press and hold the test button for 10sec.
3. The emergency light module resets and starts self-test.
Flashing / Permanent green:
Normal operation on module and battery
Flashing red light:
Battery not connected/Battery defective.
Replace battery - Press and hold the test button for 10sec.
Solid red light:
Defective emergency light module
Replace emergency light module and battery
Blinkande/Fast rött ljus
1. Kontrollera anslutningskabel mellan batteri och modul.
2. Tryck och håll ner testknappen i 10 sekunder.
3. Nödljusmodul återställs och startar självtest.
Blinkande/Fast grönt ljus:
Normal drift på modul och batteri
Blinkande rött ljus:
Batteri ej anslutet/Batteri defekt.
Ersätt batteri - Tryck och håll ner testknappen i 10 sekunder.
Fast rött ljus:
Defekt nödljusmodul
Ersätt nödljusmodul och batteri
Factory reset:
For factory reset press and hold the test button for 15 sec.
NOTE: Automatic self-test cycle is reset.
Fabriksåterställning:
För fabriksåterställning håll ner testknappen i 15sekunder.
OBS:Automatisk självtestcykel nollställs
Connect battery
When voltage is applied - the emergency light module starts
self-test.
Flashing green light:
Battery is charging/normal operation
Permanent green light:
Battery fully charged/normal operation
Anslut batteri
Vid spänningssättning - nödljusmodul startar självtest.
Blinkande grönt ljus:
Batteriet laddar och normal drift
Fast grönt ljus:
Batteri fulladdat och normal drift
Manual self test:
1. Press and hold the test button for 1-5sec.
2. LED of the emergency light module lights up.
Every 30 days - automatic self-test
Every 180 days - The LED of the emergency light module
lights up for 1,5 hours for a complete battery and module
test.
Manuellt självtest.
1. Tryck och håll ner testknappen i 1-5 sekunder.
2. Nödljusmodulens LED lyser upp.
Var 30:e dag - automatiskt självtest.
Var 180:e dag - nödljusmodulens LED lyser i 1,5h för
komplett test av batteri och modul.
Emergency light module performs automatic
self-test every 30 and 180 days.
Nödljusmodulen genomför automatiskt
självtest var 30:e och 180:e dag.
This manual suits for next models
2
