High Degree NAVIGATOR MC501R User manual

Owners Instruction Guide
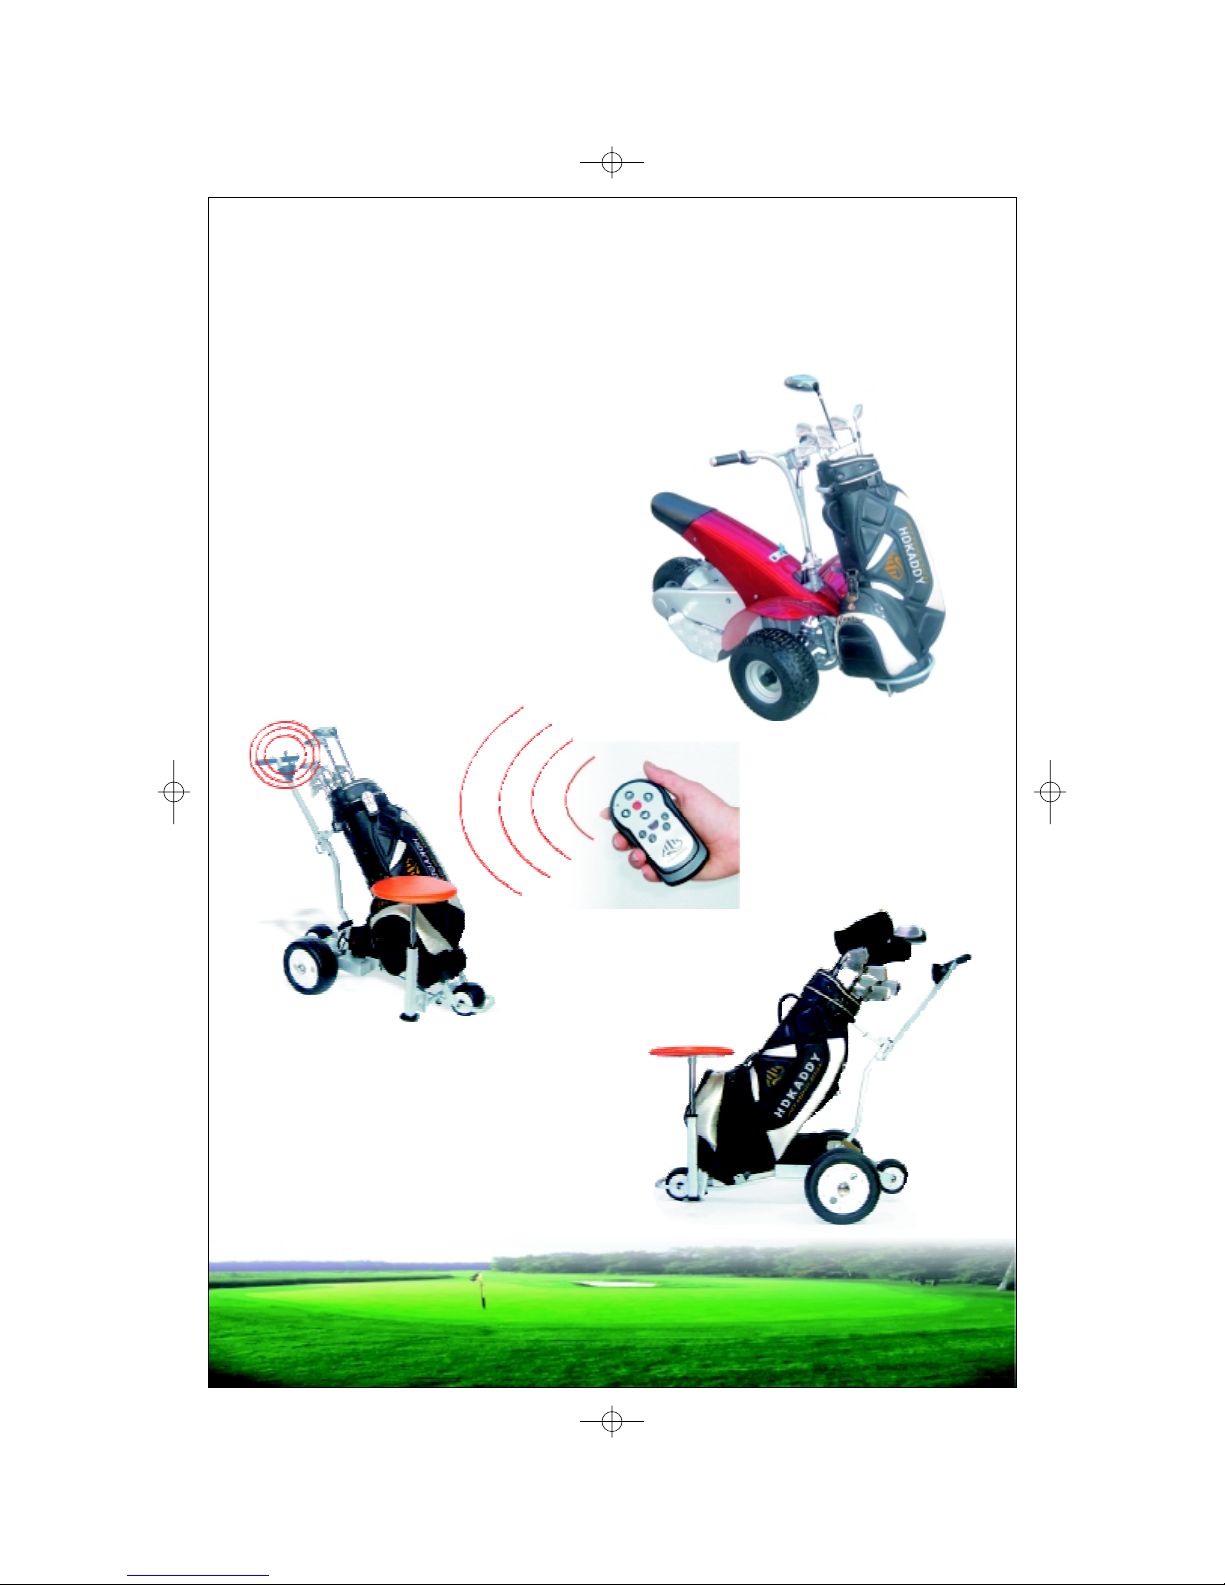
Launch your Navigator, Hover in golf club free.
Launch your Navigator, Hover in golf club free.
TOP CLASS REMOTE KADDY
NAVIGATOR
Page 1 Parts Identification.
Page 2-3 Assembly Instructions.
Page 4-5 Handset Information.
Page 6 Remote Control Detail.
Page 7 Navigator Electronics System.
Page 8 Battery Operations and Safety.
Page 9 Anti-tip wheel and etc.
Page 10 Maintenance.
Page 11 Trouble Shooting.
Page 12 Replacement parts list.
INDEX

Congratulations on your purchase of the Navigator.
Please try to avoid the temptation of going straight out to
the course to use your new , and take a few
minutes to read this manual so that you can get the best
from your .
Navigator
Navigator
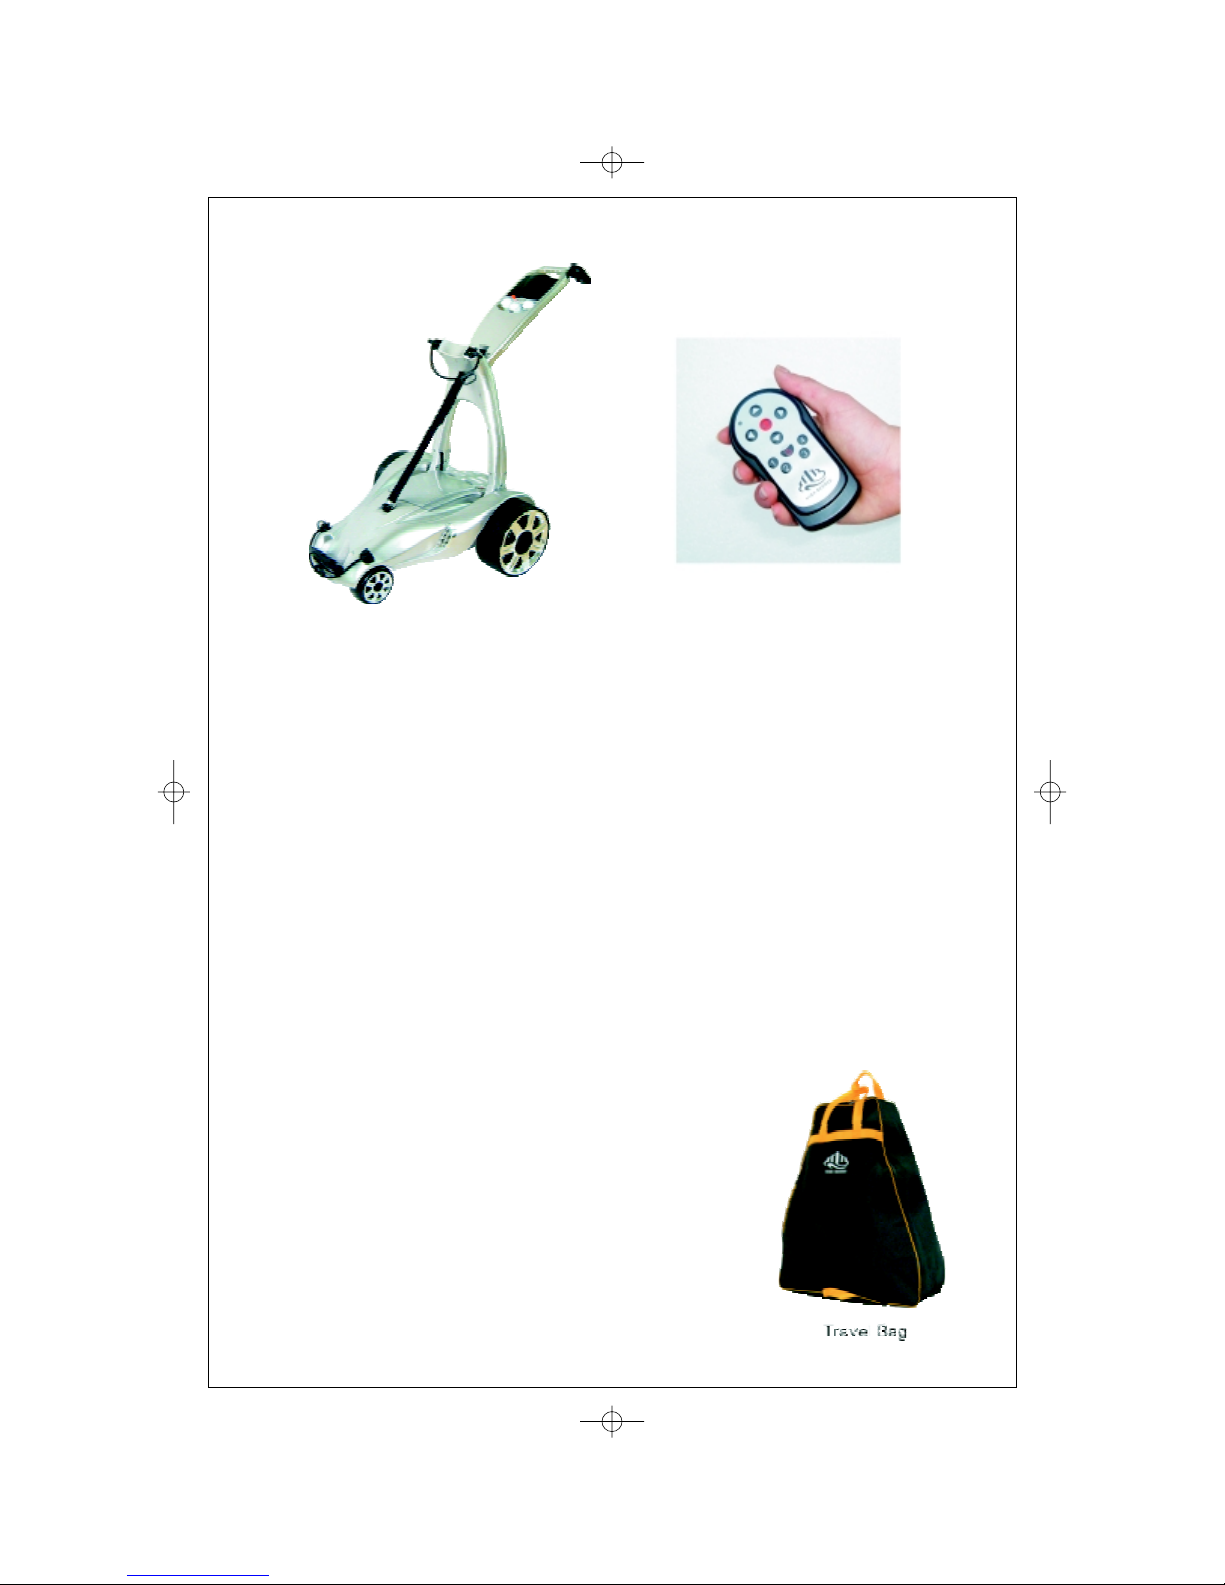
PARTS IDENTIFICATION
Handle
Scorecard Holder
Ball & Tee Holder
Top Bag Strap
Antenna
Battery Cover
Rear Wheels
Front Wheels
Bottom Bag Strap
Lower Bag Stay
Handset
Bottom Clips
Anti-Tip Wheel
Top Clip
Safety switch
1

2
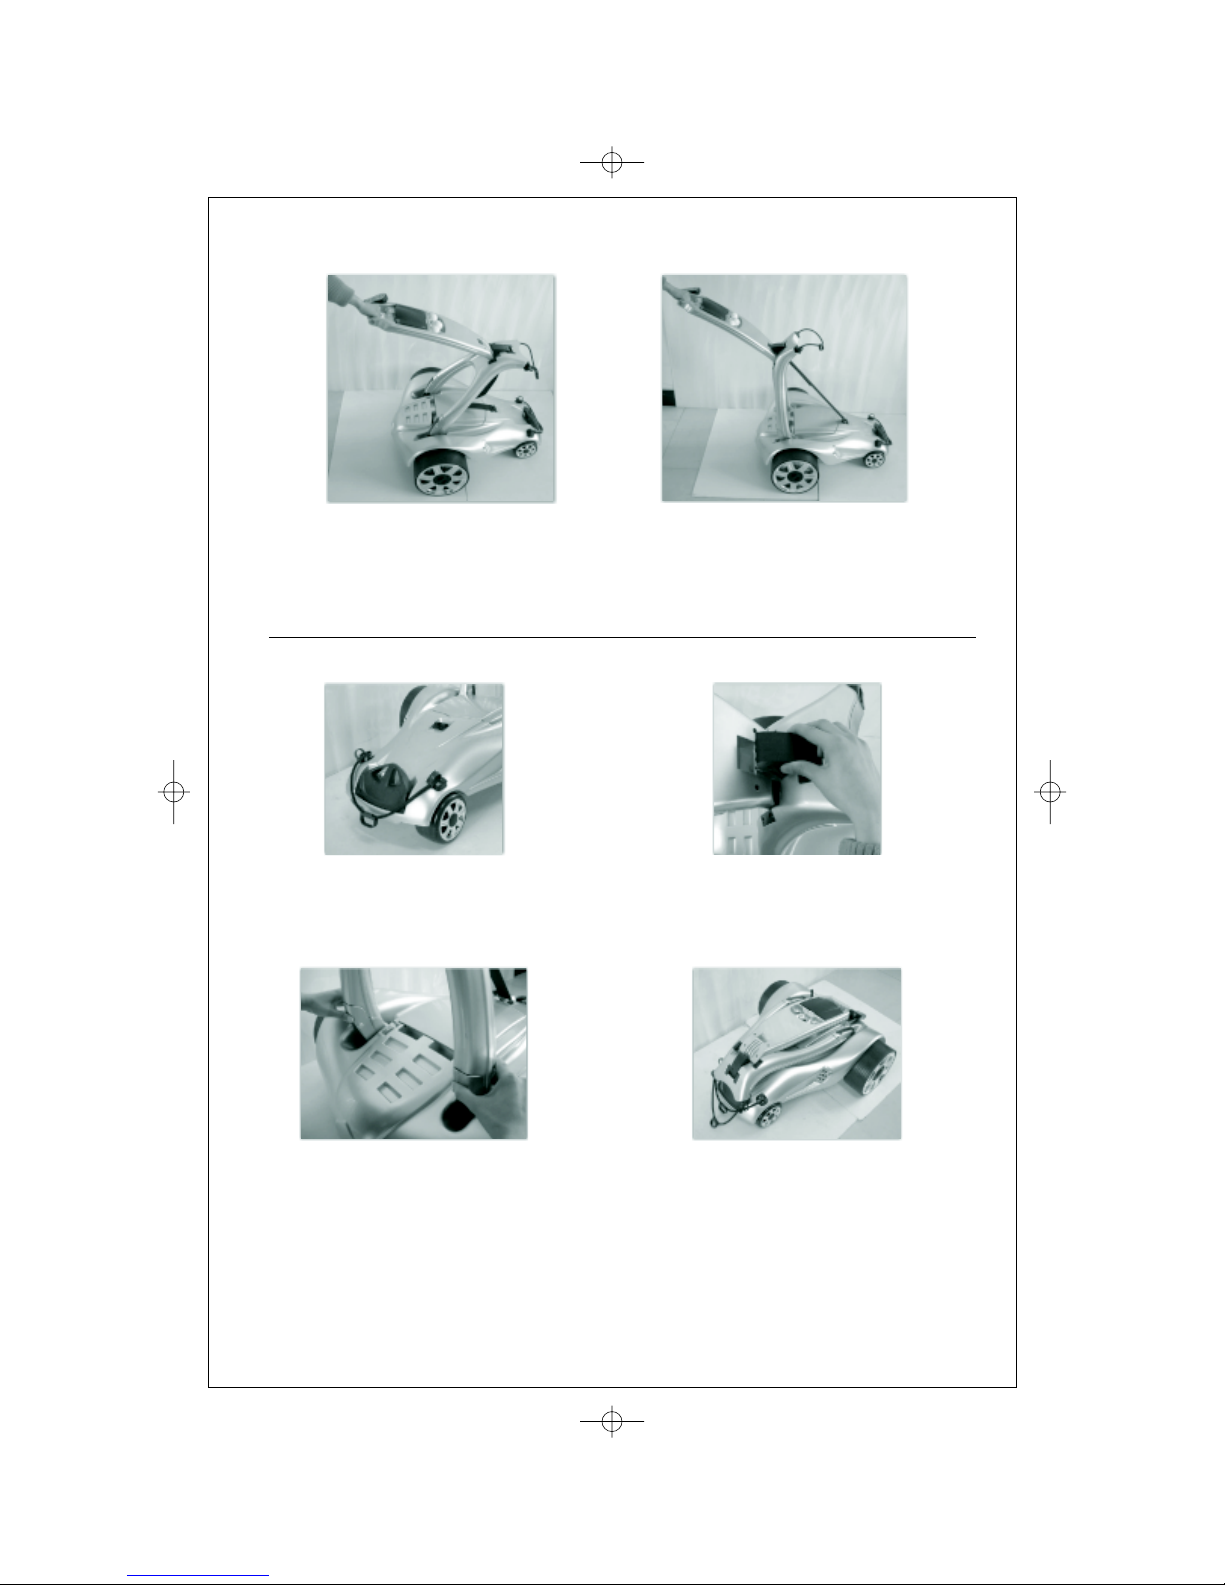
ASSEMBLY INSTRUCTIONS
The quick release mechanism has been designed for ease of
use.
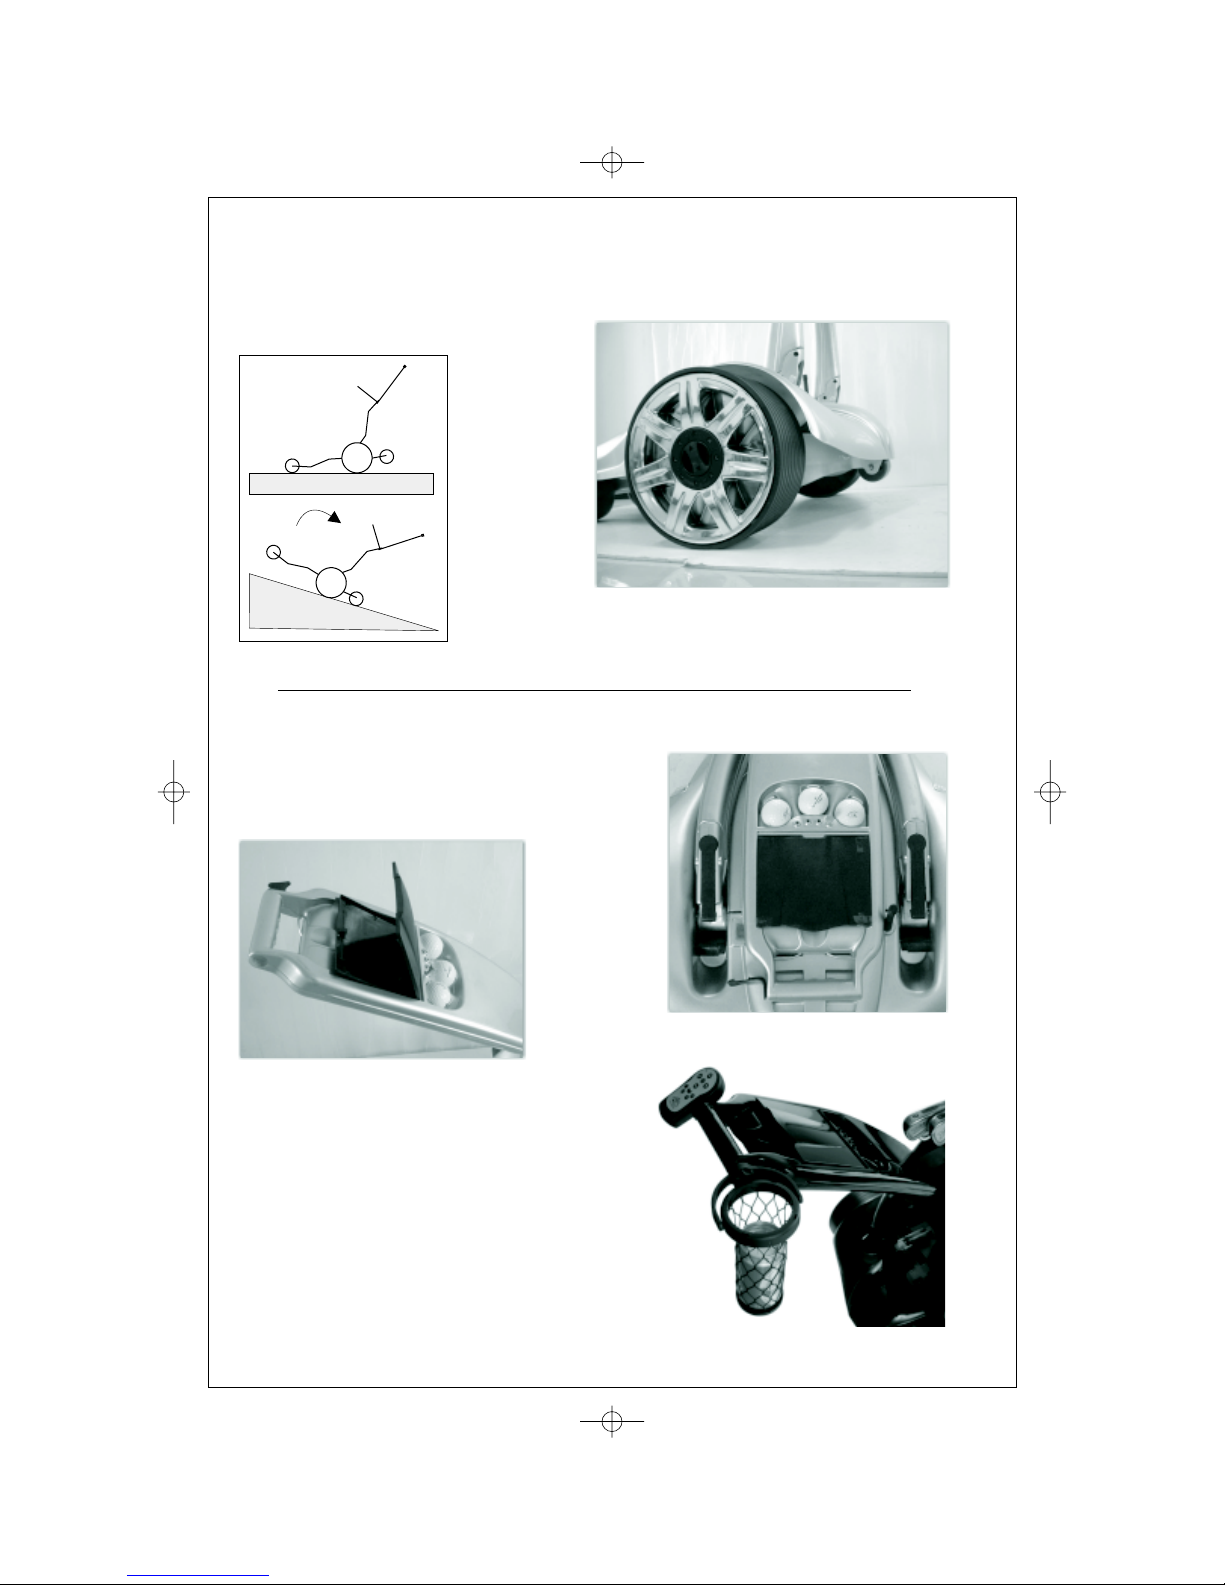
1) To remove the wheel from the 'locked' position, just turn the
handle 90 degrees clockwise so that the arrows point to the
unlocked padlock.
Now just lift the side of the Navigator and pull off the wheel.
2) Both wheels have a built in freewheel setting so that you can
always finish your round even in the unlikely event of a fault.
To engage this mode, move the handle clockwise to the unlock
symbol and move the wheel 15 to 20 mm towards you. Now
rotate the wheel by 90 degrees and push it back towards the
motor until it stops.
Turn the handle 90 degrees anti-clockwise to 'lock' and spin
the wheel.
Rear Wheel Assembly
Note: Make sure the two
wheels are engaged in the
same mode.
3
UNFOLD STEP
See page.9 to know the step for battery assembly,
Note: Do the contrary step to fold the Navigator, but make sure take
the battery off first.
Pull the handle 45 degrees upright
the main body, and continue taking
it to make the two cilps locked.
The middle Nylon bag strap is already
adjusted to protect your golf bag and
Navigator balance.
Make Sure that bottom clips are secured
to the Chasis
Release the top clip and lower the
handle until it comes to rest on the
rear cover.
Now release both lower clips(by pressing the
clips with your thumbs) simultaneously and
slowly lower the parts until they nest together.
Fold the lower bag stay.
Do not 'drop' either of the holding parts of
the Navigator.
FOLD STEP

4
Before you start, ensure that the
power switch is in "start" position.
Get to know your Navigator by
practicing away from any
obstacles.
Be aware that the handling
characteristics of your Navigator
will be different on grass than on
the car park, and with or without a
golf bag fitted. The indicator light
will flash every time a signal is
sent to the receiver.
a) Emergency Brake: The red button in the middle of the directional
controls is an emergency brake. Press and release to bring
Navigator to an immediate stop. This function is still recommended
that it be parked "across" a slope.
b) "OFF" button: It will bring Navigator to a gradual stop. Use this for
normal stopping.
c)Directional Controls: Pressing the forward button will set Navigator
in forward motion. Holding either the left or right button down from
stationary will make Navigator turn on the spot. Releasing the button
will stop the caddy. Once Navigator is in motion, continually pressing
the forward or backward buttons will either speed up or slow down it
respectively.
d)Cruise Controls: They are factory set: button 1 is the slowest with
button 4 the fastest.
e)Navigator handset is designed to have an operating range of 50
metres. You can pull aerial in the handset to increase control
distance when your range is over 50 metres.This may be affected by
factors such as atmospheric conditions, proximity to buildings, hills
and trees, power lines and condition of the handset battery (which
should be changed every year).
HANDSET INFORMATION
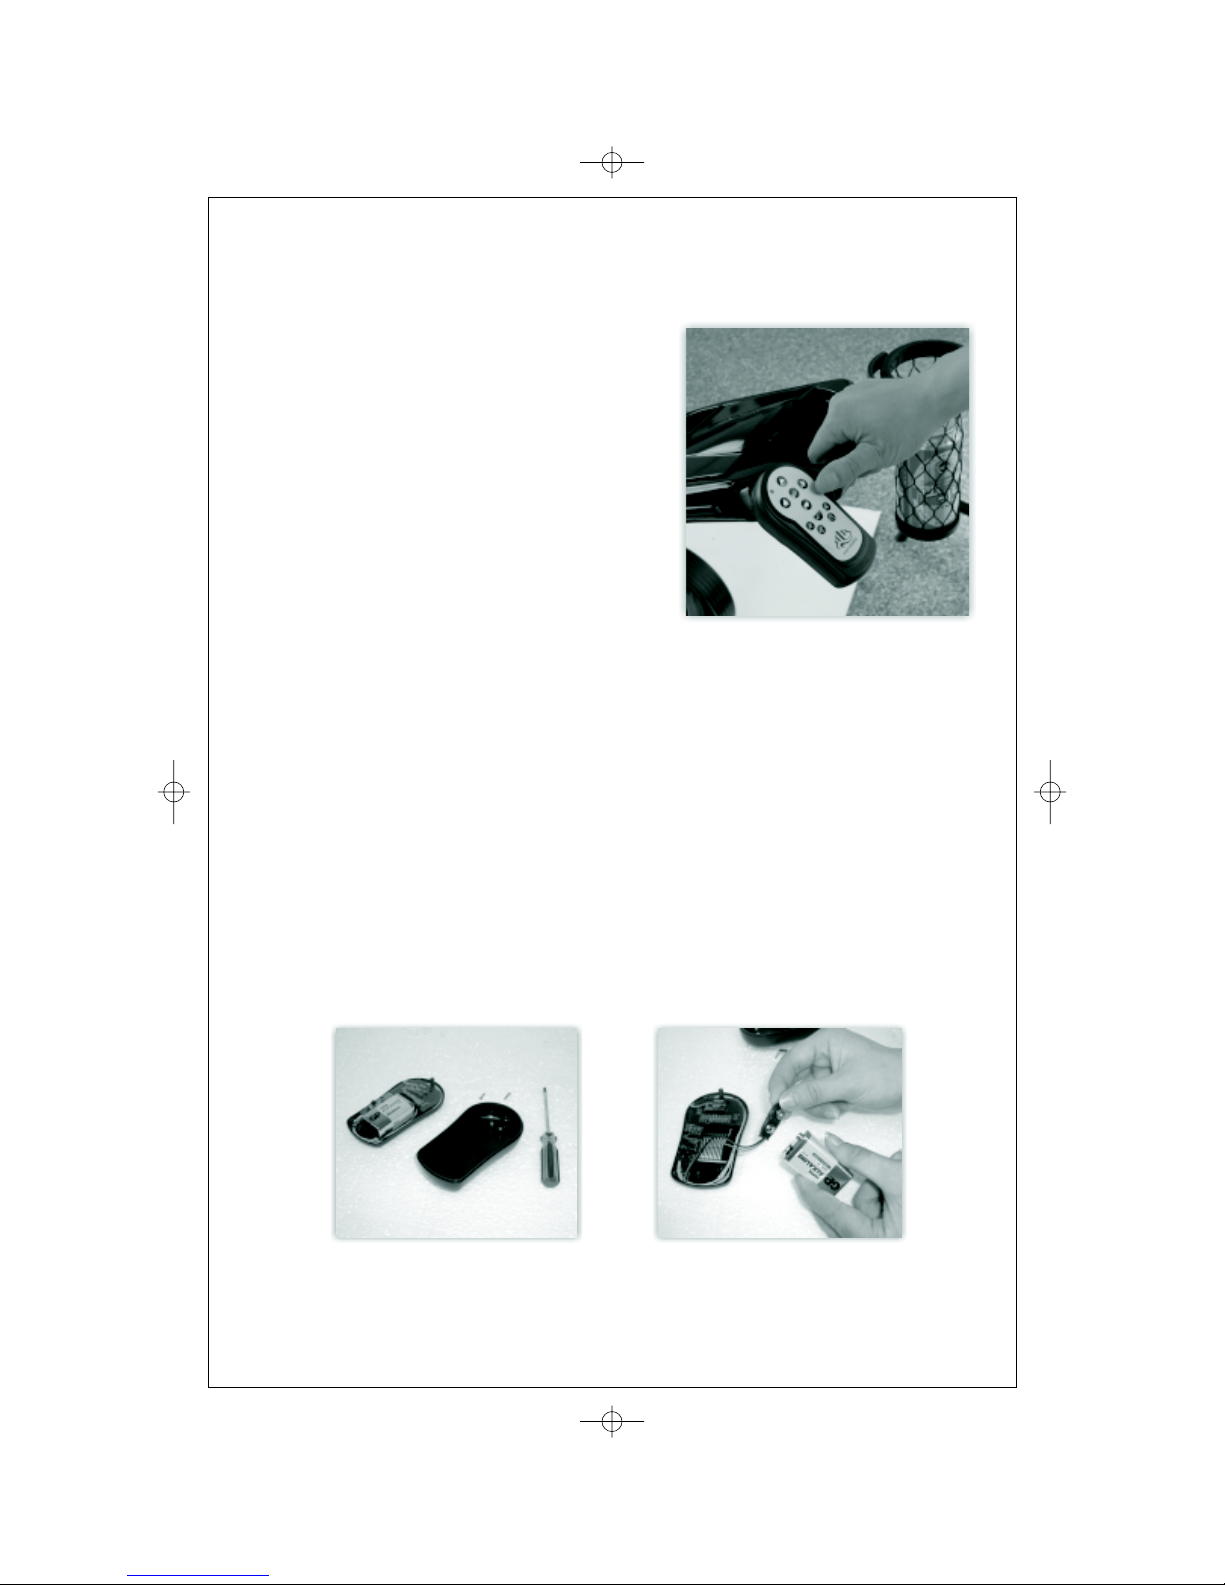
5
NOTE OF HANDSET
a) The clip on the back of
handset can also be used to
attach the handle of the
Navigator. (Fig1)
b) When control distance is
obviously shorter than 50 metres,
Navigator's response is very
slowly or indicator light cannot
flash, you need replace handset
battery.
c) When reversing the it is necessary to stop it
before commanding it to move forwards. Reverse has only
one preset speed.
d) If you are a right-handed player, park to the
right of the ball so that it does interfere with your shot.
e) The handset uses a 9V PP3 battery. Remove the screws
and open cover on the back, then replace new battery and
shut cover, making sure screws are not over-tightened.
(Fig2,Fig 3)
Navigator,
Navigator
Fig1
Fig2 Fig3
6
Remote Control Details
a)Your Robojet complies with all current telecommunications
regulations.
b)We recommended not Exceeding 50 meters. The greater the
distance between you and the Navigator, the greater the chance of
losing contact with it. Should this happen however, the Navigator will
stop automatically.
c)Microcomputer:
Navigator has 3 microcomputer controls: First is in main control box,
second is in handset, and third is in antenna. Antenna receives signal
transmitted by handset. Then main control box effects and operates.
d)Professional Remote Control Operation:
Navigator's operating system is specially designed for golf caddy.
That is more intelligentized. This handset is suitable for your hand
properly.
e)Secure Protection:
When temperature of control box over highest-limited degree and
overload, it will stop automatically to adjust itself.
Green Power on
Red Low battery. Disconnect battery, engage free wheel
Yellow Receiving signal
Red Over temperature, reset automatically when cool
Both red lights on: Overload / Short circuit
All light indicates Safety Switch activated
CAUTION: This surface can get hot
Fully recharge the battery after every round
HIGH DEGREE KADDY
The note on the controller:
6
Remote Control Details
a)Your Robojet complies with all current telecommunications
regulations.
b)We recommended not Exceeding 50 meters. The greater the
distance between you and the Navigator, the greater the chance of
losing contact with it. Should this happen however, the Navigator will
stop automatically.
c)Microcomputer:
Navigator has 3 microcomputer controls: First is in main control box,
second is in handset, and third is in antenna. Antenna receives signal
transmitted by handset. Then main control box effects and operates.
d)Professional Remote Control Operation:
Navigator's operating system is specially designed for golf caddy.
That is more intelligentized. This handset is suitable for your hand
properly.
e)Secure Protection:
When temperature of control box over highest-limited degree and
overload, it will stop automatically to adjust itself.
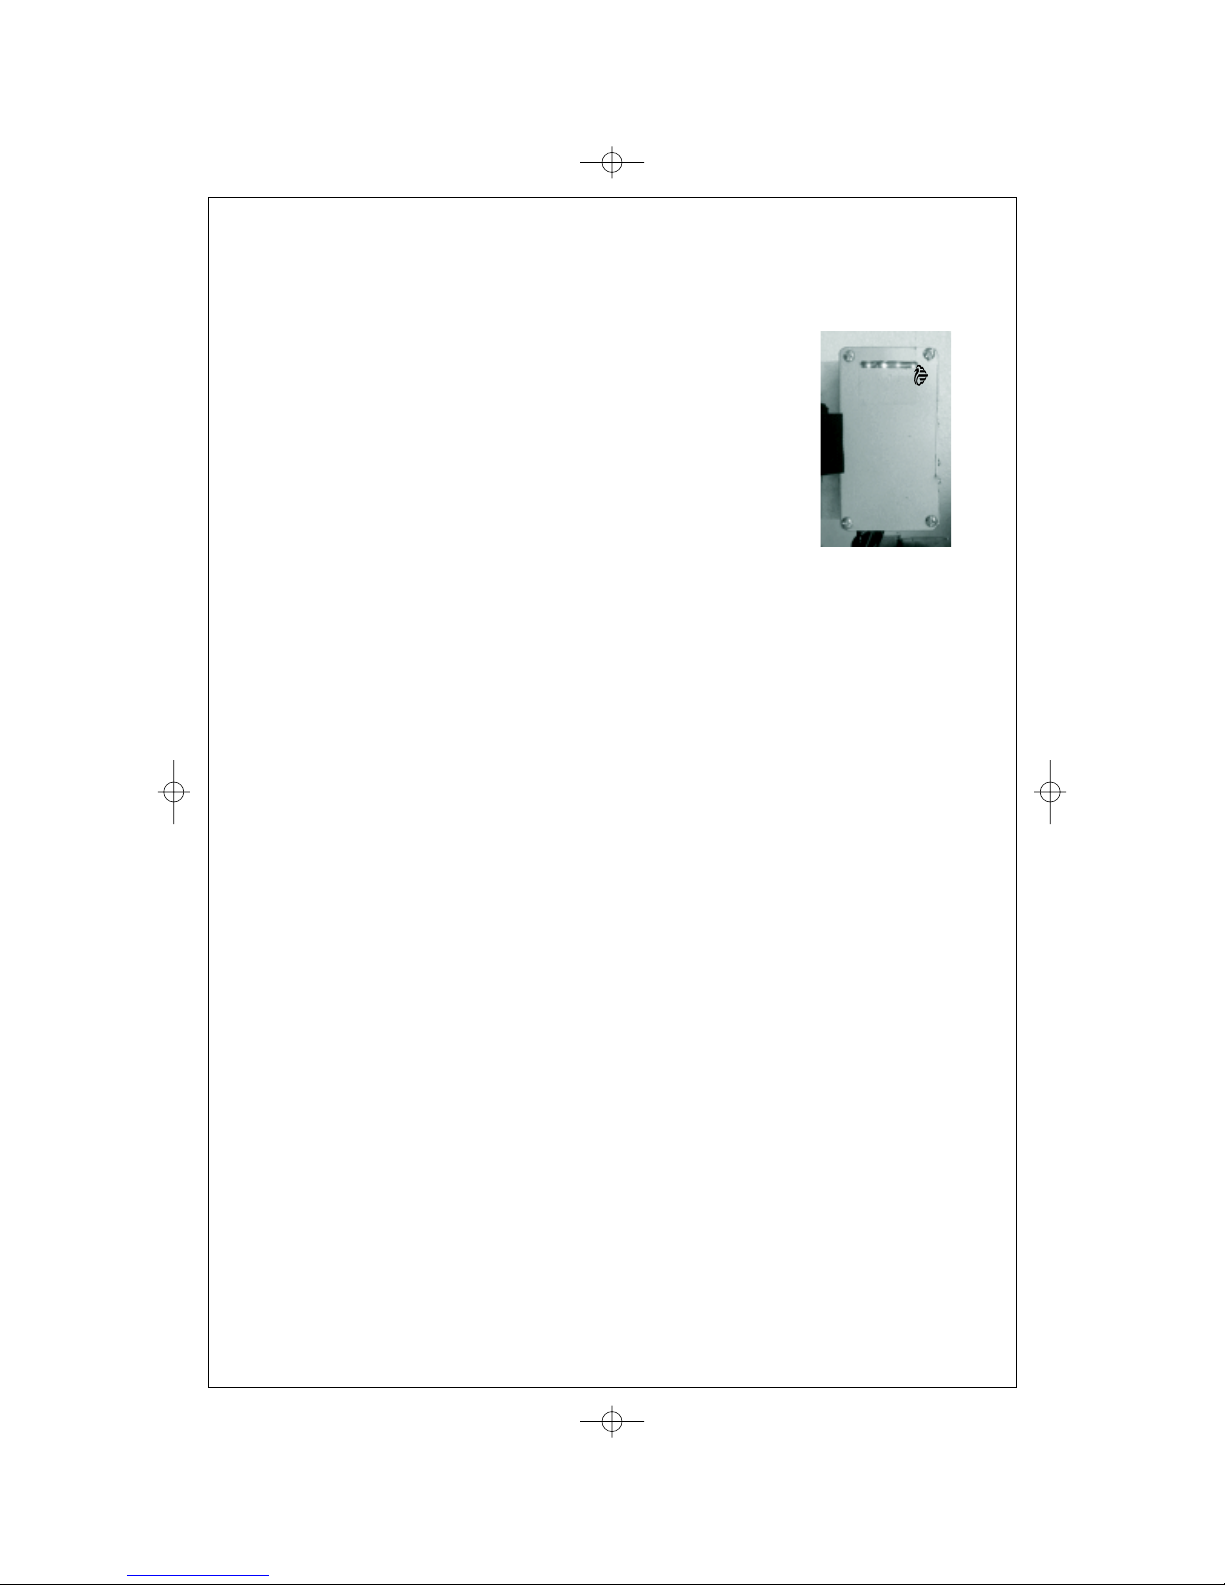
In side of battery enclosure lays the heart of the
Navigator: the microprocessor controlled electronics
system. If your Navigator should suffer a fault, there
are four diagnostic lights on the electronics case,
which are there to help you and us. When you
connect the battery, the electronics system will
automatically run through a start up routine. This in
indicated by all of the lights coming on for
approximately 2 seconds. When the start up routine
is complete, all of the lights will go out except the
green 'power on' light.
If the lights fail to go out, check that the safety switch is in the
'on' position. The safety switch should be used when you are
leaving Navigator unattended for short periods of time, for
example if you go into the pro shop for a drink. Green: Power On.
This light will remain on all of the time that the battery is
connected.
Red: Means that battery is flat. In this situation, you can make
use of the 'freewheel' position on the rear wheels and use
Navigator like a regular trolley.
Both Red: If both red lights are on then it means that the
electronics has been overloaded. For example, accidentally
leaving your Navigator running when against a tree or wall will do
this. The LED's will reset to normal when the problem is resolved.
All Lights: The safety switch has been activated. The Navigator
will be respond to any signals until the switch is deactivated. If all
lights are on and the safety switch is activated, you should
contact us immediately.
The electronics box contains no user serviceable
parts. The lid to the case is sealed to reduce the risk of water
ingress. Breaking this seal increases the risk of moisture entering
the case, and reduces the reliability of your Navigator. No attempt
should be made to open the case and doing so may invalidate
the warranty.
Important:
7
Navigator Electronics System
Green Power on
Red Low battery. Disconnect battery, engage free wheel
Yellow Receiving signal
Red Over temperature, reset automatically when cool
Both red lights on: Overload /S
hort circuit
All light indicates Safety Switch activated
CAUTION: This surface can get hot
Fully recharge the battery after every round
HIGH DEGREE KADDY

The battery supplied with your Navigator is one of the most advanced of its kind.
However all batteries begin to age the day they are made. You cannot stop this
process; but by following the simple steps below you can prolong its life.
When you get your battery A battery over 18 months old should be rejected. Now
put it on charge for at least 24 hours to activate it.
For the first three outings you may find that the trolley tires before the end of the
round. This is normal, the battery will be at full capacity once the first three rounds
are complete.
Always charge the battery as soon as you possibly can after your round but
certainly the same day.
Always keep your battery on charge between rounds. If you disconnect the battery
or the mains, the charger will assume that a different battery has been attached
and offer a bulk charge.
Never play more than 18 holes with one battery, you will
discharge it below its designed lowest voltage and
damage the battery shortening its overall life. Never
drop the battery or charger, this includes allowing the
battery to roll around in your car boot.
.
IMPORTANT: first plug the outputting
plug to your battery and only then to the
AC source, Make sure that you have
correctly aligned the pins as indicated.
Plug input end of charger to AC supply.
BATTERY OPERATION AND CARE
1) Remove the battery cover. Hold the back of the battery cover from square
slot, remove the battery cover (fig 1).
2) Ensuring that the straps are out of way, insert the battery into the chassis
with the power lead facing forwards and secure with the straps (fig 2).
3) Connect the battery and
(fig 3)
4) Insert the two slips of battery cover into the main body(fig 4), make sure
that the two square clips are secured to the chassis. Gently press the battery
cover down until it is secured in place.
ensure that the safety switch is in the 'off'
position(the 'O').
NOTE: If no power supply, please check the fuse in the battery.
Fig 1 Fig 4Fig 3Fig 2
8
9
SCORECARD HOLDER
ANTI-TIP WHEEL FUNCTION
The integrative designed anti-tip wheel make the
Navigator adapt to most terrain.
Level land
Gradient
BOTTLE HOLDER

10
The steps below will help you to get a long and reliable life from your
Navigator.
1) The Navigator has been designed so that you as a user can
concentrate on playing golf. To keep your Navigator looing its best,
we advise that you wipe any loose mud or grass from the cover and
chassis after every round. Cleaning is best performed with a sogt,
damp cloth. Do not use a hard bristled brush as this may scratch the
surface.
2) Do not use any high-pressure jet washers as this increases the
possibility of moisture entering the motors, gearboxes and
electronics.
3) Remove the rear wheels every few months and remove any debris
that might cause the wheels to drag.
4) A four hour round of golf played once a week for 12 months is
equivalent to, say, four years use out of a lawnmower. So once a
year, at least, thoroughly inspect your cart, and if you notice any
symptoms of wear, consult your local service agent.
5) Always put your machine together before connecting the battery. If
you prefer not to leave your battery on charge, as you know that you
will not be playing for at least a month, you can store the battery.
All of these points will help keep your Navigator in tip top condition
and ensure that it remains your reliable partner.
MAINTENANCE

11
TROUBLE SHOOTING
Problem Possible Cause Explanation
Battery not connected Connect the battery to the
electronics box.
Power switch is off Turn the switch on. The power
switch is located on the control
panel.
Handset batteries flat Check the red LED in the centre
of the handset. Replace
batteries if required.
Navigator has a range of
50m,but the range can
also be affected by numerous
other factors.
Navigator is overload
or over temperature.
Navigator use 5 seconds to
adjust itself.
I can hear motors
working but trolley is
not moving.
Rear wheels may be
in freewheel mode.
Use the quick release
mechanism to take the rear
wheels off freewheel.
I find it difficult to
push my Navigator
Freewheel mode is
not engaged.
Use the quick release
mechanism to put the rear
wheels onto freewheel mode.
My Navigator
occasionally starts
without me pressing
a button
Strong interference Navigator may sometimes react
to interference, however the
electronics will recognise this
and quickly stop Navigator.
I have lost my
Navigator handset
Please contact High Degree
Kaddy and we can arrange for a
replacement. There may be a
charge for this service.
The Navigator moves
in circles when
pressing the
forwards button
One wheel engaged,
one in freewheel
mode.
Ensure that both wheels are not
in freewheel position.
Navigator is not
responding to button
presses
You may be out or
range

12
REPLACEMENT PARTS LIST
Part NO. Name Part NO. Name
HM501001 Handle (above part) HM501030 Rear wheel cover
HM501002 Handle (nether part) HM501031 Rear wheel release knob
HM501003 Handset holder HM501032 Rear w heel release sliding clutch
HM501004 Scorecard holder HM501033 Rear wheel release baffle
HM501005 Top clip HM501034 Rear w heel release middle piece
HM501006 "A" tube (front part) HM501035 Front wheel left piece
HM501007 "A" tube (back part) HM501036 Front wheel right piece
HM501008 Top bag strap holder (left) HM501037 Front wheel cover
HM501009 Top bag strap holder (right) HM501038 Ront wheel axle cover
HM501010 Top clip fixity (left) HM501039 Ront wheel axle baffle
HM501011 Top clip fixity (right) HM501040 Anti-tip wheel left piece
HM501012 Handle axle fixity (left) HM501041 Anti-tip wheel right piece
HM501013 Handle axle fixity (right) HM501042 Handle axle
HM501014 Bottom clip shell (left) HM501043 Top clip axle
HM501015 Bottom clip shell (right) HM501044 Top clip spring
HM501016 Bottom clip HM501045 Bottom clip spring
HM501017 Bottom clip fixity (left) HM501046 Motor fixity axle
HM501018 Bottom clip fixity (right) HM501047 Motor fixity sheath
HM501019 Big cover HM501048 Battery cover clip
HM501020 Chassis HM501049 Lower bag stay axle
HM501021 Battery cover HM501050 Front wheel axle
HM501022 Lower bag stay HM501051 Rear wheel release spring
HM501023 Intake (left) HM501052 Motor with gear box
HM501024 Intake (right) HM501053 Controller
HM501025 Bottom bag strap holder HM501054 Receiver
HM501026 Bag strap head HM501055 Handset
HM501027 Bag strap puller HM501056 Charger
HM501028 Rear wheel HM501057 Battery package
HM501029 Rear wheel clutch
Please contact the local dealer if need replacement parts.
Other products for reference
ROBOTJET
MC101R
EASYJET
MC101A
GOLF CRUISER
GC906-2A
POWERFUL GAME, POWERFUL CARTS
POWERFUL GAME, POWERFUL CARTS
More informatin: www.hdkaddy.com
Model
Navigat or
Battery HWDWeight
24amp 165mm 126mm 175mm 8.2kg
Without
battery
with
battery
14Kg 22.2kg
Handset
Operating range
Motor
Wheelbase
Rear wheel size
Front wheel size
Load Max.
Speed Max.
Dist anc e
Climb c apac it y
Carton Dimension
8km/h
15 km
15 degree
87 x70.5x34 cm
450 mm
240 x 100 mm
130 x 65 mm
25kg
Weight
Battery:9vPP3 battery;Frequency:915Mhz
50m, auto-brake when out of range
2PCS 180w Powerful and Quiet
MC501R Weights & Dimensions
Size (when open) Size (when folded)
115 x 67 x 93 c m 78 x 67 x 33 c m
Take the weight off your game!
Table of contents


