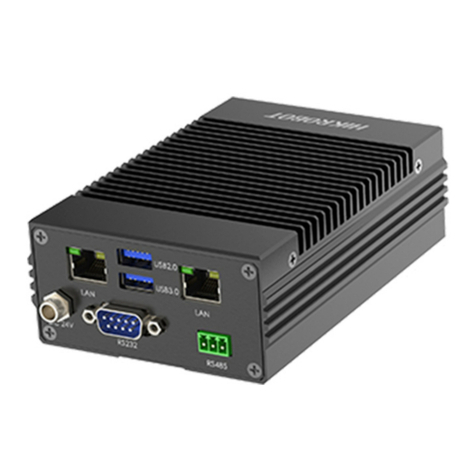
HikRobot VC3000Pro Series User manual

VC3000Pro Series Vision Controller
User Manual

VC3000Pro Series Vision Controller User Manual
i
Legal Information
© 2022 Hangzhou Hikrobot Technology Co., Ltd. All rights reserved.
About this Manual
The Manual includes instructions for using and managing the Product. Pictures, charts, images and
all other information hereinafter are for description and explanation only. The information
contained in the Manual is subject to change, without notice, due to firmware updates or other
reasons. Please find the latest version of this Manual at the Hikrobot website
(https://www.hikrobotics.com/). Please use this Manual with the guidance and assistance of
professionals trained in supporting the Product.
Trademarks
and other Hikrobot's trademarks and logos are the properties of Hikrobot in
various jurisdictions. Other trademarks and logos mentioned are the properties of their respective
owners.
: The terms HDMI and HDMI High-Definition Multimedia Interface, and the
HDMI Logo are trademarks or registered trademarks of HDMI Licensing Administrator, Inc. in the
United States and other countries.
Disclaimer
TO THE MAXIMUM EXTENT PERMITTED BY APPLICABLE LAW, THIS MANUAL AND THE PRODUCT
DESCRIBED, WITH ITS HARDWARE, SOFTWARE AND FIRMWARE, ARE PROVIDED "AS IS" AND "WITH
ALL FAULTS AND ERRORS". HIKROBOT MAKES NO WARRANTIES, EXPRESS OR IMPLIED, INCLUDING
WITHOUT LIMITATION, MERCHANTABILITY, SATISFACTORY QUALITY, OR FITNESS FOR A
PARTICULAR PURPOSE. THE USE OF THE PRODUCT BY YOU IS AT YOUR OWN RISK. IN NO EVENT
WILL HIKROBOT BE LIABLE TO YOU FOR ANY SPECIAL, CONSEQUENTIAL, INCIDENTAL, OR INDIRECT
DAMAGES, INCLUDING, AMONG OTHERS, DAMAGES FOR LOSS OF BUSINESS PROFITS, BUSINESS
INTERRUPTION, OR LOSS OF DATA, CORRUPTION OF SYSTEMS, OR LOSS OF DOCUMENTATION,
WHETHER BASED ON BREACH OF CONTRACT, TORT (INCLUDING NEGLIGENCE), PRODUCT LIABILITY,
OR OTHERWISE, IN CONNECTION WITH THE USE OF THE PRODUCT, EVEN IF HIKROBOT HAS BEEN
ADVISED OF THE POSSIBILITY OF SUCH DAMAGES OR LOSS.
YOU ACKNOWLEDGE THAT THE NATURE OF INTERNET PROVIDES FOR INHERENT SECURITY RISKS,
AND HIKROBOT SHALL NOT TAKE ANY RESPONSIBILITIES FOR ABNORMAL OPERATION, PRIVACY
LEAKAGE OR OTHER DAMAGES RESULTING FROM CYBER-ATTACK, HACKER ATTACK, VIRUS
INFECTION, OR OTHER INTERNET SECURITY RISKS; HOWEVER, HIKROBOT WILL PROVIDE TIMELY
TECHNICAL SUPPORT IF REQUIRED.
YOU AGREE TO USE THIS PRODUCT IN COMPLIANCE WITH ALL APPLICABLE LAWS, AND YOU ARE
SOLELY RESPONSIBLE FOR ENSURING THAT YOUR USE CONFORMS TO THE APPLICABLE LAW.
ESPECIALLY, YOU ARE RESPONSIBLE, FOR USING THIS PRODUCT IN A MANNER THAT DOES NOT
INFRINGE ON THE RIGHTS OF THIRD PARTIES, INCLUDING WITHOUT LIMITATION, RIGHTS OF
PUBLICITY, INTELLECTUAL PROPERTY RIGHTS, OR DATA PROTECTION AND OTHER PRIVACY RIGHTS.
YOU SHALL NOT USE THIS PRODUCT FOR ANY PROHIBITED END-USES, INCLUDING THE

VC3000Pro Series Vision Controller User Manual
ii
DEVELOPMENT OR PRODUCTION OF WEAPONS OF MASS DESTRUCTION, THE DEVELOPMENT OR
PRODUCTION OF CHEMICAL OR BIOLOGICAL WEAPONS, ANY ACTIVITIES IN THE CONTEXT RELATED
TO ANY NUCLEAR EXPLOSIVE OR UNSAFE NUCLEAR FUEL-CYCLE, OR IN SUPPORT OF HUMAN RIGHTS
ABUSES.
THE PERFORMANCE DATA IN THIS PUBLICATION IS BASED ON HIKROBOT'S INTERNAL
RESEARCH/EVALUATION. ACTUAL DATA MAY VARY DEPENDING ON SPECIFIC CONFIGURATIONS
AND OPERATING CONDITIONS AND HIKROBOT SHALL NOT BEAR THE CONSEQUENCES ARISING
THEREFROM.
IN THE EVENT OF ANY CONFLICTS BETWEEN THIS MANUAL AND THE APPLICABLE LAW, THE
LATTER PREVAILS.
Regulatory Information
FCC Information
Please take attention that changes or modification not expressly approved by the party responsible
for compliance could void the user’s authority to operate the equipment.
FCC Compliance
This equipment has been tested and found to comply with the limits for a Class A digital device,
pursuant to part 15 of the FCC Rules. These limits are designed to provide reasonable protection
against harmful interference when the equipment is operated in a commercial environment. This
equipment generates, uses, and can radiate radio frequency energy and, if not installed and used in
accordance with the instruction manual, may cause harmful interference to radio communications.
Operation of this equipment in a residential area is likely to cause harmful interference in which
case the user will be required to correct the interference at his own expense.
FCC Conditions
This device complies with part 15 of the FCC Rules. Operation is subject to the following two
conditions:
1. This device may not cause harmful interference.
2. This device must accept any interference received, including interference that may cause
undesired operation.
EU Conformity Statement
This product and - if applicable - the supplied accessories too are marked
with "CE" and comply therefore with the applicable harmonized European
standards listed under the EMC Directive 2014/30/EU, the RoHS Directive
2011/65/EU.
2012/19/EU (WEEE directive): Products marked with this symbol cannot be
disposed of as unsorted municipal waste in the European Union. For proper
recycling, return this product to your local supplier upon the purchase of
equivalent new equipment, or dispose of it at designated collection points.
For more information see: http://www.recyclethis.info

VC3000Pro Series Vision Controller User Manual
iii
2006/66/EC (battery directive): This product contains a battery that cannot
be disposed of as unsorted municipal waste in the European Union. See the
product documentation for specific battery information. The battery is
marked with this symbol, which may include lettering to indicate cadmium
(Cd), lead (Pb), or mercury (Hg). For proper recycling, return the battery to
your supplier or to a designated collection point. For more information see:
http://www.recyclethis.info
Symbol Conventions
The symbols that may be found in this document are defined as follows.
Symbol
Description
Danger
Indicates a hazardous situation which, if not avoided, will or could
result in death or serious injury.
Caution
Indicates a potentially hazardous situation which, if not avoided,
could result in equipment damage, data loss, performance
degradation, or unexpected results.
Note
Provides additional information to emphasize or supplement
important points of the main text.
Available Model
This manual is applicable to the VC3000Pro Series Vision Controller.
Safety Instruction
These instructions are intended to ensure that the user can use the device correctly to avoid danger
or property loss.
Caution:
●In the use of the device, you must be in strict compliance with the electrical safety regulations of
the nation and region.
●Use the power adapter provided by the official manufacturer. For the specific requirements of
the power adapter, please refer to the device’s specifications.
●Make sure that the power is switched off when installing or wiring the device.
●To avoid heat accumulation, keep ventilation around the device.
●If the device emits smoke, produces a peculiar smell, or makes noise, please switch off the power
immediately, unplug the power cord, and contact the service center in time.
●Make sure that the device is firmly fixed when installing it in the use environment.
●This is a Class A device that may cause radio interference in a living environment. In this case, the
user may be required to take practical measures against the interference.
●If the device does not work properly, please contact your dealer or the nearest service center.
Never attempt to disassemble the device yourself (we shall not assume any responsibility for
problems caused by unauthorized repair or maintenance).

VC3000Pro Series Vision Controller User Manual
iv
●Do not drop objects on the device or vibrate it vigorously, and keep the device away from places
with magnetic field interference. Avoid installing the device where the surface is subject to
vibration or shock (ignoring this may damage the device).
●Do not use the device in high temperature, low temperature or high humidity environment. For
specific temperature and humidity requirements, please refer to the device’s specifications.
●Do not install the indoor device in an environment where it may be exposed to water or other
liquids.
●Avoid placing the device in direct sunlight, poorly ventilated locations, or near heat sources such
as heaters or radiators (ignoring this may result in a fire hazard).
●After the device is connected to the Internet, you may face network security issues, and please
strengthen the protection of personal information and data security. When you find that the
device may have potential network security risks, please contact us in time.
●Please understand that you are responsible for the reasonable configuration of all passwords and
other related device security settings, and properly keep your user name and password.
●Please keep all original package materials of the device properly, so that when a problem occurs,
use the package materials to pack the device and send it to the agent or return it to the
manufacturer for disposal. We shall not assume any responsibility for accidental damages during
transportation caused by non-original package materials.
Personnel Requirement
Quality requirements for installation and maintenance personnel: Qualification certificate or
working experience in weak current system installation and maintenance, and relevant working
experience and qualifications. Besides, the personnel must possess the following knowledge and
operation skills:
●The basic knowledge and operation skills of low voltage wiring and low voltage electronic circuit
connection.
●The ability to comprehend the contents of this manual.
Contact Information
Hangzhou Hikrobot Technology Co., Ltd.
No. 399 Danfeng Road, Binjiang District, Hangzhou, 310051, China
E-mail: tech_support@hikrobotics.com
Website: https://en.hikrobotics.com/

VC3000Pro Series Vision Controller User Manual
v
Contents
Chapter 1 Overview............................................................................................................................. 1
1.1 Introduction...........................................................................................................................1
1.2 Key Feature ............................................................................................................................1
Chapter 2 Appearance.........................................................................................................................2
2.1 Main Module Appearance ....................................................................................................2
2.2 Extended Module Appearance .............................................................................................3
2.2.1 Light Source Extended Module ..................................................................................4
2.2.2 IO Extended Module ..................................................................................................5
Chapter 3 Installation and Access to Device ......................................................................................6
3.1 Installation Preparation ........................................................................................................6
3.2 Install Main Module ..............................................................................................................6
3.2.1 Vertical Mounted .......................................................................................................7
3.2.2 Horizontal Mounted...................................................................................................7
3.3 Install Extended Module .......................................................................................................8
3.4 Access to Device ..................................................................................................................10
Chapter 4 Interface Description........................................................................................................11
4.1 Main Module Interface .......................................................................................................11
4.1.1 Power Interface ........................................................................................................11
4.1.2 GPIO Interface ..........................................................................................................11
4.1.3 Built-In USB Interface ...............................................................................................15
4.1.4 mSATA Interface.......................................................................................................15
4.1.5 Extended Slot............................................................................................................16
4.1.6 Serial Port .................................................................................................................17
4.1.7 Remote Switch Interface..........................................................................................17
4.1.8 Memory Slot .............................................................................................................18
4.2 Extended Module Interface ................................................................................................18
4.2.1 Light Source Extended Module Interface ................................................................18
4.2.2 IO Extended Module Interface.................................................................................20

VC3000Pro Series Vision Controller User Manual
vi
Chapter 5 VC3000Pro Controller Settings.........................................................................................24
5.1 Set Connection.....................................................................................................................24
5.2 Set Main Module .................................................................................................................25
5.3 Set Light Source Extended Module.....................................................................................25
5.4 Set IO Extended Module .....................................................................................................26
5.5 Message Window ................................................................................................................27
5.6 Enable Edge Detection ........................................................................................................27
5.7 Reset Parameters ................................................................................................................27
5.8 Reboot Hardware ................................................................................................................27
Chapter 6 Firmware Update of Extended Module ...........................................................................28
Chapter 7 System Reinstallation.......................................................................................................29
Chapter 8 FAQ (Frequently Asked Question) ...................................................................................30
8.1 Why the monitor screen is black?.......................................................................................30
8.2 Why the system is blue screen or crashes, or frequent reboots? .....................................30
8.3 Why there is no signal feedback of GPIO input and electrical level change? ...................30
8.4 Why VC3000Pro Controller can run extended modules, but setting parameters failed? 31

VC3000Pro Series Vision Controller User Manual
1
Chapter 1 Overview
1.1 Introduction
The VC3000Pro Series Vision Controller adopts high performance CPU and supports 11-channel
GPIO. It has multiple interfaces like GigE, USB 2.0, and USB 3.0. The vision controller can be installed
with additional light source and IO extended modules. It is applicable to consumer electronics, food
and pharmaceutical, transportation, and so on.
1.2 Key Feature
●Adopts Intel(R) CPU 8th generation CPU.
●Provides expansion slot to connect with image frame grabbers.
●Supports 11-channel GPIO and NPN/PNP switching for output.
●Adopts Intel(R) GigE interfaces for stable data transmission.
●Built-in USB interface for on-site maintenance is optional.
●Light source and IO extended modules are optional.
Note
Refer to the device’s specification for detailed parameters.

VC3000Pro Series Vision Controller User Manual
2
Chapter 2 Appearance
2.1 Main Module Appearance
Figure 2-1 Main Module Appearance
Table 2-1 Main Module Appearance Description
No.
Name
Description
1
Power
It is used to power on/off the device. Press it shortly to
power on the device, and long press it for 4 s to power off.
2
Power Indicator
It indicates device power status. The indicator is solid
green when the device is switched on.
3
HDD Indicator
It indicates HDD status. The indicator is flashing red when
the HDD reads and writes data.
4
GPIO Interface
It provides input and output function.
5
Screw Hole for GPIO
Interface
It is used to fix GPIO interface.
6
HDMI Interface
It is used to transmit audio and video signals.
7
GigE Interface
It is used to transmit network signal.
8
VGA Interface
It is used to transmit video signal.
9
Screw Hole for VGA Interface
It is used to fix VGA interface.
10
Power Interface
It provides power supply.

VC3000Pro Series Vision Controller User Manual
3
No.
Name
Description
11
GND Hole
It is used to connect ground wire.
12
USB 2.0 Interface
It is used to connect USB flash drive, portable HDD, etc.
13
Serial Port
It is used for serial communication.
14
Screw Hole for Serial Port
It is used to fix serial port.
15
Remote Switch Interface
It is used to power on/off the device remotely.
16
Screw Hole for Remote
Switch Interface
It is used to fix remote switch interface.
17
USB 3.0 Interface
It is used to connect USB flash drive, portable HDD, etc.
18
Audio Interface
It is used to transmit audio signal.
19
Screw Hole
It is used to fix the device, and you should use M3 or M4
screw.
20
Snap Fit Component
It is used to connect extended module.
21
Connection Hole
It is used to connect main module with extended module.
22
Connection Plug
It is used to connect the plug of extended module.
2.2 Extended Module Appearance
The device can be installed with light source and IO extended modules.
Note
Up to two light source extended modules or two IO extended modules can be installed to the device
at the same time.

VC3000Pro Series Vision Controller User Manual
4
2.2.1 Light Source Extended Module
Figure 2-2 Light Source Extended Module Appearance
Table 2-2 Appearance Description of Light Source Extended Module
No.
Name
Description
1
Screw Hole
It is used to fix the extended module, and you should use M3 or M4
screw.
2
Connection Hole
It is used to connect with the main module or another extended
module.
3
Snap Fit Component
It is used to connect another extended module.
4
Connection Plug
It is used to connect the plug of extended module.
5
Light Source Trigger
Interface
It is used to trigger external devices via this interface.
6
Light Source Interface
It is used to connect light source.
7
Power Interface
It provides power supply for light source extended module.
8
DIP Switch
It is used to switch the serial port No. The serial port No. ranges from
COM 11 to COM 12, and the corresponding DIP switch No. is from 5
to 6.
Note
If you have multiple extended modules, the DIP switch takes effect
only when you set 1 DIP switch No. to ON of each module, and the
ON DIP switch No. is different among modules.

VC3000Pro Series Vision Controller User Manual
5
2.2.2 IO Extended Module
Figure 2-3 IO Extended Module Appearance
Table 2-3 Appearance Description of IO Extended Module
No.
Name
Description
1
Screw Hole
It is used to fix the extended module, and you should use M3 or
M4 screw.
2
Connection Hole
It is used to connect with the main module or another extended
module.
3
Snap Fit Component
It is used to connect another extended module.
4
Connection Plug
It is used to connect the plug of extended module.
5
GPIO Interface
It provides input and output function.
6
DIP Switch
It is used to switch the serial port No. The serial port No. ranges
from COM 11 to COM 12, and the corresponding DIP switch No.
is from 5 to 6.
Note
If you have multiple extended modules, the DIP switch takes
effect only when you set 1 DIP switch No. to ON of each module,
and the ON DIP switch No. is different among modules.

VC3000Pro Series Vision Controller User Manual
6
Chapter 3 Installation and Access to Device
3.1 Installation Preparation
You need to prepare following accessories before installation.
Table 3-1 Accessories
No.
Name
Quantity
Description
1
Power Adapter
1
It refers to the suitable power adapter that is included in
the package.
2
GPIO Cable
1
It refers to the supplied GPIO cable of main module that
is included in the package.
3
Mount Plate
1 to 2
It is used to fix device and other mechanical structures,
and you need to purchase it separately.
4
Bracket
1
It is used to mount the mount plate, and you need to
purchase it separately.
5
Screws
Several
They are used to fix the device, and are included in the
package.
6
Light Source Extended
Module (Optional)
1 to 2
You need to purchase it separately.
7
IO Extended Module
(Optional)
1 to 2
You need to purchase it separately.
3.2 Install Main Module
It is easy to install the main module, and you can install it vertically or horizontally according to
actual demands.
Before You Start
●Make sure that the device in the package is in good condition and all the assembly parts are
included.
●Make sure that all the related equipment is powered off during the installation.

VC3000Pro Series Vision Controller User Manual
7
3.2.1 Vertical Mounted
Steps
1. Use four M4 screws to vertically mount the main module to the mount plate.
2. Fix the main module to other mechanical structures via the mount plate.
Figure 3-1 Vertical Mounting of Main Module
3.2.2 Horizontal Mounted
Steps
1. Use four M3 screws to horizontally mount the main module to the mount plate.
2. Fix the main module to other mechanical structures via the bracket.

VC3000Pro Series Vision Controller User Manual
8
Figure 3-2 Horizontal Mounting of Main Module
3.3 Install Extended Module
Before You Start
●Make sure that the device in the package is in good condition and all the assembly parts are
included.
●Make sure that all the related equipment is powered off during the installation.
Steps
1. Install the extended module to the main module.
Note
Make sure the corresponding parts of the main module are correctly connected with those of
extended module.

VC3000Pro Series Vision Controller User Manual
9
Figure 3-3 Install Extended Module to Main Module
2. Fix the device to the mount plate.
–Use four M4 screws to vertically mount the device to the mount plate.
–Use five M3 screws to horizontally mount the device to the mount plate.
3. Fix the device to other mechanical structures via the mount plate or bracket.
Figure 3-4 Vertical Installation

VC3000Pro Series Vision Controller User Manual
10
Figure 3-5 Horizontal Installation
3.4 Access to Device
You can operate the device on the monitor by connecting them via HDMI or VGA cable. Or, you can
remotely access the device via the PC that is in the same network segment with the device.
Note
●The default user name of the device is Administrator, and the password is Operation666
●For security, it is highly recommended to change the default password for the first-time use.

VC3000Pro Series Vision Controller User Manual
11
Chapter 4 Interface Description
4.1 Main Module Interface
4.1.1 Power Interface
The device’s power interface is used to connect the power adapter. On the left side of the power
interface has two 0 V connectors, you can select one to connect power supply negative. On the right
side of the power interface has two 24 V connectors, you can select one to connect power supply
positive.
Figure 4-1 Power Interface
4.1.2 GPIO Interface
The main module supports 11-channel GPIO and NPN/PNP switching for output. You need to use
following GPIO cable when using GPIO interface.
Figure 4-2 GPIO Cable
The device’s GPIO Interface has 15 pins, and you can refer to the following table for pin definitions.
Note
You should refer to the table below and the label attached to GPIO cable when wiring.
Table 4-1 Pin Definitions of GPIO Interface
Type
Name
Description
Cable Color
Opto-isolated input
DI 1
Opto-isolated input 1
Red/white
DI 2
Opto-isolated input 2
Green/white

VC3000Pro Series Vision Controller User Manual
12
Type
Name
Description
Cable Color
DI 3
Opto-isolated input 3
Green
DI_COM
Opto-isolated input signal
ground
Blue
Opto-isolated output
DO 1
Opto-isolated output 1
Purple
DO 2
Opto-isolated output 2
Black
DO 3
Opto-isolated output 3
Gray
DO 4
Opto-isolated output 4
Brown
DO 5
Opto-isolated output 5
White
DO 6
Opto-isolated output 6
Red
DO 7
Opto-isolated output 7
Pink/red
DO 8
Opto-isolated output 8
Orange/white
PEXT_VDD_IN
_CNN
Opto-isolated output
external power +
Orange
DO_GND_CN
N
Opto-isolated output
external power -
Yellow
External
OPEN
GND
--
Opto-Isolated Input Wiring
Regarding opto-isolated input, different input electrical level types correspond to varied voltage
ranges.
●When the input electrical level type is high electrical level, the voltage range is from 4 V to 24 V.
●When the input electrical level type is low electrical level, the voltage range is from 0 V to 3 V.
Note
●Wiring may differ when connecting the main module to different types of external devices.
●You can design circuit diagram for other external devices according to the diagrams below.
PNP Device
When connecting the main module to PNP device, it is recommended to use 4.7 kΩ pull-down
resistor.

VC3000Pro Series Vision Controller User Manual
13
PNP Device
Signal Ground
Signal Cable
R
VCC
Power Supply
DI_COM
DI1
Figure 4-3 Connect to PNP Device
NPN Device
When connecting the main module to NPN device, it is recommended to use 4.7 kΩ pull-up resistor.
NPN Device
Signal Ground
Signal Cable
R
VCC
Power Supply
DI_COM
DI1
Figure 4-4 Connect to NPN Device
Opto-Isolated Output Wiring
The opto-isolated output of the main module can output NPN or PNP signal. Regarding opto-isolated
output, different output electrical level types correspond to varied voltage ranges.
Note
When the main module's output connects external devices, the voltage range of EXT is from 7 V to
24 V, and the output current of each pin cannot be larger than 40 mA.
●When the output electrical level type is high electrical level, the voltage range is from EXT-0.3 V
to EXT voltage value.
●When the output electrical level type is low electrical level, the voltage range is from 0 V to 0.4 V.
Table of contents
Other HikRobot Controllers manuals
Popular Controllers manuals by other brands
Sony
Sony RM-E300 operating instructions
Team Corally
Team Corally REVOC PRO 160 user manual
Microchip Technology
Microchip Technology MCP8063 user guide
Dungs
Dungs FRI 7/6 Series installation instructions
Vivanco
Vivanco 10 IN 1 UNIVERSAL LCD REMOTE CONTROL manual
Flowserve
Flowserve Limitorque L120 Series User instructions
