Hills VoiceNav User manual
r
VoiceNav User Manual Hills Industries® V0.3
1
V
oiceNav
User Manual

Table of contents
Introduction 2
Drawing 3
Glossary of terms 4
Legend 5
Warranty 5
Indicators, icons and lights 6
Away arming 7
Stay arming 8
Disarming 9
Multi area arming – away mode – all areas 10
Multi area arming – away mode – single area 11
Multi area disarming – all areas 12
Intercom room calling 13
Emergency keys 14
Understanding the main menu structure 15
To control zone bypass – bypassing zones 16
To control zone chime – add a zone to the chime group 17
To control zone chime – turn chime on / off 18
System event history – Alarm memory 19
System event history – 185 internal event log 20
System test – sirens 21
System test – communicator / back up battery 22
System test – walk test / version number 23
User configuration – configure a new pin code 24
User configuration – delete a pin code 25
User configuration – remove area control 26
User configuration – configure user authority levels 27
Phone number configuration 28
Phone number configuration – enter and delete phone numbers 29
Output control – turn outputs on / off 30
Voice message recording – exit / entry message recording 32
Voice message recording – user name recording 33
Voice message recording – zone name recording 34
Voice message recording – zone name configuration using word library 34
Voice message recording – area and output names 35
Voice message recording – room names 36
Basic system configuration – resetting latching sensors (smoke detectors / shock sensors) 37
Basic system configuration – resetting the time and date 38
Basic system configuration – call back / call answer a download session 39
Basic system configuration – adjust area entry / exit delay times 40
Mute menu explained 41
Mute menu – Adjusting volume level and microphone sensitivity 41
Mute menu – enabling / disabling features within the mute menu 43
Event log and service phrases 44
Word library 45
Zone list 46
VoiceNav User Manual Hills Industries® V0.3
1

Introduction
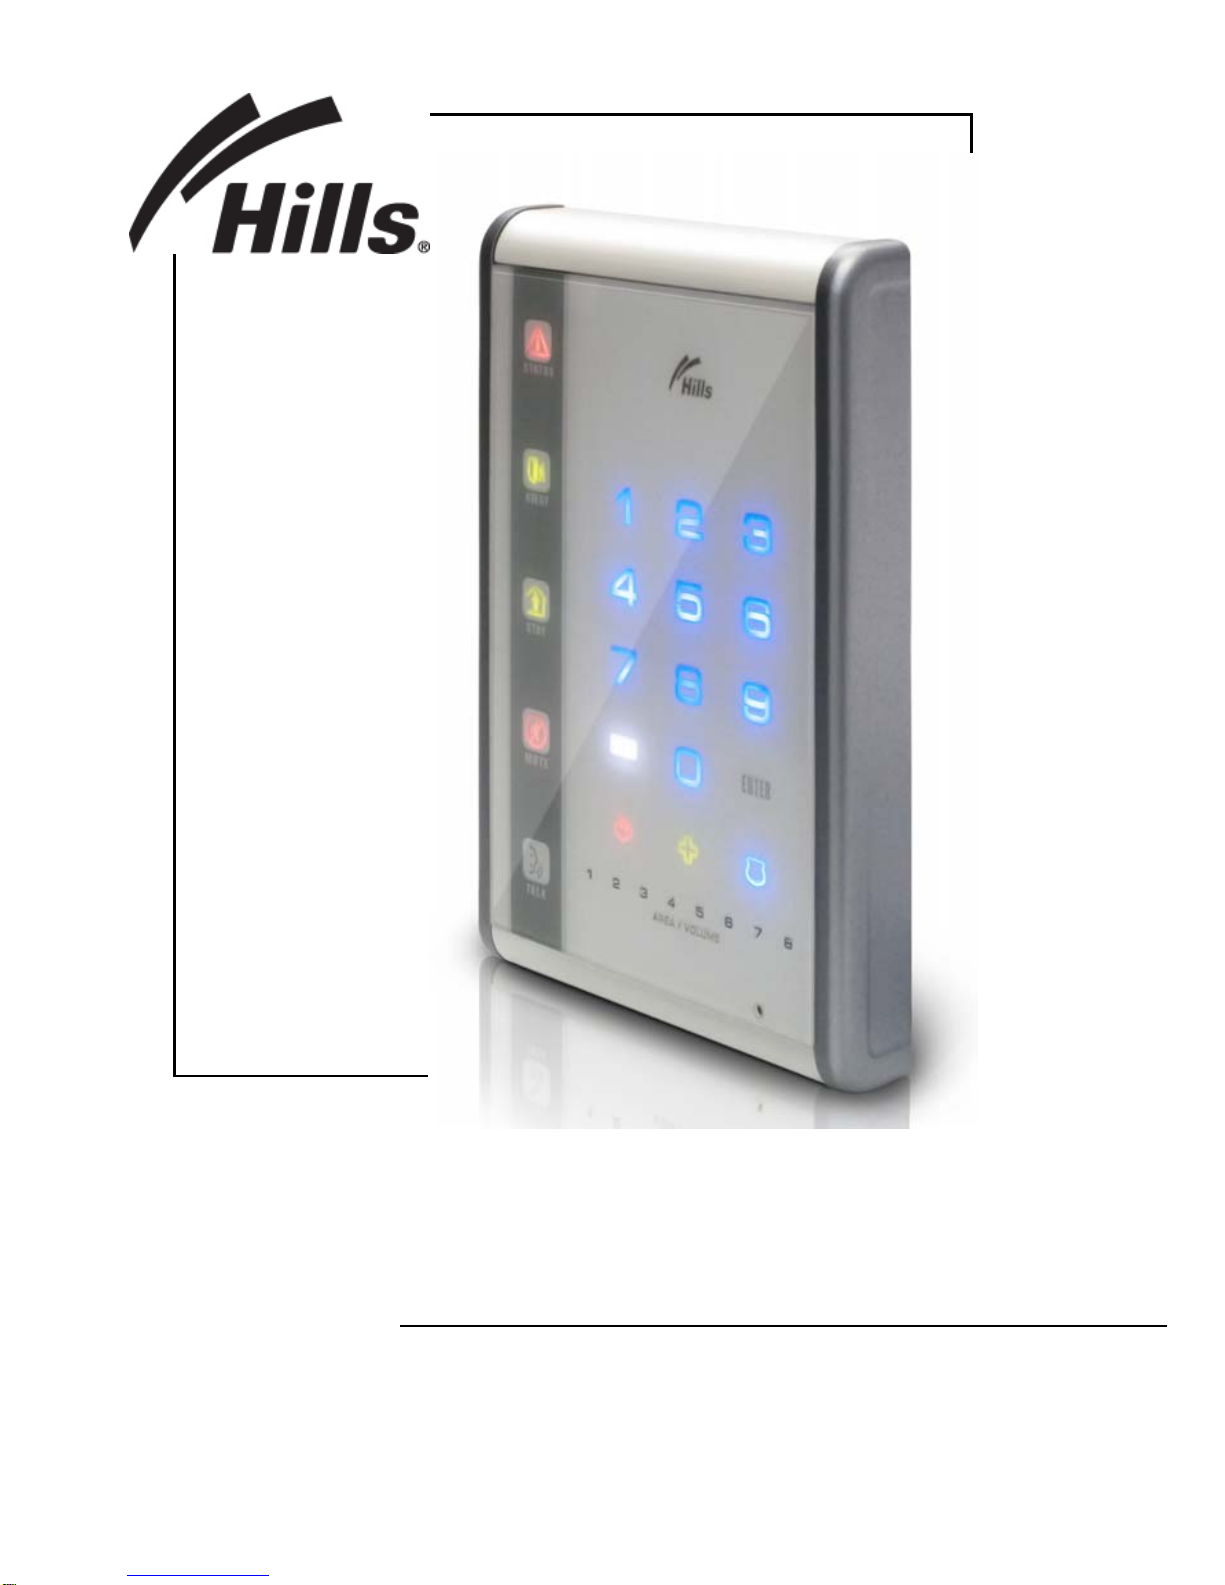
Your VoiceNav is an intuitive interface for users of your security system. Utilising the latest in touch
screen technology, and coupled with a powerful onboard microprocessor, and inbuilt phrase library,
your Hills VoiceNav delivers the most user friendly experience for controlling a security system
available today. Its voice prompts enabling even the newest users to utilise the full power of your
security system, without the need of constantly referencing back to this instruction booklet. You can
also customise your VoiceNav with personalised recordings of user names, zone names, area names,
and even room names when you utilise the onboard intercom functionality. How about leaving a
message for the next person entering the premises, or a reminder message when exiting the
premises, its easy.
We trust that you will enjoy your VoiceNav, and we would like to thank you for choosing a Hills
Security System.
All users of your security system should read and follow the instructions and precautions in this
manual before operating your security system. Failure to do so could result in the security system not
working properly.
This manual should be kept in an accessible location for the life of the security system. If you do not
understand any part of this manual, you should ask your service provider for further clarification. Read
the entire manual and if possible, practice on the VoiceNav whilst your security provider is on site.
Your security system can be turned on (armed) and off (disarmed) by entering a 4 or 6 digit code on
the touch screen of your the VoiceNav.
You may be able to turn on (arm) your security system by simply touching the [Away] key. Check with
your security provider to see if this feature has been enabled.
The system must always be turned off (disarmed) using a 4 or 6 digit code.
Do not apply excessive force on the touch screen as this could cause damage to the unit. Touch the
screen gently, using the flat part of your finger to activate the keys.
Your VoiceNav is equipped with 5 indicator icons, 8 area led’s, 3 emergency keys, a [MENU] key, and
an [ENTER] key, along with the normal numeric digits 0 – 9. All these indicators are aided by voice
prompts on how to use the system and specific information relating to the status of your security
system is also announced. Understanding what the lights mean, and listening to the instructions
announced will help you to easily operate your security system.
Keep in mind, the level of security you will obtain with this system relates specifically with two major
factors:
The quantity, quality, and placement of security devices attached to this security system.
The knowledge you have of the security system and how that knowledge is utilized in a
weekly test of the complete system.
WARNINGS
This product is to be installed by qualified SERVICE PERSONNEL only
The equipment should only be operated with an approved power adapter with insulated live pins.
CAUTION – RISK OF EXPLOSION IF BATTERY IS REPLACED BY AN INCORRECT
TYPE. DISPOSE OF BATTERIES ACCORDING TO THE INSTRUCTIONS. CONTACT YOUR
SERVICE PROVIDER FOR REPLACEMENT BATTERIES.
When installed as directed, this product conforms to the standards set by Standards
Australia on behalf of the Australian Communications Authority (ACA)
007573417
VoiceNav User Manual Hills Industries® V0.3
2

Line drawing of VoiceNav
VoiceNav User Manual Hills Industries® V0.3
3

Glossary of terms
Authority Level: The level of access that is assigned to a users pin code.
Arm: To turn your security system on.
Area: A group of zones within the security system configured with individual
control. Users of the security system are assigned areas that they are
allowed to control.
Away Mode: To turn your security system on when you are leaving the premises.
Central Station: Location where alarm signals are sent during an alarm report.
Chime Mode: An operational mode that will emit a beep at the code pad when specific
zones are activated.
Chime Group: All the zones that will activate chime, when in chime mode.
Communicator: The device that communicates signals generated from your security
system to your central station.
Duress Code: A predetermined user pin code that will arm / disarm the security system
whilst sending a special code to the central station that indicates the user
is entering / leaving the premises under duress. Only applicable on
monitored systems.
Disarm: To turn your security system off.
Exit delay: The time allowed to exit the premises after the security system is armed.
Entry delay: The time allowed to disarm your security system after the first detection
device has been activated.
Forced Arming:
An option that allows certain zones to be open when arming. A security
system that is ready to be “force armed” will flash the corresponding area
light green. Generally used on detection devices that cover the VoiceNav
(motion sensors, front door reed switches), allowing the user to arm the
security system without the need to wait for those zones to be secure.
Master Code: A four (4) or six (6) digit pin code that is used by a user to arm or disarm
the security system. Its main feature is the ability to create, alter and
delete user pin codes. Can also be used as a function code for all
features. NOTE: Your security system may have either four (4) digit
pin codes or six (6) digit pin codes, but not a mixture of both.
Monitored: A security system that is configured to send all alarm signals to a central
station.
Outputs: Where external devices are wired. These devices can be controlled from
your security system.
Perimeter: The outer edge of the protected area. IE: Door and window sensors
Quick Arm: An option that allows you to turn on (ARM) the security system by
touching the [AWAY].
Self Monitored: A security system that is programmed to send alarm signals to a private
phone number. Not all features are available with a self monitored system.
Stay Mode: To turn your security system on when you are staying in the premises,
automatically bypassing pre programmed zones and arming others.
Utilised for arming just the perimeter of the premises.
VoiceNav User Manual Hills Industries® V0.3
4

Glossar
y
of terms - Continued
Service Provider: The installation / maintenance company looking after your security
system.
User Code:
VoiceNav User Manual Hills Industries® V0.3
5
A four (4) or six (6) digit pin code that is used by a user to arm or disarm
the security system. Also can be used as a function code for certain
features. NOTE: A system may have either four (4) digit pin codes or
six (6) digit pin codes, but not a mixture of both.
Zone: Location on your security system where a detection device is connected.
Legend
There is vital visual information for you to review
1
;
An instruction will be announced, it is also written in italics.
This is what you require before moving to the next step
LImportant, must read.
"
Additional Information
[2] Touch the number shown on the numeric section of the touch screen
Start your recording
[AWAY] Touch the key shown on the touch screen
[5]-[ENTER]
Touch the number shown on the numeric section of the touch screen, then touch
the enter key.
[?]-[?]-[?]-[?] Enter the required code on the numeric section of the touch screen
Exit the premises
Area Name The recorded area name will be heard if recorded in menu - 8
Zone Name
The recorded zone name will be heard if recorded in menu - 8
User Name The recorded user name will be heard if recorded in menu - 8
Room Name The recorded room name will be heard if recorded in menu - 8
The recorded output name will be heard if recorded in menu - 8
Output Name
WARRANTY
Hills Industries guarantees this product against defective parts and workmanship for twenty-four (24)
months from the date of purchase. If any defect appears during the warranty period return it to the
place of purchase. Hills Industries assumes no liability for consequential or indirect damage, and
accepts no responsibility for repairing damage to the product caused by misuse, careless handling, o
r
where repairs have been made by others.
No other guarantee, written or verbal, is authorised by Hills Industries.

Indicators, Icons and Lights
Green System is ready.
Orange System message present.
Red (Flashing) One or more zones are in alarm condition.
Red (Steady) System trouble message present.
To hear system messages, touching the status key. IE: If the status icon is lit red
(steady), there is a system fault present, this fault will now be announced.
Green Area / Areas are all disarmed from the away mode.
Red Area / Areas are all armed the away mode.
*If both the away and stay keys are off, this VoiceNav has multi area control
Green Area / Areas are all disarmed from the stay mode.
Orange Area / Areas are all armed in the stay mode.
*If both the stay and away keys are off, this VoiceNav has multi area control
Red Mute menu is accessible.
Off Mute menu is not accessible..
Touch the mute icon to access the mute menu.
Touching mute during a system message announcement will cease the message
playing.
Red Intercom functionality enabled.
Also indicates ready to record voice message in main menu 8,
voice message recording.
Green (flashing) Copying recordings from one VoiceNav to another.
*Intercom functionality requires additional cables and programming.
MENU Access main menu options.
ENTER Enters selected option, use when prompted
Green Area ready, all zones are secure
Green Flashing Area ready, force arm zones are not secure
Red Area armed in the away mode
Red Flashing Area in alarm
Red Rapid Flashing Connected room station number
Orange Area armed in the stay mode
Area LEDs
1 - 8
Off Area not ready, zone / zones are not secure
VoiceNav User Manual Hills Industries® V0.3
6

A
way Arming
A
way arming is used when you are leaving and you want the premises protected in your absence.
If your service provider has enabled the “forced arming” feature, you will be able to arm your security
system with pre-programmed zones not secure. IE: the front door may be left open and the status
light would still show green, allowing you to arm your security system. Your VoiceNav will announce
all zones that are not secure when armed.
You may arm your system by entering your 4 or 6 digit user pin code, or if your service provider has
enabled the quick arm feature, you can simply touch the Away key.
Step How to: Arm your system in the “Away Mode”
In this example we will be using the “quick arm” feature
VoiceNav User Manual Hills Industries® V0.3
7
1.
Close all protected doors and windows, ensure everyone has left the premises.
2. 1Ensure the status light is lit steady green.
Green Your system is ready to be armed.
Orange System message present, touch [STATUS ] to review.
Red System fault message present, touch [STATUS ] to review.
Your area light should also be lit solid green indicating all zones are secure, or
flashing green indicating all zones are secure apart from forced armed zones.
[AWAY]
3.
Touch the [AWAY] key to arm your system in the away mode. Alternatively
you can enter your 4 or 6 digit user pin code to arm your security system in
the away mode.
LIf zones are not secure, your system will not arm.
You must secure all zones prior to arming.
4. 1
The away Icon will now be lit steady red, indicating the area is armed in the
away mode.
;
Area name or “Area ?” is on in the away mode.
;
Exit beeps will sound for the duration of the exit delay time, speeding up
during the final 10 seconds of exit time.
5.
Vacate the premises immediately

Stay Arming
VoiceNav User Manual Hills Industries® V0.3
8
Stay arming is used when the user is staying in the premises and they wish to arm certain zones
and bypass others IE: Arming the perimeter of the premises, whilst automatically bypassing all the
internal movement sensors. If an active zone is alarmed whilst your security system is armed in the
stay mode, it will initiate an entry delay warning tone at your VoiceNav, your sirens will sound at the
end of this warning. This delay warning time is predetermined by your service provider at the time o
f
installation.
Step How to: Arm your system in the “Stay Mode”
1. Close all protected windows and doors. If movement sensors are included in your “stay mode”
have everyone move out of those rooms.
2. 1Ensure the status light is lit green
Green Your system is ready to be armed
System message present, touch [STATUS] to review.
Orange
Red System fault message present, touch [STATUS] to review.
3.
[STAY] Touch the [STAY] key to arm your system in the stay mode.
1The stay Icon will now be lit steady orange. Indicating an armed stay mode
condition.
;Area name or Area ? is on in the stay mode
L
Your security system is now armed in the stay mode. This is generally used to
protect the perimeter of the premises whilst still being occupied .
LIf zones are not secure, your security system will not arm.
You must secure all zones prior to arming.
Any zones bypassed prior to arming will be excluded from this arming cycle. A trip on any of
theses bypassed zones will be ignored.

Disarming
Make your way to the VoiceNav through one of the designated entry / exit doors. When you are
detected entering, your VoiceNav will repeat a warning message for the duration of the entry dela
y
until a valid pin code is entered. Your sirens and communicator will activate at the end of the entr
y
delay time if a valid pin code is not entered. Away and Stay modes can be configured with different
entry delay times, ask your service provider for further details.
VoiceNav User Manual Hills Industries® V0.3
9
Step How to: Disarm your system from the “Away” or “Stay” Modes
1.
Enter the premises through your designated entry doors. If your security system has been
designed to detect your presence when making your way to the VoiceNav, a warning message
reminding you to turn off your security system will now commence. If your presence is not
detected, no warning message is announced, simply enter your 4 or 6 digit user pin code at
your VoiceNav.
2.
1If the status key and area light are flashing red, your security system has been
activated during your absence. Leave the building immediately and seek
assistance.
;Enter your code to turn off… enter your code to turn off… enter your code to
turn off… enter your code to turn off… enter your code to turn off …
3.
[?]-[?]-[?]-[?] Enter your 4 or 6 digit user pin code to disarm from either the away or stay
arming modes.
1
If your security system was armed in the away mode, the away Icon key will
now be lit steady green indicating a disarmed condition
If your security system was armed in the stay mode, the stay Icon key will now
be lit steady green indicating a disarmed condition.
;Area Name or Area Number is off

Multi Area Arming
–
“Away mode”- All Areas
A
reas, also known as partitions, are groups of zones that can be controlled independently.
If your security system is configured with multiple areas, the individual area condition is indicated at
the bottom of your VoiceNav with the area numbers 1 to 8.
The authorization level assigned to user pin codes governs which areas that user can control, so if a
user has limited area control, when they enter their pin code, only those areas assigned to their pin
code will be selectable. To then have trouble free multi area control, listen and follow all the voice
prompts.
Step How to: Arm all areas in a multi area system in the “Away Mode”
1. Close all protected doors and windows, ensure everyone has left the premises.
VoiceNav User Manual Hills Industries® V0.3
10
1Ensure the status light is lit steady green.
Green Your system is ready to be armed
Orange System message present, touch [STATUS] to review.
Red System fault message present, touch [STATUS] to review.
Your area lights should also be lit solid green indicating all zones are secure, or
flashing green indicating all zones are secure apart from a forced armed zone.
2. [?]-[?]-[?]-[?] Enter your 4 or 6 digit user pin code
;To control an individual area touch the area number, to set all areas in the away
mode touch away, to set all areas in the stay mode touch stay
1All the areas to which you have control are now displayed on the numeric touch
screen.
3. [AWAY] Touch [AWAY] to arm all areas in the away mode (only those areas to which
you have area control).
;
All areas are on in the away mode, to control an individual area touch the area
number, to set all areas in the stay mode touch stay, to turn off all areas touch
zero.
4. [MENU] To exit
1
The area lights at the bottom of your VoiceNav (only those areas to which you
have area control) will now be lit solid red, indicating away arming for those
areas. Once all areas within the security system are armed, the away key will be
lit red.
;Exit beeps will sound for the duration of the exit delay time, speeding up during
the final 10 seconds.
5. Vacate the premises immediately.
LIf zones are not secure within any of the areas you are attempting to arm,
those areas will not arm. You must secure these zones prior to arming.

Multi Area Arming
–
“Away Mode”- Single Areas
Independent area control adds an enormous amount of flexibility to your security system and you
r
VoiceNav makes it simple to control. You may wish to arm one area in the away mode and disarm
another area, whilst arming a third in the stay mode. Just follow the voice prompts and make you
r
selection. The following example shows two areas being armed in the away mode. However if you
want area one armed in the away mode, and area 2 armed in the stay mode, simply touch the stay
key at step 6 instead of the away key, following the rest of the steps to exit.
VoiceNav User Manual Hills Industries® V0.3
11
Step How to: Arm area 1 and area 2 only, in a multi area system.
1. Close all protected windows and doors. Ensure everyone has left the areas you wish to arm.
1Ensure the area lights of the areas you wish to arm are lit solid green indicating
all zones in those areas are secure, or flashing green indicating all zones are
secure apart from forced armed zones.
2. [?]-[?]-[?]-[?] Enter your 4 or 6 digit user pin code
;To control an individual area touch the area number, to set all areas in the
away mode touch away, to set all areas in the stay mode touch stay
1All the areas to which you have control are now displayed on the numeric
touch screen.
3. [1] Touch [1] to select area 1
;Area name or Area one, is ready, touch away to set in the away mode, touch
stay to set in the stay mode, touch menu to go back.
4. [AWAY] Arms area one in the away mode
;Area name or Area one, is on in the away mode, to control an individual area
touch the area number, to set all areas in the away mode touch away, to set all
areas in the stay mode touch stay, to turn off all areas touch zero.
5. [2] Touch [2] to select area 2
;Area name or Area two, is ready, touch away to set in the away mode, touch
stay to set in the stay mode, touch menu to go back.
6. [AWAY] Arms area two in the away mode
;Area name or Area two, is on in the away mode, to control an individual area
touch the area number, to set all areas in the away mode touch away, to set all
areas in the stay mode touch stay, to turn off all areas touch zero.
7. [MENU] To exit
1Area led’s 1 & 2 will be lit steady red. Indicating an away armed condition
;Exit beeps will sound for the duration of the exit delay time, speeding up during
the final 10 seconds.
8. Vacate the premises immediately.
L
If zones are not secure within any of the areas you are attempting to
arm, those areas will not arm. You must secure these zones prior to
arming.
Not all security systems are capable of multiple area control, and some sites do not require
multiple areas, ask your service provider for further information.

Multi Area Disarming
–
“All Areas”
Make your way to the VoiceNav through one of the designated entry / exit doors. When you are
detected entering, your VoiceNav will repeat a warning message for the duration of the entry delay
until a valid pin code is entered. Your sirens and communicator will activate at the end of the entry
delay time if a valid pin code is not entered. Away and Stay modes can be configured with different
entry delay times, ask your service provider for further details.
Note: Only the area where the delay entry time is running will be disarmed, all other armed areas will
remain armed.
VoiceNav User Manual Hills Industries® V0.3
12
Step How to: Disarm all areas in a multi area system
1.
Enter the premises through your designated entry door. If your security system has been
designed to detect your presence when making your way to the VoiceNav, a warning
message reminding you to turn off your security system will now commence. If your
presence is not detected, no warning message is announced, simply enter your 4 or 6 digit
user pin code at your VoiceNav.
1If the status key and area light / lights are flashing red, your security system
was activated during your absence. Leave the building immediately and seek
assistance.
;Enter your code to turn off… enter your code to turn off… enter your code to
turn off… enter your code to turn off… enter your code to turn off …
[?]-[?]-[?]-[?]Enter your 4 or 6 digit user pin code
2.
LNOTE: Only the area where the delay entry time is running will be
disarmed, all other armed areas will remain armed
1Area lights will stop being lit red, and will either now be lit solid green
indicating all zones in that area are secure, a flashing green area light
indicates all zones in that area are secure apart from forced armed zones.
Extinguished area lights indicate zones in that area are not secure.
;Area Name or Area Number is off3.
LThe area that you have entered into is now disarmed, ONLY proceed
with steps 4 and 5 if you wish to disarm all other areas
[?]-[?]-[?]-[?] Enter your 4 or 6 digit user pin code
4.
;To control an individual area touch the area number, to set all areas in the
away mode touch away, to set all areas in the stay mode touch stay, to turn
off all areas touch zero.
[0]To turn off all areas5.
;All areas are off, to control an individual area touch the area number, to set all
areas in the away mode touch away, to set all areas in the stay mode touch
stay.

Intercom Room Calling
Up to eight VoiceNavs can be configured to deliver very powerful intercom functionality, with global
calling or room-to-room connectivity. When VoiceNavs are used as intercoms, they are referred to as
room stations. Further customization of individual room stations is done within the mute menu o
f
individual room stations, which is discussed in detail on page 39 and 40.
VoiceNav User Manual Hills Industries® V0.3
13
Step How to: Call an individual room station.
In this example the receiving room station has Voice annunciation and Automatic
room answering enabled.
[TALK] Touch [TALK] to start intercom session.
1. ;Touch zero to call or monitor all rooms, touch room number to call or monitor
individual rooms, touch menu to exit
1The numeric numbers on the touch screen will display the room numbers of the
rooms that you have the ability to call. If you are unsure which room is which, touch
the status key to hear room names, then make your selection.
2. [?]Enter the room number you wish to call (Touch [ 0] to call all stations)
;Calling Room name or Room number
Receiving room station will hear ;Call from Room name or Room number
You are now connected with the room station you have called
3. [TALK] Touch and hold the talk key to speak, release to listen
[MUTE] Touch mute to exit
;Call cancelled
Receiving room station will hear ;
The calling room station can increase microphone sensitivity (level) by touching the mute key
once connected to the called room station and making a selection from 1 – 8.
Call cancelled
VoiceNav User Manual Hills Industries® V0.3
14
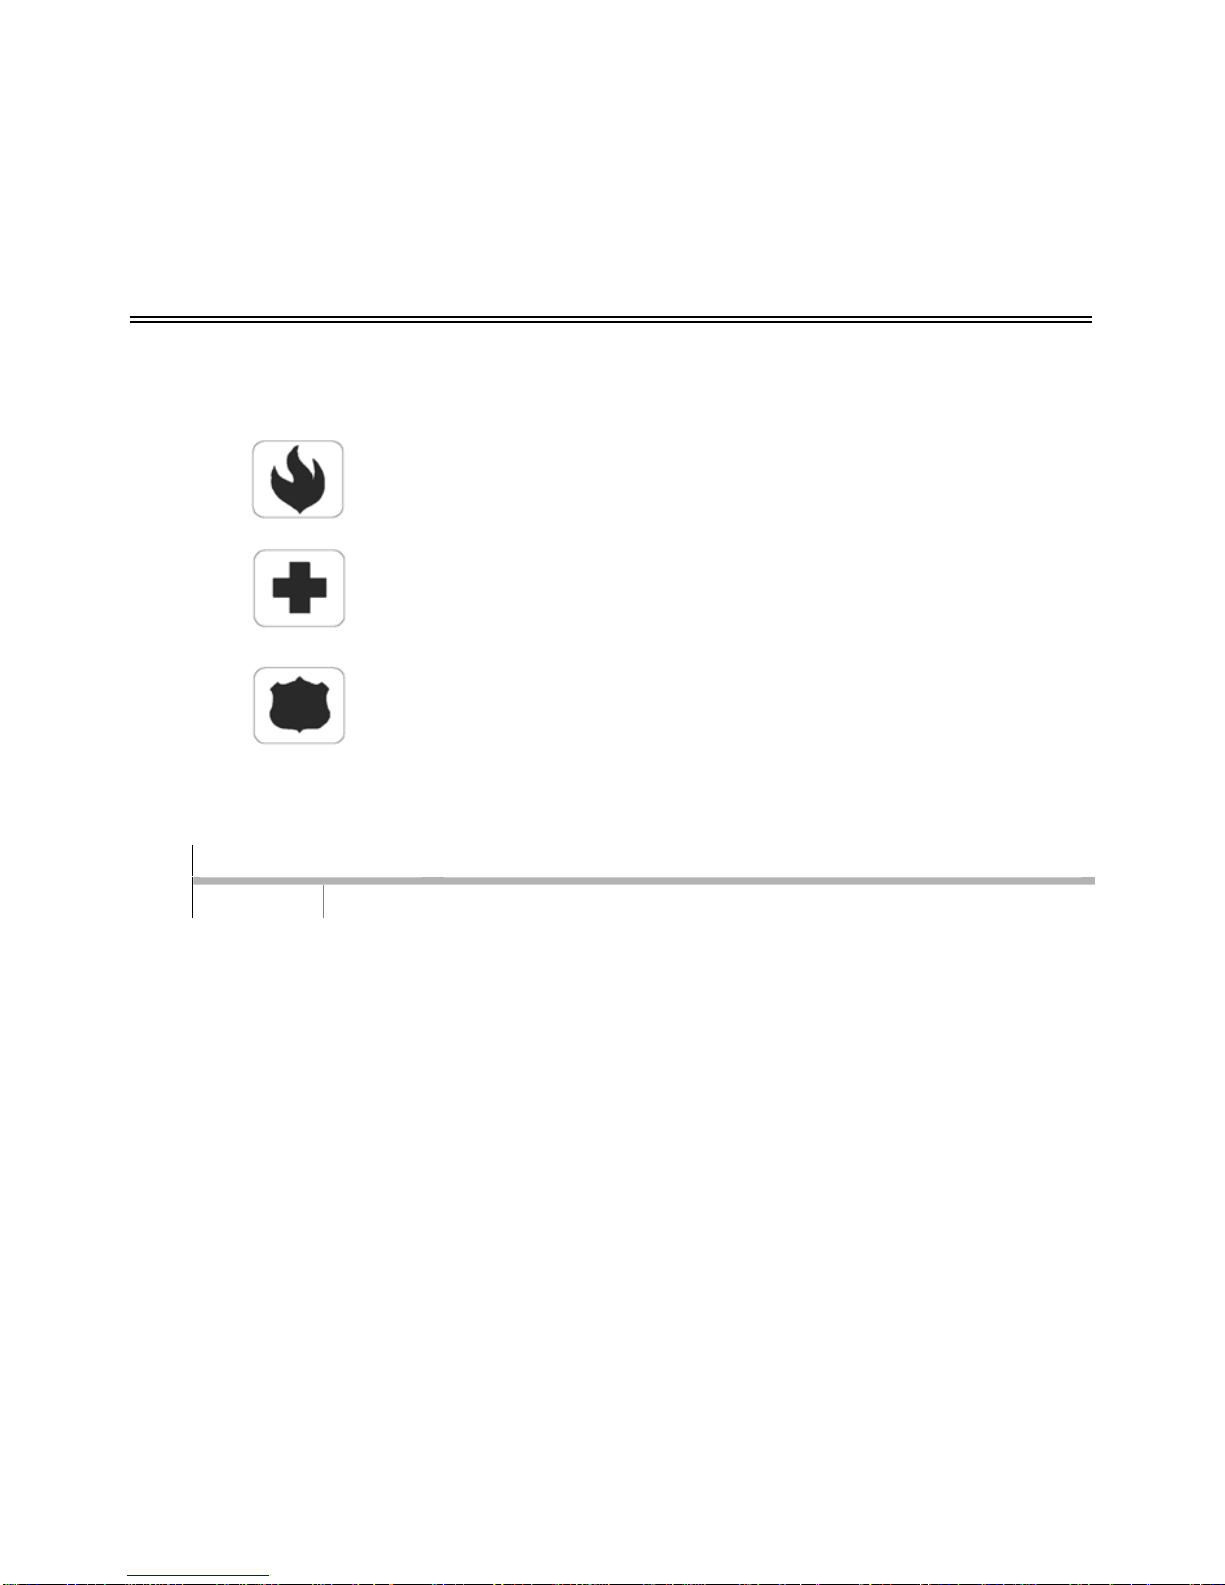
Three (3) emergency icons are available to be programmed into your VoiceNav to provide support in
the areas of personal safety: Medical, Police (duress) and Fire alarm. You must touch these keys
for two (2) seconds to activate these functions. You should only press these keys in an emergency
situation that requires a response by a central station.
Check with your service provider to find out if your security system has these function keys enabled
and clarify what responses, if any, will be provided if upon activation.
Emergency Activation Keys
Touch and hold for 2 seconds to activate the fire alarm.
;
Code pad fire alarm
Touch and hold for 2 seconds to activate the medical alarm.
;
Code pad medical alarm
Touch and hold for 2 seconds to activate the panic alarm.
;
Code pad panic alarm
Step How to: Cancel an emergency activation
1. [?]-[?]-[?]-[?]Enter your 4 or 6 digit user pin code
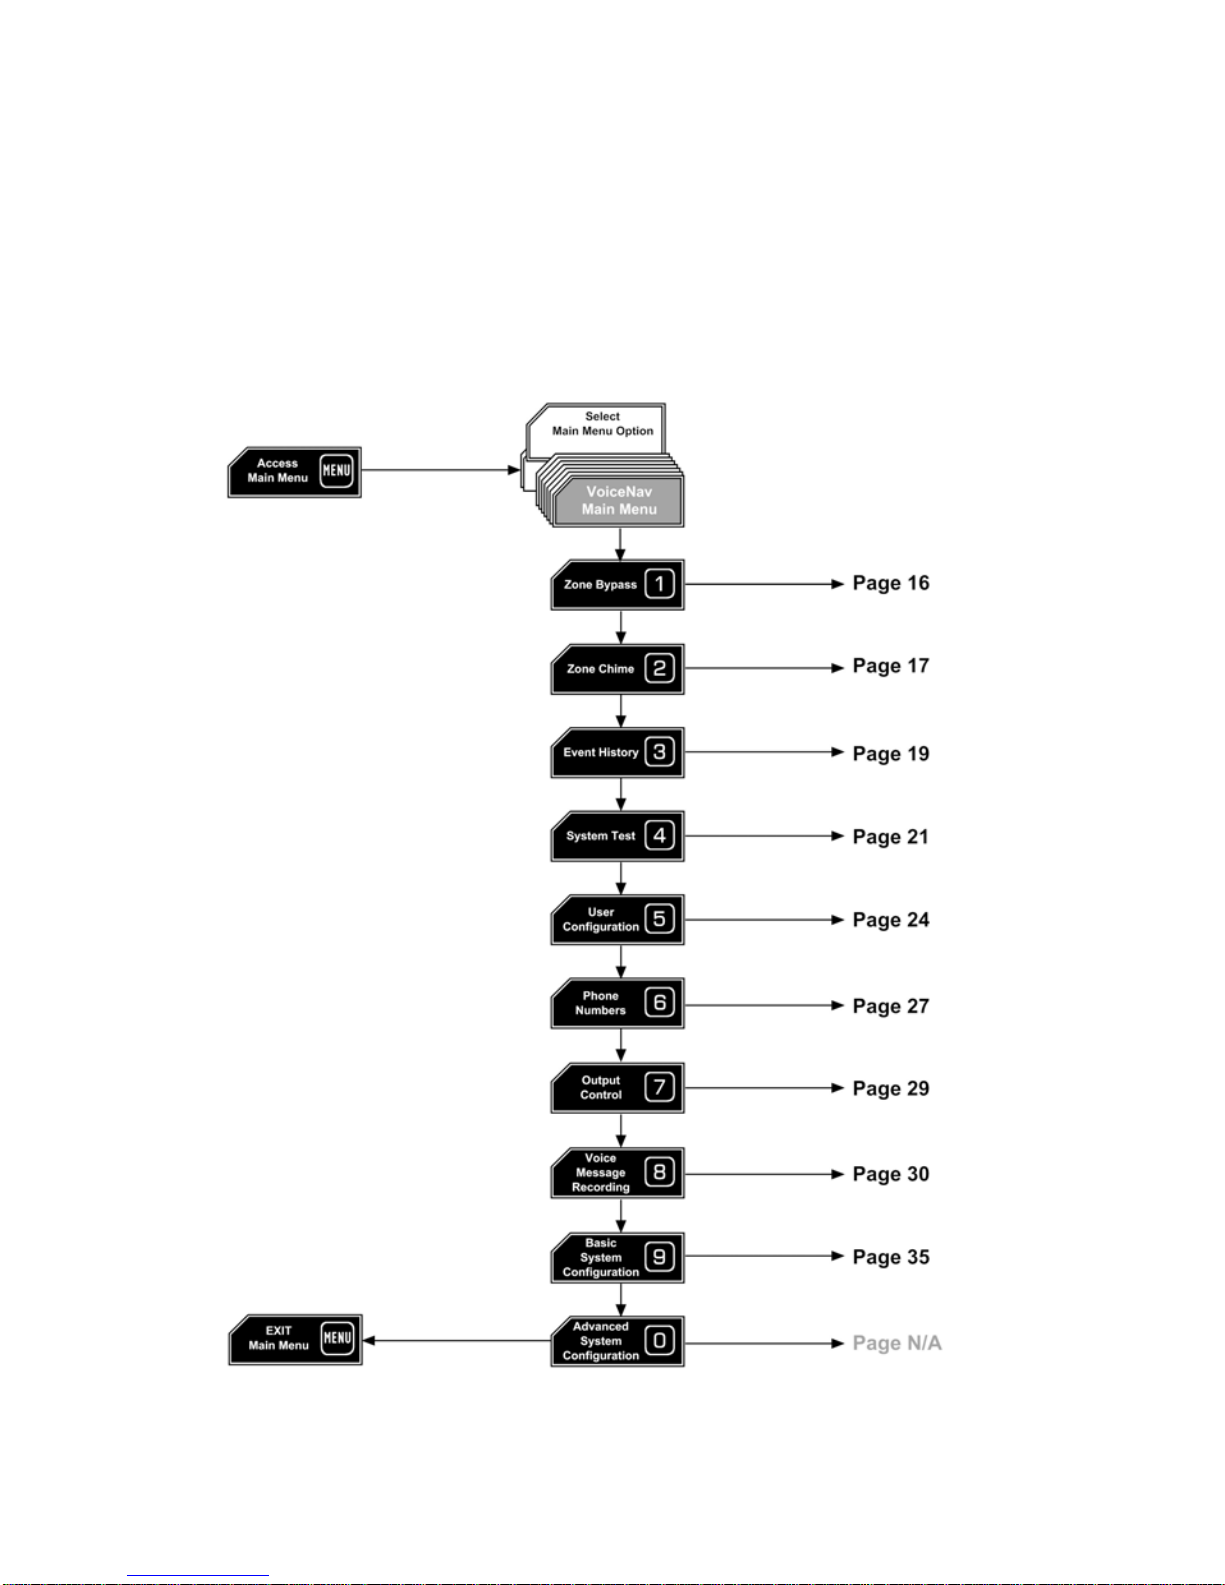
Touching the [MENU] key access the VoiceNavs main menu , here you will find the 10 main features
used for customisation and setup of your security system. With its inbuilt intuitive voice prompts
aiding you through all menus, using your VoiceNav is enjoyable and easy. From the moment you
touch the menu key, your VoiceNav immediately starts to instruct you on what to do next, simpl
y
select the option you wish to access and follow the voice prompts.
Understanding the Main Menu Structure
VoiceNav User Manual Hills Industries® V0.3
15

To Control Zone Bypass MENU
The bypass menu is used to bypass (isolate) selected zones in your security system.
A
bypassed zone is not capable of activating an alarm, as it is temporarily removed
from your system. This option is commonly used to bypass zones that require
service, or zones that you wish to add to your “stay mode” like an additional guests
bedroom. Whilst still offering security on the remaining zones, bypassing lowers you
r
level of security and caution should be exercised. All isolated zones are reset and
cleared from memory when your security system is next armed / disarmed cycle.
Your security system must be disarmed (turned off) before being able to bypass
zones. After bypassing your selected zones, your security system must be armed
(turned On) in either the away or stay mode to secure the remaining zones.
1
How to: Bypass a single zone.
VoiceNav User Manual Hills Industries® V0.3
16
Step Example: How to bypass zone 5
1. [MENU]-[1] Selects main menu - Option 1, To control zone bypass
;To control zone bypass, select a zone number followed by enter, touch enter
for zone list, touch status for bypassed zone list, touch menu to exit.
[?]-[?]-[?]-[?] Enter your 4 or 6 digit user pin code. OPTIONAL, programmable feature.
2. [5]-[ENTER] Selects zone 5.
;Zone name or Zone 5 is un-bypassed touch zero to bypass, touch enter for
next zone, select a zone number to bypass followed by enter, touch status for
bypassed zone list, touch menu to exit.
3. [0] Toggles zone 5 from un-bypassed to bypassed state (Or if already bypassed,
from bypassed to un-bypassed)
;Zone name or Zone 5 is bypassed, touch zero to un-bypass, touch enter for
next zone, select a zone number to bypass followed by enter, touch status for
bypassed zone list, touch menu to exit.
4. [MENU] Exits back to main menu (“Touch 1 to control zone bypass…etc……etc……)
[MENU] Exits from main menu
• If your zone number is higher than single digit, enter the 1, 2 or 3 digits indicating the zone
you wish to select followed by enter at step 2. IE: Touch [1]-[2]-[8] [ENTER] for zone 128.
• Touch status to check bypassed zones, or simply arm your security system and bypassed
zones will be announced automaticall
y
.

To Control Zone Chime MENU
VoiceNav User Manual Hills Industries® V0.3
17
You can programme individual zones to “beep” at the VoiceNav when tripped, this is
called Chime. Chime mode must be set to on in menu option 2 for this feature to
work. Chime mode does not trigger any alarms, and is only used as a low level alert
such as a customer entry door. You can add and delete zones from the “chime
group” offering a very flexible chime mode feature. The zones you have selected to
be in the “chime group” stay in memory and are not cleared when the security system
is armed and disarmed. 2
How to: Add a zone to the chime group
Step Example: Adding zone 4 chime group
1. [MENU]-[2] Selects main menu - Option 2, To Control Zone Chime
;Chime mode is Off, touch zero to turn On, to control an individual chime zone
select a zone number followed by enter, touch status for chime zone list, touch
menu to exit.
2. [4]-[ENTER] Selects zone 4.
;Zone name or zone 4, chime is unset, touch zero to set chime, touch enter
for next zone, select a zone number to set chime followed by enter, touch
status for chime zone list, touch menu to exit.
3. [0] Sets chime to this zone and adds the zone to the chime group
;Zone name or zone 4, chime is set, touch zero to unset chime, touch enter
for next zone, select a zone number to set chime followed by enter, touch
status for chime zone list, touch menu to exit.
4. [MENU] Moves back to main menu (“Touch 1 to control zone bypass…etc……etc……)
5. [MENU] Exits from main menu
Your security system must be disarmed (turned off) before enabling the
chime feature.
If your zone number is higher than single digit, enter the 1, 2 or 3 digits indicating the zone
you wish to select followed by enter at step 2. IE: Touch [1]-[2]-[8] [ENTER] for zone 128.

To Control Zone Chime - Continued
VoiceNav User Manual Hills Industries® V0.3
18
How to: Turn on chime mode.
Step Example: Turning on “chime mode”
1. [MENU]-[2]
Selects main menu - Option 2, To Control Zone Chime
;
Chime mode is Off, touch zero to turn On, to control an individual chime zone
select a zone number followed by enter, touch status for chime zone list,
touch menu to exit.
2. [0] Turns on chime mode
;Chime mode is On, touch zero to turn Off, to control an individual chime zone
select a zone number followed by enter, touch status for chime zone list,
touch menu to exit.
3. [MENU] Moves back to main menu (“Touch 1 to control zone bypass…etc……etc……)
4. [MENU] Exits from main menu

VoiceNav User Manual Hills Industries® V0.3
19
The Event History menu is used to listen to the last 185 events that occurred in you
r
security system. These events are held within your security system, and include events
such as, arming, disarming, system faults and alarmed zones. All events are time date
stamped so ensure your clock is set correctly in menu 9.
A
larm memory is a quick recall of the last zone(s) that caused your security system to
go into alarm condition.
System Event Histor
y
MENU
3
How to: View alarm memory.
Step Example: To review the zone / zones that caused the last alarm condition
1. MENU]-[3] Selects main menu - Option 3, Event History
;Enter your code, touch menu to exit
2. [?]-[?]-[?]-[?] Enter your 4 or 6 digit Master user pin code
;Touch one for last alarm memory, touch two for all event history, touch menu
to exit.
3. [1] To reviews last alarm memory
4. ;Alarm memory Zone name or zone ?, touch status to repeat, touch menu to
go back.
[MENU] Moves back to main menu (“Touch 1 to control zone bypass…etc……etc……)
5. [MENU] Exits from main menu
To simplify reviewing of alarm memory or system event history, first record user names, zone
names, outputs and area names in menu 8 – Recordings. Your VoiceNav will now announce
all these events by name.
Other manuals for VoiceNav
3
Table of contents
Other Hills Security System manuals


Popular Security System manuals by other brands


DSC
DSC PTD1610-SCW Installation instructions and operators manual

Aeon Labs
Aeon Labs Aeotec Siren Gen5 ZW080 Installation and Specification

First Alert
First Alert FA1220C user manual

Talovahti
Talovahti 66A user manual

DSC
DSC WT5500 installation instructions

Texecom
Texecom Ricochet Impaq Contact-W instruction manual


