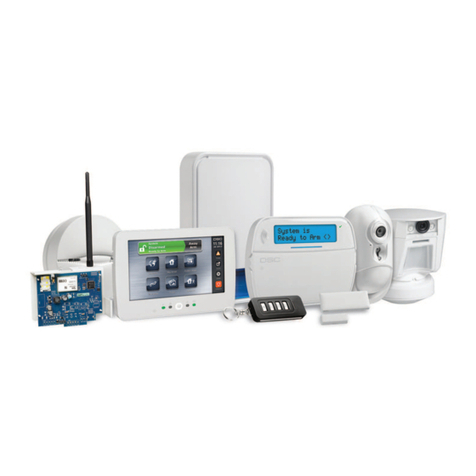
Hiltron XR400GSM Operating instructions

XR400GSM
XR800GSM
INSTALLATION GUIDE AND USE
security
Central 4/8 zones with dialing pad GSM
and incorporated detector

1.2 Technical Characteristics
security
32
security Introduction
1
1.1
!
.
!
!
!
!
!
!
!
!
!
!
!
!
!
!
!
!
!
!
!
!
!
!
!
!
!
!
!
Introduction
Features
Antitheft alarm, two delayed locations + two ready locations(6 for XR800GSM)+phone line
24h
4 cabled hubs (8 for XR800GSM) or singularly programmable radio hubs.
Module DXR2 included
Management of new radio controls DXR4 that display the correct connection/disconnection and
that warn the memory alarm.
Integrated console endowed with a backlit LCD and management of an additional console DX22
connected on bus RS485.
Infrared sensor DigiPyro with 3 rays, maximum range 5 mt in order to turn the backlit on
automatically on the display and usable keyboard as a detector and at the same time on the
delayed area number 1
Connection for the remote control command accessories type PXR, SK and KBC and output (V
and R) in order to inform about the status of the system with LED.
Output for the automatic activation of the external devices (Eg: Lights, Furnaces etc.) about
connection / disconnection of the system or on local command from the console o from the
remote control through phone call communication.
!Management of the new charger (AL35EN) with control and visualization of the voltage, of the
charge of the efficiency of the battery, of the voltage of power source and of the presence of the
network connection on the display of the console.
Two modalities of partialization of the system selectable from the console, from connectors, from a
remote controller or through remote connection GSM.
Possibility to use proximity sensors DX100/DX300 (maximum 4) in order to choose the modality of
partialization and for the related command.
New line of connection RS485 with protocol “DX bus” for the connection of the new peripheral
devices of the series DX.
Telephone dialer GSM with preregistered voice mail and SMS and customizable voice mail of 10
seconds, with GSM module Quad Band.
Sendable SMS with the status of the system report, identification of the area and warning about
the status of the power source.
Telephone alarm and warning about the status of the system, status of the areas, status of the
power source and alarm memory with pre-recorded voice.
Voice guidance menu in order to use it locally o through telephone connection for the command
and or query of the status of the central computer and of the areas and for the exclusion of the
areas
Voice responder with the activation of the guide for the menu.
` Listening environment during the phone connection.
Telephone notice for the prolonged absence of the power source of the network.
Indication of the telephone company and of intensity of the signal on the display.
Query of the phone credit left through the return of SMS.
Optional return of the received messages SMS.
Telephone book of 16 numbers
Case made of ABS with a battery compartment B12V7, 5A.
Degree of safety: 1
Environmental class: 2
Possibility to remove completely the front panel in order to access inside the case.
Board for connections on the base of the case with activation of maintenance mode (Keeps the
power source on the external siren with the removed front panel), for an easy wiring and an
ordered cabling ( EASY CONNECT SYSTEM) with a base for the connection of the radio module
DXR2.
Anti Tamper and anti opening Tamper.
Nominal supply voltage
Immediate Protection Zones
Outcoming services
Compartment for buffer battery
Duration programmable alarm
Programmable Time of the coming out
Programmable Time of the coming in
Security level
Outer container
Dimensions (L)
Dimensions(A)
Dimensions(P)
Degree of protection of the container
Tamper protection zones “24” h
Environmental class
Operating temperature
Delayed Protection Zones
Complying with the norm
Angle of coverage of the detector on the panel
Numbers in the phone book
Maximum coverage of the detector on the panel
Maximum output current of outcoming services
Maximum absorption (central computer only)
Total power supplied from the power source
Maximum absorption
230V~ ±5% 50Hz
2
Battery B 12V7.5 Ah
1
ABS
From 0 ÷ 60 sec
From 180 to 600 sec.
IP40
13,5Vcc ±10%
from 0 ÷ 60 sec
1 + Tamper
2
+5°C ÷ +40°C
2
CEI EN 50131-1
H: 85°; V: 60°
16
5mt
1A
65mA@230Vac
35W (2,6Ah a 13,5V)
160mA@230Vac
280mm
230mm
96mm
6
XR400GSM XR800GSM
XR400GSM - XR800GSM - Installation guide and use

securitysecurity Installation
2.3 Installation of the anti theft Tamper
• Drill a hole in correspondence with the placeholder on the base of the container and insert the plug
supplied.
• Tighten the screw leaving protrude from the mounting surface as required in order to keep the tamper
contact closed (6-10 mm).
• Place the plastic support in the hole on the base, fit the supplied spring on the pin button on the
tamper circuit, screw the tamper circuit on the two supports, inserting the protruding spring by the
button inside the plastic holder.
• Make sure that one the circuit is screwed the button must be pressed down, otherwise it will be
necessary unscrew the protruding screw from the mounting surface by a few turns so that protrudes
further.
• Engage the cable provided on the tamper card into the connector.
• The wires of the tamper must be connected in series to the protections of the devices on the line 24 h
of the connection card.
Screws +
dowels
PROTEC-ST
Two fixing screws
on the basis
PROTEC SERIES
Plastic
holder
5
2 Installation
2.1
!
!
!
!
!
!
General instructions
Do not install the central computer in extreme hot places or expose to bad weather.
In order to fix it safely and strongly it is appropriate to make sure to mount it on a flat surface.
Position the central computer at an easy access height in order to use the front panel.
Fix the bottom of the container on a flat and stable surface through the dowels, do 4 holes of 6 mm
corresponding to the angles of the container.
The connection cables of the external devices and the power cables can go in inside of the container
of the central computer through the hole that is in the middle of the bottom.
The connections must be carried out following the regulations CEI 79-3-2012 “Particular regulations
for the burglary systems, intruder, theft protection and anti-aggression.
2.2 Power supply
The power supply system is provided by the power supply - charger that is inside the central computer that
keeps in charge the battery constantly (B12V7, 5Ah).
WARNING!
The mains voltage 230V must be connected to the power supply/charger through two double
insulation conductors of 1,5 mm² coming from a switch (Eg. Switch magnetermic) used for the
central burglar exclusively. Put in order the two conductors inside the central computer, block them
through the supplied cable gland, possibly by means of clamps.
In order to respect the safety legislation you need to carry out and verify the connection to the earth
system, as shown in figure.
Power Gap
Power supply
230V~
50Hz
Red
White
Black
Battery 12V
Red
Black
+Rif
12V
220V
JX1
JX2
JX1
JX2
JX1
JX2
-
JX1x1 JX1x2
JX1x3 JX1x4
JX1x5 JX1x6
JX1x7 JX1x8
JX1x9
JX1x10
JX1x11 JX1x12
JX1x13 JX1x14
JX1x15 JX1x16
JX1x17 JX1x18
JX1x19 JX1x20
JX1x21 JX1x22
JX1x23 JX1x24
JX1x25 JX1x26
JX1x27 JX1x28
JX1x29 JX1x30
JX2x1 JX2x2
JX2x3 JX2x4
JX2x5 JX2x6
JX2x7 JX2x8
JX2x9
JX2x10
JX2x11 JX2x12
JX2x13 JX2x14
JX2x15 JX2x16
JX2x17 JX2x18
JX2x19 JX2x20
JX2x21 JX2x22
JX2x23 JX2x24
JX2x25 JX2x26
JX2x27 JX2x28
JX2x29 JX2x30
SIR +12v
Manutenzione
Centrale
SIR
GND
S.A
V
R
KEY
AB
-12V+
+INT GND 24H GND Z1 Z2 Z3 Z4 GND
Easy-Connect Board
CX1
Z8
Z5 Z6 Z7
Only XR800GSM
4
XR400GSM - XR800GSM - Installation guide and use

securitysecurity Installation
2.3 Installation of the anti theft Tamper
• Drill a hole in correspondence with the placeholder on the base of the container and insert the plug
supplied.
• Tighten the screw leaving protrude from the mounting surface as required in order to keep the tamper
contact closed (6-10 mm).
• Place the plastic support in the hole on the base, fit the supplied spring on the pin button on the
tamper circuit, screw the tamper circuit on the two supports, inserting the protruding spring by the
button inside the plastic holder.
• Make sure that one the circuit is screwed the button must be pressed down, otherwise it will be
necessary unscrew the protruding screw from the mounting surface by a few turns so that protrudes
further.
• Engage the cable provided on the tamper card into the connector.
• The wires of the tamper must be connected in series to the protections of the devices on the line 24 h
of the connection card.
Screws +
dowels
PROTEC-ST
Two fixing screws
on the basis
PROTEC SERIES
Plastic
holder
5
2 Installation
2.1
!
!
!
!
!
!
General instructions
Do not install the central computer in extreme hot places or expose to bad weather.
In order to fix it safely and strongly it is appropriate to make sure to mount it on a flat surface.
Position the central computer at an easy access height in order to use the front panel.
Fix the bottom of the container on a flat and stable surface through the dowels, do 4 holes of 6 mm
corresponding to the angles of the container.
The connection cables of the external devices and the power cables can go in inside of the container
of the central computer through the hole that is in the middle of the bottom.
The connections must be carried out following the regulations CEI 79-3-2012 “Particular regulations
for the burglary systems, intruder, theft protection and anti-aggression.
2.2 Power supply
The power supply system is provided by the power supply - charger that is inside the central computer that
keeps in charge the battery constantly (B12V7, 5Ah).
WARNING!
The mains voltage 230V must be connected to the power supply/charger through two double
insulation conductors of 1,5 mm² coming from a switch (Eg. Switch magnetermic) used for the
central burglar exclusively. Put in order the two conductors inside the central computer, block them
through the supplied cable gland, possibly by means of clamps.
In order to respect the safety legislation you need to carry out and verify the connection to the earth
system, as shown in figure.
Power Gap
Power supply
230V~
50Hz
Red
White
Black
Battery 12V
Red
Black
+Rif
12V
220V
JX1
JX2
JX1
JX2
JX1
JX2
-
JX1x1 JX1x2
JX1x3 JX1x4
JX1x5 JX1x6
JX1x7 JX1x8
JX1x9
JX1x10
JX1x11 JX1x12
JX1x13 JX1x14
JX1x15 JX1x16
JX1x17 JX1x18
JX1x19 JX1x20
JX1x21 JX1x22
JX1x23 JX1x24
JX1x25 JX1x26
JX1x27 JX1x28
JX1x29 JX1x30
JX2x1 JX2x2
JX2x3 JX2x4
JX2x5 JX2x6
JX2x7 JX2x8
JX2x9
JX2x10
JX2x11 JX2x12
JX2x13 JX2x14
JX2x15 JX2x16
JX2x17 JX2x18
JX2x19 JX2x20
JX2x21 JX2x22
JX2x23 JX2x24
JX2x25 JX2x26
JX2x27 JX2x28
JX2x29 JX2x30
SIR +12v
Manutenzione
Centrale
SIR
GND
S.A
V
R
KEY
AB
-12V+
+INT GND 24H GND Z1 Z2 Z3 Z4 GND
Easy-Connect Board
CX1
Z8
Z5 Z6 Z7
Only XR800GSM
4
XR400GSM - XR800GSM - Installation guide and use

2.4.1 Easy-Connect System
The new system Easy-Connect, used in the central computers XR400GSM and XR800GSM, it was
projected to ease the installation and the maintenance of the system.
The circuit of the central is divided into two boards:
A-The board of connections / fuses.
B-The board of the console and CPU.
It is possible to cable the cables inside the central computer by removing the front panel
console/CPU completely, so that it can be achieved more space. Once you finish cabling, it is possible to
reassemble the front panel and connect it through the flexible multipolar cable rapidly.
Through the connecting cable, it is possible to activate the maintenance mode: disconnect the cable
from the console panel/CPU and insert it into the connector maintenance on the links tab; the red LED on
the board lights. In this mode, with the power supply connected to the network and/or the battery inserted,
the polarization of the external siren is maintained and stops to alert.
NOTES. The red led on the connection board
indicates the maintenance method.
NORMAL CONNECTION
BAA
WARNING!
In order to let operate the system correctly, the battery must always be connected.
2.4 Description of the board EASY-CONNECT
Once the connections are completed, insert the two conductors equipped with faston type connector from the
feeder to the battery, respecting the polarity of connection.
Red= [+] positive battery / Black= [-] negative battery
After connecting the battery of the central computer and the siren, you will turn on the system
through the selector connected to the power. The LED of the network on the panel of the central computer
stops flashing and it remains with a steady light to indicate the presence of the network tension. In order
to respect the regulations and for safety, you need to carry out and verify the connection to the earth
system to all the devices that need it.
Cx1
1 (Fusibile F1)
2 (Fusibile F2)
Cx1 Connector for internal transceiver DXR2 for devices series XR.
Notes: The transmitter DXR2 must be inserted with the components facing downwards.
Fuse 1A for outcoming services/ external power supply.
Fuse 1A for outcoming sirens.
6 output for internal sirens
7 Connection GND for sirens.
8 Output for external self-powered siren.
3-4 Output for the connection to LED V and R on additional control equipment devices PX,
SK, KB.
5 Input for command pulse about input/output from additional devices PX, SK, KB.
9-10 Connection for the new bus RS485 type DX bus for new devices series DX.
11 Connection GND for external power source.
12 Connection +12 for external power supply
13 Output for command/enabling connection for external devices.
14 Connection GND.
15 Input line 24h logic NC/ balanced
16 Connection GND
17/20 Line for the input of zone 1 4 logic NC / balanced.
21 Connection GND.
22-25 Line for the input zone 5 8 logic NC / balanced, (XR800GSM only).
JX1
JX2
JX1
JX2
JX1
JX2
-
JX1x1 JX1x2
JX1x3 JX1x4
JX1x5 JX1x6
JX1x7 JX1x8
JX1x9
JX1x10
JX1x11 JX1x12
JX1x13 JX1x14
JX1x15 JX1x16
JX1x17 JX1x18
JX1x19 JX1x20
JX1x21 JX1x22
JX1x23 JX1x24
JX1x25 JX1x26
JX1x27 JX1x28
JX1x29 JX1x30
JX2x1 JX2x2
JX2x3 JX2x4
JX2x5 JX2x6
JX2x7 JX2x8
JX2x9
JX2x10
JX2x11 JX2x12
JX2x13 JX2x14
JX2x15 JX2x16
JX2x17 JX2x18
JX2x19 JX2x20
JX2x21 JX2x22
JX2x23 JX2x24
JX2x25 JX2x26
JX2x27 JX2x28
JX2x29 JX2x30
SIR +12v
Manutenzione
Centrale
SIR
GND
S.A
V
R
KEY
AB
-12V+
+INT GND 24H
1
2
3
4
5
6
7
8
9 10 11 12 13 14 15
16 17 18 19 20 21
GND Z1 Z2 Z3 Z4
CX1
GND
Z8
Z5 Z6 Z7
22 23 24 25
Installation
securitysecurity
76
CONNECTION
MAINTENANCE
MODALITY
XR400GSM - XR800GSM - Installation guide and use

2.4.1 Easy-Connect System
The new system Easy-Connect, used in the central computers XR400GSM and XR800GSM, it was
projected to ease the installation and the maintenance of the system.
The circuit of the central is divided into two boards:
A-The board of connections / fuses.
B-The board of the console and CPU.
It is possible to cable the cables inside the central computer by removing the front panel
console/CPU completely, so that it can be achieved more space. Once you finish cabling, it is possible to
reassemble the front panel and connect it through the flexible multipolar cable rapidly.
Through the connecting cable, it is possible to activate the maintenance mode: disconnect the cable
from the console panel/CPU and insert it into the connector maintenance on the links tab; the red LED on
the board lights. In this mode, with the power supply connected to the network and/or the battery inserted,
the polarization of the external siren is maintained and stops to alert.
NOTES. The red led on the connection board
indicates the maintenance method.
NORMAL CONNECTION
BAA
WARNING!
In order to let operate the system correctly, the battery must always be connected.
2.4 Description of the board EASY-CONNECT
Once the connections are completed, insert the two conductors equipped with faston type connector from the
feeder to the battery, respecting the polarity of connection.
Red= [+] positive battery / Black= [-] negative battery
After connecting the battery of the central computer and the siren, you will turn on the system
through the selector connected to the power. The LED of the network on the panel of the central computer
stops flashing and it remains with a steady light to indicate the presence of the network tension. In order
to respect the regulations and for safety, you need to carry out and verify the connection to the earth
system to all the devices that need it.
Cx1
1 (Fusibile F1)
2 (Fusibile F2)
Cx1 Connector for internal transceiver DXR2 for devices series XR.
Notes: The transmitter DXR2 must be inserted with the components facing downwards.
Fuse 1A for outcoming services/ external power supply.
Fuse 1A for outcoming sirens.
6 output for internal sirens
7 Connection GND for sirens.
8 Output for external self-powered siren.
3-4 Output for the connection to LED V and R on additional control equipment devices PX,
SK, KB.
5 Input for command pulse about input/output from additional devices PX, SK, KB.
9-10 Connection for the new bus RS485 type DX bus for new devices series DX.
11 Connection GND for external power source.
12 Connection +12 for external power supply
13 Output for command/enabling connection for external devices.
14 Connection GND.
15 Input line 24h logic NC/ balanced
16 Connection GND
17/20 Line for the input of zone 1 4 logic NC / balanced.
21 Connection GND.
22-25 Line for the input zone 5 8 logic NC / balanced, (XR800GSM only).
JX1
JX2
JX1
JX2
JX1
JX2
-
JX1x1 JX1x2
JX1x3 JX1x4
JX1x5 JX1x6
JX1x7 JX1x8
JX1x9
JX1x10
JX1x11 JX1x12
JX1x13 JX1x14
JX1x15 JX1x16
JX1x17 JX1x18
JX1x19 JX1x20
JX1x21 JX1x22
JX1x23 JX1x24
JX1x25 JX1x26
JX1x27 JX1x28
JX1x29 JX1x30
JX2x1 JX2x2
JX2x3 JX2x4
JX2x5 JX2x6
JX2x7 JX2x8
JX2x9
JX2x10
JX2x11 JX2x12
JX2x13 JX2x14
JX2x15 JX2x16
JX2x17 JX2x18
JX2x19 JX2x20
JX2x21 JX2x22
JX2x23 JX2x24
JX2x25 JX2x26
JX2x27 JX2x28
JX2x29 JX2x30
SIR +12v
Manutenzione
Centrale
SIR
GND
S.A
V
R
KEY
AB
-12V+
+INT GND 24H
1
2
3
4
5
6
7
8
9 10 11 12 13 14 15
16 17 18 19 20 21
GND Z1 Z2 Z3 Z4
CX1
GND
Z8
Z5 Z6 Z7
22 23 24 25
Installation
securitysecurity
76
CONNECTION
MAINTENANCE
MODALITY
XR400GSM - XR800GSM - Installation guide and use

2.4.3 Connections of sirens2.4.2 Connecting volumetric detectors and contacts
Installation
securitysecurity
98
TAMPER
+OUT
Detector
Resistor
3300ohm
Z3 Logic
JX1
JX2
JX1
JX2
JX1
JX2
-
JX1x1 JX1x2
JX1x3 JX1x4
JX1x5 JX1x6
JX1x7 JX1x8
JX1x9
JX1x10
JX1x11 JX1x12
JX1x13 JX1x14
JX1x15 JX1x16
JX1x17 JX1x18
JX1x19 JX1x20
JX1x21 JX1x22
JX1x23 JX1x24
JX1x25 JX1x26
JX1x27 JX1x28
JX1x29 JX1x30
JX2x1 JX2x2
JX2x3 JX2x4
JX2x5 JX2x6
JX2x7 JX2x8
JX2x9
JX2x10
JX2x11 JX2x12
JX2x13 JX2x14
JX2x15 JX2x16
JX2x17 JX2x18
JX2x19 JX2x20
JX2x21 JX2x22
JX2x23 JX2x24
JX2x25 JX2x26
JX2x27 JX2x28
JX2x29 JX2x30
SIR +12v
Manutenzione
Centrale
SIR
GND
S.A
V
R
KEY
AB
-12V+
+INT GND 24H GND Z1 Z2 Z3 Z4
1
2
CX1
GND
Z8
Z5 Z6 Z7
Long
wires
Magnetic
contact
Z1 Delayed logic Z6 Balanced
Magnetic
contact
Long
wires
Short
wires 24
Short
wires 24
TAMPER +
12V TAMPER
+
12V
JX1
JX2
JX1
JX2
JX1
JX2
-
JX1x1 JX1x2
JX1x3 JX1x4
JX1x5 JX1x6
JX1x7 JX1x8
JX1x9
JX1x10
JX1x11 JX1x12
JX1x13 JX1x14
JX1x15 JX1x16
JX1x17 JX1x18
JX1x19 JX1x20
JX1x21 JX1x22
JX1x23 JX1x24
JX1x25 JX1x26
JX1x27 JX1x28
JX1x29 JX1x30
JX2x1 JX2x2
JX2x3 JX2x4
JX2x5 JX2x6
JX2x7 JX2x8
JX2x9
JX2x10
JX2x11 JX2x12
JX2x13 JX2x14
JX2x15 JX2x16
JX2x17 JX2x18
JX2x19 JX2x20
JX2x21 JX2x22
JX2x23 JX2x24
JX2x25 JX2x26
JX2x27 JX2x28
JX2x29 JX2x30
SIR +12v
Manutenzione
Centrale
SIR
GND
S.A
V
R
KEY
AB
-12V+
+INT GND 24H GND Z1 Z2 Z3 Z4
1
2
CX1
GND
Z8
Z5 Z6 Z7
Self-powered
siren
in series ti
the 24H line
Electronic
siren
XR400GSM - XR800GSM - Installation guide and use

2.4.3 Connections of sirens2.4.2 Connecting volumetric detectors and contacts
Installation
securitysecurity
98
TAMPER
+OUT
Detector
Resistor
3300ohm
Z3 Logic
JX1
JX2
JX1
JX2
JX1
JX2
-
JX1x1 JX1x2
JX1x3 JX1x4
JX1x5 JX1x6
JX1x7 JX1x8
JX1x9
JX1x10
JX1x11 JX1x12
JX1x13 JX1x14
JX1x15 JX1x16
JX1x17 JX1x18
JX1x19 JX1x20
JX1x21 JX1x22
JX1x23 JX1x24
JX1x25 JX1x26
JX1x27 JX1x28
JX1x29 JX1x30
JX2x1 JX2x2
JX2x3 JX2x4
JX2x5 JX2x6
JX2x7 JX2x8
JX2x9
JX2x10
JX2x11 JX2x12
JX2x13 JX2x14
JX2x15 JX2x16
JX2x17 JX2x18
JX2x19 JX2x20
JX2x21 JX2x22
JX2x23 JX2x24
JX2x25 JX2x26
JX2x27 JX2x28
JX2x29 JX2x30
SIR +12v
Manutenzione
Centrale
SIR
GND
S.A
V
R
KEY
AB
-12V+
+INT GND 24H GND Z1 Z2 Z3 Z4
1
2
CX1
GND
Z8
Z5 Z6 Z7
Long
wires
Magnetic
contact
Z1 Delayed logic Z6 Balanced
Magnetic
contact
Long
wires
Short
wires 24
Short
wires 24
TAMPER +
12V TAMPER
+
12V
JX1
JX2
JX1
JX2
JX1
JX2
-
JX1x1 JX1x2
JX1x3 JX1x4
JX1x5 JX1x6
JX1x7 JX1x8
JX1x9
JX1x10
JX1x11 JX1x12
JX1x13 JX1x14
JX1x15 JX1x16
JX1x17 JX1x18
JX1x19 JX1x20
JX1x21 JX1x22
JX1x23 JX1x24
JX1x25 JX1x26
JX1x27 JX1x28
JX1x29 JX1x30
JX2x1 JX2x2
JX2x3 JX2x4
JX2x5 JX2x6
JX2x7 JX2x8
JX2x9
JX2x10
JX2x11 JX2x12
JX2x13 JX2x14
JX2x15 JX2x16
JX2x17 JX2x18
JX2x19 JX2x20
JX2x21 JX2x22
JX2x23 JX2x24
JX2x25 JX2x26
JX2x27 JX2x28
JX2x29 JX2x30
SIR +12v
Manutenzione
Centrale
SIR
GND
S.A
V
R
KEY
AB
-12V+
+INT GND 24H GND Z1 Z2 Z3 Z4
1
2
CX1
GND
Z8
Z5 Z6 Z7
Self-powered
siren
in series ti
the 24H line
Electronic
siren
XR400GSM - XR800GSM - Installation guide and use

2.4.4 Connection radio receivers DXR1 / DXR2
To manage radio devices series XR (contact XR200, sensors infrared XR152 and XR8, siren XR300,
radiocommands XR20 and DXR4) on this central is installed a module radio DXR2.
DXR2 is connected directly on the connector CX1 of the circuit Easy-Connect inside of the central unit
that shall ensure the connection to the line RS485- DX bus.
DXR1 connects on the line DX bus like in the figure , and can be placed far away from the central unit
ina position to obtain more coverage for the radio signal of devices of the series XR.
On the central unit anyway it isn’t possible to work more than two transceivers.
For all devices DX bus, it is necessary to assign an unique addresse to the transceiver.
DXR2 it’s already configured with addresse 32 and cannot be modificated . It’s possible to mount only
one DXR2 on the central unit, un eventual second transceiver can be only one DXR1 with addresse 33.
DXR1 have a dip switch two positions with whichto select ands addresse accepted from the central unit :
- 32 with both dip switch in off;
- 33 with both dip switch 1 in on and 2 in off.
If utilise DXR1 in addiction to a DXR2 it’s
necessary to configurate it only with addresse
33.
The central unit XR400GSM and
XR800GSM accept only transceiver with
addresse 32 or 33 and doesn’t accept
devices with duplicate addresse .
Receiver 1
Possible configurations
Receiver 2
Not present
Not present
Not present
DXR1 (Addresse 33)
DXR1 (Addresse 33)
A
B
D
E
F
Not present
Not present
DXR2 (Interior)
DXR1 (Addresse 32)
DXR1 (Addresse 32)
DXR1 (Addresse 33)
CDXR2 (Interior)
security
10
NOTE:The red LED on the devices DXR1 and DXR2 diplays the reception of a radio signal, while the
green one diplays the transmission towards other devices. In the waiting phase, the red LED flashes to
diplay the proper functioning. Where it occur errors of connections the two LEDS flash alternately while
they flash together when the receivers are not enabled on the central computer.
1
1
2
2
Add. 32
Add. 33
Receiver 1
Receiver 2
DXR1
DXR1
ADDRESSE 32
ADDRESSE 33
1
1
2
2
-
-
+
+
A
A
B
B
ALTERNATIVE TO DXR2
JX1
JX2
JX1
JX2
JX1
JX2
-
JX1x1 JX1x2
JX1x3 JX1x4
JX1x5 JX1x6
JX1x7 JX1x8
JX1x9
JX1x10
JX1x11 JX1x12
JX1x13 JX1x14
JX1x15 JX1x16
JX1x17 JX1x18
JX1x19 JX1x20
JX1x21 JX1x22
JX1x23 JX1x24
JX1x25 JX1x26
JX1x27 JX1x28
JX1x29 JX1x30
JX2x1 JX2x2
JX2x3 JX2x4
JX2x5 JX2x6
JX2x7 JX2x8
JX2x9
JX2x10
JX2x11 JX2x12
JX2x13 JX2x14
JX2x15 JX2x16
JX2x17 JX2x18
JX2x19 JX2x20
JX2x21 JX2x22
JX2x23 JX2x24
JX2x25 JX2x26
JX2x27 JX2x28
JX2x29 JX2x30
SIR +12v
Manutenzione
Centrale
SIR
GND
S.A
V
R
KEY
AB
-12V+
+INT GND 24H GND Z1 Z2 Z3 Z4
1
2
CX1
DXR2 Internal board
Receiver 1
Address 32 – fixed
NOTE: The transceiver DXR2
must be inserted with the
components face-down
Z8
Z5 Z6 Z7
Installation
security
11
XR400GSM - XR800GSM - Installation guide and use

2.4.4 Connection radio receivers DXR1 / DXR2
To manage radio devices series XR (contact XR200, sensors infrared XR152 and XR8, siren XR300,
radiocommands XR20 and DXR4) on this central is installed a module radio DXR2.
DXR2 is connected directly on the connector CX1 of the circuit Easy-Connect inside of the central unit
that shall ensure the connection to the line RS485- DX bus.
DXR1 connects on the line DX bus like in the figure , and can be placed far away from the central unit
ina position to obtain more coverage for the radio signal of devices of the series XR.
On the central unit anyway it isn’t possible to work more than two transceivers.
For all devices DX bus, it is necessary to assign an unique addresse to the transceiver.
DXR2 it’s already configured with addresse 32 and cannot be modificated . It’s possible to mount only
one DXR2 on the central unit, un eventual second transceiver can be only one DXR1 with addresse 33.
DXR1 have a dip switch two positions with whichto select ands addresse accepted from the central unit :
- 32 with both dip switch in off;
- 33 with both dip switch 1 in on and 2 in off.
If utilise DXR1 in addiction to a DXR2 it’s
necessary to configurate it only with addresse
33.
The central unit XR400GSM and
XR800GSM accept only transceiver with
addresse 32 or 33 and doesn’t accept
devices with duplicate addresse .
Receiver 1
Possible configurations
Receiver 2
Not present
Not present
Not present
DXR1 (Addresse 33)
DXR1 (Addresse 33)
A
B
D
E
F
Not present
Not present
DXR2 (Interior)
DXR1 (Addresse 32)
DXR1 (Addresse 32)
DXR1 (Addresse 33)
CDXR2 (Interior)
security
10
NOTE:The red LED on the devices DXR1 and DXR2 diplays the reception of a radio signal, while the
green one diplays the transmission towards other devices. In the waiting phase, the red LED flashes to
diplay the proper functioning. Where it occur errors of connections the two LEDS flash alternately while
they flash together when the receivers are not enabled on the central computer.
1
1
2
2
Add. 32
Add. 33
Receiver 1
Receiver 2
DXR1
DXR1
ADDRESSE 32
ADDRESSE 33
1
1
2
2
-
-
+
+
A
A
B
B
ALTERNATIVE TO DXR2
JX1
JX2
JX1
JX2
JX1
JX2
-
JX1x1 JX1x2
JX1x3 JX1x4
JX1x5 JX1x6
JX1x7 JX1x8
JX1x9
JX1x10
JX1x11 JX1x12
JX1x13 JX1x14
JX1x15 JX1x16
JX1x17 JX1x18
JX1x19 JX1x20
JX1x21 JX1x22
JX1x23 JX1x24
JX1x25 JX1x26
JX1x27 JX1x28
JX1x29 JX1x30
JX2x1 JX2x2
JX2x3 JX2x4
JX2x5 JX2x6
JX2x7 JX2x8
JX2x9
JX2x10
JX2x11 JX2x12
JX2x13 JX2x14
JX2x15 JX2x16
JX2x17 JX2x18
JX2x19 JX2x20
JX2x21 JX2x22
JX2x23 JX2x24
JX2x25 JX2x26
JX2x27 JX2x28
JX2x29 JX2x30
SIR +12v
Manutenzione
Centrale
SIR
GND
S.A
V
R
KEY
AB
-12V+
+INT GND 24H GND Z1 Z2 Z3 Z4
1
2
CX1
DXR2 Internal board
Receiver 1
Address 32 – fixed
NOTE: The transceiver DXR2
must be inserted with the
components face-down
Z8
Z5 Z6 Z7
Installation
security
11
XR400GSM - XR800GSM - Installation guide and use

2.4.6 Connection of the console Dx22
WARNING:
On this central computer, the input IN and the output OUT of the console DX22 are not used.
The ID of the console must be regulated at 08, otherwise it will be displayed the writing:
UNADDRESSED CONSOLE
In order to readdress the console at 08 you have to:
-Power the console
-Press the button for 4 seconds to start the main manu
-Choose the menu address and confirm with
-Select address 08 and press
-Confirm the changes with the button
ESC
CONSOLE
ADDRESSE 8
DX22
BInOut A + -
JX1
JX2
JX1
JX2
JX1
JX2
-
JX1x1 JX1x2
JX1x3 JX1x4
JX1x5 JX1x6
JX1x7 JX1x8
JX1x9
JX1x10
JX1x11 JX1x12
JX1x13 JX1x14
JX1x15 JX1x16
JX1x17 JX1x18
JX1x19 JX1x20
JX1x21 JX1x22
JX1x23 JX1x24
JX1x25 JX1x26
JX1x27 JX1x28
JX1x29 JX1x30
JX2x1 JX2x2
JX2x3 JX2x4
JX2x5 JX2x6
JX2x7 JX2x8
JX2x9
JX2x10
JX2x11 JX2x12
JX2x13 JX2x14
JX2x15 JX2x16
JX2x17 JX2x18
JX2x19 JX2x20
JX2x21 JX2x22
JX2x23 JX2x24
JX2x25 JX2x26
JX2x27 JX2x28
JX2x29 JX2x30
SIR +12v
Manutenzione
Centrale
SIR
GND
S.A
V
R
KEY
AB
-12V+
+INT GND 24H GND Z1 Z2 Z3 Z4 Z5GND
1
2
CX1
NOTE: The transceiver DXR2
must be inserted with
the components
face-down.
DXR2
Z8
Z5 Z6 Z7
2.4.5 Connecting key readers DX100/DX300
NOTA
PROTEC4GSM and PROTEC8GSM manageo until 4 readers that must beconfigured invidually through
dip-switch .
Make sure not to use the same address on more devices.WARNING:WARNING:
Installation
securitysecurity
1312
JX1
JX2
JX1
JX2
JX1
JX2
-
JX1x1 JX1x2
JX1x3 JX1x4
JX1x5 JX1x6
JX1x7 JX1x8
JX1x9
JX1x10
JX1x11 JX1x12
JX1x13 JX1x14
JX1x15 JX1x16
JX1x17 JX1x18
JX1x19 JX1x20
JX1x21 JX1x22
JX1x23 JX1x24
JX1x25 JX1x26
JX1x27 JX1x28
JX1x29 JX1x30
JX2x1 JX2x2
JX2x3 JX2x4
JX2x5 JX2x6
JX2x7 JX2x8
JX2x9
JX2x10
JX2x11 JX2x12
JX2x13 JX2x14
JX2x15 JX2x16
JX2x17 JX2x18
JX2x19 JX2x20
JX2x21 JX2x22
JX2x23 JX2x24
JX2x25 JX2x26
JX2x27 JX2x28
JX2x29 JX2x30
SIR +12v
Manutenzione
Centrale
AB
-12V+
+INT GND 24H GND Z1 Z2 Z3 Z4 Z5GND
1 2
-+A B
ADDRESSE 17
34
ADDRESSE 16
1 2
-+A B 34
ADDRESSE 18
1 2 -+A B
34
ADDRESSE 19
DX100
DX100
DX300
Add. 16
Reader 1
ON
Add. 17
Reader 2
ON
Ind. 18
Reader 3
ON
Add. 18
Add. 19
Reader 4
Ind. 18
ON
CX1
NOTE:The devices
XR400GSM
and XR800GSM
can manage until 4 readers
that have to be
configured singularly
through the dip-switches.
DXR2
SIR
GND
S.A
V
R
KEY
1 2 -+A B
34
DX300
GND
Z8
Z5 Z6 Z7
Make sure not to
use the
same address
on more devices.
WARNINGWARNING
XR400GSM - XR800GSM - Installation guide and use

2.4.6 Connection of the console Dx22
WARNING:
On this central computer, the input IN and the output OUT of the console DX22 are not used.
The ID of the console must be regulated at 08, otherwise it will be displayed the writing:
UNADDRESSED CONSOLE
In order to readdress the console at 08 you have to:
-Power the console
-Press the button for 4 seconds to start the main manu
-Choose the menu address and confirm with
-Select address 08 and press
-Confirm the changes with the button
ESC
CONSOLE
ADDRESSE 8
DX22
BInOut A + -
JX1
JX2
JX1
JX2
JX1
JX2
-
JX1x1 JX1x2
JX1x3 JX1x4
JX1x5 JX1x6
JX1x7 JX1x8
JX1x9
JX1x10
JX1x11 JX1x12
JX1x13 JX1x14
JX1x15 JX1x16
JX1x17 JX1x18
JX1x19 JX1x20
JX1x21 JX1x22
JX1x23 JX1x24
JX1x25 JX1x26
JX1x27 JX1x28
JX1x29 JX1x30
JX2x1 JX2x2
JX2x3 JX2x4
JX2x5 JX2x6
JX2x7 JX2x8
JX2x9
JX2x10
JX2x11 JX2x12
JX2x13 JX2x14
JX2x15 JX2x16
JX2x17 JX2x18
JX2x19 JX2x20
JX2x21 JX2x22
JX2x23 JX2x24
JX2x25 JX2x26
JX2x27 JX2x28
JX2x29 JX2x30
SIR +12v
Manutenzione
Centrale
SIR
GND
S.A
V
R
KEY
AB
-12V+
+INT GND 24H GND Z1 Z2 Z3 Z4 Z5GND
1
2
CX1
NOTE: The transceiver DXR2
must be inserted with
the components
face-down.
DXR2
Z8
Z5 Z6 Z7
2.4.5 Connecting key readers DX100/DX300
NOTA
PROTEC4GSM and PROTEC8GSM manageo until 4 readers that must beconfigured invidually through
dip-switch .
Make sure not to use the same address on more devices.WARNING:WARNING:
Installation
securitysecurity
1312
JX1
JX2
JX1
JX2
JX1
JX2
-
JX1x1 JX1x2
JX1x3 JX1x4
JX1x5 JX1x6
JX1x7 JX1x8
JX1x9
JX1x10
JX1x11 JX1x12
JX1x13 JX1x14
JX1x15 JX1x16
JX1x17 JX1x18
JX1x19 JX1x20
JX1x21 JX1x22
JX1x23 JX1x24
JX1x25 JX1x26
JX1x27 JX1x28
JX1x29 JX1x30
JX2x1 JX2x2
JX2x3 JX2x4
JX2x5 JX2x6
JX2x7 JX2x8
JX2x9
JX2x10
JX2x11 JX2x12
JX2x13 JX2x14
JX2x15 JX2x16
JX2x17 JX2x18
JX2x19 JX2x20
JX2x21 JX2x22
JX2x23 JX2x24
JX2x25 JX2x26
JX2x27 JX2x28
JX2x29 JX2x30
SIR +12v
Manutenzione
Centrale
AB
-12V+
+INT GND 24H GND Z1 Z2 Z3 Z4 Z5GND
1 2
-+A B
ADDRESSE 17
34
ADDRESSE 16
1 2
-+A B 34
ADDRESSE 18
1 2 -+A B
34
ADDRESSE 19
DX100
DX100
DX300
Add. 16
Reader 1
ON
Add. 17
Reader 2
ON
Ind. 18
Reader 3
ON
Add. 18
Add. 19
Reader 4
Ind. 18
ON
CX1
NOTE:The devices
XR400GSM
and XR800GSM
can manage until 4 readers
that have to be
configured singularly
through the dip-switches.
DXR2
SIR
GND
S.A
V
R
KEY
1 2 -+A B
34
DX300
GND
Z8
Z5 Z6 Z7
Make sure not to
use the
same address
on more devices.
WARNINGWARNING
XR400GSM - XR800GSM - Installation guide and use

2.5 Connecting the console board/cpu
Once finished the connections on the board Easy-Connect, it is possible to reconnect the console
board/CPU. Use the multipolar flexible cable and verify to insert it in the board on the bottom of the
container on the central connector JX1. The other end of the cable must be inserted in the connector J3
on the console tab edge. The two connectors are endowed with an index of insertion and allow to mount
the flexible cable in one position only. Position the panel on special supports and fit it under the two lateral
hooks. Tighten the two sealing screws to the lower corners of the panel. Before powering the unit, insert
the SIM CARD inside the SIM module turning the contacts down and put the beveled corner inside as
shown in figure. The SIM Card must be free of lock code; if needed, use a phone to delete the lock code
of the SIM Card. Fully insert the antenna connector until you hear it click. Once completed the wiring ,
insert the two spade connectors from the feeder on the battery respecting the polarity: red connector on
the positive (+) of the battery and the black on the negative (-) and give the power supply voltage by
activating the selector prepared for the system.
WARNING!
In order to use the system correctly, the battery must be always connected.
1 Jack of the antenna GSM
2 Connector of the SIM CARD
3 Central Connector
4 Setup button
5 Anti-opening tamper
JX3JX3JX3
JX3x1 JX3x2
JX3x3 JX3x4
JX3x5 JX3x6
JX3x7 JX3x8
JX3x9
JX3x10
JX3x11 JX3x12
JX3x13 JX3x14
JX3x15 JX3x16
JX3x17 JX3x18
JX3x19 JX3x20
JX3x21 JX3x22
JX3x23 JX3x24
JX3x25 JX3x26
JX3x27 JX3x28
JX3x29 JX3x30
SETUP
1
23
4
5
Insert the micro sim card inside the
module considering the beveled corner.
2.4.7 Connections with the traditional electronic key
* *This connection provides for the activation of the tamper alarm 24h when used a false key.
NOTE: In case of installation of PX100/SK100, place the bridge JP1 so that you can set
the OUT in monostable modality. (generates a control pulse).
NOTE: Have a look at the SK100 manual.
In series to the 24h line
JX1
JX2
JX1
JX2
JX1
JX2
-
JX1x1 JX1x2
JX1x3 JX1x4
JX1x5 JX1x6
JX1x7 JX1x8
JX1x9
JX1x10
JX1x11 JX1x12
JX1x13 JX1x14
JX1x15 JX1x16
JX1x17 JX1x18
JX1x19 JX1x20
JX1x21 JX1x22
JX1x23 JX1x24
JX1x25 JX1x26
JX1x27 JX1x28
JX1x29 JX1x30
JX2x1 JX2x2
JX2x3 JX2x4
JX2x5 JX2x6
JX2x7 JX2x8
JX2x9
JX2x10
JX2x11 JX2x12
JX2x13 JX2x14
JX2x15 JX2x16
JX2x17 JX2x18
JX2x19 JX2x20
JX2x21 JX2x22
JX2x23 JX2x24
JX2x25 JX2x26
JX2x27 JX2x28
JX2x29 JX2x30
SIR +12v
Manutenzione
Centrale
AB
-12V+
+INT GND 24H GND Z1 Z2 Z3 Z4 GND
ELECTRONIC KEY
R +
12VLEDUscita
Chiave Falsa
NC NA C V
C NA NC
CX1
NOTE: The transceiver
DXR2 must be
inserted with the
components
face-down.
DXR2
SIR
GND
S.A
V
R
KEY
(optional connection *)
Z8
Z5 Z6 Z7
Installation
securitysecurity
1514
XR400GSM - XR800GSM - Installation guide and use

2.5 Connecting the console board/cpu
Once finished the connections on the board Easy-Connect, it is possible to reconnect the console
board/CPU. Use the multipolar flexible cable and verify to insert it in the board on the bottom of the
container on the central connector JX1. The other end of the cable must be inserted in the connector J3
on the console tab edge. The two connectors are endowed with an index of insertion and allow to mount
the flexible cable in one position only. Position the panel on special supports and fit it under the two lateral
hooks. Tighten the two sealing screws to the lower corners of the panel. Before powering the unit, insert
the SIM CARD inside the SIM module turning the contacts down and put the beveled corner inside as
shown in figure. The SIM Card must be free of lock code; if needed, use a phone to delete the lock code
of the SIM Card. Fully insert the antenna connector until you hear it click. Once completed the wiring ,
insert the two spade connectors from the feeder on the battery respecting the polarity: red connector on
the positive (+) of the battery and the black on the negative (-) and give the power supply voltage by
activating the selector prepared for the system.
WARNING!
In order to use the system correctly, the battery must be always connected.
1 Jack of the antenna GSM
2 Connector of the SIM CARD
3 Central Connector
4 Setup button
5 Anti-opening tamper
JX3JX3JX3
JX3x1 JX3x2
JX3x3 JX3x4
JX3x5 JX3x6
JX3x7 JX3x8
JX3x9
JX3x10
JX3x11 JX3x12
JX3x13 JX3x14
JX3x15 JX3x16
JX3x17 JX3x18
JX3x19 JX3x20
JX3x21 JX3x22
JX3x23 JX3x24
JX3x25 JX3x26
JX3x27 JX3x28
JX3x29 JX3x30
SETUP
1
23
4
5
Insert the micro sim card inside the
module considering the beveled corner.
2.4.7 Connections with the traditional electronic key
* *This connection provides for the activation of the tamper alarm 24h when used a false key.
NOTE: In case of installation of PX100/SK100, place the bridge JP1 so that you can set
the OUT in monostable modality. (generates a control pulse).
NOTE: Have a look at the SK100 manual.
In series to the 24h line
JX1
JX2
JX1
JX2
JX1
JX2
-
JX1x1 JX1x2
JX1x3 JX1x4
JX1x5 JX1x6
JX1x7 JX1x8
JX1x9
JX1x10
JX1x11 JX1x12
JX1x13 JX1x14
JX1x15 JX1x16
JX1x17 JX1x18
JX1x19 JX1x20
JX1x21 JX1x22
JX1x23 JX1x24
JX1x25 JX1x26
JX1x27 JX1x28
JX1x29 JX1x30
JX2x1 JX2x2
JX2x3 JX2x4
JX2x5 JX2x6
JX2x7 JX2x8
JX2x9
JX2x10
JX2x11 JX2x12
JX2x13 JX2x14
JX2x15 JX2x16
JX2x17 JX2x18
JX2x19 JX2x20
JX2x21 JX2x22
JX2x23 JX2x24
JX2x25 JX2x26
JX2x27 JX2x28
JX2x29 JX2x30
SIR +12v
Manutenzione
Centrale
AB
-12V+
+INT GND 24H GND Z1 Z2 Z3 Z4 GND
ELECTRONIC KEY
R +
12VLEDUscita
Chiave Falsa
NC NA C V
C NA NC
CX1
NOTE: The transceiver
DXR2 must be
inserted with the
components
face-down.
DXR2
SIR
GND
S.A
V
R
KEY
(optional connection *)
Z8
Z5 Z6 Z7
Installation
securitysecurity
1514
XR400GSM - XR800GSM - Installation guide and use

Programming
79
7
7
9
9
Warning no Power?
Number 01
123456789 >
Send SMS all.?
SMS no Power?
7=YES
7=YES
7=YES
9=NO
9=NO
9=NO
3.1.2 Telephone book
Entering telephone numbers
Once you enter the program menu, press to visualize.
Press or . On the diplay will appear:
Use the buttons or to select one of the 16 memory locations of the telephone book and press
or
At this stage you have to enter the telephone number (maximum 16 numbers):
NOTE: In order to correct any typing error use the button to delete the last number you dialled or select
the wrong one using the buttons and dial the correct new number.
In order to confirm press the button or . You can visualize:
Press the buttons or in order to communicate to the central the order to to send or not the
SMS of alarm to the set up telephone number.
When the following inquiry will appear:
Press the buttons or if you wish to send or not a voice message in case of a prolonged lack of
electricity network for the set up number.
When the following inquiry will appear:
Choose or if you wish or not to send SMS in case of a prolonged lack of electricity network
for the set up number.
NOTE: The SMS and the voice call alert are carried out after 30 minutes of lack of electricity network, also
when the central computer is not enabled.
Number 01
Not Programmed
Enter numbers
ADDRESS BOOK
1
56781
3 Programming
It is possible to interact with the central computer from the console using the panel through the menu:
-Programming menu: you can access by entering the code SETUP ( of default) in order
to program and for the operating parameters of the central computer.
-Control menu: you can access by entering the USER code ( of default) for the
command of the central functions.
-Voice menu: the menu is enabled by pressing the button from the keyboard or from through
telephone connection GSM. Through a guiding voice you can access the control functions dialling your
user code when required.
The control unit displays cyclically the reports related to the status of the system like the state of the alarm
memory the status of the power supply, the exclusion of areas and anomalies of the system.
These indications can be used pressing these buttons
Before to use the central unit, it is necessary to configure its functioning .
5 6 7 8
1 2 3 4
3.1.1 Access to the Programming Menu
Dial the code SETUP ( default) and then or on the System console while the
central computer is turned off.
In the programming menu are available the following entries:
1-Telephone book to insert, modify or erase 16 telephone numbers.
2-Setup to manage the keys, the entry codes, data entry and output, alarm duration,
limitation of the number of alarm cycles, configuration of logical/balanced zones,
capacity control system, mute and privacy for the enterers, enabling of devices
on bus RS485 and management of the alarm 24 h when there is no link,
activation mode output +INT, forwarding received SMS and starting GSM
module.
3 - Info indication about the release of the firmware, IMEI of the module GSM and
indication on the electricity network presence.
4 - Reset of installation To restart the central module GSM.
5 - Cancel Setup To delete all the control panel configurations and bring it to the factory settings..
6 - Call tests For the control of the GSM network.
7 - Welcome msg For the recording and playback of the personalized message.
Press the buttons the preferred voice and confirm the choice with or , or dial the number
of the option to access to the chosen option.In order to exit the menu dial or .
NOTE:
•If you try to enter a wrong code (after having pressed 24 buttons), the keyboard stops working for 15
seconds, during this time you can't try again.
• If you don't use the keyboard for about 1 minute, the central computer closes the program menu and it is
ready for use.
• When the central computer is enabled, it isn't possible to enter the program menu.
• If you forget the SETUP code it is possible to enter the program menu and modify the enter codes,
keeping pressed the SETUP button on the electronic board of the central computer. In order to access to
the board will provide the opening of the case of the central computer enabling an alarm cycle for 24 h.
5 6 7 8
5 6 7 8
securitysecurity
16 17
XR400GSM - XR800GSM - Installation guide and use

Programming
79
7
7
9
9
Warning no Power?
Number 01
123456789 >
Send SMS all.?
SMS no Power?
7=YES
7=YES
7=YES
9=NO
9=NO
9=NO
3.1.2 Telephone book
Entering telephone numbers
Once you enter the program menu, press to visualize.
Press or . On the diplay will appear:
Use the buttons or to select one of the 16 memory locations of the telephone book and press
or
At this stage you have to enter the telephone number (maximum 16 numbers):
NOTE: In order to correct any typing error use the button to delete the last number you dialled or select
the wrong one using the buttons and dial the correct new number.
In order to confirm press the button or . You can visualize:
Press the buttons or in order to communicate to the central the order to to send or not the
SMS of alarm to the set up telephone number.
When the following inquiry will appear:
Press the buttons or if you wish to send or not a voice message in case of a prolonged lack of
electricity network for the set up number.
When the following inquiry will appear:
Choose or if you wish or not to send SMS in case of a prolonged lack of electricity network
for the set up number.
NOTE: The SMS and the voice call alert are carried out after 30 minutes of lack of electricity network, also
when the central computer is not enabled.
Number 01
Not Programmed
Enter numbers
ADDRESS BOOK
1
56781
3 Programming
It is possible to interact with the central computer from the console using the panel through the menu:
-Programming menu: you can access by entering the code SETUP ( of default) in order
to program and for the operating parameters of the central computer.
-Control menu: you can access by entering the USER code ( of default) for the
command of the central functions.
-Voice menu: the menu is enabled by pressing the button from the keyboard or from through
telephone connection GSM. Through a guiding voice you can access the control functions dialling your
user code when required.
The control unit displays cyclically the reports related to the status of the system like the state of the alarm
memory the status of the power supply, the exclusion of areas and anomalies of the system.
These indications can be used pressing these buttons
Before to use the central unit, it is necessary to configure its functioning .
5 6 7 8
1 2 3 4
3.1.1 Access to the Programming Menu
Dial the code SETUP ( default) and then or on the System console while the
central computer is turned off.
In the programming menu are available the following entries:
1-Telephone book to insert, modify or erase 16 telephone numbers.
2-Setup to manage the keys, the entry codes, data entry and output, alarm duration,
limitation of the number of alarm cycles, configuration of logical/balanced zones,
capacity control system, mute and privacy for the enterers, enabling of devices
on bus RS485 and management of the alarm 24 h when there is no link,
activation mode output +INT, forwarding received SMS and starting GSM
module.
3 - Info indication about the release of the firmware, IMEI of the module GSM and
indication on the electricity network presence.
4 - Reset of installation To restart the central module GSM.
5 - Cancel Setup To delete all the control panel configurations and bring it to the factory settings..
6 - Call tests For the control of the GSM network.
7 - Welcome msg For the recording and playback of the personalized message.
Press the buttons the preferred voice and confirm the choice with or , or dial the number
of the option to access to the chosen option.In order to exit the menu dial or .
NOTE:
•If you try to enter a wrong code (after having pressed 24 buttons), the keyboard stops working for 15
seconds, during this time you can't try again.
• If you don't use the keyboard for about 1 minute, the central computer closes the program menu and it is
ready for use.
• When the central computer is enabled, it isn't possible to enter the program menu.
• If you forget the SETUP code it is possible to enter the program menu and modify the enter codes,
keeping pressed the SETUP button on the electronic board of the central computer. In order to access to
the board will provide the opening of the case of the central computer enabling an alarm cycle for 24 h.
5 6 7 8
5 6 7 8
securitysecurity
16 17
XR400GSM - XR800GSM - Installation guide and use

DELETED Number 3
Not Programmed
Followed by
7
Number 03
122668899
Cancel?
7=YES 9=NO
3.1.3 Deleting telephone numbers
In order to delete a telephone number, enter the menu “Telephone book” and press the buttons
until you put in evidence:
Press and choose with the telephone number you want to delete.
On the display will appear:
Confirm the choice with the button or .
The diplay will show:
press the button in order to confirm the cancellation.
On the diplay will appear for a few moments:
At the end, press or in order to come back to the former menu.
3.2 Setup
Enter the program menu and dial or use the buttons in order to visualize:
And press or .
Write key - Write the memorized code in the central computer on a key.
Read key - Read the code from a key and memorize it in the central computer.
New Key Code - Memorize the new code in the central computer.
SETUP Code - Modify the SETUP code to access to the program.
USER Code - Modify the USER code for the access to the commands.
Pre-alarm time - Modify the timer entrance.
Exit time - Modify the timer exit.
Alarm duration - Modify the duration of the alarm of the sirens.
Max 5 cicles all. - Limit the maximum numbers of the cycles of alarm for every insertion.
Area Log/Bal/Rf - Configure the zone lines with a logical or balance entrance.
IR onArea 1 - To enable or less the detector infrared placed on the panel to alarm the 1 zone
Partial A - Which zones check with a partial insertionA.
Partial B - Which zones check with a partial insertion B.
Ins. Input key - To allow to configure which type of connection will made with a pulse on the
Ins. from Keyfob - To select which type of connection will be made from two button remote controls
(DXR20/XR20)
Beep key reader -Adjust the loudness of the beep of the key readers DX300.
Privacy key readers. - Hide the information about the status of the central computer and of the key readers
DX300.
Beep key reader - play audible alarm on the key readers DX300.
Radio Code - Code of 18 binary digits (a sequence of “0” and of “1” )
485 Device - Enable the key readers on the bus RS485..
24h Device 485 - Enable alarm 24 h when lacking the link of the devices on bus RS485.
OUT + INT Setting - Mode of operation of the output + INT.
Forward SMS - Sending the received SMS to the first number in the telephone book.
GSM Module - Enable module GSM.
In order to exit the SETUP menu and come back to the program menu, press or .
terminal
block “KEY”.
2
8
765
2-Setup
2
Write key
Delete numbers
ADDRESS BOOK
Programming
securitysecurity
1918
XR400GSM - XR800GSM - Installation guide and use

DELETED Number 3
Not Programmed
Followed by
7
Number 03
122668899
Cancel?
7=YES 9=NO
3.1.3 Deleting telephone numbers
In order to delete a telephone number, enter the menu “Telephone book” and press the buttons
until you put in evidence:
Press and choose with the telephone number you want to delete.
On the display will appear:
Confirm the choice with the button or .
The diplay will show:
press the button in order to confirm the cancellation.
On the diplay will appear for a few moments:
At the end, press or in order to come back to the former menu.
3.2 Setup
Enter the program menu and dial or use the buttons in order to visualize:
And press or .
Write key - Write the memorized code in the central computer on a key.
Read key - Read the code from a key and memorize it in the central computer.
New Key Code - Memorize the new code in the central computer.
SETUP Code - Modify the SETUP code to access to the program.
USER Code - Modify the USER code for the access to the commands.
Pre-alarm time - Modify the timer entrance.
Exit time - Modify the timer exit.
Alarm duration - Modify the duration of the alarm of the sirens.
Max 5 cicles all. - Limit the maximum numbers of the cycles of alarm for every insertion.
Area Log/Bal/Rf - Configure the zone lines with a logical or balance entrance.
IR onArea 1 - To enable or less the detector infrared placed on the panel to alarm the 1 zone
Partial A - Which zones check with a partial insertionA.
Partial B - Which zones check with a partial insertion B.
Ins. Input key - To allow to configure which type of connection will made with a pulse on the
Ins. from Keyfob - To select which type of connection will be made from two button remote controls
(DXR20/XR20)
Beep key reader -Adjust the loudness of the beep of the key readers DX300.
Privacy key readers. - Hide the information about the status of the central computer and of the key readers
DX300.
Beep key reader - play audible alarm on the key readers DX300.
Radio Code - Code of 18 binary digits (a sequence of “0” and of “1” )
485 Device - Enable the key readers on the bus RS485..
24h Device 485 - Enable alarm 24 h when lacking the link of the devices on bus RS485.
OUT + INT Setting - Mode of operation of the output + INT.
Forward SMS - Sending the received SMS to the first number in the telephone book.
GSM Module - Enable module GSM.
In order to exit the SETUP menu and come back to the program menu, press or .
terminal
block “KEY”.
2
8
765
2-Setup
2
Write key
Delete numbers
ADDRESS BOOK
Programming
securitysecurity
1918
XR400GSM - XR800GSM - Installation guide and use

3.2.3 NEW KEY CODE
Through this function it is possible to substitute the memorized code in the central computer with a
different one automatically generated.
Select the function
And press or
The display will show the following message:
New Key Code OK
NEW KEY CODE OK
3.2.4 SETUP CODE
The Set Up code allows you to access to the programming central computer.
Use the buttons until you visualize on the display:
3.2.5 USER CODE
Press or .
and enter the 4 numbers of the code
The user code, allows you to access to the command functions of the central computer.
Press di buttons until you visualize:
And press or to modify this code
Dial the new code of 4 numbers again.
SETUP CODE
USER Code
SETUP Code
----
USER Code
----
NOTE: It is necessary to enable the readers before writing the keys.
3.2.1 Write key
This function allow to writ in the keys DXK, PX and KEY the code of the central unit.
To select the first voice :
And dial or .
The display visualize:
The LED of readers DX200 and display of DX300 flashing fast awaiting of a key DXK/KEY. To approach a key
to the connector and to wait that finishes flashing .
The central unit will emit a Beep of writing confirm and will be visualized for a moment on display the message
Repeat this operation for every key DXK or KEY to use on the central unit .
If you don’t approach a key within 1 minute lthe function is canceled and the central unit goes out from
programming menu .
Write Key
WAIT PROGRAMMING
WRITE KEY
3.2.2 READ THE KEY
Through this function it’s possible to replace the code morized in the central unit reading it from a
programmed key before.
To select the command Read key and dial or
The display will visualize the following message :
To approach the key PX to DX100, or the key KEY to the reader DX300
The central unit will emit a Beep to confirm the occurred reading and will be visualized
for a moment and the confirm message
WAIT READ
READING KEY
NOTE: It’s necessary to enable the readers before to write keys.
NOTE: It’s necessary to enable the readers before to write the keys.
Programming
securitysecurity
20 21
It’s necessary
to enable the
readers
before to write keys
WARNINGWARNING
XR400GSM - XR800GSM - Installation guide and use
This manual suits for next models
1
Table of contents
Other Hiltron Security System manuals

