1 BY ONE O00QH-0514 User manual
1byone Products Inc.
2313 E Philadelphia Street, Unit M, Ontario, CA 91761
www.1byone.com
www.1byone.com
Instruction Manual
Bedienungsanleitung/Manuel d’instruction
Manual de instrucciones/Manuale di Istruzioni
SKU: O00QH-0514

- 01 - - 02 -
EN
DE
FR
ES
IT
EN
DE
FR
ES
IT
Voltage of receiver
Voltage of PIR sensor
PIR sensor’s frequency
PIR sensor’s detecting angle
PIR sensor’s detecting distance
Operating range
Power consumption
Receiver’s ring volume
Working temperature
DC 6V ( 3 x Type C batteries or adapter)
DC4.5V ( 3 x AAA batteries)
433.92MHz+100KHz
45 degree
5-8m/12-15ft
100m/300ft (without obstacles)
Receiver: <1.2W PIR sensor: <0.06W
Over 100dB within 0.5m/1.6ft
-20°C ~ 50 °C
Parameters:
Thank you for purchasing 1byone Wireless Alert
Alarm. Please read this instruction manual before
use to ensure safe operation.
If any package contents are visibly damaged or missing,
please immediately contact 1byone Support Center at
https://www.1byone.com/Support for assistance.
2 x PIR sensors 1 x Receiver
4 x Wall plugs 4 x Screws
1 x Instruction manual
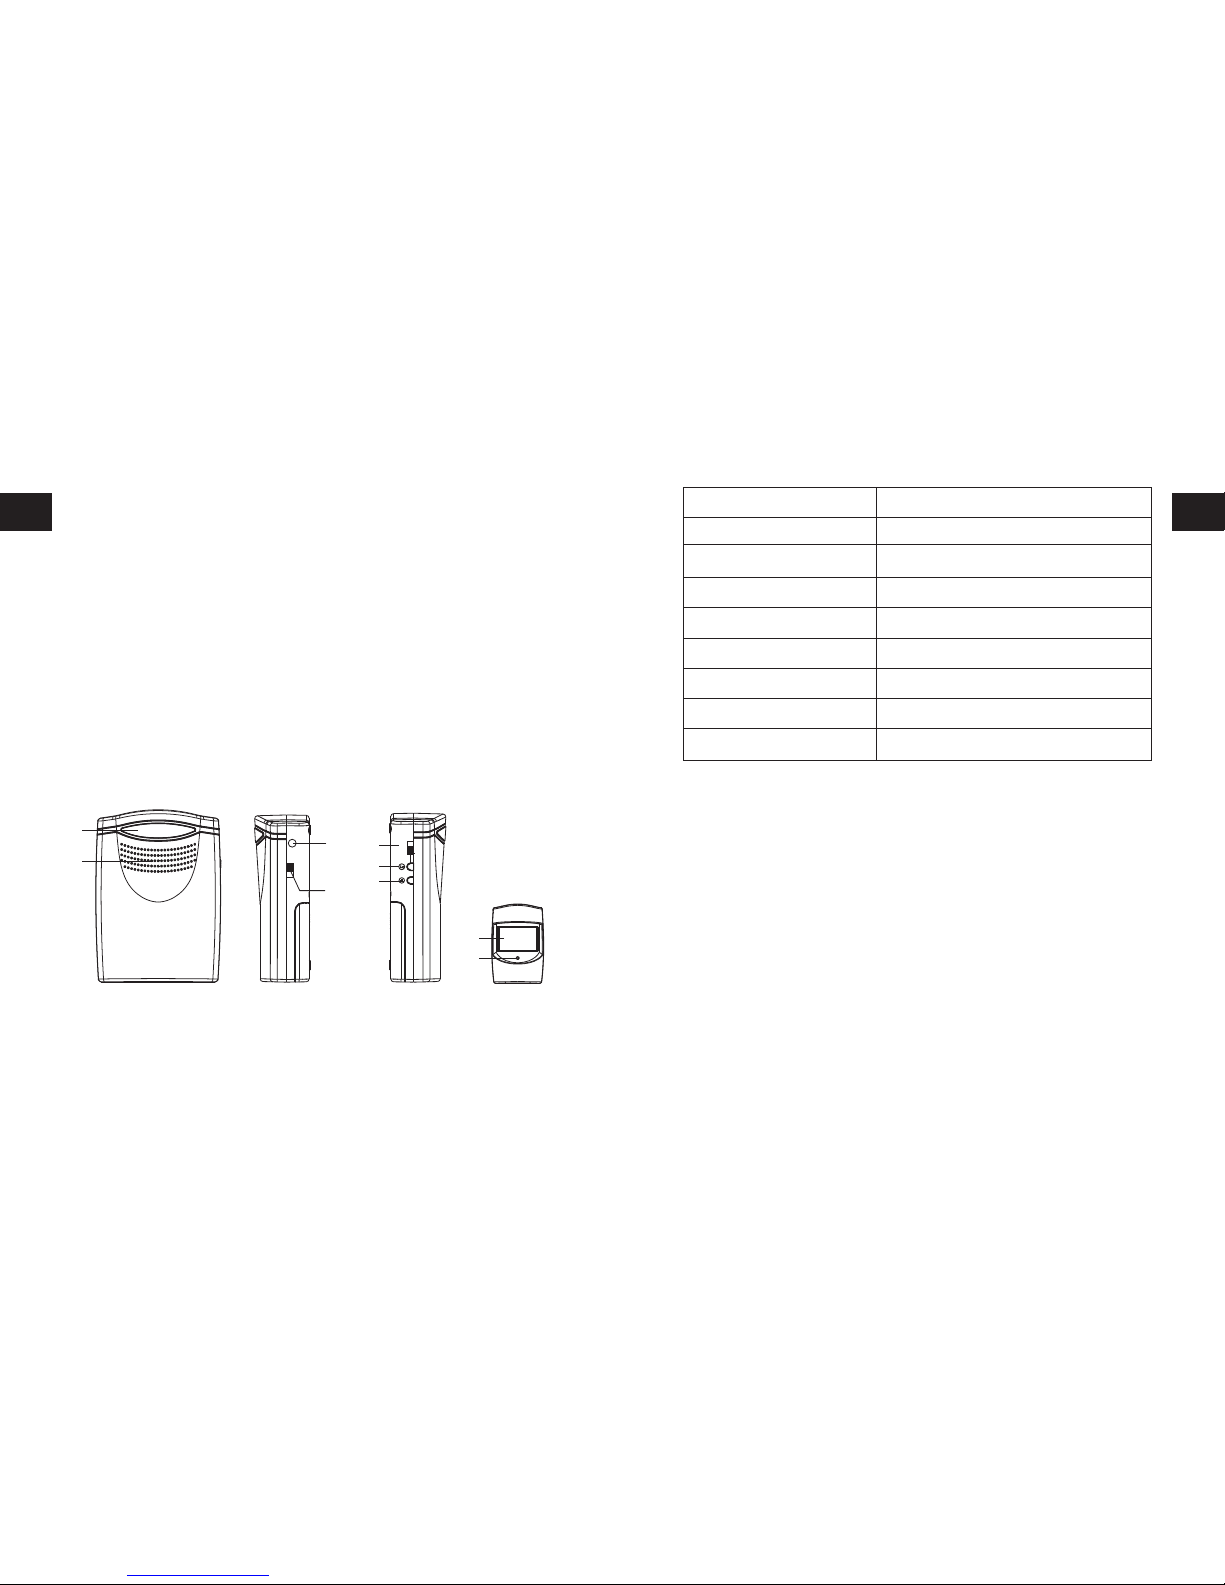
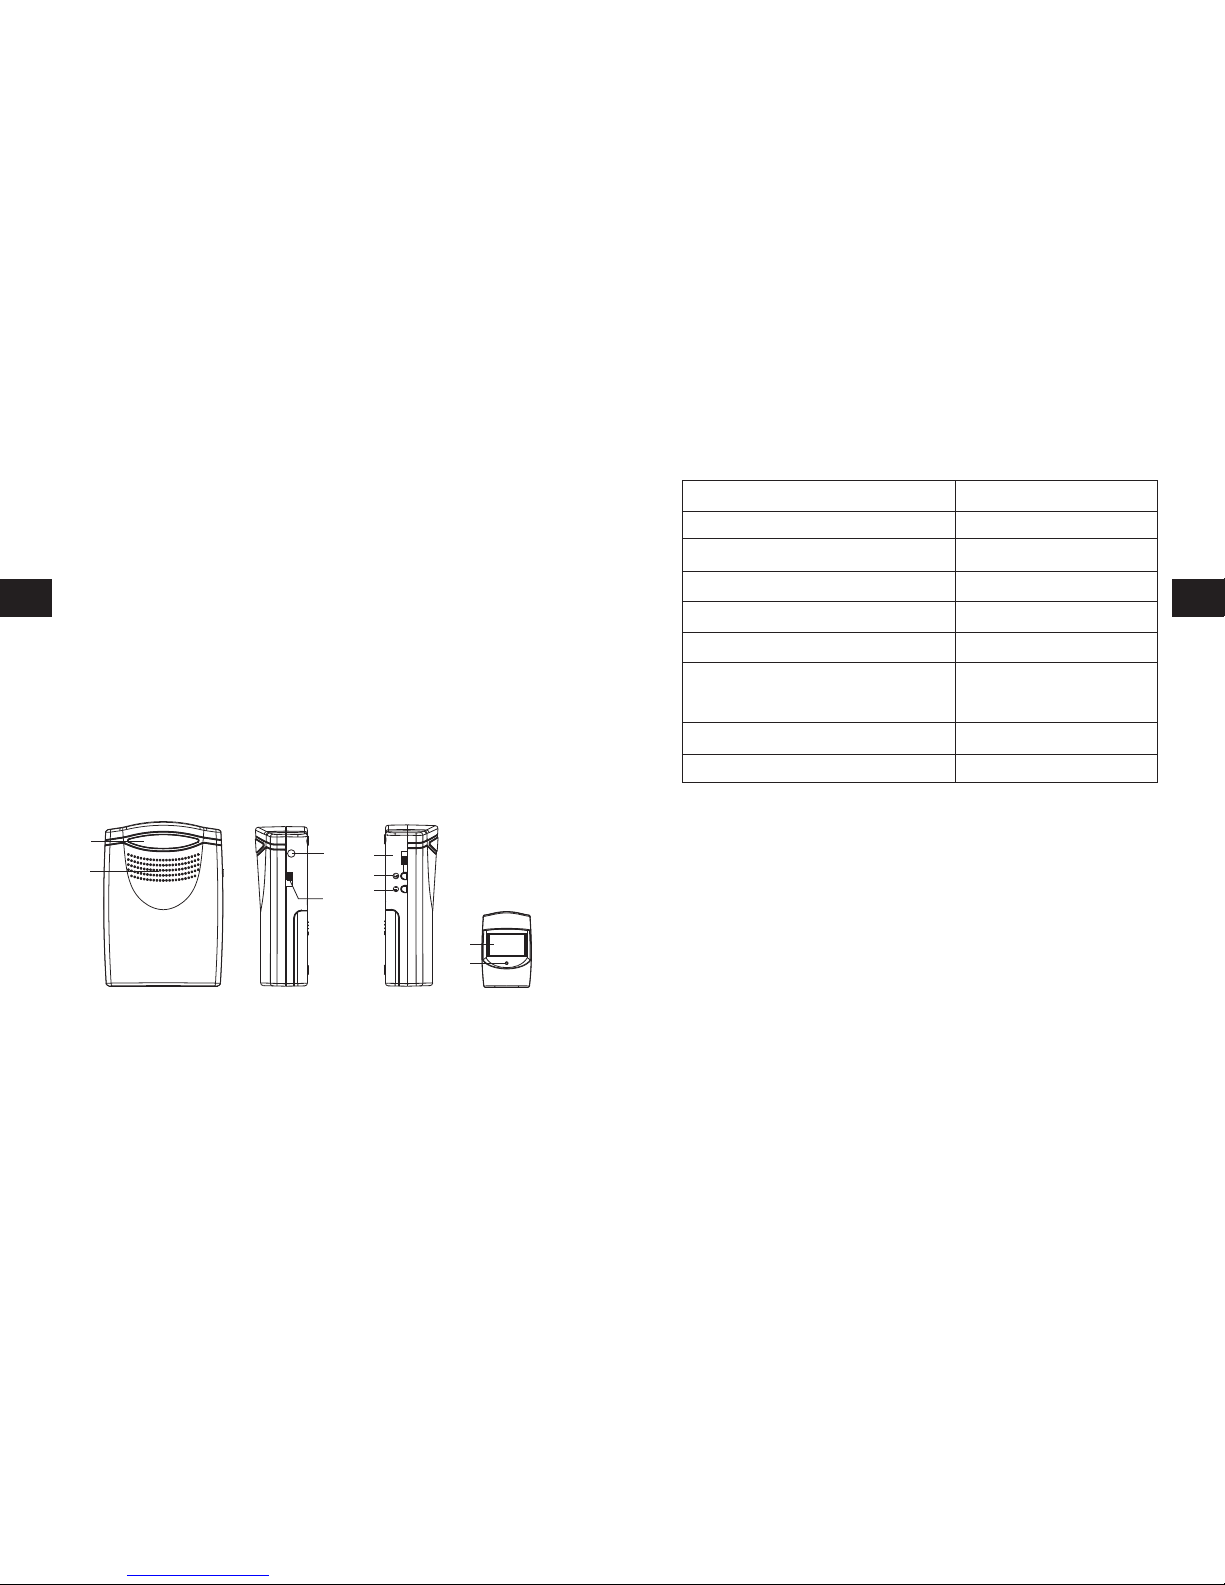
(1) LED indicator ( 2) Speaker
(3) DC power input jack (4) Door chime and alarm switch
(5) On/Off switch (6) Sound and flash switch
(7) Pairing button (8) PIR detector
(9) LED indicator
1. Package Contents:
2. Parts Names:
(1)
(2)
CHIME
LOW
ALARM
(3)
(4)
OFF
ON
(5)
(6)
(7)
(8)
(9)
PIR sensor:
The PIR sensor is powered by 3 x AAA batteries,
please insert the batteries using the following
procedure:
·Remove the screw on the back of the PIR sensor
with a screwdriver.Next, remove the battery
compartment cover.
·Insert 3 x AAA batteries into the battery
compartment, using the correct polarity to
eliminate the danger of fire.
·Replace the battery compartment cover and
tighten the screw.
3. Power Supply:
Receiver:
The receiver can be powered by 3 x type C batteries
or by an adapter (output:DC 6V).
a. If powered by batteries, please insert the batteries
using the following procedure:
·Remove the screws on the back of the receiver
with a screwdriver. Next remove the battery
compartment cover.
·Insert 3 x C type batteries into the battery
compartment, using the correct polarity to
eliminate the danger of fire.
·Replace the battery compartment cover and
tighten the screw.
b. If powered by an adapter (recommended adapter
SKU OUS00-0278): Insert the adapter’s connector
into the DC power input jack on the side of the
receiver, then plug into a power outlet.
Safety Note:
For the receiver:
·Be sure to remove all batteries before connecting
to the adapter and plugging into a safe power
outlet.
·Do not expose the receiver to water spray or
water drops and do not place liquid-filled objects
such as vases or opened drink containers on or
near the receiver and the power outlet.
·If power by batteries, replace them when
exhausted with the same type and voltage
battery.
·Remove the batteries or unplug the adapter from
the power outlet if the Alarm kit is not to be used
for an extended period of time.
For the PIR sensor:
·The PIR sensor is powered by 3 x AAA batteries.
When exhausted, replace it using the same type
and voltage batteries.
·Always insert the batteries using the correct
polarity to eliminate the danger of fire.
·Keep old and new batteries away from children.
·Old batteries should be properly disposed using
safe environmental practices.
·Remove the batteries from the PIR sensor if you
do not intend to use the Alarm kit for an
extended period of time.
Low voltage indication: When the batteries are
exhausted, the LED indicator on the receiver and PIR
sensor will flash once every second to remind you to
replace the batteries.

- 03 - - 04 -
EN
DE
FR
ES
IT
EN
DE
FR
ES
IT
PIR sensor:
The PIR sensor is powered by 3 x AAA batteries,
please insert the batteries using the following
procedure:
·Remove the screw on the back of the PIR sensor
with a screwdriver. Next, remove the battery
compartment cover.
·Insert 3 x AAA batteries into the battery
compartment, using the correct polarity to
eliminate the danger of fire.
·Replace the battery compartment cover and
tighten the screw.
Receiver:
The receiver can be powered by 3 x type C batteries
or by an adapter (output:DC 6V).
a. If powered by batteries, please insert the batteries
using the following procedure:
·Remove the screws on the back of the receiver
with a screwdriver. Next remove the battery
compartment cover.
·Insert 3 x C type batteries into the battery
compartment, using the correct polarity to
eliminate the danger of fire.
·Replace the battery compartment cover and
tighten the screw.
b. If powered by an adapter (recommended adapter
SKU OUS00-0278): Insert the adapter’s connector
into the DC power input jack on the side of the
receiver, then plug into a power outlet.
Safety Note:
For the receiver:
·Be sure to remove all batteries before connecting
to the adapter and plugging into a safe power
outlet.
·Do not expose the receiver to water spray or
water drops and do not place liquid-filled objects
such as vases or opened drink containers on or
near the receiver and the power outlet.
·If power by batteries, replace them when
exhausted with the same type and voltage
battery.
·Remove the batteries or unplug the adapter from
the power outlet if the Alarm kit is not to be used
for an extended period of time.
For the PIR sensor:
·The PIR sensor is powered by 3 x AAA batteries.
When exhausted, replace it using the same type
and voltage batteries.
·Always insert the batteries using the correct
polarity to eliminate the danger of fire.
·Keep old and new batteries away from children.
·Old batteries should be properly disposed using
safe environmental practices.
·Remove the batteries from the PIR sensor if you
do not intend to use the Alarm kit for an
extended period of time.
Low voltage indication: When the batteries are
exhausted, the LED indicator on the receiver and PIR
sensor will flash once every second to remind you to
replace the batteries.
- 05 - - 06 -
EN
DE
FR
ES
IT
EN
DE
FR
ES
IT
A.Turning the receiver on/off:
Be sure to switch the button to the "ON" position
when using the Alarm kit.
You can turn off the alarm when needed by
switching the button to the "OFF" position.
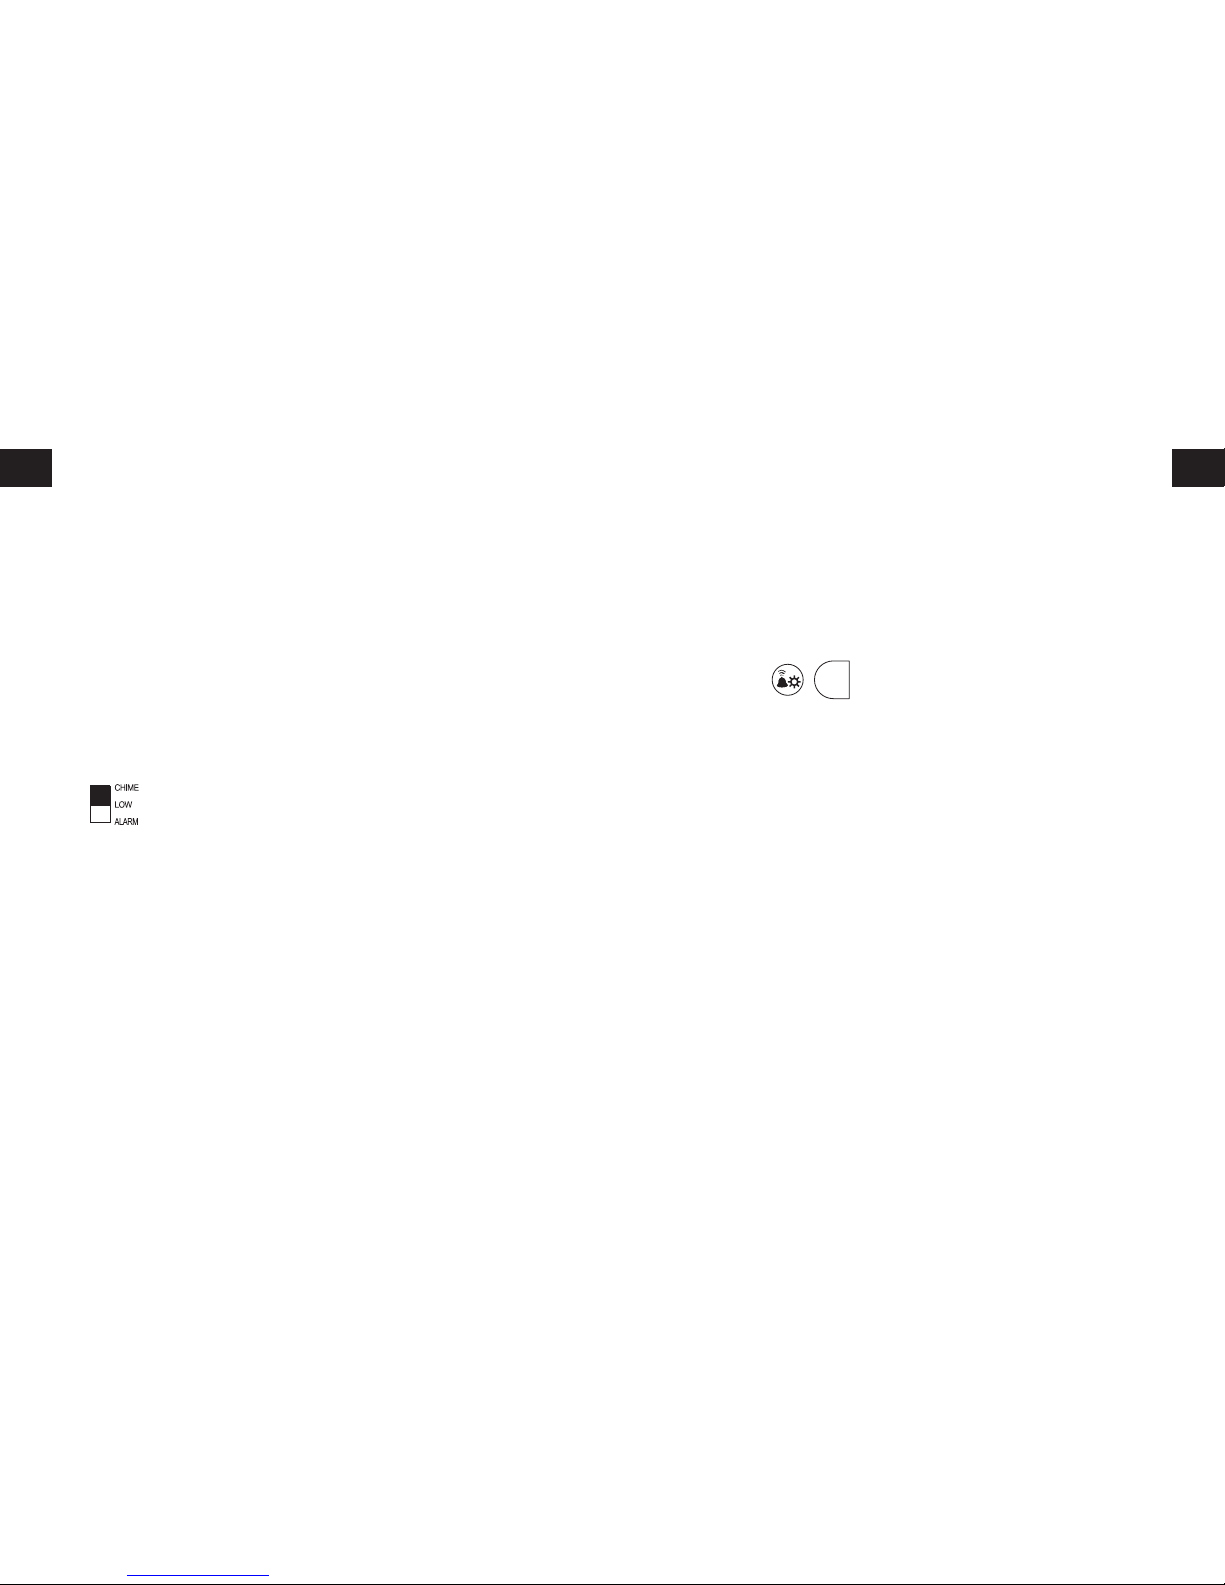
B. Selecting the work mode:
The receiver can work as a doorbell or work as an
alarm.
To select the working mode, switch the button
on the side of the receiver to one of the
following positions:
C. Selecting the notification mode:
The receiver will notify after the PIR sensor has
detected a car or someone passing by with a
chime/alarm sound, flashing LED, or chime/alarm
sound and flashing LED at the same time.
To select the notification mode, press the Sound
and Flash
button on the side of the receiver.The
receiver will display the current notification mode.
Keep pressing the Sound and Flash button and
stop when you have reached the preferred mode.
D: Pairing additional PIR sensors/receivers to the
alarm system:
Up to 5 PIR sensors can be paired with one
receiver.You can also extend the alarm system
with any number of receivers.This is only possible
when the PIR sensor and receiver are working on
the same frequency. Pair additional PIR sensors/re-
ceivers using the same pairing process as
described below.
The following pairing instructions are relevant to
receiver SKU O00QH-0512 and PIR sensor SKU
a. Chime - The receiver will work as a doorbell and
play a high volume "Ding Dong" sound.
b. Low - The receiver will work as a doorbell and play
a low volume "Ding Dong" sound.
c.Alarm - The receiver will work as an alarm and play
an alarm sound.
PIR sensor:
The PIR sensor is powered by 3 x AAA batteries,
please insert the batteries using the following
procedure:
·Remove the screw on the back of the PIR sensor
with a screwdriver. Next, remove the battery
compartment cover.
·Insert 3 x AAA batteries into the battery
compartment, using the correct polarity to
eliminate the danger of fire.
·Replace the battery compartment cover and
tighten the screw.
4. Operation:
Receiver:
The receiver can be powered by 3 x type C batteries
or by an adapter (output:DC 6V).
a. If powered by batteries, please insert the batteries
using the following procedure:
·Remove the screws on the back of the receiver
with a screwdriver. Next remove the battery
compartment cover.
·Insert 3 x C type batteries into the battery
compartment, using the correct polarity to
eliminate the danger of fire.
·Replace the battery compartment cover and
tighten the screw.
b. If powered by an adapter (recommended adapter
SKU OUS00-0278): Insert the adapter’s connector
into the DC power input jack on the side of the
receiver, then plug into a power outlet.
Safety Note:
For the receiver:
·Be sure to remove all batteries before connecting
to the adapter and plugging into a safe power
outlet.
·Do not expose the receiver to water spray or
O00QH-0513
After the receiver and PIR sensor have been
powered, press the
Pairing button on the side of the
receiver. Next trigger the PIR sensor.If pairing is
successful, the receiver will play a ringing/alarm
sound.It normally takes about 30 seconds for the
PIR sensor and receiver to pair. If there is no
pairing within 30 seconds, the receiver will
automatically exit pairing mode.Please try pairing
again.
E: Resetting and re-pairing:
If the receiver rings but the PIR sensor has not
been triggered,or the PIR sensor interferes with
another receiver, it may be necessary to wipe the
current pairings and pair again.
For Resetting the PIR sensors, press the Pairing
button and hold for 5 seconds.The receiver will
ring and flash a LED, then all the PIR sensors
information will be deleted.
You can now re-pair the wanted PIR sensor.
F: Installation:
The PIR sensor and receiver can be mounted on a
wall or just put on a flat place.
To mount on a wall:
Select a suitable location for the receiver and PIR
sensor.
Drill holes on the wall. Next push the wall plugs
into the drilled holes and then insert the screws
into the wall plugs.Finally, mount the PIR
sensor/receivers on the screws.
Note:
• The recommended installation height for the PIR
sensor is 3.3-4.9ft (1.0-1.5m)
• The PIR sensor detecting angle is 45 degree and
detecting distance is 16.4-26.2ft (5-8m). Install
the PIR sensor in key monitoring areas such as
the entrance to a garage, store, or house.
• If installing the PIR sensor outside, note that
moving leaves and branches, strong wind, and
drastic changes in temperature can affect and
influence the sensor.
• The PIR sensor and receiver can connect up to
300ft/100m without any obstacles.
• The PIR sensor’s transmitting frequency is
water drops and do not place liquid-filled objects
such as vases or opened drink containers on or
near the receiver and the power outlet.
·If power by batteries, replace them when
exhausted with the same type and voltage
battery.
·Remove the batteries or unplug the adapter from
the power outlet if the Alarm kit is not to be used
for an extended period of time.
For the PIR sensor:
·The PIR sensor is powered by 3 x AAA batteries.
When exhausted, replace it using the same type
and voltage batteries.
·Always insert the batteries using the correct
polarity to eliminate the danger of fire.
·Keep old and new batteries away from children.
·Old batteries should be properly disposed using
safe environmental practices.
·Remove the batteries from the PIR sensor if you
do not intend to use the Alarm kit for an
extended period of time.
Low voltage indication: When the batteries are
exhausted, the LED indicator on the receiver and PIR
sensor will flash once every second to remind you to
replace the batteries.
433MHz and its range can be affected by metal,
walls,concretes, and interfering signals from
other electronic appliances with the same
frequency, including televisions, radios, and
cookers.
• Avoid placing the PIR sensor and receiver near to
the above mentioned electronic appliances.
• Do not expose the PIR sensor and receiver to
direct sunlight or high temperatures, otherwise
overheating may cause them irreparably
damaged.
• Do not install the PIR sensor and receiver near
any source of naked flames such as lighted
candles.
• Please test the PIR sensor and receiver at the
potential installation locations before actual
installation to confirm range and transmission
effectiveness.

- 07 - - 08 -
EN
DE
FR
ES
IT
EN
DE
FR
ES
IT
C. Selecting the notification mode:
The receiver will notify after the PIR sensor has
detected a car or someone passing by with a
chime/alarm sound, flashing LED, or chime/alarm
sound and flashing LED at the same time.
To select the notification mode, press the Sound
and Flash
button on the side of the receiver.The
receiver will display the current notification mode.
Keep pressing the Sound and Flash button and
stop when you have reached the preferred mode.
D: Pairing additional PIR sensors/receivers to the
alarm system:
Up to 5 PIR sensors can be paired with one
receiver.You can also extend the alarm system
with any number of receivers.This is only possible
when the PIR sensor and receiver are working on
the same frequency. Pair additional PIR sensors/re-
ceivers using the same pairing process as
described below.
The following pairing instructions are relevant to
receiver SKU O00QH-0512 and PIR sensor SKU
O00QH-0513
After the receiver and PIR sensor have been
powered, press the
Pairing button on the side of the
receiver. Next trigger the PIR sensor.If pairing is
successful, the receiver will play a ringing/alarm
sound.It normally takes about 30 seconds for the
PIR sensor and receiver to pair. If there is no
pairing within 30 seconds, the receiver will
automatically exit pairing mode.Please try pairing
again.
E: Resetting and re-pairing:
If the receiver rings but the PIR sensor has not
been triggered,or the PIR sensor interferes with
another receiver, it may be necessary to wipe the
current pairings and pair again.
For Resetting the PIR sensors, press the Pairing
button and hold for 5 seconds.The receiver will
ring and flash a LED, then all the PIR sensors
information will be deleted.
You can now re-pair the wanted PIR sensor.
F: Installation:
The PIR sensor and receiver can be mounted on a
wall or just put on a flat place.
To mount on a wall:
Select a suitable location for the receiver and PIR
sensor.
Drill holes on the wall. Next push the wall plugs
into the drilled holes and then insert the screws
into the wall plugs.Finally, mount the PIR
sensor/receivers on the screws.
Note:
• The recommended installation height for the PIR
sensor is 3.3-4.9ft (1.0-1.5m)
• The PIR sensor detecting angle is 45 degree and
detecting distance is 16.4-26.2ft (5-8m). Install
the PIR sensor in key monitoring areas such as
the entrance to a garage, store, or house.
• If installing the PIR sensor outside, note that
moving leaves and branches, strong wind, and
drastic changes in temperature can affect and
influence the sensor.
• The PIR sensor and receiver can connect up to
300ft/100m without any obstacles.
• The PIR sensor’s transmitting frequency is
433MHz and its range can be affected by metal,
walls,concretes, and interfering signals from
other electronic appliances with the same
frequency, including televisions, radios, and
cookers.
• Avoid placing the PIR sensor and receiver near to
the above mentioned electronic appliances.
• Do not expose the PIR sensor and receiver to
direct sunlight or high temperatures, otherwise
overheating may cause them irreparably
damaged.
• Do not install the PIR sensor and receiver near
any source of naked flames such as lighted
candles.
• Please test the PIR sensor and receiver at the
potential installation locations before actual
installation to confirm range and transmission
effectiveness.

- 09 - - 10 -
EN
DE
FR
ES
IT
EN
DE
FR
ES
IT
a.The receiver rings without the PIR sensor being
triggered.
The receiver may be matching on the same
frequency with nearby PIR sensors.You should
reset the pairing and re-pair your PIR sensors.
b.There is no ring/LED flash when the PIR sensor is
triggered.
• Check whether the batteries (AAA) are inserted
in the PIR sensor.
• If the receiver is powered by batteries, check
whether batteries (Type C batteries) are inserted
in the receiver.
• If the receiver is powered by an adapter, check
whether the power outlet being used for the
adapter is working properly.
• Check whether you have turned on the receiver.
• Pair the receiver and PIR sensor again.
c.The ringtone/alarm volume is greatly reduced.
A weak battery can reduce the ring volume.
Change the batteries every 10-12 months.
Metal constructions, walls, and other appliances
C. Selecting the notification mode:
The receiver will notify after the PIR sensor has
detected a car or someone passing by with a
chime/alarm sound, flashing LED, or chime/alarm
sound and flashing LED at the same time.
To select the notification mode, press the Sound
and Flash
button on the side of the receiver.The
receiver will display the current notification mode.
Keep pressing the Sound and Flash button and
stop when you have reached the preferred mode.
D: Pairing additional PIR sensors/receivers to the
alarm system:
Up to 5 PIR sensors can be paired with one
receiver.You can also extend the alarm system
with any number of receivers.This is only possible
when the PIR sensor and receiver are working on
the same frequency. Pair additional PIR sensors/re-
ceivers using the same pairing process as
described below.
The following pairing instructions are relevant to
receiver SKU O00QH-0512 and PIR sensor SKU
5.Trouble Shooting:
O00QH-0513
After the receiver and PIR sensor have been
powered, press the
Pairing button on the side of the
receiver. Next trigger the PIR sensor.If pairing is
successful, the receiver will play a ringing/alarm
sound.It normally takes about 30 seconds for the
PIR sensor and receiver to pair. If there is no
pairing within 30 seconds, the receiver will
automatically exit pairing mode.Please try pairing
again.
E: Resetting and re-pairing:
If the receiver rings but the PIR sensor has not
been triggered,or the PIR sensor interferes with
another receiver, it may be necessary to wipe the
current pairings and pair again.
For Resetting the PIR sensors, press the Pairing
button and hold for 5 seconds.The receiver will
ring and flash a LED, then all the PIR sensors
information will be deleted.
You can now re-pair the wanted PIR sensor.
F: Installation:
The PIR sensor and receiver can be mounted on a
wall or just put on a flat place.
To mount on a wall:
Select a suitable location for the receiver and PIR
sensor.
Drill holes on the wall. Next push the wall plugs
into the drilled holes and then insert the screws
into the wall plugs.Finally, mount the PIR
sensor/receivers on the screws.
Note:
• The recommended installation height for the PIR
sensor is 3.3-4.9ft (1.0-1.5m)
• The PIR sensor detecting angle is 45 degree and
detecting distance is 16.4-26.2ft (5-8m). Install
the PIR sensor in key monitoring areas such as
the entrance to a garage, store, or house.
• If installing the PIR sensor outside, note that
moving leaves and branches, strong wind, and
drastic changes in temperature can affect and
influence the sensor.
• The PIR sensor and receiver can connect up to
300ft/100m without any obstacles.
• The PIR sensor’s transmitting frequency is
433MHz and its range can be affected by metal,
walls,concretes, and interfering signals from
other electronic appliances with the same
frequency, including televisions, radios, and
cookers.
• Avoid placing the PIR sensor and receiver near to
the above mentioned electronic appliances.
• Do not expose the PIR sensor and receiver to
direct sunlight or high temperatures, otherwise
overheating may cause them irreparably
damaged.
• Do not install the PIR sensor and receiver near
any source of naked flames such as lighted
candles.
• Please test the PIR sensor and receiver at the
potential installation locations before actual
installation to confirm range and transmission
effectiveness.
with the same frequency can also affect the
receiver’s ringing. Avoid mounting the PIR sensor
and receiver near any metal objects.
- 11 - - 12 -
EN
DE
FR
ES
IT
EN
DE
FR
ES
IT
a.The receiver rings without the PIR sensor being
triggered.
The receiver may be matching on the same
frequency with nearby PIR sensors.You should
reset the pairing and re-pair your PIR sensors.
b.There is no ring/LED flash when the PIR sensor is
triggered.
• Check whether the batteries (AAA) are inserted
in the PIR sensor.
• If the receiver is powered by batteries, check
whether batteries (Type C batteries) are inserted
in the receiver.
• If the receiver is powered by an adapter, check
whether the power outlet being used for the
adapter is working properly.
• Check whether you have turned on the receiver.
• Pair the receiver and PIR sensor again.
c.The ringtone/alarm volume is greatly reduced.
A weak battery can reduce the ring volume.
Change the batteries every 10-12 months.
Metal constructions, walls, and other appliances
Disposal of the appliance
Under no circumstances should you
dispose of the appliance in normal
domestic waste.This product is subject
to the provisions of European Directive
2012/19/EU.
The appliance’s packaging is made from
environmentally friendly material and
can be disposed of at your local recycling
plant.
Dispose of the appliance via an approved disposal
company or your municipal waste facility. Please
observe the currently applicable regulations.Please
contact your waste disposal centre if you need any
further information.
Disposal
Disposal of batteries
Used batteries may not be disposed of in
household waste.
All consumers are statutorily required to dispose of
batteries at a collection point provided by their local
municipality or retail store.
The purpose of this obligation is to ensure batteries
are disposed of in a non-polluting manner. Only
dispose of batteries when they are fully discharged.
with the same frequency can also affect the
receiver’s ringing. Avoid mounting the PIR sensor
and receiver near any metal objects.
- 13 - - 14 -
EN
DE
FR
ES
IT
EN
DE
FR
ES
IT
Sollte etwas in Ihrem Paket fehlen oder das Paket
beschädigt sein, melden Sie sich bitte umgehend bei
https://www.1byone.com/Support
Vielen Dank, dass Sie sich für den 1byone Alarman-
lage mit Infrarot-Sensor entschieden haben. Bitte
lesen Sie diese Bedienungsanleitung sorgfältig.
Infrarot-Sensor:
Der Infrarot-Sensor wird durch 3 AAA Batterien
betrieben. Bitte legen Sie die Batterien wie folgt ein:
·Entfernen sie die Schraube auf der Rückseite des
Infrarot-Sensors mit einem Schraubenzieher.
·Legen Sie die AAA Batterien wie angegeben in
das Batteriefach.
·Stecken Sie den Aufsatz wieder auf das
Batteriefach und ziehen Sie die Schraube an.
Empfänger:
Der Empfänger kann mit 3x Typ C Batterien oder
2 x Infrarot-Sensor 1 x Empfänger
4 x Wandhalterung 4 x Schraube
1 x Bedienungsanleitung
(1)LED Anzeige (2)Lautsprecher
(3)Stromanschluss (4)Türklingel und Alarmschalter
(5)An / Aus Schalter (6) Ton und Signalschalter
(7)Kopplungsknopf (8)Infrarot-Sensor
(9)LED Anzeige
Spannung des Infrarot-Sensors
Spannung des Empfängers
Frequenz des Infrarot-Sensor
Infrarot-Sensor Blickwinkel
Infrarot-Sensor Sichtweite
Nutzungsreichweite
Stromverbrauch
Empfänger Lautstärke
Betriebstemperatur
DC 6V (3x Typ C Batterien oder Adapter)
DC4.5V ( 3 x AAA batteries)
433.92MHz+100KHz
45 Grad
5-8m/12-15ft
100m/300ft (Ohne Hindernisse)
Empfänger: <1.2W Infrarot-Sensor: <0.06W
Über 100dB innerhalb 0.5m
-20 bis 50°C
1. Lieferumfang
2.Teilebeschriftung 3. Stromversorgung
Technische Eigenschaften mit einem Adapter betrieben werden.
a. Wenn er mit Batterien betrieben wird folgen Sie
einfach der folgenden Anleitung:
·Entfernen sie die Schraube auf der Rückseite des
Empfängers mit einem Schraubenzieher.
·Legen Sie die drei Typ C Batterien wie angegeben
in das Batteriefach.
·Stecken Sie den Aufsatz wieder auf das
Batteriefach und ziehen Sie die Schraube an.
b. Wenn Sie das Gerät mit einem Adapter nutzen
(Wie bei OEU00-0278) stecken Sie einfach den
Adapter in die Steckdose und verbinden Sie das
andere Ende mit dem Empfänger.
Sicherheitshinweis:
Für den Empfänger:
·Stellen Sie sicher, dass Sie die Batterien entfernen,
bevor Sie den Adapter nutzen. Nur eine
Energiequelle zurzeit nutzen.
·Lassen Sie keine Flüssigkeiten und Wasser an den
Empfänger.Vermeiden Sie Kontakt mit Regen
oder jeglicher Art von Spritzwasser.
·Ersetzen Sie die Batterien immer mit den gleichen
Batterien des selten Typs.
(1)
(2)
CHIME
LOW
ALARM
(3)
(4)
OFF
ON
(5)
(6)
(7)
(8)
(9)
·Entfernen Sie die Batterien oder den Adapter aus
der Steckdose, wenn Sie das Produkt über einen
längeren Zeitraum nicht nutzen.
Für den Infrarot-Sensor
·Der Infrarot-Sensor wird von 3 AAA Batterien
betrieben. Ersetzen Sie die Batterien immer mit
den gleichen Batterien des selten Typs.
·Folgen Sie der angegebenen Polarität beim
Einlegen der Batterien.
·Halten Sie Batterien von Kindern fern.
·Alte Batterien müssen fachgerecht entsorgt
werden!
·Entfernen Sie die Batterien, wenn Sie das Produkt
über einen längeren Zeitraum nicht nutzen.
Wenn die LED des Sensors jede Sekunde einmal
kurz blinkt, heißt dass, dass die Batterie gewechselt
werden muss.

- 15 - - 16 -
EN
DE
FR
ES
IT
EN
DE
FR
ES
IT
A. Den Empfänger An / Ausschalten
Stellen Sie sicher, dass der Schalter auf“ON”
geschaltet ist.
Sie können den Alarm ausschalten indem Sie den
Schalter auf“OFF”legen.
Infrarot-Sensor:
Der Infrarot-Sensor wird durch 3 AAA Batterien
betrieben. Bitte legen Sie die Batterien wie folgt ein:
·Entfernen sie die Schraube auf der Rückseite des
Infrarot-Sensors mit einem Schraubenzieher.
·Legen Sie die AAA Batterien wie angegeben in
das Batteriefach.
·Stecken Sie den Aufsatz wieder auf das
Batteriefach und ziehen Sie die Schraube an.
Empfänger:
Der Empfänger kann mit 3x Typ C Batterien oder
4. Nutzung
mit einem Adapter betrieben werden.
a. Wenn er mit Batterien betrieben wird folgen Sie
einfach der folgenden Anleitung:
·Entfernen sie die Schraube auf der Rückseite des
Empfängers mit einem Schraubenzieher.
·Legen Sie die drei Typ C Batterien wie angegeben
in das Batteriefach.
·Stecken Sie den Aufsatz wieder auf das
Batteriefach und ziehen Sie die Schraube an.
b. Wenn Sie das Gerät mit einem Adapter nutzen
(Wie bei OEU00-0278) stecken Sie einfach den
Adapter in die Steckdose und verbinden Sie das
andere Ende mit dem Empfänger.
Sicherheitshinweis:
Für den Empfänger:
·Stellen Sie sicher, dass Sie die Batterien entfernen,
bevor Sie den Adapter nutzen. Nur eine
Energiequelle zurzeit nutzen.
·Lassen Sie keine Flüssigkeiten und Wasser an den
Empfänger.Vermeiden Sie Kontakt mit Regen
oder jeglicher Art von Spritzwasser.
·Ersetzen Sie die Batterien immer mit den gleichen
Batterien des selten Typs.
·Entfernen Sie die Batterien oder den Adapter aus
der Steckdose, wenn Sie das Produkt über einen
längeren Zeitraum nicht nutzen.
Für den Infrarot-Sensor
·Der Infrarot-Sensor wird von 3 AAA Batterien
betrieben. Ersetzen Sie die Batterien immer mit
den gleichen Batterien des selten Typs.
·Folgen Sie der angegebenen Polarität beim
Einlegen der Batterien.
·Halten Sie Batterien von Kindern fern.
·Alte Batterien müssen fachgerecht entsorgt
werden!
·Entfernen Sie die Batterien, wenn Sie das Produkt
über einen längeren Zeitraum nicht nutzen.
Wenn die LED des Sensors jede Sekunde einmal
kurz blinkt, heißt dass, dass die Batterie gewechselt
werden muss.
B. Modi auswählen
Der Empfänger kann als Alarm und als Türklingel
genutzt werden.
Um den Modus auszuwählen, nutzen Sie den
Schalter an der Seite des Empfängers um
folgendes einzustellen:

- 17 - - 18 -
EN
DE
FR
ES
IT
EN
DE
FR
ES
IT
A. Den Empfänger An / Ausschalten
Stellen Sie sicher, dass der Schalter auf“ON”
geschaltet ist.
Sie können den Alarm ausschalten indem Sie den
Schalter auf“OFF”legen.
C. Den Benachrichtigungsmodus einstellen:
Der Empfänger wird im Alarmmodus sofort einen
Alarmton ausgeben, sobald der Infrarot-Sensor
eine Bewegung oder eine Wärmequelle
gefunden hat. Die LED wird während des
Alarmtons
blinken. Um dies zu konfigurieren, drücken Sie.
Der Empfänger zeigt dann durch
Blinken und Ton die momentan ausgewählte
a. Chime – Der Empfänger funktioniert wie eine
Türklingel und macht einen lauten“Ding Dong”
Ton.
b. Low – In diesem Modus wird der Empfänger
einen leisen“Ding Dong”Ton auslösen.
c. Alarm – Der Empfänger arbeitet als Alarmanlage.
Option an und hören Sie auf zu drücken, wenn
die Einstellung OK ist.
D. Weitere Infrarot-Sensoren an das System
anschließen
Bis zu 5 Infrarot-Sensoren können mit einem
Empfänger gekoppelt werden, und bis zu 100
Empfänger können im ganzen System vorhanden
sein. Dies ist allerdings nur möglich, wenn
Empfänger und Infrarot-Sensor auf gleicher
Frequenz arbeiten. Das Kopplungssystem hilft den
Geräten die gleiche Frequenz zu nutzen:
Nachdem Sie beide Geräte eingeschaltet haben,
drücken Sie den
Knopf“ “ an der Seite des Empfängers.
Führen Sie danach sofort eine Bewegung vor
dem Infrarot-Sensor aus,dies sollte die Kopplung
abschließen.Wenn es funktioniert hat, wird der
Empfänger einen Ton abspielen. Dies kann bis zu
30 Sekunden dauern.Wenn es nach 30 Sekunden
nicht geklappt hat, wiederholen Sie den Vorgang
noch einmal.
E. Resetten und neu-Kopplung
Wenn der Empfänger tönt, obwohl der
Infrarot-Sensor nicht betätigt wurde, oder der
Information mit anderen Empfängern Störungen
aufweist, müssen Sie ggf.die Einstellungen
löschen.
Halten Sie dafür den Kopplungsknopf 5 Sekunden
gedrückt, bis die LED blinkt und ein Ton zu hören
ist. Nun sind die Daten gelöscht.
Nun können Sie die Kopplung erneut
durchführen.
F. Installation:
Der Infrarot-Sensor und der Empfänger kann an
jeder flachen Wand angebracht werden.
Wandanbringung:
Suchen Sie sich eine geeignete Stelle für den
Empfänger und den Infrarot-Sensor. Prüfen Sie
grob, ob der Abstand zwischen beiden Geräten
OK ist, indem Sie die gekoppelten Geräte einmal
einschalten und auslösen.Bohren Sie auf
gleichem Abstand wie bei dem Gerät Löcher in
die Wand und drücken Sie die Wandhalterungen
in die Löcher. Schrauben Sie die Schrauben in die
Halterungen und hängen Sie das Gerät an.
B. Modi auswählen
Der Empfänger kann als Alarm und als Türklingel
genutzt werden.
Um den Modus auszuwählen, nutzen Sie den
Schalter an der Seite des Empfängers um
folgendes einzustellen:
Notiz:
• Die empfohlene Höhe des Sensors ist 1 bis 2 Meter.
• Der Infrarot-Sensor hat einen Blickwinkel von 45°
und eine Sichtweite von ca 5-8m.Installieren Sie
den Infrarot-Sensor an Schlüsselpositionen wie z.B.
Am Garageneingang, Ladentür oder Terrasse.
• Wenn Sie den Infrarot-Sensor außen anbringen,
sollten Sie bedenken, dass herumfliegende Blätter
und starke Temperaturunterschiede den Sensor
beeinflussen können
• Der Infrarot-Sensor kann sich mit dem Empfänger
auf bis zu 100m austauschen.
• Die Frequenz des Infrarot-Sensors liegt bei 433MHz
und kann von Metallen, Beton und anderen
elektronischen Signalen beeinflusst werden.Bitte
stellen Sie sicher, dass die Reichweite ausreicht um
die Wände zu durchdringen.
• Vermeiden Sie den Sensor oder Empfänger auf
anderen elektrischen Geräten zu installieren.
• Lassen Sie beide Geräte nicht in zu hohen
Temperaturen oder dauerndem direktem
Sonnenlicht um das Material nicht zu gefährden.
• Installieren Sie die Geräte nicht nah an offenem
Feuer (Kamin, Kerzen)

- 19 - - 20 -
EN
DE
FR
ES
IT
EN
DE
FR
ES
IT
C. Den Benachrichtigungsmodus einstellen:
Der Empfänger wird im Alarmmodus sofort einen
Alarmton ausgeben, sobald der Infrarot-Sensor
eine Bewegung oder eine Wärmequelle
gefunden hat. Die LED wird während des
Alarmtons
blinken. Um dies zu konfigurieren, drücken Sie.
Der Empfänger zeigt dann durch
Blinken und Ton die momentan ausgewählte
Option an und hören Sie auf zu drücken, wenn
die Einstellung OK ist.
D. Weitere Infrarot-Sensoren an das System
anschließen
Bis zu 5 Infrarot-Sensoren können mit einem
Empfänger gekoppelt werden, und bis zu 100
Empfänger können im ganzen System vorhanden
sein. Dies ist allerdings nur möglich, wenn
Empfänger und Infrarot-Sensor auf gleicher
Frequenz arbeiten. Das Kopplungssystem hilft den
Geräten die gleiche Frequenz zu nutzen:
Nachdem Sie beide Geräte eingeschaltet haben,
drücken Sie den
Knopf“ “ an der Seite des Empfängers.
Führen Sie danach sofort eine Bewegung vor
dem Infrarot-Sensor aus,dies sollte die Kopplung
abschließen.Wenn es funktioniert hat, wird der
Empfänger einen Ton abspielen. Dies kann bis zu
30 Sekunden dauern.Wenn es nach 30 Sekunden
nicht geklappt hat, wiederholen Sie den Vorgang
noch einmal.
E. Resetten und neu-Kopplung
Wenn der Empfänger tönt, obwohl der
Infrarot-Sensor nicht betätigt wurde, oder der
Information mit anderen Empfängern Störungen
aufweist, müssen Sie ggf.die Einstellungen
löschen.
Halten Sie dafür den Kopplungsknopf 5 Sekunden
gedrückt, bis die LED blinkt und ein Ton zu hören
ist. Nun sind die Daten gelöscht.
Nun können Sie die Kopplung erneut
durchführen.
F. Installation:
Der Infrarot-Sensor und der Empfänger kann an
jeder flachen Wand angebracht werden.
Wandanbringung:
Suchen Sie sich eine geeignete Stelle für den
Empfänger und den Infrarot-Sensor. Prüfen Sie
grob, ob der Abstand zwischen beiden Geräten
OK ist, indem Sie die gekoppelten Geräte einmal
einschalten und auslösen.Bohren Sie auf
gleichem Abstand wie bei dem Gerät Löcher in
die Wand und drücken Sie die Wandhalterungen
in die Löcher. Schrauben Sie die Schrauben in die
Halterungen und hängen Sie das Gerät an.
Notiz:
• Die empfohlene Höhe des Sensors ist 1 bis 2 Meter.
• Der Infrarot-Sensor hat einen Blickwinkel von 45°
und eine Sichtweite von ca 5-8m.Installieren Sie
den Infrarot-Sensor an Schlüsselpositionen wie z.B.
Am Garageneingang, Ladentür oder Terrasse.
• Wenn Sie den Infrarot-Sensor außen anbringen,
sollten Sie bedenken, dass herumfliegende Blätter
und starke Temperaturunterschiede den Sensor
beeinflussen können
• Der Infrarot-Sensor kann sich mit dem Empfänger
auf bis zu 100m austauschen.
• Die Frequenz des Infrarot-Sensors liegt bei 433MHz
und kann von Metallen, Beton und anderen
elektronischen Signalen beeinflusst werden.Bitte
stellen Sie sicher, dass die Reichweite ausreicht um
die Wände zu durchdringen.
• Vermeiden Sie den Sensor oder Empfänger auf
anderen elektrischen Geräten zu installieren.
• Lassen Sie beide Geräte nicht in zu hohen
Temperaturen oder dauerndem direktem
Sonnenlicht um das Material nicht zu gefährden.
• Installieren Sie die Geräte nicht nah an offenem
Feuer (Kamin, Kerzen)

- 21 - - 22 -
EN
DE
FR
ES
IT
EN
DE
FR
ES
IT
a. Der Empfänger empfängt Signale obwohl der
Sensor nicht ausgelöst hat.
Bitte löschen Sie die Daten auf dem Sender und
koppeln Sie die Geräte erneut.
b. Es Klingelt nicht / Die LED leuchtet nicht,wenn
der Infrarot-Sensor auslöst.
• Prüfen Sie,ob alle Batterien korrekt eingelegt
sind.
• Prüfen Sie die Adapter und die Steckdose ob
diese korrekt mit Strom versorgt wird.
• Prüfen Sie,ob der Empfänger eingeschaltet ist.
• Koppel Sie die beiden Geräte erneut.
C. Den Benachrichtigungsmodus einstellen:
Der Empfänger wird im Alarmmodus sofort einen
Alarmton ausgeben, sobald der Infrarot-Sensor
eine Bewegung oder eine Wärmequelle
gefunden hat. Die LED wird während des
Alarmtons
blinken. Um dies zu konfigurieren, drücken Sie.
Der Empfänger zeigt dann durch
Blinken und Ton die momentan ausgewählte
5. Problemlösungen:
Option an und hören Sie auf zu drücken, wenn
die Einstellung OK ist.
D. Weitere Infrarot-Sensoren an das System
anschließen
Bis zu 5 Infrarot-Sensoren können mit einem
Empfänger gekoppelt werden, und bis zu 100
Empfänger können im ganzen System vorhanden
sein. Dies ist allerdings nur möglich, wenn
Empfänger und Infrarot-Sensor auf gleicher
Frequenz arbeiten. Das Kopplungssystem hilft den
Geräten die gleiche Frequenz zu nutzen:
Nachdem Sie beide Geräte eingeschaltet haben,
drücken Sie den
Knopf“ “ an der Seite des Empfängers.
Führen Sie danach sofort eine Bewegung vor
dem Infrarot-Sensor aus,dies sollte die Kopplung
abschließen.Wenn es funktioniert hat, wird der
Empfänger einen Ton abspielen. Dies kann bis zu
30 Sekunden dauern.Wenn es nach 30 Sekunden
nicht geklappt hat, wiederholen Sie den Vorgang
noch einmal.
E. Resetten und neu-Kopplung
Wenn der Empfänger tönt, obwohl der
Infrarot-Sensor nicht betätigt wurde, oder der
Information mit anderen Empfängern Störungen
aufweist, müssen Sie ggf.die Einstellungen
löschen.
Halten Sie dafür den Kopplungsknopf 5 Sekunden
gedrückt, bis die LED blinkt und ein Ton zu hören
ist. Nun sind die Daten gelöscht.
Nun können Sie die Kopplung erneut
durchführen.
F. Installation:
Der Infrarot-Sensor und der Empfänger kann an
jeder flachen Wand angebracht werden.
Wandanbringung:
Suchen Sie sich eine geeignete Stelle für den
Empfänger und den Infrarot-Sensor. Prüfen Sie
grob, ob der Abstand zwischen beiden Geräten
OK ist, indem Sie die gekoppelten Geräte einmal
einschalten und auslösen.Bohren Sie auf
gleichem Abstand wie bei dem Gerät Löcher in
die Wand und drücken Sie die Wandhalterungen
in die Löcher. Schrauben Sie die Schrauben in die
Halterungen und hängen Sie das Gerät an.
Notiz:
• Die empfohlene Höhe des Sensors ist 1 bis 2 Meter.
• Der Infrarot-Sensor hat einen Blickwinkel von 45°
und eine Sichtweite von ca 5-8m.Installieren Sie
den Infrarot-Sensor an Schlüsselpositionen wie z.B.
Am Garageneingang, Ladentür oder Terrasse.
• Wenn Sie den Infrarot-Sensor außen anbringen,
sollten Sie bedenken, dass herumfliegende Blätter
und starke Temperaturunterschiede den Sensor
beeinflussen können
• Der Infrarot-Sensor kann sich mit dem Empfänger
auf bis zu 100m austauschen.
• Die Frequenz des Infrarot-Sensors liegt bei 433MHz
und kann von Metallen, Beton und anderen
elektronischen Signalen beeinflusst werden.Bitte
stellen Sie sicher, dass die Reichweite ausreicht um
die Wände zu durchdringen.
• Vermeiden Sie den Sensor oder Empfänger auf
anderen elektrischen Geräten zu installieren.
• Lassen Sie beide Geräte nicht in zu hohen
Temperaturen oder dauerndem direktem
Sonnenlicht um das Material nicht zu gefährden.
• Installieren Sie die Geräte nicht nah an offenem
Feuer (Kamin, Kerzen)
c.Der Klingelton ist sehr leise
Es könnte sein, dass die Batterien alle sind, Bitte
wechseln Sie die Batterien alle 10 bis 12 Monate.
Es kann sein, dass das Signal von Metall und
Wänden reflektiert wird und daher nur
abgeschwächt ankommt.Versuchen Sie den
Infrarot-Sensor an einem anderen Ort anzubrin-
gen.

- 23 - - 24 -
EN
DE
FR
ES
IT
EN
DE
FR
ES
IT
Gerät Entsorgen
Werfen Sie das Gerät keinesfalls in den
normalen Hausmüll. Dieses Produkt
unterliegt der europäischen Richtlinie
2012/19/EU.
Die Verpackung besteht aus umweltfre-
undlichen Materialien, die Sie über die
örtlichen Recyclingstellen entsorgen
können.
Entsorgen Sie das Gerät über einen zugelassenen
Entsorgungsbetrieb oder über Ihre kommunale
Entsorgungseinrichtung. Beachten Sie die aktuell
geltenden Vorschriften. Setzen Sie sich im
Zweifelsfall mit Ihrer Entsorgungseinrichtung in
Verbindung.
Batterien/Akkus entsorgen
Batterien/Akkus dürfen nicht im
Hausmüll entsorgt werden.
Jeder Verbraucher ist gesetzlich verpfl ichtet,
Batterien / Akkus bei einer Sammelstelle seiner
Gemeinde/seines Stadtteils oder im Handel
abzugeben. Diese Verpflichtung dient dazu, dass
Batterien/Akkus einer umweltschonenden
Entsorgung zugeführt werden können. Geben Sie
Batterien/Akkus nur im entladenen Zustand zurück.
Entsorgung

- 25 - - 26 -
EN
DE
FR
ES
IT
EN
DE
FR
ES
IT
Si le contenu du pacquet est visiblement endommagé ou
manquant, veuillez contacter immédiatement le service
clients 1byone au :https://www.1byone.com/Support
Merci pour l’achat de l’alarme infra-rouge sans fil.
Merci de lire ce manuel d’instruction avant utilisation
pour assurer une utilisation en toute sécurité.
Récepteur infra-rouge:
Le récepteur infra-rouge est alimenté par 3 piles
AAA, insérer les piles en utilisant la procédure
décrite ci-dessous :
·Retirer les vis sur le dos du capteur infra-rouge
avec un tournevis.Retirer ensuite les piles du
compartiment qui leur est dédié.
·Insérer 3 piles AAA dans le compartiment à piles,
en utilisant la polarité qui convient pour éliminer
tout danger d‘incendie.
2 x capteur infrarouge 1 x récepteur
4 x prise murale 4 x vis
1 x manuel d’instructions
(1) Indicateur LED (2) Haut-parleur
(3) Connecteur d’entrée (4) Interrupteur et carillon de porte
(5) Interrupteur“ON/OFF” (6) Son et commutateur
(7) Bouton de synchronisation
(8) Détecteurs infra-rouges passifs
(9) Indicateur LED
Tension de la Sonnette
Tension d’un récepteur infra-rouge
Fréquence de capteur infra-rouge
Détecteur Infra-Rouge d’angle
Détecteur Infra-Rouge d’angle
Champ d’opération
Consommation d’énergie
Récepteur du volume
Température d’utilisation
DC 6V ( 3 x piles Type C ou adaptateur)
DC4.5V (3x piles AAA)
433.92MHz+100KHz
45 degrés
5-8m
100m (sans obstacles)
Récepteur : <1.2W récepteur
Récepteur :capteur <1.2W : <0.06W
Plus de 100 dB dans un périmetre de 0.5 m
-20°C ~ 50 °C
1. Contenu de l’emballage
2. Nom des composants
3. Alimentation électrique
Paramètres:·Replacer la protection des piles et fixer les vis.
Récepteur:
Le récepteur peut être alimenté par 3 piles de type
C ou bien par un adaptateur (production : DC 6V).
a. Si l’appareil est alimenté par des piles, veuillez les
insérer en suivant les procédures suivantes :
·Retirer les vis du bas du récepteur avec un
tournevis. Enlever la protection du compartiment
des piles.
·Insérer 3 piles de type C dans le compartiment à
piles,en utilisant la polarité correcte pour éliminer
le danger d’incendie.
·Replacer le compartiment pour batterie et le
visser à l’aide d’un tournevis.
b. Si alimenté par un adaptateur ( nous vous
recommandons l’adaptateur SKU OEU00-0278):
insérer le cordon d’alimentation de l’adaptateur
dans une prise de courant murale.
Note de sécurité
Pour le récepteur:
·Soyez sur de retirer toutes les piles avant de
connecter l’adaptateur et de le brancher dans
(1)
(2)
CHIME
LOW
ALARM
(3)
(4)
OFF
ON
(5)
(6)
(7)
(8)
(9)
une prise d’alimentation électrique sûre.
·Ne pas exposer le produit à des jets d’eau ou
gouttes d‘eau. Ne pas placer d’objets contenants
des liquides tels que des vases ou des boissons
près du récepteur ou de l’alimentation électrique.
·Si vous utilisez des piles, les remplacer une fois
qu’elles sont vides et les remplacer avec le même
type de piles.
·Retirer les piles ou débrancher l’adaptateur de la
prise électrique si le kit d ‘alarme n’est pas utilisé
pendant une longue période.
Pour le récepteur infra-rouge:
·le récepteur infra-rouge est alimenté par des 3
piles AAA. Lorsque ces piles sont usées, les
remplacer avec le même type de piles avec la
même tension.
·Toujours insérer les piles en utilisant la polarité
convenable pour éviter tout risque de feu.
·Garder les piles neuves et usagées à distance des
enfants.
·Les vielles batteries devraient être recyclées en
respectant les normes environnementales.
·Enlever les piles du récepteur infra-rouge si vous
n’avez pas l’intention d’utiliser ce kit pour une
longue période.
Indication de sous tension :lorsque les piles sont
usées,l’indicateur lumineux LED sur le récepteur et
le récepteur infra-rouge vont clignoter chaque
seconde pour vous rappeler de changer les piles.

- 27 - - 28 -
EN
DE
FR
ES
IT
EN
DE
FR
ES
IT
Récepteur infra-rouge:
Le récepteur infra-rouge est alimenté par 3 piles
AAA, insérer les piles en utilisant la procédure
décrite ci-dessous :
·Retirer les vis sur le dos du capteur infra-rouge
avec un tournevis.Retirer ensuite les piles du
compartiment qui leur est dédié.
·Insérer 3 piles AAA dans le compartiment à piles,
en utilisant la polarité qui convient pour éliminer
tout danger d‘incendie.
·Replacer la protection des piles et fixer les vis.
Récepteur:
Le récepteur peut être alimenté par 3 piles de type
C ou bien par un adaptateur (production : DC 6V).
a. Si l’appareil est alimenté par des piles, veuillez les
insérer en suivant les procédures suivantes :
·Retirer les vis du bas du récepteur avec un
tournevis. Enlever la protection du compartiment
des piles.
·Insérer 3 piles de type C dans le compartiment à
piles,en utilisant la polarité correcte pour éliminer
le danger d’incendie.
·Replacer le compartiment pour batterie et le
visser à l’aide d’un tournevis.
b. Si alimenté par un adaptateur ( nous vous
recommandons l’adaptateur SKU OEU00-0278):
insérer le cordon d’alimentation de l’adaptateur
dans une prise de courant murale.
Note de sécurité
Pour le récepteur:
·Soyez sur de retirer toutes les piles avant de
connecter l’adaptateur et de le brancher dans
une prise d’alimentation électrique sûre.
·Ne pas exposer le produit à des jets d’eau ou
gouttes d‘eau. Ne pas placer d’objets contenants
des liquides tels que des vases ou des boissons
près du récepteur ou de l’alimentation électrique.
·Si vous utilisez des piles, les remplacer une fois
qu’elles sont vides et les remplacer avec le même
type de piles.
·Retirer les piles ou débrancher l’adaptateur de la
prise électrique si le kit d ‘alarme n’est pas utilisé
pendant une longue période.
Pour le récepteur infra-rouge:
·le récepteur infra-rouge est alimenté par des 3
piles AAA. Lorsque ces piles sont usées, les
remplacer avec le même type de piles avec la
même tension.
·Toujours insérer les piles en utilisant la polarité
convenable pour éviter tout risque de feu.
·Garder les piles neuves et usagées à distance des
enfants.
·Les vielles batteries devraient être recyclées en
respectant les normes environnementales.
·Enlever les piles du récepteur infra-rouge si vous
n’avez pas l’intention d’utiliser ce kit pour une
longue période.
Indication de sous tension :lorsque les piles sont
usées,l’indicateur lumineux LED sur le récepteur et
le récepteur infra-rouge vont clignoter chaque
seconde pour vous rappeler de changer les piles.

- 29 - - 30 -
EN
DE
FR
ES
IT
EN
DE
FR
ES
IT
A. Marche/ arrêt:
Soyez sûr de positioner le bouton sur « ON »
lorsque vous utilisez le kit de l’alarme.
Vous pouvez éteindre l’alarme lorque c’est
nécessaire en mettant le bouton en mode « OFF ».
B.Sélectionner le mode d’utilisation.
Le récepteur peut fonctionner comme une
sonnette de porte ou bien comme une alarme.
Pour sélectionner le mode opérationnel, placer le
bouton sur le côté du récepteur sur
l’une des positions suivantes:
a. Carillon : le récepteur fonctionne comme une
sonnette et utilise le son“Ding Dong”à un fort
volume.
C. Sélectionner un mode d’alimentation
Le récepteur envoie une notification après avoir
détecté une voiture ou quelqu’un avec un son
d’alarme, ou bien avec un signal lumineux.
Pour sélectionner le mode de notification, presser
sur le bouton « Sound and Flash » .Le récepteur
affichera le mode de notification. Continuer de
presser sur le bouton « Sound & Flash »
quand vous avez obtenu le mode désiré.
D. Synchroniserdes capteurs infrarouges au système
d’alarme.
Jusqu’ à 5 récepteurs peuvent être synchronisé s
avec un récepteur.Vous pouvez aussi étendre le
système d’alarme avec n’importe quel nombre de
récepteurs.Synchroniser les récepteurs en
utilisant le système de pairage ci-dessous.
Importe quel nombre de récepteurs.Synchroniser
les récepteurs en utilisant le système de pairage
Récepteur infra-rouge:
Le récepteur infra-rouge est alimenté par 3 piles
AAA, insérer les piles en utilisant la procédure
décrite ci-dessous :
·Retirer les vis sur le dos du capteur infra-rouge
avec un tournevis.Retirer ensuite les piles du
compartiment qui leur est dédié.
·Insérer 3 piles AAA dans le compartiment à piles,
en utilisant la polarité qui convient pour éliminer
tout danger d‘incendie.
4. opérations
·Replacer la protection des piles et fixer les vis.
Récepteur:
Le récepteur peut être alimenté par 3 piles de type
C ou bien par un adaptateur (production : DC 6V).
a. Si l’appareil est alimenté par des piles, veuillez les
insérer en suivant les procédures suivantes :
·Retirer les vis du bas du récepteur avec un
tournevis. Enlever la protection du compartiment
des piles.
·Insérer 3 piles de type C dans le compartiment à
piles,en utilisant la polarité correcte pour éliminer
le danger d’incendie.
·Replacer le compartiment pour batterie et le
visser à l’aide d’un tournevis.
b. Si alimenté par un adaptateur ( nous vous
recommandons l’adaptateur SKU OEU00-0278):
insérer le cordon d’alimentation de l’adaptateur
dans une prise de courant murale.
Note de sécurité
Pour le récepteur:
·Soyez sur de retirer toutes les piles avant de
connecter l’adaptateur et de le brancher dans
ci-dessous.
Les instructions de synchronisation sont adaptées
aux modèles SKU 000QH-00512 et SKU
000QH-0513.
Après que le récepteur soit alimenté, preser sur le
bouton de
synchronisation situé sur le coté du
récepteur.
Lorsque le pairage est effectué, le récepteur
utilisera 1 son d’alarme/ de clochette.
S’il n’y a pas de synchronisation pendant 30
minutes,le récepteur va automatiquement être
en mode synchronisation pendant 30 minutes.
Réesayer de synchroniser.
E. Redémarrage et re synchronisation
Si le récepteur sonne mais le système infra-rouge
n’a pas été amorçé , il serait nécessaire de passer
un coup de chiffon sur les appareils 1byone et de
recommencer la synchronisation.
Pour réinstaller les récepteurs,presser le bouton
de synchronisation et le maintenir pendant 5
secondes.Le récepteur clignotera et les
informations seront effacées.
Vous pouvez désormais réparer le récepteur
désiré.
F. Installation
Le capteur infra-rouge et le récepteur peuvent
être montés sur un mur ou juste sur une surface
plate.
Pour installer sur un mur.
Sélectionner un endroit pour le récepteur et le
capteur infra-rouge.
Installer les vis et les trous et les insérer dans la
prise murale.
Finalement, mettre les c apteurs infra-rouge sur
les vis.
Remarque:
• La hauteur recommandée de l’installation pour
les capteurs infra-rouge est de 1 à 1.5 mètre.
• Le récepteur infra-rouge dispose d’un angle de
détection de 45 degrés.
La distance de détection varie entre 5 et 8
mètres.
Installer le détecteur infra-rouge dans des
endroits tels que le garage, un magasin ou une
maison.
• Si vous installez le capteur infra-rouge, veuillez
une prise d’alimentation électrique sûre.
·Ne pas exposer le produit à des jets d’eau ou
gouttes d‘eau. Ne pas placer d’objets contenants
des liquides tels que des vases ou des boissons
près du récepteur ou de l’alimentation électrique.
·Si vous utilisez des piles, les remplacer une fois
qu’elles sont vides et les remplacer avec le même
type de piles.
·Retirer les piles ou débrancher l’adaptateur de la
prise électrique si le kit d ‘alarme n’est pas utilisé
pendant une longue période.
Pour le récepteur infra-rouge:
·le récepteur infra-rouge est alimenté par des 3
piles AAA. Lorsque ces piles sont usées, les
remplacer avec le même type de piles avec la
même tension.
·Toujours insérer les piles en utilisant la polarité
convenable pour éviter tout risque de feu.
·Garder les piles neuves et usagées à distance des
enfants.
·Les vielles batteries devraient être recyclées en
respectant les normes environnementales.
·Enlever les piles du récepteur infra-rouge si vous
n’avez pas l’intention d’utiliser ce kit pour une
longue période.
Indication de sous tension :lorsque les piles sont
usées,l’indicateur lumineux LED sur le récepteur et
le récepteur infra-rouge vont clignoter chaque
seconde pour vous rappeler de changer les piles.
noter que les feuilles et les branches, le vent fort,
et les changements drastiques de température
peuvent affecter et influencer le capteur.
• Le récepteur infra-rouge peut se connecter
jusqu’ à 100 mètres sans aucun obstacle.
• Le récepteur infra-rouge dispose d’une
fréquence de transmission de 433 MHZ et son
champ de transmission peut être affecté par le
métal, les murs, des signaux interférents et
d’autres produits électroniques avec la même
fréquence,inculant les télévisions,la radio et les
cuisinières.
• Eviter de placer les récepteurs et les détecteurs
infra-rouge à proximité de produits électro-
niques.
• Ne pas exposer le récepteur infra-rouge
directement à la lumière du soleil ou sous de
hautes températures, autrement la surchauffe
pourrait causer des dégâts.
• Ne pas installer le détecteurs infra-rouge à
proximité de sources de chaleur telles que des
bougies.
• Veuillez tester les détecteurs infra-rouge avec le
récepteur dans un endroit où la zone de
transmission est appropriée.
b.Bas : le récepteur fonctionne comme une
sonnette et utilisera la sonnerie « Ding Dong »
en bas volume.
c.Alarme – le récepteur fonctionnera comme une
alarme et utilisera un son d’alarme.

- 31 - - 32 -
EN
DE
FR
ES
IT
EN
DE
FR
ES
IT
C. Sélectionner un mode d’alimentation
Le récepteur envoie une notification après avoir
détecté une voiture ou quelqu’un avec un son
d’alarme, ou bien avec un signal lumineux.
Pour sélectionner le mode de notification, presser
sur le bouton « Sound and Flash » .Le récepteur
affichera le mode de notification. Continuer de
presser sur le bouton « Sound & Flash »
quand vous avez obtenu le mode désiré.
D. Synchroniserdes capteurs infrarouges au système
d’alarme.
Jusqu’ à 5 récepteurs peuvent être synchronisé s
avec un récepteur.Vous pouvez aussi étendre le
système d’alarme avec n’importe quel nombre de
récepteurs.Synchroniser les récepteurs en
utilisant le système de pairage ci-dessous.
Importe quel nombre de récepteurs.Synchroniser
les récepteurs en utilisant le système de pairage
ci-dessous.
Les instructions de synchronisation sont adaptées
aux modèles SKU 000QH-00512 et SKU
000QH-0513.
Après que le récepteur soit alimenté, preser sur le
bouton de
synchronisation situé sur le coté du
récepteur.
Lorsque le pairage est effectué, le récepteur
utilisera 1 son d’alarme/ de clochette.
S’il n’y a pas de synchronisation pendant 30
minutes,le récepteur va automatiquement être
en mode synchronisation pendant 30 minutes.
Réesayer de synchroniser.
E. Redémarrage et re synchronisation
Si le récepteur sonne mais le système infra-rouge
n’a pas été amorçé , il serait nécessaire de passer
un coup de chiffon sur les appareils 1byone et de
recommencer la synchronisation.
Pour réinstaller les récepteurs,presser le bouton
de synchronisation et le maintenir pendant 5
secondes.Le récepteur clignotera et les
informations seront effacées.
Vous pouvez désormais réparer le récepteur
désiré.
F. Installation
Le capteur infra-rouge et le récepteur peuvent
être montés sur un mur ou juste sur une surface
plate.
Pour installer sur un mur.
Sélectionner un endroit pour le récepteur et le
capteur infra-rouge.
Installer les vis et les trous et les insérer dans la
prise murale.
Finalement, mettre les c apteurs infra-rouge sur
les vis.
Remarque:
• La hauteur recommandée de l’installation pour
les capteurs infra-rouge est de 1 à 1.5 mètre.
• Le récepteur infra-rouge dispose d’un angle de
détection de 45 degrés.
La distance de détection varie entre 5 et 8
mètres.
Installer le détecteur infra-rouge dans des
endroits tels que le garage, un magasin ou une
maison.
• Si vous installez le capteur infra-rouge, veuillez
noter que les feuilles et les branches, le vent fort,
et les changements drastiques de température
peuvent affecter et influencer le capteur.
• Le récepteur infra-rouge peut se connecter
jusqu’ à 100 mètres sans aucun obstacle.
• Le récepteur infra-rouge dispose d’une
fréquence de transmission de 433 MHZ et son
champ de transmission peut être affecté par le
métal, les murs, des signaux interférents et
d’autres produits électroniques avec la même
fréquence,inculant les télévisions,la radio et les
cuisinières.
• Eviter de placer les récepteurs et les détecteurs
infra-rouge à proximité de produits électro-
niques.
• Ne pas exposer le récepteur infra-rouge
directement à la lumière du soleil ou sous de
hautes températures, autrement la surchauffe
pourrait causer des dégâts.
• Ne pas installer le détecteurs infra-rouge à
proximité de sources de chaleur telles que des
bougies.
• Veuillez tester les détecteurs infra-rouge avec le
récepteur dans un endroit où la zone de
transmission est appropriée.

- 33 - - 34 -
EN
DE
FR
ES
IT
EN
DE
FR
ES
IT
a. Le récepteur se met en route sans que le capteur
infra-rouge ne soit enclenché.
Le récepteur peut être utilisé sur la même
fréquence que les récepteurs infra-rouges.
Vous devriez resynchroniser vos récepteurs
infra-rouges.
b. Il n’y a pas de sonnerie/flash LED lorsque le
récepteur infra-rouge est enclenché.
• Vérifier si les piles (AAA) sont insérées dans le
récepteur infra-rouge.
• Si le récepteur est alimenté par des piles,vérifier
qu’elles (piles de type C) sont convenablement
insérées dans le récepteur.
• Si le récepteur est alimenté par un adaptateur,
vérifier si la prise de courant marche convenable-
ment.
• Vérifier si vous avez allumé le récepteur.
• Synchroniser le récepteur et le capteur
infra-rouge.
c.Le volume de la sonnerie / l’alarme est trop
réduit.
C. Sélectionner un mode d’alimentation
Le récepteur envoie une notification après avoir
détecté une voiture ou quelqu’un avec un son
d’alarme, ou bien avec un signal lumineux.
Pour sélectionner le mode de notification, presser
sur le bouton « Sound and Flash » .Le récepteur
affichera le mode de notification. Continuer de
presser sur le bouton « Sound & Flash »
quand vous avez obtenu le mode désiré.
D. Synchroniserdes capteurs infrarouges au système
d’alarme.
Jusqu’ à 5 récepteurs peuvent être synchronisé s
avec un récepteur.Vous pouvez aussi étendre le
système d’alarme avec n’importe quel nombre de
récepteurs.Synchroniser les récepteurs en
utilisant le système de pairage ci-dessous.
Importe quel nombre de récepteurs.Synchroniser
les récepteurs en utilisant le système de pairage
5. FAQ
ci-dessous.
Les instructions de synchronisation sont adaptées
aux modèles SKU 000QH-00512 et SKU
000QH-0513.
Après que le récepteur soit alimenté, preser sur le
bouton de
synchronisation situé sur le coté du
récepteur.
Lorsque le pairage est effectué, le récepteur
utilisera 1 son d’alarme/ de clochette.
S’il n’y a pas de synchronisation pendant 30
minutes,le récepteur va automatiquement être
en mode synchronisation pendant 30 minutes.
Réesayer de synchroniser.
E. Redémarrage et re synchronisation
Si le récepteur sonne mais le système infra-rouge
n’a pas été amorçé , il serait nécessaire de passer
un coup de chiffon sur les appareils 1byone et de
recommencer la synchronisation.
Pour réinstaller les récepteurs,presser le bouton
de synchronisation et le maintenir pendant 5
secondes.Le récepteur clignotera et les
informations seront effacées.
Vous pouvez désormais réparer le récepteur
désiré.
F. Installation
Le capteur infra-rouge et le récepteur peuvent
être montés sur un mur ou juste sur une surface
plate.
Pour installer sur un mur.
Sélectionner un endroit pour le récepteur et le
capteur infra-rouge.
Installer les vis et les trous et les insérer dans la
prise murale.
Finalement, mettre les c apteurs infra-rouge sur
les vis.
Remarque:
• La hauteur recommandée de l’installation pour
les capteurs infra-rouge est de 1 à 1.5 mètre.
• Le récepteur infra-rouge dispose d’un angle de
détection de 45 degrés.
La distance de détection varie entre 5 et 8
mètres.
Installer le détecteur infra-rouge dans des
endroits tels que le garage, un magasin ou une
maison.
• Si vous installez le capteur infra-rouge, veuillez
noter que les feuilles et les branches, le vent fort,
et les changements drastiques de température
peuvent affecter et influencer le capteur.
• Le récepteur infra-rouge peut se connecter
jusqu’ à 100 mètres sans aucun obstacle.
• Le récepteur infra-rouge dispose d’une
fréquence de transmission de 433 MHZ et son
champ de transmission peut être affecté par le
métal, les murs, des signaux interférents et
d’autres produits électroniques avec la même
fréquence,inculant les télévisions,la radio et les
cuisinières.
• Eviter de placer les récepteurs et les détecteurs
infra-rouge à proximité de produits électro-
niques.
• Ne pas exposer le récepteur infra-rouge
directement à la lumière du soleil ou sous de
hautes températures, autrement la surchauffe
pourrait causer des dégâts.
• Ne pas installer le détecteurs infra-rouge à
proximité de sources de chaleur telles que des
bougies.
• Veuillez tester les détecteurs infra-rouge avec le
récepteur dans un endroit où la zone de
transmission est appropriée.
Une pile faible peut réduire le volume de la
sonnerie. Changer les piles tous les 10-12 mois
environ.
Les constructions en métal, les murs, et d’autres
applications avec la même fréquence peuvent
aussi affecter le volume la sonnerie.
Eviter de monter les récepteurs infra-rouges près
d’objets en métal.
- 35 - - 36 -
EN
DE
FR
ES
IT
EN
DE
FR
ES
IT
a. Le récepteur se met en route sans que le capteur
infra-rouge ne soit enclenché.
Le récepteur peut être utilisé sur la même
fréquence que les récepteurs infra-rouges.
Vous devriez resynchroniser vos récepteurs
infra-rouges.
b. Il n’y a pas de sonnerie/flash LED lorsque le
récepteur infra-rouge est enclenché.
• Vérifier si les piles (AAA) sont insérées dans le
récepteur infra-rouge.
• Si le récepteur est alimenté par des piles,vérifier
qu’elles (piles de type C) sont convenablement
insérées dans le récepteur.
• Si le récepteur est alimenté par un adaptateur,
vérifier si la prise de courant marche convenable-
ment.
• Vérifier si vous avez allumé le récepteur.
• Synchroniser le récepteur et le capteur
infra-rouge.
c.Le volume de la sonnerie / l’alarme est trop
réduit.
Mise au rebut de l'appareil
L'appareil ne doit en aucun cas être
mis aux ordures ménagères normales.
Ce produit est assujetti à la directive
européenne 2012/19/EU.
L'emballage est réalisé à l'aide de
matériaux écologiques qu'il est
possible de confier aux centres de
recyclage proches de chez vous.
Eliminez l'appareil par l'intermédiaire d'une
entreprise de traitement des déchets autorisée ou
via le service de recyclage de votre commune.
Respectez la réglementation en vigueur.En cas de
doute, veuillez contacter votre centre de recyclage.
Mise au rebut
Mettre au rebut les piles/accus
Il est interdit de jeter les piles/accus
aux ordures ménagères.
Chaque consommateur est légalement tenu de
rapporter les piles/accumulateurs à un point de
collecte de sa commune/son quartier ou dans le
commerce.Cette obligation a pour objectif d'assur-
er le traitement écologique des piles et accus. Ne
rejetez que des piles/accus à l'état déchargé.
Une pile faible peut réduire le volume de la
sonnerie. Changer les piles tous les 10-12 mois
environ.
Les constructions en métal, les murs, et d’autres
applications avec la même fréquence peuvent
aussi affecter le volume la sonnerie.
Eviter de monter les récepteurs infra-rouges près
d’objets en métal.
- 37 - - 38 -
EN
DE
FR
ES
IT
EN
DE
FR
ES
IT
Si algún contenido del paquete está visiblemente dañado o
falta, por favor, póngase en contacto con el servicio de
atención al cliente de 1byone en https://www.1by-
one.com/Support para recibir asistencia.
Gracias por la compra de 1byone alarma inalámbrica con
detector de infrarrojos.Por favor lea estas instrucciones
antes de usar para asegurar un uso seguro.
Sensor de infrarrojos:
El sensor de infrarrojos es alimentado por 3 pilas
AAA, por favor, intruduzca las pilas usando el
siguiente procedimiento:
·Retire los tornillos de la parte trasera del sensor
de infrarrojos con un destornillador.A
continuación, quite el compartimento de la
batería.
·Inserte 3 pilas AAA dentro del compartimento
de la batería, usando la polaridad correcta para
2 x sensor de infrarrojos 1 x Receptor
4 x tacos 4 x tornillos
1 x manual de instrucciones
(1) Indicador LED (2) Altavoz
(3)Toma de entrada de corriente continua
(4)Interruptor de timbre y alarma
(5)Interruptor de encendido y apagado
(6)Botón de sonidos y flash (7)Botón de emparejamiento
(8)Detector de infrarrojos (9)Indicador LED
Voltaje del sensor de infrarrojos
Voltaje del sensor de infrarrojos
Frecuencia del sensor de infrarrojos
Ángulo de detección del sensor de infrarrojos
Distancia de detección del sensor de infrarrojos
Rango de operación
Consumo de energía
Volumen del timbre del receptor
Temperatura de trabajo
CC 6V (3 pilas tipo C o adaptador)
CC 4,5V (3 pilas AAA)
433.92MHz+100KHz
45 grados
5-8 metros
100m (sin obstáculos)
Receptor: <1.2W
Sensor de infrarrojos: <0.06W
Más de 100dB entre 0,5m
-20°C ~ 50 °C
1. Contenido del paquete:
2. Nombres de las partes:
3. Fuente de alimentación
Parámetros: evitar peligro de fuego.
·Vuelva a colocar la tapa del compartimento de la
batería y apriete el tornillo.
Receptor:
El receptor puede ser alimentado por 3 pilas tipo C
o por un adaptador (salida: cc de 6V)
a. Si es alimentado por pilas, por favor ponga las
pilas usando el siguiente procedimiento:
·Retire los tornillos de la parte trasera del receptor
con un destornillador. A continuación, retire la
tapa del compartimento de la batería.
·Ponga 3 pilas tipo C dentro del compartimento
de la batería, usando la correcta polaridad para
evitar un peligro de fuego.
·Vuelva a poner el compartimento de la batería y
apriete el tornillo.
b. Si es alimentada por un adaptador (adaptador
recomendado SKU OEU00-0278).Ponga el
conector del adaptador en un enchufe de
corriente continua en el lado del receptor y
después conéctelo a un enchufe.
(1)
(2)
CHIME
LOW
ALARM
(3)
(4)
OFF
ON
(5)
(6)
(7)
(8)
(9)
Nota de seguridad:
Para el receptor:
·Asegúrese de quitar todas las pilas antes de
conectarlo al adaptador y enchufarlo a un
enchufe seguro.
·No exponga el receptor a agua pulverizada o
goteos y no ponga objetos que contengan
líquidos como vasos o botellas abiertas encima o
cerca del receptor ni del enchufe.
·Si es alimentado por pilas,cambie las pilas
cuando se agoten por otras del mismo tipo.
·Quite las pilas o desenchufe el adaptador del
enchufe si la alarma no se va a usar por un
período largo de tiempo.
Para el sensor de infrarrojos:
·El sensor de infrarrojos se alimenta por 3 pilas
AAA. Cuando se agoten, reemplácelas usando el
mismo tipo y voltaje de pilas.
·Inserte siempre las pilas usando la correcta
polaridad para eliminar peligro de fuego.
·Mantenga las pilas usadas y nuevas fuera del
alcance de los niños.
·Las pilas usadas deben desecharse correctamente
usando practicas ambientales seguras.
·Retire las pilas del sensor de infrarrojos si no tiene
intención de usar la alarma por un período largo
de tiempo.
Indicador de baja tensión:cuando las pilas se
agoten, el indicador LED del receptor y del sensor de
infrarrojos parpadearán una vez por segundo para
recordarle que cambie las pilas.
Other manuals for O00QH-0514
1
Table of contents
Languages:
Other 1 BY ONE Security System manuals


Popular Security System manuals by other brands


BeaconMedaes
BeaconMedaes TotalAlert 2 Installation, operation and maintenance instructions

MOOSE
MOOSE Z700 Installation and programming guide

Whelen Engineering Company
Whelen Engineering Company 2004B installation guide

Malmbergs
Malmbergs LM-101LD instruction manual

Huawei
Huawei IVS1800 user manual

Silent Alert
Silent Alert MM4A-2212-EU-LEAD quick start guide


