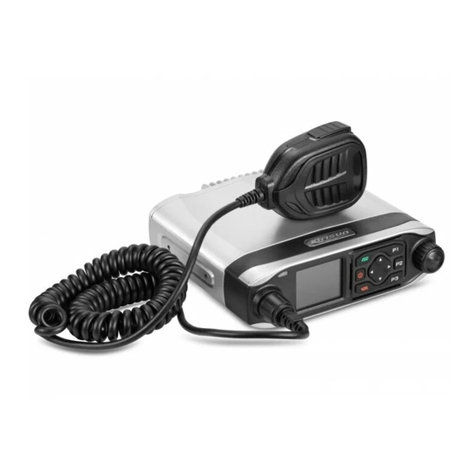
Himalaya DRM2009 User manual

DRM2009
Handbuch (Deutsche) p.2 – p.7
Manuel (Français) p.8 – p.12
Manual (English) p.13 – p.17
All features, functionalities, and other product specifications, as well as the
information contained in this document are based upon the latest available information
and are believed to be accurate at the time of printing. Himalaya reserves the right to
change or modify any information or specification without notice or obligation.

2
ZUBEHÖER
Zum Paket gehören ein Empfänger (DRM2009) und ein Netzteil.
EIGENSCHAFTEN
•DRM/DAB (Band 3 und L Band)
•AM(LW/MW/KW)/UKW(RDS)
•Aufnahmen mit SD-Karte (unterstützt unmittelbare und
programmierte DAB- und DRM-Aufnahmen, ebenso MP3
Wiedergabe)
•Einfache Pause/Wiedergabe Eigenschaft unterstützt DAB und
DRM Aufnahmen auf den internen Speicher
•EPG für DAB-Dienst
•40 Stationen speicherbar (10 für jeden Modus), zwei Weckzeiten
und ein Dutzend programmierbare Einstellungen für
Digitalrundfunk (DAB und DRM)
•Externer Antenneneingang, digitaler Ausgang, analoger Ausgang
(Kopfhörer)
•Zwei Lautsprecher
•Batteriebetrieb (ca. 3 Sturden, aber Dauer abhängig von der
Batteriekapazität)
Hinweise und Empfehlungen
Wenn dieses Gerät über einen langen Zeitraum nicht in Gebrauch ist,
empfehlen wir, die Batterien zu entfernen.
Aus Sicherheitsgründen darf dieses Gerät nur von qualifiziertem Personal
geöffnet werden.
Das Gerät sollte nicht Spritzwasser oder außergewöhnlich hohen
Temperaturen ausgesetzt werden.
Bitte besuchen Sie http://www.himalaya.com.hk für mehr Informationen.

3
DIAGRAMM
1. STANDBY
3. VOLUME
6. REC/SEEK
7. PAUSE
2. MODE(AFS)
4. BACK
8. EPG
9. +5
10-14. Numerische/Wiedergabe-
knöpfe
5. SELECT
(Rotary Knob)
USB
DIGITAL OUT
ON/OFF
HEADPHONE
POWER IN
Schlitz für SD-
Karte
Batteriefach ANTENNA INPUT
VORDERSEITE
RÜCKSEITE
LINKE SEITE RECHTE SEITE
BEDIENUNG
Alle Knöpfe und der Drehknopf auf der Vorderseite werden nur aktiviert,
wenn das Radio eingeschaltet ist. Alle Knöpfe funktionieren durch
kurzzeitiges Drücken, einige Knöpfe haben Zusatzfunktionen durch Halten.
1. STANDBY
Dieser Knopf wechselt beim Radio zwischen Bereitschaft und EIN. Kein
anderer Knopf funktioniert, wenn sich das Radio in Position Bereitschaft
befindet.
2. MODUS/AFS
Dieser Knopf wechselt zwischen fünf Modi. Diese Modi sind DAB, DRM,
FM (UKW), AM und Playlist. Am Display wird für jeden Modus die oberste
Ebene des entsprechenden Menüs angezeigt.
Im DRM-Modus wird die AFS-Eigenschaft (automatische
Frequenzumschaltung) durch Halten dieses Knopfes initiiert.
3. VOLUME
Dieser Knopf regelt die Lautstärke, die am Drehknopf eingestellt werden
kann.

4
4. BACK
Kurzzeitiges Drücken dieses Knopfes führt zur vorherigen Anzeige zurück
und kann zur Aufhebung einiger Operationen benutzt werden.
5. SELECT (DREHKNOPF)
Mit diesem Knopf können vier verschiedene Operationen durchgeführt
werden: Drücken, Gedrückt-Halten, Drehung im Uhrzeigersinn und gegen
den Uhrzeigersinn.
Drücken des Knopfes auf der obersten Ebene (bei jedem Modus) zeigt das
Menü an. Danach zeigt ein weiteres Drücken des Knopfes die Auswahl
einer Wahlmöglichkeit an. Verschiedene Wahlmöglichkeiten können durch
Drehen des Knopfes ausgewählt werden. Auf der obersten Ebene zeigt das
Drehen des Knopfes alle Stationen an, die vorher entweder durch
Autoscanning oder Programmierung gespeichert worden sind.
6. REC/SEEK
In den Modi UKW (FM) und AM (nur LW und MW) stellt dieser Knopf die
nächste Sendestation ein.
In den Modi DAB und DRM nimmt dieser Knopf die laufende Übertragung
auf die SD-Karte vor, die sich in dem Schlitz auf der linken Seite des
Empfangsgerätes befindet.
7. PAUSE
Im DRM-Modus und im DAB-Modus hält dieser Knopf die Wiedergabe an
und speichert das laufende Programm auf dem internen Speicher des Geräts.
Erneutes Drücken unterbricht die Aufnahme und gibt das gespeicherte
Programm wieder. Der Knopf kann dann benutzt werden, um zwischen
Wiedergabe und Aufnahme hin- und herzuschalten.
Im Playlist Modus erlaubt dieser Knopf dem Benutzer die Wiedergabe
anzuhalten und die laufende gewählte Datei wieder aufzunehmen.
8. EPG/INFO
Im DAB-Modus aktiviert dieser Knopf die EPG (Elektronischer
Programmführer) Eigenschaft.
Wird der Knopf gehalten, werden die Textinformationen nicht als Fließtext
sondern als Blocktext dargestellt (DAB und DRM).
9-14. +5 und andere Zahlen/Wiedergabe
Die momentan empfangene Station kann durch Halten eines der Knöpfe
gespeichert werden, was durch eine Anzeige im Display bestätigt wird.
Kurzzeitiges Drücken des Knopfes ruft die Station wieder auf.
Im Modus Playlist erlauben diese Knöpfe die Steuerung verschiedener
Wiedergabe-Eigenschaften der gerade gewählten Datei.

5
RADIO HÖREN
Modus
Kurzzeitiges Drücken des Knopfes MODE(AFS) wechselt zwischen den
fünf Modi: DAB, DRM, UKW (FM), AM und Playlist.
Auto Scan
Kurzes Drücken des Drehknopfes zeigt das Menü des gewählten
Radiomodus an. "Station" ist markiert und durch erneutes kurzes Drücken
erscheint das Untermenü. Durch markieren von "Autoscan" und des
gewünschten Bandes sucht das Radio am Standort verfügbare Stationen.
Gefundene Stationen werden im Datenspeicher abgelegt und können später
aufgerufen werden.
Stationsliste (Station List)
Durch Drehen des Drehknopfes wird die Stationsliste für den eingestellten
Modus angezeigt. Auf den Knöpfen 1-10 gespeicherte Stationen werden
zuerst angezeigt. Die gesamte Stationsliste kann durch die Auswahl „All
Stations“ angezeigt werden.
Gespeicherte Stationen
Für jeden Radiomodus können 10 Stationen gespeichert werden, also
insgesamt 40.
Programmieren eines Speicherplatzes
Durch längeres Drücken eines der Knöpfe 1-5 kann die gerade empfangene
Station gespeichert werden. Durch vorheriges kurzes Drücken des +5
Knopfes (Anzeige erscheint im Display) können auf die gleiche Weise die
Speicherplätze 6-10 belegt werden. Jede Station kann nur auf einem
Speicherplatz abgelegt werden.
Aufrufen eines Speicherplatzes
Zum Aufrufen der gespeicherten Station die Knöpfe 1 bis 5 bzw. 6-10 (+5)
drücken.
Seek (Suche)
Durch kurzzeitiges Drücken des REC/SEEK-Knopfes im UKW (FM)- und
AM (nur LW und MW)-Mode wird die nächste verfügbare Station
eingestellt.
Manuelle Sendersuche
Längeres Drücken und anschließendes Drehen des Drehknopfes erlaubt die
Frequenzeinstellung von Hand.

6
EPG und Info
Zur Anzeige dieser textbasierten Eigenschaften, die beide im vorigen
Abschnitt beschrieben sind, diese Taste benutzen.
AUFNAHME UND WECKEN
Pause
Im DAB und im DRM Modus erlaubt der Knopf PAUSE eine einfache
Einstellung der Wiedergabe/Pause Möglichkeit, wie im vorigen Abschnitt
beschrieben.
Unmittelbare Aufnahme
Im DAB- und DRM-Modus wird durch Drücken des REC/SEEK-Knopfes
der Aufnahmemodus aufgerufen.
Timed Recordings (Zeitgesteuerte Aufnahmen)
Durch kurzes Drücken des Drehknopfes wird das Menü aufgerufen und darin
die markierte Position "Timed Recordings". Das Menü zeigt die bisher
eingestellten Aufnahmezeiten an. Neue Zeiten können hinzugefügt oder alte
gelöscht werden.
Durch Drehen des Knopfes kann eine der zwölf Aufnahmen eingestellt
werden. Optionen wie "Once"(einmal), "Every day"(täglich),
"Weekly"(wöchentlich), "Weekdays"(werktags), "Weekends"(Wochenende),
und "Off"(Aus/Löschung) werden für spezielle Abfolgen genutzt. Durch
kurzes Drücken des Drehknopfes wird die ausgewählte Option markiert. Der
Drehknopf wird auch zur Einstellung des Datums, der Zeit, der Dauer und
des aufzunehmenden Programms verwendet.
Weckzeiten
Durch kurzes Drücken des Drehknopfes das Menü und darin die markierte
Position "Alarms" aufrufen.
Die Einstellungen der Weckzeit sind ähnlich denen der zeitgesteuerten
Aufnahmen aus dem vorangehenden Abschnitt.
Playlist
Nachdem der Modus "playlist" durch Drücken des Knopfes Mode(AFS)
aufgerufen ist, erscheint eine Liste von auf der SD-Karte verfügbaren
Dateien. Der Dateiname oder ID3 Name, falls vorhanden, wird auf der
ersten Zeile angezeigt während die Aufnahmezeit auf der zweiten Zeile
angezeigt wird.

7
Wiedergabe von MP3 und Radioaufnahmen
MP3 und Radioaufnahmen können abgespielt werden, wenn das Radio im
Playlist-Modus ist. Wiedergabefunktionen werden durch die Knöpfe 1-5
gesteuert. "All files"(alle Dateien), "All files shuffle"(alle Dateien
verwürfelt), "Single repeat"(einzeln wiederholen), "All files repeat"(alle
Dateien wiederholen) und "All file shuffle repeat"(alle verwürfelten Dateien
wiederholen) sind Wahlmöglichkeiten zur Bestimmung des Ablaufs, mit
dem die Aufnahmen abgespielt werden können.
Löschen von Dateien
Dateien können durch Drücken der "+5"-Taste (Papierkorb) gelöscht
werden, wenn eine MP3- oder Aufnahme gewählt ist.

8
LISTE DE CONTENU
Un recepteur (DRM2009) et un chargeur sont inclus.
FONCTIONALITÉS
•DRM/DAB (Bande 3 et Bande L)
•AM(LW/MW/SW)/FM(RDS)
•Supporte cartes Secure Digital (SD) (supporte enregistrements
instantanés et programmés DAB and DRM, aussi supporte MP3
playback)
•Easy Play / Pause fonctions (supporte DAB et DRM
enregistrements en mémoire interne)
•EPG pour DAB service
•40 mémoires de station (10 dans chaque mode), double réglage
d'alarme et 12 enregistrements programmables pour les stations
numériques (DAB et DRM).
•Entrée antenne, sortie numérique, sortie analogue pour casque
•Deux haut-parleurs
•Environ trois heures de marche sur batteries, la capacité réelle
depend de la qualité des batteries.
Conseils d'utilisation
Lorsque la radio est inutilisée pour de longue périodes il est recommandé
d'enlever les batteries.
Pour des raisons de securité, la radio ne doit pas être demontée en dehors
d'un service de maintenance professionnel.
La radio doit être maintenue á l'abri de projections de liquides et de
températures excessives.
Visitez http://www.himalaya.com.hk pour plus d’informations.

9
DIAGRAMME
CONTRÖLES
Les boutons sur la façade avant ne sont actifs que lorsque la radio est
alimentée et le bouton marche/arrêt est sur la position marche. Les différent
boutons ont des modes d'opération différents, presser, presser et tenir ou
tourner.
1. STANDBY (VEILLE)
Ce bouton fait passer la radio du mode veille au mode ON. Les autres
boutons ne fonctionnent pas lorsque la radio est en veille.
2. MODE/AFS
Ce bouton permet de sélectionner les modes DAB, DRM, FM, AM et
Playlist. Le menu de base est affiché au début de chaque mode.
Dans le mode DRM, l’option AFS est obtenue en maintenant pressé ce
bouton.
3. VOLUME
Ce bouton sélectionne le mode volume, qui peut alors être ajusté en tournant
le bouton principal.

10
4. BACK
Ce bouton permet de revenir en arrière dans les menus ou d'annuler certaines
opérations.
5. SELECT (Bouton principal)
Ce bouton a plusieurs modes d'opération :
•Lorsque la radio est en mode de base, appuyer sur le bouton fait
apparaitre le menu correspondent au mode sélectionné. Une fois dans
un menu ce bouton permet de sélectionner une option.
•Tourner le bouton permet de naviguer dans les menus.
•En mode de base, tourner le bouton permet de sélectionner les stations
mémorisées.
6. REC/SEEK
Dans les modes FM et AM, ce bouton lance la recherche de la prochaine
station.
Dans les modes DAB et DRM, ce bouton permet d'enregistrer la radio en
cours sur la SDcard inseré dans la fiche sur le cote gauche de l'appareil.
7. PAUSE
Dans les modes DRM et DAB, ce bouton pause la diffusion. En mode
diffusion où la radio enregistre en mémoire interne, ce mode permet
d'alterner entre l'enregistrement et la diffusion de la station en cours.
En mode Playlist ce bouton permet de pauser et de reprendre la diffusion du
fichier en cours.
8. EPG/INFO
En mode DAB, ce bouton active le EPG (Electronic Programmable Guide).
Si la station en cours diffuse des informations textuelles, ce bouton permet
de les visualiser. Presser et maintenir ce bouton affiche les données en
multiligne.
9-14. +5 et boutons numériques / Playback
En mode radio, maintenir pressé un de ces boutons mémorise la station avec
le numéro appuyé.
Appuyer rapidement sur ces boutons sélectionne la station mémorisée
précedement.
En mode Playlist ces boutons permettent d'accéder aux fonctions de gestion
des fichiers.

11
ECOUTER LA RADIO
Mode
Ce bouton permet de sélectionner un des 5 modes DAB, DRM, FM, AM et
Playlist.
Auto Scan
Pour lancer la recherche automatique de stations, appuyez sur le bouton
principal pour ouvrir le menu. Sélectionnez d'abord l'option Stations puis
l'option AutoScan et finalement la bande de fréquence qui dépend du mode
en cours. Les nouvelles stations sont ajoutées a la base de données qui peut
être consultée ultérieurement.
Liste des stations
En mode de base tourner le bouton principal permet de sélectionner la station
parmi les stations de la base de données correspondant au mode en cours.
Pour voir toutes les stations sélectionnez l'option All Stations.
Mémoires
40 stations peuvent être mémorisées, 10 dans chaque mode.
Pour mémoriser une nouvelle station
Maintenir pressé un des boutons numeriques (1 á 5) mémorise la station en
cours. Pour atteindre les numéros de 6 á 10 appuyez d'abord sur le bouton +5
puis maintenez presse un des boutons numériques de 1 á 5. Une station ne
peut être memorisée que sur un numéro.
Retrouver une station mémorisée
Appuyer rapidement sur ces boutons sélectionne la station mémorisée
précedement. Pour les numéros de 6 á 10 pressez d'abord sur le bouton +5.
Seek
Dans les modes FM et AM, ce bouton lance la recherche de la prochaine
station.
Réglage de station manuel
Presser et maintenir le bouton principal permet le réglage manuel des
stations.
EPG and Info
Les fonctions textes sont accessibles en utilisant le bouton approprié. Voir la
section precedente.

12
ENREGISTREMENT ET ALARME
Pause
Dans les modes DRM et DAB, ce bouton pause la diffusion. En mode
diffusion ou la radio enregistre en mémoire interne, ce mode permet
d'alterner entre l'enregistrement et la diffusion de la station en cours.
Enregistrement instantanne
En mode DAB et DRM pressez le bouton REC/SEEK pour enregistrer.
Enregistrement programmable
Dans le mode de base pressez le bouton principal puis sélectionnez l'option
Timed Recordings.
L'écran Timed Recordings montre le dernier programme. Vous pouvez
ajouter ou effacer des programmes. En tournant le bouton principal vous
pouvez sélectionner un des 12 programmes. En appuyant sur le bouton
principal vous entrez dans le mode édition du programme sélectionné. Un
programme peut être défini pour une occurrence (“Once”), tous les jours
(“Every day”), toutes les semaines (“Weekly”), jours de la semaine
(“Weekdays”), les week-ends (“Weekends”) ou désactivé (“Off”). Tournez
le bouton principal pour changer les différents paramètres tels que date,
heure, durée et la station.
Alarmes
Dans le mode de base appuyez sur le bouton principal puis sélectionnez
l'option Alarms. Pour régler les alarmes utilisez la même procédure que pour
Timed Recordings.
Playlist
Quand le bouton MODE(AFS) est pressé, la liste des fichiers présents sur la
SDcard apparait. La nom du fichier, suivi de la date de création sont affichés.
Jouer les MP3 et les enregistrements
Les fichiers MP3 et les morceaux enregistrés peuvent être diffusés quand la
radio est en mode Playback. Les opérations de diffusion sont controllées par
les boutons numériques 1-5.
Les options "All files", "All files shuffle", "Single repeat", "All files repeat"
et "All file shuffle repeat", déterminent l'ordre dans lequel les fichiers sont
diffusés.
Effacement des fichiers
Le fichier en cours peut être effacé en appuyant sur la touche +5.

13
PACKAGE LIST
A receiver (DRM2009) and a power adapter are included in this package.
FEATURE LIST
•DRM/DAB (Band 3 and L Band)
•AM(LW/MW/SW)/FM(RDS)
•Recordings onto SDcard (supports instant and scheduled DAB and
DRM recordings, also supports MP3 playback)
•Easy Play / Pause Control (supports DAB and DRM recording to
internal memory)
•EPG for DAB service
•40 Station Presets (10 for each mode), dual alarm clocking settings
and a dozen programmable recordings for digital (DAB and DRM)
broadcasts
•Antenna Input, Digital Output, Analog (Headphone) Output
•Dual Speakers
•Battery Operations (around 3 hours but actual performance varies
depending on the capacity of the batteries)
Tips and Recommendations
If this unit is not in use for long periods, we recommend that you remove the
batteries.
For safety reason, this unit should be opened only by qualified personnel.
Liquid splash or exposure to excessive temperatures should also be avoided.
Please visit http://www.himalaya.com.hk for more information.

14
DIAGRAM
CONTROL
All the buttons and the rotary knob on the front panel are activated only
when the radio is powered and its ON/OFF switch on the right side-panel is
at the ON position. All buttons allow press operation while some supports
press-and-hold (long press) operation.
1. STANDBY
This button toggles the radio between STANDBY and ON. Other buttons do
not function when the radio is STANDBY.
2. MODE/AFS
This button switches among the five modes: DAB, DRM, FM, AM and
Playlist. The top level (idle) screen is displayed for each mode.
In the DRM mode, AFS (Alternative Frequency Switching) feature is
supported by this button via press-and-hold.
3. VOLUME
This button toggles the volume control which can then be adjusted by
turning the rotary knob.

15
4. BACK
This button returns to the previous screen and can be used to cancel some
operations.
5. SELECT (Rotary Knob)
Four operations can be performed by this knob: press, press-and-hold,
clockwise and counterclockwise turns.
Pressing this knob at the top level (of each mode) will display the menu.
Once the menu is displayed, pressing this button indicates the selection of a
highlighted option. Different options can be highlighted by turning the
knob.
At the top level, tuning the knob shows the available stations that were
memorized earlier, either by auto-scanning or presetting.
6. REC/SEEK
In the FM and AM modes, this button tunes to the next available station.
In the DAB and DRM modes, this button records the current transmission
onto the SDcard that is placed in the slot (on the left side of the receiver).
7. PAUSE
In the DRM and DAB modes, this button will stop playing the transmission.
Internal memory of the radio will be used to record the current transmission.
The button can then be used to toggle the playing and recording of the
transmission.
In the Playlist mode, this button simply allows the user to pause and resume
the current selected recording file.
8. EPG/INFO
In the DAB mode, this button activates the EPG (Electronic Programmable
Guide) feature.
For reception that provides text information, press-and-hold this button will
show this INFO in a multiple-line format instead of scrolling.
9-14. +5 and other Numeric / Playback
In the radio modes, press-and-hold the Numeric buttons (on the bottom row)
presets the current station. Pressing (without holding) the button will recall
the last stored station.
In the Playlist mode, these buttons allow the control of various playback
features of the current selected file.

16
RADIO LISTENING
Mode
Pressing the MODE(AFS) button toggles between the five modes: DAB,
DRM, FM, AM and Playlist.
Auto Scan
At the top level of the radio modes, press the rotary knob to initiate the
menu. Highlight and select Stations option. Then select the AutoScan
option and the band (which depends on the radio mode) for auto scanning.
Stations found will be added to the database for later retrieval.
Station List
At the top level, turn the rotary knob will show the Station List for the
current mode. The preset list, if present, will be shown first. Entire list can
be shown by selecting All Stations.
Presets
There are a total of 40 presets (10 for each radio mode).
Storing a preset memory
Press-and-hold the numeric buttons (1 through 5) will store the current
station. For memory 6 to 10, press the +5 button first (the display will
reflect whether +5 is activated) and then press-and-hold the numeric button
for storing. Each station can only be stored onto at most one preset memory.
Loading a preset memory
Press the numeric buttons (1 through 5) to retrieve the stored station. For
memory 6 to 10, press the +5 button first before retrieval.
Seek
Press the REC/SEEK button in the FM and AM modes will find the next
available station.
Manual Tune
Press-and-hold the rotary knob allows manual tuning for stations.
EPG and Info
A dedicated key is devoted for these text-based features, which have both
been described in the previous section.

17
RECORDINGAND ALARM
Pause
In DAB and DRM modes, the PAUSE button allows easy operation of the
play / pause feature as described in the previous section.
Instant Record
In DAB and DRM modes, press the REC/SEEK button will enter the
recording mode.
Timed Recordings
At the top level, press the rotary knob to enter the menu and turn it to
highlight the Timed Recordings option.
The Timed Recordings screen shows the current recording that has already
been setup. New recordings can be added or deleted.
Turn the rotary knob to select one of the 12 recordings. Options such as
“Once”, “Every day”, “Weekly”, “Weekdays”, “Weekends” and “Off” (for
deletion) are used for schedule specifications. Press the rotary knob for
highlight selection. The rotary knob is also used to select date, time,
duration and the programme for recording.
Alarms
At the top level, Press the rotary knob to enter the menu and turn it to
highlight the Alarms option.
Operations to setup the alarm are very similar to that of the Timed
Recordings, which can be found in the previous section.
Playlist
Once the playlist mode is entered via pressing the MODE(AFS) button, a list
of available files on the SDcard is displayed. The filename, or ID3 name if
presented, is displayed on the first line while the creation time is shown on
the second line.
MP3 and Recordings Playback
MP3 and radio recordings can be playback once the radio is in Playlist mode.
Playback operations can be controlled by the numeric/playback buttons 1-5.
“All files”, “All files shuffle”, “Single repeat”, “All files repeat” and “All
file shuffle repeat” are options to determine the ordering of how recordings
are played.
File Deletion
Files can be deleted when the “+5 (delete file)” key is pressed once a MP3 or
recording file is selected.
Table of contents
Languages: