manuals.online logo
Brands
  1. Home
  2. •
  3. Brands
  4. •
  5. Hisense
  6. •
  7. Refrigerator
  8. •
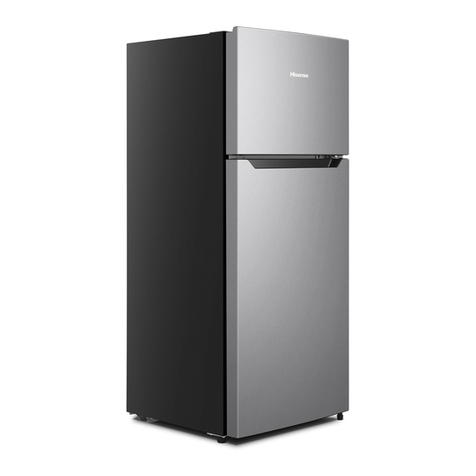
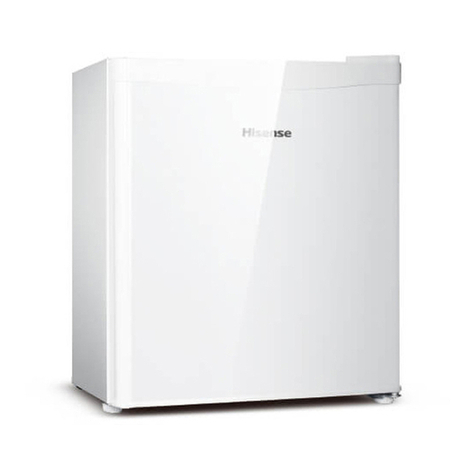
  9. Hisense WMS017M6XBE User manual

Hisense WMS017M6XBE User manual

For questions about features, operation/performance, parts or service, call:
1-877-465-3566
0RGHO
:060;%(
Refrigerator Use & Care Guide
Table of Contents
ImportantSafetyInstruction ..1
Installation .......3
DescriptionoftheAppliance ..4
TemperatureControl 6
CleaningandCare . .7
EnergySavingTips .. 8
TroubleShooting . 8
Disposaloftheappliance ..... 10
1For your safety and correct usage,please read these instructions carefullybefore using your new appliance toavoid unnecessary mistakes andaccidents. Please ensure that allpeople using this appliance are familiarwith its operation and safety features.Keep these instructions in a safe placefor future reference and be sure thatthey are kept with the appliance in theevent that it is moved or sold, so thateveryone using it through its life will beproperly informed on its correctappliance usage and safety. Themanufacturer is not responsible fordamages caused by misuse. Theappliance is for indoor and domesticuse only.Electrical InformationThe appliance must be plugged intoits own dedicated 115 Volt, 60 Hz.,15 Amp, AC only electrical outlet.The power cord of the appliance is equipped with a three-prong grounding plug for your protectionagainst electrical shock hazards. Itmust be plugged directly into aproperly grounded three prongreceptacle. The receptacle must be installed in accordance with localcodes and ordinances. Consult a qualified electrician. Avoid
connecting refrigerator to a Ground Fault Interruptor (GFI) circuit. Do not
use an extension cord or adapter plug.
/ĨƚŚĞ^hWW>zKZŝƐĚĂŵĂŐĞĚŝƚ
ŵƵƐƚďĞƌĞƉůĂĐĞĚďLJƚŚĞ
ŵĂŶƵĨĂĐƚƵƌĞƌŝƚƐƐĞƌǀŝĐĞĂŐĞŶƚŽƌ
ƐŝŵŝůĂƌůLJƋƵĂůŝĨŝĞĚƉĞƌƐŽŶŝŶŽƌĚĞƌƚŽ
ĂǀŽŝĚĂŚĂnjĂƌĚ
Never unplug the refrigerator by
pulling on the power cord. Alwaysgrip the plug firmly, and pullstraight out from the receptacle to
prevent damaging the power cord.
Unplug the refrigerator before
cleaning and before replacing alight bulb to avoid electrical shock.
Performance may be affected if the
voltage varies by 10% or more.Such damage is not covered under
your warranty.Do not plug the unit into anelectrical outlet controlled by a wallswitch or pull cord to prevent therefrigerator from being turned offaccidentally. Fire Hazard The appliance contains a small quantity of refrigerant (R600a)which is environmentally friendly butpotentially flammable in the refrigerant circuit.Table of Contents
*NQPSUBOUTBGFUZJOTUSVDUJPOT
Safety for Children and OthersWho are VulnerableThis appliance is not intended foruse by persons (including children)with reduced physical, sensory or mental capabilities, or lack of experience and knowledge, unless they have been given supervision or instruction concerning the use of the appliance by a person responsible for their safety. Children should besupervised to ensure that they donot play with the appliance.Keep all packaging away fromchildren to avoid risk of suffocation.If you are discarding your oldappliance, pull the plug out of thesocket, cut the connection cable(as close to the appliance as youcan).Cut off the main plug anddiscard. Break off any old locks orlatches as a safeguard and removethe door to prevent children playing from suffering an electric shock or from closing themselves inside it.This appliance is intended to be used in household and similar applications such as:- staff kitchen areas in shops, offices and other working environments;- farm houses and by clients in hotels, motels and other residential type environments;- bed and breakfast environments;- catering and similar non-retail applications.Do not store flammable gases orliquids inside the appliance. Thereis a risk of an explosion.Do not operate any electricalappliances within the appliance(e.g. electric ice cream makers,mixers, etc.).When unplugging, always pull theProper Disposal of yourRefrigeratorRisk of Child EntrapmentChild entrapment and suffocation arenot only problems of the past. Junkedor abandoned refrigerators are stilldangerous - even if they are sitting“for just a few days”.If you are getting ridof your old refrigerator, please followthe instructions below to help preventaccidents.Before you throw away yourold refrigerator:Remove doors.Leave shelves in place so childrenmay not easily climb inside.Have refrigerant removed by aqualified service technician.2General safety and Daily useplug from the main outlet. Do not
pull on the cord.Do not place hot items near the
plastic components of this appliance.
Do not place food products directly
against the air outlet on the rear wall.
Frozen food must not be refrozen
once it has been thawed out.Store pre-packaged frozen food in
accordance with the frozen food
manufacturer’s instructions.The appliance’s manufacturer
storage recommendations shouldbe strictly adhered to. Refer to the
relevant instructions for storage.Do not place carbonated or fizzy
drinks in the freezer compartment
as it creates pressure on the container, which may cause it to explode, resulting in damage to the appliance.
Ice lollies (popsicles) can causefrost burns if consumed straight
from the freezer compartment.Do not place food directly against
the air outlet inside the refrigerator.
Do not place the appliance in direct
sunlight.ŽŶŽƚƐƚŽƌĞĞdžƉůŽƐŝǀĞƐƵďƐƚĂŶĐĞƐ
ƐƵĐŚĂƐĂĞƌŽƐŽůĐĂŶƐǁŝƚŚĂĨůĂŵŵĂďůĞ
ƉƌŽƉĞůůĂŶƚŝŶƚŚŝƐĂƉƉůŝĂŶĐĞ
Before installing, follow these important first steps.LocationPosition the appliance away from sources of heat such as stoves, radiators, direct sunlight etc. Maximum performance and safety are guaranteed by maintaining the correct indoor temperature for the class of unit concerned, as specified on the rating plate. This appliance performs welloofrom 12.8 to 43.3 C (55-110 F ). Theappliance may not work properly if it isleft for a longer period at a temperature above or below the indicated range. IMPORTANT!There is a need of good ventilationaround the fridge for easy dissipationof heat, high efficiency of refrigerationand low power consumption. For thispurpose, sufficient clear space shouldbe available around the fridge. It is advisable for there to be 75 mm (3 inch)separating the back of the fridge to thewall, at least 100 mm (4 inch) of space at its two sides, and a minimum of 100 mm (4 inch) from its top and a clear space up front to allow the doors oto open 1ϯϱ.Appliances must not be exposed to rain. Sufficient air must be allowed to circulate in the lower rear section of appliance, as poor air circulation can affect performance.tZE/E'dŚĞĨŽĂŵƉĂĚĂďŽǀĞƚŚĞ
ĐŽŵƉƌĞƐƐŽƌŝƐŽŶůLJƐƵŝƚĂďůĞĨŽƌ
ƚƌĂŶƐƉŽƌƚĂŶĚŵƵƐƚďĞƌĞŵŽǀĞĚďĞĨŽƌĞ
ƵƐĞ Wash any removable parts of therefrigerator interior, and exteriorwith mild detergent and warmwater. Wipe dry. Do not use harshcleaners on these surfaces.Do not use razor blades or othersharp instruments, which canscratch the appliance surface when removing adhesive labels. Any glue leftfrom the tape can be removed with a mixture of warm water and milddetergent, or touch the residue with the sticky side of tape already removed. Do not remove the serial plate.Caution: flammable refrigerant used! When handing, moving and use of therefrigerator, make sure to avoid either damaging the refrigerant tubing,or increasing the risk of a leak.WARNING: Keep ventilation openings, in the appliance enclosure or in thebuilt-in structure, clear of obstruction.WARNING: Do not use mechanical devices or other means to accelerate the defrosting process, other than those recommended by the manufacturer.WARNING: Do not damage the refrigerant circuit.WARNING: Do not use electrical appliances inside the food storagecompartments of the appliance, unless they are of the type recommendedby the manufacturer.Cleaning3
Table of Contents
*OTUBMMBUJPO
State of California Proposition 65 Warnings:WARNING: This product contains one or more chernicals known to the State of California to cause cancer.WARNING: This product contains one or more chernicals known to the State of California to cause birthdefects or other reproductive harm.California (U.S.A.) Residents WARNING: Cancer and Reproductive Harm - www.P65Warnings.ca.gov4EKddŚŝƐĨŝŐƵƌĞŝƐŽŶůLJĂƐŬĞƚĐŚŽĨƚŚĞƌĞĨƌŝŐĞƌĂƚŽƌƚŚĞĂĐƚƵĂů
ƉƌŽĚƵĐƚŵĂLJĚŝĨĨĞƌĨƌŽŵŝƚ
༃upperhingecover
༅doorrack
༇caďŝŶĞƚ
༉waterdrainƚƌĂLJ
་screwholecover
༄refrigeratŽƌdoor
༆gasketpart
༈glassshelf
༊rollbondevaporator
༌ĐŚŝůůĞƌƌŽŽŵĐŽǀĞƌ
Table of Contents
%FTDSJQUJPOPGUIF"QQMJBODF
Reversing the Door5The side at which the door opens can be changed from the right side (as supplied) to the left side, if the installation site requires.Tools you will need:1. 8SFODINN2. 1IJMJQT4DSFXESJWFS3. Putty knife or thin-blade screwdriverBefore you start lay the refrigerator on it’s back in order to gain access to the base, you should rest it on soft foam packaging or similar material to avoid damaging the cooling pipes at the rear of the refrigerator.༃ƵƉƉĞƌŚŝŶŐĞĐŽǀĞƌ
༆ŚŝŶŐĞŚŽůĞĐĂƉ
༉ůŽǁĞƌŚŝŶŐĞ
༄ƐƉĞĐŝĂůĨůĂŶŐĞƐĞůĨͲƚĂƉƉŝŶŐƐĐƌĞǁ
༇ƐĐƌĞǁ
༊ƐƉĞĐŝĂůĨůĂŶŐĞƐĞůĨͲƚĂƉƉŝŶŐƐĐƌĞǁ
༅ƵƉƉĞƌŚŝŶŐĞ
༈ĚŽŽƌƐƚŽƉƉĞƌ
་ďŽƚƚŽŵĨĞĞƚ
༌ƐĐƌĞǁŚŽůĞĐŽǀĞƌ
ƔOpen the refrigerator door and remove all fittings inside the door.
ƔRemove the upper hinge cover ǐ.
ƔRemove the two screws Ǒthat connect the upper hinge ǒon the right side of the caELQHW top.
ƔCarefully lift the door and place it on a padded surface to prevent scratching.
ƔRemove the screw hole cover Ǚand hinge hole cap Ǔand transfer it to the uncovered hole on the right
side of the unit. Be sure to press the button firmly into the hole.
ƔRemove the screw ǔattached to the door stopper Ǖ, then remove the door stopper, replace the door
stopper to the other side of the door, and fix it with screw.
ƔRemove the two screws Ǘthat hold the lower hinge ǖon the right side of the cabinet.
ƔRemove the bottom feet ǘand transfer it to the right side of the cabinet.
ƔSet the door into its new place making sure the pin enters the bushing at the lower frame section (hole).
ƔSecure the upper hinge ǒpreviously removed in step 4 on the left side of the unit. Make sure the pin enters
the bushing on the upper frame section (hole).
ƔLoosely secure the lower hinge ǖand do not tighten the bolts until the door is in the closed position and
leveled.
ƔReplace the upper hinge cover ǐ.
ƔTurn the door upright again.
ƔOpen the door and attach all fittings.
Remove all food.Unplug the power cord.Clean and dry thoroughly.Leave the door open slightly toprevent odour and mould growth .Insert the plug of the connection leadinto an outlet with protective earthcontact.The temperature selector knob is located on the right side of the fridge.Setting OFF means
Turning the temperature control “OFF”
position stops the cooling cycle, but
does not shut off the power to the
refrigerator.
Turn the knob clockwise to turn the
refrigerating unit on. Coldest setting is
all the way to “MAX” position. The unit
operates automatically at the set
position. If the unit is unplugged , power
lost, or turned off, you must wait 3 to
5 minutes before restarting the unit. If
you attempt to restart before this time
delay, the refrigerator will not start.
Setting MIN means:
Highest temperature, warmest setting.
Setting MAX means:
Lowest temperature, coldest setting.
^ĞƚƚŝŶŐD/ŵĞĂŶƐ
DŝĚĚůĞƚĞŵƉĞƌĂƚƵƌĞŵŝĚĚůĞƐĞƚƚŝŶŐ IMPORTANT !Normally we advise you select settingof “MID”, if you want the temperaturewarmer or colder please turn the knobto lower or higher setting accordingly.Though the unit is energy efficient, it ismore efficient at lower positionsettings. IMPORTANT !High ambient temperatures (e.g. onhot summer days) and a cold setting onthe temperature regulator (position “MAX” ) can cause the compressor to run continuously or even non-stop! When the refrigerator is in use, the compressor needs being on and off normally to ensure its defrosting. Therefore, we should avoid setting the refrigerator’s notch too high(MAX). If you find the refrigerator frosts too much, please set the refrigerator’s notch lower. Vacation Tips: lf the appliancewill not be used for several months:67HPSHUDWXUH
&RQWURO
5FNQFSBUVSF$POUSPM
For hygienic reasons the applianceinterior, including interior accessories,should be cleaned regularly. The fridgeshould be cleaned and maintained atleast every two months. Warning! Danger ofelectrical shock! The appliance may not be connected to the outlet during cleaning! Before cleaning switch the appliance off and remove the plug from the mains, or switch off the circuit breaker or fuse. Remove the food from the appliance before cleaning. Store food in a cool place and keep well covered. Never clean the appliance with a steam cleaner. Moisture could accumulate in electrical components. Hot vapors can lead to the damage of plastic parts. The appliance must be dry before it is placed back into service. IMPORTANT! Ethereal oils and organic solvents can attack plastic parts, e.g. lemon juice or the juice from orange peel,butyric acid, and cleansers thatcontain acetic acid. Do not allowsuch substances to come intocontact with appliance parts.Do not use any abrasive cleansers.Clean the appliance and theinterior accessories with a clothand lukewarm water. Commerciallyavailable dish washing detergentsmay also be used.After cleaning, wipe with freshwater and a clean dish cloth.Accumulation of dust at thecondenser increases energyconsumption. For this reasoncarefully clean the condenser at theback of the appliance once a yearwith a soft brush or a vacuumcleaner.Check the water drain hole on therear wall of the refrigeratorcompartment.Clear a blocked drain hole with theaid of something like a soft peg. Becareful not to create any damage tothe cabinet by sharp objects.After everything is dry, placeappliance back into service.Defrosting Your Refrigerator Defrosting process is automatic. Melted frost flows into drip tray and automatically evaporates. 7
$MFBOJOHBOE$BSF
Do not place warm foods into the appliance. Allow warm foods to cool first. Do not install the appliance near cookers, radiators or other sources of warmth. High ambient temperatures cause longer, more frequent operation of the compressor. In order to make the cooling system work efficiently, please make sure the side plates and back plate of the product are with some distance from the wall. It is strongly recommended that its back is 75 mm (3 inch) away from the wall, its sides are at least have a space of 100 mm (4 inch) separately and the height from over its top is no less than 100 mm (4 inch) . During the defrost cycle, water will accumulate in the drip tray. The drip tray may need to be emptied during the defrost cycle. Do not leave unattended. After defrosting is complete, empty When the product works, please do not open the door too often or leave the door open any longer than necessary. Do not set temperature any colder than necessary. The direct cooling refrigerator (with a freezer) needs to be defrosted when necessary. This will improve the cold transfer and reduce energy consumption. The sketch map shows the right combination of the shelves which can lead to more energy efficiency. If users adjust the combination, it may result in more energy-consumption. Store food logically. Do not exceed the storage period specified. and wipe down the drip tray, as well as the interior of the refrigerator. You may now reset the refrigerator to the desired temperature and put the food back in.Correcting MalfunctionsA malfunction may be caused by only aminor fault that you can rectify yourselfusing the following instructions. Do notperform any other work on theappliance if the following informationdoes not provide assistance in yourspecific case.Please keep upright at least 2 hoursbefore use to prevent damage ofcompressor. IMPORTANT!Repairs to refrigerators/freezers shouldonly be performed by qualified servicetechnician. Improper repairs can giverise to significant hazards for the user.If your appliance needs repairing,please contact your specialist dealer oryour local Service Center.8
&OFSHZ4BWJOH5JQT5SPVCMF4IPPUJOH
Problem Possible Cause SolutionAppliance does notwork.Appliance cools toomuch.The food is toowarm.Heavy build-up offrost, possibly alsoon the door seal.Unusual noisesThe compressordoes not startimmediately afterchanging thetemperature setting.Water on the floor orstorage shelves.Appliance is not switched on.Main plug is not plugged in or isloose.Fuse has blown or is defective.Socket is defective.Temperature is set too cold.Temperature is not properlyadjusted.Door was open for an extendedperiod.A large quantity of warm foodwas placed in the appliancewithin the last 24 hours.The appliance is near a heatsource.Door seal is not air-tight(possibly after reversing thedoor).Appliance is not level.The appliance is touching thewall or other objects.A component, e.g. a pipe, on therear of the appliance is touchinganother part of the appliance orthe wall.This is normal, no error hasoccurred.Check that the drip tray ishoused properly.Drip tray is full of water.Switch on the appliance. Insert main plug. Check fuse, replace if necessary.Electrical malfunctions areto be corrected by anelectrician.Turn the temperatureregulator to a warmersetting temporarily. Please look in the“temperature control”section.Open the door only as longas necessary.Turn the temperatureregulation to a colder settingtemporarily.Please look in the“installation” section.Carefully warm the leakingsections of the door sealwith a hair dryer (on a coolsetting). At the same timeshape the warmed door sealby hand such that it sitscorrectly.Re-adjust the feet.If necessary, carefully bendthe component out of theway.Move the appliance slightly.The compressor starts aftera period of time.See the “cleaning and care”section.9
It is prohibited to dispose of this appliance as household waste.Packaging materials:Packaging materials with the recycle symbol are recyclable. Dispose of thepackaging into a suitable waste collection container to recycle it.Before disposal of the appliance:1. Pull out the main plug from the main socket.2. Cut off the power cord and discard with the main plug.Warning! Refrigerators contain refrigerant and gases in the insulation.
Refrigerant and gases must be disposed of professionally as they may cause
eye injuries or ignition. Ensure that tubing of the refrigerant circuit is not
damaged prior to proper disposal.This symbol on the product or in its packing indicates that thisproduct may not be treated as household waste. Instead, it shouldbe taken to the appropriate waste collection point for the recycling ofelectrical and electronic equipment. By ensuring this product isdisposed of correctly, you will help prevent potential negativeconsequences for the environment and human health, which couldotherwise be caused by the inappropriate waste handling of thisproduct. For more detailed information about the recycling of thisproduct, please contact your local council, your household wastedisposal service, or the shop where you purchased the product.Correct Disposal of this product10%JTQPTBMPGUIFBQQMJBODF

Other Hisense Refrigerator manuals

Hisense RS694N4TFF Mounting instructions

Hisense

Hisense RS694N4TFF Mounting instructions

Hisense RQ689N4AC1 Mounting instructions

Hisense

Hisense RQ689N4AC1 Mounting instructions

Hisense HR6TFF270 Mounting instructions

Hisense

Hisense HR6TFF270 Mounting instructions

Hisense HRF254N6TSE User manual

Hisense

Hisense HRF254N6TSE User manual

Hisense RB372N4CC2 Mounting instructions

Hisense

Hisense RB372N4CC2 Mounting instructions

Hisense RD-39DR4SAA/CPA1 User manual

Hisense

Hisense RD-39DR4SAA/CPA1 User manual

Hisense RD-43WC4SBA/CSA2 Mounting instructions

Hisense

Hisense RD-43WC4SBA/CSA2 Mounting instructions

Hisense RC33 Mounting instructions

Hisense

Hisense RC33 Mounting instructions

Hisense RB296F4AW1 Mounting instructions

Hisense

Hisense RB296F4AW1 Mounting instructions

Hisense RR195D4DR1 Mounting instructions

Hisense

Hisense RR195D4DR1 Mounting instructions

Hisense HRCD585BW Mounting instructions

Hisense

Hisense HRCD585BW Mounting instructions

Hisense RB335N4WB1 Mounting instructions

Hisense

Hisense RB335N4WB1 Mounting instructions

Hisense RQ515N4AC2 Mounting instructions

Hisense

Hisense RQ515N4AC2 Mounting instructions

Hisense RL415N4ACE Mounting instructions

Hisense

Hisense RL415N4ACE Mounting instructions

Hisense RF702N4IS1 Mounting instructions

Hisense

Hisense RF702N4IS1 Mounting instructions

Hisense RD-30WC4SAW User manual

Hisense

Hisense RD-30WC4SAW User manual

Hisense RT600N4DC2 User manual

Hisense

Hisense RT600N4DC2 User manual

Hisense HQD20 Series User manual

Hisense

Hisense HQD20 Series User manual

Hisense RM-53WC1SHA/UVE-001 User manual

Hisense

Hisense RM-53WC1SHA/UVE-001 User manual

Hisense RB327N4WB1 Mounting instructions

Hisense

Hisense RB327N4WB1 Mounting instructions

Hisense H415BI-WD Mounting instructions

Hisense

Hisense H415BI-WD Mounting instructions

Hisense HRQ208N6TSE User manual

Hisense

Hisense HRQ208N6TSE User manual

Hisense RB390N4BFC Mounting instructions

Hisense

Hisense RB390N4BFC Mounting instructions

Hisense RF210N6ASE User manual

Hisense

Hisense RF210N6ASE User manual

Popular Refrigerator manuals by other brands

Engel MD14F owner's guide

Engel

Engel MD14F owner's guide

SANTO 70278-5 KG user manual

SANTO

SANTO 70278-5 KG user manual

GE MONOGRAM ZISP480DXSS datasheet

GE

GE MONOGRAM ZISP480DXSS datasheet

Telefunken TER 1101S user manual

Telefunken

Telefunken TER 1101S user manual

AEG RCS736EXMX user manual

AEG

AEG RCS736EXMX user manual

Oceanic OCEAFC207W Instruction booklet

Oceanic

Oceanic OCEAFC207W Instruction booklet

Viking 5 Series installation guide

Viking

Viking 5 Series installation guide

Aspes AC11856NF user manual

Aspes

Aspes AC11856NF user manual

Pkm KS 165.4-2 instruction manual

Pkm

Pkm KS 165.4-2 instruction manual

Whirlpool GSS30C6EYW User instructions

Whirlpool

Whirlpool GSS30C6EYW User instructions

Fhiaba Integrated 599 Series installation guide

Fhiaba

Fhiaba Integrated 599 Series installation guide

Mobicool MBF20PS operating manual

Mobicool

Mobicool MBF20PS operating manual

Frigidaire FFHT1814QB use & care

Frigidaire

Frigidaire FFHT1814QB use & care

Miele KFN 15943 DE edt/cs Operating and installation instructions

Miele

Miele KFN 15943 DE edt/cs Operating and installation instructions

Beko BSSA315K2S Instructions of use

Beko

Beko BSSA315K2S Instructions of use

Igloo FR832 operating instructions

Igloo

Igloo FR832 operating instructions

Beko B1854N user manual

Beko

Beko B1854N user manual

GE Profile PGCS1PJXSS Dimensions and installation information

GE

GE Profile PGCS1PJXSS Dimensions and installation information

manuals.online logo
manuals.online logoBrands
  • About & Mission
  • Contact us
  • Privacy Policy
  • Terms and Conditions

Copyright 2025 Manuals.Online. All Rights Reserved.