Hisense HA550 User manual

USER MANUAL
HA550 CM1671
CD HI-FI SYSTEM

Features .....................................................................................................................2
For your Attention........................................................................................................3
Panel..........................................................................................................................4
Connections...............................................................................................................5
Remote Control........................................................................................................6-7
Basic Playback.......................................................................................................8-10
Trouble shooting........................................................................................................11
Specifications............................................................................................................12
Contents
Contents
-1-

Features
-2-
Thanks for your purchase of our product. Please read through this manual before making
connections and operating this product. Retain this manual for future reference.
●Compatible with CD,MP3,CD-R,CD-RW,etc.
●With USB Slot .
●With bluetooth function .
●Full function remote control.
●FM stereo radio tuner.
Note: The player is not compatible with all disc;
Some of the disc could not read, caused by the disc is dirty,disc of poor quality, etc.
Package Contents:
User manual
User m anual
Remote control
Batteries FM antenna

To reduce the risk of electric shock or fire, do not open the cover. Refer servicing to qualified
service personnel.
This mark indicates this unit belongs to class 1 laser product. The laser beam may produce
radiation harm to the directly touching human body.
IMPORTANT NOTES:
For Your Attention
The lightning flash is intended to alert the user to the presence of dangerous voltage within the
product's enclosure, and touching the internal components may result in a risk of electric shock
to persons.
The exclamatory mark is intended to alert the user to the presence of important operating
instructions.
CLASS 1
LASER PRODUCT
RISK OF ELECTRIC SHOCK
DO NOT OPEN
CAUTION
CAUTION
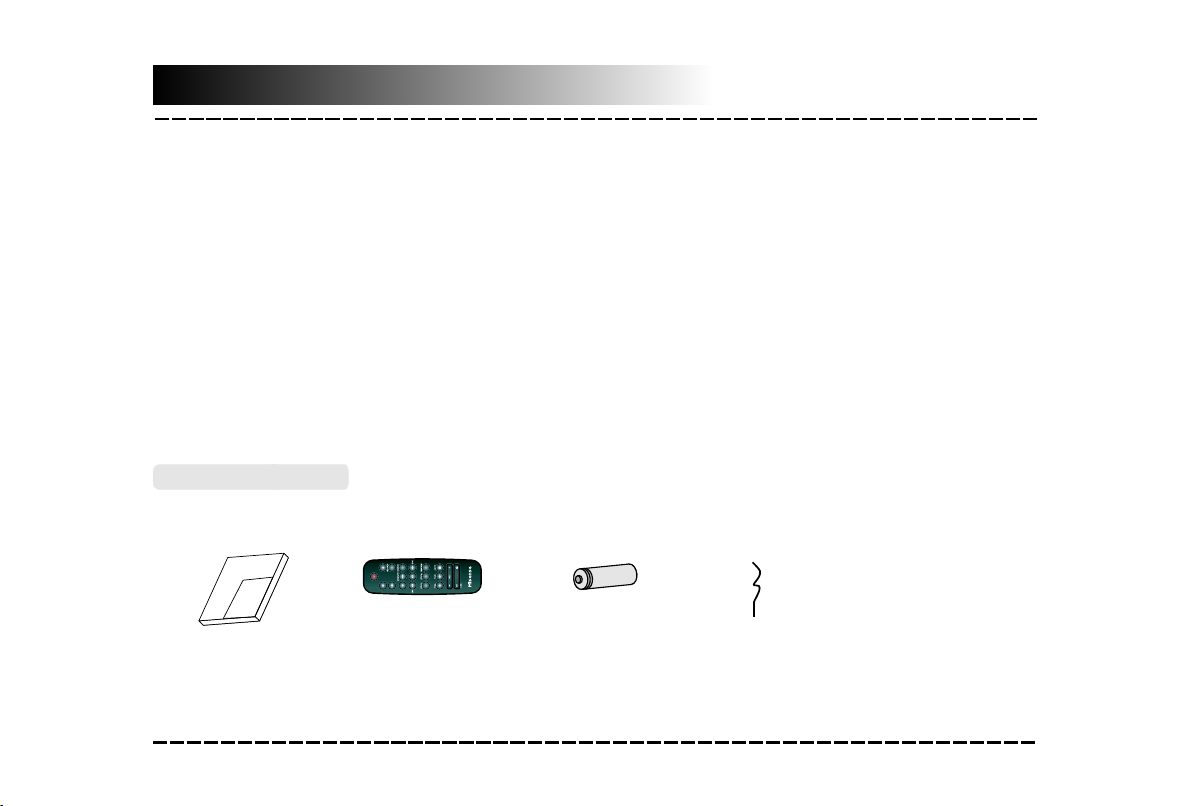
●Please read through this manual before making connections and operating this product. Retain this manual for
future reference.
●Don't open the cabinet of this unit. No user-serviceable parts inside. Refer servicing to qualified personnel only.
●Switch off the unit when you don't use it. Switch off the unit and disconnect it from the AC power supply when it is
not being used for a long time.
●Don't install the unit in a place exposed to heating sources or direct sunshine.
●Don't install the unit in a place exposed to moisture or rain.
●The apparatus shall not be exposed to dripping or splashing and any object filled with liquids, such as vases shall
not be placed on it.
●Install the unit on a horizontal, flat and firm surface with good ventilation. Never block the vents which will cause
malfunction resulted from overheating.
●Use a soft and clean rag to clean the outside of the unit . Never clean it with chemicals or detergent.
●This book is only a guide for user's operation, not a criterion for configuration.
●Only use attachments/accessories specified by the manufacturer.
●Where the Mains plug is used as the disconnect device, the disconnect device shall remain readily operable.
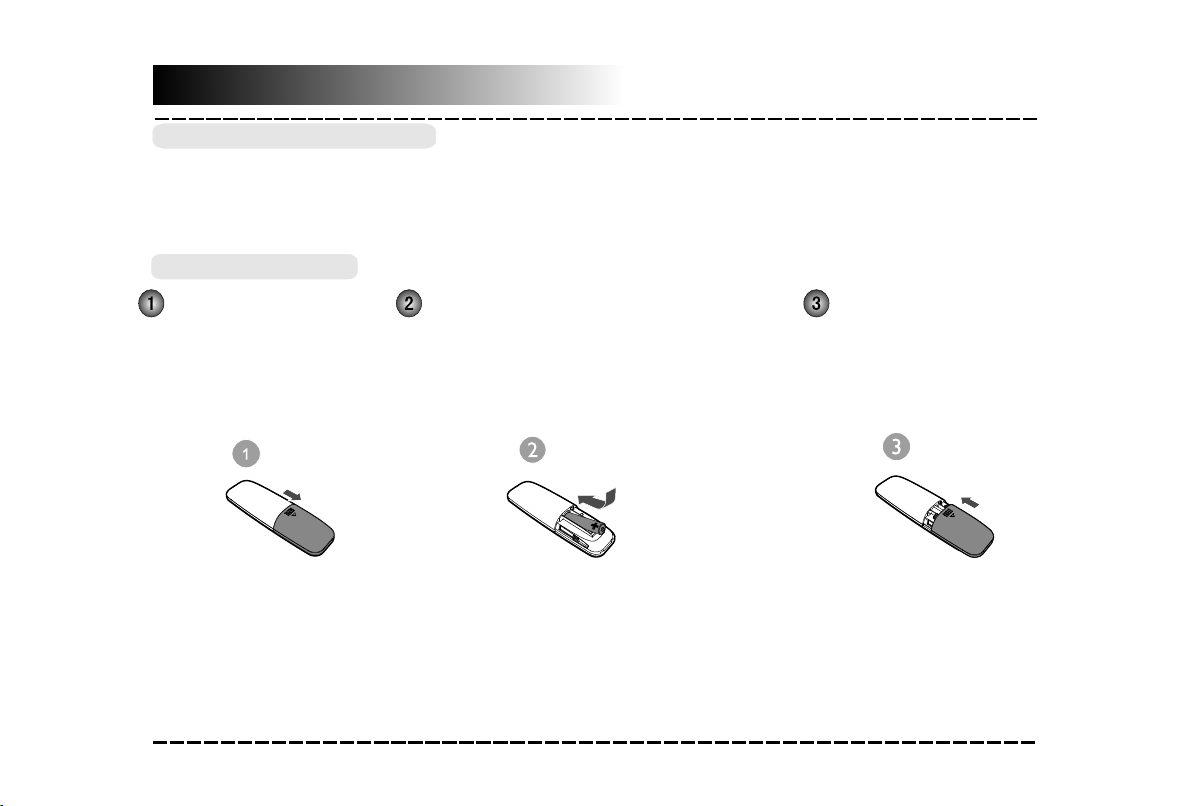
WARNING: The batteries shall not be exposed to excessive heat such as sunshine, fire or the like.
CAUTION: Danger of explosion if battery is incorrectly replaced.Replace only with the same or equivalent type.
-3-

REAR PANEL:FRONT PANEL:
Panel
-4-
1 STANDBY/ON
2 PLAY/PAUSE
3 HEADPHONES
4 PREVIOUS/FAST REWIND
5 LINE IN
6 USB SLOT
7 NEXT/FAST FORWARD
8 MASTER VOLUME ADJUSTER
9 SOURCE
5
46717 18
10 EQ
11 STOP
12 DISC TRAY
13 OPEN/CLOSE
14 DISPLAY SCREEN
15 FM ANTENNA JACK
16 AUX IN(L/R INPUT)
17 SPEAKER LED OUTPUT
18 SPEAKER OUTPUT
3
2
19
810
13
11
14
15 16
12

Connections
-5-
Connect the speakers to speaker output terminals
with their attached speaker cables .
Amplifier Audio Input
CD Audio Output
Speaker
Speaker output
R L
LINE IN
This unit has an extra group of audio input terminal.
You can input the analogue stereo audio signals
from extra devices such as VCD, CD, VCR,MP3
player, etc.
Use the audio cable to connect the stereo audio
output terminals of a VCD, CD, VCR player to the
input terminal (LINE IN) of this unit. Its
corresponding signal source is LINE IN which can
be available by pressing [SOURCE] on the remote
control.
Speaker Output
AUDIO SYSTEM CONNECTION
The model of the player is HA550,press [SOURCE] button to switch to the corresponding signal source,
use your smart phone to search the bluetooth signal of the player, then input the password 0000 if
necessary, at this time, " BT " will displays on the display screen and the player will synchronize to
play songs on your smart phone while they connected successfully. Disconnect the bluetooth on the
smart phone to switch off the bluetooth connect.
The bluetooth is connected to your smart phone successfully for the first time, disconnect the
bluetooth on your smart phone then reconnected it, the player will memories your smart phone and
repaired automatically.Press [PLAY/PAUSE] to resume the playback.
NOTE: In bluetooth mode, [PLAY/PAUSE], [MUTE],[NEXT] and [PREVIOUS] buttons are also active.
BLUETOOTH CONNECTION
Bluetooth
Model: HA550
3

-6-
Remote control
Insert the batteries into the remote control. Point the remote control at the remote sensor on the front
panel. The remote control works within a distance of about 8 metres from the sensor and within an
angle of about 30 degrees from the left and right side.
Note:
●Remove the battery when you do not intend to use the remote control for a long time.
●Weak batteries can leak and severely damage the remote control.
●The battery must not be exposed to excessive heat source, such as sunshine, fire or any other
things like that.
●Be environmentally friendly and dispose of batteries according to your government regulations.
Remote Control Operation
Battery Installation
Remove the battery
compartment cover on
the back of the remote
control.
Load one AAA/1.5V battery into the
battery compartment making sure that
the battery have been inserted with the
correct polarities matching the symbols
+, - as indicated inside the battery
compartment.
Replace the
cover.

Remote Control
-7-
1 STANDBY
2 CD
3 USB
4 FM
5 PROG/MEMORY
6 FAST REWIND/
PREVIOUS
7 PLAY/PAUSE
8 FOLD-
9 FOLD+
10 10-/TUN-
11 10+/TUN+
12 VOLUME-
13 EQ/LED
14 OPEN/CLOSE
15 SOURCE
16 REPEAT
17 FAST FORWARD/NEXT
18 RANDOM
19 STOP/AUTO
20 VOLUME+
21 MUTE
2
20
7
6
12
1
3
4
17
5
818
19
9
15
14
13
11
10
16
21

STANDBY
●Press to switch on the unit. Press it again to put the unit in standby mode.
●Press to temporarily pause a playback. Press it again to resume the playback.
●Hold down this button for 3 seconds to disconnect bluetooth.
●Press to stop a playback .
Basic Playback
-8-
CD Operation
●Press to enter to CD mode.
●Press to enter to FM tuner mode.
STOP
●Press to skip to the next track.
●Press to return to the previous track.
●Press to enter to USB mode.
●Hold down for fast forward playback .
●Hold down for fast rewind playback .
●Press repeatedly to switch among CD,LINE IN,BLUETOOTH,USB and TUNER mode.
OPEN/CLOSE
●Press to open or close the disc tray.
SOURCE

PROGRAM
●Press [VOLUME+] to turn up the volume.
VOL+
MUTE
●Press to temporarily switch off the sound . Press it again to switch it on.
Basic Playback
-9-
●Press [VOLUME-] to turn down the volume.
VOL-
RANDOM
REPEAT
● Press to switch the RANDOM play mode
●Press repeatedly to switch the repeat modes.
FOLD-
●Press to skip the next folder .
●In stop mode, place a CD and press [PROGRAM] to access to the program mode. Press the arrows
[ ]/ [ ] to select the desired track and press once again [PROGRAM] to confirm your selection.
Press [ ] to start program playback.
10+
●Press this button for each time to increase ten tracks.
10-
●Press this button for each time to decrease ten tracks.
FOLD+
● folder .Press to return to the previous
●Press to switch the equalizer modes.
●Hold down this button repeatedly to switch different LED display brightness mode on the speaker
EQ
LED

NOTE: In Tuner mode, [VOLUME+/-], [MUTE] buttons are also active. For details, please refer to the introduction
of the CD operation in this chapter.
The following buttons are used in tuner mode. Press [FM] to select tuner mode.
Tuner Operation
Basic Playback
-10-
●Press to skip to the next preset station.
●Press to skip to the previous preset station.
●TUN+: press to fine tune (increase) the frequency;
●TUN-: press to fine tune (decrease) the frequency.
●Hold down [TUN+/-] to increase/decrease the frequency continuously.
●Hold down to do auto scanning for the broadcasting radio channels, press it again to stop auto
scanning.
TUN+/-
●After tuning in a new frequency, press [MEMORY] then select a preferred station by pressing arrows
[ ]/[ ], press [MEMORY] again to confirm and save it as a preset station.
MEMORY

-11-
Troubleshooting
Before resorting to maintenance service, please kindly check by yourself with the following chart.
The player breaks
down when a USB
drive is inserted
into the player.
Sound
There is no sound or
the sound is
distorted.
●The audio cables aren't connected securely.
●The volume is set to the minimum level.
●The sound is switched off.
●Connect the audio cables securely.
●Turn up the volume.
●Press [MUTE] on the remote control to
switch on the sound.
●Press [PLAY/PAUSE].
The remote
control does not
function.
●There is no battery in the remote control.
●The batteries are out of charge.
●The remote control isn't pointed to the remote
sensor.
●The remote control is out of its operating area.
●The unit is shut down.
●Install one AAA/1.5V battery in it.
●Replace the battery with new one.
●Make sure that the remote control is
pointed to the remote control sensor.
●Make sure the remote control is within
the operating area.
●Switch off the unit and disconnect it from
the AC outlet. Then power on the unit again.
Unable to play a
disc
●This disc is placed in the disc tray in a wrong way.
●The unit isn't compatible with the disc.
●The disc is dirty.
●Check that the disc is placed in the disc
tray with its label side upwards.
●/
●Clean the disc.
Symptom Cause(s) Remedy
The buttons on the
unit doesn't work.
●Switch off and unplug the unit.
Then connect the plug to the power supply
and switch it on again.
●The unit is being interfered with static electricity
etc.
●The AC power cord is not connected to the power
supply or is not connected to a power supply
securely.
●Please check that the AC power cord
is connected securely.
No Power
●The connected USB drive is probably not a
certified one.
●The player cannot play any uncertified USB drive.
In case the player breaks down, turn it off, disconnect
the power cord from the AC outlet and unplug the USB
drive from the player. Then, power on the player again.
The player will resume the normal status.

-12-
Specifications
200WX4
Power supply
AC ~100-240V,50/60Hz
Working
environment
Temperature -10~+35℃
Relative humidity
5%~90%
THD+NOISE ≤-60dB(1kHz)
WOW FLUTTER Below the limit of apparatus measure
S/N(A weight)
≥70dB( )1kHz
FM band Range 87.5MHz~108MHz
Power output (Max)
Power consumption 100W
Disc output
Tuner
Frequency response
±3dB(20Hz~20kHz)
Dynamic Range
>80dB( )1kHz

Table of contents
Other Hisense Stereo System manuals