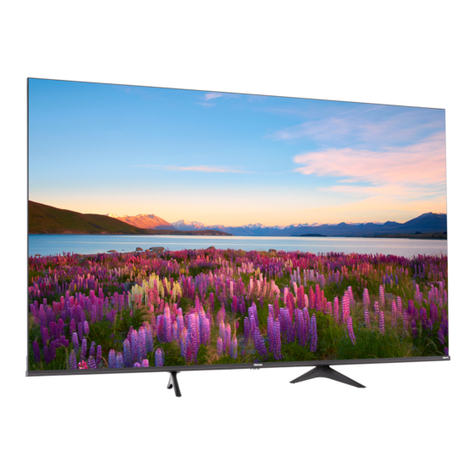
Hisense TC24FS2H User manual

CONTENTS
1. X-RAY RADIATION PRECAUTION………………………………………………………1
2. SAFETY PRECAUTION………………………………………………………. ……………1
3. PRODUCT SAFETY NOTICE…………………………………………………………..……2
4. THE ALIGNMENT FLOW CHART……………………………………………………..……3
5. INSTALLATION AND SERVICE ADJUSTMENTS…………………………………………3
6. USA CHANNEL FREQUENCY TABLE (181 CH) …………………………………...…… 9
7. WIRING DIAGRAM………………………………………………………. ……..…………12
8. BLOCK DIAGRAM………………………………………………………. ……...…….……13
9. IC BLOCK DIAGRAM………………………………………………………. ……...………14
10. TDA9850 BLOCK DIAGRAM
………………………………………………. ……..….……15
11. COMPONENT AND BOTTOM VIEW………………………………………………....……16
12. SCHEMATIC DIAGRAM………………………………………………. …………..….……23
13. ELECTRICAL PARTS LIST………………………………………………. ………..….……24

-1 -
CAUTION: BEFORE SERVICING THE CHASSIS, READ THE “X-RAY RADIATION
PRECAUTION” “SAFETY PRECAUTION” ON PAGE 1 AND “PRODUCT
SAFETY NOTICE”ON PAGE 2 OF THIS MANUAL.
X-RAY RADIATION PRECAUTION
1. Excessive high voltage can produce potentially hazardous X - RAY RADIATION. To avoid such
hazards, the high voltage must not be above the specified limit. The normal value of the high
voltage of this receiver is 27.5kV at zero beam current (minimum brightness) under a 120V AC
power source. The high voltage must not, under any circumstances, exceed 30kV.
2. Each time a receiver requires servicing, the high voltage should be checked following the HIGH
VOLTAGE CHECK procedure in this manual. It is recommended the reading of the high voltage
be recorded as a part of service record. It is important to use an accurate and reliable high voltage
meter.
3. This receiver is equipped with a Fail Safe (FS) circuit which prevents the receiver from
producing an excessively high voltage even if the B+ voltage increases abnormally. Each time the
receiver is serviced, the FS circuit must be checked to determine that the circuit is properly
functioning, following the FS CIRCUIT CHECK procedure in this manual.
4. The primary source of X-RAY RADIATION in this TV receiver is the picture tube. For
continuous X-RAY RADIATION protection, the replacement tube must be exactly the same type
tube as specified in the parts list.
5. Some parts in this receiver have special safety-related characteristics for X-RAY RADIATION
protection. For continuous safety, parts replacement should be undertaken only after referring to
the PRODUCT SAFETY NOTICE below.
SAFETY PRECAUTION
WARNING:
Service should not be attempted by anyone unfamiliar with the necessary precaution on this
receiver. The following are the necessary precautions to be observed before servicing this chassis.
1. Since the power supply circuit of this receiver is directly connected to the AC power line, an
isolation transformer should be used during any dynamic service to avoid possible shock hazard.
2. Always discharge the picture tube anode to the CRT conductive coating before handling the
picture tube. The picture tube is highly evacuated and if broken, glass fragments will be violently
expelled. Use shatter proof goggles and keep picture tube away from the unprotected body while
handling.
3. When replacing a chassis in the cabinet, always be certain that all the protective devices are put
back in place, such as: non-metallic control knobs, insulating covers, shields, isolation
resistor-capacitor network etc.
4. When replacing parts or circuit boards, disconnect the power cord.
5. When replacing a high wattage resistor (oxiode metal film resistor) on the circuit board, keep the
resistor 10mm (1/2in) away from circuit board.
6. Connection wires must be kept away from components with high voltage or high temperature.
7. If any fuse in this TV receiver is blown, replace it with the FUSE specified in the chassis parts
list.
-2 -
8. Before returning the set to your customer, always perform an AC leakage current check on the
exposed metallic parts of the cabinet, such as antennas, terminals, screwheads, metal overlays,
control shafts etc. to be sure the set is safe to operate without danger of electrical shock. Plug the
AC line cord directly into a 120V AC outlet (do not use a line isolation transformer during this
check). Use an AC voltmeter having 5000 ohms per volt or more sensitivity in the following
manner:
Connect a 1500 ohm 10 watt resistor, paralleled by a 0.15μF, AC type capacitor, between a known
good earth ground (water pipe, conduit, etc.) and the exposed metallic parts, one at a time. Measure
the AC voltage across the combination of 1500 ohm resistor and 0.15 μF capacitor. Reverse the
AC plug at the AC outlet and repeat AC voltage measurements for each exposed metallic part.
Voltage measured must not exceed 0.3 volts RMS. This corresponds to 0.2 milliamp. AC. Any
value exceeding this limit constitutes a potential shock hazard and must be corrected immediately.
PRODUCT SAFETY NOTICE
Many electrical and mechanical parts in the chassis have special safety-related characteristics.
These characteristics are often passed unnoticed by a visual inspection and the X-RAY
RADIATION protection afforded by them cannot necessarily be obtained by using replacement
components rated for higher wattage, etc. Replacement parts which have these special safety
characteristics are identified in this manual and its supplement electrical components having such
features are shaded on the schematic diagram and the parts list.
Before replacing any of these components, read the parts list in this manual carefully. The use of
substitute replacement parts which do not have the same characteristic as specified in the parts list
may create shock, fire, X-RAY RADIATION or other hazards.

-3 -
THE ALIGNMENT FLOW CHART
INSTALLATION AND SERVICE ADJUSTMENTS
GENERAL
In the majority of cases, a color television receiver will need only slight touch-up adjustment upon
installation. Check the basic characteristics such as FS、EHV and focus. Observe the picture for
good black and white details without objectionable color shading. If color shading is evident,
demagnetize the receiver.
If color shading still persists, perform purity and convergence adjustments. This should be all that is
necessary to achieve optimum receiver performance.
FOCUS ADJUSTMENT
Adjust the FOCUS control (on T471) for well defined scanning lines on the picture screen.
HIGH VOLTAGE CHECK
CAUTION: These is no HIGH VOLTAGE ADJUSTMENT on this chassis. Checking should be
done following the steps below.
1. Connect an accurate high voltage meter to the second anode of the picture tube.
2. Turn on the receiver. Set the BRIGHTNESS and CONTRAST controls to minimum (zero beam
current).
3. High voltage will be measured about 27.5kV.
4. Vary the BRIGHTNESS control to both extremes to be sure the high voltage does not exceed the
limit under any conditions.
FS CIRCUIT CHECK
The Fail Safe (FS) circuit check is indispensable for the final check in the servicing. Checking
should be done following the steps below.
PIF
B+,AGC,H-frequency
To fit the front cabinet,
external degaussing
Preheat for 30 minutes
Factory items’ adjustment
Focus
Heatrun for 2 hours
White balance re-
alignment, focus, high
voltage,
To fit the back cabinet
X-ray protection test, sound power test, CCD, V-chip,
BTSC, secret code setting, AV function check.
Control buttons, channels, white balance, sound, hit the set

-4 -
1. Turn the power switch on and adjust customer controls for normal operation.
2. Temporarily short R412 on the Main Board with a jumper wire. Raster and sound will
disappear.
3. The receiver must remain in this state even after removing the jumper wire. This is the evidence
that the FS circuit is functioning properly.
4. To obtain a picture again, temporarily turn the receiver off and allow the FS circuit more than 30
seconds to reset. Then turn the power switch on to produce a normal picture.
Troubleshooting Guide for Fail Safe Circuit
YES NO
NO
YES
PIF alignment
1) Apply DC 12Vto output pin of N551(pin3 of N551 ) , connect pin7 of LA76814(N101)
to GND.
2) Apply 95dBμ,45.75MHz RF signal to the tuner's IF pin through a 1000P ceramic
capacitor. Connect the DC voltameter's⊕pole to LA76814 pin 47 , ⊙pole to GND.
Note: For LA76814 ES01 version, the voltameter's⊕pole should connect to pin50 .
3) Adjust T202 with a non-inductive screwdriver until the reading on the DC voltameter is DC
3.6V±0.01V.
B+ CHECK
1) Prepare the test equipment.
2) Use the DC voltameter at DC 200V position to test VD551⊕, i.e. B+.
3) Connect the power plug to AC 120V/60Hz, turn on the power switch, wait for normal raster,
then adjust RP551 to make B+ = 130V±0.5V.
Test point
VD551⊕
VD556⊕
VD554⊕
VD555⊕
DC(V) 130 25 15 18
Check that the set returns to normal operation when pin
34 of N101 on the Main Board is grounded with jumper
Faulty
Power Circuit or Horizontal Circuit
Check if the voltage across capacitor
C411 is approximately 21V.
Defective Fail Safe Circuit

-5 -
TEST EQUIPMENT
1) DC regulated power supply PAB18-1.8
2) Audio voltameter
3) Oscilloscope
4) High-voltage meter
5) Digital multimeter
6) AC voltameter
TEST MODE SET(CHECK)
TEST MODE ADJUSTMENT INSTRUCTION
TEST MODE adjustment is a special adjustment which is controlled by I2C BUS. The TV set has
been set at optimum mode at the factory. Except for special need, such as replacing CRT、
MEMORY、IC etc., it is hoped not to adjust it. To conduct TEST MODE's adjustment, please do it
according to the following steps:
There are two special romote controller for the set. One is "Under Adjustment" and the other is
"Under Adjustment for W/B Balance".
1) Press "PROD" button to enter the FACTORY, B/W BALANCE, ADJUST or SETUP mode.
2) In B/W BALANCE mode, select the item you want to adjust directly by pressing the button on
the"Under Adjustment for W/B Balance" remote controller and use the "ADJ+" or "ADJ-" button
to adjust. You can press "ADJUP" or "ADJDOWN" to select needed adjustment item and use
the "ADJ+" or "ADJ-" button to adjust too.
3) In ADJUST mode, select the item you want to adjust directly by pressing the button on the "Under
Adjustment" remote controller and use the "ADJ+" or "ADJ-" button to adjust. You can press
"ADJUP" or "ADJDOWN" to select needed adjustment item and use the "ADJ+" or "ADJ-"
button to adjust too.
4) In SETUP mode, select the item you want to adjust by pressing the button "ADJUP" or
"ADJDOWN" on the "Under Adjustment". Then use the "ADJ+" or "ADJ-" button to adjust.
adjust.
5) Press "PROD" to exit the TEST MODE.
H-blanking, H-center adjustment
1) Receive test signal, enter into the ADJUST mode.
2) Select the H.BLK.LEFT and H.BLK.RIGHT item, adjust the level to make the H -blanking
amount on the left and right screen at an appropriate position.
3) Select the H.PHASE item, adjust the level to make the left and right picture sysmmetrical.
H-Size, E/W correction
Receive test signal, adjust RP302 to make Horizontal size right, and adjust RP301 to make E/W correction
right.
V-amplitude, linearity, S-correction, center adjustment
1) Receive test signal, enter into the ADJUST mode. adjust the value to make V-center and the CRT's
2) Select the V.POS item , adjust the value to make V-center and the CRT's geometric center is in
accordance. Then select the V.SIZE item, adjust the value to make the overscan is less than or

Equate 10% .
2) Select the V.LINE item, adjust the value to make the upper and lower grid's(on the screen) vertical
distance equal. Select the V.SC item, adjustthe value to make the vertical distance from upper
grid to middle screen is equal to the vertical distance from lower grid to middle screen.
3) Repeat the above steps 2) &3) to make the V-center, V-amplitude, V-linearity at the optimum
mode.
White balance, sub-brightness adjustment
1) Receive test signal, enter into B/W BALANCE mode with the special remote controller of
"Under Adjustment for B/W BALANCE".
2) Set the value of item as the following table:
Name
S-BRI
B-BIA
G-BIA
R-BIA
B-DRV
G-DRV
R-DRV
C.B/W
Name Default
Value Description
0~127
0~255
0~255
0~255
0~127
0~15
0~127
0~3
-
-
-
-
65
7
65
0
Sub Brightness
Blue Bias
Green Bias
Red Bias
Blue Drive
Green Drive
Red Drive
Cross B/W
3) Set the value of S-BRI=85, then press "LINE" button. Adjust the SCREEN potentiameter
clockwise until a slight bright horizontal line appears on the screen. Adjust the value of
R-BIA, G-BIA and B-BIA, until the line change white. Press "LINE" button again. Then
decrease S-BRI to a proper value.
4) Press "LINE" button to exit B/W BALANCE mode.
ADJUST MENU LIST
Receive test signal, enter into ADJUST mode with the special remote controller of
"Under Adjustment".
Item
00*
01**
02**
03**
04*
05*
06*
07*
08**
09**
10**
11**
12
13
14
15
Name
H.PHASE
NT.H.PHASE
H.BLK.LEFT
H.BLK.RIGHT
V.SIZE
V.LINE
V.POSI
V.SC
NT.V.SIZE
NT.V.LINE
NT.V.POSI
NT.V.SC
RF.AGC
VOL.OUT
OSD.H.POSI
OSD.V.POSI
Description
H.PHASE
Vertical Size
Vertical Linearity
Vertical DC
Vertical S-Correction
RF AGC Delay
Volume Control
Value Default
0~127
0~7
0~7
0~31
0~31
-16~+15
-32~+31
0~31
0~63
0~31
0~127
0~127
0~63
-16~+15
-32~+31
0~31
13
82
0
7
00
3
6
33
00
00
00
00
30
127
16
11
- 6 -

16
17
18
19
21
22
INPUT LEVEL
SPECTRAL
WIDE BAND
STEREO
FILTER SET
SAP VCO
0~63
0~63
0~63
0~15
0~63
0~31
63
0
0
7
63
63
Note: 1.All the items sign with "*" can adjust to different value for different
TV set.
2.All the items sign with "**" do not affect the IC of La76814.
ADJUST MENU LIST
Receive test signal, enter into ADJUST mode with the special remote controller of
"Under Adjustment".
Item
00
01
02
03
04
05
06
07
08
09
10
11
12
13
14
15
Name
LA76814/LA76812
SAP IC SELECT
SUB.CONT
SUB.COLOR
SUB.SHARP
SUB.TINT
BLK.STR.DEF
AFC GAIN
V.SETUP
CD.MODE
DIGITALOSD
OSD CONT
GRAY MOD
B.GAMSEL
RG.GAM.DEF
FBPBLK.SW
Description
0:LA76814; 1:LA76812
Subsharpness(0~31)
Subtint(0~63)
Black Stretch Definition(0:on; 1:off)
AFC Gain(0:low; 1:high)
Gray Mode(0/1)
Blue Selection(0~3)
Default
0
15
31
15
0
31
1
1
1
0
1
2
0
2
0
0
Subcolor(0~63)
Subcontrast(0~31)
0:TDA9850; 1:CXA2104; 2:TDA9855; 3:UPC1851B
Digital OSD(0:Analog; 1:Digital)
Count Down Mode(LA76814:0/1;LA76812:0~7)
Vertical Synchronization Separate Sense(0:low; 1:high)
OSD Contrast(0~127)/LA76814(0~3)
FBPBLK.SW(0/1)
Red&Green Definition(0/1)
16
17
18
19
20
21
22
23
24
25
26
27
28
29
30
BRIGHT ABL.TH
EMG.ABL.DEF
BRT.ABL.DEF
MID.STP.DEF
R-Y/B-Y G.BL
R-Y/B-Y ANG
C.KILL.OFF
SND.TRAP
VOL.FIL
VIF.SYS.SW
VIDEO.LEVEL
FM.LEVEL
POWER OPT
POWER FLAG
SEARCH CHECK
Mid.Stp.Def(0/1)
R-Y/B-Y Gain Balance(0~15)(None for)(LA76814)
R-Y/B-Y Angle(0~15)
C_Kill OFF(0/1)
FM Level(31)
0:Twice On; 1:Memory; 2or3:Once On
0
0
0
0
8
0
8
3
1
0
7
16
1
1
0
Brt.Abl.Def(0/1)
Emg.Abl.Def(0/1)
Bright.Abl.Threshold(0~7)
Video IF(0:45.75M;1:58.75M)
Volume Filter Defeat(0/1)
Sound Trap(0~7)
Video Level(0~7)
0:No Power On Search;1:Power On Search
0:No Power On Screen;1:Power On Screen
31
32
33
34
35
SEARCH SPEED
AV OPTION
POSITION L/R
BLUE BACK
BLACK BACK
Blue Back When No Signal(0:Off; 1:On)
Black Back When Switch Channel(0:Off;1:On)
1
1
2
0
0
Position of CH Number(0:Upper Left;1:Upper Right)
AV Input (0:No; 1:1; 2:2; 3:3)
0:Slow;1:Quick
- 7 -

36
37
38
39
40
41
42
43
STEREO OPTION
WOOFER/H.PHONE
WOOFER VOL.OPT
SENSITIVITY
V.MUTE P.OFF
CCD OPTION
V-CHIP OPTION
PASSWORD OPT
Cut Video Out Before Power Off(0:on; 1:off)
CCD Function(0:off; 1:on)
0:Woofer;1:Headphone
Password of V-CHIP(0:off;1:on)
0
1
0
0
0
1
1
1
Volume of H.Phone(0:No Woofer;1:Woofer)
Sensitivity Function(0:off;1:on)
V-CHIP Function(0:off; 1:on)
Stereo Option(0:off;1:on)
44
45
COMB.OPTION
TUNER OPTION 1
0
0:TDF-3M3;1:PHOLIPUV1336B
Y/C Separate Function(0:off;1:on)
46
47
GAME OPTION
SCREEN OPTION
Game Option(0:on; 1:off)
0:No Screen;1:Screen When Power On;2:ScreenWhen Power Off;3:Screen When Power On/Off
0
1
- 8 -

-9-
USA CHANNEL FREQUENCY TABLE
U.S.A. Channel
PIF 45.75MHZ, CIF 42.17MHZ, SIF 41.25MHZ.
UNIT:MHZ
Channel fp(picture) fs(sound) Channel fp(picture) fs(sound)
2 55.25 59.75 36 603.25 607.75
3 61.25 65.75 37 609.25 613.75
4 67.25 74.75 38 615.25 619.75
5 77.25 81.75 39 621.25 625.75
6 83.25 87.75 40 627.25 631.75
7 175.25 179.75 41 633.25 637.75
8 181.25 185.75 42 639.25 643.75
9 187.25 191.75 43 645.25 649.75
10 193.25 197.75 44 651.25 655.75
11 199.25 203.75 45 657.25 661.75
12 205.25 209.75 46 663.25 667.75
13 211.25 215.75 47 669.25 673.75
14 471.25 475.75 48 675.25 679.75
15 477.25 481.75 49 681.25 685.75
16 483.25 487.75 50 687.25 691.75
17 489.25 493.75 51 693.25 697.75
18 495.25 499.75 52 699.25 703.75
19 501.25 505.75 53 705.25 709.75
20 507.25 511.75 54 711.25 715.75
21 513.25 517.75 55 717.25 721.75
22 519.25 523.75 56 723.25 727.75
23 525.25 529.75 57 729.25 733.75
24 531.25 535.75 58 735.25 739.75
25 537.25 541.75 59 741.25 745.75
26 543.25 547.75 60 747.25 751.75
27 549.25 553.75 61 753.25 757.75
28 555.25 559.75 62 759.25 763.75
29 561.25 565.75 63 765.25 769.75
30 567.25 571.75 64 771.25 775.75
31 573.25 577.75 65 777.25 781.75
32 579.25 583.75 66 783.25 787.75
33 585.25 589.75 67 789.25 793.75
34 591.25 595.75 68 795.25 799.75
35 597.25 601.75
69 801.25 805.75

-10-
USA CHANNEL FREQUENCY TABLE
U.S.A. CATV Channel
PIF 45.75MHZ, CIF 42.17MHZ, SIF 41.25MHZ.
UNIT:MHZ
Channel fp(picture) fs(sound) Channel fp(picture) fs(sound)
1 73.25 77.75 36 295.25 299.75
2 55.25 59.75 37 301.25 305.75
3 61.25 65.75 38 307.25 311.75
4 67.25 74.75 39 313.25 317.75
5 77.25 81.75 40 319.25 323.75
6 83.25 87.75 41 325.25 329.75
7 175.25 179.75 42 331.25 335.75
8 181.25 185.75 43 337.25 341.75
9 187.25 191.75 44 343.25 347.75
10 193.25 197.75 45 349.25 353.75
11 199.25 203.75 46 355.25 359.75
12 205.25 209.75 47 361.25 365.75
13 211.25 215.75 48 367.25 371.75
14 121.25 125.75 49 373.25 377.75
15 127.25 131.75 50 379.25 383.75
16 133.25 137.75 51 385.25 389.75
17 139.25 143.75 52 391.25 395.75
18 145.25 149.75 53 397.25 401.75
19 151.25 155.75 54 403.25 407.75
20 157.25 161.75 55 409.25 413.75
21 163.25 167.75 56 415.25 419.75
22 169.25 173.75 57 421.25 425.75
23 217.25 221.75 58 427.25 431.75
24 223.25 227.75 59 433.25 437.75
25 229.25 233.75 60 439.25 443.75
26 235.25 239.75 61 445.25 449.75
27 241.25 245.75 62 451.25 455.75
28 247.25 251.75 63 457.25 461.75
29 253.25 257.75 64 463.25 467.75
30 259.25 263.75 65 469.25 473.75
31 265.25 269.75 66 475.25 479.75
32 271.25 275.75 67 481.25 485.75
33 277.25 281.75 68 487.25 491.75
34 283.25 287.75 69 493.25 497.75
35 289.25 293.75
70 499.25 503.75

-11-
USA CHANNEL FREQUENCY TABLE
U.S.A. CATV Channel
PIF 45.75MHZ, CIF 42.17MHZ, SIF 41.25MHZ.
UNIT:MHZ
Channel fp(picture) fs(sound) Channel fp(picture) fs(sound)
71 505.25 509.75 99 115.25 119.75
72 511.25 515.75 100 649.25 653.75
73 517.25 521.75 101 655.25 659.75
74 523.25 527.75 102 661.25 665.75
75 529.25 533.75 103 667.25 671.75
76 535.25 539.75 104 673.25 677.75
77 541.25 545.75 105 679.25 683.75
78 547.25 551.75 106 685.25 689.75
79 553.25 557.75 107 691.25 695.75
80 559.25 563.75 108 697.25 701.75
81 565.25 569.75 109 703.25 707.75
82 571.25 575.75 110 709.25 713.75
83 577.25 581.75 111 715.25 719.75
84 583.25 587.75 112 721.25 725.75
85 589.25 593.75 113 727.25 731.75
86 595.25 599.75 114 733.25 737.75
87 601.25 605.75 115 739.25 743.75
88 607.25 611.75 116 745.25 749.75
89 613.25 617.75 117 751.25 755.75
90 619.25 623.75 118 757.25 761.75
91 625.25 629.75 119 763.25 767.75
92 631.25 635.75 120 769.25 773.75
93 637.25 641.75 121 775.25 779.75
94 643.25 647.75 122 781.25 785.75
95 91.25 95.75 123 787.25 791.75
96 97.25 101.75 124 793.25 797.75
97 103.25 107.75 125 799.25 803.75
98 109.25 113.75

- 12 -

BLOCK DIAGRAM
- 13-
A101
TUNER
CPU N701
LC863232A
IR RX
SAWF
SAWF
Z201
CPU N701
LC863232A
MEMORY
N702
AT24C04
N101LA76814
DEFLECTION
PIF
SIF
VIDEO
IR TX
MU28P0381
CHROMA
VIDEOFM
OUT
OUT
IN
V OUT
N451
LA7841
HOUT
V432
3DD2553
T471
FBT
CRT
CRT
DRIVE
B
G
R
BTSC
TDA9850
SWITCH
TC4053BP/BF
AUDIO
IN
VIDEO
OUT
VIDEO
IN
POWER
V513
2SC4237
B1
130V
B3
16V
B2
18V
B8
25V
AC120V
NTSC
AUDIO
OUT
AUDIO
AMP
LA4287
IN1IN2

AudioOutput
FMOutput
PIFAGCFilter
RFAGCOutput
PIFInput1
PIFInput2
IFGround
IFVcc
FMFilter
AFTOutput
BusData
BusClock
ABL
RedInput
GreenInput
BlueInput
FastBlankingInput
RGBVcc
RedOutput
GreenOutput
BlueOutput
B.AKBInput
Vertical
Output
RAMPALC
Filter
HolizontalAFC
Filter
Holizontal/Bus
Vcc
Holizontal
Output FBPInput
VCOIREF
NC
NC
OSDContrast
HolizontalGround
X-RAY
KillerFilter
ChromaAPC1Filter
fsc(3.58MHz)Output
3.58MHzCrystal
ACCFilter
SelectedVideoOutput
Video/Vertical/BUSGround
ExternalVideoInput(YIN)
Video/VerticalGround
InternalVideoInput(S_CIN)
BlackLevelDetector
VideoOutput
APCfilter
VCOCoil2
VCOCoil1
FLLFilter
Ext.AudioInput.
SIFOutput
2.5
2.5
2.53
2.56
2.8
2.8
5V
2.12
2.34
4.8
4.8
3.52
1.1
1.15
1.13
0
8
3.16
3.16
3.05
0
2.51
2.63
5V
2.63
0.48
2.4
1.93
2.11
2.3
4
4
3.7
2.18
2.53
2.7
5V
2.4
0
2.32
3.06
2.64
0.53
3.3
0.35
0
0
2.9
1.7
1.11
SIFAPCFilter
SIFInput
3
LA76814IC BLOCK DIAGRAM
- 14 -

9
8
24
6
12
102025
29
303132
21
326
4
5
C16
+C15 C17 C14
R2
R3
C13 C12 C11
++++++
C10 C9 CLCR
+
C19 C18
++ SDA SCL
VrefVCAPVCC
onlyduring
adjustment
28
7
23
22
21
27 OUTL
OUTR
stereo
mono
SAP
to
audio
processing
C8
SAPwithoutDBX
MAD
MHA010
C6 C7
++
18 19
L+R
L-R/SAP
1713 14 15 16
C2 C3 C4
R1 ++
C5 Q1 ceramic
resonator
11
+
C1
composite
baseband
input
STEREODECODER
INPUT
LEVEL
ADJUST NOISE
DETECTOR
SAP
DEMODULATOR DBX STEREO
ADJUST SUPPLY
STEREO/SAP
SWITCH
TDA9850
DE-EMPHASIS
LOGIC,IC-
2
TRANSCEIVER
DEMATRIX
+
MODE
SELECT
- 15 -

COMPONENT VIEW OF MAIN BORAD
- 16 -

COMPONENT VIEW OF KEY BORAD
- 17 -

COMPONENT VIEW OF INDICATOR BORAD
- 18 -

COMPONENT VIEW OF CRT BORAD
- 19 -
Table of contents
Other Hisense TV manuals

Hisense
Hisense A87H User manual

Hisense
Hisense 75U90G User manual

Hisense
Hisense LTDN40K320UHK User manual

Hisense
Hisense 58A6BG User manual

Hisense
Hisense HL55V89PZ User manual

Hisense
Hisense H4 series User manual

Hisense
Hisense GM642XF User manual

Hisense
Hisense LTDN50K360HK User manual

Hisense
Hisense A6H User manual

Hisense
Hisense LCD19W57 User manual

Hisense
Hisense H5507 User manual

Hisense
Hisense 32R4 User manual

Hisense
Hisense LHD19W57EU User manual

Hisense
Hisense Hisense 40K368AW User manual

Hisense
Hisense ES-A150203 User manual

Hisense
Hisense H9E Plus Instruction Manual

Hisense
Hisense HL46T39PZLN3D User manual

Hisense
Hisense 65P9 User manual

Hisense
Hisense H8809 User manual

Hisense
Hisense 50H6D User manual