Hitachi CL-8330BF User manual

THINNING
OFF

English Page 1~7
8~14
ѣᮽ
HOW TO REPLACE THE CUTTER
How to remove
How to install
Step 1 Step 2
Step 1 Step 2

THINNING
OFF
1
4
5 6 7
8 9 10
11 12 13
32
THINNING
OFF
CUT
THINNING
OFF
THINNING
OFF
THINNING
OFF

Tilt head position
傾斜頭部位置How to hold
剪刀拿法How to hold
剪刀拿法Straight head position
平直頭部位置Switch
position
選擇掣位置How to hold
剪刀拿法Tilt head position
傾斜頭部位置Switch
position
選擇掣位置Switch
position
選擇掣位置How to hold
剪刀拿法選擇掣位置Tilt head position
傾斜頭部位置How to hold
剪刀拿法Switch
position
選擇掣位置Tilt head position
傾斜頭部位置How to hold
剪刀拿法Switch
position
選擇掣位置Tilt head position
傾斜頭部位置14 15 16
17 18 19
20 21 22 23
24 25 26 27
28 29 30
31 32 33
CUT
Switch
CUT CUT
CUT
or

34 35 36 37 38
39 40 41
42 43 44
45 46 47
48 49 50
51 52 53
54 55

English -1-Safety precautions
Items described here are for using the product safely and properly, and to prevent
hazards and injury to the user and other persons before they occur.
Items are classified as follows.All items are important descriptions related to safety,
therefore make sure to observe them.
Extent of hazard which has the potential to cause death or serious
injury to the user in the case of improper handling.
Extent of hazard or damage which has the potential to cause slight
injury to the user or damage to property (house or household goods)
in the case of improper handling.
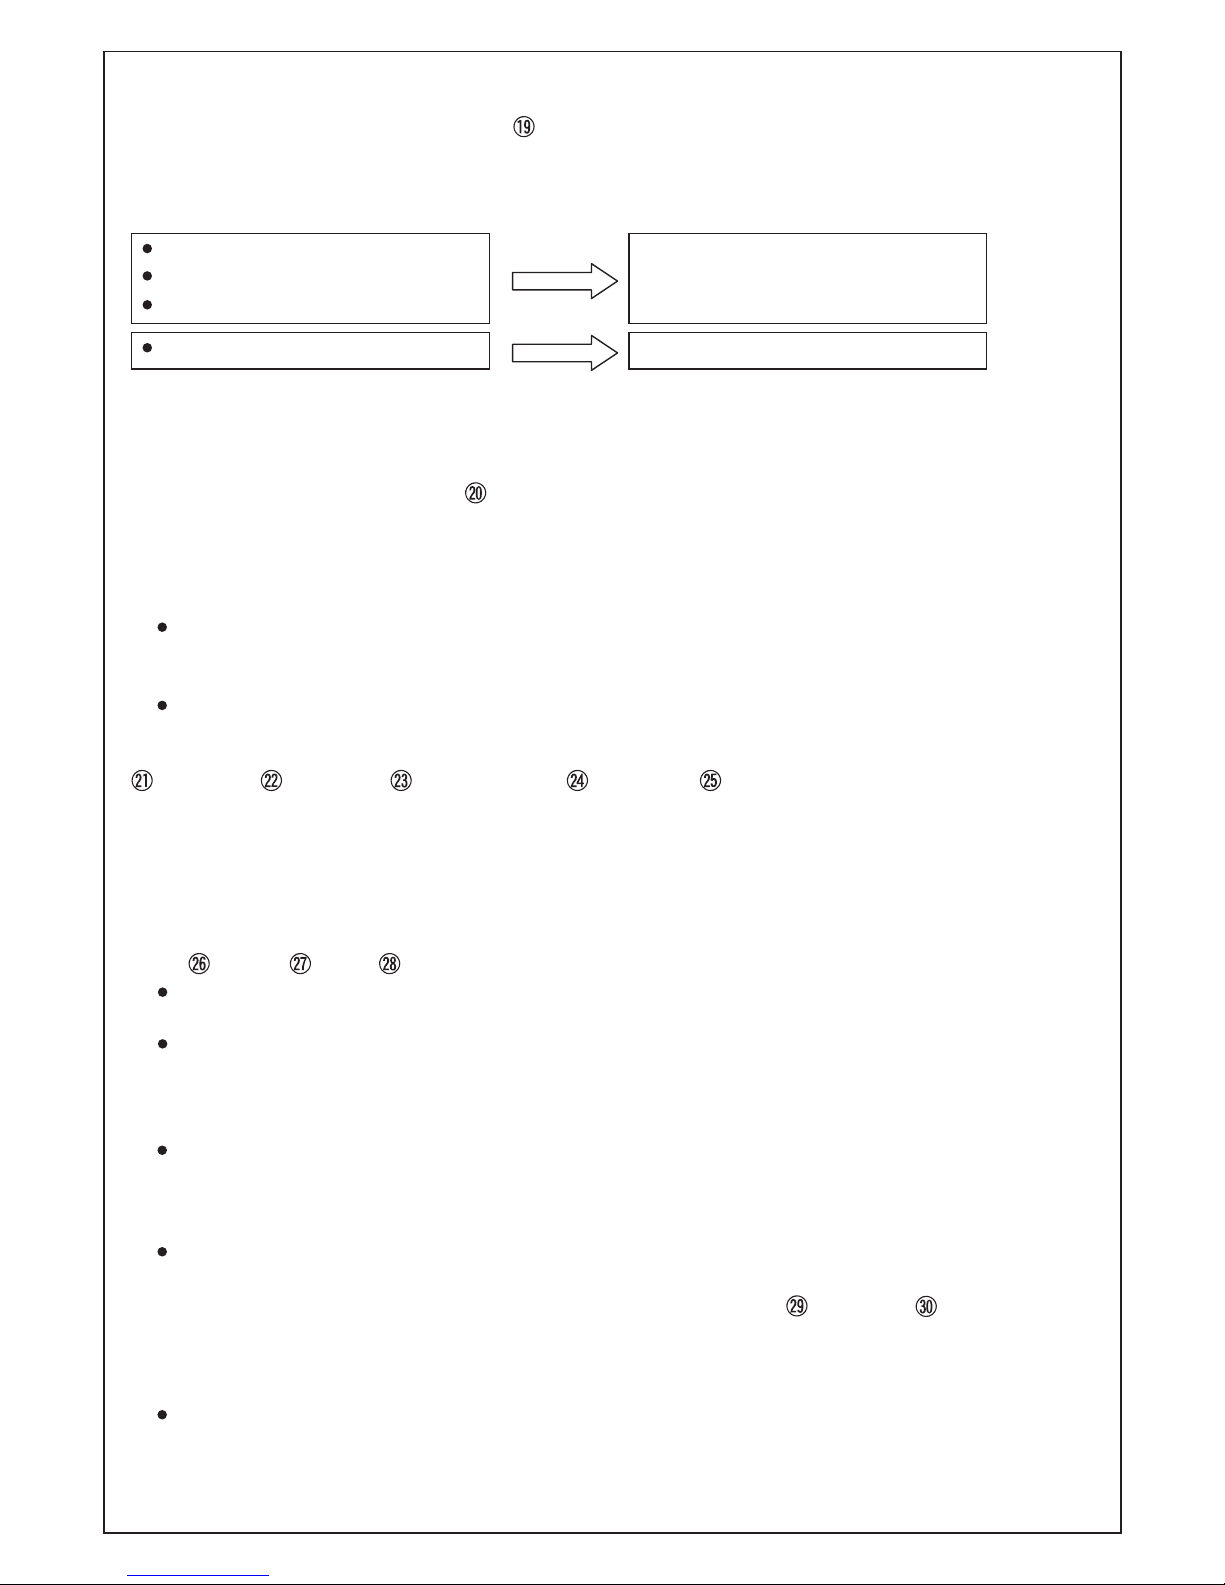
<Example of graphic illustration>
This symbol means "prohibited" (never do this).
"Disassembly prohibited" "Prohibited use in wet location"
"Prohibited to wet"
This symbol means "compulsory" (be sure to do).
"General activities" "Pull out the power cord from outlet"
Use only 100 - 240V AC for power supply. (Cause of fires and electric shocks)
This appliance is not intended for use by persons (including children) with reduced
physical, sensory or mental capabilities, or lack of experience and knowledge, unless
they have been given supervision or instruction concerning use of the appliance by a
person responsible for their safety.
Children should be supervised to ensure that they do not play with the appliance.
Never use a power cord or power plug if they are damaged or outlet insertion is loose.
(Cause of electric shocks, short circuits and ignition)
Never allow pins or dust to attach to the power plug or plug for the appliance.
(Cause of electric shocks, short circuits or ignition)
Never damage, forcibly bend, pull, twist, place a heavy object on top, sandwich, modify,
or wind the power cord around the power adaptor, etc. (Cause of fire or electric shocks)
The cord of the power adaptor cannot be replaced.
If the cord is damaged, the power adaptor should be scrapped.
After reading, make sure to keep this manual in a place where users can refer to it at any time.
Keep the appliance dry.
Never place or store the appliance where it can fall or be pulled into a bath or sink.
Do not place in or drop into water or other liquid.
(Cause of electric shocks and short circuits)
"Prohibited to clean with water"
Never use the appliance and power adaptor in a place where water is splashed such as
a bathroom or in a place with high humidity. (Cause of electric shocks and short circuits)
Never clean the appliance and power adaptor with water.
Never soak it in water or splash water on it. (Cause of electric shocks and short circuits)
Prohibited
Prohibited
Prohibited
Prohibited

-2-Unplug
Make sure to disconnect the power plug from the outlet for maintenance.
Never connect or disconnect the power plug to/from the outlet with wet hands.
(Cause of electric shocks or injury)
Prohibited
Never modify the appliance. Only a qualified technician may make repairs.
(Cause of fires, electric shocks, or injury)
When disconnecting a power plug or plug for the appliance, do not pull the cord, but
make sure to pull the plug to disconnect.
(Cause of electric shocks, short circuits or ignition)
Regularly clean the power plug and plug for the appliance, so that dust does not attach.
(Cause of electric shocks, short circuits or ignition)
After operation, keep the appliance in a place free from moisture. (Cause of damage to
the clipper if left in a bathroom due to condensation and rust occurring inside the clipper)
Make sure
Never touch the edge of the operating blade with bare hands. (Cause of injury to fingers)
Never use another power adaptor than the included power adaptor. Never charge
another product with the included power adaptor.
(Cause of short circuits or ignition due to abnormal heating)
Never charge or leave in humid or hot places. (inside a car in summer, etc)
(Failure to do so may result in malfunctions.)
Disconnect the power plug from the outlet after charging. (Cause of injury
or burns, or electrical shocks/current leakage fire due to degradation of insulation)
Secure the appliance and power adaptor to prevent it from dropping in water.
Unplug
Prohibited
Safety precautions
1. Never use cream or gel shaving agents.
Cause of blade clogging or damage.
2. Do not charge each time you use the clipper.
Cause for loss of battery performance.
3. When the appliance has stopped moving, do not leave it with the switch turned on.
4. Never place or dry in places exposed to direct sunlight or high temperatures.
Cause of damage by deformation or discoloration.
5. Never wipe the appliance or power adaptor with alcohol, benzene, or thinner.
Cause of deformation or discoloration.
The blade has been finished to high precision. Do not allow contact with hard
surfaces. If the edge becomes damaged or deformed, it can cause injuries to the skin.
Do not press cutting edge against skin too hard since this could result in skin injury.
The clippers are specifically designed for human hair cutting. Do not use your clippers
on cats, dogs, or other pets.

-3-NAMES OF PARTS (Fig.1)
Cropped hair attachment
Knob
Head
Charge indicator lamp
Switch position display
Body
Switch
Cutter
Lubrication oil
Cleaning brush
Power adaptor (KH-185B)
Power plug
Cord
Plug for equipment
PREPARATIONS BEFORE USING
Before using, first charge the clipper or connect to AC outlet.
1. Turn the switch “OFF” and insert plug for equipment into the unit socket. (Fig.2)
Charging can only be done at the “OFF” position.
Socket
2. Insert power plug into outlet. (Fig.3)
During charging, the charge indicator lamp lights.
Standard charging time is 5 hours.
The unit can be operated for about 50 minutes on a full charge.
When using continuously for more than 20 minutes, stop and allow to rest about 10 minutes every
20 minutes and lubricate oil to the cutting edge.
Continuous use of the unit for over 20 minutes may cause deterioration of cutting performance.
This is the same with when using the unit with AC current.
3. After charging the clipper, unplug the power adaptor and plug for equipment.
Do not pull on cord when removing power plug for equipment.(Fig.4)
Do not charge the clipper if room temperature exceeds 40 ℃or drops below 5℃.
Extreme temperatures will shorten battery life.
DIRECT AC POWER SOURCE
As in the case of charging, insert plug for equipment into the socket and power plug into outlet.
Wait 2 minutes to turn the switch on.
If the switch is set at “OFF” after use, the clipper starts charging.
BEFORE USING
1. Open the cutter in direction of arrow. (Fig.5)
2. Apply about 1 drop of accessory oil at the blade 4 oil points. (Fig.6)
Always lubricate before and after use.
Cutting performance deteriorates if the cutter is not lubricated properly. When doing more than one
haircut in one session, clean and lubricate the blade once after finishing each cut.
3. Close the cutter in direction of arrow.(Fig.7)
4. Allow the clipper to operate without actually cutting for about 10 seconds and wipe off any excessive
lubrication oil.
HEAD TILTING
Head can tilt 25 degrees as shown in the figure. (Fig.8)
25° Over 25 degrees Opposite direction
CUTTING
CUTTING AND THINNING OPERATION
Slide the switch in direction of arrow ; and set the position read as “CUT” then the clipper starts
operating. (Fig.9)
FEATURES
Since two Ni-MH batteries are built in, the clipper can be used for about 50 minutes with a full charge.
Cordless 5 hour charging/AC type.
Cutting length can be adjusted to 3mm, 6mm, 9mm, 12mm by using the cropped hair attachments.
Easy-to-use tiltable head.
The head is tiltable up to 25 degree for ease of side trimming.
PROCEDURE FOR CHARGING

-4-THINNING CUT
Slide switch in direction of arrow ; and set the position read as “ I” then the thinning plate protrudes
and the blade starts operating. (Fig.10)
If the switch is pushed one step further in arrow direction, and set the position read “ II” and
the thinning plate protrudes clipper farther. (Fig.11)
Thinning plate
HOW TO USE THINNING
When first starting to use the unit
When thinning a small quantity
When finishing
When thinning a large quantity.
Thinning (light) “ II”
Thinning (heavy) “ I”
CONNECTION AND ADJUSTMENT OF ATTACHMENT
1. While pressing knob at each side of the attachment, align attachment with cutting
height display panel (12 mm.... 3 mm) on the clipper and press the attachment as behind as
possible.(Fig.12)
2. Push attachment with finger to set for the desired height as shown in the figure.(Fig.13)
Cutting height display
PREPARATIONS BEFORE CUTTING
1. Place a vinyl sheet or a sheet of newspaper on the floor.
Use a chair as high as possible for haircut work.
2. Apply powder to the neck, place tissue paper, and wrap around it with a towel. (Fig.14)
3. Put on a cape from the front and fasten it with a string.
If a suitable cape is not available, substitute a nylon wrapping cloth or the like.
NAMES OF HAIR PARTS (Fig.15)
Bangs Crown Around ears Sideburn Neck
HAIRCUT
SHORT HAIR
1.Thinning (entire head)
(1) Comb hair to desired style.
(2) Lightly move the clipper from top to bottom as if combing the hair. (Fig.17.18)
Front Side Back
By keeping one hand underneath the hair while cutting with the clipper, there is little chance of cut
hair getting in the face.
Do not thin hair near top of head since short hair will stand up.
2.Cutting top head
Pull up hair between fingers directly perpendicular to top head and slowly run the clipper above
fingers to cut.
To ensure cutting at the same length, take up hair already cut together with hair to be cut and
cut latter to the same length as the former. (Fig.19.20)
3.Cutting around ears
Put the cutter lightly against the skin and move it in a circle in the arrow direction. (Fig.21.22)
Hold the ear by hand to facilitate the job.
4.Side cutting (evening up the sides)
Put the cutter at right angles to the skin to trim the hair. (Fig.23.24) Neck Sideburns
5.Shaving downy hair
Put the cutter directly on the skin and shave the downy hair working from the lower to the upper
part of the neck. (Fig.25.26)
Do not press the cutter too hard.
6.Finishing the whole head
Comb entire head. Even out any rough parts by using the clipper with thinning comb. (Fig.27.28)

-5-BOB STYLE
1.Thinning (entire head)
(1) Comb hair to desired style.
(2) Lightly move the clipper from top to bottom as if combing the hair. (Fig.29.18)
If person has a lot of hair, take up a portion of hair in hand and thin hair beneath hand. (Fig.30)
By keeping one hand underneath the hair while cutting with the clipper, there is little chance of cut
hair getting in the face.
Do not thin hair near top of head since short hair will stand up.
2.Side cutting (evening up the sides)
Put the cutter at right angles to the skin to trim the hair. (Fig.31.24)
3.Shaving downy hair
Put the cutter directly on the skin and shave the downy hair working from the lower to the upper part
of the neck. (Fig.32.26)
Do not press the cutter too hard.
LONG HAIR
1.Thinning (entire head)
(2) Lightly move the clipper from top to bottom as if combing the hair. (Fig.33.18)
2.Side cutting (evening up the sides)
Apply the cutter to skin at right angle.
Side and back
Comb hair first, and be sure to keep evenness and balance in hair length while cutting. (Fig.35.24)
3.Shaving downy hair
Put the cutter directly on the skin and shave the downy hair working from the lower to the
upper part of the neck. (Fig.36.26)
Do not press the cutter too hard.
(1) Comb hair to desired style.
If person has a lot of hair, take up a portion of hair in hand and thin hair beneath hand. (Fig.34)
Do not thin hair near top of head since short hair will stand up.
CREW CUT
1.Close cropping
Clipping the entire part
(1) Mount the cropped hair attachment of proper size of for the desired cutting length.
(2) While putting the comb of the cropped hair attachment in contact with the head skin, slowly crop
the hair from the hairline toward the crown against the growing direction of the hair. (Fig.37.20)
(3) Finish by cropping the entire part in crossed manner as shown to make sure that no part is left
uncropped. (Fig.39)
(4) Clip the lower part of the back.
Mount the cropped hair attachment one size smaller than the cropped hair attachment used for
close cropping.
9mm for side trimming against 12mm for close cropping. 6mm against 9mm, 3mm against 6mm.
The knack for quick and clean cropping is to crop the once cropped part over again. (Fig.38)
Clip the lower part of the back by gradually moving the clippers away from the head skin. (Fig.40.26)
2.Cutting around ears
(1) Remove the cropped hair attachment.
(2) Put the cutter lightly against the skin and move it in a circle in the arrow. (Fig.41.22)
Hold the ear by hand to facilitate the job.
3.Side cutting (evening up the sides)
Put the cutter at right angle to the skin to trim the hair. (Fig.42.24)
4.Shaving downy hair
Put the cutter directly on the skin and shave the downy hair working from the lower to the upper part of
the neck. (Fig.43.26)
Do not press the cutter too hard.

-6-1.Thinning (entire head)
(1) Comb hair to desired style.
(2) Lightly move the clipper from top to bottom as if combing the hair. (Fig.44.18)
By keeping one hand underneath the hair while cutting with the unit, there is little chance of cut
hair getting in the face.
Do not thin hair near top of head since short hair will stand up.
If person has a lot of hair, take up a portion of hair in hand and thin hair beneath hand. (Fig.45)
LAYERING AND SHAPING
2.Cutting of crown
To ensure cutting at the same length, take up hair already cut together with hair to be cut and
cut latter to the same length as the former.
Pull up hair between fingers directly perpendicular to top head and slowly run the clipper above
fingers to cut. (Fig.46.20)
3.Layering and shaping
(1) Lift up hair from the bottom with a comb.
(2) Hold comb firmly in place and cut hair in direction of arrow. (Fig.47.20)
Do not try to cut a lot of hair at once.
Cut a little at a time.
Always comb hair cutting and trim portion while checking that cutting
has been done properly.
4.Cutting around ears
Put the cutter lightly against the skin and move it in a circle in the arrow direction. (Fig.48.22)
Hold the ear by hand to facilitate the job.
5.Side cutting (evening up the sides)
Put the cutter at right angle to the skin to trim the hair. (Fig.49.24)
6.Shaving downy hair
Put the cutter directly on the skin and shave the downy hair working from the lower to the
upper part of the neck. (Fig.50.26)
Do not press the cutter too hard.
7.Finishing the whole head
Comb entire head. Even out any rough parts by using the clipper set for thinning. (Fig.51.28)
SERVICING PROCEDURES
Always clean out hair and lubricate the cutter after use.
2. Use accessory cleaning brush to clean out hair from the unit and around cutter. (Fig.52)
1. Always turn switch to “OFF” before servicing the unit.
3. Open the blade from the clipper and clean out hair from the inside. (Fig.53)
4. Lubricate the cutter with a few drops of oil.
Store the clipper in a dry place.
This mark means that the appliance is not
washable.
SPECIFICATION
Power supply Power adaptor
(KH-185B) 100-240V AC 50-60Hz
Charging time 5 hours (Standard)
Power adaptor : Approximately 100g
Cropped hair attachment, Cleaning brush, Lubrication oil
Weight
Body : Approximately 155g
Accessories
Cord length 1.8 m
Ni-MH battery (DC 1.2V, 950mAh × 2)Main body

-7-When any trouble occurs during use, disconnection the use, and make sure of the following points
before asking a repair.
Symptom Points to be checked Remedy
Sharpness is not good.
Rotation is weak.
A great deal of hair cuttings are
accumulated inside the cutter.
Periodically clean up and
lubricate.
Charging is not
available.
The switch is set to on. Turn the switch “OFF” and
begin charging.
The clipper is out of
charge. It does not
work even through the
cord is connected.
The cord is connected with the
switch set to on.
Turn the switch “OFF” and
use after waiting for a while.
Charging is not available. The cord is interrupted. Is not the
service life of Ni-MH
battery, cutter or motor over?
Ask a shop where you have
bought, to repair.
Does not work.
The battery is to be disposed of safely.
In accordance with current recycling legislation, do not dispose of the battery contained in this appliance
with normal household waste. When recharging can no longer be effected, please dispose in the
method advised by your local area council.
PLEASE NOTE WHEN DISPOSING OF THE PRODUCT
Keep the removed battery out of the reach of children.
If a child appears to have swallowed a battery, immediately seek medical attention.
If the battery
electrolyte leaks, do not touch it with bare hands but take the following action.
If electrolyte gets into eyes, do not rub eyes but immediately rinse with clean water and then seek
medical attention.
If electrolyte adheres to the body or clothing, sufficiently rinse with clean water and then seek
medical attention.
Never disassemble except when disposing of the product. (Cause of fires, electric shocks, or injury)
HOW TO REMOVE THE NICKEL METAL HYDRIDE BATTERY
1. Disconnect the power adaptor from the appliance when removing the battery.
2. Keep the switch at on until the shaver stops moving completely to discharge the battery.
3. Remove the cutter.
4. With the switch at “ OFF ” remove the 1 (+) screw from the body, and remove the front case.
(Fig. 54)
Battery
5. Take the battery out of the main body, cut the lead wires of the battery near the terminals. (Fig. 55)
Never allow the (+) and (-) terminals of the removed battery to make contact.
(Cause of short circuits or burns)
Lead wires Terminal
Screw Front case
Remove the battery before disposing of the appliance.

-8-“禁止用水清洗”中文安全上的注意事項此處表示的注意事項,是為了讓您安全、正確地使用本產品,以防止對您以及他人造成危害與損害。注意事項區分如下。每一項均是有關安全的重要內容,請務必遵守。●●如果錯誤使用可能會造成使用者輕傷或損壞物品(房屋、家庭用具等)的危害和損壞程度。如果錯誤使用可能會造成使用者死亡或重傷的危害程度。<圖示例>記號,表示“禁止”(絕對不要做)的行為。記號,表示“強制”(必須做)的行為。“禁止拆開” “禁止在有水的場所使用”“一般的行為”“將電源插頭從插座上拔下”警告注意•閱讀後,必須妥善保管,將其放置使用者隨時可以參閱的地方。不可使用交流100V-240V以外的電源。(否則會造成火災或觸電)警告生理、感覺或心理能力欠佳或缺少經驗及知識的人士(包括兒童)不得使用本產品,除非他們得到其安全責任人在本產品使用方面的監督或指導。應對兒童進行監督,確保其不玩耍本產品。不可使用損壞的電源線或電源插頭,也不可使用鬆動的插座。(否則會因損傷電源線,造成火災或觸電)不可損傷、用力彎曲、拉扯、扭曲、捆紮、重壓、夾入、加工電源線或捲繞在電源變壓器上。(否則會損壞電源線,造成火災或觸電)電源插頭或配件插頭上不可粘附存。(否則會造成觸電、短路或起火)電源適配器的軟線無法更換。如果軟線損壞,則電源適配器應報廢。“禁止打濕”禁止禁止保持乾燥。不要放置或保存在容易掉落或滑入浴缸或水槽的地方。不要置於或掉入水或其它液體中。(以防觸電或短路)

-9-安全注意事項1. 不要使用剃鬚乳或剃鬚膠,以防刀片阻塞或故障。2. 不要每次使用剪髮器都充電,以防電池性能下降。3. 剪髮器停止不動時,請關掉剪髮器,將開關調至「OFF」位置。4. 不要將剪髮器在陽光直射下或高溫之處放置或乾燥,以防變形導致故障或褪色。5. 不要用酒精、苯或稀釋劑擦拭剪髮器或電源適配器,以防變形或褪色。警告禁止拔下電源插頭不可擅自讓未經授權的人士拆解、修理或修改。(否則會造成火災、觸電、受傷或故障)清潔保養時,必須請拔掉電源。若沾濕了手,不可插入或拔除電源插頭。(否則會造成觸電或受傷)禁止禁止不要用水清洗剪髮器或電源適配器。不要在水中浸泡,或讓水濺到。(以防觸電或短路)不要在浴室等容易濺水的地方或濕度較大的地方使用剪髮器和電源適配器。(以防觸電或短路)注意務必遵守拔下配件插頭時,不可拉電源線,必須用手握住插頭拔下。(否則會造成觸電、短路或起火)請定期清潔電源插頭、配件插頭,不可使插頭粘上灰塵。(否則會造成觸電、短路或起火)使用後,放置濕氣少的地方保存。(如果放置浴室潮濕的地方,會使機身內部產生露水或生銹造成機器故障)妥善保管剪髮器和電源適配器,以防掉落水中。刀片為精密組件,不要觸碰硬物表面。如果刀口損壞或變形,那麼可能損傷皮膚。不要將刀口緊壓皮膚,因為這樣可能導致皮膚損傷。禁止拔下電源插頭不使用時,務必將電源插頭從插座上拔下。(否則會造成受傷、燙傷、因絕緣劣化引起的觸電或漏電火災)不要裸手觸碰運轉的刀片。(以防損傷手指)除了附帶的電源適配器外,不要使用其它的電源適配器給本產品充電。也不要用附帶的電源適配器給其它的產品充電。(以防短路或異常發熱導致著火)剪髮器專門為修剪人髮而設計,不要用於小貓、小狗或其它寵物。不要將本產品放在濕度較大或較熱的地方充電。(如夏天在車內等地方充電)(否則可能導致本產品故障)

-10-各部分名稱(圖1)附件掀鈕頭部充電指示燈選擇掣顯示本體開關刀片潤滑油清掃刷電源適配器 (KH-185B)電源插頭軟線剪髮器插頭使用前準備使用之前,剪髮器要先充電或連接到交流插座上。1. 將開關調至「OFF」,將剪髮器插頭插入主體插座。(圖2)開關未處於「OFF」位置,則不能充電。插座2. 將電源插頭插入電源插座。(圖3)在充電過程中,充電表示燈點亮。標準充電時間為5小時完全充電後,剪髮器可使用約50分鐘當連續使用20分鐘以上時,請每隔20分鐘讓本機休息約10分鐘,並在內刀邊緣滴上潤滑油。連續使用本機20分鐘以上時,會導致切刀性能降低。當用AC電源來操作本機時,也應遵守同樣的事項。3. 充電完畢後,拔下電源插頭和器具插頭。拔下電源適配器插頭時不要拉軟線。(圖4)室內溫度超過40℃或低於5℃時,不要給剪髮器充電。極端溫度將會縮短電池壽命。直接使用交流電源與充電時相同,將剪髮器插頭插入主體插座,將電源插頭插入電源插座,待2分鐘後打開開關。使用後,將開關調至「OFF」,便可充電。使用之前1. 按箭頭指示的方向打開刀片。(圖5)2. 在刀片的4個油點位置滴下潤滑油,每個位置1滴。(圖6)使用前後務必注油,否則會降低鋒利性。每次剃很多人時,每剃完一個人便應清掃和注油。3. 按箭頭指示的方向關閉刀片。(圖7)4. 約空轉10秒鐘,擦去滲出的油。頭部傾斜如圖所示,可將頭部傾斜25度。(圖8)25度25度以上反方向剪髮的時候剪髮與修髮操作按照箭頭指示的方向滑動選擇掣,顯示便出現「CUT」字樣,繼而刀鋒便開動。(圖9)功能特點由於本剪髮器內置了兩節鎳氫電池,所以在完全充電的情況下,能使用約50分鐘。可以無線使用的5小時充電/交流電兩用式用附件可以調節為3毫米、6毫米、9毫米和12毫米的剃髮高度。易用的可傾斜頭部將頭部傾斜25度,可輕鬆修剪髮際。充電方法

-11-修髮的時候按照箭頭指示的方向滑動選擇掣,顯示便出現「I」字樣,修髮板伸出,繼而刀鋒便開動。(圖10)如果按照箭頭指示的方向進一步滑動選擇掣,則顯示窗出現「II」字樣,修髮板繼續往前伸出剪髮器。(圖11)修髮板如何修髮首次使用剪髮器時少量修薄時修飾髮型時大量修薄時少髮修薄「II」多髮修薄「I」附件的連接和調整1. 按壓連在連接附件兩邊的掀鈕,使連接附件和主體上的剃刀高度顯示器的顯示吻合 (12毫米……3毫米),然後儘可能地將連接附件壓向主體。(圖12)2. 用手指將連接附件推進到自己想要的高度,如右圖顯示的那樣。(圖13)修剪剃刀顯示器剪髮前的準備 1. 在地板上鋪上塑料布或報紙。椅子高的話,易於剃頭。2. 在脖子上撒上撲粉,圍上紙,再圍上毛巾。(圖14)3. 如無披肩,可使用尼龍製的布或類似物品。各部位頭髮的名稱(圖15)前部頭頂部耳邊鬢角後頸剃頭方法短髮型1. 修薄頭髮(將頭髮全面修薄)(1) 用梳子將自己喜愛的髮型順髮勢梳理。(2) 輕輕地用理髮器由上向下將頭髮梳整好。(圖17.18)前部側面後部在用剪髮器修剪時,將手放在頭髮下面,這樣剪下的斷髮就不會散落到臉上。頭頂附近的頭髮請不要修薄。因為那樣剪後的頭髮會豎起來。2. 頭頂部的剃髮用手指將頭髮順頭皮垂直拿起,用剪髮器貼著手指上面緩慢地剃髮。為保證剪髮的長度齊整,將已剪完的頭髮與需要剪的頭髮一起拿起,比照已經剪完的部分,推剪需要剪的部分。(圖19.20)3. 修耳邊髮際輕輕地將刀片端接觸皮膚,一點一點地向箭頭方向圓推。(圖21.22)用手按住耳朵則易於推剃。4. 剃髮際(修髮際)將刀與皮膚呈直角進行修整推剃。(圖23.24)後頸鬢角5. 剃汗毛將刀片直接接觸皮膚,從下向上輕輕推剃茸毛至後頸部位。(圖25.26)不要用力按壓。6. 全面修飾髮型梳理全部頭髮。遇有不平整的部分,請用修薄梳將其修至妥當為止。(圖27.28)

-12-幼童裝當頭髮又厚又密時,先將頭髮一束一束提起然後修剪內側的頭髮。(圖30)長髮型2. 剃髮際(修髮際)將刀鋒垂直按在皮膚上。側面和後部先把頭髮梳理好,確保頭髮長度和厚度均勻,然後再開始修剪。(圖35.24)平頭裝1. 平頭型剃整個頭髮(1)安裝適合頭髮長度的尺寸合適的短髮附件。(2)將裝有短髮附件的梳子緊貼頭皮時,從四邊戧著頭髮生長方向緩慢地推向頭頂部。 (圖37.20)(3)如圖所示,交替推剃,不留殘髮。(圖39)(4)修後部髮際裝上比已剪頭髮長度再小一號的短髮附件,進行最後精細修剪。剪髮長度為12毫米時候,使用9毫米的短髮附件進行後側部精細修剪;剪髮長度為9毫米時候,使用6毫米的短髮附件進行後側部髮際精細修剪。剪髮長度為6毫米時候,使用3毫米的短髮附件進行後側部髮際精細修剪。重複推剃可剃得更乾淨。(圖38)修後部髮際時,邊剃邊緩緩地上浮剪髮器主體。(圖40.26)2. 修耳邊髮際(1)將短髮附件取下。(2)輕輕將刀片端接觸皮膚,一點一點地向箭頭方向圓推。(圖41.22)1. 修薄頭髮(將頭髮全面修薄)(1) 用梳子將自己喜愛的髮型順髮勢梳理。(2) 輕輕地用理髮器由上向下將頭髮梳整好。(圖29.18)在用剪髮器修剪時,將手放在頭髮下面,這樣剪下的斷髮就不會散落到臉上。頭頂附近的頭髮請不要修薄。因為那樣剪後的頭髮會豎起來。2. 剃髮際(修髮際)將刀與皮膚呈直角進行修整推剃。(圖31.24)3. 剃汗毛將刀片直接接觸皮膚,從下向上輕輕推剃茸毛至後頸部位。(圖32.26)不要用力按壓。當頭髮又厚又密時,先將頭髮一束一束提起然後修剪內側的頭髮。(圖34)1. 修薄頭髮(將頭髮全面修薄)(1) 用梳子將自己喜愛的髮型順髮勢梳理。(2) 輕輕地用理髮器由上向下將頭髮梳整好。(圖33.18)頭頂附近的頭髮請不要修薄。因為那樣剪後的頭髮會豎起來。3. 剃汗毛將刀片直接接觸皮膚,從下向上輕輕推剃茸毛至後頸部位。(圖36.26)不要用力按壓。用手按住耳朵則易於推剃。3. 剃髮際(修髮際)將刀與皮膚呈直角進行修整推剃。(圖42.24)4. 剃汗毛將刀片直接接觸皮膚,從下向上輕輕推剃茸毛至後頸部位。(圖43.26)不要用力按壓。

-13-推剃2. 頭頂部的剃髮䁢ᾅ嫱−檖䘬攟⹎滲㔜炻⮯−⬴䘬柕檖冯暨天−䘬柕檖ᶨ崟㊧崟炻㭼䄏䴻−⬴䘬
悐↮炻㍐−暨天ᾖ−䘬悐↮ˤ
䓐ㇳ㊯⮯柕檖枮柕䙖✪䚜㊧崟炻䓐−檖☐層叿ㇳ㊯䶑ㄊ⛘⇫檖ˤ炷⚾ĵķ炽ijı炸
3. 推剃炷IJ炸䓐㡛⫸⽆ᶳ⎹ᶲ⮯柕檖㍸崟ˤ
炷ij炸⚢⭂⤥㡛⫸炻㊱䄏䭕柕㕡⎹⇫⍣⽆㡛⫸䷓ᶲ朊曚↢䘬柕檖ˤ炷⚾ĵĸ炽ijı炸
ᶨ㫉ᶵ天⇫檖忶⣂炻ㅱᶨ溆ᶨ溆⛘㍐⇫ˤ
㍐⇫⼴炻⽭枰䓐㡛⫸㡛㔜炻ᶨ怲䡢娵㍐⇫悐↮炻ᶨ怲㍐⇫ġġġġġġġġġġġġġ䘬悐↮ˤ
㡛⤥柕檖ˤ忯㚱ᶵ⸛㔜䘬悐↮炻婳䓐−檖☐⮯℞ᾖ唬军⥍䔞䁢㬊ˤ(圖51.28)清潔方法ἧ䓐⼴⊁⽭⮯檖⯹㶭䎮Ḧ㶐䁢−檖☐㲐㱡ˤ
2. 用附屬的清掃刷清掃主體和刀片周圍。(圖52)3. 從剪髮器本體中退出刀刃,清除剪髮器裡面的頭髮。(圖53)4. 在刀片上滴幾滴潤滑油進行潤滑。⮯−檖☐ᾅ⬀⛐Ḧ䆍嗽ˤ
忁ᾳ㧁娴堐㖶㛔暣☐䓊⑩ᶵ⎗䓐㯜㰾㲿ˤ
規格充電時間標準5小時電源適配器 : 約100g附件, 清掃刷, 潤滑油重量本體 : 約155g附件軟線長度1.8 m當頭髮又厚又密時,先將頭髮一束一束提起然後修剪內側的頭髮。(圖45)1. 修薄頭髮(將頭髮全面修薄)(1) 用梳子將自己喜愛的髮型順髮勢梳理。(2) 輕輕地用理髮器由上向下將頭髮梳整好。(圖44.18)在用剪髮器修剪時,將手放在頭髮下面,這樣剪下的斷髮就不會散落到臉上。頭頂附近的頭髮請不要修薄。因為那樣剪後的頭髮會豎起來。4. 修耳邊髮際(1)將短髮附件取下。(2)輕輕將刀片端接觸皮膚,一點一點地向箭頭方向圓推。(圖48.22)用手按住耳朵則易於推剃。5. 剃髮際(修髮際)將刀與皮膚呈直角進行修整推剃。(圖49.24)6. 剃汗毛將刀片直接接觸皮膚,從下向上輕輕推剃茸毛至後頸部位。(圖50.26)不要用力按壓。7. 全面修飾髮型1. 清理時,務必將開關調至「OFF」位置。電源變壓器電源適配器(KH-185B)IJııĮijĵıặṌ㳩暣炻ĶıĮķı崓勚
捛㯓暣㰈炷䚜㳩暣IJįijặ炻ĺĶıŮłũǘijᾳ炸本體

-14-■如果使用過程中出現異常,請停止使用,在委託修理之前,請按下表進行檢查:䕯䉨 㩊㞍悐ỵ 嗽䎮㕡㱽
扺⇑⿏ᶵ列ˤ
廱≽㓰㝄ᶵ⤥ˤ
↨䇯ℏ“㗗⏎➮䧵Ḯ⣏慷檖⯹ˤ ⭂㛇㶭㌫㲐㱡ˤ
ᶵ傥暣ˤ 攳斄㗗⏎嗽㕤忳ἄỵ伖ˤ ⮯攳斄婧军ˬŐŇŇ˭炻䃞⼴
暣ˤ
−檖☐暣慷䓐䚉炻忋㍍
庇䶂⼴炻ṵ䃞ᶵⶍἄˤ
忋㍍庇䶂㗪㗗⏎⮯攳斄婧军
忳ἄỵ伖Ḯˤ
⮯攳斄婧军ˬŐŇŇ˭炻䦵䫱
䇯⇣⼴ℵἧ䓐ˤ
ᶵ傥暣ˤ 庇䶂㗗⏎㕟䶂ˤ捛㯓暣㰈ˣ
↨䇯ˣ楔忼㗗⏎忼⇘ἧ䓐
⢥␥ˤ
⥼妿䴻扟⸿忚埴ᾖ䎮ˤ
ᶵ傥忳ἄˤ
昌朆⮵㛔䓊⑩忚埴嗽伖⏎⇯ᶵ天㉮⌠ˤ炷㚱⎗傥⮶农䀓䀥ˣ妠暣ㆾ侭 ⭛炸ˤ
天忂忶⬱ℐ䘬㕡㱽嗽伖暣㰈ˤ
㟡㒂䎦埴⚆㓞㱽夷炻ᶵ天⮯㛔暣☐䓊⑩䘬暣㰈冯ᶨ凔⭞⹕⺊㡬䈑ᶨ崟㡬ˤ䔞䃉㱽ℵ暣
㗪炻婳㊱䄏䔞⛘䭉䎮悐攨⺢嬘䘬㕡㱽Ḱẍ嗽䎮ˤ
對產品進行處置時,請遵循下列注意事項:婳⮯⍾↢䘬暣㰈㓦伖⛐䪍妠䡘ᶵ⇘䘬ỵ伖ˤ
⤪㝄䘤䎦䪍⮯暣㰈⏆ᶳ炻䩳⌛⮳㯪慓䗪㓹≑ˤ⤪㝄暣㰈暣妋㵚㳑㺷炻婳ᶵ天崌ㇳ妠㐠炻
㍉⍾⤪ᶳ㍒㕥烉
⤪㝄暣妋㵚ᶵヶℍ䛤炻ᶵ天䓐ㇳ㍱䛤䜃炻ㅱ䩳⌛䓐㶭㯜㰾㲿炻⎴㗪⮳㯪慓䗪㓹≑ˤ
如何拆卸鎳氫電池IJįġ 天⍾↢暣㰈炻婳㕟攳暣㸸怑惵☐冯暣☐䓊⑩䘬忋㍍ˤ
⛐⮵㛔暣☐䓊⑩忚埴嗽伖⇵炻婳⮯暣㰈⍾↢ˤ
警告
⤪㝄暣妋㵚㱦⇘幓橼ᶲㆾ侭堋㚵ᶲ炻恋湤䩳⌛䓐⣏慷㶭㯜忚埴㶭㲿炻⎴㗪⮳㯪慓䗪㓹≑ˤ
ijįġ ἧ攳斄ᾅ㊩⛐忳ἄỵ伖䚜军⇫櫂↨⬴ℐ 㬊忳≽炻ἧ暣㰈㓦暣ˤ
Ĵįġ ⍾ᶳ↨䇯ˤ
ĵįġ ⮯攳斄婧军ˬŐŇŇ˭ỵ伖炻⮯IJ炷Ĭ炸坢䴚㒘ᶳ炻䃞⼴ℵ⮯⇵㭤⍾ᶳˤ炷⚾Ķĵ炸
坢䴚 ⇵㭤
Ķįġ ⮯暣㰈⽆橼ℏ⍾↢炻↯㕟暣㰈月役暣㤝䘬⺽䶂ˤ炷⚾ĶĶ炸
暣㰈 ⺽䶂 暣㤝
注意不要將取出的鋰離子電池觸碰正(+)負(-)極導線。(否則會造成短路或燙傷)

12015491123456789XYZ4(K)EDCBA
Table of contents
Other Hitachi Hair Clipper manuals