manuals.online logo
Brands
  1. Home
  2. •
  3. Brands
  4. •
  5. Hitachi
  6. •
  7. LCD TV
  8. •
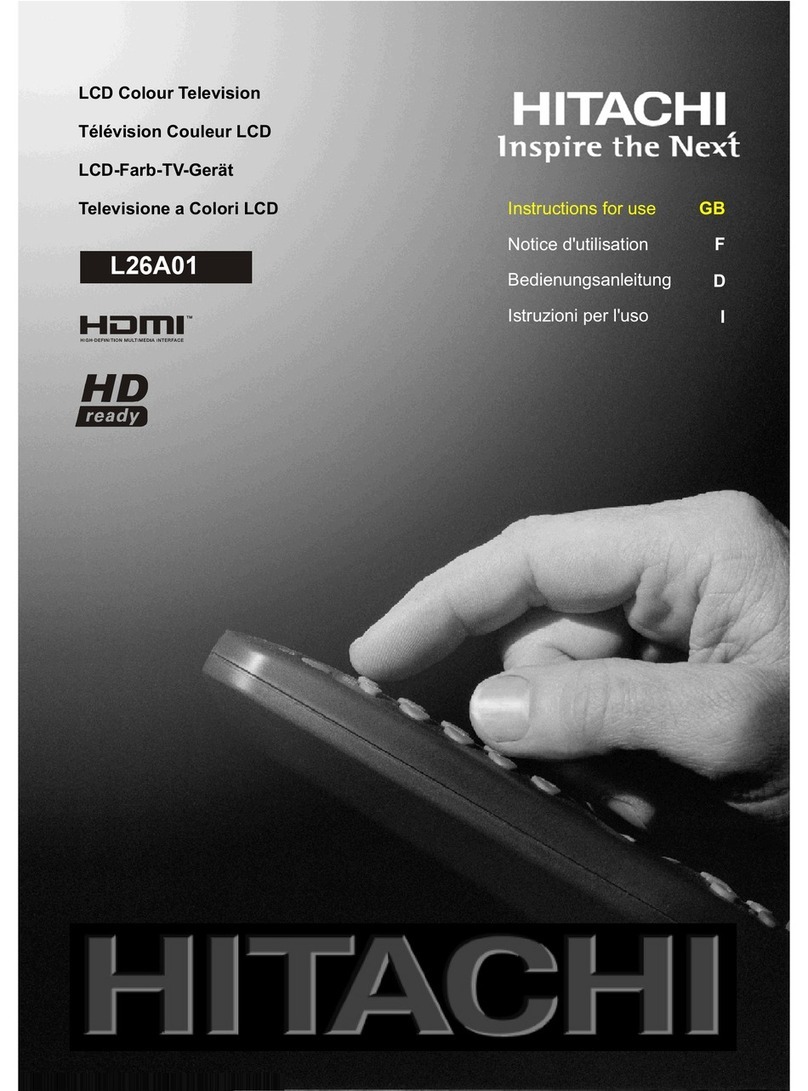
  9. Hitachi 22LD4200 User manual

Hitachi 22LD4200 User manual

GB
Instructions for use
22LD4200
- 1 -
Contents
Remote Control Buttons ......................... 2
Control Panel Buttons ............................ 3
Preparation ............................................. 4
Installation of device on the wall
(Optional) ............................................. 4
Features ............................................... 6
Panel Features .................................... 6
Safety Precautions ................................. 6
Before Switching on your TV .................
Power connection ................................ 8
Connections to the erial socket ......... 8
How to connect other devices .............. 8
Inserting batteries in the remote
control handset .................................... 8
Switching the TV ON/OFF .......................
To switch the TV on: ............................. 8
To switch the TV off: .............................. 9
Operating the TV ..................................... 9
.P.S. ( utomatic Programming
System) ................................................ 9
Operating with the buttons on the
TV set ................................................... 9
Operating with Remote Control ........... 9
Menu System ........................................ 10
Sound Menu ....................................... 11
Picture Menu ...................................... 13
Feature Menu ..................................... 15
Installation Menu ................................ 16
Programme Menu .............................. 17
Source Menu ...................................... 18
Other Features ...................................... 19
TV Status ............................................ 19
Programme Swap (P<P) ................... 19
Double-digit (- / - -) ............................. 19
Personal Preferences (PP) ................ 19
Sound Indicator .................................. 19
Picture Mode ...................................... 20
Sleep Timer Indicator ......................... 20
Mute Indicator ..................................... 20
No-Signal Detection (TV) ................... 20
No-Signal Detection (PC) .................. 20
Volume Bar ......................................... 20
V Modes ............................................ 20
Signal Out Of Range .......................... 21
PC MODE ............................................... 21
Installation .......................................... 21
Switching from TV to PC .................... 21
Main Menu in PC mode: ..................... 21
Sound Menu ....................................... 21
Picture Menu ...................................... 21
PIP Picture .......................................... 21
Feature Menu ..................................... 22
Geometry Menu .................................. 22
Source Menu ...................................... 22
PIP Source Menu ............................... 23
Teletext .................................................. 23
To operate Teletext ............................. 23
To select a page of Teletext ................ 23
To Select Index Page ......................... 23
To Select Double Height Text ............. 23
To Reveal concealed Information .... 23
To Stop utomatic Page Change ....... 24
To Select a Subpage .......................... 24
Fastext ................................................ 24
To exit Teletext .................................... 24
To Display the Time ........................... 24
Peripheral Equipment Connections .... 24
PC Sound Connection ....................... 24
Via the Euroconnector ........................ 25
Via erial Input .................................... 25
Decoder .............................................. 25
TV and Video Recorder ...................... 25
Playback NTSC .................................. 25
Search for and store the test signal
of the video recorder .......................... 25
Camera and Camcorder ................... 26
Connect the decoder to the video
recorder .............................................. 26
Connecting Headphones .................. 26
Connecting the PC ............................. 26
AERIAL Connections ............................. 2
PC INPUT TYPICAL DISPLAY MODES ... 29
Tips ........................................................ 30
Specifications ....................................... 31
Important Instruction ........................... 32
ENG-2200-1547UK-22 INCH TFT IB.p65 03.03.2004, 17:591
- 2 -
Remote Control Buttons
= Stand By
= Cursor Up
= Cursor Right
OK = Store
= Info (Program Menu)
0 - 9 = Direct Program
-/-- = Double Digit
=Previous Programme
P/CH + = Programme Up
+ = Volume +
= TV / Quit Menu
= External Source
( V-1, V-2, V-3, S-VIDEO, PC)
Yellow (FEATURE) = Feature Menu
Blue (INSTALL) = Installation Menu
= Hold
= Update
= Index Page
= Reveal, PC = Switch from TV to PC
= Expand, = spect ratio
= PIP on / PIP off
= Teletext
= Time
Red (SOUND) = Sound Menu
Green (PICTURE) = Picture Menu
= Mute
I-II = Mono/Stereo - Dual I-II
- = Volume -
- P/CH = Programme Down
= Personal Preference
M = Menu

= Cursor Down

= Cursor Left
02.



































ENG-2200-1547UK-22 INCH TFT IB.p65 03.03.2004, 17:592
- 3 -
Control Panel Buttons
92/80( 3&K 0(18 32:(5
/('
,1)5$5('5(&(,9(5
92/80( 3&K 0(18 79$9
63($.(5
79$9
)227723&29(5
3&,1387 '& 9 3&$8',2 $17
:
 
ENG-2200-1547UK-22 INCH TFT IB.p65 03.03.2004, 17:593
- 4 -
Preparation
Install Display on solid horizontal surface such as a table or desk.
For ventilation, leave a space of at least 10 cm free all around the set. To prevent any fault
and unsafe situations, please do not place any objects on top of the set.
Use this apparatus in tropical and/or moderate climates.
Installation of device on the wall (Optional)
Step1:
Invert the flat monitor screen and placed it on a flat surface. Remove the foot top cover. Re-
move the back support from the screen. Replace the support with the mounting bracket align
the holes from the bracket with the mounting holes found on the back of the monitor chassis.
Secure the bracket with the same four (4) 4 (mm) head screws.
Step 2:
Choose the wall where the monitor
would be located. Level and mark
with a pencil the four (4) mounting
points found on the wall bracket. Drill
pilot holes for the plastic anchors
then secure the wall bracket with the
four (4) L=32 mm x D=5 mm screws
(supplied).
Step 3:
Raise the monitor with the mounting
bracket attached and slip the top
opening to the safety flange on the
secured wall bracket. Let the monitor
fall in place safely and secure the
two (2) D=4 mm x L=10 mm safety
screws (supplied) with a long screw-
driver for additional security.
Note: Do not over tighten!
EDFNVXSSRUW
IRRWDVVHPEO\
ENG-2200-1547UK-22 INCH TFT IB.p65 03.03.2004, 17:594
- 5 -
0RXQWLQJEUDFNHW
:DOOEUDFNHW




3
O
D
V
W
L
F

D
Q
F
K
R
U
V




'

P
P

[

/


P
P

V
F
U
H
Z
V




/


P
P

[

'

P
P

V
F
U
H
Z
V




'

P
P

[

/


P
P

V
F
U
H
Z
V
:$//6758&785(
/&'021,725
(OPTIONAL)
ENG-2200-1547UK-22 INCH TFT IB.p65 03.03.2004, 17:595
- 6 -
Features
 It is a remote controlled colour television
and PC monitor.
 100 programmes from VHF, UHF bands or
cable channels can be preset.
 It can tune cable channels.
 Controlling the TV is very easy by its menu
driven system.
 It has 2 pieces of Euroconnector socket for
external devices (such as video, video
games, audio set, etc.)
 To use as a monitor, 15 Pin Mini D-Sub con-
nector for computer.
 2 German stereo and Nicam stereo sys-
tems.
 Multilanguage OSD.
 Teletext (Fastext, 7 pages).
 It is possible to connect headphone.
 .P.S. ( utomatic programming system)
 ll programmes can be named.
 Programme swapping between last two
programmes watched
 Forward or backward automatic tuning.
 Sleep timer.
 Child lock
 uto, 4:3, 16:9, Cinema, Subtitle, Zoom
and Panorama modes are available at TV
and V.
 uto, 4:3 and 16:9 modes are available
at PC.
 WSS is available with uto, 4:3, 16:9 and
Cinema modes.
 utomatic sound mute when no transmis-
sion.
 When no valid signal is detected, after 5
minutes the TV switches itself automatically
to stand-by mode.
 NTSC Playback.
 Universal power supply range is a standard
feature on this model.
 TV Picture in PC (if PC input available).
 TV Picture and PC
 PLL (Channel Search)
 PC input (Support Up to WXG 1280 x 720)
 Stereo PC udio Input
 Plug & Play for Windows 9X, ME, 2000, XP
 4H Comb filter
Panel Features
 High resolution, 22-inch TFT LCD display.
 High contrast ratio (500:1 Typical)
 Brightness: 450 cd/m2.
 High-speed response time : 23 msec.
 Wide viewing angle (typical) 170° (horizontal)
and 170° (vertical).
 8-bit colour depth, display 16.7 million
colours.
Safety Precautions
1. Power Source
The TV set is designed to operate on 15 V
DC. The adaptor should be operated from a
100-240V AC, 50-60 Hz. outlet. Ensure you
select the correct voltage setting for your
convenience.
. Power Cord
The power supply cord should be placed so
that it is not likely to be walked on or pinched
by items placed upon them or against it. Pay
particular attention to cord where it enters
the plug, power outlet, and the point where it
exits from the receiver.
3. Moisture and Water
Do not use this equipment in a humid and
damp place (avoid the bathroom, the sink in
the kitchen, and near the washing machine).
Do not expose this equipment to rain or wa-
ter, as this may be dangerous and do not
place objects filled with liquids on.
4. Cleaning
Before cleaning, unplug the adaptor from the
main supply, outlet. Do not use liquid or
aerosol cleaners. Use soft and dry cloth.
ENG-2200-1547UK-22 INCH TFT IB.p65 03.03.2004, 17:596
- 7 -
DO NOT LEAVE YOUR TV AT STAND-BY
OR OPERATING WHEN YOU LEAVE YOUR
HOUSE
"The LCD panel is very high technology
product with about a million thin film tran-
sistors, giving you fine picture details. Oc-
casionally, a few non-active pixels may ap-
pear on the screen as a fixed point of blue,
green or red. Please note that this does
not affect the performance of your prod-
uct."
5. Ventilation
The slots and openings on the receiver are
intended for ventilation and to ensure reli-
able operation. To prevent overheating,
these openings must not be blocked or cov-
ered in anyway.
6. Lightning
In case of storm and lightning or when go-
ing on holiday, disconnect the power cord
from the wall outlet.
7. Replacement Part
When replacement parts are required, be
sure the service technician has used re-
placement parts which are specified by the
manufacturer or have the same specifica-
tions as the original one. Unauthorised sub-
stitutions may result in fire, electrical shock,
or other hazards.
8. Servicing
Please refer all servicing to qualified per-
sonnel. Do not remove cover as this may re-
sult in electric shock.
9. Naked Flame Sources
Do not place naked flame sources on the
apparatus.
WARNING: When the device is not in use
for a long time, disconnect from power.
Instructions for waste disposal:
 Packaging and packaging aids are recy-
clable and should principally be recycled.
Packaging materials, such as foil bag, must
be kept away from children.
 Battery, including those which is heavy
metal-free, should not be disposed of with
household waste. Please dispose of used
battery in an environmentally sound man-
ner. Find out about the legal regulations
which apply in your area.
 old cathode fluoresant lamp in L D PANEL
contains a small amount of mercury, please
follow local ordinates or regulations for dis-
posal.
ENG-2200-1547UK-22 INCH TFT IB.p65 03.03.2004, 17:597
- 8 -
Before Switching on your TV
Power connection
3&,1387 '&9 3& $8',2 $17 
:
$9 $9
$&DGDSWHU
7R  3 2 : ( 5
,1387'&9
WHUPLQDO
IMPORTANT: The TV set is designed to op-
erate on 15 V DC. For this, an adaptor is
used which gives 15V DC voltage. Connect
this adaptor to a system that supplies 100-
240V AC, 50-60 Hz.
 fter unpacking, allow the TV set to reach the
ambient room temperature before you con-
nect the set to the mains.
Connections to the Aerial socket
9+)8+)

:
795($53$1(/
&$%/(79
6$7(//,7(5(&(,9(5
 Connect the aerial or cable TV plug to the
aerial socket on the back of the TV. If you
are also connecting a video recorder or sat-
ellite receiver you should connect the aerial
or cable plug to this device first and then
connect the RF out socket on the device to
the aerial socket on the TV (see P27 for
more details).
How to connect other devices
IMPORTANT: Switch off the TV before con-
necting any external device.
Sockets for external connections are at the
back of the TV. For connection of other de-
vices via Euroconnector refer to the manuals
of the related devices.
Inserting batteries in the remote
control handset
 Remove the battery cover located on the
back of the handset by gently pulling up-
wards from the indicated part.
 Insert two (R03) or equivalent type of
batteries inside.
 Replace the battery cover.
NOTE: Remove battery from remote control
handset when it is not to be used for a long
period.Otherwise it can be damaged due to
any leakage of battery.
Switching the TV ON/OFF
To switch the TV on:
Your TV will switch on in two steps:
1- Connect the power supply cord to the sys-
tem. Press the POWER button at the top of
the TV. Then the TV switches itself to stand-
by mode and the led becomes red located
on the front of the TV.
2- To switch on the TV from stand-by mode
either:
Press a digit button on the remote control so
that a programme number is selected,
or,
Press -P/Ch or P/Ch+ button at the top
of the TV or press -P/CH or P/CH+ button
ENG-2200-1547UK-22 INCH TFT IB.p65 03.03.2004, 17:598
- 9 -
on the remote control, so that last switched
off programme is selected.
In either case the TV will switch on and the
led becomes green.
To switch the TV off:
 Press the stand-by button on the remote
control, so the TV will switch to stand-by
mode and the GREEN LED will become
RED,
or,
Press the POWER button located on the
top of the TV, so the TV will switch off and the
GREEN LED will turn off.
Operating the TV
You can operate your TV both usin the
remote control handset and onset buttons.
A.P.S. (Automatic Programming
System)
"All Prestored Programmes Will Be
Erased" message will be displayed when
you turn on your TV for the first time. PS,
searches and sorts all channels and stores
them automatically on your TV, according to
the transmission of programme systems in
your area.
To cancel PS before starting, press TV
button. First of all choose the Country.
This, will effect the sort process in PS. By
pressing the   or   button, come to the
"Language" item and select the language in
which the menus of the TV will appear. s
soon as you change the language, the
menu items will be displayed in the selected
language. To select Continue use
 or   button and press   or   but-
ton.
:DUQLQJ
&RXQWU\
/DQJXDJH
&RQWLQXH
&DQFHO
$
OO3UHVWRUHG3URJUDPPHV
:LOO%H(UDVHG
$36,V5XQQLQJ
3OHDVH:DLW
fter PS is finalized, a programme list will
appear on the screen. In the programme list
you will see the programme numbers and
names assigned to the programmes.
If you press the TV button at any time while
the .P.S. is running, the .P.S. will be
ended. Then, the program list on the screen
will show channels captured until this time.
If you do not accept the locations and / or the
programme names of programmes, you
can change them in Programme menu.
Operating with the buttons on the
TV set
Volume setting and programme selection
can be made by using the buttons at the
control panel on the top of the TV.
Volume Setting
 Press - VOLUME button to decrease vol-
ume or VOLUME + button to increase vol-
ume, so a volume level scale (slider) will be
displayed at the middle of the bottom on the
screen.
Programme Selecting
 Press P/Ch + button to select the next pro-
gramme or - P/Ch button to select the pre-
vious programme.
Entering Main Menu
 Press "M" button to enter Main menu. In the
Main menu select submenu using
- P/Ch or P/Ch + button and enter the sub-
menu using - VOLUME or VOLUME + but-
ton. To learn the usage of the menus, refer to
the Menu System section.
Operating with Remote Control
The remote control handset of your TV is de-
signed to control all the functions of the
model you selected. The functions will be
described in accordance with the menu sys-
tem of your TV.
Functions of the menu system are de-
scribed in Menu System section.
ENG-2200-1547UK-22 INCH TFT IB.p65 03.03.2004, 17:599
- 10 -
Volume Setting
Press  + button to increase volume.
Press -  button to decrease volume.
volume level scale (slider) will be displayed
at the middle of the bottom on the screen.
Programme Selecting
(Previous or next programme)
 Press -P/CH button to select the previous
programme.
 Press P/CH+ button to select the next pro-
gramme.
Programme Selecting (direct access):
Press digit buttons on the remote control
handset to select programmes between 0
and 9. TV will switch to the selected pro-
gramme. To select programmes between
10 - 99, you must use the double digit button
"- / - -".
3
this OSD is displayed at the left
hand upper on the screen.
Press the digit buttons consecutively for the
channel you wish to select. (eg for
programme 27, first press 2 then 7). If you
do not press the second digit within 3 secs
of pressing the first, the display will disap-
pear.
Press directly the programme number to
reselect single digit programmes.
Programme Swapping
 Press "P<P" (programme swap) button to
select the last selected programme. This
button provides swapping between last two
selected programmes. For example, select
programme 8, then select programme 2.
Now, if you press "P<P" button, programme
8 will be selected. If you press the same
button again, programme 2 will be selected
and so on.




Menu System
Your TV has been designed with a menu
system to provide an easy manipulation of a
multi-function system. The TV is controlled
by choosing the commands, which are dis-
played on the screen.
Press the "M" button. The main menu will be
displayed at the middle of the screen.
0HQX
To select a sub-menu use   or   button,
and press   or   button or directly press
OK button.
MAIN MENU
The menu system is described below.
The short way in order to enter the menus,
press :
"M" Button, Main Menu.
Red Button, Sound Menu.
Green Button, Picture Menu.
Yellow Button, Feature Menu.
Blue Button, Install Menu.
"" Button, Programme Menu in TV
mode or,
Source Menu In AV mode
Menu button has two functions; first is open-
ing or closing the main menu, and the sec-
ond is closing the sub-menu and then open-
ing its parent menu.
ENG-2200-1547UK-22 INCH TFT IB.p65 03.03.2004, 17:5910
- 11 -
Sound Menu
To change sound settings
 Enter the Sound Menu directly by pressing
the Red button or,
 s you enter the main menu, sound will be
the first item. In the main menu, select
Sound using   or   button, then enter
the sound menu pressing   ,   or
OK button.
Setting Volume:
s you enter the sound menu, Volume will
be the first selected option.
 Press   button to increase volume.
 Press   button to decrease volume.
Or you can directly change the volume set-
tings using  + (to increase) or
-  (to decrease) button.
6RXQG
Setting Balance
It allows adjusting the distribution between
the left and right speakers.
 Using   or   button select Balance.
 Press   button to change balance to the
right.
 Press   button to change balance to the
left.
When balance control is in mid position, the
cursor is displayed with one arrow.
6RXQG
Selecting Sound Mode
 Using   or   button select Sound
Mode.
 Press   or   button to change Sound
Mode.
You can choose Mono, Stereo or Dual
(I-II) mode, only if the selected channel sup-
ports that mode.
You can also change sound mode directly
pressing I-II button on your remote control.
6RXQG
0RQR
In case of bilingual broadcast (Dual Sound),
you can select original or dubbed language
using mode option.
Setting Effect
You can use this feature to switch the sound
effect on and off. Pressing   or   button
will turn on and off this feature. If the current
sound system is Mono and the sound effect
is set ON, then the sound will be heard as if
it is Stereo. If the current sound system is
Stereo, switching this effect on will give a
more spatial sound.
ENG-2200-1547UK-22 INCH TFT IB.p65 03.03.2004, 17:5911
- 12 -
6RXQG
2Q
To Change Headphone Sound Settings
 Using   or   button select Headphone.
 Press   or   button or directly press
OK button on Headphone, to enter the
Headphone menu. This is a sub-menu of
Sound menu, and all options in this menu
are working as the same in the Sound
menu.
6RXQG
Setting Headphone Volume
 s you enter the Headphone sound menu,
Volume will be the first selected option.
 Press   button to increase volume.
 Press   button to decrease volume.
+3KRQH
Setting Headphone Sound Mode
 Using   or   button select Mode.
Pressing   or   button will change the
current sound mode. (e.g.: If the current
sound mode is stereo, it will be stereo or
visa versa).
In case of bilingual broadcast, you can se-
lect original or dubbed language again us-
ing mode menu. So when somebody listens
to the original language from the loudspeak-
ers, somebody else can listen to the dubbed
language from headphone.
To Store the Settings
 Press OK button on the remote control to
store the settings directly.
or,
 Using   or   button select Store. Press
,   or OK button to store current
headphone volume and sound mode. The
stored values will be valid for all the
programmes.
Equalizer
 Using   or   button select Equalizer.
 Press   or   button or directly press
OK button to enter Equalizer sub-menu.
6RXQG
(TXDOL]HU
In Mode item there are five predefined and
one user defined options. These are User,
Classic, Jazz, Rock, Pop and Flat. The pre-
defined options can not be changed by the
ENG-2200-1547UK-22 INCH TFT IB.p65 03.03.2004, 17:5912
- 13 -
user. If you want to change one of the fre-
quency values of the predefined options, the
Mode must be switched to User option.
The 5 items below the Mode are available to
adjust the sound settings in
5 frequency values: 120 Hz, 500 Hz, 1.5 kHz,
5 kHz and 10 kHz. To change the values of
5 frequency options, select one of the op-
tions by   or   button, and then press
 to increase the value, or   to de-
crease the value. In mid position, cursor is
displayed with one arrow.
To store the Equalizer settings, press   or
 button or directly press OK button on
Store option.
The settings will be stored and you can re-
call them by selecting "USER" in the MODE
item.
Setting AVL
 Using   or   button select VL.
 Pressing   or   button will turn on and
off this feature.
utomatic Volume Limiting ( vl) function
normalises sound to obtain fixed output
level between programmes, having different
sound levels.
6RXQG
2Q
To Store the Settings
 When the cursor is on any item which has
no sub-menu press OK button on the re-
mote control to store the settings directly.
or,
 Press  ,   or OK button on Store
option to store Sound menu settings.
6RXQG
6WRUHG
Picture Menu
 To enter the Picture menu directly, press the
Green button, or
 Press "M" button, now you are in main
menu. In the Main menu, select Picture
using   or   button, then enter the Pic-
ture menu pressing   /   or OK but-
ton.
0HQX
Setting Brightness
 s you enter the picture menu, Brightness
will be the first item.
 Press   button to increase brightness.
 Press   button to decrease brightness.
3LFWXUH
Setting Contrast
 Using   or   button select Contrast.
 Press   button to increase contrast level.
 Press   button to decrease contrast level.
ENG-2200-1547UK-22 INCH TFT IB.p65 03.03.2004, 17:5913
- 14 -
3LFWXUH
Setting Colour
 Using   or   button select Colour.
 Press   button to increase colour level.
 Press   button to decrease colour level.
3LFWXUH
Setting Sharpness
 Using   or   button select Sharpness.
 Press   button to increase peaking level.
 Press   button to decrease peaking level.
3LFWXUH
Setting Picture Mode:
 Using   or   button select Picture Mode.
 Press   or   button to set Picture Mode.
Picture Mode can be set to Auto, 4:3, 16:9,
Cinema, Subtitle, Zoom or Panorama.
3LFWXUH

Setting Noise Reduction
 Using   or   button select Noise Re-
duction.
 Press   or   button to select Noise Re-
duction level Off or Minimum or Medium
or Maximum then select store and press
 or   button to save your setting.
Note 1:
At low signal level, the changings on the Noise Reduction
function are not effective when there is menu on the
screen. If the menu is removed, the effect of this func-
tion is seen. At normal broadcasting, Noise Reduction
changings are effective at once.
Note 2:
At moving pictures, while Noise Reduction is at maxi-
mum level, some picture distortions may occur. If Noise
Reduction is set to medium or minimum, the picture will
improve.
3LFWXUH
Setting Hue
(During Playback NTSC system, this will ap-
pear in V mode only when NTSC video
source is applied. Otherwise, HUE option is
invisible in Picture menu.):
 Using   or   button select Hue.
 Press   button to increase hue level.
 Press   button to decrease hue level.
Center value is indicated with one arrow.
ENG-2200-1547UK-22 INCH TFT IB.p65 03.03.2004, 17:5914
- 15 -
3LFWXUH
To Store the Settings
 When the cursor is on any item which has
no sub-menu press OK button on the re-
mote control to store the settings directly.
or,
 Press  ,   or OK button on Store op-
tion to store Picture menu settings.
3LFWXUH
6WRUHG
Feature Menu
 To enter the Feature menu directly, press the
Yellow button, or
 Press "M" button, now you are in main
menu. In the main menu, select Feature us-
ing   or   button. Then enter the Feature
menu pressing   /   or OK button.
0HQX
Sleep Timer
s you enter the Feature menu, Sleep Timer
will be the first selected option. Use   or
 button to change the Sleep Timer val-
ues between Off, 0:15, 0:30, 0:45, 1:00, 1:15,
1:30, 1:45 and 2:00.
If sleep timer is activated it is displayed with
the TV status on the upper right of the
screen.

)HDWXUH
2II
Once the time set with the sleep timer has
elapsed, the set will go to standby.
Child Lock
You can use this feature to prevent children
turning on/off TV or changing programmes
or adjustments etc. without remote control.
The Child Lock feature can be set On or Off
by   or   button. When Off is selected,
there will be no difference in the operation of
your TV. When On is selected, the TV can
only be controlled by the remote control
handset. In this case the control panel but-
tons at the top of the TV will not work.
)HDWXUH
2II
Selecting Menu Language
Menu language can be chosen by pressing
 or   button on Language item.
)HDWXUH
(QJOLVK
ENG-2200-1547UK-22 INCH TFT IB.p65 03.03.2004, 17:5915
- 16 -
Av-2 Output
From v-2 Output; TV, V-1 or V-3 can be
given. TV, V-1 or V-3 can be chosen by
pressing   or   button on "Av-2 OUT-
PUT".
)HDWXUH
79
PC Sound Mode
PC sound can be chosen by pressing  
or   button on PC Sound Mode item.
You can select sound that comes from TV,
V-1, V-2, V-3 or PC to hear in PC mode.
)HDWXUH
3&
To Store Settings
In Feature menu all settings are stored auto-
matically.
Installation Menu
 To enter the Installation menu directly, press
the Blue button, or
 Press "M" button, now you are in main
menu. In the main menu, select Install.
using   or   button. Then enter the In-
stall menu pressing   /   or OK but-
ton.
0HQX
When any item is selected with   or  
button in the install menu, the selected item
will be highlighted on the bottom bar.
Changes by pressing   or   button will
be result only at highlighted item on the bot-
tom bar.
Selecting Programme
To select programme number, you can use
 or   button, Digit Buttons or The
Double Digit button with digit buttons.
,QVWDOO
3&&,
Selecting Band
Band, can be chosen either,
 C or S by   or   button.
Selecting Channel
Channel can be changed by   or   but-
ton, by Digit Buttons or by the Double Digit
button with digit buttons.
For band C,
01 - 83, WEST EUROPE.
01 - 12, 21 - 69, EAST EUROPE .
01 - 17, 21 - 73, UK.
01 - 76, FRAN E.
04 - 09, FRAN E 2.
For band S,
01 - 41, for all channel tables.
Selecting Standard
The "Standard" setting is fixed to "I". You
cannot change this item's setting.
ENG-2200-1547UK-22 INCH TFT IB.p65 03.03.2004, 17:5916
- 17 -
Selecting Search
To start the search process, press   but-
ton for forward search or   button for back-
ward search. If a signal is found or reaches
to end of the band after searching, press
 or   buttons to continue search pro-
cess. To stop the search process when you
want, press   or   buttons again.
Selecting Fine Tuning
You can use the Fine Tuning process for
fine adjustment (after coarse adjustment), if
you are not happy about the image on the
screen.
Use   or   button on Fine Tuning item,
until getting the best image on the screen.
Normally the Fine Tuning cursor is placed
next to the left side on the slider and this is
indicated with one arrow.
Setting VCR ( Video Cassette Recorder )
Mode
 This item can be seen in TV, V-1, V-2, V-3,
S-VIDEO modes.
 If you want to watch a VCR source from one
of these modes, then it will be better to set
VCR mode on. For this, while the cursor is
on this item press the   or   buttons to
set it On.
 If you want to watch a DVD , then you must
set this item off; because DVD is not a
source like a VCR and to see the picture
better, you must set the VCR mode Off.
To Store Settings
 Press OK button on the remote control to
store the settings directly.
or,
 Press  ,   or OK button on Store op-
tion to store Install menu settings.
Programme Menu
 To enter Programme menu directly, press
the " " button in TV mode, or
 Press "M" button, now you are in main
menu. In the main menu, select Program.
using   or   button. Then enter the
Programme menu, press   /   or OK
button.
0HQX
Moving cursor to four direction you can reach
20 programmes in the same page. By
scrolling the pages up or down by pressing
the navigation buttons you can select all the
programmes in TV mode (except the V
mode).
By cursor action, programme selection is
done automatically. It is also possible to se-
lect programme by using digit or double-
digit button. In this way programme selec-
tion is also automatic. The TV Status is
changed by the programme selection too.
When using double-digit button in order to
select a programme, the Programme Num-
ber in TV Status OSD is displayed in "P --"
form, and by pressing digit buttons they are
displayed in it.
Programme Number is between 00 and 99.
Programme Name has a name string with 4
characters. fter autostore process the Pro-
gramme Names are set to:
 Channel search "C-01" or "S-01" (band
and channel number) or name of the tuned
channel if defined.
3URJUDP3
1DPH
'HOHWH
,QVHUW
$XWRVWRUH
ENG-2200-1547UK-22 INCH TFT IB.p65 03.03.2004, 17:5917
- 18 -
t the bottom of the menu there is a pro-
gramme sort functions section. Each func-
tion is activated by coloured button (seen
above). Name allows changing the pro-
gramme name. By Delete you can delete
programmes that you do not require. Insert
section is for inserting programmes into an-
other programme spaces. By selecting
Autostore section, utostore menu will be
available.
Name:
To change the name of a programme, se-
lect the programme and then press the RED
(Name) button. The first letter begins to blink
on the selected name. To change that letter
 or   button can be used, and to select
the other letters,   or   button can be
used. If the cursor is at the last letter of the
Programme Name, pressing   button
moves the cursor at the beginning. On the
contrary, if the cursor is at the beginning of
the Programme Name, pressing   button
moves the cursor at the end.
fter changing the name press the RED
(Store) button. fter activating the name
process the Insert, Delete and
Autostore processes will be inactive and
"Cancel" option will be valid. If you do want to
store the new name, press the BLUE
(Cancel) button.
&DQFHO
6WRUH
Insert:
When the Green (Insert)button is pressed,
"Name", "Autostore" and "Delete" functions
are erased, the selected programme ( ) is
displayed with an arrow. From now on, the
automatic selection is cancelled. With navi-
gation buttons, the decided programme
space (B) can be selected and by pressing
the green button again, the selected
programme will be inserted.
Press Blue button to activate "Cancel" func-
tion of "Insert" process.
Delete:
To start the "Delete" process, press the yel-
low "Delete" button, (Name, Insert and
Autostore functions are inactive). Press-
ing yellow button again erases the selected
programme from the programme list, and
the programmes below shift one up. Press-
ing Blue button cancels the activated De-
lete process.
Autostore:
To enter utostore menu, press the blue
button. To learn the features of this function
see "Autostore" below.
utostore, searches and stores all channels
automatically on your TV, according to the
transmission of programme systems in
your area.
:DUQLQJ
&RXQWU\
&RQWLQXH
&DQFHO
$OO3UHVWRUHG3URJUDPPHV
:LOO%H(UDVHG
$36,V5XQQLQJ
3OHDVH:DLW
First of all choose the Country by using
 or   button.
To cancel Autostore before starting, press
TV button. To select Continue use   or
 button and press   or   button.
fter utostore is finalized, a programme list
will appear on the screen. In the programme
list you will see the programme numbers
and names assigned to the programmes.
If you do not accept the locations and/or the
programme names of programmes, you
can change them in Programme menu.
Source Menu
You can switch your TV to V modes by
pressing directly AV button or by selecting
in source menu from the main menu.
While in V mode, you can also switch your
TV to TV or other V modes by selecting in
source menu from the main menu.
ENG-2200-1547UK-22 INCH TFT IB.p65 03.03.2004, 17:5918
- 19 -
0HQX
In main menu, firstly use   or   button
then use   /   or OK button to enter
Source menu. In source menu, move the
cursor by   or   button and then press
OK button or   or   buttons when the
cursor is on the required item. The selected
mode comes automatically on the screen.
79
$9
$9
$9
69,'(2
3&
Other Features
TV Status
Programme Number, Programme Name
(or AV), (they are displayed on the upper left
of the screen) and Sleep Timer (shows the
time left on the upper right screen if en-
abled). The sound indicator and picture
mode are displayed with them too. They are
displayed after programme change for 3
seconds.
3
Programme Number
35
Programme Name (4 characters)
These OSDs are displayed when a new
programme is entered by digit button or by
pressing P<P, -P/CH, P/CH+, TV,
AV or   button.
Programme Swap (P<P)
This button is used to go to the previously
entered programme again. Pressing "P<P"
consecutively allows to swap into two last
entered programmes.




Double-digit (- / - -)
This OSD is displayed when the "Double-
Digit" button pressed in place of the pro-
gramme number indicator.
3
In order to enter a two digit programme
number you must push both numbers within
3 seconds. If the second number is not en-
tered within 3 secs the display will disap-
pear.
Personal Preferences (PP)
ll the preset values will be restored, when
pressing "PP".
33
Sound Indicator
The alternatives of the indicator are Mono,
Stereo, Dual I and Dual II. This indicator is
displayed under the programme number in-
dicator on the screen. "I-II" button is used to
select Mono or Stereo, or Dual I or Dual II.
0RQR
In Mono broadcast or in forced-mono (for
stereo broadcast).
6WHUHR
In Stereo broadcast.
'XDO,
If dual broadcast detected. Dual I is selected
in default and also can be selected after
Dual II by Remote Control.
'XDO,,
If Dual II selected by Remote Control.
ENG-2200-1547UK-22 INCH TFT IB.p65 03.03.2004, 17:5919

Other Hitachi LCD TV manuals

Hitachi 42LDF30UA User manual

Hitachi

Hitachi 42LDF30UA User manual

Hitachi 37LD8D20UC User manual

Hitachi

Hitachi 37LD8D20UC User manual

Hitachi LE49S508 User manual

Hitachi

Hitachi LE49S508 User manual

Hitachi 50VF820 - 50" Rear Projection TV User manual

Hitachi

Hitachi 50VF820 - 50" Rear Projection TV User manual

Hitachi LE32ECD05AU User manual

Hitachi

Hitachi LE32ECD05AU User manual

Hitachi 17LD4200 User manual

Hitachi

Hitachi 17LD4200 User manual

Hitachi L32A403 - 31.51" LCD TV User manual

Hitachi

Hitachi L32A403 - 31.51" LCD TV User manual

Hitachi 26LD4550U User manual

Hitachi

Hitachi 26LD4550U User manual

Hitachi 37LD8A20 A User manual

Hitachi

Hitachi 37LD8A20 A User manual

Hitachi L32VC04U H User manual

Hitachi

Hitachi L32VC04U H User manual

Hitachi 42PD3200A User manual

Hitachi

Hitachi 42PD3200A User manual

Hitachi ULTRAVISION L32S504 Technical manual

Hitachi

Hitachi ULTRAVISION L32S504 Technical manual

Hitachi C15-LC880SNT User manual

Hitachi

Hitachi C15-LC880SNT User manual

Hitachi 26LD8000TA User manual

Hitachi

Hitachi 26LD8000TA User manual

Hitachi 22LD4550U User manual

Hitachi

Hitachi 22LD4550U User manual

Hitachi L22HP04E User manual

Hitachi

Hitachi L22HP04E User manual

Hitachi L32HP01 User manual

Hitachi

Hitachi L32HP01 User manual

Hitachi Ultravision C50-LD7000 User manual

Hitachi

Hitachi Ultravision C50-LD7000 User manual

Hitachi L32HR1U User manual

Hitachi

Hitachi L32HR1U User manual

Hitachi 37LD8550 User manual

Hitachi

Hitachi 37LD8550 User manual

Hitachi L19HP03U A User manual

Hitachi

Hitachi L19HP03U A User manual

Hitachi L19DP03C User manual

Hitachi

Hitachi L19DP03C User manual

Hitachi L32HC04U User manual

Hitachi

Hitachi L32HC04U User manual

Hitachi L40C205 User manual

Hitachi

Hitachi L40C205 User manual

Popular LCD TV manuals by other brands

Grundig 19 VLE 2000 TC manual

Grundig

Grundig 19 VLE 2000 TC manual

Audiovox FPE4707HR - 47" LCD TV operating manual

Audiovox

Audiovox FPE4707HR - 47" LCD TV operating manual

Sharp LC-65D90U Service manual

Sharp

Sharp LC-65D90U Service manual

GVA GVA22FLEDCJ instruction manual

GVA

GVA GVA22FLEDCJ instruction manual

BELLAGIO LT 2033 user manual

BELLAGIO

BELLAGIO LT 2033 user manual

LG 42LB1DR owner's manual

LG

LG 42LB1DR owner's manual

Samsung LN32C530F1F user manual

Samsung

Samsung LN32C530F1F user manual

Premier TV-5231LEDC instruction manual

Premier

Premier TV-5231LEDC instruction manual

LG 19LH20R owner's manual

LG

LG 19LH20R owner's manual

Sharp LC 15A2U Service manual

Sharp

Sharp LC 15A2U Service manual

AOC N27W551T user manual

AOC

AOC N27W551T user manual

Philips 42PFL9903H brochure

Philips

Philips 42PFL9903H brochure

Philips 32PFL7803S Specifications

Philips

Philips 32PFL7803S Specifications

Polaroid FLA-2007B instruction manual

Polaroid

Polaroid FLA-2007B instruction manual

Samsung UN22D5003 Specifications

Samsung

Samsung UN22D5003 Specifications

Zenith C32V37 Specifications

Zenith

Zenith C32V37 Specifications

Panasonic TC-L32S1 - 31.5" LCD TV operating instructions

Panasonic

Panasonic TC-L32S1 - 31.5" LCD TV operating instructions

AOC Envision L42W665 Service manual

AOC

AOC Envision L42W665 Service manual

manuals.online logo
manuals.online logoBrands
  • About & Mission
  • Contact us
  • Privacy Policy
  • Terms and Conditions

Copyright 2025 Manuals.Online. All Rights Reserved.