SAFETY FIRST!
Mains supply : 230V~ 50Hz
Power consumption : 850W
We continually strive to improve our products, specications may change without
prior notice.
DSG Retail Limited is responsible for after sales services.
If you have a query about the product please contact our product support lines
0844 561 6263 (Currys) and 08700 118 117 (Pixmania).
SPECIFICATIONS
The mark is in compliance with the Waste Electrical and Electronic
Equipment Directive 2002/96/EC (WEEE). The mark indicates the
requirement NOT to dispose the equipment including any spent or
discarded batteries as unsorted municipal waste, but use the return
and collection systems available.
DSG Retail Ltd. Maylands Avenue Hemel Hempstead
Hertfordshire HP2 7TG England
Visit Partmaster.co.uk today for the easiest way to buy
electrical spares and accessories. With over 1 million
spares and accessories available we can deliver direct to
your door the very next day. Visit www.partmaster.co.uk
Or call 0870 6001 338 (UK customers only) Calls charged at National Rate.
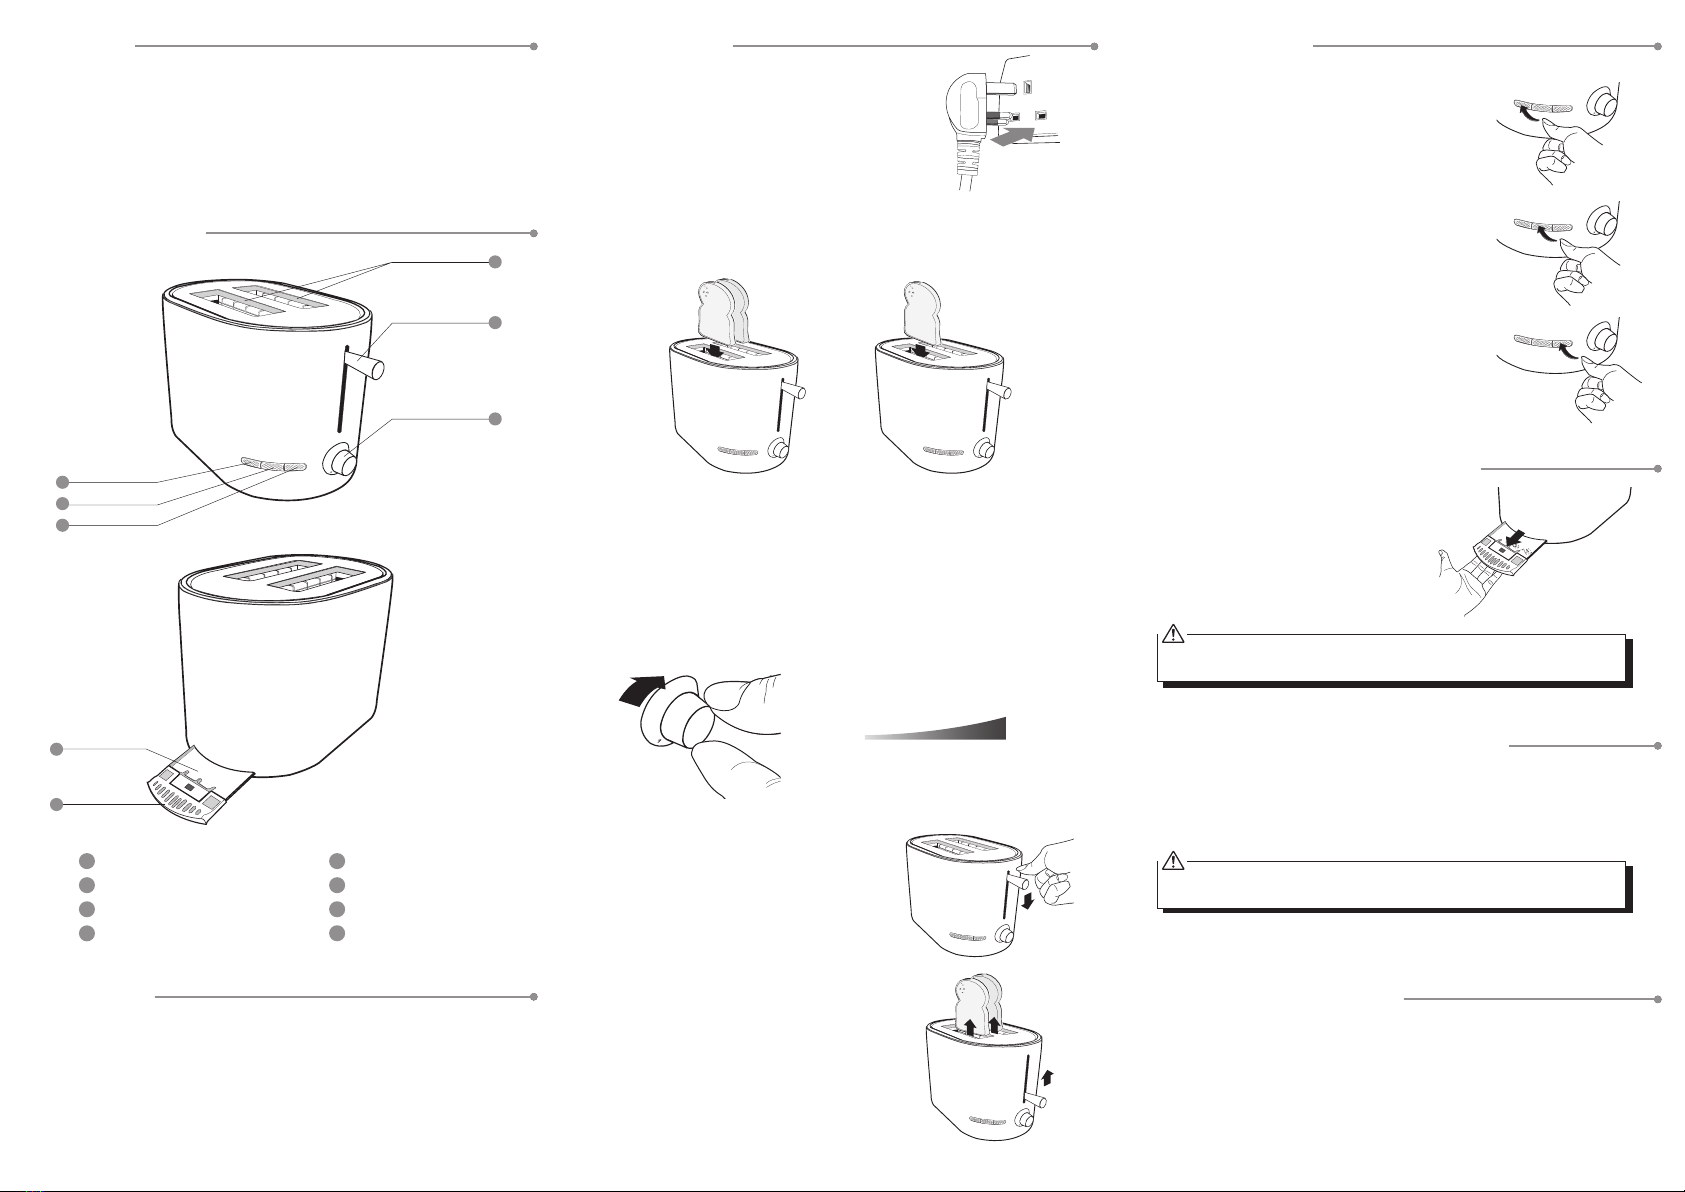
• Read all the instructions carefully before using the appliance and keep them for future
reference.
• Retain the manual. If you pass the appliance onto a third party, make sure to include
this manual.
• Check that the voltage marked on the rating label matches your mains voltage.
Damage
• Please inspect the appliance for damage after unpacking.
• Do not continue to operate the appliance if you are in any doubt about it working
normally, or if it is damaged in any way - switch o, withdraw the mains plug and
consult your dealer.
Location of Appliance
• The appliance must be placed on a flat stable surface and should not be subjected to
vibrations.
• Do not place the appliance on sloped or unstable surfaces as the appliance may fall
o or tip over.
• The mains socket must be located near the appliance and should be easily accessible.
• This appliance is designed for indoor use only.
Temperature
• Avoid extreme degrees of temperature, either hot or cold. Place the appliance well
away from heat sources such as radiators or gas/electric res.
• Avoid exposure to direct sunlight and other sources of heat.
• Do not touch hot surfaces. Temperature of accessible surfaces may be very high when
the appliance is operating. Use handles or knobs only.
Naked Flames
• Never place any type of candle or naked flame on the top of or near the appliance.
Moisture
• To reduce the risk of fire, electric shock or product damage, do not expose this
appliance to rain, moisture, dripping or splashing. No objects filled with liquids, such
as vases, should be placed on the appliance.
• If you spill any liquid into the appliance, it can cause serious damage. Switch it off at
the mains immediately. Withdraw the mains plug and consult your dealer.
Ventilation
• To prevent the risk of electric shock or fire hazard due to overheating, ensure that
curtains and other materials do not obstruct the ventilation vents.
• Do not install or place this appliance in a bookcase, built-in cabinet or in another
conned space. Ensure the appliance is well ventilated.
Safety
• Always disconnect the appliance from the mains supply before moving the appliance.
• In the interests of safety and to avoid unnecessary energy consumption, never leave
the appliance unattended for long periods of time, e.g. overnight, while on holiday or
while out of the house. Disconnect the mains plug from the mains socket.
• Bread may burn. Your appliance must not be used near or below curtains or other
combustible materials. It must be watched when in use.
• Only place toast bread in your appliance. Do not attempt to toast any pastry or bread
product which is lled with a fruit or sugary lling (pop tarts etc). The stungs may
leak from the appliance and cause damage to your appliance with the possible risk of
a re occurring.
• Oversize food, metal foil packages or utensils must not be inserted in the appliance as
they may cause re or electric shock.
• Don’t attempt to dislodge food while the appliance is operating.
• Take the bread out carefully after toasting to avoid injuries.
• Do not use the appliance for uses other than its intended use.
Mains Cable
• Make sure the appliance or appliance stand is not resting on top of the mains cable, as
the weight of the appliance may damage the mains cable and create a safety hazard.
• Do not let the mains cable overhang the edge of the work surface or allow it to touch
hot surfaces or sources of heat or flame.
• If the mains cable is damaged it must be replaced by the manufacturer, its service
agent, or similarly qualied persons in order to avoid a hazard.
Supervision
• This appliance is not intended for use by persons (including children) with reduced
physical, sensory or mental capabilities, or lack of experience and knowledge, unless
they have been given supervision or instruction concerning the use of the appliance
by a person responsible for their safety.
• Children should be supervised to ensure that they do not play with the appliance.
• Never let anyone especially children push anything into the holes, slots or any other
openings in the case - this could result in a fatal electric shock.
Service
• To reduce the risk of electric shock, do not remove screws. The appliance does not
contain any user-serviceable parts. Please leave all maintenance work to qualied
personnel.
• Do not open any fixed covers as this may expose dangerous voltages.
Maintenance
• Ensure to unplug the appliance from the mains socket before cleaning.
• Allow the appliance to cool completely before cleaning or storing.
• Do not use any type of abrasive pad or abrasive cleaning solutions as these may
damage the appliance’s surface.
• Do not use liquids to clean the appliance.
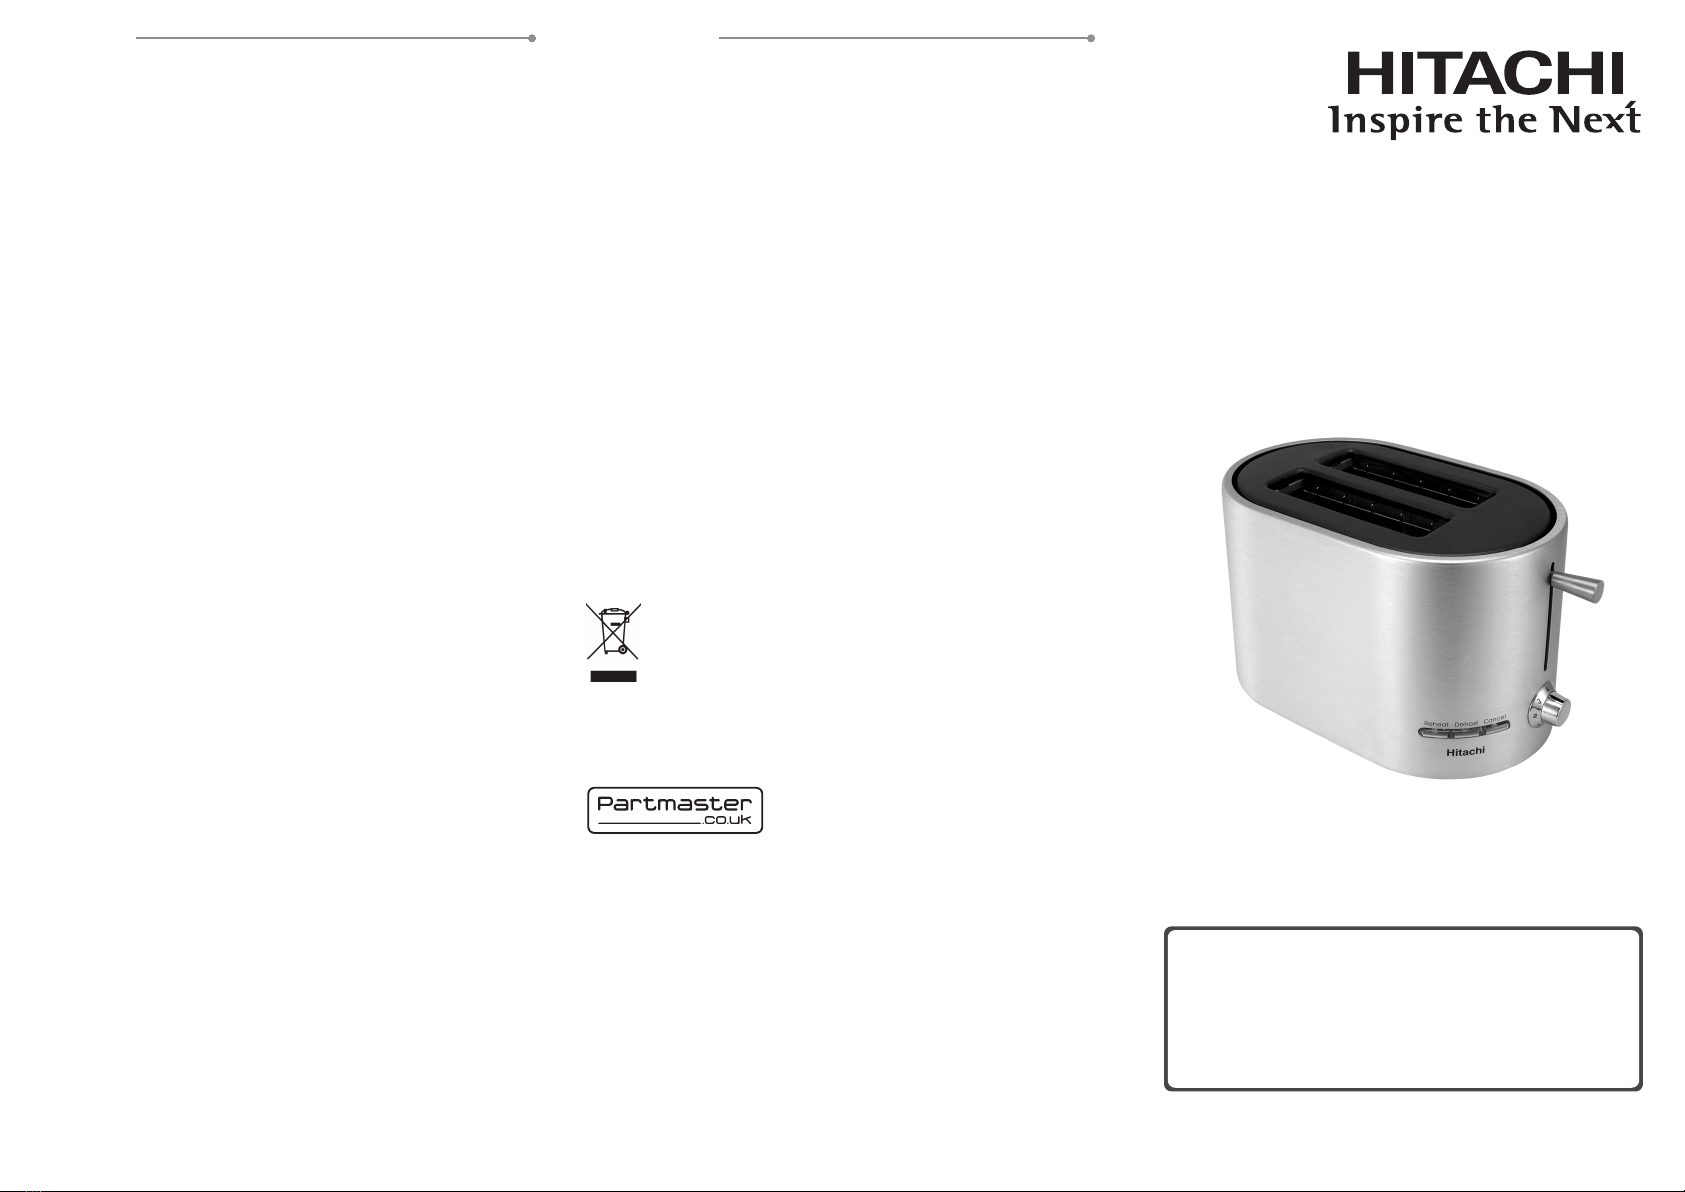
Instruction Manual
HPT521BA
Brush Aluminium Toaster
GB - 1 GB - 5
Congratulations
on the purchase of your new HIitachi Toaster.
We recommend that you spend some time reading this instruction
manual in order to fully understand all the operational features it oers.
Read all the safety instructions carefully before use and keep this
instruction manual for future reference.
HITACHI EUROPE LTD