Hitech Juice Presso Classic User manual

0801
The picture diagram only and could be similar as the product.
Don’t connect to the power before you complete reading
of this statement, and properly retained for reference
because the continuous improvement of products are
subject to change without notice.
WARNING
AFTER USE ,BE SURE TO PULL OUT THE PLUG
DO NOT LET CHILDREN TO PLAY WITH SLOW JUICER
USER MANUAL
Juice Presso Classic

7. Please do not make the product used on or beside high-temperature
gas or electric stove.
8. It is forbidden to use finger, spoon or chopstick to push fruits/
vegetables into the feed inlet of the machine.
9. Please do not touch or move any moving part during operation of
the machine.
10. Please do not make metal sheet or other conducting material
inserted into the juicer, so as to prevent fire or short circuit.
11. Before the machine is cleaned, moved or it is not used, please pull
out the plug.
12. Be sure not to put the machine near inflammable goods.
13. If the supply cord is damaged, it must be replaced by the
manufacturer, its service agent or similarly qualified persons
inorder to avoid accident.
14. Be sure to hold the plug with hands when the plug is pulled out, and
it is forbidden to pull the power line or touch the wire with wet hands.
15. Please be sure that the juicer is put on a firm plane before it is used.
16. Please be sure to pull out the power plug after the use.
17. Switch off the appliance and disconnect from supply before
changing accessories or approaching parts that move in use.
18. Always disconnect the appliance from the supply if it is left
unattended and before assembling, disassembling or cleaning.
19. This appliance shall not be used by children. Keep the appliance
and its cord out of reach of children.
20. Appliances can be used by persons with reduced physical, sensory
or mental capabilities or lack of experience and knowledge if they
have been given supervision or instruction concerning use of the
appliance in a safe way and if they understand the hazards involved.
21. Children shall not play with the appliance.
22. This appliance can be used by children and persons with reduced
physical, sensory or mental capabilities or lack of experience and
knowledge if they have been given supervision or instruction
concerning use of the appliance in a safe way and understand the
hazards involved. Children shall not play with the appliance.
Cleaning and user maintenance shall not be made by children
without supervision.
2
Product features
1. Non-grinding juicing method featured by slow squeezing is adopted for the
product, so the natural flavor and nutrient elements of fruits and vegetables
are well retained. The product has multiple functions, inclu-ding making
vegetable juice and fruit juice, etc.
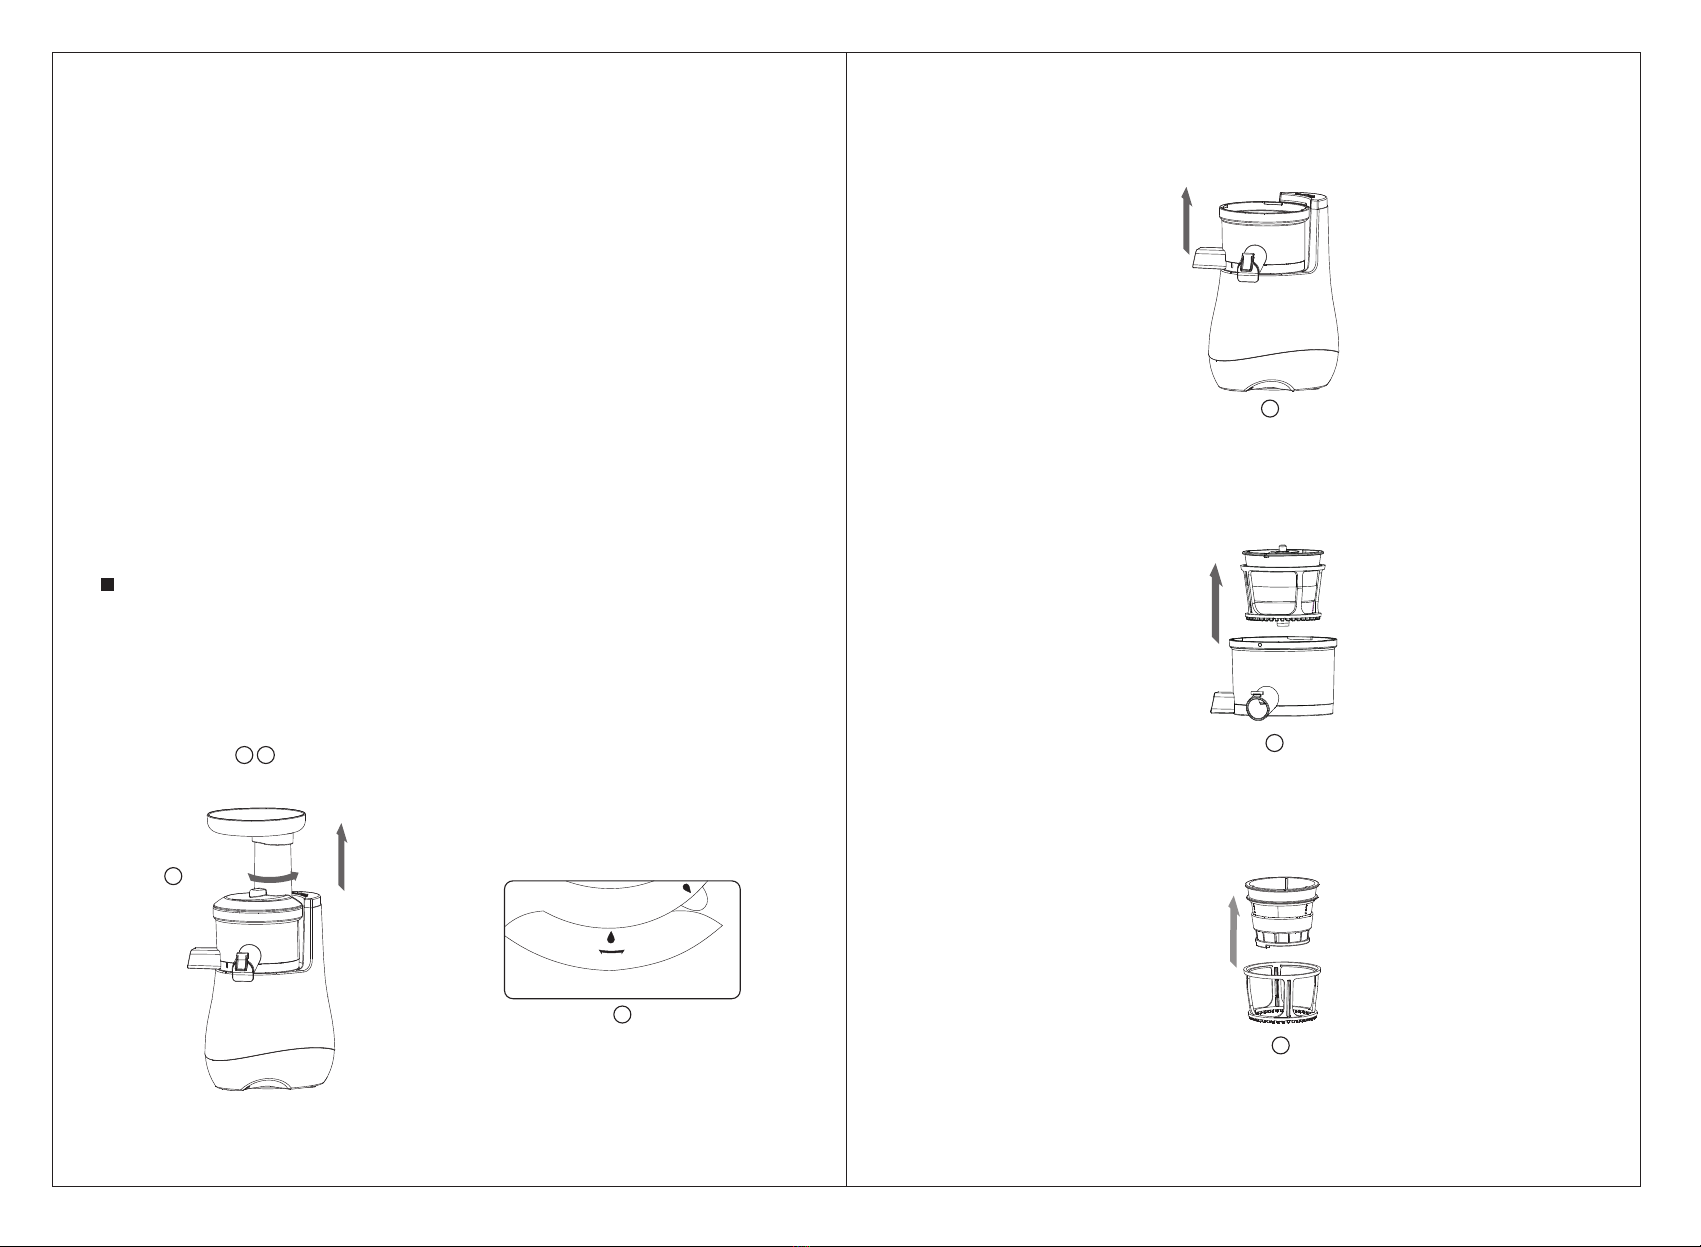
2. The squeezing cup may be separated with the mainframe, and it is
convenient to clean.
3. Dual-switch design makes the product safer (make the squeezing cup
installed onto the mainframe; apply the front cover of squeezing body, and
then turn on the switch to make the juicer run).
1
Warning: The product is applicable to family use, and it is
inapplicable to commercial use, otherwise its service life may be
shortened. Don't use the unit if the filter damaged.
Safety notes
Please carefully read the manual before use the juicer, and pleaseuse
the machine according to the instruction book. Be sure not to use the
product for other purposes.
1. Please do not make the machine share the same power supply with
other high-power electric appliances, and the product shall be used
with 30A leakage circuit breaker installed.
2. To prevent electric leakage and other hazards, please use the
machine according to the instruction book.
3. It is forbidden to make the machine power line and plug immersed
into water orother liquids.
4. Be careful to watch it during operation of the machine.
5. If the parts or product structure is found to be damaged (particularly,
the safetyprotection device and power line are damaged), please do
not use the machine. Do not attempt to repair it by yourself, and it
shall be repaired by professionals.
6. Do not let children or the disabled operate the machine under the
condition that they have not received any guidance or supervision.
20min
Specification
Nominal voltage Nominal frequency Nominal power Nominal time
220-240V 50-60Hz 120W

Assembly method
Marking line
2. Put the squeezing barrel
into the washing rack.
Marking point on
squeezing barrel
Marking point on
squeezing cup
3. Make the assembled squeezing barrel and
washing rack installed into the squeezing cup
* When installation, please make the marking
point on the squeezing barrel align with that
on the squeezing cup
4. Make the spiral propeller
installed into the squeezing
barrel.
1.
1 . Make the squeezing cup inserted to the
fixed point position of the main body.
2 .Install stopper to Juice Outlet
Pictures are for reference only.
Filter
Juice cup
Marc cup
3 3
Washing rack
Squeezing cup
Juice outlet stopper
Marc outlet stopper
Cleaning brush
Pushing rod
Accessories
Juice outlet
Marc outlet
Auger
Feeding tube
Switch
Main body

2
3
OPE N
OPEN
CLO SE
CLO SE
Marking point on
squeezing body cover
Marking point on
squeezing cup
5. Install the squeezing body cover
① When it is installed downwards, the marking
point on squeezing body cover shall align
with that on the squeezing cup.
②③ Make “ ” at the back of the protruding part
of squeezing body cover rotate towards
“ ” on squeezing cup in clockwise direction
and lock.
Notes:Please don't use wet hand operate
switch Before put into fruits and vegetable,
don't let unit run free, Otherwise it may
damage the unit.
Turn on the switch (forward)
Forward: Make fruits and vegetables pushed
downwards for squeezing.
Reverse: Fruits and vegetables return upwards
Make the clean fruits and vegetables (if the size of the
fruits and vegetables is larger than that of the feed in-
let, please make them cut into the blocks with proper
size) put into the feed inlet, and make the pushed in-
wards by the pushing rod.
Notes: Please use fresh fruits and vegetables
to make the juice. The stale fruits and
vegetables that have been stored in
refrigerator for a long time shall be used after
being immersed in cold water for over 10min.
* The kernel of fruits must be removed.
After the squeezing process is completed, please
press the stop switch, and pull out the power plug.
Notes:Please do not store the squeezed
juice for a long time.
The machine is inapplicable to crush grains (motor
clamp and mechanical failure are liable to be caused).
Pushing rod
Feed inlet
5 6
6.See the figure. Make the two juice/marc receiving
cups put at the appropriate position: one is used to
receive juice, and another is used to receive marc
(the two cups have the same overall dimension).
Stop
ON
R
Corotation
Reverse
Reverse Forward
Press
Rubber pad
1. Before the juice cup is installed, please confirm whether the rubber pad of the marc
outlet at the bottom of the juice cup is properly installed.
Make the rubber pad of marc outlet inserted into the rectangular slot.
Make the rubber pad of marc outlet properly inserted.
Notes: The rubber pad must be properly installed, otherwise leakage
phenomenonmay occur.
1
2
Rubber pad installation
Stop
ON
R
Corotation
Reverse
Reverse Forward
Press
If the machine stops suddenly during operation, press
offfirstly, and then press the “reverse” button to make
the materials in the auger pushed upwards; and then
press “forward” button (repeat the process for about 3
times).
*During “reverse” of the machine, please use hands to
press the feed tube slightly (prevent loosening of the
cover).
*If the juicer still does not run after the aforesaid
operation, please disassemble the squeezing cup for
cleaning, and then try the juicer again.
*The hard materials (such as carrot) must be cut into
strips, otherwise hard materials maybe damage juicer.

OP EN
CLOSE
Disassembly method
5. Respectively disassemble the spiral propeller, squeezing barrel and washing rack.
8
1. Power off to stop the machine, and pull out the power plug.
2. Use hands to hold the squeezing body cover and rotate it in counter clockwise direction
(see the figure 1 2 );and pull out the squeezing body cover when it is rotated to the position
indicated in the figure.
3.Hold the juicer outlet on the squeezing cup shake it lightly and take it out (see the figure
③).
4. Take out the spiral propeller + squeezingbarrel + washing rack assembly in thesqueezing
cup (see the figure④).
1
2
3
4
5
Notes for use
* Please read the following contents before use.
1 .The materials shall be put into the juicer slowly one by one, and new materials shall
be put into it after the previous materials have been squeezed.
2. The hard materials(such as carrot) shall be put into the machine after being cut into
the blocks about 10- 20mm. (The materials with particularly strong fiber shall be put
into the machine slowly after being cut into the strip of about 20mm length).
3. When the carrot that have been stored at low temperature for over 1 week, it is
unsuitable making juice;
4. The juice amount will be small if the materials are not fresh. When dry materials stored
in refrigerator are used for squeezing, the materials shall be squeezed after being
immersed in clear water for sufficient water absorption, so that the effect will be better.
5. Some Hard and much fiber materials are not applicable to make juice (such as kudzu,
sugarcane, etc).
6. There will be certain friction noise when carrot (hard flesh) or apple(hard peel) is used
for squeezing, but this has no impact on the product.
7. Juice will be splash from the feed inlet when such materials as cherries tomatoes and
grapes are used for squeezing. when use soft fruit to make juice, please mix some
apple or pear together, it will be better to get more juice and marc will go out more
smoothly.
Notes:This juicer continues working max time is 10 mins, it will stop
after 10 mins, Please Cool juicer about 10 mins and restart it again;
7

10
Troubleshooting
Phenomenon Cause Troubleshooting method
1. Whether the power plug is
inserted properly.
2.The quantity of materials put
into the machine is too much
3. Hard fruits and vegetables
are not cu.
4.Continues working time more
than 20 Mins.
Materials stored in refrigerator
too long before squeezing.
1. Accessories are not properly
installed.
2. The machine is put on oblique
ground.
3. Parts cause extrusion sound
during squeezing.
1. Dreg attaches to the container
2. The container and
accessories are liable to be
dyed when materials with
pigment (such as carrot,
spinach,etc.) are used for
squeezing.
1. Make the plug inserted into
the socket.
2. First, press “R” for 2-3s to
make the materials return
upwards; then choose function
button and start again(repeat
the process for about 3 times).
If the machine still does not run
please clean the machine and
then use it.
3. Hard fruits and vegetables
(such as carrot) shall be
squeezed after being cut into
strips.
4. Let machine stop and cool about
10 Mins, restart it again if need.
1. The juice amount will be
increased if the materials are
squeezed after being immersed
in clear water for sufficient
water absorption.
2. Use fresh fruit.
1. lnspect whether the
accessories are properly
installed after the machine
stops.
2. Please put the machine on a
plane.
3. The sound caused by extrusion
of fruits and vegetables, and
please do not worry about it.
1. Clean the machine in time
after use.
2. Clean the machine with
detergent after use.
The rubber pad at the bottom
of squeezing cup is not
installed properly.
The running machine
stops suddenly
The juice amount is small
There is abnormal noise
The container and
accessories are dyed
after use
Juice flows out of the
mainframe
Please reinstall the
squeezing rubber pad by
referring to the installation
method.
Cleaning method
2. Do not make the mainframe put into water for cleaning; and be sure to use wringed soft
cloth to clean it.
3. After cleaning, please dry the cleaned parts and store them in a clean and ventilating
place.
Notes:
1. Please wash the machine in time after use, otherwise the dreg will attach
to thecontainer, which will affect the assembly and cleaning, and even
result in perfor-mance reduction.
2. The rubber pad at the bottom of the squeezing cup may be washed. Please
refer to the contents in page 5.
9
1. Wash the disassembled parts with flowing water; if the meshes are blocked up by dreg,
please use the cleaning brush for the cleaning.
Note: Please do not use iron wire brush, abradant or sharp cleaning tool
for the cleaning.
This manual suits for next models
1
Table of contents
Other Hitech Blender manuals