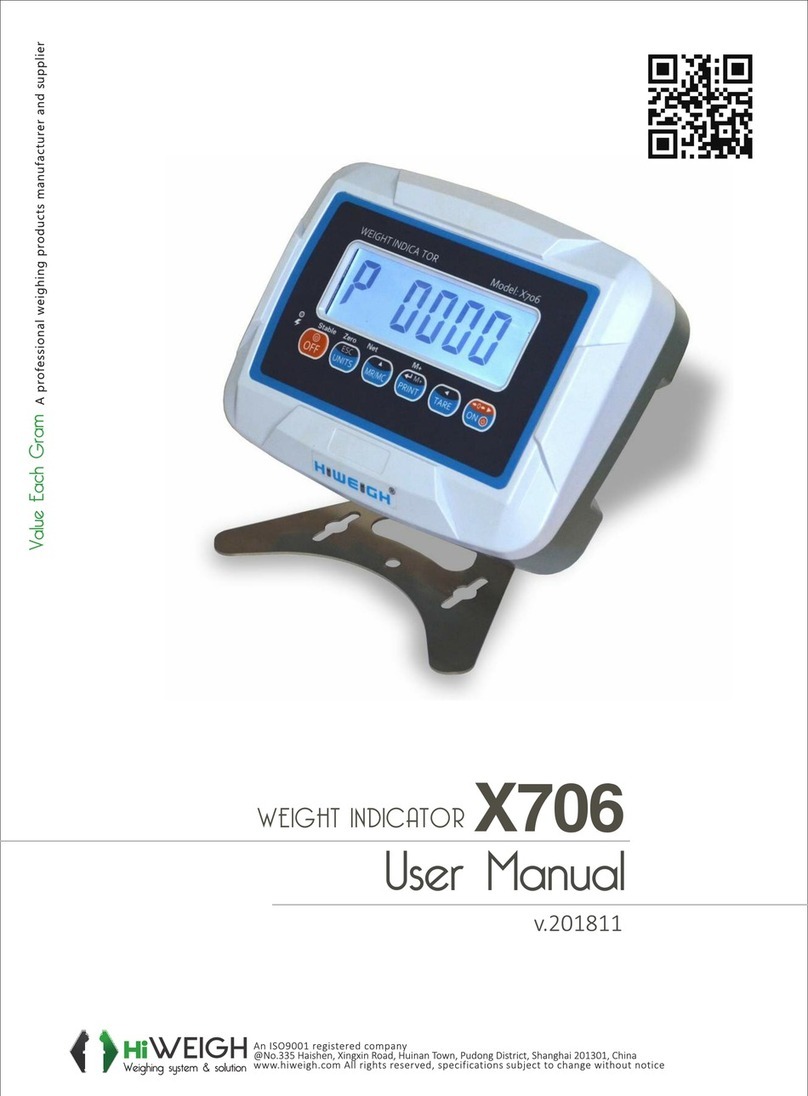
HiWeigh X722 User manual


1
Before Use
1.1 Safety precautions
WARNING!
▲Do#not#use#X722(s)#weighing#terminal#in#hazardous#area!#Do#not#use#
it#within#areas#classified#as#hazardous#division#1/2#or#zone#
0/1/2/21/22#because#of#combustible#or#explosive#atmospheres.####
#
#Never#immerse#it#in#corrosive#chemical#liquid.#
#
#Static#sensitive#device,#it#must#be#handled#only#by#qualified#technicians.#
Improper#handling#may#damage#the#circuit#card#and#the#device,#which#is#
not#covered#by#the#warranty.#
DANGER!
Electric#shock#hazard!#
#Make#sure#the#indicator#is#grounded#well.#
#
# Always#unplug#AC#cable#before#performing#any#service#work#on#the#indicator!#And#wait#for#
at#least#30#seconds#before#any#operation#on#the#indicator.#
DISPOSAL
In#conformance#with#the#European#Directive#2002/96/EC#on#Waste#Electrical#and#Electronic#
Equipment#(WEEE),#this#device#may#not#be#disposed#of#in#domestic#waste.#This#also#applies#to#
countries#outside#the#EU#as#per#their#specific#regulations.#
#
Please#dispose#of#this#product#in#accordance#with#local#regulations#at#the#collecting#point#
specified#for#electrical#and#electronic#equipment.#
If#you#have#any#questions,#please#contact#the#responsible#authority#or#the#distributor#from#
which#you#purchased#this#indicator.#
#
Should#this#indicator#be#passed#on#to#other#parties#(for#private#or#professional#use),#the#
content#of#this#regulation#must#also#be#related.#
#
The#indicator#has#a#rechargeable#internal#battery.#The#battery#contains#heavy#metals.#Please#
observe#the#local#regulations#on#the#disposal#of#environmentally#hazardous#materials.#
#
OPERATION
Use$an$independent$electric$source$to$prevent$electronic$disturbances.
$
Don’t$place$any$object$on$the$platform$when$switching$on$the$indicator.
$
Please,$warm-up$the$scale$during$2-3$minutes$before$using$it.
$
Avoid$sudden$changes$in$temperature$and$draughts.
$
Don’t$overload$the$scale;$do$not$exceed$its$maximum$capacity.
#
All#Rights#Reserved,#any#copying,#reproducing,#republishing,#posting,#distributing#by#any#means#is#prohibited#without#permission.

2
Index
Specifications$
5$
Power$
5$
Before$using$
5$
System$power$consumption$
5$
Connect$the$loadcell$to$the$indicator$
5$
Display$description$
6$
Basic$function$operation$
7$
Basic$parameter$setting$
8$
$$-$A/D$count$
8$
$$-$High$/$Low$limits$setting$
8$
$$-$Auto-power$off$
9$
$$-$Backlight$setting$
9$
$$-$Hold$function$
9$
$$-$RS-232$output$
10$
$$-$RS-232$baud$rate$
10$
$$-$Communication$protocol$
10$
$$-$RS-232$speed$setting$
12$
$$-$Zero$average$
12$
$$-$G$value$setting$
12$
Advanced$function$setting$
13$
$$-$Check$weighing$(span)$
13$
$$-$Zero$calibration$
13$
Guarantee$
13$
#
#
#
#
#
#
#
#
#
#
#
#
#
#
#
#
#
#
#
#
#
#
#
#
#
#
#
#
#
#
#
#
#
#
#
#

3
1. Technical Specifications
Model#
X722#|#X722s#
Enclosure#Type#
ABS#|#Stainless#Steel#
Product#Dimension#
240x180x105mm#(X722)#
250x205x68mm#(X722s)#
Accuracy#
Class#III#
Display#Resolution#
1/3,000#–#1/60,000#
Internal#Resolution#
300,000#–#600,000#
Sampling#Rate#
20times/s#
Display#
6#digits#LCD#(40mm)#with#backlit#
Power#
100-240V-12V1Ah#AC/DC#Adapter#
Power#Consumption:#
About#12mA#
-with&backlight&
About&36mA&
-with&backlight&and&RS232&
About&48mA&
Rechargeable#Battery#
6V4Ah#(around#320hrs#without#backlight)#
Load#cell#Sensitivity#
0.6#–#3.0mV/V#
Sensitivity#
0.12uV/d#minimum#
Load#Cell#Quantity#
1-8#*#350OΩ#or#1-16*750Ω
Excitation#voltage#
5#VDC#
Units#
Kg#|#lb,#g#|#oz,#etc.#
Non-linearity#
≤ 0.01%F.S.
Operating#Temperature#
-10~45#
Storage#Temperature#
-25~55#
Relative#humidity#
85%Rh#non-condensing#
Communication#
Optional#isolated#RS232,#Bluetooth,#WiFi,#Relay,#etc.#
Shipping#Weight#
2.3-3.2kg#
2. Model Identification
#
Model:## # ##X722######S##-####UK#####0######0###
Corresponding:# ######A########B#########C######D######E#
#
A#=#Main#model#name#
B#=#Enclosure:## # -A#(or#none):# ABS#
# # # # -S:## # Stainless#Steel#
#
C#=#Plug#type,#examples:#
#
#
#
#
#
#
#
AU#=#Australia#Type#
CN#=#China#Type#
EU#=#EU#Type#
US#=#USA#Type#
SA#=#South#Africa#Type#
UK#=#UK#Type#

4
D#=#Output:# # # 0#=#RS232#
# # # # 1#=#Bluetooth#
# # # # 2#=#WiFi#
# # # # 3#=#Relay#
#
E#=#Bracket# # # 0#=#No#bracket#
# # # # 1#=#ABS#bracket#
# # # # 2#=#S.S.#bracket#
#
3. Packing List
After#the#weighing#terminal#received,#please#open#the#box#carefully#and#check#the#following#items#included:#
- Indicator####x#1#
- S.S#bracket#with#screws## # x#1#(X722s)#
- Connectors#and#screws#bag# x#1##
- Manual# ## # # x#1#
- Other#parts###depend#
#
4. Connecting
4.1 LOAD CELL
#
#####For#6-wire#load#cells####for#4-wire#load#cells#(short#connect:#
+EXC#and#+SEN
,#–
SEN#and#-EXC
.)
#
# ##
#
#
# #
$
#
#
#
Connect#the#load#cell#to#the#7-pin#connector,#for#4-wire#load#cells,#short#connect#+EXC#and#+SEN,#–SEN#and#
-EXC.)#as#above#instruction.#
$
!
+EXC#………………#Excitation#+#
+SEN#………………#Sense#+#
+SIG#………………#Signal#+#
SHIELD#……….…….#Shield#
-SIG##………………#Signal#–#
-SEN#………………#Sense#–#
-EXC#………………#Excitation#–#
+EXC#………………#Excitation#+#
+SEN#………………#Excitation+#
+SIG#………………#Signal#+#
SHIELD#……….…….#Shield#
-SIG##………………#Signal#–#
-SEN#………………#Excitation#–
#
-EXC#………………#Excitation#–#
+EXC#(1)## ………………#Excitation#+#
+SEN#(2)## ………………#Sense#+#
+SIG#(3)## ………………#Signal#+#
-SIG#(4)### ………………#Signal#–#
-SEN#(5)## ………………#Sense#–#
-EXC#(6)## ………………#Excitation#–#
SHIELD#(7)#……….…….#Shield#
#

5
4.2 RS232
#
#
#
#
5. Display
6. Keypad
## ## #
#
BASIC FUNCTION OPERATION
$
$$$$Press$and$hold$this$key$for$2$seconds$to$turn$off$the$balance.$
$
$
$$$$Press$this$key$to$turn$on$the$balance$
$
$$$!Function!1.$To$select$the$desired$weight$unit.$$
$$$$Function!2.$To$exit$from$setup$mode.$
INDICATOR# ##############COMPUTER#
#
Pin2#(TXD)# ---###Pin3#(RXD)#
Pin3#(RXD)#---###Pin2#(TXD)#
Pin5#(GND)#---#####Pin5#(GND)#

6
$$$$Function!1.$$ To$reset$the$weight$to$zero$“0”,$but$the$display$value$has$to$be$$
$$$$$$$$$$$$$$$$$$$$ $ lower$than$
±$
2%$of$maximum$capacity.$$
$$$Function!2.$$ To$move$one$space$to$the$left$or$downward$in$setup$mode.$
$$
$$$$Function!1.$$ To$subtract$the$container´s$weight.$$$
$$$Function!2.$$ To$move$one$space$to$the$right$or$upward$in$setup$mode.$$
$$$$
$$$Function!1.$$ To$view$gross$or$net$weight$when$the$balance$is$on$tare$$
status.$All$other$keys$will$be$disabled$when$gross$weight$is$activated.$$
$$ $$$Function!2.$$ To$increase$values$upward$in$setup$mode.$$
$
$$$Function!1.$$ Key$of$confirmation$in$setup$mode.$$
$$$Function!2.$$ Manually$transmitting$data$through$RS232$to$computer$or$
$$$ $ printer.$
$
$$$$If$you$know$the$weight$of$the$container,$press$this$key$and$input$the$container$weight$value,$
$$$$then$put$the$goods$into$the$container,$the$display$will$show$the$net$weight$only.$
$
$$$$To$set$the$value$of$high$limit$
$
$$$$To$set$the$value$of$low$limit.$
$
$$$$To$program$check$weighing$High$/$Low$conditions$(remark-)$
$
$
$$$$To$accumulate$weights,$the$max$of$the$weight$times$is$9999$
$
$
$$$$To$introduce$sample$value.$
$
$$ $$$To$recall$accumulations$
$
$
$$$$To$enter$in$counting$pieces$function.$
$
$
$$$To$view$the$total$accumulation$weighing$
$
$
$$$$Backlight$$ $
$
$$$$To$clear$data$

7
BASIC PARAMETER SETTING
To access to functions setting, press the and key at the same time.
Press the to select the parameter (UF-1
~
UF-9)
.
UF-1 A/D count
1. Press the key to view the A/D count.
2. To move to next parameter press the ► key.
3. To exit and return to normal weighing press the key.
UF-2 High / Low limits setting
1. Press the key to enter.
2. The display will show the message “000000L”
3. Use the keys and to move cursor and press the to select
number.
4. Press the key to confirm.
5. The display will show “00000H”
6. Use the keys and to move cursor and press the to select
number.
7. Press the key to confirm.
8. Buzzer beep see remark ( - )
UF-3 Auto-power off
Modes:
- AoFF 00 – Auto-turn off disable.
- AoFF 01 – The balance will automatically turn off after 1 minute of non use.
1. Press the key to access to auto-power configuration.
2. Use the keys and to move from one digit to other and the key
to select the desired mode.
3. Press the key to confirm.
UF-4 Backlight setting
Modes:
- A: Automatic
- ON: Backlight on

8
- OFF: Backlight off
1. Press the to access to backlight configuration.
2. Use the key to select the desired mode.
3. Press the key to confirm.
UF-5 HOLD function (keeps the reading fixed on display for few seconds after
removing the load from the platter)
Modes:
- HOLD 0 : Disable.
- HOLD 1 : Weighing animals mode.
1. Press the key to access to HOLD function configuration.
2. Use the key to select the desired mode.
3. Press the key to confirm.
UF-6 RS-232 Output
232 0 - RS-232 disable
232 1 - Stable output – Format 1
232 2 - Stream output – Format 1
232 3 - Manual output – Format 1
232 4 - Stable output – Format 2
232 5 - Stream output – Format 2
232 6 - Manual output – Format 2
RS232 Baud rate
b 1200 Baud rate 1200
b 2400 Baud rate 2400
b 4800 Baud rate 4800
b 9600 Baud rate 9600
b 19200 Baud rate 19200
b 38400 Baud rate 38400
1. Press the to enter
2. Press the to select the baud rate

9
3. Press the key to confirm.
Communication Protocol
UART signal of EIA-RS232 C
Format:
1. Serial output: 1200/2400/4800/9600/19200/34800 BPS
2. Data bits: 8 bits
3. Parity bits: None
4. Stop bits: 1 bit
S
t
a
r
t
bit
D
a
t
a
bi
ts
S
t
op
bi
t
s
Format 1 (232 1 – 3):
HEAD1 (2 BYTES)
HEAD2 (2 BYTES)
OL – Overload
ST – Stable
NT – Net weight
US – Unstable
GS – Gross weight
F
i
x
ed
18
B
Y
T
E
S
ASC
II
(
k
g
g
t
lb
)
1
2
1
1
2
1
1
2
3
4
5
6
7
8
1
2
1
2
H
E
AD1
,
H
E
AD2
,
DA
T
A U
N
IT
CR
LF
F
i
x
ed
21
B
Y
T
E
S
ASC
II
(
t
l.
T
lbo
z)
12 1 1 2 1 1 2 3 4 5 6 7 8 9 1 2 3
41 2
H
E
AD1
,
H
E
AD2
,
DA
T
A U
N
IT
CR
L
F
F
i
x
ed
19
B
Y
T
E
S
ASC
II
(
p
c
s
)
1
2
1
1
2
1
1
2
3
4
5
6
7
8
1
2
3
1
2
H
E
AD1
,
H
E
AD2
,
DA
T
A U
N
IT
CR
L
F
1.
E
x
am
pl
e
+
0.876
k
g
S
t
a
bl
e
n
et
w
e
i
g
h
t
:
S
T
,
N
T
,
+
0
0
0
.
8
7
6
k
g
0D
0A
2.
E
x
am
pl
e
-
1.568
lb
un
s
t
a
bl
e
g
ro
ss
w
e
i
g
h
t
:

10
U
S
,
G
S
,
-
0
0
1
.
5
6
8
l
b
0D
0A
3.
E
x
am
pl
e
-
20. 5.40
lb
o
z
un
s
t
a
bl
e
g
ro
ss
w
e
i
g
h
t
:
S
T
,
G
S
,
-
1
0
0
5
4
0
l
b
o
z
0D
0A
4.
E
x
am
pl
e
+
1000
p
c
s
s
t
a
bl
e
n
et
w
e
i
g
h
t
:
S
T
,
N
T
,
+
0
0
0
1
0
0
0
p
c
s
0D
0A
F
or
ma
t
2 (232 4
~
6)
:
F
i
x
ed
12
B
Y
T
E
S
ASC
II
(
k
g
g
t
lb
)
1
2
3
4
5
6
7
8
1
2
1
2
DA
T
A U
N
IT
CR
L
F
F
i
x
ed
15
B
Y
T
E
S
ASC
II
(
t
l.
T
lbo
z)
1
2
3
4
5
6
7
8
9
1
2
3
4
1
2
DA
T
A U
N
I
T
CR
L
F
i
x
ed
13
B
Y
T
E
S
ASC
II
(
p
c
s
)
1 2 3 4 5 6 7 8 1 2 3 1 2
DA
T
A U
N
IT
CR
L
F
O
u
tp
u
t
e
x
am
pl
e
s
:
1.
E
x
am
pl
e
+
0.876
k
g
s
t
a
bl
e
n
et
w
e
i
g
h
t
:
+
0
0
0
.
8
7
6
k
g
0D
0A
2.
E
x
am
pl
e
-
1.568
lb
un
s
t
a
bl
e
g
ro
ss
w
e
i
g
h
t
:
-
0
0
1
.
5
6
8
l
b
0D
0A
3.
E
x
am
pl
e
-
20. 5.40
lb
o
z
un
s
t
a
bl
e
g
ro
ss
w
e
i
g
h
t
:
-
1
0
0
5
4
0
l
b
o
z
0D
0A
4.
E
x
am
pl
e
+
1000
p
c
s
s
t
a
bl
e
n
et
w
e
i
g
h
t
:
+
0
0
0
1
0
0
0
p
c
s
0D
0A
UF-7 RS-232 Speed setting
1. Press the key to enter.
2. Press the key to select the desired mode.
Mode 1 : Normal

11
Mode 2: Fast
Mode 3: Slow
3. Press the key to confirm.
UF-8 Zero average
1. Press the key to enter.
2. Press the key to select.
3. Press the key to confirm.
UF-9 G Value setting
1. Press the key to display the G value of manufacture place.
2. If set the G value of local press the key and then the or keys and
key to input the new G value.
ADVANCED FUNCTION SETTING
1. In weight mode, press the and keys, the display will show ECF – 1.
2. Press the or keys to select ECF-1, ECF-2 or ECF-3
* ECF-1 Check weighing (SPAN)
Press the to enter, display will show CALZ.
Press the to zero the display.
Use the keys and to select the digit.
Press key to input the weight value.
Put the calibration weight on the platter and press the key to calibrate.
* ECF-2 Zero Calibration

12
Press the key to enter.
The display will show CALZ.
Press the key to zero.
Press the key to calibrate.
GUARANTEE
This scale is guaranteed for one year from the delivery date. The guarantee covers any
fabrication defect of the material.
During this period, we cover the manpower and the spare parts necessary for the
reparation of the scale.
This guarantee does not cover the failures caused by an inappropriate use or
overcharge.
The guarantee does not cover the freight cost (transport) necessary to repair the
scale.


This manual suits for next models
1
Table of contents
Other HiWeigh Accessories manuals
Popular Accessories manuals by other brands
Campbell
Campbell SDMS40 instruction manual

MAC PARA
MAC PARA Haven user manual

Kambrook
Kambrook Snugasabug KEB302 Instruction booklet

SICK
SICK KTS-WB61141142 Series manual
Zenner
Zenner INDOOR T+H SENSOR LoRa Sz204 868 ID IP40 Assembly and operating instructions
ITOH DENKI
ITOH DENKI POWER MOLLER PLUS F-RAT-NX75 manual
