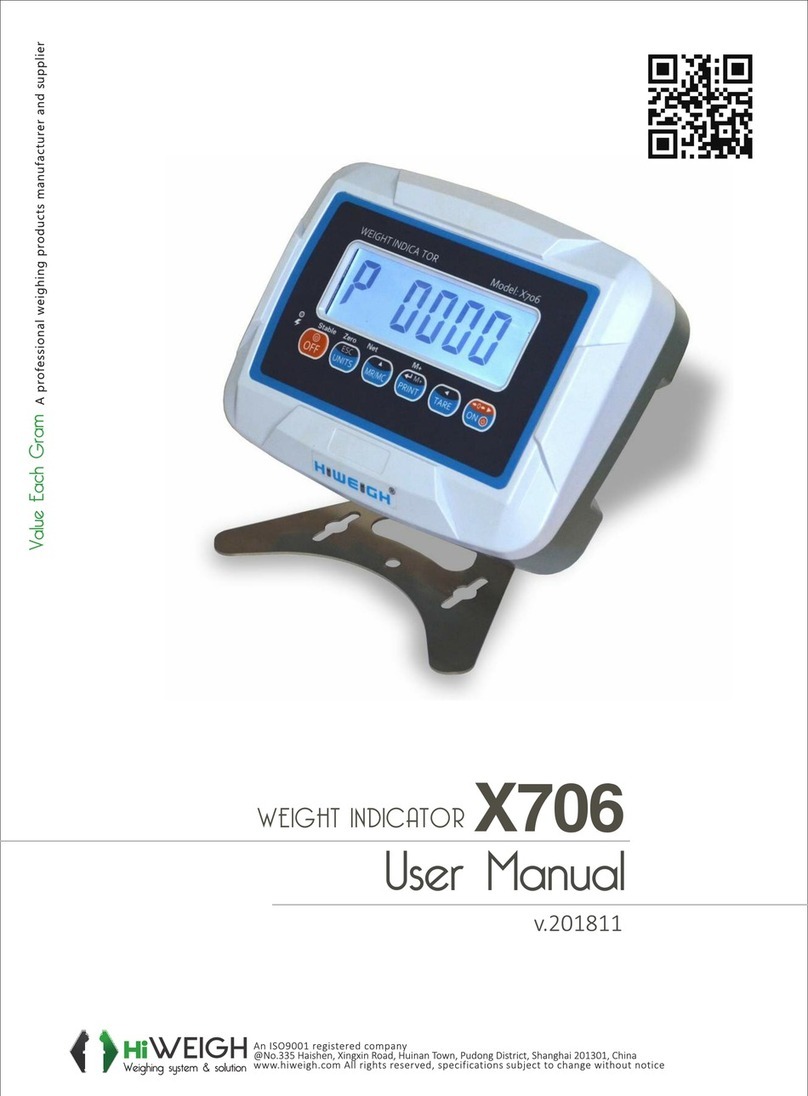
HiWeigh X6 User manual


Version 2011.12 X6 User Manual
Safety precautions
WARNING!
▲Do not use X6/X6P indicators in hazardous area or in dusty environments.
Never flood the Indicator, immerse it in liquid or pour liquids on it.
Do not expose indicator to either direct sun light or any heat sources.
Do not open the indicator!
The warranty is void if this stipulation is ignored. The indicator may only be opened by
authorized persons.
DANGER!
Electric shock hazard!
▲Always unplug AC adapter before performing any work on the indicator
Hazard of electric shock if the power cable is damaged!
▲Check the power cable for damage regularly. Unplug the power cord immediately if the power
cable is damaged.
DISPOSAL!
In conformance with the European Directive 2002/96/EC on Waste Electrical and Electronic
Equipment (WEEE), this device may not be disposed of in domestic waste. This also applies to
countries outside the EU as per their specific regulations.
Please dispose of this product in accordance with local regulations at the collecting point
specified for electrical and electronic equipment.
If you have any questions, please contact the responsible authority or the distributor from
which you purchased this indicator.
Should this indicator be passed on to other parties (for private or professional use), the content
of this regulation must also be related.
The indicator has a rechargeable internal battery. The battery contains heavy metals. Please
observe the local regulations on the disposal of environmentally hazardous materials.

Version 2011.12 X6 User Manual
1. Introduction and Specifications
•Simple operation
•Weighing up to 1:30000 divisions
•Excitation voltage: 5V DC, up to 12, 350Ωload cells. up to 24, 750Ωload cells
•A/D resolution: 1.5 million internal counts
•A/D sampling rate: 60 times/second
•Accuracy of measured weight can be temporary increased ten times
6-digit, 7-segment with a decimal point, :20 mm high Green LED display
•Real-time clock and programmable date and lock to stop work
•28 function keys menu driven calibration and configuration
•Selectable display resolution
•Selectable kg and t unit
•Selectable digital filtering
•Four non-linearity calibration points
•Allow changing of indicator without recalibration
•Lock display when overload is greater 130% FS
•Auto zero range
•Store and recall up to 500 vehicle numbers and tares, 1000 weighing records and 10 unit-prices
•Optional built-in micro printout or external 24-pin dot matrix printer
•Selectable manual or automatic printout
•Daily, monthly and statistics reports by time, vehicle or goods number
•RS-232C interface with 2 transmit outputs, selectable baud rate: 1200, 2400, 4800, 9600
•Optional RS-485 interface
•External Power supply options from 187V to 242V, 50Hz/60Hz
•Internal rechargeable 6V DC battery
•Operating temperature: 0to 45
•Relative humidity: < 85% non-condensing
•Dimensions: 320 mm width x 200 mm high x 180 mm deep

Version 2011.12 X6 User Manual
2. Indicator front panel
3. Keypad functions
[ TRUCK ] Store vehicle number or recall the vehicle records
[èT ] Set or clear tare, [ Tare ] in the manual
[ STORE ] Store vehicle numbers and tare
[ CLEAR ] Clear vehicle number, tare and weighing record
[ SET ] Enter set menu
[ GOODS ] Store goods number
[ ENTER ] Confirm the last operation and go to the next step
[ PRINT ADD] Manual printing
[ DATE TIME] Display date and time or set time
[GWT NET ] Display gross / net weight
[è0 ç] Zero display and sets zero point, [ Zero ] in the manual
[
é
] Scroll through the available parameter values
[ Cè] Recall unit-price
[ Cç] Store unit-price
[ # $ ] Display or set unit-price
[ STATIS ] Print statistics reports
[ DAILY ] Print daily reports
[ MONTH ] Print monthly reports
3.1. Status LED
[ Zero ] Turn on when gross weight is less than 0.4d
[ Tare ] Turn on when tare is not 0
[ Auto ] Turn on when indicator is automatically accumulating records or printing
[ Stable ] Turn on when the weight on the platform is stable
[ Vehicle ] Turn on when vehicle number is stored
[ Goods ] Turn on when goods number is stored
3.2. Error codes
[ OU ] Overload due to measured weight > 100% FS + 9d
[-FULL- ] Overload due to measured weight > 100% FS + 30% FS

Version 2011.12 X6 User Manual
[ -OU ] Initial zero is too low
[--OY-- ] Storing of vehicle number and tare is successfully.
[--OY-1 ] Vehicle number and tare storage is full (Maximum storage is 100 vehicle)
[--OY-2 ] Weighing record storage is full (Maximum storage is 1000 records)
[- c- d- ] Battery failure, mains power not present or voltage too low
[-OFF-- ] Battery is low and indicator will power-off to protect the battery from over discharge
[Err 1 ] A/D errors due to A/D failure or low A/D counts less than -10% FS
[Err 2 ] A/D errors due to A/D failure or high A/D counts greater than 10% FS
[Err 3 ] E2PROM data error
3.3. Load cell to indicator DB5 plug
1 è+E (+Excitation)
2 è+S (+Signal)
3 è-S (-Signal)
4 è-E (-Excitation)
5 èGND
3.4. DB25 parallel port 24-pin dot matrix printer connector
3.5. RS-232 DB9 plug
2 èRXD1 Input
3 èTXD1 Output
5 èSignal GND
6 èTXD2 Output
4. Power-on configurations
Switch on On/Off key to turn on the indicator. It may be necessary to press and hold [ Set ] key for one second to
check the software version and perform self-test. After self-test, with no load on the platform, press [ Zero ] key
to zero the display. The display will display [ 0] and turn on [Zero] LED.
If initial zero is too high, [HHHHHH] is displayed when the indicator is first connected to load cells.
If initial zero is too low, [LLLLLL] is displayed, then followed by [ -OU ] in about then 1.5 seconds. Make sure
that the zero output of load cell is not less than –1% FS.
Before an indicator can be used, its configuration parameters must be set. Press and hold [ Set ] key and switch
on the indicator, the display will display the version number, start counting down to zero and enter the
configuration menu.

Version 2011.12 X6 User Manual
Step
Operation
Display
Comments
1
Press [ Set ]
Press [2003]
[PS 0]
[PS 2003]
Enters configuration menu
Password is 2003
2
Press [Enter]
Press [↑]
[d 10]
[d 1]
Sets display resolution.
Press [↑] key to cycle through the following options:
1, 2, 5, 10,20,50,0.1,0.2,0.5.1.0,2.0,5.0,0.01,0.02,0.05,0.10
0.20,0.50,0.001,0.002,0.005,0.010,0.020,0.050,1
Selects d=1
3
Press [Enter]
Press [3000]
[--FS--] &
[160000]
[--FS--] &
[3000]
Sets FS capacity.
Sets the capacity by keying in the F·S
Displays [--FS--] & [3000]
Selects FS = 3000
4
Press [Enter]
Press [0]
[Unt 1]
[Unt 0]
Sets unit: Unt=0 to select kg
Unt=1 to select t
5
Press [Enter]
Press [35]
[t 15]
[t 35]
Sets digital filter parameter: 0 - 99
The display will update faster and filter faster as the filter
parameter is changed from 90 to 0
Selects filter parameter to 35
6
Press [Enter]
Press [0]
[rng--2]
[rng--0]
Auto zero tracking range is determined by < 0.4(1+rng)d
rng=2: auto zero tracking range < 1.2d
rng=0: auto zero tracking range < 0.4d
Factory setting is rng=0
7
Press [Enter]
Press [0]
[01-- 1]
[01-- 0]
Zero range setting:
01=0: the display can be zero by pressing [Zero] key while
the load is less than 2% F·S
01=1: the display can be zero by pressing [Zero] key while
the load is less than 50% F·S
Selects 01=0
8
Press [Enter]
[02--3]
Zero range when the display turn on:
02=0: the display will not zero
02=1: the display will not zero while the initial values is less
than 2% F·S
02=2: the display will not zero while the initial values is less
than 10% F·S
02=3: the display will not zero while the initial values is less
than 20% F·S
9
Press [2]
[02--2]
Selects 02=2
If the initial values is less than 10% FS, the display will zero
10
Press [Enter]
[FULL-0]
Locks the display when the scale is overloaded
Selects the function with pressing [↑] key
FULL=0: the display will not be locked when the scale is
overloaded
FULL=1: the display will be locked when the scale is
overloaded
12
Press [Enter]
[weight]
Returns to weighing mode

Version 2011.12 X6 User Manual
5. Zero Display
6. Calibration. First point calibration
Step
Operation
Display
Comments
1
Press [Set]
Press [8888]
[PS 0]
[PS8888]
Enters set menu.
Calibration password is 8888
2
Press [Enter]
Press [1000]
[CAL-SP] & [0]
[CAL-SP] &
[1000]
Loads standard weight for 1000 on the platform and wait for
Stable LED to turn on.
3
Press [Enter]
[-------]
[1000]
Starts first point calibration and wait for calibration to
complete. Calibrate the other 3 points for more accuracy.
7. Displaying and changing calibration parameters
•Modification of calibration values could affect the measured weight.
•**** is the new calibration value to be entered into the indicator.
Step
Operation
Display
Comments
1
Press [Set]
[PS 0]
Enters set menu
2
Press [3388]
Press [Enter]
[PS 3388]
[--PA--] & [calib -1]
Password is 3388
Displays the old first point calibration value
3
Press [1****]
Press [Enter]
[--PA--] & [1****]
[weight]
Enters and displays new first calibration value
Returns to weighing mode
8. Set and abort display lock: Set$date$to$lock$display$
Step
Operation
Display
Comments
1
Press [Set]
[PS 0]
Enters set menu.
2
Press [9485↑]
Press [Enter]
[PS 9485]
[00.00.00]
Password is 9485↑
3
Press [050820]
Press [Enter]
[05.08.20]
[PS 0]
Enters the date to lock display
Selects 08/20/05
4
Press [1713]
Press [Enter]
[PS 1713]
[weight]
Enters a 4-digit password
Example password entered is 1713
Password is 0 if [Enter] is pressed without entering a 4-digit
password
System passwords cannot be entered
Returns to weighing mode
Note:When the display is locked, the indicator will display [--PAY--] and non-operational.
$
Step
Operation
Display
Comments
1
Press [Set ]
[PS 0]
Enters set menu
2
Press [Zero ]
Press [Enter]
[PS 0]
[---------]
[0]
Sets the zero point with no load on the platform

Version 2011.12 X6 User Manual
8.1.$Abort$display$lock$
Step
Operation
Display
Comments
1
Press [Set]
[PS 0]
Enters set menu
2
Press [1713]
[PS 1713]
Password is 1713
3
Press [Enter]
[YAH00]
Aborts the lock and returns to weighing mode
8.2.$Disable$display$overload$lock$
The indicator can be programmed to lock the display when there is an overload. Once the display is locked, it has
to be disabled to return to weighing mode.
Step
Operation
Display
Comments
1
Press [Set]
[-FULL-]
&
[overload]
[PS 0]
Display cycles between [-FULL-] and [130% F·S]
2
Press [77↑49]
[PS 7749]
Password to disable overload lock is 77↑49
3
Press [Enter]
[weight]
Displays the current weight and returns to weighing mode
•The load cells will be overloaded when the weight on the platform is greater than 10% FS.
•The display will cycle between [-FULL-] and [≥F·S + 30% F·S] when the weight on the platform is greater
than FS + 30% FS in about 2 seconds.
The load cells are overloaded and the display will be locked.
9. Changing an indicator without recalibration
•Copy all the configuration values of the old indicator to the new indicator.
•Enter the four calibration points of the old indicator into the new indicator.
•Zero the display and changing of indicator is complete.
10. Display date and set time
Step
Operation
Display
Comments
1
Press [Date Time]
[08.18.36]
Displays current time of the indicator
2
Press [120000]
[12.00.00]
Sets time to 12 o’clock
3
Press [Enter]
[weight]
Returns to weighing mode
4
Press [Date Time]
[05.08.28]
Displays current date
5
Press [Enter]
[weight]
Press [Enter] if date need not be changed and returns to
weighing mode
11. Zero
Step
Operation
Display
Comments
1
Weight on platform
less than 2% FS
[ 10]
Weight on the platform is 10 kg
2
Press [Zero]
[ 0]
Zero LED is turned on
12. TareAcquire$tare
Step
Operation
Display
Comments

Version 2011.12 X6 User Manual
1
Empty truck on the
platform
[ 2568]
Displays the tare of the truck
2
Press [Tare]
[ 0]
Enters the tare of the truck and the Gross and Net LED are
turned on
12.1$Store$tare$
Step
Operation
Display
Comments
1
Tare state
[ 0]
The Tare and Net LED are turned on
2
Press [Tare]
[ 2568]
Returns to weighing mode. The Tare and Net LED are
turned on. The display shows the tare values saved
12.2.$Digital$tare$
Step
Operation
Display
Comments
1
Loaded truck on the
platform
[ 2568]
Displays Gross weight.
2
Press [1000]
[ 1000]
Enters the tare of truck.
3
Press [Tare]
[ 1568]
Displays net weight and the Tare and Net LED are turned
on.
13. Gross / Net weight
Step
Operation
Display
Comments
1
Loaded truck on
the platform
[ 2568]
Displays Gross weight
2
Press [1000]
[ 1000]
Enters the tare of truck
3
Press [Tare]
[ 1568]
Displays net weight and the Tare and Net LED are turned
on
4
Press [GWT/Net]
[ 2568]
Displays Gross weight and the Tare and net LED are
turned on
14. Display, store and recall vehicle number and tareEnter$vehicle$number
Step
Operation
Display
Comments
1
Press [159]
[ 159 ]
Enters Vehicle Number
1
Press [Truck]
[ Weight]
Displays the vehicle number and returns to weighing mode
14.1.$Display$vehicle$number$
Step
Operation
Display
Comments
1
Press [Truck]
[ 369]
Displays the vehicle number and returns to weighing mode
14.2.$Storing$tare$
Step
Operation
Display
Comments
1
Empty truck on
platform
[ 5678]
Displays tare and gross weight of the truck
2
Press [159]
[ 159]
Enters vehicle number 159
3
Press [Truck]
[- no -]
No record found
4
Press [Store]
[--0Y--]
The first weighing record is stored into memory. If memory

Version 2011.12 X6 User Manual
is full, the indicator will display [--0Y--]
5
[5678]
Returns to weighing mode
14.3.$Display$tare$and$net$weight$
14.4.$Display$the$net$and$gross$weight$
14.5.$Enter$Goods$number$
Step
Operation
Display
Comments
1
Press [Goods]
[F12-34]
Displays former goods number
2
Press [2179]
[F21-79]
Enters new goods number F=21-79
3
Press [Enter]
[weight]
Returns to weighing mode
15. Sets and display unit-price
i. Display summary
Step
Operation
Display
Comments
1
Truck on platform
[1000]
Displays gross weight of truck
2
Press [#/$]
[-sum-]
Displays the sum of goods
ii. Setting unit-price
Step
Operation
Display
Comments
1
Press [#/$] twice
[y 0.22]
Displays the stored unit-price
2
Press [50]
[y 0.50]
Enters new unit-price (0.50)
Step
Operation
Display
Comments
1
Loaded truck on
platform
[ 9800]
Displays the gross weight of the truck
2
Press [159]
[ 159]
Enters vehicle number 159
3
Press [Truck]
[ 5678]
[ 4122]
Displays the tare and net weight of the truck
Step
Operation
Display
Comments
1
Truck on platform
[ 9800]
Displays the gross weight of the truck
2
Press [159]
[ 159]
Enters vehicle number 159
3
Press [Truck]
[ 4122]
Displays the net weight of the truck and the Tare and Net
LED are turned on
4
Press [GWT/Net]
[ 9800]
Displays the gross weight of the truck

Version 2011.12 X6 User Manual
3
Press [Enter]
[weight]
Returns to weighing mode
15.1.$Storing$unit-price$
Step
Operation
Display
Comments
1
Press [#/$] twice
[y 0.50]
Displays the stored unit-price
2
Press [120]
[y 1.20]
Enters new unit-price 1.20
3
Press [Enter]
[weight]
Returns to weighing mode
4
Press [C←]
[Unp ]
5
Press [5]
[Unp 5]
Stores the 5th unit-price
6
Press [Enter]
[weight]
Returns to weighing mode
15.2.$Recall$unit-price$
Step
Operation
Display
Comments
1
Press [C→]
[np ]
2
Press [5]
[np 5]
Recalls the 5th unit-price
3
Press [Enter]
[y 1.20]
Displays the 5th unit-price for 2 seconds
[weight]
Returns to weighing mode
16. Temporarily set indicator to high resolution
Step
Operation
Display
Comments
1
[ 3000]
In weighing mode
2
Press [Set] [↑]
[3000.0]
Temporarily sets display to high resolution
3
Press [Enter]
[ 3000]
Returns to weighing mode
17. Printing
Printing can be done from an external parallel port 24-pin dot matrix printer or from the optional build-in
micro-printer.
17.1.$Manual$printing$
Operation
Display
Comments
[1543]
Displays current weight
Press [Print]
[ ]
Starts printing
[n 128]
Displays number 128 when printing completes
[1543]
Returns to weighing mode
17.2.$Automatic$printing$
Display
Comments
[1543]
Displays current weight
[ ]
Starts printing
[n 128]
Displays number 128 when printing completes

Version 2011.12 X6 User Manual
[1543]
Returns to weighing mode
$
17.3.$Advance$paper$on$the$micro-printer$
Operation
Comments
[weight]
Displays current weight
Press [↑] and hold
[ ]
Advances printer paper
18. Statistics: Records$by$total$weight
Operation
Display
Comments
Press
[Statis]
[ 1000]
Displays current weight
[n 126]
Numbers of weighing is 126
[H 3256]
Total weight’s upper 4 digits 3256
[L 2630]
Total weight’s lower 4 digits 2630 and the total weight is 32562630
[ 1000]
Returns to weighing mode
18.1. Statistics by vehicle number
Operation
Display
Comments
[ 1000]
Displays current weight
Press [Truck]
[Statis]
[ ]
Printer prints the sum according to the same vehicle. Make sure
the vehicle number is entered earlier
[ 1000]
Returns to weighing mode after printing
18.2.$Statistics$by$goods$number$
Operation
Display
Comments
[ 1000]
Displays current weight
Press [Goods]
[Statis]
[ ]
Printer prints the sum according to the same goods number
[ 1000]
Returns to weighing mode after printing
18.3.$Statistics$by$Daily$reports$
Operation
Display
Comments
[ 1000]
In weighing mode
Press [Daily]
[Statis]
[ ]
Printer prints the sum according to the daily reports
[ 1000]
Returns to weighing mode after printing
18.4.$Statistics$by$Monthly$reports$
Operation
Display
Comments
[ 0]
In weighing mode
Press [Month]
[Statis]
[ ]
Printer prints the sum according to the monthly reports

Version 2011.12 X6 User Manual
[ 0]
Returns to weighing mode after printing
19. Clear
•When the indicator is in weighing mode and [Clear] key is pressed, it will display [CLEAr].
•Press [Clear] key will clear the numbers entered from the keypad.
19.1.$Clear$the$latest$weighing$record$
Step
Operation
Display
Comments
1
Press
[Clear] [1]
[CLEAr 1]
Clears the latest weighing record from memory
2
Press [Enter]
[weight]
Returns to weighing mode
19.2.$Clear$vehicle$records$and$tares$
Step
Operation
Display
Comments
1
Press [Clear]
[CLEAr]
Press [Truck]
[ 139]
Enters vehicle number
2
Press [Enter]
[weight]
Clears vehicle number and tare record from memory
19.3.$Clear$all$weighing$records$
Step
Operation
Display
Comments
1
Press [Clear]
[CLEAr ]
2
Press [Month]
[Enter]
[weight]
Clears all weighing records
20. Printer options: Parallel$port$printer$options
Step
Operation
Display
Comments
1
Press [Set]
[PS 0]
Enters set menu
2
Press [Print]
[P1-- 11]
Printing options:
P1=00: One row format printout
P1=01: One record printout
P1=02: Two records printout
P1=03: Three records printout
P1=11: Weighing bill
3
Press [01]
[P1-- 01]
Selects P1=01
4
Press [Enter]
[P2-- 1]
Auto or Manual printing option:
P2=0: Manual printing & accumulation
P2=1: Automatic printing & accumulation
5
Press [0]
[P2-- 0]
Selects printing option P2=0
6
Press [Enter]
[P3-- 0]
Unit-price options: P3=0: kg
7
Press [0]
[P3-- 0]
Selects kg unit

Version 2011.12 X6 User Manual
8
Press [Enter]
[P4--500]
Printer will not print if the weight is less than selected
weight
P4=0 Allows printing when the weight is not stable
P4=500 Allows printing only when the weight > 500
9
Press [0]
[P4-- 0]
Selects P4=0
10
Press [Enter]
[b 2400]
Sets baud rate for RS-232 interface:
1200240048009600
11
Press [↑]
[b 4800]
Sets baud rate to 4800
12
Press [Enter]
[weight]
Returns to weighing mode
20.1.$Micro-printer$options$
Step
Operation
Display
Comments
1
Press [Set]
[PS 0]
Enters set menu
2
Press [Print]
[P1--11]
The format of printing options:
P1=00: Prints record by time
P1=10: Prints record by vehicle number
P1=20: Prints record by goods number
P1=01: One bill paper
P1=02: Two bill paper
P1=03: Three bill paper
P1=11: One weighing bill form
P1=12: Two weighing bill form
P1=13: Three weighing bill form
3
Press [01]
[P1--01]
Selects P1=01
4
Press [Enter]
[P2--00]
Manual or Automatic Printing options:
P2=00: Manual printing and manual accumulation only
when weight is stable
P2=01: Auto printing and auto accumulation
P2=10: Manual printing and manual accumulation when
Weight is not stable
5
Press [10]
[P2-- 10]
Selects P2=10
6
Press [Enter]
[P3--0 ]
See 16.1 Parallel port printer options
21. A/D counts
A/D counts can be ewed to check the load cells wiring. If the A/D counts do not change, check the load cell
wiring. Do not proceed until the A/D counts are acceptable. The minimum A/D counts are 55000 and maximum
A/D counts are 65000.
Step
Operation
Display
Comments
1
Press [Set]
[ 0]
[PS 0]
2
Press [Store]
[61252]
A/D counts are 61252.
3
Press [Enter]
[ 0]
Returns to weighing mode.

Version 2011.12 X6 User Manual
22. Series communication interface
•The RS-232 interface signals TXD1, TXD2, GND are similar to TOLEDO RS-232 interface.
•The RS-485 interface is optional.
•The following LED displays can be connected to the indicator via the RS-232 interface:
Type
MDS8
MDS5L
MDS5
MDS3
Height of word (mm)
200
130
130
82
Luminiferous components
Module
Luxury module
Lattice
Module
Exterior size
900×320×78
780×400×58
650×225×80
350×180×30
23. Record Printouts: Micro-printer$printouts
a. records by time b. records by vehicle number
1 8:01 300 123456 5000 (vehicle number 123456
2 8:10 2800 345678 5500
3 8:15 3500
c. records by goods number d. Daily Reports
1 12-01 4000 (goods number 12-01) 2003-03-08
17:00
2 12-02 3800
NO: 56 (number of accumulation)
3 12-03 4100 Add: 220000 kg (total weight)
e. records by total weight f. Monthly reports
NO: 999 (number of accumulation) 2003-03-08
17:10
W: 220000 kg (total weight) NO: 999 (number of accumulation)
Add:28820000 kg (total weight)
g. Statistics by vehicle number h. Statistics by goods number
2003-03-08 16:50 2003-03-08 16:50
#: 123456 NO: 3(vehicle number)
F:
12-01 NO: 2 (goods number 12-01)
W: 9850 kg (weight of vehicle)
W: 7500 kg (weight of goods)
i. Weighing Bill j. English weighing bill
Weighing Bill Weighing Bill
No.
No.
1
Date
Date
03-08-12
Time
Time
08:08
Vehicle
Vehicle
1233456
Goods
Goods
F12-32
Gross
Gross
4500kg
Tare
Tare
1000kg
Net
Net
3500kg
Unit-price
$
Unit-price
0.20 $
Sum
$
Sum
700 $
Remark
Remark

Version 2011.12 X6 User Manual
23.1.$Parallel$port$printer$printout$
1. Records
No.
Date
Time
Vehicle
Goods
Gross
Tare
Net
Unit-P
Sum
1
03-05-15
8:01
123456
10-25
4180
1000
3180
1.50
4770.00
2
03-05-15
8:10
567891
20-30
4180
2000
2180
1.70
3706.00
3
03-05-15
8:16
345678
11-23
5600
2200
3400
1.45
4930.00
2. Number of accumulation and total weight
Number of accumulation: 11 Total Weight: 3772.7kg
3. Weighing bill Samples
Weighing Bill kg Weighing Bill kg Weighing Bill kg
Name
Name
Name
No.
1
No.
1
No.
1
Date
2003-03-10
Date
2003-03-10
Date
2003-03-10
Time
8:02
Time
8:02
Time
8:02
Vehicle
123456
Vehicle
123456
Vehicle
123456
Goods
10-25
Goods
10-25
Goods
10-25
Gross
8200
Gross
8200
Gross
8200
Tare
3800
Tare
3800
Tare
3800
Net
4400
Net
4400
Net
4400
Unit-price
1.70
Unit-price
1.70
Unit-price
1.70
Sum
7480.00
Sum
7480.00
Sum
7480.00
4. Weighing Bill (refer to next page)

Version 2011.12 X6 User Manual
Weighing Bill
Weighing Bill
Weighing Bill
No.1
Operator
No.2
No.3
User
Company
Name and Logo
Company
Name and Logo
Company
Name and Logo
Remark
Remark
Remark
No.
No.
No.
Date
Date
Date
Time
Time
Time
Vehicle
Vehicle
Vehicle
Goods
Goods
Goods
Gross
Gross
Gross
Tare
Tare
Tare
Net
Net
Net
Unit-price
$
Unit-price
$
Unit-price
$
Sum
$
Sum
$
Sum
$
Services
We offers a full range of technical services such as on site and workshop repair, preventative maintenance and
calibration facilities.


Table of contents
Other HiWeigh Accessories manuals
