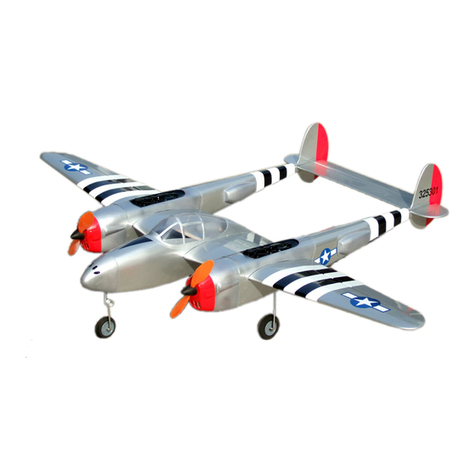
Hobby 4 CH BlitzRCWorks Sky Surfer RC Trainer... User manual

4 CH BlitzRCWorks
Sky Surfer RC Trainer Airplane

CAUTION:All instructions and warnings must be followed exactly.
Mishandling of Li-Po batteries can result in a fire,personal injury,
and/or property damage.
• By handling,charging or using the included Li-Po battery,you assume all
risks associated with lithium batteries.
•If, at any time, the battery begins to balloon or swell, discontinue use
immediately. If charging or discharging, discontinue and disconnect.
Continuing to use, charge or discharge a battery that is ballooning or
swelling can result in a fire.
• Always store the battery at room temperature in a dry area for best results.
• Always transport or temporarily store the battery in a temperature range of
40-120º F(5-49º C).Do not store battery or aircraft in a car or direct sun-
light.If stored in a hot car,the battery can catch fire or be damaged.
• Always charge batteries away from flammable materials.
• Always inspect the battery before charging and never charge dead or dam-
aged batteries.
• Always disconnect the battery after charging,and let the charger cool
between charges.
• Always consistently monitor the temperature of the battery pack while
charging.
• ONLY USE A CHARGER SPECIFICALLY DESIGNED TO CHARGE LI-PO
BATTERIES.Failure to charge the battery with a compatible charger
may cause fire, resulting in personal injury and/or property damage.
• Never discharge Li-Po cells to below 3V under load.
• Never cover warning labels with hook and loop strips.
• Never leave charging batteries unattended.
• Never charge batteries over recommended levels.
• Never attempt to dismantle or alter the charger.
• Never allow minors under the age of 14 to charge battery packs.
•Never charge batteries in extremely hot or cold places(recommended
temperature is 40-120°F or 5-49°C)or place in direct sunlight.
Charging Warnings
Meaning of Special Language:
The following terms are used throughout the product manual to indicate various levels of potential harm when operating this product:
NOTICE: If procedures are not properly followed, the risk of physical property damage AND a possibility of serious injury are likely.
CAUTION: If procedures are not properly followed, the risk of physical property damage AND a possibility of serious injury are likely.
WARNING: If procedures are not properly followed, the risk of physical property damage AND a possibility of serious injury are likely.
WARNING: Read this instruction manual entirely to become thoroughly familiar with the features of the product before
Failure to operate the product correctly can result in damage to the product or personal property and it can cause serious
operating.
injury.
This is a sophisticated hobby product.It must be operated with caution and common sense and requires some basic mechanical ability.Failure to
opera-te this product in a safe and responsible manner could result in injury or damage to the product or other property.This product is not
intended for use by children without direct adult supervision.Do not use with incompatible components or alter this product in any way contrary to
the instructions provided by
Banana Hobby. This manual contains instructions for safety,operation and maintenance.It is essential to read and
follow all the instructions and warnings in the manual prior to assembly,setup or use, in order to correctly operate the product and/or avoid
damage or serious injury.
14+
Not for children under 14
years.This is not a toy.
AGE RECOMMENDATON:
As the user of this product,you are solely responsible for operating it in a
man-ner that does not endanger yourself and/or others or result in damage
to the product and property of others.
•
Always keep a safe distance, in all directions, around your model to avoid
collisions or injury.This model is controlled by a radio signal subject to
interference from many sources outside of your control; interference can
cause momentary loss of control.
• Always operate your model in open spaces away from full-size vehicles,
traffic and people.
• Always carefully follow the directions and warnings for this and any optional
support equipment (chargers,rechargeable battery packs,etc.).
•
Always keep all chemical,small and electric parts out of the
reach of children.
• A lways avoid water exposure to all equipment that is not speciffically
designed for this purpose.Moisture causes damage to electronics.
• N ever place any portion of the model in your mouth as it could cause
serious injury or death.
• Never operate your model with low transmitter batteries.
• Always keep aircraft in sight and under control.
• Always use fully charged batteries.
•
Always keep the transmitter in the on state while aircraft is in use.
• Always remove batteries before disassembly.
• Always keep moving parts clean.
• Always keep parts dry.
•
Always let the parts cool before touching after use.
• Always remove batteries after use.
• Always ensure failsafe is properly set before flying .
• Never operate aircraft with damaged wiring.
• Never touch moving parts.
Safety Precautions and Warnings
NOTICE
Please read this manual carefully before operating this plane. We hope this manual is useful in guiding you through the installation and
adjustment of the plane so that you may successfully fly it.
Please read the entire manual before attempting to assemble anything and before contacting Banana Hobby. For contact information, please go
to the back of this manual.

C O N T E N T S
. . . . . . . . . . . . . . . . . . . . . . . . . . . . . . . . . . . . . . . . . . . . . . . . . . . . . . . . . . . . . . . . . . . . . . . . . . . . . . . . . . . 0 1
.................................................................................01
...............................................................................................................02
..........................................................................................................................03-05
About the Radio System .........................................................................................................06
How to Operate .......................................................................................................................07
Troubleshooting .................................................................................................................09-10
..............................................................................................11
Pre-Flight Checks ..................................................................................................................11
Box Contents
S p e c i f i c a t i o n s
Battery Charging
A s s e m b l y
Model Flying Precautions
Binding the Radio System .......................................................................................................08
Center of Gravity .....................................................................................................................08

Specifications
A) Fuselage
B) Main Wings
C) Horizontal Stabilizer (Elevator)
D)Vertical Stabilizer (Rudder)
E) Plane Battery
F) Balance Charger
G) Balance Charger Adapter
H) Aileron Y-Split Cable
I) Transmitter
J) Propeller
K) Wing Spar
L) Control Horn (4)
M) Linkage Rod (4)
N) Bind Plug
O) Receiver
Items are not scaled
Length: 925 mm (about 36.5 inches)
Wing Span: 1400 mm (about 55 inches)
Wing Area: 26 dm2
Wing Loading: 25g/dm2
Flying Weight: 650 grams (about 33 ounces)
Servos: 9g.
ESC: With brushed motor - 15A
With brushless motor - 20A
Battery: With brushed motor - 7.4V 1600MAh Li-Po
With brushed motor - 11.1V 1300MAh Li-Po
Flight Time: Approximately 5 minutes per charge This
varies depending on how much charge your battery
has and your throttle usage. To prolong the flight
time, you can lower the throttle and let the plane glide.
Radio Control Range: 3.000 feet (1.000 meters)
Material: EPO Foam
Measurements are approximated
Transmitter, receiver, and balance charger models may vary for each package and is
subject to change by the manufacturer without notice

The battery balance charger that you received comes with a universal adapter
equipped with a voltage system that varies depending on the country. To eliminate the
danger of voltage incompatibility, the manufacturer has supplied a universal adapter
that plugs directly to your car's battery. If you are using this glider in North America,
you can purchase a 12V DC wall adapter from any local electronics store or on our
website at www.bananahobby.com under the name "RC Airplane Parts" and then
clicking on "RC Airplane Parts & Accessories". The charging process may vary
depending on which model balance charger you receive. Please match the battery
charger that you received with one of the chargers below.
To connect the adapter to a car battery, use the end with the red and black alligator
clips. The red is for + (positive) and black is for - (negative). You don't need to turn on
your car. DO NOT charge far more than 1.5 hours. This will damage the battery.
Battery Charging
BC-3S10 2S/3S Balance Charger
1. Plug in the power source to the charger. The power light turns on.
2. Plug in the battery to the charger and the charge light will turn red.
3. When the charge is complete, the charge light will turn green.
BlitzRCWorks BZ-C005 Balance Charger for Lithium Battery Pack
1. Plug in the power source to the charger. The status LED will turn red.
2. Plug in the battery to the charger and the light will blink red.
3. When the charge is complete, this light usually turns solid red or turns off.
BlitzRCWorks V2 Balance Charger (ATI-0910)
1. Plug in the power source to the charger. The light will turn green.
2. Turn the dial between 1. 0A and 0. 3A.
This indicates how fast you want to charge you battery. The recommended setting to prolong
the battery life is 0. 3A but this is the slowest charging rate. If you are in a hurry, you can turn
the dial to 1. 0A for faster charging.
3. Plug in the battery to the charger and the light will turn green.
4. When the charge is complete, the light will turn green.
2S/3S LiPo Charger (YTF1003)
1. Plug in the power source to the charger, The power light will turn on.
2. Plug in the battery to the charger and the left light will blink red.
3. When the charge is complete, the left light will turn green.
Starmax Balance Charger (ST-E00S-A1)
1. Plug in the power source to the charger. The light on the right will turn red.
2. Plug in the battery to the charger and the left light will turn green.
3. When the charge is complete, the left light should turn off.
02

Assembly Instructions
1. Install the main wings.
Install one wing at a time. Push the black wing rod into one wing first
Fix the wing onto the fuselage with the installed wingspar. Afterwards, install the second
main wing to the other side and make sure you can access the aileron servo leads to
connect them to the y-harness on the cockpit side. Afterwards, fix the main wings onto the
fuselage and secure them with the supplied screws.
Aileron servo wire
Push this into the fuselage so
that you can connect it later.
Repeat for the other wing.
2.Remove the canopy from the fuselage to connect wires.
Look for the wires as shown inside the fuselage. These wires will need to attach to the receiver
according to their labels.
03
Canopy / Cockpit
Channel 4. Rudder
Electronic Speed Controller
Battery Conector
(Do not connect the battery yet)
Channel 3, Trottle
Channel 2, Elevator
Place glue here.

Assembly Instructions
3.Attach the aileron wires.
Since there are two ailerons (1 on each wing) but both are controlled together by a single
channel, they will need to be connected to a cable with a single end. Once you have the aileron
wires ( from the aileron servos) for both wings pushed into the fuselage, connect the Y split
cable as shown.
4.Attach the aileron servo to the aileron.
In order to control the movement of the aileron on both wings, you will need to attach the
aileron servo's push rod/clevis to the control horn using the linkage rod as shown. This is as it
appears on the underside of each wing. Make sure to secure the control horns with the
supplied screws and backing plates
5.Install the propeller.
Make sure to push the propeller all the way in and to secure it using a tool to tighten the
propeller nut.
04
Y Split
Goes into
receiver's Channel
1, Aileron
Aileron Servo wires
(These wires are from the wings)
Control Horn
Servo
Servo arm
Repeat for the other wing
Linkage rod
Aileron
Must be positioned this way with the
control horn's holes facing towards the
nose of the glider

Assembly Instructions
6.Attach the elevator servo to the horizontal stabilizer (elevator).
Glue the horizontal stabilizer into the fuselage as shown. In order to control the movement of
the elevator, you will need to attach the elevator servo's push rod/clevis to the control horn
using one of the long linkage rods that runs along the inside of the fuselage. Make sure to
secure the control horns with the supplied screws and backing plates. Please note that the
elevator and rudders use a similar push rod, do not get them confused.
7.Attach the rudder servo to the vertical stabilizer (rudder).
Glue the vertical stabilizer to the end of the fuselage first. In order to control the movement of
the rudder, you will need to attach the rudder servo's push rod/clevis to the control horn using
one of the long linkage rods that runs along the inside of the fuselage. Make sure to secure the
control horns with the supplied screws and backing plates. Please note that the elevator and
rudders use a similar push rod, do not get them confused.
05
Must be positioned
this way
Control Arm
Elevator linkage wire
Must be positioned
this way
Rudder
Elevator
Rudder linkage wire

About the Radio System
Mode two
Transmitter
Receiver
06
Carrying Handle
Throttle Trim
Throttle Stick
Rudder Trim
Bind Button
Antenna
Neck strap hook
Elevator trim
Elevator
Ailerons
Aileron trim
Power switch
Channel settings
Transmitter and receiver model may vary for each package by the manufacturer.
All radio systems are similar and work the same way.

How to Operate
07
Please make sure to read and follow these instructions carefully first before attempting to
operate the plane. This is a requirement for your safety and the safety of others. Failure to
follow these instructions can and may void your warranty. You must do a preflight check
before operating.
How to power up correctly
1. Turn on the transmitter (controller).
2. Lower the throttle stick and throttle trim both all the way down first.
3. Turn on your glider by plugging in your battery.
Make sure all the other trims (except throttle) are centered.
Make sure to turn off the glider first before the transmitter as your glider may somehow
pick up stray signals and take off.
When plugging in the battery, your glider must be on a leveled surface (i.e. ground or
table) and not in your hand.
How to speed up and slow down
Use the throttle settings. Pushing the throttle stick and throttle trim usually makes the
motor run faster; pushing these settings down usually slows down the motor. The throttle
setting may be different for some people depending on which direction the manufacturer
had set the channel settings on the transmitter.
How to hand launch
Prepare the Sky Surfer by tilting its nose up to about a 45° angle and apply roughly about
80% throttle. Afterwards, launch the model with some force and quickly apply up elevator
to keep it from pitching down. Please establish positive rate of climb, positive altitude and
positive speed before attempting flight maneuver.
How to go up and down in altitude
To gain altitude, ensure that the model is generating suitable lift. Then push the elevator
stick (right stick) down so that the elevator on the glider can move up and provide positive
pitch for a climbing setting. To reduce altitude, pitch the elevator stick up so that the
elevator on the glider can move down and provide negative pitch for descent.
How to roll left and right
Use the aileron settings. Moving the right stick left usually raises the left aileron and lowers
the right one. Moving the right stick right usually raises the right aileron and lowers the left
one. This setting also depends on what your aileron settings is on the transmitter's channel
setting.
How to turn left and right
Use the rudder settings. Moving the left stick to the left usually moves the rudder to the left.
So that when the wind hits the rudder, it applies pressure on this area and make the glider
turn left. Moving the left stick right will turn the rudder to the right, which will make the
glider turn right.

Binding the Radio System
The transmitter and receiver are usually already binded by the manufacturer, however, if you
need to bind the system by yourself, please follow these steps:
1. Turn off everything. Unplug the plane's battery and turn off the transmitter.
2. Plug in the bind plug into the receiver's BAT channel.
3. Turn on the glider by plugging in the battery. Make sure the throttle wire is plug into channel
4. Push down the bind button on the transmitter.
5. Turn on the transmitter.
6. Wait about a few seconds and unplug the bind button.
7. Unplug the glider's battery.
8. Turn off the transmitter.
9. Push the bind button up to work mode. Make sure you do not press the bind button during
flight or when operating this plane. This can also make the transmitter lose connection with the
receiver
Center of Gravity
08

TROUBLESHOOTING
03
09
1. My motor is running in reverse.
Your wires from the motor to the ESC may have been switched. How to solve this problem
depends on which version of the Sky Surfer you have.
Brushed: There are two wires connecting from the ESC to the motor. You will need to pull the
wires out from the opened space to the motor (as shown below), unsold the wires from the motor,
switch the wires around and sold it back to the motor.
Brushless: There are three wires connecting from the ESC to the motor. You will have to pull the
wires out (as shown below), unplug two of the wires, switch them and plug them back. It may take
more than one or two tries of switch another combination to get the right result
To access to the
motor wires from
the ESC.
2. The controls in the glider are not working.
You may need to either rebind the transmitter to the receiver (in other words, establish a
connection) or it could be that you plugged in the throttled channel in the receiver incorrectly. Try
going into channel 3 in the receiver, unplug the wire, flip the wire upside down (or 180°) and plug it
back to the same slot. If this still does not work, make sure the copper terminal of the throttle
connector is facing down and then proceed to rebind the radio system.
3. My ailerons and elevators are working together. I want these functions to work separately.
You have the Delta Wing Mixing function on. To turn it off, go to your transmitter and flip the first
channel setting switch. It should be labeled as "mix". Just flip the switch to the opposite direction
(i.e. If it is set to NOR, flip it to REV and viceversa).
4. My motor keeps cutting in and out.
There is more than likely a loose connection between the ESC and the motor. If you have the
brushed Sky Surfer, you may need to resold the wire. If you have the brushless Sky Surfer, you will
need to secure any loose wires.

TROUBLESHOOTING
03
03
10
5. My motor is making a screeching sound.
There may be something wrong with your motor and it can be internal. Conctact Banana Hobby as
soon as possible and do not operate this glider using the same motor. If possible, try using
another motor(of the same type or compatible) to test the glider but pleaase contact us to solve
this issue.
6. I hear beeping from the glider and no functions are working.
The amount of beeps varies depending on what is going on with the glider. The most common
issue is that your transmitter is not binded to your receiver. If you have tried the bind process
already, make sure the throttle stick and the throttle trim are both all the way down and try the
bind process again. Please contact Banana Hobby if you continue experiencing the same
problem.
7. My motor suddenly started going at full speed when I turned it on and my throttle settings were
all set to the lowest position before I turned on the plane.
There may have been some wiring issues or the manufacturer didn't set up the throttle settings
correctly on your transmitter. If this gets to happen, please unplug the the glider's battery as soon
as possible and then turn the transmitter off. Your plane may act as if it were alive if you turn off
the transmitter before the glider. After doing so, go to channel 3 (throttle) and flip this switch (i.e. If
it is set to NOR, flip it to REV and viceversa).
8. I cannot get my motor to run mbut my servos are still working.
You may need to jumpstart your ESC. Please follow these instructions:
1. Make sure everything is turned off.
2. Set all setting in the middle position or centered, except for the left vertical trim (throttle trim)
which should be located in the lowest position.
3. Have the throttle stick up at the highest position.
4. Turn on the glider by plugging in the battery.
5. Pull the throttle stick down and then take up slowly.
6. The glider should start throttling up now and the motor should be working perfectly.
9. My glider keeps veering to the left or right.
Make sure the motor is mounted on properly and that it is centered. If it is angled incorrectly, this
may affect the performance of the glider. If your motor is angled incorrectly, you will have to use a
hobby knife to take the motor out. You should be careful and you will propably have to take some
foam out but that is fine. Once you took it out, glue it back correctly.

- Do not fly this model in poor weather, high winds, low visibility, extreme temperatures, rain and storms.
- Never attempt to catch this model whilst in flight.Even a slow moving model can cause harm to yourself and to
others and this risks damage to the model.
- This model is recommended for children no younger than 14 years old. All children,
always be supervised by a capable and responsible adult when operating this model.
not matter what age, should
- Always unplug your model battery when not in use.Never leave the battery installed in the model.
- Please remember to keep clear of the propeller at all times when your flight battery is connected.
- Before flying,always turn on your transmitter first then plug your flight battery into the model.
- After flying,always unplug your battery first then turn off your radio transmitter.
-Exercise caution when charging your batteries and follow your battery manufacturer's safety guideline when
doing so.
- Select your flight area carefully. Always choose an open space that is unobstructed by trees and/or buildings and
away from crowded area.Avoid flying in area with roads,electricity/telephone poles or wires and water nearby or
within close proximity to full size air traffic.
MODEL FLYING PRECAUTIONS
PRE-FLIGHT CHECKS
1. Always range check your model before any flight (especially when flying a new
your radio manufacturer's guidelines to perform this check.
model for the first time). Follow
2.Check that all screw/bolts and mounting points are firmly secured, including control horns and clevises.
3.Only fly with fully charged batteries (both in your radio and model).Failure to do so could result in loss of
control, damage to the model and/or persons/property around you. Check that your batteries are fully charged.
With the model powered on (transmitter on first, then receiver/model) check that all surfaces are free from
damage/obstructions, moving freely in the correct directions with stick input.
4.
5.Inspect the model and prop for any damage that may have occurred during transit and listen for any unusual
sounds from the electronics when powered on. If in doubt,do not fly.
6.If this is your first flight with the model double check that the CG is at the correct position. If not, adjust the
battery position inside your model accordingly.
7.If you are an inexperienced model pilot, seek the assistance of an experienced pilot to perform these final
checks and to test fly the model for you.
11

Distributed by:
Banana Hobby
California,USA
Call or Text(626) 629-8243
WWW.bananaHobby.com
4 CH BlitzRCWorks
Sky Surfer RC Trainer Airplane
Table of contents
Other Hobby Toy manuals
Popular Toy manuals by other brands

Model Engines
Model Engines Sea Vixen instruction manual

Horizon Hobby
Horizon Hobby E-flite Turbo Timber 1.5m instruction manual

Black Horce Model
Black Horce Model L-39 Albatros BH 141 Instruction manual book

FMS
FMS Hawker Typhoon operating manual

THE WORLD MODELS
THE WORLD MODELS SPITFIRE EP instruction manual

Fisher-Price
Fisher-Price DYR80 instruction sheet