Holstein Housewares HH-09191001B User manual

Lea este manual antes de usar el artefacto y guárdelo para referencia
READ THE MANUAL BEFORE USE AND SAVE FOR FUTURE REFERENCE
DIGITAL AIR FRYER
FREIDORA DE AIRE DIGITAL
THIS MANUAL IS FOR USE WITH ALL ITEMS WITH THE
MODEL NUMBER:
HH-09191001B
ESTE MANUAL DE USUARIO APLICA PARA TODOS LOS
PRODUCTOS CON EL NÚMERO DE MODELO:
HH-09191001B

2www.holsteinhousewares.com
WHEN USING ELECTRICAL APPLIANCES, BASIC SAFETY
PRECAUTIONS SHOULD ALWAYS BE FOLLOWED TO
PREVENT THE RISK OF FIRE, ELECTRIC SHOCK, BURNS, OR
OTHER INJURIES OR DAMAGES.
1 . Read all instructions before using this appliance.
2 . Always unplug the appliance from the electrical outlet before relocating or
cleaning it.
3 . Keep hands and utensils out of the appliance when using it. Do not touch hot
surfaces. CAUTION: Surface becomes hot during use.
4 . Do NOT plug/unplug the appliance into/from the electrical outlet with your hands
wet.
5 . Do NOT operate the appliance if the power cord is cut, damaged, or if the wires
are exposed.
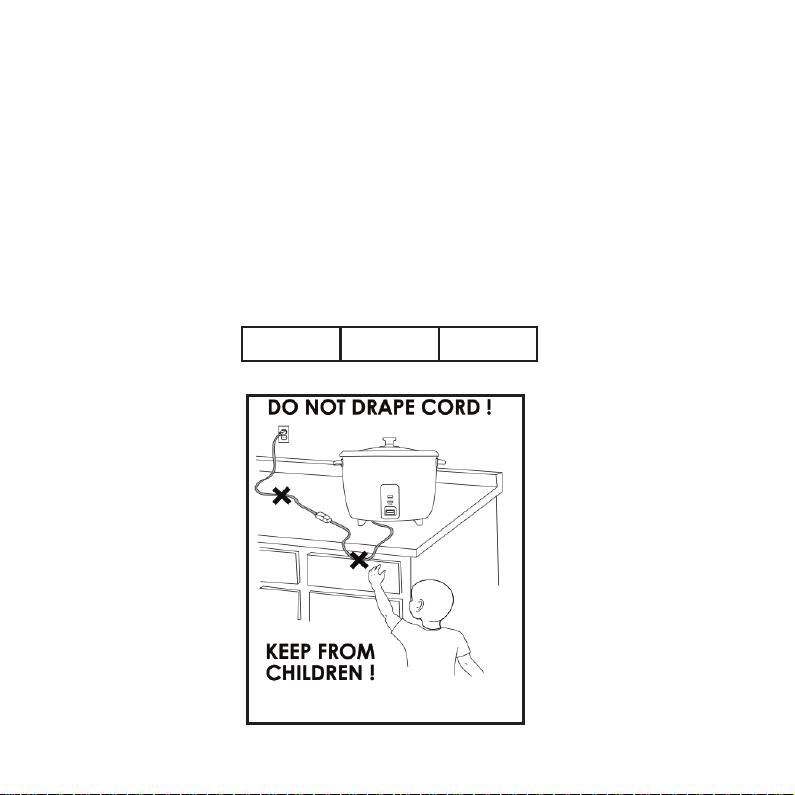
6 . Keep the power cord and appliance AWAY from heated surfaces, including
stovetops, burners, or heated ovens.
7 . Do NOT immerse in or expose the base, power cord, or plug into water or any
other liquids. NEVER use this appliance near water or wet surfaces.
8 . To disconnect the appliance from an electrical outlet, pull directly on the plug;
DO NOT pull on the power cord.
9 . Do NOT put any stress on the power cord where it connects to the appliance, as
the power cord could fray and break.
10. Do NOT operate the appliance if it malfunctions, or if it is dropped or damaged.
11. This appliance has NO user-serviceable parts. Do NOT attempt to examine or
repair this appliance yourself. ONLY qualied and approved service personnel
should perform servicing.
12. This appliance is intended for HOUSEHOLD and INTERIOR USE ONLY and cannot
be used for any other purpose. This item is NOT a toy.
IMPORTANT SAFEGUARDS

3
www.holsteinhousewares.com
13. Keep the appliance out of the reach of children and pets. This appliance is NOT
intended to be used by children and strict supervision is necessary when used
near children.
14. Do NOT leave the appliance unattended while it is in use.
15. Do NOT use any attachments or accessories that are not recommended or sold
and approved by the manufacturer for this appliance.
16. Always operate the appliance on a dry, at, stable, and heat-resistant surface to
avoid accidents.
17. Do NOT move the appliance while it is in use. Always let it cool down before
moving it.
18. Do NOT let the cord hang over the edge of a table or counter.
19. Use an oven mitt when operating the appliance for safety.
20. Do not place any of the following materials in the appliance: paper, cardboard,
plastic, and the like.
21. Do not place the appliance against a wall or against other appliances. Leave at
least 10cm of free space on the back and sides of appliance.
22. Do not place anything on top of the appliance.
23. Do not cover the air outlet when the appliance is working.
24. Filling the basket with oil may cause a re.
25. Do not touch the inside of the appliance while it is operating.
26. Always unplug the appliance while it is not in use.
27. The appliance needs approximately 30 minutes to cool down for handle or
cleaning safety.
28. AUTOMATIC SWITCH-OFF: This appliance is equipped with a timer. When the
timer has counted down to 0, the appliance produces a bell sound and switches
o automatically. To switch o manually, press “2” for more than 3 seconds.
KEEP THESE INSTRUCTIONS

4www.holsteinhousewares.com
WARNING: During the rst few minutes of initial use, you may notice
a little smoke and/or a slight odor. This is normal and should quickly
disappear. It will not recur after appliance has been used a few times.
• EXTENSION CORDS
A short power-supply cord is to be provided to reduce the risk resulting
from becoming entangled in or tripping over a longer cord. Longer
detachable power-supply cords or extension cords are available and may
be used if care is exercised in their use. If a longer detachable power-supply
cord or extension cord is used:
ADDITIONAL SAFEGUARDS
DO NOT OPERATE THE APPLIANCE IF THE
POWER CORD SHOWS ANY DAMAGE, OR IF
THE APPLIANCE WORKS INTERMITTENTLY,
OR STOPS WORKING ENTIRELY.

5
www.holsteinhousewares.com
1 . The marked electrical rating of the cord set or extension cord should be
at least as great as the electrical rating of the appliance, and
2 . The longer cord should be arranged so that it will not drape over the
countertop or tabletop where it can be tripped over, snagged, or pulled
on unintentionally by children or the user.
• POLARIZED PLUG
This appliance has a polarized plug (one blade is wider than the other). To
reduce the risk of electric shock, this plug is intended to t into a polarized
outlet only one way. If the plug does not t fully into the outlet, reverse the
plug. If it still does not t, contact a qualied electrician. Do not attempt to
modify the plug in any way.
1 . Unpack the appliance and all parts. Remove all packaging materials,
including any stickers or labels.
2 . Read these instructions carefully.
3 . Clean the interior surface of the appliance with a damp cloth. Wipe
dry with a soft cloth immediately. Do not use abrasive materials. Wipe
down the exterior with a soft dry cloth.
4 . NEVER IMMERSE THE APPLIANCE OR CORD INTO WATER OR ANY OTHER
LIQUID.
5 . Position the appliance on a stable, dry, level, and heat-resistant surface
near an electrical outlet.
6 . Unroll the electrical cord.
7 . Operate this appliance on a separate outlet and circuit from other
appliances to avoid overloading the circuit.
8 . Do not ll the pan with oil.
BEFORE FIRST USE

6www.holsteinhousewares.com
FOR HOUSEHOLD USE ONLY
CAUTION: The surfaces of the appliance get hot. To avoid accidental
burns, scalping, or steam being released while cooking, always
manipulate the appliance by using an oven mitt.
USING THE APPLIANCE
INSTRUCTIONS FOR THE AIR FRYER
1. Place the appliance on a stable, horizontal and level surface. Do not place
appliance on non-heat-resistant surfaces.
2. Put the power plug in a wall outlet. The power indicator will light up.
3. Carefully pull the basket out of the airfryer. WARNING: NEVER pour oil
or grease in the basket, as it may cause res if these safety instructions
are not followed.
4. Put the ingredients in the basket. Note: Never ll the basket beyond
the MAX indication, as this could aect the quality of the end result.
Always use common sense. Smaller pieces of food will cook faster than
larger pieces.
5. Slide the basket back into the air fryer. Never use the basket without
the grill in it. Do not touch the basket during and for some time after
use, as it gets very hot. Only hold the basket by the handle.
6. If the appliance is cold, add 3 minutes to the preparation time. NOTE:

7
www.holsteinhousewares.com
you can let the appliance preheat without any ingredients inside. Turn
the timer knob to more than 3 minutos and wait until the heating-up
light turns o (after approximately 3 minutes). Then, turn the timer
knob to the desired preparation time.
7. The timer starts counting down the set preparation time.
8. During the frying process, the working light will turn on and o. This
doesn´t reect cooking completion, only that appliance is maintaining
cooking temperature.
9. Excess oil from the ingredients is collected on the bottom of the grill.
10. Some ingredients require shaking halfway through the preparation
time. To shake the ingredients, pull the basket out of the appliance by
the handle and shake it.Then slide the basket back into the air fryer.
11. When the timer is done, pull the basket out of the appliance and place
it on a heat-resistant surface.
12. Check if the ingredients are ready. If the ingredients are not ready yet,
simply slide the basket back into the appliance and set the timer to a
few extra minutes.
13. When ingredients are ready, slide the basket out of the air fryer and
take ingredients out using a pair of tongs to lift the ingredients out of
the basket. NOTE: do not turn the basket upside down, as any excess
oil that has been collected at the bottom will leak onto the ingredients.
14. When a batch of ingredients is ready, the appliance is instantly ready
for the next batch.

8www.holsteinhousewares.com
TIPS
1. Because the air technology instantly reheats the air inside the appliance,
pulling the basket briey out of the appliance during hot air frying barely
disturbs the process.
2. Prepare ingredients similar in size to avoid some of them from being over-
cooked or undercooked.
3. Smaller ingredients usually require a slightly shorter preparation time than
larger ingredients.
4. A larger amount of ingredients only requires a slightly longer preparation time,
a smaller amount of ingredients only requires a slightly shorter preparation
time.
5. Shaking smaller ingredients halfway through the preparation time optimizes
the end result and can help prevent unevenly fried ingredients.
6. Add some oil to fresh potatoes for a crispy result. Fry your ingredients in
the airfryer within a few minutes after you added the oil.
7. Do not prepare extremely greasy ingredients such as sausages in the air-
fryer.
8. Snacks that can be prepared in an oven can also be prepared in the air-
fryer.
9. Use pre-made dough to prepare lled snacks quickly and easily. Pre-made
dough also requires a shorter preparation time than home-made dough.
CLEANING:
1. Remove the power plug from the wall outlet and let the appliance cool
down.
2. Clean the appliance after every use. Remove oil from the bottom of the
basket after every use to prevent smoke.

9
www.holsteinhousewares.com
3. Let the basket, grill and the inside of the appliance cool completely before
you start cleaning. The grill, basket and the inside of the appliance have a
non-stick coating. Do not use metal kitchen utensils or abrasive cleaning
materials to clean them, as this may damage the non-stick coating.
4. Wipe the outside of the appliance with a moist cloth.
5. Clean the grill and basket with hot water, some dishwashing liquid and a
non-abrasive sponge. You can use a degreasing liquid to remove any re-
maining dirt. Note: The grill and basket are dishwasher-safe.
6. Clean the inside of the appliance with hot water and a non-abrasive
sponge.
CAUTION:
DO NOT IMMERSE THE APPLIANCE, THE POWER CORD OR
THE PLUG INTO WATER OR ANY LIQUIDS.
TROUBLESHOOTING:
THE INGREDIENTS FRIED WITH THE AIR FRYER ARE NOT DONE.
• Ingredients that lie on top of or across each other need to be shaken half-
way through the cooking time.
• Ingredients are too thick and need to be cooked for extra minutes.
• Do not ll the basket beyond the MAX indication.
WHITE SMOKE COMES OUT OF THE APPLIANCE.
• When you fry greasy ingredients in the airfryer, a large amount of oil or
rendered fat will leak into the pan.The oil or fat produces white smoke and
the pan may heat up more than usual.This does not aect the appliance or
the end result. Midway through the cooking process you can carefully pour
o any excess oil or rendered fat from the pan and then continue cooking.

10 www.holsteinhousewares.com
STORAGE
1 . After following the steps of cleaning and maintenance, collect the
power cord.
2 . Store the appliance in a dry and clean place.
SPECIFICATIONS
Before using the appliance, verify that the domestic supply voltage matches
that indicated on the appliance.
Electrical Specications
120V~ 900W
60Hz

11
www.holsteinhousewares.com
PARTS
1.- Indicator lights
2.- Timer knob
3.- Housing
4.- Basket
5.- Basket handle
6.- Grill
7.- Air outlet
8.- Power cord

12 www.holsteinhousewares.com
Ingredients:
• 3 cups wheat our
• 1 1/2 TBSP garlic salt
• 1 TBSP ground black pepper
• 1 TBSP paprika
• 1/2 TSP chicken seasoning
• 1 TSP salt
• 1/4 TSP ground black pepper
• 2 beaten eggs
• chicken legs
Steps:
1 . Mix all dry ingredients with the our
2 . Follow the Air Fryer instructions and have it ready to use
3 . Dredge the chicken through the our mixture, then into the egg, then
back into the our mixture again. Shake o excess our.
4 . Following the Air Fryer instructions, place the chicken in the Fryer and
cook until done.
5 . Serve and enjoy!
Fried Chicken

13
www.holsteinhousewares.com
Ingredients:
• 1 sliced onion into rings
• 1 1/4 cups wheat our
• 1 TSP baking powder
• 1 TSP salt
• 1 egg
• 1 cup milk
• 3/4 cup dry breadcrumbs
Steps:
1 . Separate the onion rings. In a small bowl, mix the our, baking powder,
and salt.
2 . Dip the onion rings in the our mix until fully covered. Mix egg and milk
with the our mix. Dip the onion rings in the mix once again.
3 . Spread bread crumbs on a plate or shallow dish and dredge the mix-
covered-rings onto the crumbs, one by one.
4 . Fry the rings (a few at a time) for about 2-3 minutes or until golden
brown.
5 . Let them cool, serve, and enjoy!
Onion Rings

14 www.holsteinhousewares.com

15
www.holsteinhousewares.com

16 www.holsteinhousewares.com
AL USAR ARTEFACTOS ELÉCTRICOS, SIEMPRE DEBEN TOMARSE
PRECAUCIONES BÁSICAS DE SEGURIDAD PARA EVITAR EL RIESGO DE
INCENDIO, CHOQUE ELÉCTRICO, QUEMADURAS U OTRAS LESIONES O
DAÑOS.
1 . Lea todas las instrucciones antes de usar este artefacto.
2 . Siempre desconecte el artefacto de la toma eléctrica antes de trasladarla o limpiarla.
3 . Mantenga las manos y utensilios fuera del artefacto cuando está en uso. No toque las
supercies calientes. Utilice un guante de cocina y las asas o las perillas. PRECAUCIÓN: La
supercie se calienta durante el uso.
4 . No enchufe / desenchufe el artefacto a / de la toma eléctrica con las manos mojadas.
5 . No utilice el artefacto si el cable de alimentación está cortado, dañado, o si los cables están
expuestos.
6 . Mantenga el cable de alimentación y el artefacto alejado de supercies calientes,
incluyendo estufa de cocina, hornillas u hornos calientes.
7 . No sumerja o exponga el artefacto, cable de alimentación o el enchufe al agua o cualquier
otro líquido. NUNCA utilice este artefacto cerca del agua o supercies mojadas.
8 . Para desconectar el artefacto del toma de corriente, tire directamente del enchufe; No tire
del cable de alimentación.
9 . No ponga presión sobre el cable de alimentación donde se conecta con el artefacto, ya
que el cable de alimentación podría separarse y romperse.
10. No haga funcionar el artefacto si funciona mal, o si se ha caído o dañado.
11. Este artefacto no tiene partes reparables por el usuario. NO intente examinar o reparar este
artefacto usted mismo. Sólo el personal de servicio calicado y aprobado debe realizar el
mantenimiento.
12. Este artefacto está destinado para uso doméstico e INTERIOR SOLAMENTE y no puede ser
utilizado para cualquier otro propósito. Este artefacto no es un juguete.
13. Mantenga el artefacto fuera del alcance de los niños y las mascotas. Este artefacto no
está diseñado para ser utilizado por personas (incluidos niños) con capacidades físicas,
sensoriales o mentales reducidas, o falta de experiencia y conocimiento, a menos que
sean supervisados o instruidos acerca del uso del artefacto por una persona responsable
INSTRUCCIONES DE SEGURIDAD

17
www.holsteinhousewares.com
de su seguridad.
14. No deje el artefacto sin vigilancia mientras está en uso. Puede ocurrir un incendio si el
artefacto está cubierto o entra en contacto con material inamable incluyendo las cortinas,
paredes y similares cuando está en funcionamiento
15. NO utilice ningún aditamento o accesorio no recomendado o vendido y aprobado por el
fabricante para este artefacto. Utensilios de metal no deben insertarse en el artefacto, ya
que pueden provocar un incendio o riesgo de choque eléctrico
16. SIEMPRE opere el artefacto sobre una supercie seca, plana y estable, resistente al calor
para evitar accidentes.
17. NO mueva el artefacto mientras está en uso. Siempre deje que se enfríe antes de moverlo.
18. No deje que el cable cuelgue sobre el borde de una mesa o mostrador.
19. Utilice un guante de cocina al retirar la cesta cuando está en uso por seguridad.
20. No coloque cualquiera de los siguientes materiales en la unidad: papel, cartón, plástico y
similares.
21. No apoye el artefacto sobre paredes u otros artefactos. Deje por lo menos 10cm de espacio
libre hacia atrás y a los lados del artefacto.
22. No coloque nada sobre el artefacto.
23. No cubra la salida de aire mientras artefacto está funcionando.
24. No llene la cesta con aceite, ya que podría causar un incendio.
25. No toque la parte interior del artefacto mientras esté en funcionamiento.
26. Siempre desconecte el artefacto cuando no esté en uso.
27. El artefacto necesita aproximadamente 30 minutos para enfriarse por completo.
28. APAGADO AUTOMATICO: este artefacto está equipado con un temporizador. Cuando el
temporizadorllegaa 0, elartefactoemite unsonido decampanayse apaga automáticamente.
Para apagar manualmente, presione el ¨2¨por más de 3 segundos.
¡CONSERVE ESTAS INSTRUCCIONES!

18 www.holsteinhousewares.com
PRECAUCIÓN: Durante los primeros minutos de uso inicial, usted
puede notar un poco de humo y/o un olor del artefacto. Esto es
normal y desaparecerá. No va a reaparecer después de que el ar-
tefacto se haya utilizado un par de veces. Antes de usar la freidora
por primera vez, lave la olla y la cesta con agua tibia y jabón. Seque
cuidadosamente la olla para mantener el buen aspecto estético. No
utilice el artefacto con aceite o grasa.
• CABLES DE EXTENSIÓN
Se provee un cordón eléctrico corto para reducir el riesgo de enredarse o
tropezar. Pueden usarse cables de extensión más largos si se toman las
precauciones necesarias en su uso. Si se usa un cable de extensión:
1. Las características eléctricas del cable de extensión deben ser iguales o
superiores a las del artefacto.
INSTRUCCIONES DE SEGURIDAD
ADICIONALES
NO USE EL ARTEFACTO SI EL CORDÓN
ELÉCTRICO MUESTRA CUALQUIER TIPO DE
DAÑO O SI EL ARTEFACTO FUNCIONA
INTERMITENTEMENTE O DEJA DE
FUNCIONAR POR COMPLETO.

19
www.holsteinhousewares.com
2. El cable debe colocarse de forma que no cuelgue para evitar que puedan
tropezar, enredarse o tirar de él accidentalmente (especialmente por niños
o mascotas).
• ENCHUFE POLARIZADO.
Este electrodoméstico tiene un enchufe polarizado (una clavija del enchufe
es más ancha que la otra). Para reducir el riesgo de descarga eléctrica, este
enchufe está diseñado para entrar de un sólo modo en el toma corriente. Si
el enchufe no entra totalmente en el toma corriente, invierta su posición. Si
aun así no entrase, póngase en contacto con un electricista calicado. No
intente modicar el enchufe de ninguna manera.
1 . Desempaque cuidadosamente el artefacto y todas las partes. Retire
todos los materiales de embalaje, incluyendo etiquetas de promoción
que diculten el uso del artefacto.
2 . Lea las instrucciones de uso cuidadosamente.
3 . Limpie las supercies interiores y exteriores del artefacto con un paño
húmedo. Seque con un paño suave de inmediato. No use materiales
abrasivos.
4 . NUNCA SUMERJA EL ARTEFACTO O EL CABLE EN AGUA U OTROS
LÍQUIDOS.
5 . Coloque el artefacto en un lugar estable, seco, y resistente al calor.
6 . Desenrolle el cordón eléctrico.
7 . Utilice este artefacto en un tomacorriente separado del circuito de otros
artefactos para evitar la sobrecarga del circuito.
8 . No llene la cesta con aceite
ANTES DEL PRIMER USO

20 www.holsteinhousewares.com
SOLO PARA USO DOMÉSTICO
PRECAUCION: Las supercies del artefacto se calientan. Siempre
manipule el artefacto utilizando un guante de cocina para evitar
quemaduras mientras está en uso.
FUNCIONAMIENTO
INSTRUCCIONES DE USO DE LA FREIDORA DE
AIRE.
1. Coloque el artefacto sobre una supercie plana, estable y resistente al
calor.
2. Enchufe el cordón eléctrico al tomacorriente. La luz indicadora se
encenderá.
3. Utilizando la manilla, saque cuidadosamente la cesta de la freidora.
IMPORTANTE ADVERTENCIA DE SEGURIDAD: NO vierta aceite o grasa
en la cesta o la parrilla, ya que podría causar incendios si no se res-
petan estas precauciones
4. Añada la comida en la cesta primeramente. No exceda la cantidad
máxima permitida, ya que esto puede afectar la calidad de la comida.
Siempre use el sentido común. Usar trozos más pequeños permitirá
que se cocinen un poco más rápido que trozos más grandes.
5. Deslice la cesta dentro la freidora de aire y asegúrese de que quede
bien cerrado. NUNCA use la cesta sin la parrilla adentro.
6. Si el artefacto está frío, agregue 3 minutos al tiempo de preparación.
NOTA: puede permitir que el artefacto se precaliente, por no más de 3
Table of contents
Languages:
Other Holstein Housewares Fryer manuals