HOLTOP XHBQ-D2DCTHC User manual

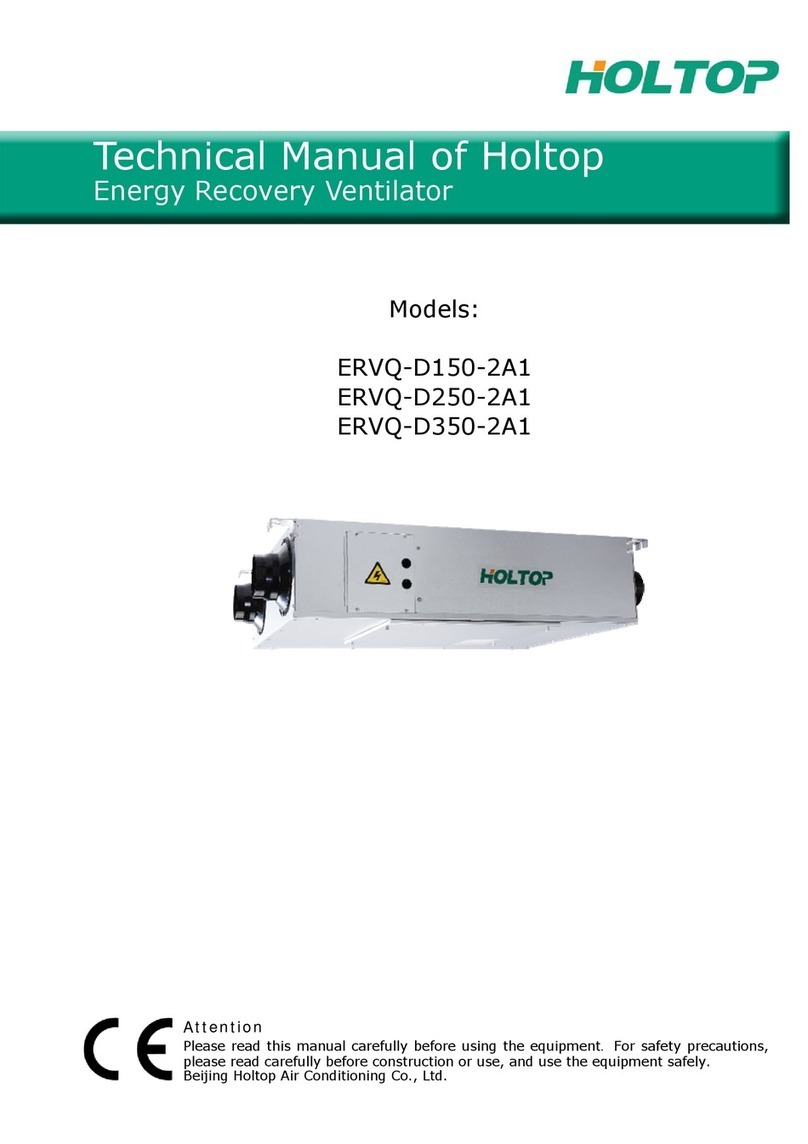
Technical Manual of Holtop
Energy Recovery Ventilator
Models:
XHBQ-D2DCTHC XHBQ-D2DCPMTHC
XHBQ-D3DCTHC XHBQ-D3DCPMTHC
XHBQ-D4DCTHC XHBQ-D4DCPMTHC
XHBQ-D6DCTHC XHBQ-D6DCPMTHC
XHBQ-D8DCTHC XHBQ-D8DCPMTHC
XHBQ-D10DCTHC XHBQ-D10DCPMTHC
XHBQ-D13DCTHC XHBQ-D13DCPMTHC
XHBQ-D15DCTHC XHBQ-D15DCPMTHC
XHBQ-D20DCTHC XHBQ-D20DCPMTHC
XHBQ-D26DCTHC XHBQ-D26DCPMTHC
Attention
Please read this manual carefully before using the equipment. For safety precautions,
please read carefully before const n ructioor use, and use the equipment safely.

Contents
Safety Considerations
Unit Specifications
Dimension
Installation Considerations
Electrical Installation
Precautions for use
Controller Instructions
Maintenance
Failure diagnosis
3-4
5-8
9-10
11-14
15-17
18
19-26
27
27

Safety Considerations
3
Safety attentions
Please read the following safety instructions before installation. And ensure that the unit is installed
correctly.
Please observe all instruction in order to avoid any injury or damage to equipment or property.
The following symbols indicate potential levels of caution.
Situations with a risk or death or
serious injure.
Situations with a risk of injury or
equipment/property damage.
The following symbols indicate compliance which must be observed
Not allowed or Stop
Must follow or obliged
Installation to be carried out by qualified
person, End Users must not install, move or
re-install this equipment by themselves
An anti-bird net or similar device should be
installed to outside vents. Ensure there are
no obstructions to or in the ducts
Installation engineers must follow this man-
ual strictly. Improper action can create a
health hazard and reduce efficiency of the
unit
Fresh air vent must be far enough away
from any flue gas discharge or areas where
hazardous vapors are present
Unit must be installed strictly following this
manual and mounted to a weight bearing
surface for the weight of the unit
Electric engineering must follow national
regulations and the manual, use special ca-
bles. Less capacity cables and improper en-
gineering can cause electric shock or fire.
During maintenance or repair, the unit and
circuit breaker must be switched off. Other-
wise electric shock could occur.
Ground wire cannot be connected to gas
pipe, water pipe, lighting rod or telephone
line etc. Incorrect grounding can cause
electric shock.

Safety Considerations
4
Power cable and wires must be installed by
a qualified electrical engineer. Improper
connection can cause over heating. Fire and
loss of efficiency.
To avoid condensation, insulation should be
fitted to fresh air ducts. Other ducting may
also require insulation depending on dew
point conditions.
Insulation between the metal ducting and
wall penetration must be installed if the
ducting penetrates metal wall cladding, to
avoid risk of electric shock or current leak-
age.
The cover of wiring box must be pressed
down and closed to avoid dust and dirt en-
tering. Excess dust and dirt can cause over-
heating of terminals and result in fire or
electric shock.
Use only approved installation hardware
and accessories. Failure to observe can re-
sult in fire risk, electric shock and equip-
ment failure
Where the unit is positioned, at high level in
a hot humid situation. Please ensure suffi-
cient ventilation is available
The outdoor ducts must be installed facing
downwards to avoid rain water entering.
Improper installation can cause water leak-
age.
Correctly sized MCB must be fitted to the
unit suitable earth leakage protection
should also be installed to avoid risk of elec-
tric shock or fire.
Do not install the unit in an extremely hu-
mid conditions, as it may result in electric
shock and pose a fire risk.
Do not use the units as the primary kitchen
extract grease and fatty deposits can block
the heat exchanger, filter and pose a fire
risk.
Don not install the unit in areas there any
poisonous or caustic gases are present.
Do not install the unit near open flame as it
may result in over heating and pose a fire
risk
Acidic or alkali environments can cause poi-
soning or a fire
Rated supply voltage must be maintained,
otherwise this may cause fire.

Specifications
5
Model
XHBQ-
D2DCTHC
XHBQ-
D3DCTHC
XHBQ-
D4DCTHC
XHBQ-
D6DCTHC
XHBQ-
D8DCTHC
Performance
Airflow(m3/h)
200
300
400
600
800
Airflow (l/s)
56
83
111
167
222
External pressure(Pa)
75
85
88
97
100
Enth. Eff (%)
Cooling
55-66
57-70
57-70
59-74
55-66
Heating
59-70
61-72
60-74
61-78
57-76
Temp. Eff (%)
70-82
68-82
69-83
70-83
68-83
Noise Db(A)
31.5
34.5
37.5
39
41
Power Supply
220~240V/1Ph/50Hz
Input Power (W)
43
80
116
162
290
Power Cable
3x1.5mm2
Control Cable
2x0.5mm2
Control
Standard
Yes (7-Day Time-clock)
(BMS)Modbus
Yes
Fan Type
BLDC Fan Motors
Fan Speeds (Supply)
10 Speed Fan Control
Fan Speeds (Exhaust)
10 Speed Fan Control
Summer Bypass
Yes (Automatic with adjustable range)
Defrost
Yes (Automatic with adjustable range)
CO2Control
Optional sensor (On / Off control with adjustable range)
Fan Boost Contacts
Yes (1x available connections to Volt-Free contacts: Close= boost to High
Speed)
Fire Shutdown
Yes (1x available connection to Volt-Free contacts: Closed = Shutdown)
Weight (Kg)
23
25
31
34
53
Size (WxHxD) (mm)
666*580*264
744*599*270
744*804*270
867*902*280
1134*884*388
Duct Size (mm)
150
150
150
200
250

Specifications
6
Model
XHBQ-
D10DCTHC
XHBQ-
D13DCTHC
XHBQ-
D15DCTHC
XHBQ-
D20DCTHC
XHBQ-
D26DCTHC
Performance
Airflow(m3/h)
1000
1300
1500
2000
2600
Airflow (l/s)
278
360
417
555
722
External pressure(Pa)
86
90
72
77
81
Enth. Eff (%)
Cooling
58-70
56-68
63-71
60-68
56-68
Heating
62-75
59-70
65-73
62-72
59-70
Temp. Eff (%)
70-83
70-83
76-80
76-82
70-83
Noise dB(A)
42
43
50
51.5
53
Power Supply
220~240V/1Ph/50Hz
Input Power (W)
327
424
700
724
848
Power Cable
3x1.5mm2
Control Cable
2x0.5mm2
Control
Standard
Yes (7-Day Time-clock)
(BMS)
Modbus
Yes
Fan Type
BLDC Fan Motors
Fan Speeds (Supply)
10 Speed Fan Control
Fan Speeds (Exhaust)
10 Speed Fan Control
Summer Bypass
Yes (Automatic with adjustable range)
Defrost
Yes (Automatic with adjustable range)
CO2Control
Optional sensor (On / Off control with adjustable range)
Fan Boost Contacts
Yes (1x available connections to Volt-Free contacts: Close= boost to High
Speed)
Fire Shutdown
Yes (1x available connection to Volt-Free contacts: Closed = Shutdown)
Weight (Kg)
61
71
106
122
142
Size (WxHxD) (mm)
1134*1134*388
1193*1243*388
1134*884*776
1134*1134*776
1193*1243*776
Duct Size (mm)
250
250
650*280
650*280
650*280

Specifications
7
Model
XHBQ-
D2DCPMTHC
XHBQ-
D3DCPMTHC
XHBQ-
D4DCPMTHC
XHBQ-
D6DCPMTHC
XHBQ-
D8DCPMTHC
Performance
Airflow(m3/h)
200
300
400
600
800
Airflow (l/s)
56
83
111
167
222
External pressure(Pa)
65
75
78
87
90
Enth. Eff (%)
Cooling
55-66
57-70
57-70
59-74
55-66
Heating
59-70
61-72
60-74
61-78
57-76
Temp. Eff (%)
70-82
68-82
69-83
70-83
68-83
Noise Db(A)
31.5
34.5
37.5
39
41
Power Supply
220~240V/1Ph/50Hz
Input Power (W)
43
80
116
162
290
Power Cable
3x1.5mm2
Control Cable
2x0.5mm2
Control
Standard
Yes (7-Day Time-clock)
(BMS)
Modbus
Yes
Fan Type
BLDC Fan Motors
Fan Speeds (Supply)
10 Speed Fan Control
Fan Speeds (Exhaust)
10 Speed Fan Control
Summer Bypass
Yes (Automatic with adjustable range)
Defrost
Yes (Automatic with adjustable range)
CO2Control
Optional sensor (On / Off control with adjustable range)
Fan Boost Contacts
Yes (1x available connections to Volt-Free contacts: Close= boost to High
Speed)
Fire Shutdown
Yes (1x available connection to Volt-Free contacts: Closed = Shutdown)
Weight (Kg)
24.5
34.5
37.5
35
54
Size (WxHxD) (mm)
736*580*264
814*599*270
814*804*270
867*902*280
1134*884*388
Duct Size (mm)
150
150
150
200
250

Specifications
8
Model
XHBQ-
D10DCPMTHC
XHBQ-
D13DCPMTHC
XHBQ-
D15DCPMTHC
XHBQ-
D20DCPMTHC
XHBQ-
D26DCPMTHC
Performance
Airflow(m3/h)
1000
1300
1500
2000
2600
Airflow (l/s)
278
360
417
555
722
External pressure(Pa)
76
80
62
67
71
Enth. Eff (%)
Cooling
58-70
56-68
63-71
60-68
56-68
Heating
62-75
59-70
65-73
62-72
59-70
Temp. Eff (%)
70-83
70-83
76-80
76-82
70-83
Noise dB(A)
42
43
50
51.5
53
Power Supply
220~240V/1Ph/50Hz
Input Power (W)
327
424
700
724
848
Power Cable
3x1.5mm2
Control Cable
2x0.5mm2
Control
Standard
Yes (7-Day Time-clock)
(BMS)
Modbus
Yes
Fan Type
BLDC Fan Motors
Fan Speeds (Supply)
10 Speed Fan Control
Fan Speeds (Exhaust)
10 Speed Fan Control
Summer Bypass
Yes (Automatic with adjustable range)
Defrost
Yes (Automatic with adjustable range)
CO2Control
Optional sensor (On / Off control with adjustable range)
Fan Boost Contacts
Yes (1x available connections to Volt-Free contacts: Close= boost to High
Speed)
Fire Shutdown
Yes (1x available connection to Volt-Free contacts: Closed = Shutdown)
Weight (Kg)
62
72
108
124
144
Size (WxHxD) (mm)
1134*1134*388
1193*1243*388
1134*884*776
1134*1134*776
1193*1243*776
Duct Size (mm)
250
250
650*280
650*280
650*280

Dimensions
9
EA
RA
OA
SA
EA
OA
SA
RA
EA
RA
OA
SA
EA
OA
SA
RA
Electric
Box
Electric
Box
Electric
Box
Electric
Box
Dimensions
XHBQ-D2DCTHC XHBQ-D3DCTHC
Model
A
B
C
E
F
G
I
K
M
N
XHBQ-D2DCTHC
580
666
100
725
510
19
290
20
264
Φ144
XHBQ-D3DCTHC
599
744
100
675
657
19
315
111
270
Φ144
XHBQ-D4DCTHC
804
744
100
675
862
19
480
111
270
Φ144
XHBQ-D2DCPMTHC XHBQ-D3DCPMTHC
XHBQ-D4DCPMTHC
Model
A
B
C
E
F
G
I
K
M
N
XHBQ-D2DCPMTHC
580
736
100
795
510
19
290
20
264
Φ144
XHBQ-D3DCPMTHC
599
814
100
745
657
19
315
111
270
Φ144
XHBQ-D4DCPMTHC
804
814
100
745
860
19
480
111
270
Φ144

Dimensions
10
OA
RA
EA
SA
OA
RA
EA
SA
Dimensions
XHBQ-D6DCTHC~XHBQ-D10DCTHC
XHBQ-D6DCPMTHC~XHBQ-D10DCPMTHC
XHBQ-D13DCTHC
XHBQ-D13DCPMTHC
Model
A
B
C
D
E
F
G
L
K
M
M1
M2
N
XHBQ-D6DCTHC
902
867
107
197
833.5
922
20.5
451.5
115.5
280
139.5
Φ194
XHBQ-D8DCTHC
884
1134
85
202
818
1189
20.5
378
128
388
194
Φ242
XHBQ-D10DCTHC
1134
1134
85
202
1068
1189
20.5
628
128
388
194
Φ242
XHBQ-D13DCTHC
1243
1193
85
241
1172.5
1248
20.5
629.5
133
388
191
241
Φ242
XHBQ-D6DCPMTHC
902
867
107
197
833.5
922
20.5
451.5
115.5
280
139.5
Φ194
XHBQ-D8DCPMTHC
884
1134
85
202
818
1189
20.5
378
128
388
194
Φ242
XHBQ-D10DCPMTHC
1134
1134
85
202
1068
1189
20.5
628
128
388
194
Φ242
XHBQ-D13DCPMTHC
1243
1193
85
241
1173
1248
20.5
629.5
133
388
191
241
Φ242
XHBQ-D15DCTHC~XHBQ-D26DCTHC
XHBQ-D15DCPMTHC~XHBQ-D26DCPMTHC
Model
A
B
C
D
E
F
G
H
I
XHBQ-D15DCTHC
1434
1134
1189
884
818
378
776
650
280
XHBQ-D20DCTHC
1434
1134
1189
1134
1068
628
776
650
280
XHBQ-D26DCTHC
1493
1193
1248
1243
1173
629.5
776
650
280
XHBQ-D15DCPMTHC
1434
1134
1189
884
818
378
776
650
280
XHBQ-D20DCPMTHC
1434
1134
1189
1134
1068
628
776
650
280
XHBQ-D26DCPMTHC
1493
1193
1248
1243
1173
629.5
776
650
280
The
access
door
Electric
control
box
Electric
control
box
The
access
door

Installation Considerations
11
Installation Considerations
1. Protect the unit to avoid dust or other obstructions entering the unit and accessories during installa-
A 600
EA
OA
EA
OA
OA
EA
XHBQ-D2DCTHC
XHBQ-D2DCPMTHC
XHBQ-D3DCTHC
XHBQ-D4DCTHC
XHBQ-D3DCPMTHC
XHBQD4DCPMTHC
XHBQ-D6DCTHC~XHBQ-D26DCTHC
XHBQ-D6DCPMTHC~XHBQ-D26DCPMTHC
2. Be sure the ceiling height is no less than the Figures in above table B column。
XHBQ-D2DCTHC,XHBQ-D2DCPMTHC
XHBQ-D6DCTHC~XHBQ-D26DCTHC
XHBQ-D6DCPMTHC~XHBQ-D26DCPMTHC
XHBQ-D3DCTHC, XHBQ-D4DCTHC
XHBQ-D3DCPMTHC, XHBQ-D4DCPMTHC
Model
A
Inner ceiling
height B
XHBQ-D6DCTHC
902
330
XHBQ-D8DCTHC
884
450
XHBQ-D10DCTHC
1134
450
XHBQ-D13DCTHC
1243
450
XHBQ-D15DCTHC
884
450
XHBQ-D20DCTHC
1134
450
XHBQ-D26DCTHC
1193
450
XHBQ-D6DCPMTHC
902
330
XHBQ-D8DCPMTHC
884
450
XHBQ-D10DCPMTHC
1134
450
XHBQ-D13DCPMTHC
1243
450
XHBQ-D15DCPMTHC
884
450
XHBQ-D20DCPMTHC
1134
450
XHBQ-D26DCPMTHC
1193
450
Model
A
Inner ceiling
height B
XHBQ-D2DCTHC
580
320
XHBQ-D3DCTHC
599
320
XHBQ-D4DCTHC
804
320
XHBQ-D2DCPMTHC
580
320
XHBQ-D3DCPMTHC
599
320
XHBQ-D4DCPMTHC
804
320
A
600
RA
SA
450
SERVICE
PORT
A
600
RA
SA
450
SERVICE
PORT
RA
SA
450
SERVICE PORT
450
B
450
450

Installation Considerations
12
螺母
垫圈
吊装部件
垫圈
螺母
天花板吊装螺杆
Suspending screw pole
(
Φ
10-
Φ
12)
Nut
Gasket
Suspending Part
Gasket
Nut
3. Unit must not be installed close to boiler flues.
4. Fol- lowing phenome-
non should be avoided
in the ducting installation.
Serve bends Multiple direction changes Multiple reducers/ crimped duct
5. Exessive use of flex-duct and long flex-duct runs should be avoided.
6. Fire dampers must be fitted as per national and local fire regulations.
7. Unit must not be exposed to ambient temperature above 40℃and should not face an open fire.
8. Take action to avoid dew and frost.
As shown by drawing below, unit will produce dew or frost when saturation curve is formed from A to C.
Use pre-heater to ensure conditions are kept to right of the curve (B to B',to move C to C) to prevent
condensation or frost formation.
9. To avoid the outdoor exhaust air cycling back to indoor, the distance between the two vents installed
on the outside wall should be over 1000mm.
Physical Installation
1.Installer to prepare suitable threaded hangers with adjustable nuts and gaskets.
2.Install as shown by the image above. Installation must be level and securely fastened.
3.Failure to observe proper fixing could result in injury, equipment damage and excessive vibration.
Uneven installation will also effect damper operation.

Installation Considerations
13
坡度1/100-1/50
Gradient1/100-1/50
Ducting
1. Connection of unit vents and ducts should be taped or sealed to prevent air leakage, and should com-
ply to relevant guidelines and regulations.
2. The two outdoor vents should face downward toward the outside to prevent any rain water ingress.
(angle 1/100 1/50).
3. Insulation must be with the two ducts outside to prevent condensation.
Material: glass cotton, Thickness: 25mm

Installation Considerations
14
Installation Diagram
XHBQ-D2DCTHC~XHBQ-D4DCTHC
XHBQ-D2DCPMTHC~XHBQ-D4DCPMTHC
EA
XHBQ-D6DCTHC~XHBQ-D26DCTHC
XHBQ-D6DCPMTHC~XHBQ-D26DCPMTHC
Suspending Pole
Exhaust Duct
Supply Duct
SA
RA
Return Duct
Supply Air
insulation
Return Air
OA
Outside Fresh Air Duct

Electrical Installation
15
Power must be isolated during installation and before maintenance to avoid injury by electric shock. The
specifications of cables must strictly match the requirements, otherwise it may cause performance fail-
ure and danger of electric shock or fire.
Power supply is AC220V/50HZ/1 Phase. Open the cover of electrical box, connect the 3 wires (L/N/GND)
to the terminals and connect the cable of the control panel to the board according to the wiring dia-
gram, and join the control panel to the cable. A cable fixing device offered by installer is recommended
Model
Spec. of power supply
cable
Spec. of normal controller cable
XHBQ-D2DCTHC to XHBQ-D26DCTHC
3×1.5mm2
2×0.5mm2
XHBQ-D2DCPMTHC to XHBQ-D26DCPMTHC
We do not accept any liability for any problems caused by the user’s self and non-authorized re-
engineering to the electrical and control systems.

Electrical Installation
16
Wiring Diagrams
Supply
fan
Exhaust
fan
Yellow Black Yellow Black
Blue White Red Blue White Red
FAN1
FAN2
Control panel
CO2 sensor
AC220V
Masterslave panel
communication
PCB Board
A B
Input4
Input3
Input2
Input1
Reserved port for RS485 connection
Bypass control switch
Differential pressuresignal input
External ON/OFF signal
Fire signal input (Default is short circuit)
Valve
1059
Temp1 Temp2 Temp3
Temp4
Temperature and humidity sensor
Black
White
Yellow
Bypass-
valve
Model
Power supply
Panel type
XHBQ-D2DCTHC to XHBQ-D13DCTHC
220V~50Hz
HDK-CK-DC
XHBQ-D2DCPMTHC to XHBQ-D13DCPMTHC
RH
C02
D1+
D1-
VCC
VSP
FG
Display
Error
D1+
D1-
VCC
VSP
FG
RUN
Heater2
Heater1
PE N L
PE N L
Electricalpreheating
Electrical heating
Running signal
Fault signal
RAtemp.
OA temp.
FR(EA) temp.
SA temp.

Electrical Installation
17
Wiring Diagrams
Supply
fan
Exhaust
fan
Yellow Black Yellow Black
Blue White Red Blue White Red
FAN1 FAN2
Control panel
CO2 sensor
AC220V
Masterslave panel
communication
PCB Board
A B
Input4
Input3
Input2
Input1
Reserved port for RS485 connection
Bypass control switch
Differential pressure signal input
External ON/OFF signal
Fire signal input(Default is short circuit)
Valve
1059
Temp1 Temp2 Temp3 Temp4
Temperature and humidity sensor
Black White Yellow
Bypass-
valve
Supply
fan
Exhaust
fan
Yellow Black Yellow Black
Blue White Red Blue White Red
FAN1 FAN2
A B
AC220V
Masterslave panel
communication
PCB Board
Input4
Input3
Input2
Input1
Valve
1059
Temp1 Temp2 Temp3 Temp4
Black White Yellow
Bypass-
valve
Model
Power supply
Panel type
XHBQ-D15DCTHC to XHBQ-D26DCTHC
220V~50Hz
HDK-CK-DC
XHBQ-D15DCPMTHC to XHBQ-D26DCPMTHC
RH
RH
C02
C02
D1+
D1-
VCC
VSP
FG
D1+
D1-
VCC
VSP
FG
Display
Display
Error
Error
D1+
D1-
VCC
VSP
FG
D1+
D1-
VCC
VSP
FG
RUN
RUN
Heater2
Heater2
Heater1
Heater1
PE
N
L
PE
N
L
PE
N
L
PE
N
L
Electrical preheating
Electrical heating
Running signal
Fault signal
RA temp.
OA temp.
FR(EA) temp.
SA temp.

18
Commissioning
1. Check the wiring after the installation works are completed, and there must be commissioning.
2. Turn on the power supply, and carry out the commissioning and operation according to controller
instructions. Check the working conditions of the blower, exhaust fan and bypass. The motor will stop
running for more than 10 seconds when the bypass valve of the ventilator is operating.
3. When abnormalities occur in commissioning, it can be thought that the connection is wrong. To
prevent electric shock, please turn off the special circuit breaker immediately and reconnect the wire
Precautions for Use
Loose or incorrect wiring connection can
cause explosion or fire when the unit starts
to work. Use only rated power voltage.
Don’t put fingers or objects into vents of
fresh air or exhaust air supply. Injury may
be caused by the rotation of the impeller.
Don’t install, move or re-install the unit by
yourself. Improper action may cause unit
instability, electric shock or fire.
Don’t change, disassemble or repair the
unit by yourself. Improper action may cause
electric shock or fire.
Running the unit continuously in an abnormal
status may cause failure, electric shock or
fire.
Switch off the power and breaker when you
clean the exchanger.
Don’t site intake supply vent in hot and hu-
mid
conditions , as it may cause failure, current
leakage or fire.
Don’t put any burner directly facing the
fresh air discharge, otherwise it may cause
an insufficient burning.
Isolate power during extended off periods
Isolate power and take care when cleaning
unit. (Risk of electric shock)
Observe guidelines and regulations relating
to incomplete combustion when use is asso-
ciated with fuel burning appliances.
Clean the filter regularly. A blocked filter may
result in poor indoor air quality.
Precautions for Use

19
Repair
Fan speed
sleep
Temperature type
Temperature display
Auto mode
Filter alarm
Bypass on/off
Clock
ON/OFF Button
MODE Button
UP Button
DOWN Button
SET Button
Weekly timer on/off
Week
Communication
Display screen and Buttons
Operation Instructions
1. On/off button: turn on or turn off the equipment. When it is turned on, the back light of the display
screen will be on, and it will be off if there is no operation within 30 seconds ;when the back light is off
under the power on state, press any button and it will be on again ; press On/off button for more than 6
seconds to lock the screen, and press it again for more than 6 seconds to unlock it. Do not operate un-
der the lock state. When the equipment is off, the display screen goes out. The air volume mode is kept
2. Press MODE to switch to display the detected items: the default interface in starting up is RA. Press-
ing lightly the MODE button, the users can choose or switch to the state of other detected items. The
sequence is RA-OA-FR(EA)-SA-Setting-CO2-Humidity (indoor temperature - outdoor temperature - ex-
haust temperature - supply temperature - setting temperature - concentration of carbon dioxide - hu-
Interface display of timer on/off mode: time, week, timer on, timer off, air volume and indoor tempera-
Interface display of sleep mode: sleep icon, time, week and indoor temperature.
Touch Screen Controller Introduction

20
Touch Screen Controller Introduction
Current humidity
HUMI.
Setting humidity
COMM
COMM
COMM
RA temperature OA temperature
FR temperature SA temperature
SA temperature setting CO2 concentration
Humidity control
Timing on/off mode Sleep mode
COMM
COMM
Touch Screen Controller Introduction
This manual suits for next models
19
Table of contents
Other HOLTOP Fan manuals