manuals.online logo
Brands
  1. Home
  2. •
  3. Brands
  4. •
  5. Holux
  6. •
  7. GPS
  8. •
  9. Holux M-1000 User manual

Holux M-1000 User manual

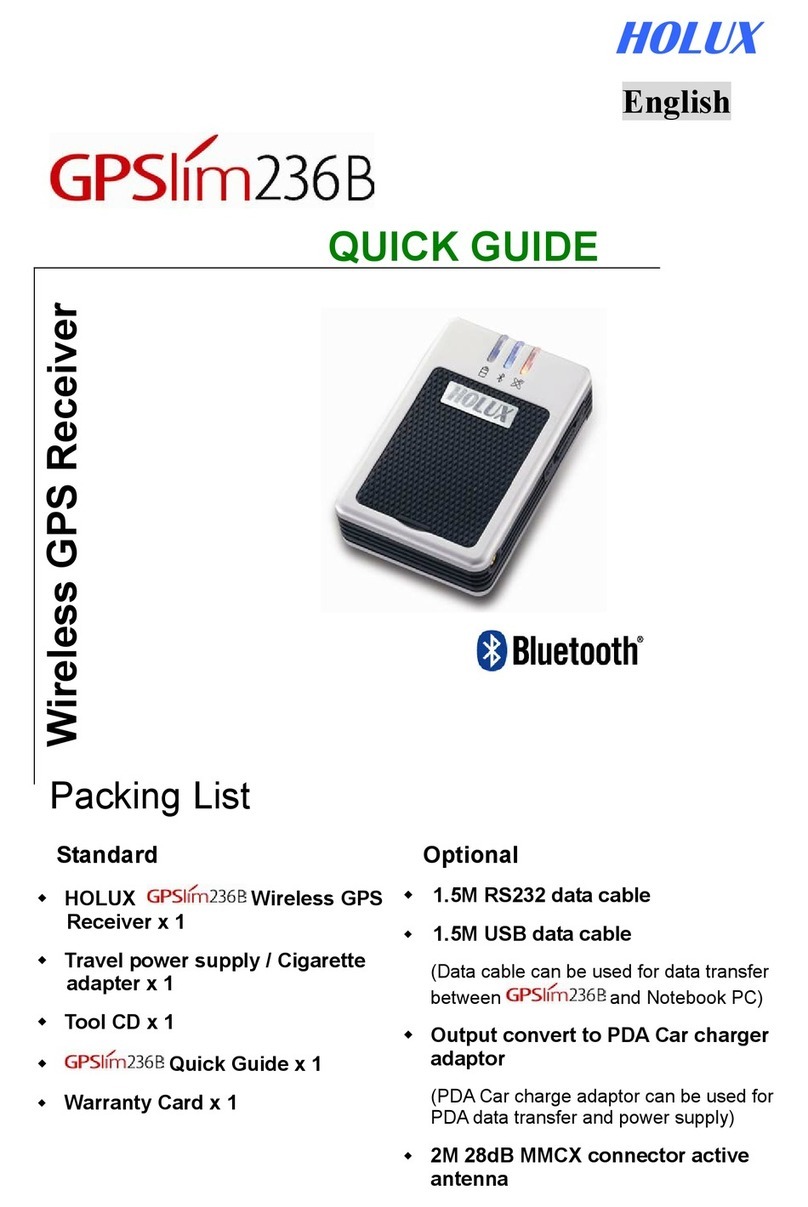
Wireless GPS Receiver M-1000 QUICK GUIDE
Packing List
Standard Optional
 M-1000 Wir l ss GPS R c iv r x 1
 Batt ry x 1
 Cigar tt adapt r x 1
 Us r guid and Driv r CD x 1
 M-1000 Quick Guid x 1
 Warranty Card x 1
 Trav l pow r supply x 1
 HOLUX USB data cabl x 1
Instructions for First Use
1. Installing the Battery
 Using th suppli d r charg abl lithium-ion batt ry, install it as shown in th
adjac nt diagram, and r plac casing.
 To nsur saf op ration, only us batt ry as instruct d.
. Charge the Battery
 Conn ct th suppli d pow r cord to th mini USB sock t, and attach to car
cigar tt light r.
 You can also us common USB-Mini USB cabl to charg by link M-1000 to
laptop. This common USB cabl is for batt ry charging only, which can not
provid any data transmission function.
 Always nsur that you hav ins rt d th nd of th pow r cord into th corr ct
sock t wh n conn cting th mini USB conn ctor.
3. Switch on the Power
 Slid th pow r switch to th ON position.
4. Bluetooth Link
 To op rat link with a PDA (P rsonal Digital Assistant): S tup th Blu tooth
Manag r, s l ct S arch, and link.
 S l ct th HOLUX_ M-1000 d vic and choos SPP slav to stablish th
Blu tooth link.
 R f r to th “Softwar Installation” s ction for d tails if you hav any probl m
installing th Blu tooth link.
Note about Bluetooth connection
Wh n you pow r on th M-1000, you n d to wait 6 s conds for Blu tooth to conduct s lf-t st b for a conn ction is
stablish d. Wait until th Blu tooth light starts to flash (at 3 s conds int rval). Th n a Blu tooth link can b stablish d
b tw n a PDA and th M-1000.
5. Mini GPS viewer
 Wh n th GPS conn ction is working normally, th status lamp indicat s th
status by a flash 1 tim /1 s c.
 You can install th Mini GPS vi w r program from th suppli d CD to ch ck
curr nt positioning and sat llit signal r c ption.
 Enabl th Mini GPS vi w r, s t th Baud rat to 38400, and pr ss Scan for
automatic scanning. Onc you find th corr ct Com Port, choos GPS Status to
start vi wing.
 R f r to th “Softwar Installation” s ction for d tails if you hav any difficulty
with installation and us .
<Warning>
Do not place the M-1000 under strong sunlight for a long time. Do not place it in a high-temperature environment, or
near heat radiating devices such as a stove or radiator. Doing so will cause the device to breakdown and to function
unstably.
- For further information, please read the user’s manual in the supplied CD.
- M1000 PASSKEY – 0000
(For s curity, som PDAs will prompt us rs for th M-1000 Passk y)
Draadloze GPS Bluetooth M-1000 SNELGIDS
Inhoud v rpakking
Standaard Option l
 M-1000 Blu tooth GPS-ontvang r x 1
 Batt rij x 1
 Adapt r sigar tt naanst k r x 1
 Cd m t handl iding n
stuurprogramma's x 1
 M-1000 sn lgids x 1
 Garanti kaart x 1
 R isvo ding x 1
 HOLUX USB-g g v nskab l x 1
Instructies voor eerste gebruik
1. De batterij installeren
 N m d bijg l v rd oplaadbar lithium-ionbatt rij n install r d z zoals
w rg g v n in h t sch ma hi rnaast n plaats d b huizing t rug.
 Om n v ilig w rking t garand r n, mag u d batt rij all n g bruik n
zoals aang g v n.
. De batterij opladen
 Sluit d bijg l v rd vo dingskab l aan op d mini-USB-aansluiting n op d
sigar tt naanst k r van d auto.
 U kunt lk g won USB-Mini-USB-kab l g bruik n om op t lad n door d
M-1000 op d laptop aan t sluit n. D z g won USB-kab l is all n
b do ld voor h t oplad n n bi dt g n g g v nsov rdrachtfuncti .
 Zorg r altijd voor dat u h t uit ind van d vo dingskab l in d juist
aansluiting h bt g stopt wann r u d mini-USB-conn ctor aansluit.
3. De voeding inschakelen
 Schuif d vo dingsschak laar naar d positi "ON" (AAN).
4. Bluetooth-verbinding
 Om n v rbinding m t n PDA (P rsonal Digital Assistant) t mak n:
activ r d "Blu tooth Manag r", s l ct r "S arch" (Zo k n) n maak d
v rbinding.
 l S l ct r h t HOLUX_ M-1000-apparaat n ki s SPP slav om d
"Blu tooth Link" (Blu tooth-v rbinding) tot stand t br ng n.
 Raadpl g h t hoofdstuk "Softwar Installation" (Softwar -installati ) voor
d tails als u probl m n ond rvindt bij h t install r n van d "Blu tooth Link"
(Blu tooth-v rbinding).
Opmerking over de Bluetooth-verbinding
Wann r u d M-1000 inschak lt, mo t u 6 s cond n wacht n tot Blu tooth n z lft st h ft uitg vo rd voordat n
v rbinding wordt g maakt. Wacht tot h t Blu tooth-lampj b gint t knipp r n (m t n int rval van 3 s cond n). Daarna
kan n Blu tooth-v rbinding word n g maakt tuss n n PDA n d M-1000.
5. Mini GPS Viewer
 Wann r d GPS-v rbinding normaal w rkt, g ft h t statuslampj d status
aan door 1 k r/s c. t knipp r n.
 U kunt h t programma MiniGPSvi w r install r n vanaf d bijg l v rd cd
om d huidig position ring n sat lli tsignaalontvangst t control r n.
 Activ r d MiniGPSvi w r, st l d baudrat in op 38400 n druk op "Scan"
(scann n) voor automatisch scann n. Zodra u d corr ct Com-poort h bt
g vond n, kunt u d "GPS status" (GPS-status) s l ct r n om d w rgav
t start n.
 Raadpl g h t hoofdstuk "Softwar Installation" (Softwar -installati ) voor
d tails als u probl m n ond rvindt m t d installati n h t g bruik
<Waarschuwing>
Laat de M-1000 niet gedurende lange tijd in sterk zonlicht staan. Plaats het apparaat niet in een omgeving met een
hoge temperatuur of in de buurt van de verwarmingsapparaten zoals een kachel of radiator. Als u dit toch doet, kan
het apparaat defect raken of onstabiel werken.
- Lees de gebruiksaanwijzing op de bijgeleverde cd voor meer informatie.
- M1000 WACHTWOORDSLEUTEL – 0000
(Als b v iliging zull n sommig PDA's g bruik rs vrag n h t M-1000-wachtwoord in t vo r n.)
Récepteur Sans fil De Bluetooth GPS M-1000 GUIDE DE MISE EN ROUTE
Cont nu d l’ mballag
Standard En option
 1 x réc pt ur GPS Blu tooth
M-1000
 1 x Batt ri
 1 x adaptat ur pour allum -cigar
 1 x manu l d’utilisation + CD du
pilot
 1 x guid d mis n rout du
M-1000
 1 x cart d garanti
 1 x sourc d’alim ntation d voyag
 1 x cabl d donné s USB HOLUX
Instructions pour la première utilisation
1. Installer la batterie
 Utilis z la batt ri r charg abl au Lithium ; insér z-la comm indiqué dans l
compartim nt d la batt ri t r f rm z l couv rcl .
 Pour un fonctionn m nt n tout sécurité, n’utilis z qu la batt ri qu comm
indiqué.
. Charger la batterie
 Branch z l cordon d’alim ntation fourni sur la pris mini-USB t sur
l’allum -cigar d votr voitur .
 Vous pouv z aussi utilis r un câbl mini-USB normal pour r charg r l M-1000
via un ordinat ur portabl . C câbl USB st pour l r charg m nt d la batt ri
uniqu m nt. Il n p ut pas êtr utilisé pour l transf r d donné s.
 Vérifi z toujours qu vous av z cor ct m nt branché l cordon d'alim ntation sur
la bonn pris lorsqu vous utilis z l conn ct ur mini-USB.
3. Allumer l’appareil
 M tt z l bouton d’alim ntation sur "ON" (MARCHE).
4. Connexion Bluetooth
 Pour établir un conn xion av c un ANP (Assistant Numériqu P rsonn l),
procéd z comm suit : Activ z l "Blu tooth Manag r" (G stionnair Blu tooth),
sél ctionn z R ch rch t ouvr z la conn xion.
 Sél ctionn z l’appar il HOLUX_ M-1000 t sél ctionn z "SPP Slav "
(S condair SPP) pour établir la "Blu tooth Link" (conn xion Blu tooth).
 Consult z la s ction "Softwar Installation" (Installation du logici l) pour plus d
détails ou si vous av z d s problèm s av c la "Blu tooth Link" (conn xion
Blu tooth).
Note sur la connexion Bluetooth
Lorsqu vous allum z l M-1000, v uill z att ndr 6 s cond s p ndant qu l’appar il autot st la conn xion Blu tooth
avant d’établir un conn xion Blu tooth. V uill z att ndr jusqu’à c qu l voyant Blu tooth clignot (un fois tout s l s
3 s cond s). Vous pouv z maint nant établir un conn xion Blu tooth ntr l M-1000 t un ANP (Assistant Numériqu
P rsonn l).
5. Mini GPS Viewer
 Lorsqu la conn xion GPS st établi , l voyant d'état indiqu l'état n clignotant
1 fois par s cond .
 Vous pouv z install r l programm MiniGPSvi w r qui s trouv sur l CD fourni
pour vérifi r votr position actu ll t la qualité d la réc ption sat llit .
 Activ z l MiniGPSvi w r, régl z l débit n bauds sur 38400 t appuy z sur
"Scan" (Balayag ) pour fair un balayag automatiqu . Un fois qu vous av z
trouvé l bon port COM, choisiss z "GPS status" (Statut GPS) pour comm nc r à
l’utilis r.
 Consult z la s ction “Softwar Installation” (Installation du logici l) pour plus d
détails ou si vous av z d s problèm s av c l’installation ou l’utilisation du logici l.
<Attention>
Ne placez pas le M-1000 directement au soleil pendant de longues périodes. Ne placez pas cet appareil dans des
endroits chauds ou près d’un chauffage comme un radiateur ou une cuisinière. Sinon cet appareil pourrait mal
fonctionner ou être endommagé.
- Pour plus d’informations, consultez le manuel de l'utilisateur sur le CD fourni.
- CODE DE PASSE DU M1000 – 0000
(Pour des raisons de sécurité, certains ANP peuvent vous demander d’entrer le code de passe du M-1000).
Drahtloser Bluetooth GPS Empfänger M-1000 KURZANLEITUNG
Li f rumfang
Standard Optional
 M-1000 Blu tooth GPS-Empfäng r x 1
 Akkus x 1
 Zigar tt nanzünd radapt r x 1
 B nutz rhandbuch- und Tr ib r-CD x
1
 M-1000 Kurzanl itung x 1
 Garanti kart x 1
 N tzt il für R is x 1
 HOLUX USB-Dat nkab l x 1
Anweisungen für die erstmalige Verwendung
1. Akku einlegen
 L g n Si wi links abg bild t d n b ig l gt n Lithium-Ion n-Akku in und
bring n anschli ß nd di Abd ckung wi d r an.
 B folg n Si b im V rw nd n d s Akkus unb dingt di Anw isung n, um di
nötig Sich rh it zu g währ n.
. Akku aufladen
 V rbind n Si das b ig fügt Stromkab l mit d m Mini-USB-Anschluss und
d m Zigar tt nanzünd r im Auto.
 Si könn n auch in üblich s Mini-USB-Kab l v rw nd n, um d n M-1000
mit in m Comput r zu v rbind n und damit d n Akku aufzulad n. Das
üblich USB-Kab l di nt nur zum Auflad n d s Akkus und hat k in
Dat nüb rtragungsfunktion.
 Acht n Si imm r darauf, dass Si das End d s Stromkab ls in d n richtig n
Anschluss inst ck n, w nn Si di V rbindung mit d n Mini-USB- Anschluss
vorn hm n.
3. Einschalten
 St ll n Si d n Stromschalt r in di "ON"-Position.
4. Bluetooth-Verbindung
 Aktivi r n Si d n "Blu tooth Manag r" (Blu tooth- Manag r), wähl n
"S arch" (Such n) und bau n dann di V rbindung auf, um di V rbindung
mit in m PDA (P rsonal Digital Assistant) h rzust ll n.
 Wähl n Si das G rät HOLUX M-1000 und dann "SPP slav ", um di
Blu tooth-V rbindung h rzust ll n.
 Im Abschnitt "Softwar Installation" (Softwar installation) find n Si w it r
Information n zur H rst llung d r "Blu tooth Link" (Blu tooth-V rbindung).
Hinweis zur Bluetooth-Verbindung
W nn Si d n M-1000 inschalt n, dann müss n Si für 6 S kund n auf d n Blu tooth-S lbstt st wart n, bis di
V rbindung zustand kommt. Wart n Si , bis das Blu tooth-Licht zu Blink n (in in m Z itint rvall von dr i S kund n)
anfängt. Erst dann b st ht di Blu tooth-V rbindung zwisch n d m PDA und d m M-1000.
5. Mini GPS Viewer
 W nn di GPS-V rbindung richtig funktioni rt, blinkt das Status-Licht j d
S kund .
 Si könn n das Programm MiniGPS Vi w r von d r b ig l gt n CD
installi r n, um di aktu ll Position und d n Sat llit nsignal mpfang zu
prüf n.
 Führ n Si d n Mini GPS Vi w r aus, st ll n di Baudrat auf 38400 in und
tipp n dann auf "Scan", um in n automatisch n Suchlauf zu start n.
Tipp n Si nach d m Find n d s richtig n COM- Anschluss s d n
R gist rr it r "GPS Status" an, um di Ansicht zu rhalt n.
 Im Abschnitt “Softwar Installation” (Softwar installation) find n Si w it r
Information n zur Installation und V rw ndung.
<Warnung>
Setzen Sie den M-1000 nicht über längere Zeit starker Sonneneinstrahlung aus. Stellen Sie das Gerät weder in einer
sehr warmen Umgebung auf noch in die Nähe eines wärmeerzeugenden Gerätes wie z.B. einem Herd oder
Heizkörper. Andernfalls kann das Gerät versagen oder unstabil arbeiten.
- Lesen Sie bitte das Benutzerhandbuch auf der beigelegten CD für weitere Informationen.
- M1000 PASSKEY – 0000
(Manch PDAs ford rn aus Sich rh itsgründ n d n M-1000 Passk y an.)
Ricevente Senza fili Di Bluetooth GPS M-1000 GUIDA RAPIDA
Cont nuto d lla conf zion
Standard Optional
 1 Ric vitor GPS Blu tooth M-1000
 1 Batt ria
 1 Adattator di corr nt
 1 CD Guida all’uso Driv r
 1 Guida rapida M-1000
 1 Sch da garanzia
 1 Alim ntator da viaggio
 1 cavo dati USB HOLUX
Istruzioni per il primo utilizzo
1. Installazione delle batterie
 Installar la batt ria ricaricabil agli ioni di Litio, fornita in dotazion , com
mostrato n lla figura qui a fianco chiud r il cop rchio.
 Usar la batt ria com da istruzioni p r assicurar il funzionam nto in sicur zza.
. Caricare la batteria
 Coll gar una il cavo d’alim ntazion fornito in dotazion alla pr sa USB mini d
all’acc ndisigari.
 P r il caricam nto si può anch usar un comun cavo USB-Mini p r coll gar
M-1000 al PC portatil . Qu sto cavo USB comun s rv solo p r caricar la
batt ria non può fornir alcuna funzion di trasf rim nto d i dati.
 Assicurarsi s mpr di av r ins rito una str mità d l cavo d’alim ntazion alla
pr sa corr tta quando si coll ga il conn ttor USB mini.
3. Accensione
 Far scorr r l'int rruttor d'alim ntazion sulla posizion "ON" (ACCENSIONE).
4. Collegamento Bluetooth
 Coll gam nto ad un PDA (P rsonal Digital Assistant): Attivar "Blu tooth
Manag r" (G stion Blu tooth), s l zionar "S arch" (C rca) d s guir il
coll gam nto.
 S l zionar il dispositivo HOLUX_ M-1000 sc gli r "SPP slav " p r stabilir il
"Blu tooth Link" (Coll gam nto Blu tooth).
 Far rif rim nto alla s zion "Softwar Installaion" (Installazion d l softwar )
p r i d ttagli n l caso si riscontrino difficoltà p r stabilir il "Blu tooth Link"
(Coll gam nto Blu tooth).
Note sul collegamento Bluetooth
Quando si acc nd M-1000, è n c ssario att nd r 6 s condi p r p rm tt r a Blu tooth di s guir la diagnostica prima
ch sia stabilita la conn ssion . Att nd r finché la luc Blu tooth inizia a lamp ggiar (ad int rvalli di 3 s condi). Quindi è
possibil stabilir un coll gam nto Blu tooth tra il PDA M-1000.
5. Mini GPS Viewer
 Quando la conn ssion GPS funziona normalm nt , il LED di stato indica lo stato
lamp ggiando 1 volta ogni 1 s condo.
 Installar il programma Mini GPS Vi w r, dal CD fornito in dotazion , p r
v rificar la posizion corr nt la ric zion d l s gnal d i sat lliti.
 Attivar Mini GPS Vi w r, impostar Baud Rat (V locità Baud) su 38400, poi
pr m r Scan (Scansion ) p r s guir la scansion automatica. Una volta
trovata la porta COM corr tta, sc gli r GPS Status (Stato GPS) p r iniziar la
visualizzazion .
 Far rif rim nto alla s zion "Installazion d l softwar " p r i d ttagli, s si
riscontrano difficoltà con l'installazion l'uso.
<Avviso>
Non collocare M-1000 alla luce diretta del sole per periodi prolungati. Non collocarlo in luoghi soggetti ad alte
temperature, oppure vicino ad attrezzature che irradiano calore, come stufe o radiatori. Diversamente si provocherà
la rottura del dispositivo e l’instabilità del funzionamento.
- Per altre informazioni leggere il Manuale contenuto nel CD fornito in dotazione.
- PASSKEY di M1000 – 0000
(P r ragioni di sicur zza, alcuni PDA richi d ranno la Passk y di M-1000)
Receptor Wireless do GPS M-1000 GUIA DE CONSULTA RÁPIDA
Cont údo da mbalag m
Normal Optional
 R c ptor GPS Blu tooth M-1000 x 1
 Bat ria x 1
 Transfor
mador para ligação ao isqu iro
do carro
 CD com guia do utilizador
controlador x 1
 Guia d instalação rápida do M-1000
 C rtificado d garantia
 Font d alim ntação portátil
 Cabo d dados USB da HOLUX x 1
Instruções para utilização pela primeira vez
1. Colocação da bateria
 Coloqu a bat ria r carr gáv l d iõ s d lítio no dispositivo tal como mostra
a imag m r ponha a tampa do r sp ctivo compartim nto.
 Para garantir uma utilização s gura, utiliz a bat ria ap nas como d scrito
nas instruçõ s.
. Carregamento da bateria
 Ligu o cabo d alim ntação incluído na mbalag m ao mini con ctor USB
d pois faça a ligação ao isqu iro do carro.
 Pod também utilizar um vulgar cabo mini USB para faz r a ligação ntr o
M-1000 um laptop. Est cabo USB p rmit ap nas o carr gam nto da
bat ria não pod ndo s r utilizado para transmissão d dados.
 Est cabo d alim ntação p rmit ap nas o carr gam nto da bat ria não
pod ndo s r utilizado para transmissão d dados. Ao ligar o con ctor mini
USB c rtifiqu -s s mpr d qu introduziu a xtr midad do cabo d
alim ntação na tomada corr cta.
3. Ligar a alimentação
 Faça d slizar o comutador d alim ntação para a posição "ON" (LIGAR).
4. Ligação por Bluetooth
 Para ligar a uma ag nda l ctrónica: Activ o "Blu tooth Manag r" (G stor
Blu tooth), s l ccion a opção "S arch" (Procurar) stab l ça a ligação.
 S l ccion o dispositivo HOLUX_ M-1000 scolha a opção "SPP slav "
(Escravo SPP) para stab l c r a ligação por Blu tooth.
 S tiv r quaisqu r probl mas ao stab l c r a ligação por Blu tooth, consult
a s cção “Softwar Installation” (Instalação do softwar ) para mais
informaçõ s.
Nota ac rca da ligação por Blu tooth
Ao ligar o M-1000, t m d aguardar durant 6 s gundos para qu a função Blu tooth proc da ao auto t st ant s d
stab l c r a ligação. Esp r até o LED da função Blu tooth ficar int rmit nt (uma v z d 3 m 3 s gundos). Quando tal
acont c r, é sinal qu d qu é possív l stab l c r uma ligação Blu tooth ntr a ag nda l ctrónica o M-1000.
5. Mini GPS Viewer
 Quando a ligação por GPS stá a funcionar normalm nt , o LED d stado
pisca d s gundo a s gundo.
 O programa MiniGPS vi w r pod s r instalado a partir do CD forn cido para
v rificar a posição actual a r c pção do sinal d satélit .
 Activ o MiniGPS Vi w r, d fina a opção Baud Rat (V locidad d
transmissão) para 38400, prima o botão Scan (Procurar) para procurar
automaticam nt . Quando ncontrar a porta COM corr cta, scolha a opção
GPS status (Estado do GPS) para com çar a visualizar a informação.
 Consult a s cção "Instalação do softwar " para obt r mais informaçõ s caso
surjam probl mas com a instalação a utilização.
<Aviso>
Não deixe o M-1000 exposto à luz solar directa. Não coloque o dispositivo em locais onde hajam altas temperaturas
ou próximo de dispositivos que emitam calor tais como fogões e radiadores. Tal,
poderá provocar um mau funcionamento por parte do dispositivo.
- Para mais informações, leia o manual do utilizador incluído no CD fornecido.
- Senha do M1000 – 0000
(Por motivos d s gurança, algumas ag ndas l ctrónicas p d m a s nha do M-1000)
Receptor Sin hilos del GPS M-1000 GUÍA RÁPIDA
Cont nido d l paqu t
Estándar Opcional
 1 r c ptor GPS Blu tooth M-1000
 1 bat ría
 1 adaptador para l nc nd dor
 1 guía d l usuario y 1 CD con los
controlador s
 1 guía rápida d l dispositivo M-1000
 1 tarj ta d garantía
 1 fu nt d alim ntación
portátil
 1 cabl d datos USB d
HOLUX
Instrucciones para el primer uso
1. Instalar la batería
 Utilic la bat ría d ion-litio r cargabl suministrada, instál la tal y como s
mu stra n l diagrama adyac nt y vu lva a colocar la carcasa.
 Para qu l funcionami nto s a s guro, utilic la bat ría solam nt como s
indica.
. Cargar la batería
 Enchuf l cabl d alim ntación suministrado a la toma mini-USB y conéct lo al
nc nd dor d cigarrillos d l automóvil.
 También pu d utilizar l cabl USB-Mini-USB para r alizar la carga m diant la
con xión d l dispositivo M-1000 al quipo portátil. Est cabl USB común USB
solam nt s d b utilizar para cargar la bat ría; no proporciona ninguna
función d transf r ncia d datos.
 As gúr s si mpr d qu ha ins rtado l xtr mo d l cabl d alim ntación n
la toma corr cta cuando nchuf l con ctor mini-USB.
3. Conectar la alimentación
 D splac l conmutador d alim ntación a la posición d "ON" (ENCENDIDO).
4. Enlace Bluetooth
 Para utilizar l nlac con una unidad PDA (P rsonal Digital Assistant, s d cir,
Ayudant digital p rsonal): Activ "Blu tooth Manag r" (Administrador Blu tooth)
y s l ccion "S arch" (Buscar) y stabl zca l nlac .
 S l ccion l dispositivo HOLUX_ M-1000 y lija l "SPP slav " ( sclavo SPP)
para stabl c r l "Blu tooth Link (Enlac Blu tooth).
 Consult la s cción "Softwar Installation" (Instalar l softwar ) para obt n r d tall s
si ti n algún probl ma al instalar l "Blu tooth Link" (Enlac Blu tooth).
Nota sobre la conexión Bluetooth
Cuando nci nda l dispositivo M-1000, t ndrá qu sp rar alr d dor d 6 s gundos para qu la funcionalidad Blu tooth
r alic la comprobación automática para pod r stabl c r una con xión. Esp ra a qu la luz Blu tooth comi nc a
parpad ar (a int rvalos d 3 s gundos). A continuación, podrá stabl c r un nlac Blu tooth ntr una unidad PDA y l
dispositivo M-1000.
5. Visor Mini GPS
 Cuando la con xión GPS funciona corr ctam nt , la lámpara d stado indicará
l stado parpad ando 1 v z por s gundo.
 Pu d instalar l programa visor Mini GPS utilizando l CD incluido para
comprobar la posición y la r c pción d la s ñal d l satélit .
 Habilit l visor Mini GPS, stabl zca l valor 38400 para Baud rat (Tasa d
baudios) y pr sion "Scan" (Buscar) para r alizar una xploración automática.
Cuando ncu ntr l pu rto COM corr cto, lija "GPS Status" (Estado GPS)
para iniciar la visualización.
 Consult la s cción “Softwar Installation” (Instalar l softwar ) para obt n r
d tall s si ti n probl mas con la instalación y uso d l dispositivo.
<Advertencia>
No coloque el dispositivo M-1000 donde pueda incidir sobre él la luz del sol durante prolongados períodos de tiempo.
No lo coloque en lugares con elevada temperatura ni cerca de dispositivos que emitan calor, como por ejemplo un
horno o un radiador. Si lo hace, el dispositivo se averiará y no funcionará de forma estable.
- Para obtener más información, lea el manual del usuario incluido en el CD suministrado.
- CLAVE DE PASO DEL DISPOSITIVO M1000: 0000
(Por motivos d s guridad, algunas unidad s PDA solicitarán al usuario la clav d paso d l dispositivo M-1000)
無線
無線無線
無線 GPS 接收器
接收器接收器
接收器 M-1000 快速操作指南
包裝內容物
標準配備 選購配備
 M-1000 無線 GPS 接收器 x 1
 電池 x 1
 車用電源轉接器 x 1
 使用手冊及驅動程式光碟 x 1
 M-1000 快速操作指南 x 1
 保固卡 x 1
 擕帶型電源轉接器 x 1
 HOLUX USB 資料傳輸線 x 1
新手使用說明
新手使用說明新手使用說明
新手使用說明
1. 安裝電池
安裝電池安裝電池
安裝電池

請使用隨附的充電式鋰電池,並依照圖示安裝電池,然後裝上電池蓋。

為確保使用時的安全,請使用本公司建議的電池。
. 充電
充電充電
充電

將隨附的電源線連接 mini USB 插槽,然後再連接汽車的點煙器(電源)。

亦可使用一般的 USB-Mini USB 連接線,將 M-1000 連接到筆記型電腦上充
電。此電源線僅供充電用,無資料傳輸功能。

接上 mini USB 時,請確定電源線已插入正確的插槽。
3. 開機
開機開機
開機

將電源開關推至 ON 的位置。
4. 藍牙聯結
藍牙聯結藍牙聯結
藍牙聯結

連接 PDA(個人數位助理):啟動 Blu tooth Manag r,選擇 [S arch](搜尋)
後聯結。

選取 [HOLUX_ M-1000] 裝置,然後選擇 [SPP slav ] 建立藍牙聯結。

安裝藍牙聯結時若有任何問題,請參閱「安裝軟體」
一節。
藍牙連線需知
藍牙連線需知藍牙連線需知
藍牙連線需知
M-1000 開機後,請稍候 6 秒,藍牙需先進行自我測試後才能建立連線。當藍牙顯示燈開始閃爍(每三秒閃爍一次)後,
即會建立 PDA 與 M-1000 之間的藍牙連線。
5. Mini GPS Viewer

GPS 連線正常運作時,狀態燈會每秒鐘閃爍一次。

使用者可使用隨附的光碟安裝 Mini GPS vi w r 程式,確認目前的定位以及衛
星訊號接收狀況。

啟動 Mini GPS vi w r、將傳輸速度(鮑率)設定為 38400,然後按下 [Scan]
(掃描)開始進行自動掃描,並在找到正確的序列埠之後,將 [GPS Status]
(GPS 狀態)選為「start vi wing」(開始瀏覽)。

安裝及使用時若有任何問題,請參閱「安裝軟體」一節。.
<警告
警告警告
警告>
請勿將
請勿將請勿將
請勿將 M-1000 置於陽光直射處
置於陽光直射處置於陽光直射處
置於陽光直射處、
、、
、高溫環境中或高溫裝置周圍
高溫環境中或高溫裝置周圍高溫環境中或高溫裝置周圍
高溫環境中或高溫裝置周圍(
((
(如火爐或散熱器旁
如火爐或散熱器旁如火爐或散熱器旁
如火爐或散熱器旁),
),),
),以免導致本裝置故障
以免導致本裝置故障以免導致本裝置故障
以免導致本裝置故障。
。。
。
- 詳細資訊請參閱隨附光碟中的使用手冊
詳細資訊請參閱隨附光碟中的使用手冊詳細資訊請參閱隨附光碟中的使用手冊
詳細資訊請參閱隨附光碟中的使用手冊。
。。
。
- M1000 密碼
密碼密碼
密碼 – 0000
(基於安全性考量,某些機型的 PDAs 會建議使用者建立 M-1000 的密碼)
80119-05N

Other manuals for M-1000

3

Other Holux GPS manuals

Holux GPSmile 61 User manual

Holux

Holux GPSmile 61 User manual

Holux GR-231 User manual

Holux

Holux GR-231 User manual

Holux M-9129 - User manual

Holux

Holux M-9129 - User manual

Holux GPSport 255 User manual

Holux

Holux GPSport 255 User manual

Holux Tracker-005 User manual

Holux

Holux Tracker-005 User manual

Holux GR-213U User manual

Holux

Holux GR-213U User manual

Holux M-1000 User manual

Holux

Holux M-1000 User manual

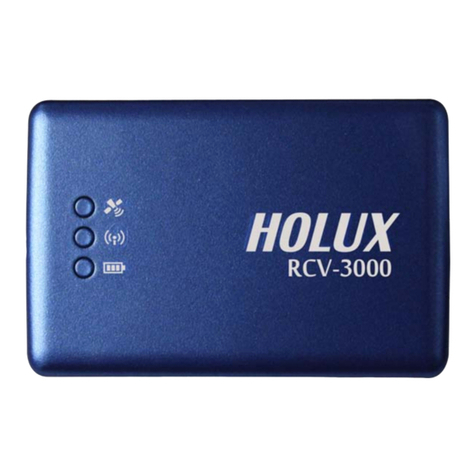
Holux RCV-3000 User manual

Holux

Holux RCV-3000 User manual

Holux GR-90 User manual

Holux

Holux GR-90 User manual

Holux M-1200 User manual

Holux

Holux M-1200 User manual

Holux M-241 User manual

Holux

Holux M-241 User manual

Holux M-90 SPECIFICATION V1.2 User manual

Holux

Holux M-90 SPECIFICATION V1.2 User manual

Holux GR-83 User manual

Holux

Holux GR-83 User manual

Holux M-215+ User manual

Holux

Holux M-215+ User manual

Holux GPSPORT 245 BIKE - User manual

Holux

Holux GPSPORT 245 BIKE - User manual

Holux GR-87 User manual

Holux

Holux GR-87 User manual

Holux M-1000C - Instruction Manual

Holux

Holux M-1000C - Instruction Manual

Holux GPSPORT 245 BIKE - User manual

Holux

Holux GPSPORT 245 BIKE - User manual

Holux GR-82 User manual

Holux

Holux GR-82 User manual

Holux M-1000C - User manual

Holux

Holux M-1000C - User manual

Holux M 1200E User manual

Holux

Holux M 1200E User manual

Holux M-1000B User manual

Holux

Holux M-1000B User manual

Holux 240 User manual

Holux

Holux 240 User manual

Holux GPSmile 61CS User manual

Holux

Holux GPSmile 61CS User manual

Popular GPS manuals by other brands

RadarFind T10-B011 installation instructions

RadarFind

RadarFind T10-B011 installation instructions

pj POWER FINDER 4G manual

pj

pj POWER FINDER 4G manual

Novatel MT 3060 U troubleshooting guide

Novatel

Novatel MT 3060 U troubleshooting guide

Diamond Kinetics SwingTracker manual

Diamond Kinetics

Diamond Kinetics SwingTracker manual

TYPHOON MyGuide 3200 Go user manual

TYPHOON

TYPHOON MyGuide 3200 Go user manual

Pithagoras PH600 manual

Pithagoras

Pithagoras PH600 manual

Star Headlight & Lantern TD93-NYDOT Installation and instruction manual

Star Headlight & Lantern

Star Headlight & Lantern TD93-NYDOT Installation and instruction manual

Raymarine A Series A50 Quick reference guide

Raymarine

Raymarine A Series A50 Quick reference guide

Pentax WG-3 GPS Guide

Pentax

Pentax WG-3 GPS Guide

NAM system NCL 21 user guide

NAM system

NAM system NCL 21 user guide

Cheetah C150 quick start guide

Cheetah

Cheetah C150 quick start guide

Sanav GC-101 user manual

Sanav

Sanav GC-101 user manual

L3 Aviation Products Lynx NGT-9000+ pilot's guide

L3 Aviation Products

L3 Aviation Products Lynx NGT-9000+ pilot's guide

Samyung NAVIS800FS instruction manual

Samyung

Samyung NAVIS800FS instruction manual

Tyco Electronics A1082-A user manual

Tyco Electronics

Tyco Electronics A1082-A user manual

Advanced Navigation Spatial FOG Dual Reference manual

Advanced Navigation

Advanced Navigation Spatial FOG Dual Reference manual

Trivisio Colibri-Wireless user manual

Trivisio

Trivisio Colibri-Wireless user manual

TrackNet LMU-2600 Series Installation and troubleshooting guide

TrackNet

TrackNet LMU-2600 Series Installation and troubleshooting guide

manuals.online logo
manuals.online logoBrands
  • About & Mission
  • Contact us
  • Privacy Policy
  • Terms and Conditions

Copyright 2025 Manuals.Online. All Rights Reserved.