12 13
COOL OPERATION
-Press the MODE button until the "COOL" indicator light illuminates.
-Press the ADJUST button "+" or "-" to select your desired room temperature. The temperature can be set within
-Press the "FAN SPEED" button to choose the fan speed.
DRY OPERATION
-Press the MODE button until the "DRY" indicator light illuminates.
-Under this mode, you cannot select fan speed or adjust the temperature. The fan motor operates at LOW speed.
-Keep windows and doors closed for the best dehumidifying effect.
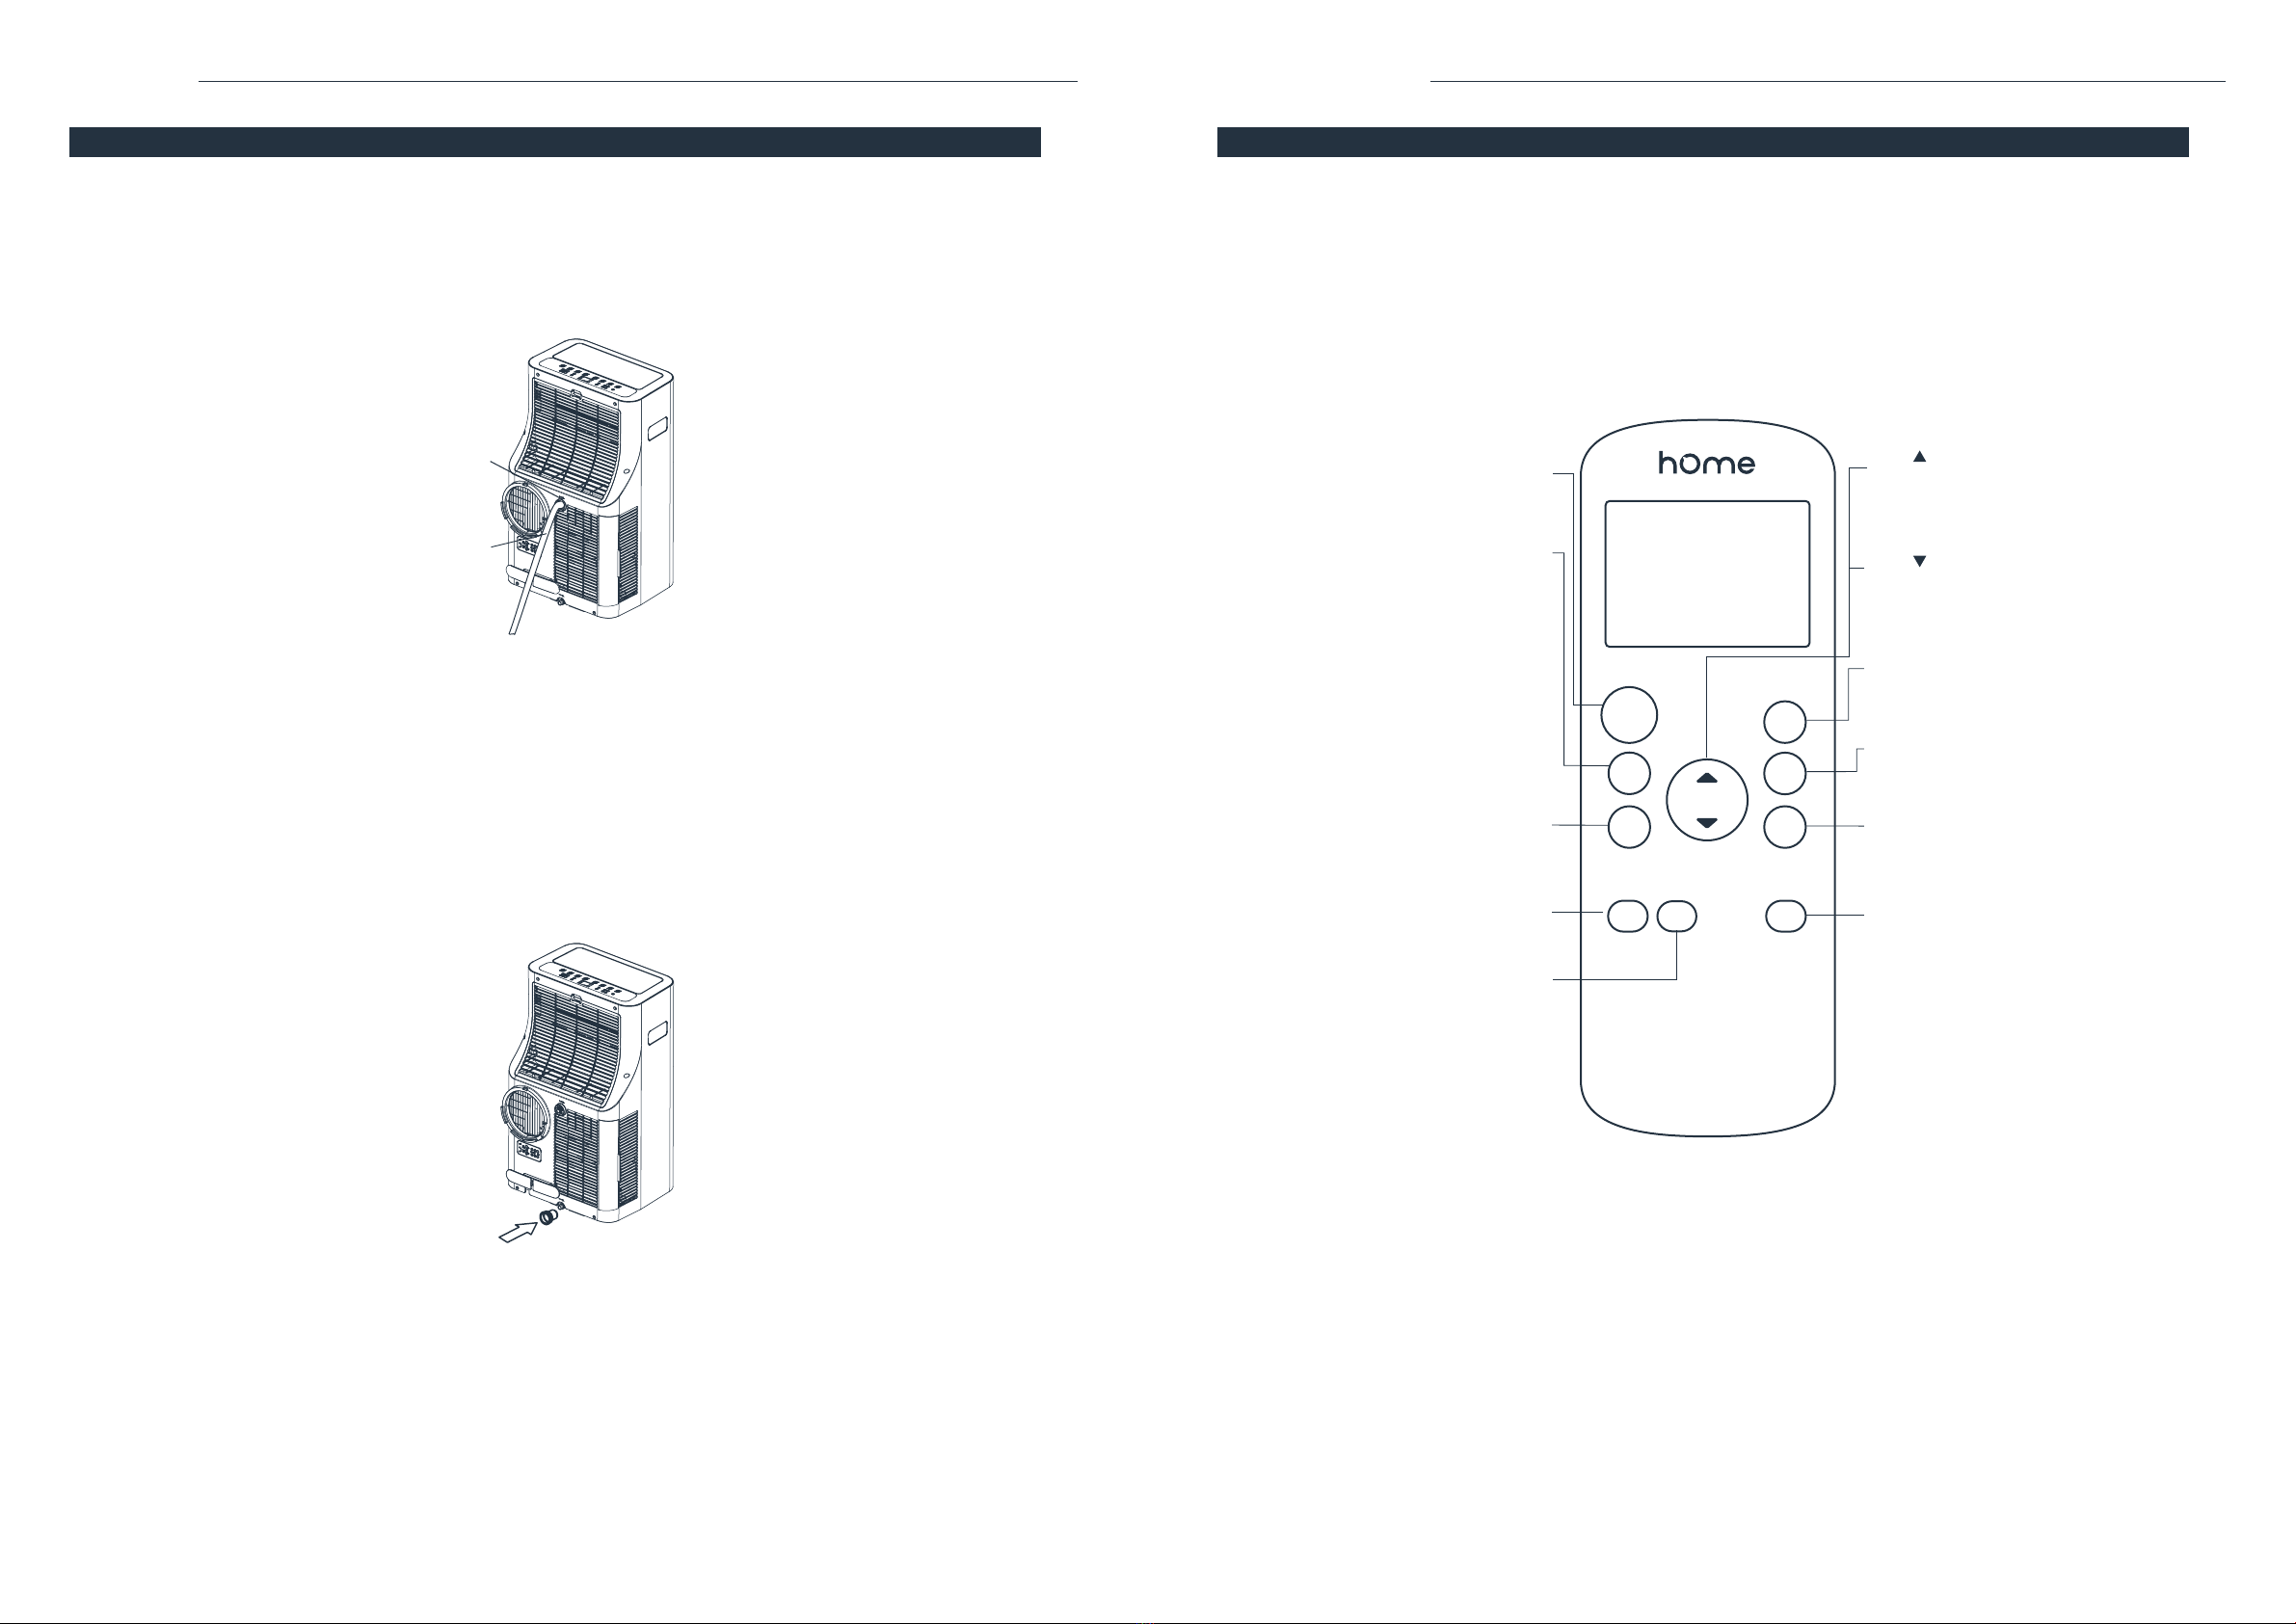
-You can set the humidity level as the unit has a humidity sensor. Put the Drain Hose in the Drain Outlet for the best dehumidifying effect.
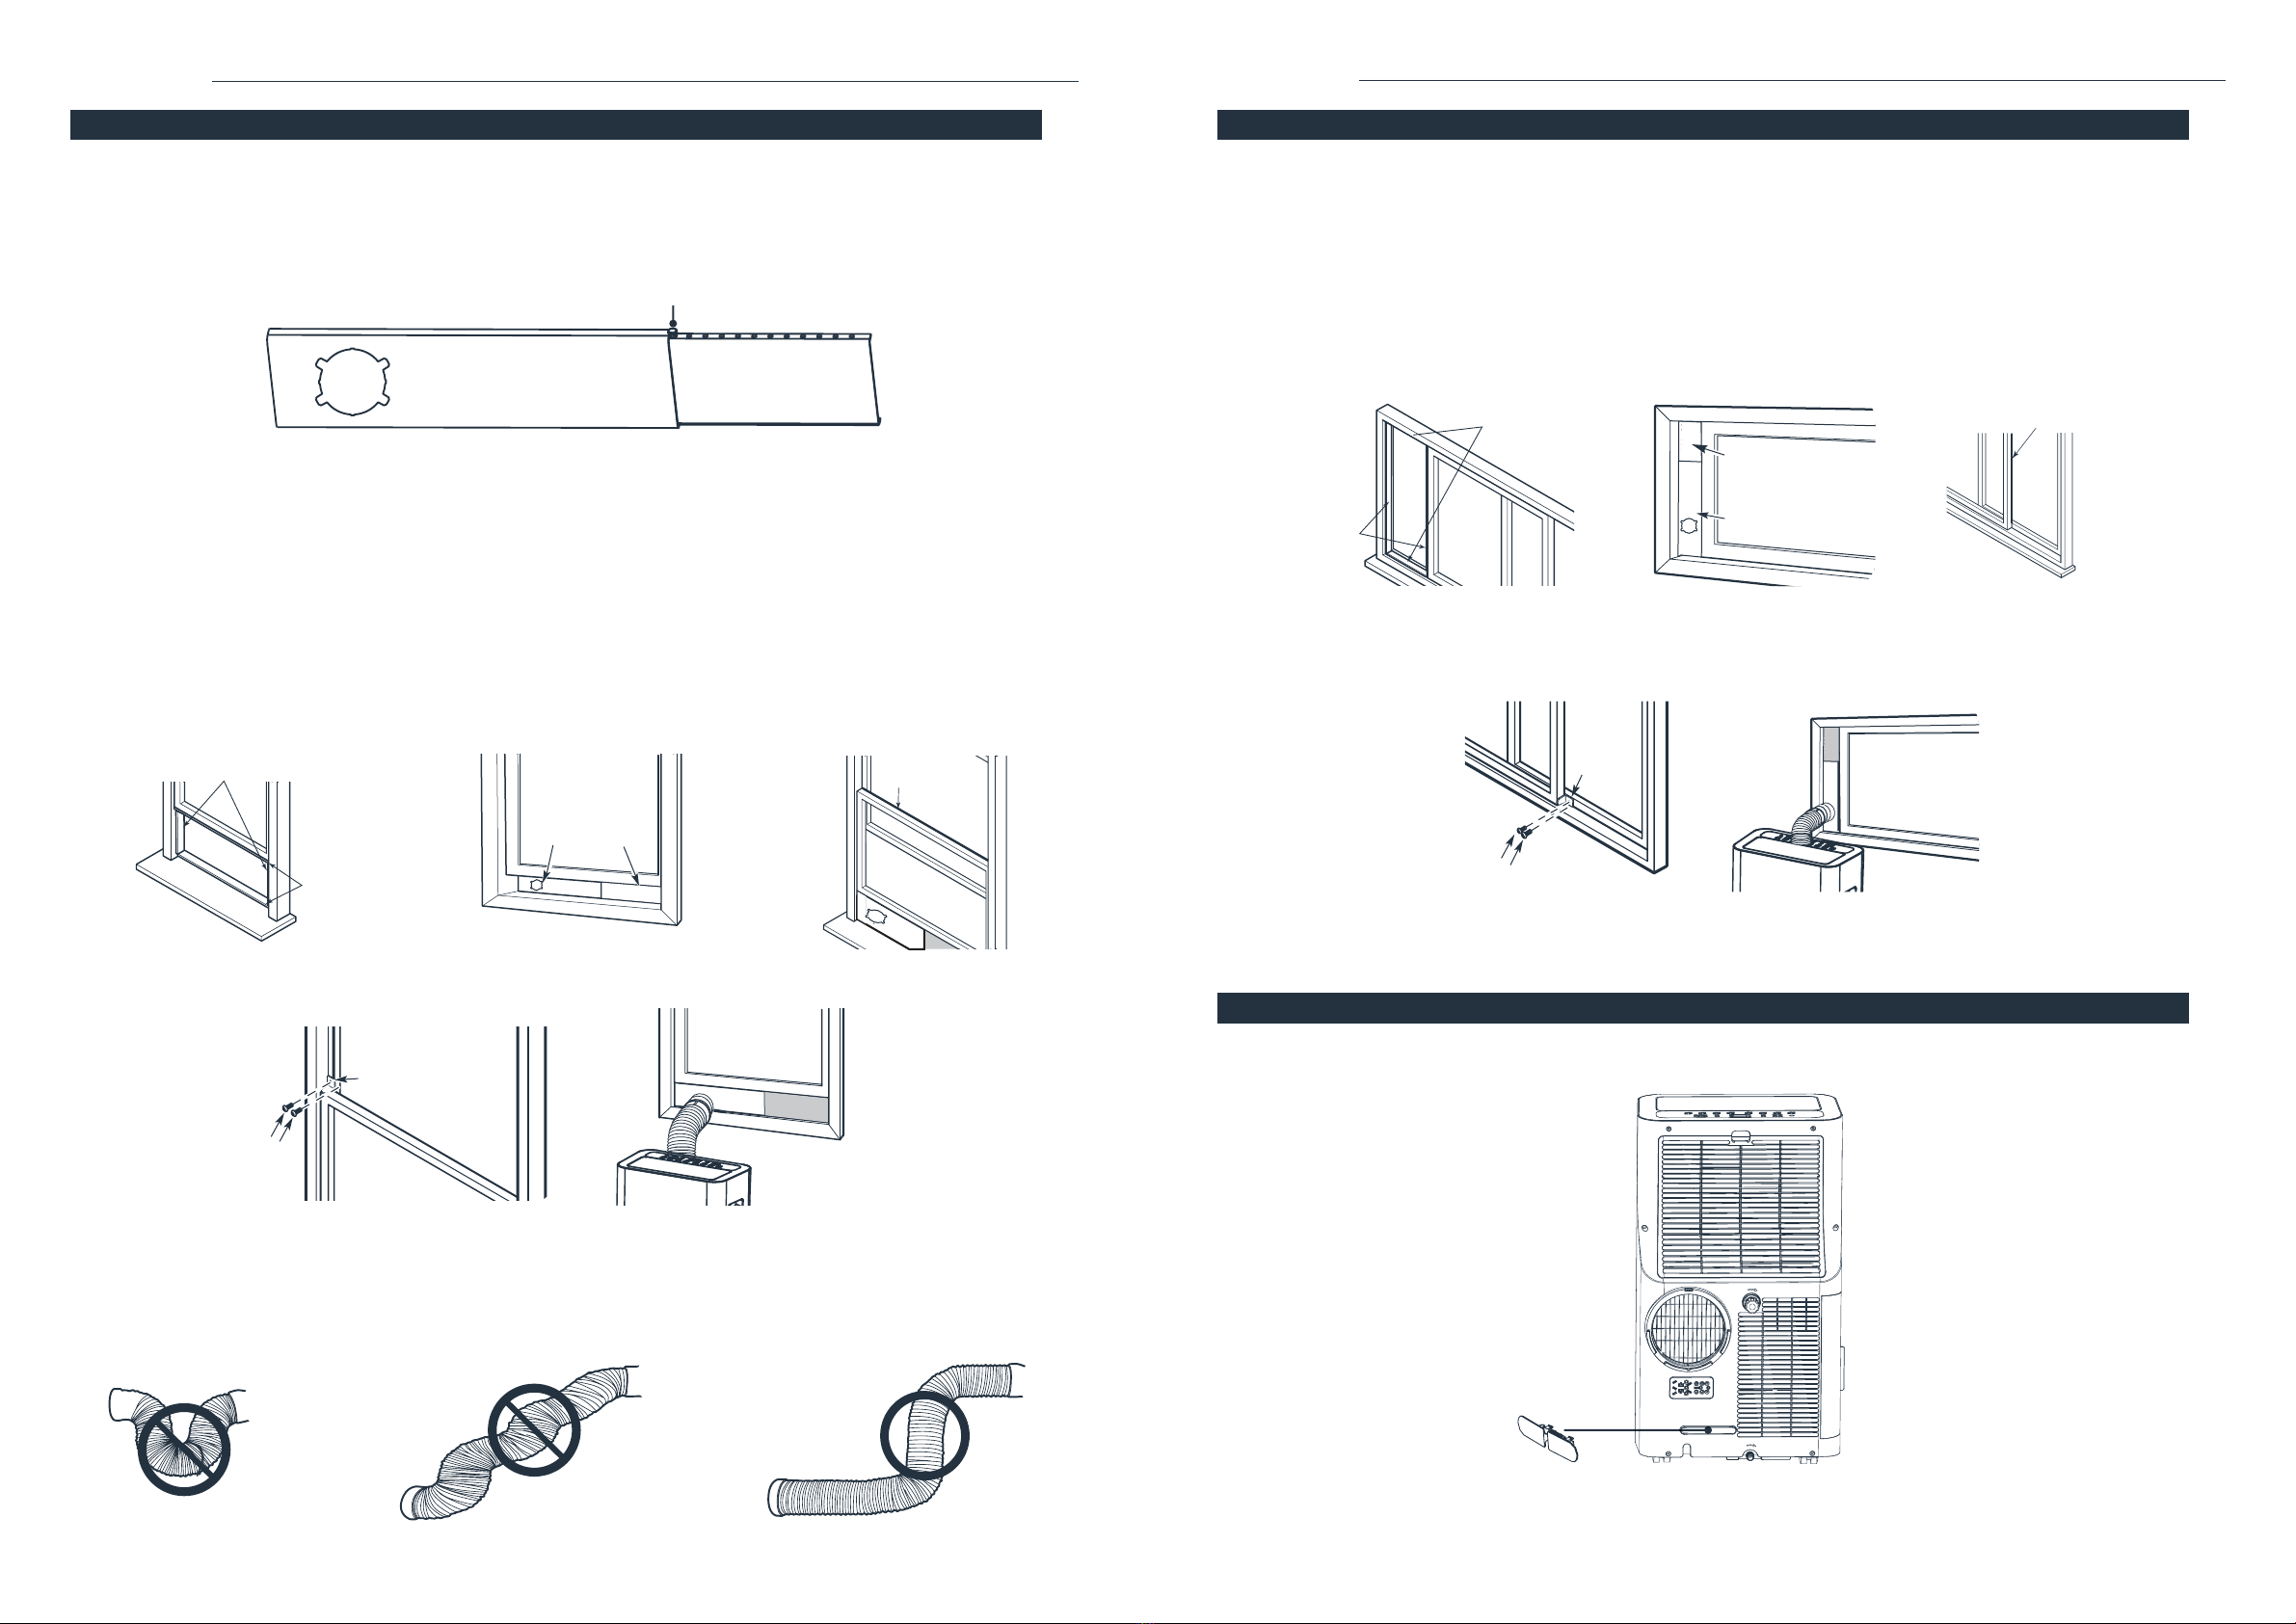
You don't have to connect the duct to the window.
AUTO OPERATION
-When you set the air conditioner in AUTO mode, it will automatically select cooling or fan only operation, depending on what temperature
-The air conditioner will adjust the room temperature automatically to your set temperature.
-Under AUTO mode, you are not able to select the fan speed.
FAN OPERATION
-Press the MODE button until the "FAN" indicator light illuminates.
-Press the FAN SPEED button to choose the fan speed. The temperature cannot be adjusted.
-Do not put the duct to the window.
TIMER OPERATION
-When the unit is on, press the Timer button to initiate the Auto-off program, and the TIMER OFF indicator light will illuminate. Press the
UP or DOWN button to select the desired Auto-off time. Press the TIMER button again within 5 seconds, and the Auto-on program will be
initiated and the TIMER ON indicator light will illuminate. Press the UP or Down button to select the desired Auto-on time.
-Press and hold the UP or DOWN button to change the Auto time by 0.5-hour increments for up to 10 hours, then at 1-hour increments
for up to 24 hours.
-If there is no operation in 5 seconds, the system will automatically revert back to display the previous temperature setting.
-Turning the unit ON or OFF at any time or adjusting the Timer setting to 0.0 will cancel the Timer program.
-When a malfunction occurs, the Timer program will be canceled.
SLEEP/ECO OPERATION
returns to the original temperature. The unit will continue to operate as originally programmed.
NOTE: This feature is unavailable under FAN or DRY mode.
OPERATION INSTRUCTIONS
OPERATION
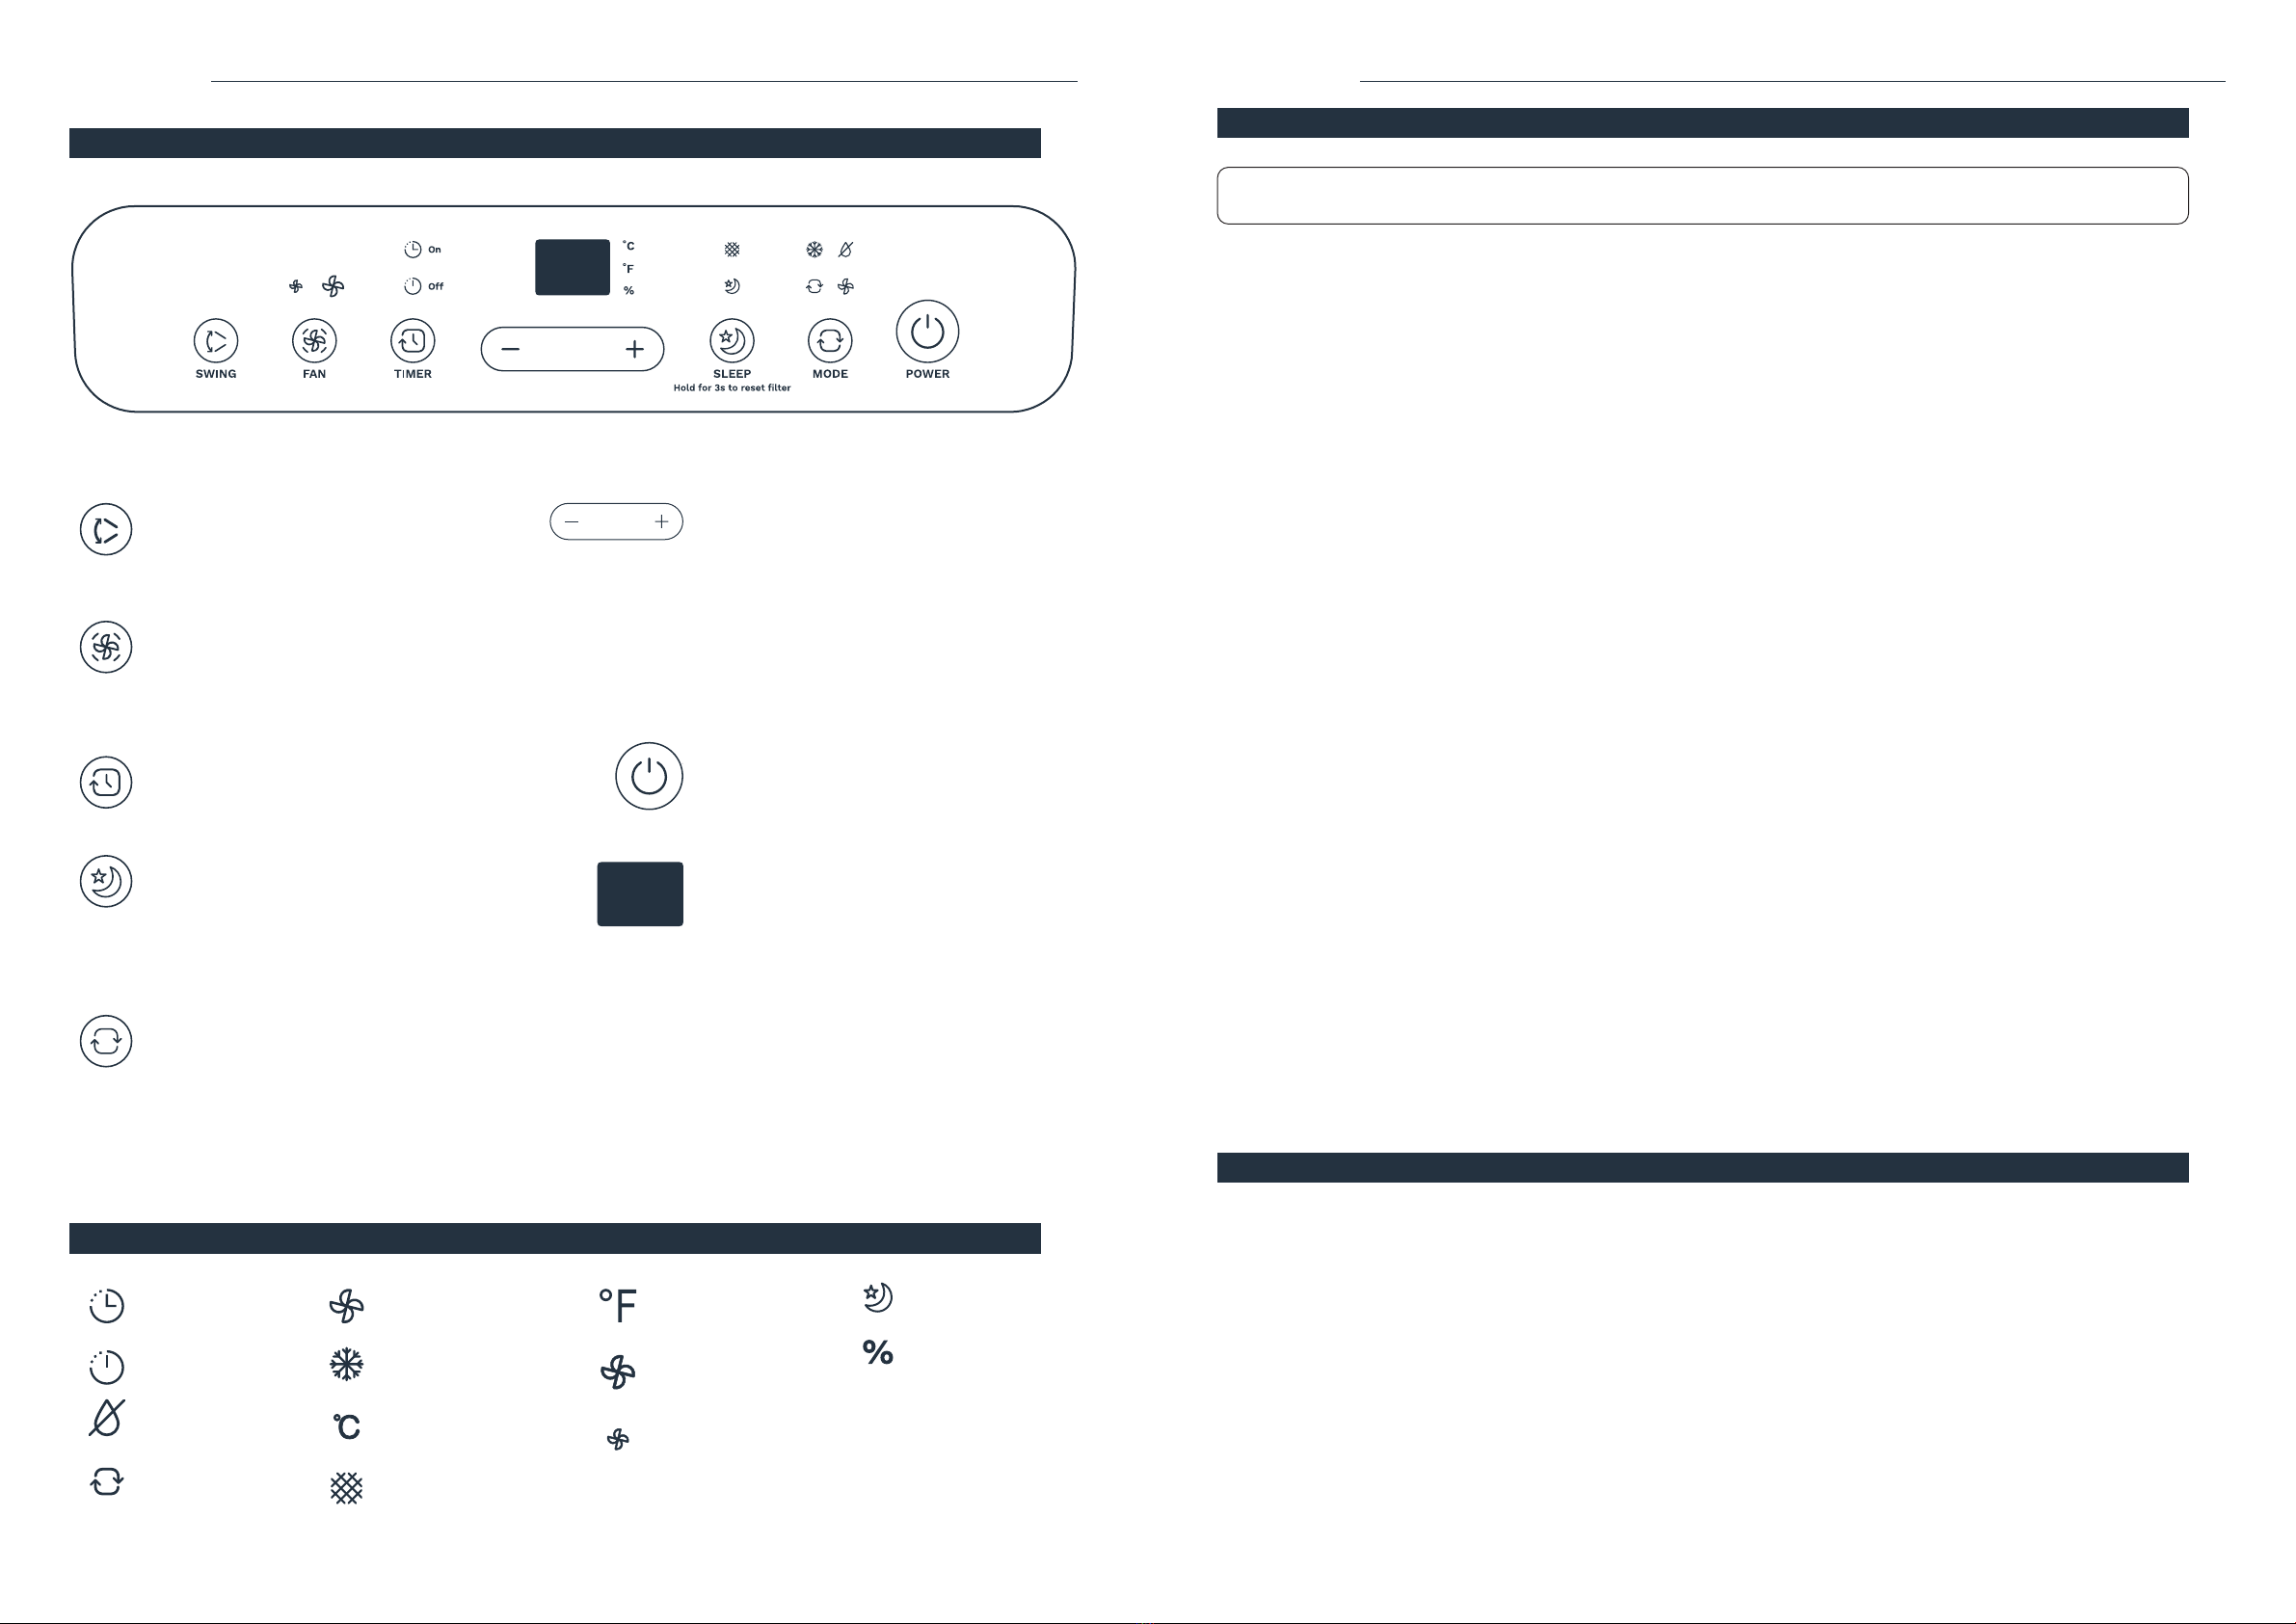
CONTROL PANEL
OPERATION
OTHER FEATURES
AUTO-RESTART
If the unit shuts off unexpectedly due to a power outage, it will restart with the previous function setting automatically
when the power resumes.
WAIT FOR 3 MINUTES BEFORE RESUMING OPERATION
After the unit stops working, do not restart operation for the next 3 minutes to protect the unit.
Operation will automatically start again after 3 minutes.
AIR FLOW DIRECTION ADJUSTMENT
-When the Power is ON, the Air Outlet Door opens fully.
-Press the SWING button on the panel or Remote Control to initiate the Auto swing feature.
The Air Outlet Door will swing up and down automatically.
-Please do not adjust the Air Outlet Door manually.
NOTE: The unit can be operated by use of the control panel or the Remote Control.
Expect a 1-second delay when using the Remote Control to operate.
SWING BUTTON: Press to initiate the Auto swing
feature. When the operation is ON, you can choose to
press it to stop the Air Outlet Door at the desired angle.
A complete swing takes about 30 seconds for the Air
Outlet Door to move from the bottom to the top.
FAN BUTTON: Press to control the fan speed. Press to
select the fan speed; LOW, HIGH and AUTO. The fan
speed indicator light illuminates under different fan
settings except for AUTO speed. When you select AUTO
fan speed, all the fan indicator lights will turn dark.
TIMER BUTTON: Press it to initiate the AUTO ON start
time and AUTO OFF stop time program, in conjunction
SLEEP(ECO)/FILTER BUTTON: Press it to initiate the
light will illuminate to remind you to clean the Air Filter
for 3 seconds to cancel the reminder.
MODE BUTTON: This button allows you to select the
appropriate operating mode. Each time you press the
button, a mode is selected in a sequence that goes
from AUTO, COOL, DRY and FAN. The mode indicator
light will illuminate under the different mode settings.
NOTE: On the DRY mode, you can adjust the humidity
for models with the humidity sensor.
UP (+) AND DOWN (-) BUTTONS: This button allows
0–24hrs. You can also adjust the humidity level in a
range of 35%RH (Relative Humidity) to 85%RH
(Relative Humidity) in 5% increments.
NOTE: To convert the displaying temperature between
Fahrenheit and Celsius, press and hold the Up and
Down buttons at the same time for 3 seconds.
POWER BUTTON:
LED DISPLAY: Shows the set temperature in °C or °F,
the Auto-timer settings, and the humidity settings.
When using DRY and FAN modes, it shows the room
temperature.
INDICATOR LIGHTS
Degrees Fahrenheit
High fan
Low fan
Sleep mode
Humidity
Timer on
Timer off
Dry mode
Auto mode
Fan mode
Cool mode
Degrees Celsius
Filter light
FAN
TIMER
SLEEP
MODE
POWER
SWING