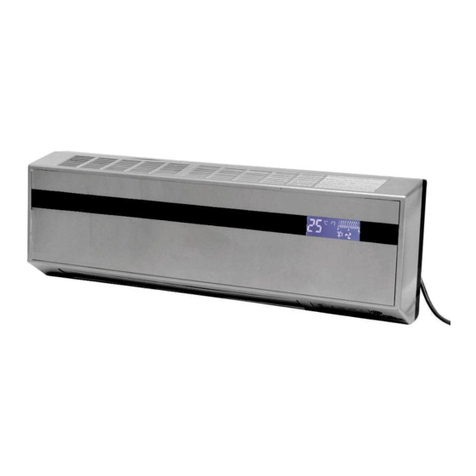
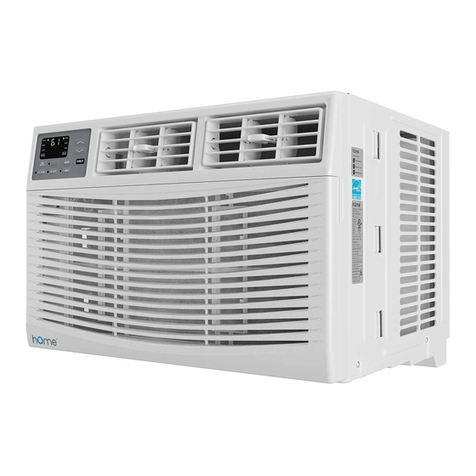
Home HME030356N User manual

Thank you for purchasing our appliance. Please be sure to read the
entirety of this user manual carefully prior to use of the product. If you
have any questions regarding the use of this product, please call 1-800-
898-3002.
Split AC
HME030356N
HME030357N
HME030358N
HME030359N
HME030363N
HME030364N

BEFORE FIRST USE:
The Split AC contains both Indoor (Part 1) and Outdoor (Part
2) units. These main unit parts are shipped separately in two
boxes. Only start installation when you have both boxes. It is
recommended to have the Split AC professionally installed by an
HVAC specialist.
To prevent any internal damage, it is very important to keep
refrigeration units (like this one) upright throughout their journey.
Please leave the indoor and outdoor units standing upright and
outside the box for 24 HOURS before plugging it in.
In the event this product malfunctions, or you believe it is
defective, please contact Customer Service at homelabs.com/
the defective product (pending further instruction). A defective
product should be clearly marked or stored where it cannot
be used by mistake. Failure to keep the product in its original
quality from the time of receipt may impede hOme™’s ability
to correct any legitimate problem and may limit the extent to
which hOme™ may provide recourse.

Important Safety Instructions
Operating Instructions
Cleaning and Maintenance
Accessories
Installation
Refrigerant Piping Connection
Air Evacuation
Electrical Requirements
Test Run
Troubleshooting
Warranty
Manufacturing Info
Warning
Contact Us
6-8
9-20
21-23
24
25-36
37-39
40-41
42
43
44-46
47
47
47
47
TABLE OF CONTENTS


on bringing home your new appliance!
Congratulations
Don’t forget to register your product at homelabs.com/reg
for updates, coupons, and other relevant information.
Although greatly appreciated, product registration is not
required to activate any warranty.

6
Read Safety Precautions Before Operation and Installation
Incorrect installation as a result of one’s failure to follow instructions can cause serious damage or injury.
WARNING This symbol indicates the possibility of personal injury, loss of life, property damage,
or other serious consequences.
WARNINGS FOR PRODUCT USE
• If you notice something unusual (like a burning smell), immediately turn off the unit and disconnect
injury.
•
high speeds. This may cause injury.
•
• Do not operate the air conditioner in places near or around combustible gases. Emitted gas may
collect around the unit and cause an explosion.
• Do not operate your air conditioner in a wet room such as a bathroom or laundry room. Too much
exposure to water can cause a short circuit.
• Do not expose your body directly to cool air for a prolonged period of time.
• Do not allow children to play with the air conditioner. Children must be supervised around the unit at
all times.
• If the air conditioner is used together with burners or other heating devices, thoroughly ventilate the
• In certain functional environments such as kitchens, server rooms, etc., the use of specially designed
air-conditioning units is highly recommended.
WARNINGS FOR CLEANING AND MAINTENANCE
• Turn off the device and disconnect the power before cleaning. Failure to do so can cause electric shock.
• Do not clean the air conditioner with excessive amounts of water.
• Do not clean the air conditioner with combustible cleaning agents. Combustible cleaning agents can
WARNING
• This appliance is not intended for use by persons (including children) with reduced physical, sensory,
or mental capabilities, or with the lack of experience and knowledge on its use, unless they have
been given supervision or instruction concerning the use of the appliance by a person responsible for
their safety. Children should be supervised to ensure that they do not play with the appliance.
• Turn off the air conditioner and disconnect the power if you are not going to use it for a long time.
• Turn off and unplug the unit during storms.
• Make sure that water condensation can drain unhindered from the unit.
• Do not operate the air conditioner with wet hands. This may cause electric shock.
• Do not use this unit for any other purpose than its intended use.
• Do not climb onto or place objects on top of the outdoor unit.
Important Safety Instructions

7
Important Safety Instructions
• Do not allow the air conditioner to operate for long periods of time with doors or windows open, or if
the humidity is very high.
ELECTRICAL WARNINGS
•
hazards.
• Keep the power plug clean. Remove any dust or grime that accumulates on or around the plug. Dirty
• Do not pull the power cord to unplug the unit. Hold the plug and pull it from the outlet. Pulling
• Do not modify the length of the power supply cord or use an extension cord to power the unit. Do
• The product must be properly grounded at the time of installation, or electric shock may occur. For all
electrical work, follow all local and national wiring standards, regulations, and the installation manual.
• Connect cables tightly and clamp them securely to prevent external forces from damaging the
electrical connections must be made according to the Electrical Connection Diagram located on the
panels of the indoor and outdoor units.
• All wiring must be properly arranged to ensure that the control board cover can be closed properly.
If the control board cover is not closed properly, it can lead to corrosion and cause the connection
•
which has at least 0.12 inch clearances in all poles and has a leakage current that may exceed 10mA,
with the residual current device (RCD) having a rated residual operating current not exceeding 30mA,
in accordance with the wiring rules.
FUSE SPECIFICATIONS
• The air conditioner’s circuit board (PCB) is designed with a fuse to provide over-current protection.
T30A/250VAC (>18000Btu/h units).
WARNINGS FOR INSTALLATION
• Installation must be performed by an authorized dealer or specialist. Defective installation can cause
• Installation must be performed according to the installation instructions. Improper installation can
• Installation must be performed in accordance with NEC and CEC requirements, by authorized
personnel only.
• Contact an authorized service technician for repair or maintenance of this unit. This appliance shall
be installed in accordance with national wiring regulations.
•
• Install the unit in a stable location that can support the unit’s weight. If the chosen location cannot

8
support the unit’s weight or the installation is not done properly, the unit may drop and cause
serious injury and damage.
• Install drainage piping according to the instructions in this manual. Improper drainage may cause
water damage to your home and property.
• For units that have an auxiliary electric heater, do not install the unit within 3 feet of any
combustible material.
• Do not install the unit in a location that may be exposed to combustible gas leaks. If combustible
• Do not turn on the power until all work has been completed.
• When moving or relocating the air conditioner, consult experienced service technicians for the
disconnection and re-installation of the unit.
• For complete information on appliance installation with a supporting bracket, read the "Indoor Unit
Installation" and "Outdoor Unit Installation" sections on this manual.
SPECIAL NOTICE
• Disposing of this appliance in the forest or other natural surroundings endangers your health, and at
the same time, is bad for the environment. Hazardous substances may seep into the ground water and
result in food and water contamination.
FCC STATEMENT
The remote control could comply with the local national regulations. In USA, this remote control
(1) This remote control may not cause harmful interference, and
(2) This remote control must accept any interference received, including interference that may cause
undesired operation.
This remote control has been tested and found to comply with the limits for a Class B digital device,
pursuant to Part 15 of the FCC Rules. These limits are designed to provide reasonable protection against
harmful interference in a residential installation. This remote control generates, uses and can radiate radio
frequency energy and, if not installed and used in accordance with the instructions, may cause harmful
interference to radio communications. However, there is no guarantee that interference will not occur
in a particular installation. If this remote control does cause harmful interference to radio or television
reception, which can be determined by turning the equipment off and on, the user is encouraged to try to
• Reorient or relocate the receiving antenna.
• Increase the separation between the equipment and receiver.
• Connect the equipment into an outlet on a circuit different from that to which the receiver is connected.
• Consult the dealer or an experienced radio/TV technician for help.
•
authority to operate the equipment.
SAVE THESE INSTRUCTIONS
For Household Use Only
Important Safety Instructions

9
INDOOR UNIT DISPLAY
Note: Different models have different front panels and display windows. Not all the indicators described
below are available for the air conditioner you purchased. Check the indoor display window of the unit to
know which model you purchased.
Illustrations in this manual are for explanatory purposes. The actual shape of your indoor unit may be
slightly different. The actual shape of your unit shall prevail.
Power Cable (Not supplied)
Remote Control
Louver
Front Panel
Display window
Display Code
Meanings
Displays temperature, operation feature, and
Error codes:
“ ” is on for 3 seconds when:
• FRESH, SWING, TURBO, or SILENCE feature is turned on.
• TIMER OFF is set.
• FRESH, SWING, TURBO, or SILENCE feature is turned off.
“ ” Defrosting is activated.
“ ” Anti-cold air feature is activated.
“ ” Self-cleaning is activated.
“ ”
“ ” Wireless Control is activated (only for some models).
“ ” 8°C heating feature is activated.
• TIMER ON is set (if the unit is OFF, remains on when TIMER ON is set).
“ ”
“ ” is on for 3 seconds when:
Operating Instructions

10
OPERATING TEMPERATURE
If your air conditioner is used beyond the temperature ranges found on the table below, certain safety
protection features may be activated and could cause the unit to stop working.
Inverter Split Type
COOL MODE HEAT MODE DRY MODE
Room
Temperature
62°F–90°F
(17°C–32°C)
32°F–86°F
(0°C–30°C)
50°F–90°F
(10°C–32°C)
Outdoor
Temperature
32°F–122°F
(0°C–50°C)
5°F–86°F
(-15°C–30°C)
32°F–122°F
(0°C–50°C)
5°F–122°F
(-15°C–50°C)
(For models with low- temp
cooling systems.)
FOR OUTDOOR UNITS WITH AUXILIARY ELECTRIC HEATER
When outdoor temperature is below 0°C (32°F), keep the unit plugged in at all times to ensure smooth,
ongoing performance.
Fixed-speed Type
COOL MODE HEAT MODE DRY MODE
Room
Temperature 62°F–90°F (17°C–32°C) 32°F–86°F
(0°C–30°C) 50°F–90°F (10°C–32°C)
Outdoor
Temperature
64°F–109°F (18°C–43°C)
19°F–75°F
(-7°C–24°C)
52°F–109°F (11°C–43°C)
19°F–109°F (-7°C–43°C)
(For models with low-temp
cooling systems)
64°F–109°F (18°C–43°C)
Note: Room relative humidity should be less than 80%. If the air conditioner operates in higher humidity,
For your unit to have optimized performance, follow the rules stated below:
• Keep doors and windows closed.
• Save power by using the TIMER ON and TIMER OFF functions.
• Do not block air inlets or outlets.
•
Operating Instructions

11
OTHER FEATURES
1. Auto-restart
If the unit loses power, it will automatically restart with the last settings used, once power
resumes.
2. Louver Angle Memory
3. Refrigerant Leakage Detection
when the unit detects any refrigerant leakage.
4. Sleep Mode
• This function is used to decrease energy use and also helps ensure you sleep comfortably. It
can only be activated via remote control and is not available in FAN or DRY mode.
• Press the SLEEP button when you are ready to sleep. When in COOL mode, the unit will increase
the temperature by 2°F (1°C) after 1 hour, then increase an additional 2°F (1°C) after another
hour. When in HEAT mode, the unit will decrease the temperature by 2°F (1°C) after 1 hour, then
decrease an additional 2°F (1°C) after another hour. The sleep feature will stop after 8 hours and
Set
Temperature
1hr 1hr
Keep
Running
SLEEP Operation
Saving Energy During Sleep
Heat Mode (-2°F/1°C) Per Hour
for the First Two Hours
Cool Mode (+2°F/1°C) Per Hour
for the First Two Hours
5.
When the Follow Me feature is activated, the remote will then act as the thermostat instead of
the unit, helping the unit more accurately cool to your desired temperature based on the ambient
temperature in the area where the remote is located.
• To activate the Follow Me feature, point the remote control towards the unit and press the
"Follow Me" button. The remote will display the actual temperature at its current location. The
remote control will send this signal to the air conditioner every 3 minutes until the Follow Me
button is pressed again. If the unit does not receive the Follow Me signal during any 7-minute
interval, the unit will beep to indicate the Follow Me mode has ended.
• To deactivate this feature, just press the FOLLOW ME button again.
Operating Instructions

12
ADJUSTING AIRFLOW DIRECTION
While the unit is on, press the SWING/DIRECT button on the remote control to set the vertical direction
Remote Control section on this manual for details.
Note:
• In COOL or DRY mode, do not set the louver at a vertical angle for too long. This will leave droplets
• In COOL or HEAT mode, setting the louver at a
vertical angle can reduce the performance of the
your preferred direction.
WARNING
• The manual button is only intended for testing
purposes and emergency operation. Do not use it unless
the remote control is lost and it is absolutely necessary
to utilize the manual button to operate the unit.
• Turn the unit off before any manual operation.
•
of the unit. The interior high-speed fan could hurt you.
• Do not move the louver by hand as it will cause the
louver to become out of sync with the remote control.
To reset the louver, turn the unit off and unplug it for a
few seconds, then restart it.
1. Open the front panel of the indoor unit.
2. Locate the MANUAL CONTROL button on the lower
3. Press the MANUAL CONTROL button to activate the
FORCED AUTO mode.
4. Press the MANUAL CONTROL button again to activate
5. Press the MANUAL CONTROL button once more to turn
the unit off.
6. Close the front panel.
To restore to regular operation, use the remote control to
activate the unit.
Deflector
Rod
Operating Instructions
Fig.B
Range
Manual Control
Button

13
Operating Instructions
REMOTE CONTROL
Note:
• The buttons on the remote control might be slightly different from
the actual one you purchased. The actual remote you received
(including its buttons) shall prevail.
• If the function or feature described isn’t available in your unit,
then nothing will happen when pressing the relative button for
that function or feature on the remote control.
Press to turn the unit on or off.
AUTO
COOL
DRY
HEAT FAN
Note: Do not select Heat Mode if you purchased the cooling-only model.
Cooling-only appliances don't support Heat Mode.
Press to select the fan speed. You can choose from any of the
Auto Low Med High
Press to activate/disable the sleep function. In sleep mode, the unit
can maintain a comfortable temperature while saving energy. This
function is available in COOL, HEAT, or AUTO mode only.
For complete details, see Sleep Mode in the “Other Features” section
on Page 11.
Note: To exit Sleep Mode, just press MODE, FAN, or the ON/OFF
button.
The Turbo function enables the unit to reach the preset temperature
unit does not support this function, nothing will happen when you
press this button. Press the TURBO button to activate/disable this
function.
In SELF CLEAN mode, the unit will automatically clean and dry the
evaporator and keep it fresh for the next operation. Press the SELF
CLEAN button to activate/disable this function.
1
2
4
3
5
6
8
9
7
10
12
13
14
11

14
Operating Instructions
7. TEMP
Press this button to increase the indoor temperature by 1°F
increments. You can set the temperature up to 86°F.
TEMP
Press this button to decrease the indoor temperature by 1°F
increments. The lowest temperature that can be set is 62°F.
Hold both TEMP and
the two temperature systems: °C and °F.
Note:
• Setting the temperature is not available in Fan mode.
• When the Silence function is activated, the unit will reduce the noise
to the lowest level and create a quiet and comfortable environment.
To activate/disable the SILENCE function, press the SILENCE/FP
.
•
a steady 46°F and prevents freezing, most especially in vacation
homes or rooms that are not frequently used in winter and could
be susceptible to damage. To activate/disable the FP function,
To exit the FP function, press the ON/OFF, SLEEP, SILENCE/FP,
MODE, FAN or TEMP buttons.
Press to set auto-on time (in 30-minute increments). When setting the
time and it reaches 10 hours, if you continue to press the button, it
will increase the time to 60-minute increments. To cancel the auto-on
timer, press this button to adjust it to 0 hour.
Press to set auto-off time (in 30-minute increments). When setting the
time and it reaches 10 hours, if you continue to press the button, it
will increase the time to 60-minute increments. To cancel the auto-off
timer, press this button to adjust it to 0 hour.
Press to Start or Stop the Swinging of the Horizontal Louver.
Press to activate the Follow Me feature. For details, refer to the "Follow
Me Setting" in the “Other Features” section on Page 11.
Press to turn the Display On or Off.
1
2
4
3
5
6
8
9
7
10
12
13
14
11

15
DISPLAY INDICATORS INTRODUCTION
Operation Mode
AUTO COOL DRY HEAT FAN
Remote control is ON
Low battery warning
Auto-on timer is set
Auto-off timer is set
Shows preset temperature, room temperature, or
time under TIMER setting
Indicates Sleep Mode
Indicates that the air conditioner is operating in
Follow me mode
Not available for this unit
Fan speed indications
Low speed
Medium speed
High speed
Auto speed
Note:
of clear presentation. During actual operation, only the
relative functional indicators will be shown on the display.
Operating Instructions

16
HOW TO USE THE BUTTONS
Ensure that the unit is plugged in and powered on. The OPERATION
1. Press the MODE button and select “Auto”.
2. Press the TEMP or button to set the desired temperature.
The temperature can be set within a range of 62°F~86°F in 1°F
increments.
3. Press the ON/OFF button to start the operation.
Note:
- In Auto Mode, the air conditioner can be programmed to run in Cooling,
Fan, or Heating Mode by detecting the room temperature and the set
temperature.
- In Auto Mode, you cannot select fan speed as it is automatically
controlled.
- If Auto Mode is not comfortable for you, select another mode.
Ensure that the unit is plugged in and powered on.
1. Press the MODE button to select among “COOL”, “HEAT,” (cooling &
heating models only), and “FAN” Mode.
2. Press the TEMP or buttons to set the desired temperature
within 62°F~86°F in 1°F increments.
3. Press the FAN
“Auto”, “Low”, “Med”, and “High”.
4. Press the ON/OFF button to start the operation.
Note:
In FAN Mode, you cannot set the temperature. In this case, only steps 1, 3,
and 4 can be performed.
Ensure that the unit is plugged in and powered on. The OPERATION
1. Press the MODE button to select “DRY” mode.
2. Press the TEMP or buttons to set the desired temperature
within 62°F~86°F in 1 °F increments.
3. Press the ON/OFF button to start the dehumidifying operation.
Note:
In Dehumidifying Mode, fan speed is automatically controlled and cannot
be changed.
Operating Instructions
SILENCE
FP
MODE
FAN
TEMP
ON/OFF
TIMER
ON
TIMER
OFF
3
1
2
LED FOLLOW
ME
TURBO SELF
CLEAN
SWING DIRECT
SLEEP
MODE
FAN
TEMP
ON/OFF
SILENCE
FP
TIMER
ON
TIMER
OFF
3
1
2
LED FOLLOW
ME
TURBO SELF
CLEAN
SWING DI RE CT
SLEEP
MODE
FAN
TEMP
ON/OFF
TIMER
ON
TIMER
OFF
4
1
3
2
SILENCE
FP
LED FOLLOW
ME
TURBO SELF
CLEAN
SWING DI RE CT
SLEEP

17
Follow the steps below to set the timer to turn on or turn off the
air conditioner automatically.
1. Press the TIMER ON button. The remote control screen
shows “TIMER ON”, and then shows an “H” and the last
memorized auto-on time.
2. Press the TIMER ON button repeatedly to reset the auto-on
time. The set time will increase in half-hour increments within
0-10 hours and in one hour increments within 10-24 hours.
3. After the time is set, there will be a one second delay
before the remote control transmits the signal to the air
conditioner. After another 2 seconds, the signal “H” will
disappear, then the set temperature will resume on the
display, and the “TIMER ON” indicator lights up, indicating
that the timer is set successfully.
1. Press the TIMER OFF button. The remote control screen
shows “TIMER OFF”, and then shows an “H” and the last
memorized auto-off time.
2. Press the TIMER OFF button repeatedly to set the auto-off
time. The set time will increase in half-hour increments
within 0-10 hours and in one hour increments within 10-24
hours.
3. After time is set, there will be a one second delay before the
remote control transmits the signal to the air conditioner.
After another 2 seconds, , the signal “H” will disappear, then
the set temperature will resume on the display, and the
“TIMER OFF” indicator lights up, indicating that the timer is
set successfully.
WARNING
• When you set the timer, the remote control transmits the
remote control within the receiving range of 20ft.
• The effective operation time set by the remote control for the
3.0, 3.5, 4.0, 4.5, 5.0, 5.5, 6.0, 6.5, 7.0, 7.5, 8.0, 8.5, 9.0, 9.5, 10,
11, 12, 13, 14, 15, 16, 17, 18, 19, 20, 21, 22, 23, and 24 hours.
Operating Instructions
2
1
MODE
FAN
TEMP
ON/OFF
TIMER
ON
TIMER
OFF
SILENCE
FP
LED FOLLOW
ME
TURBO SELF
CLEAN
SWING DIRECT
SLEEP

18
TIMER ON (Auto-On Operation)
The TIMER ON feature is useful when you want the unit to turn on
automatically before you return home.
Example:
1. Press the TIMER ON
an “h” will appear on the remote control screen.
2. Press the TIMER ON button repeatedly until “6.0h” is displayed on
the remote control screen.
3. After 3 seconds, the digital display will show the temperature. The
“TIMER ON” indicator lights up, which indicates that the timer has
been set successfully.
TIMER OFF (Auto-Off Operation)
The TIMER OFF feature is useful when you want the unit to turn off
automatically after you go to bed.
Example:
1. Press the TIMER OFF
will appear on the remote control screen.
2. Press the TIMER OFF button repeatedly until “10h” is displayed on
the remote control screen.
3. After 3 seconds, the digital display will show the temperature. The
“TIMER OFF” indicator lights up, which indicates that the timer
has been set successfully.
Operating Instructions
Start
Off
6 hours later
Set
Stop
On
Set 10 hours later

19
TIMER OFF TIMER ON
(On Stop Start operation)
This feature is useful when you want to stop the air conditioner
after you go to bed, and start it again in the morning when you
wake up or when you return home.
Example:
To set the air conditioner to turn off after 2 hours and to turn on
1. Press the TIMER OFF
time and an “h” will be displayed.
2. Press the TIMER OFF button repeatedly until “2.0H” is
displayed on the TIMER OFF display area.
3. Press the TIMER ON
time and an “h” will be displayed.
4. Press the TIMER ON button repeatedly until “10H” is
displayed on the TIMER ON display area.
5. Wait for 3 seconds and the digital display will show the
temperature. The “TIMER ON OFF” indicator lights up,
indicating that the timers have been set successfully.
TIMER ON TIMER OFF
(Off Start Stop operation)
This feature is useful when you want the air conditioner to turn
on before you wake up and to turn off after you leave the house.
Example:
To set the air conditioner to turn on after 2 hours and to turn off
after 5 hours.
1. Press the TIMER ON
time and an “h” will be displayed.
2. Press the TIMER ON button repeatedly until “2.0H” is
displayed on the TIMER ON display area.
3. Press the TIMER OFF
time and an “h” will be displayed.
4. Press the TIMER OFF button repeatedly until “5.0H” is
displayed on the TIMER OFF display area.
5. Wait for 3 seconds and the digital display area will show
the temperature. The “TIMER ON OFF” indicator lights up,
indicating that the timers have been set successfully.
Operating Instructions
On
Stop
2 hours later
after setting
Set
Start
10 hours later
after setting
Off Stop
Start
2 hours later
after setting
5 hours later
after setting
Set

20
Operating Instructions
Handling the Remote Control
• Use the remote control within a distance of 20ft from the appliance,
pointing it towards the receiver of the appliance. Reception is
WARNING
• The air conditioner will not operate if curtains, doors, or other materials
block the signals from the remote control to the indoor unit.
• Prevent any liquid from falling into the remote control. Do not expose
the remote control to direct sunlight or heat.
• If the infrared signal receiver on the indoor unit is exposed to direct
sunlight, the air conditioner may not function properly. Use curtains
to protect the indoor unit.
• If other electrical appliances react to the remote control, move these
appliances or consult your local dealer.
• Do not drop the remote control. Handle it with care.
• Do not place heavy objects on the remote control.
Replace the batteries if there is no beep when pressing a button or the
power indicator light fades away.
The remote control is powered by two dry batteries (R03/LR03X2). To
(1) Open the battery compartment on the remote control.
(2) Replace the batteries and make sure the battery polarity is correct.
(3) Close the battery compartment cover.
Note:
When the batteries are removed, all programming will be erased on the
remote control. After inserting new batteries, the remote control must be
reprogrammed.
WARNING
• Do not mix old batteries with new batteries or batteries of different
types.
• Do not leave the batteries in the remote control if they are not going
to be used for 2 or 3 months.
• Do not dispose batteries as unsorted municipal waste. It is necessary
to collect such waste separately for special treatment.
26ft
This manual suits for next models
5
Table of contents
Other Home Air Conditioner manuals
Popular Air Conditioner manuals by other brands

Bryant
Bryant 14 SEER Service manual

GE
GE AEL05 installation instructions

Mitsubishi Electric
Mitsubishi Electric MFZ-KW25VG installation manual

Panasonic
Panasonic CS-C12MKF-2 operating instructions

HomeTech
HomeTech FL-1701R instructions

Panasonic
Panasonic S-22MF2E5A8 Service Manual & Test Run Service Manual