8
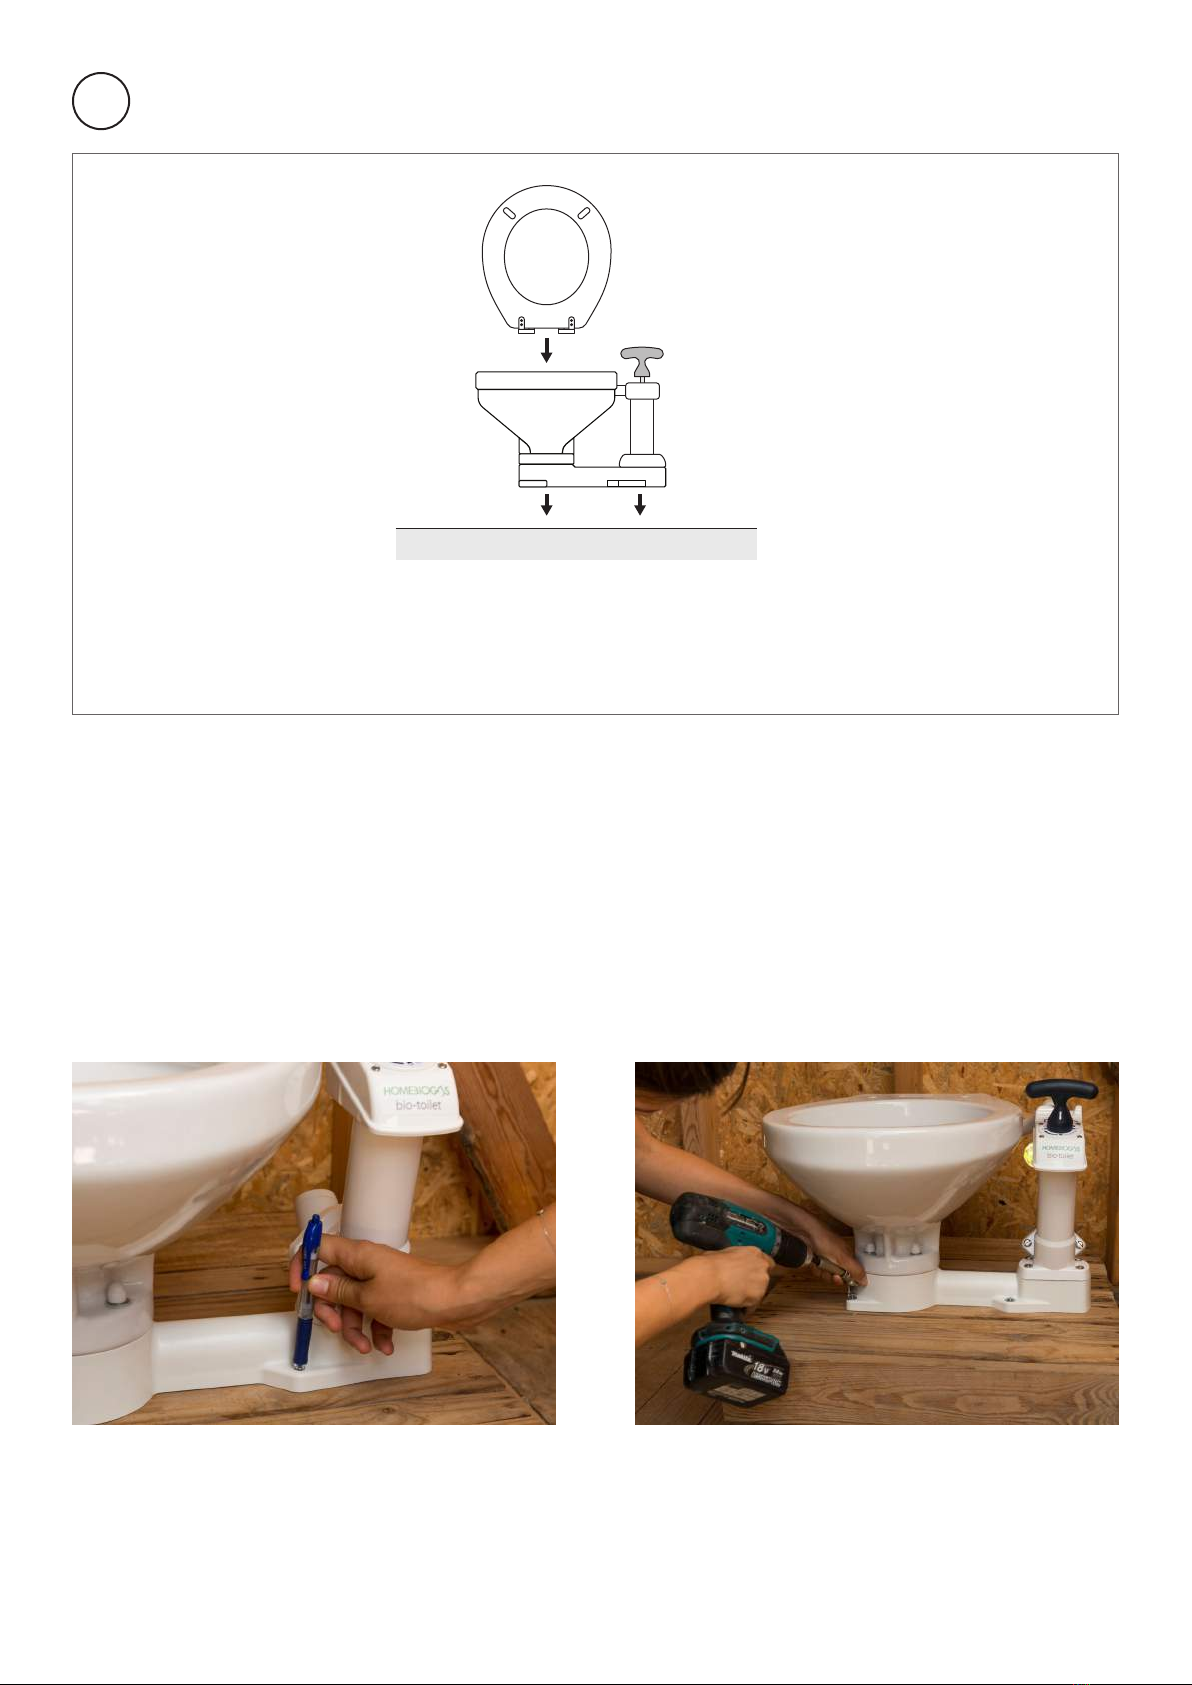
installing the toilet
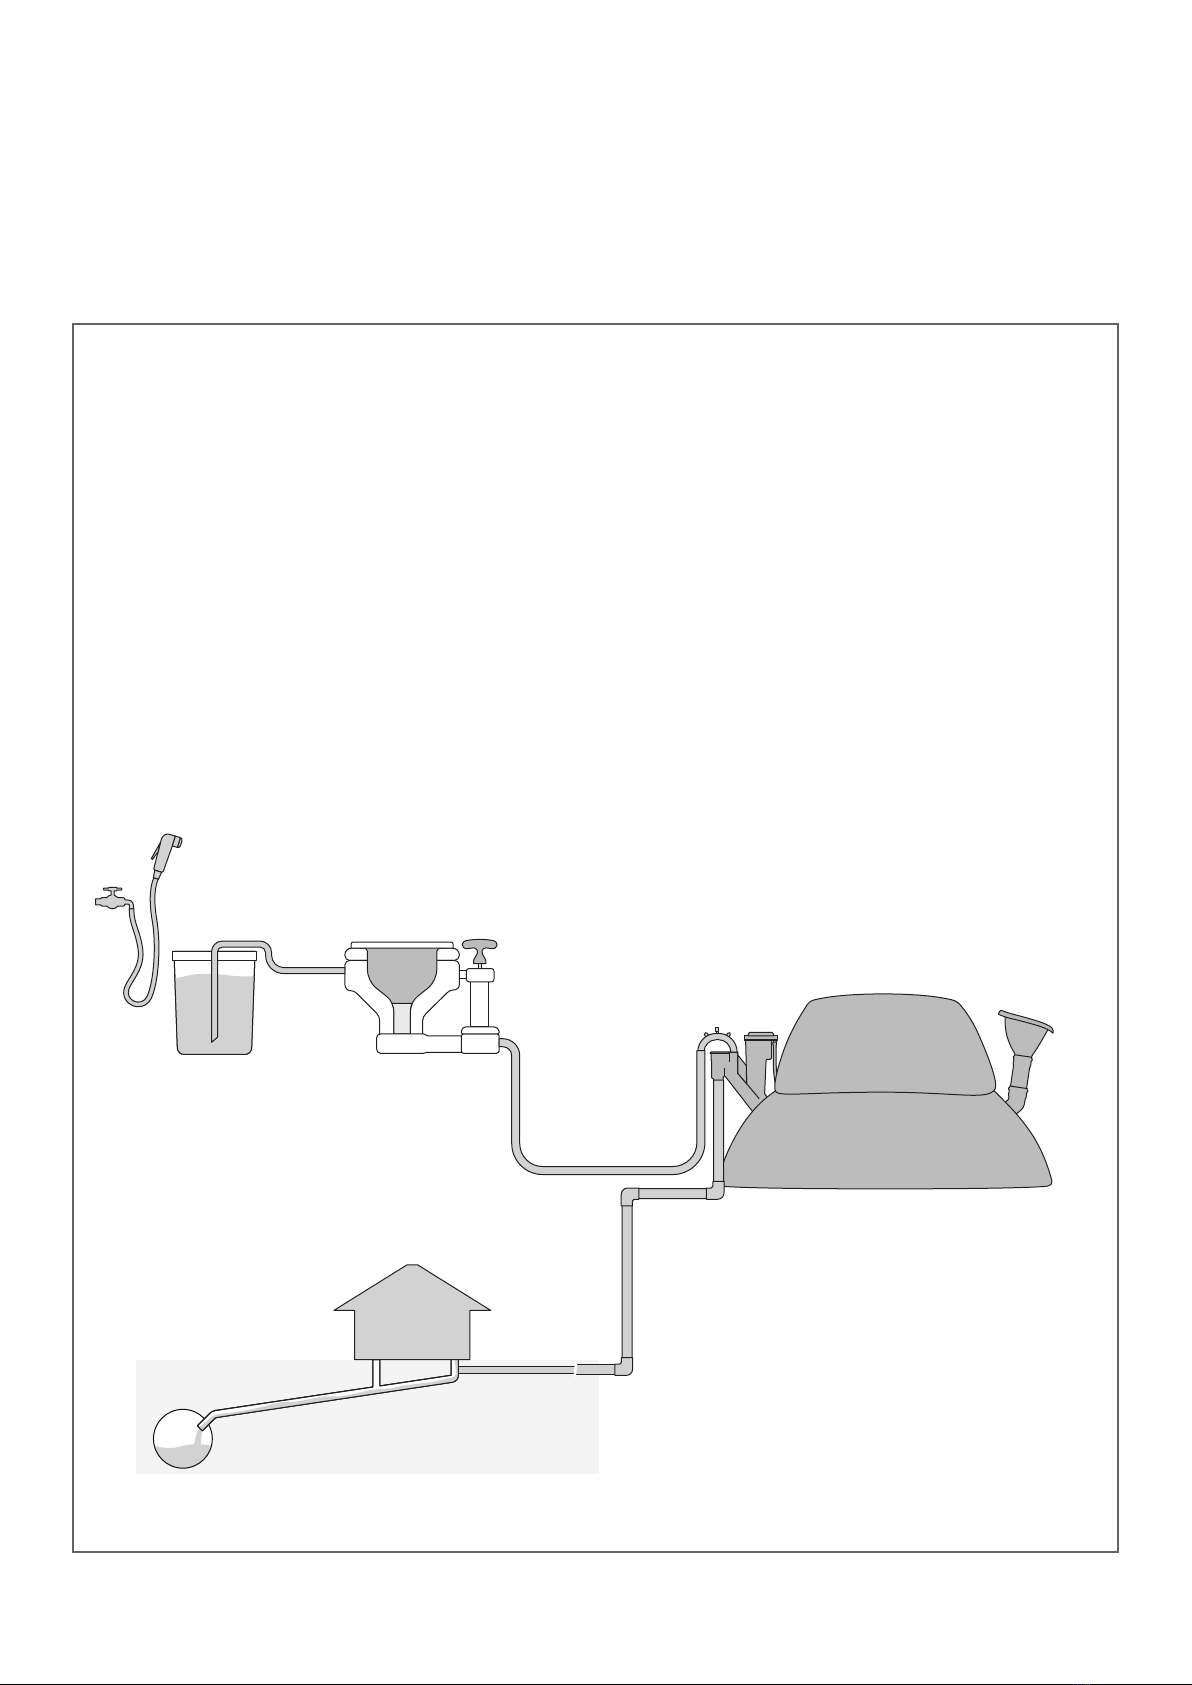
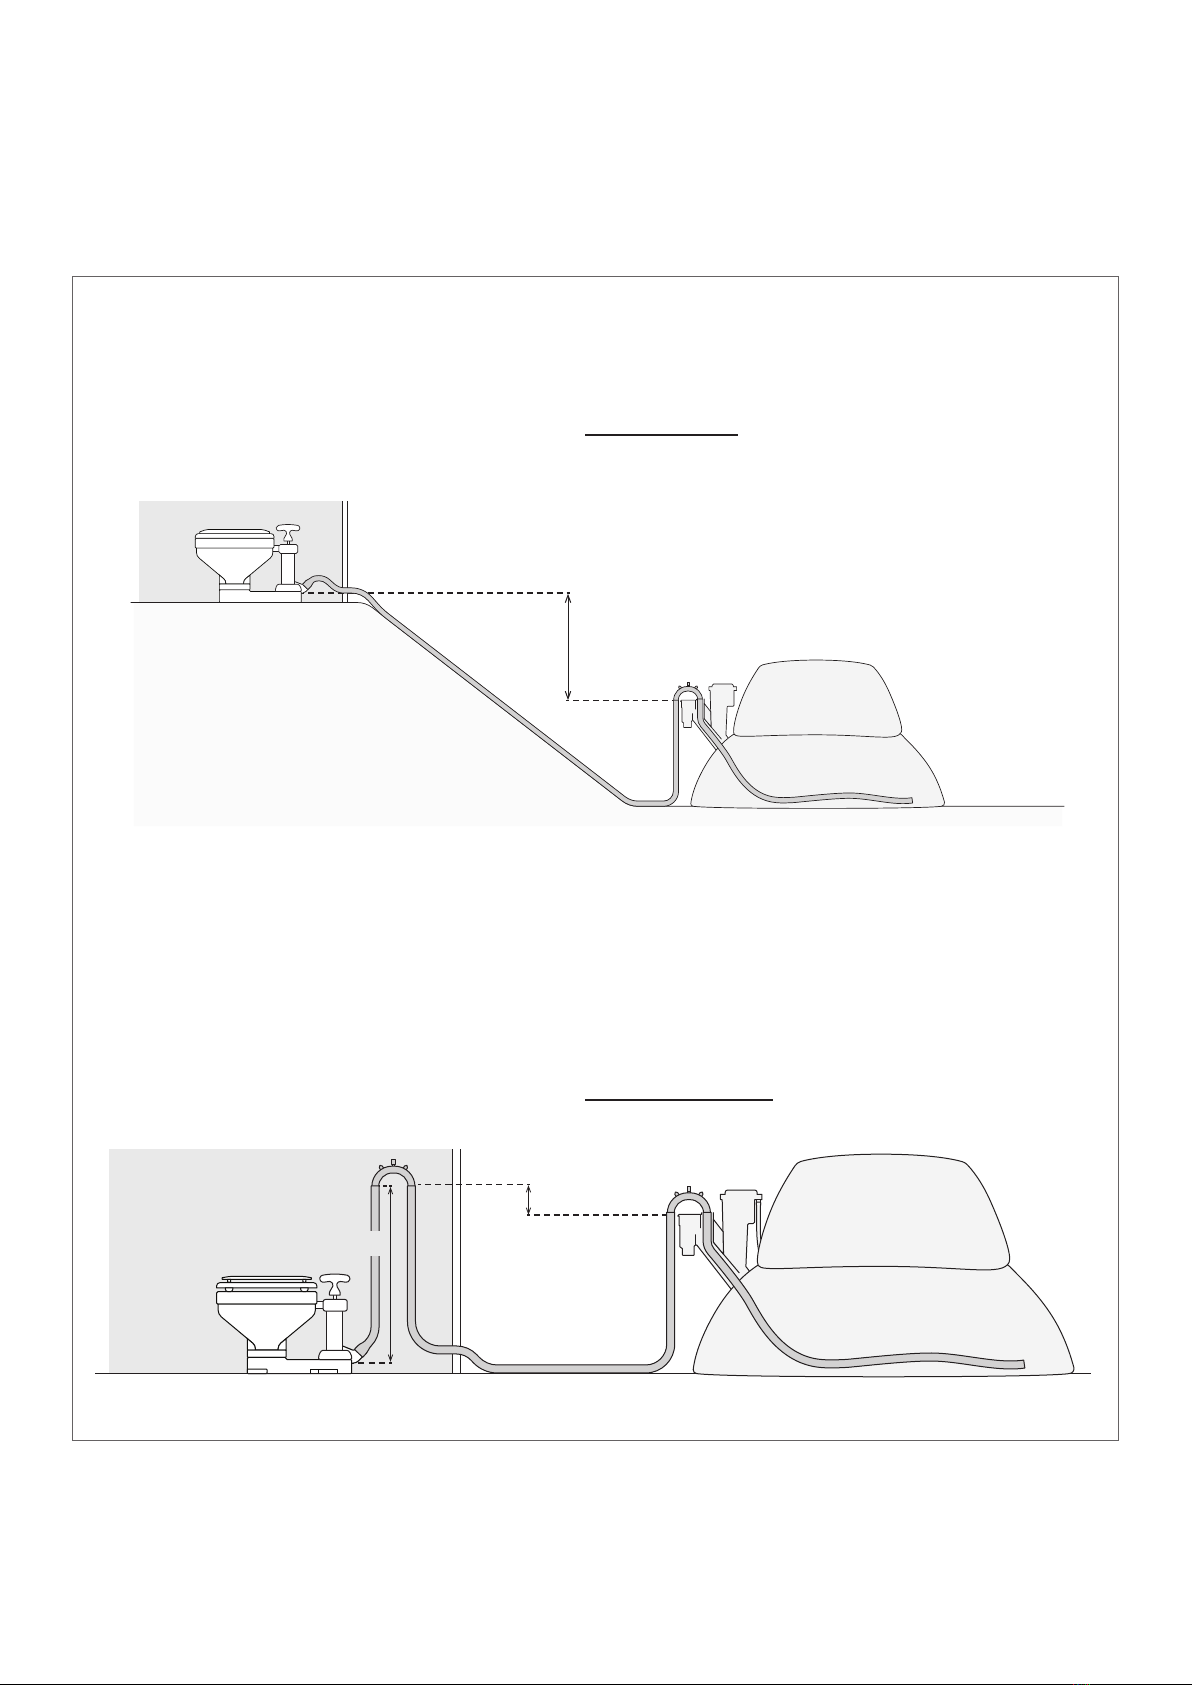
• Flexible, reinforced sanitation hose (38mm/1.5in) of suitable length to connect toilet to system.
An odor-proof sanitation hose is recommended, especially for indoors toilet connections.
• 8mm diameter bolts for mounting toilet bowl (length depending on ooring/platform)
• PVC pipes and ttings to connect fertilizer outlet to chosen euent system (length depending
on toilet location - p15)
• Optional ball valve for 38mm/1.5in pipe, to install after pipe for easier maintenance
If constructing draineld/mulch basin (optional - refer p16):
Draineld:
• large gravel (1-2”diameter), 180 - 360 liter
• ne gravel (0.25-0.75” diameter), 25 - 75 liter
Mulch Basin
• landscaping mulch, large wood chips, ne wood chips/sawdust
Other tools required:
• Power drill (holes for mounting toilet bowl)
• Screwdriver (at) for hose clamps
• Shovel for draineld construction
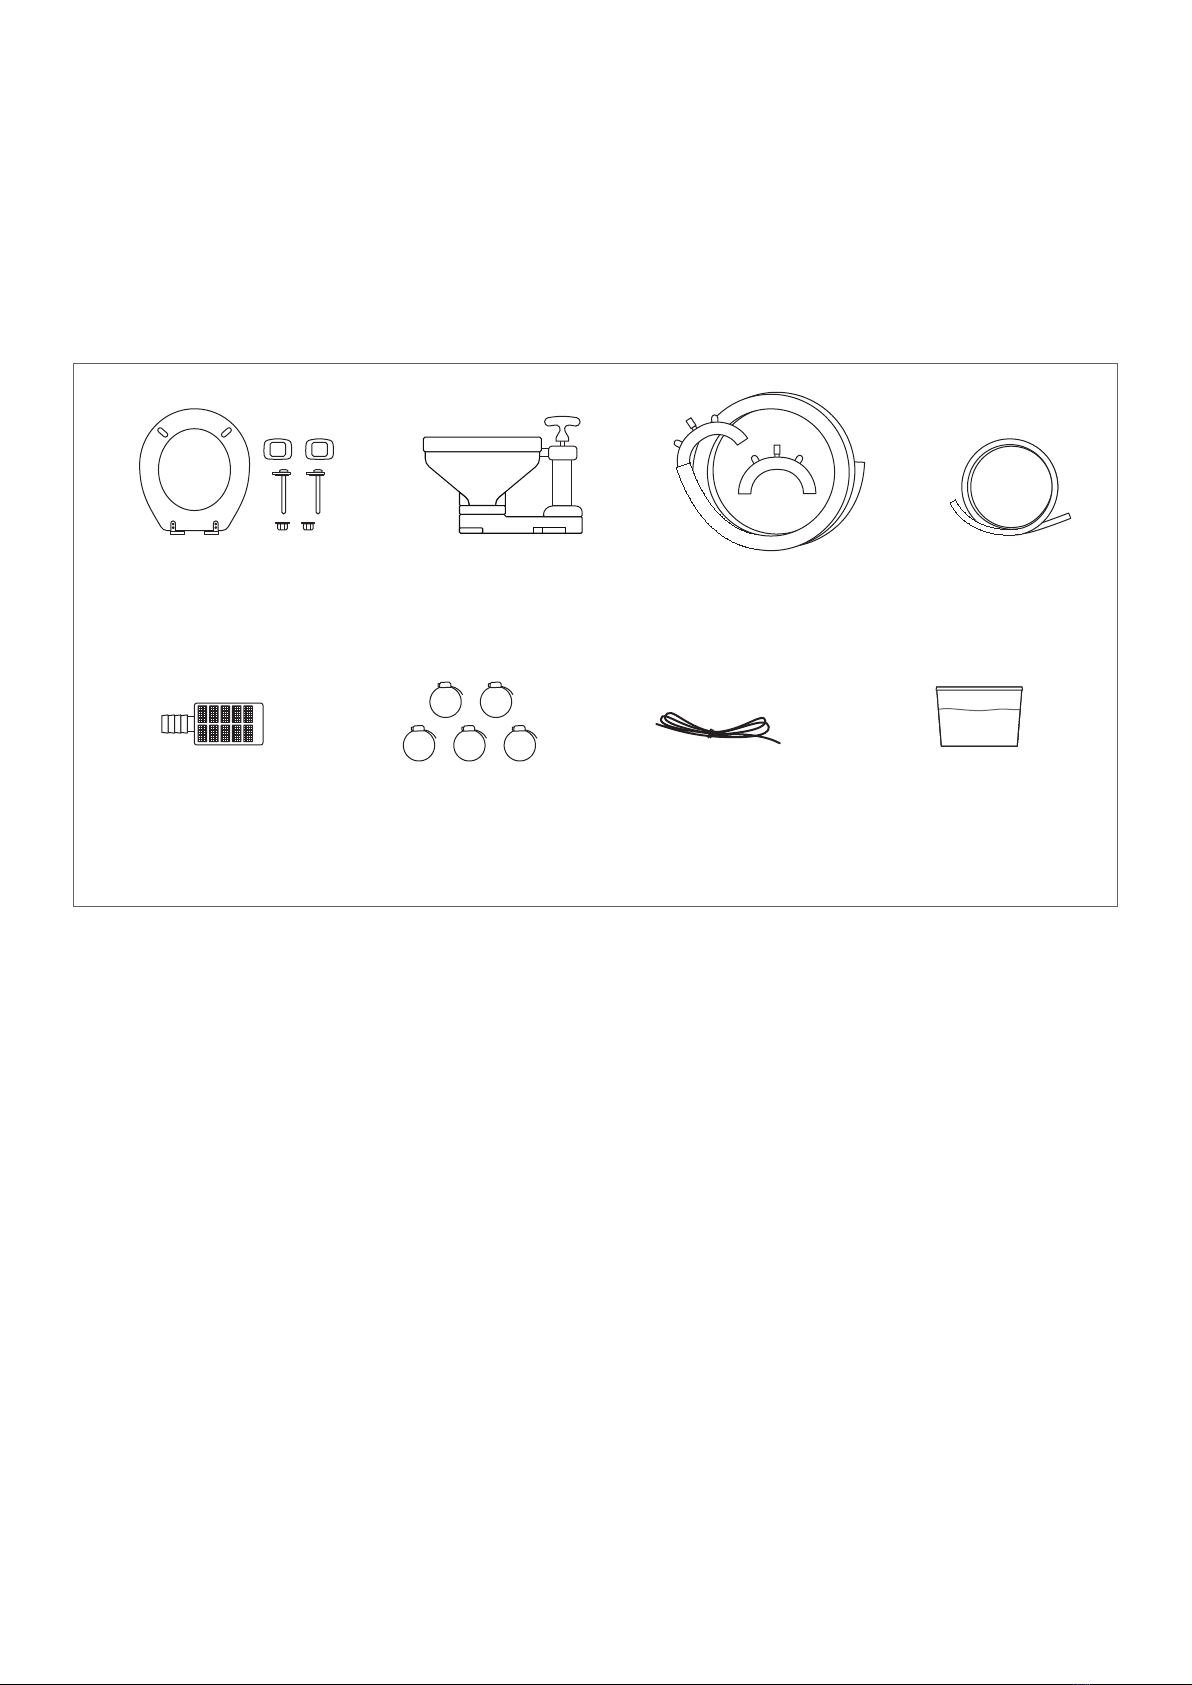
Parts supplied in the box
Parts/Materials to prepare (not supplied)
LUBRICANT
toilet seat & seat cover
+ ttings
ush reservoir water
lter
ceramic toilet bowl &
pump assembly
5 hose-clamps
for waste pipe
2m waste pipe +
vented loop attached,
extra vented loop
stabilizing cord
(for homebiogas system
combined outlet)
2m ush water
inlet pipe
lubricant
(for monthly
maintenance)