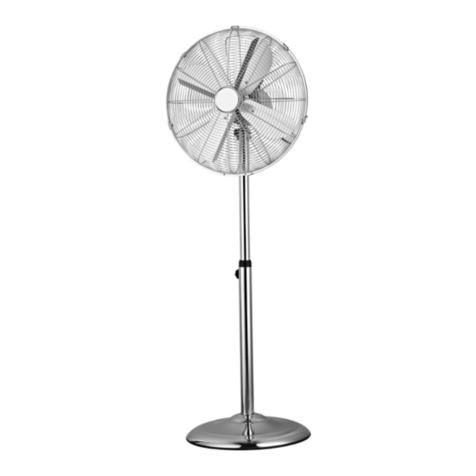
Homemaker MH-MF40A User manual

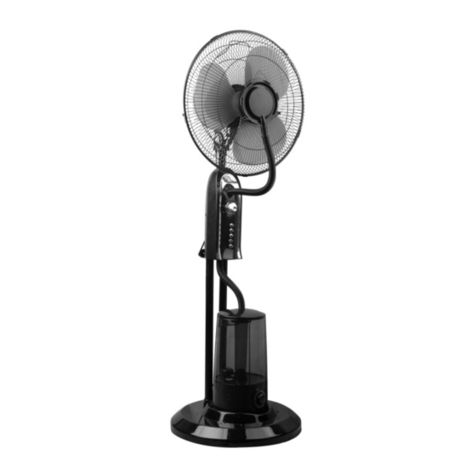
40cm Pedestal Misting Fan
User Manual
Model No.: MH-MF40A
220 – 240Va.c. 50Hz 70W
Rev 4
Note: The specifications and/or components of this appliance are subject to change without prior notice.

Page 2 of 20
1Safety Instructions.........................................................................3
2Components ...................................................................................5
3Assembly ........................................................................................6
3.1 Base .................................................................................................................. 6
3.2 Fan Head / Controller Assembly.................................................................... 8
3.3 Fan Blade and Safety Grille............................................................................ 9
3.4 Misting Generator and Water Tank.............................................................. 12
4Filling the Water Tank..................................................................13
5Setting the Fan Head Angle.........................................................14
6Remote Control ............................................................................14
7Operation ......................................................................................15
7.1 Using the Fan................................................................................................. 15
7.2 Oscillating Function...................................................................................... 16
7.3 Fan Modes...................................................................................................... 16
7.3.1 Normal Mode............................................................................................................. 16
7.3.2 Natural Mode............................................................................................................. 16
7.3.3 Sleep Mode ............................................................................................................... 16
7.4 Timer............................................................................................................... 17
7.5 Using the Misting generator......................................................................... 17
8Care and Cleaning........................................................................18
8.1 General Cleaning........................................................................................... 18
8.2 Descaling ....................................................................................................... 19
9Storage..........................................................................................19
10Warranty Against Defect .............................................................20

Page 3 of 20
1 Safety Instructions
When using electrical appliances, basic safety precautions should always be followed,
including the following:
•Carefully read this instruction manual before using appliance.
•Keep appliance out of reach of young children.
•This appliance is not intended for use by persons (including children) with reduced
physical, sensory or mental capabilities, or lack of experience and knowledge, unless
they have been given supervision or instruction concerning use of the appliance by a
person responsible for their safety.
•Children should be supervised to ensure that they do not play with the appliance.
•Ensure children and babies do not play with plastic bags or any packaging materials.
•Do not disassemble the appliance. There are no user serviceable parts inside.
•VERY IMPORTANT:
Ensure that appliance does not get wet (water splashes etc.).
Do not use appliance with wet hands.
Do not immerse appliance in water or other liquids or use near sinks, baths or showers.
•Always operate the appliance from a power source of the same voltage, frequency and
rating as indicated on the product identification plate.
•Position the power supply lead properly so that they will not be walked on or pinched by
items placed on or against them.
•Use appliance only for its intended use. Appliance is intended for household use only
and not for commercial or industrial use.
•Do not use appliance if it has been dropped or any part of appliance (including cord or
plug) has been damaged.
•If the supply cord is damaged, it must be replaced by qualified electrical person only or
the product must be disposed in order to avoid a hazard.
•The use of accessories not intended for use with this appliance may cause injuries to
the user or damage to the appliance.
•Do not install the unit on other appliances, on uneven surfaces or where it could be
subject to: heat sources (e.g. radiators or stoves), direct sunlight, excessive dust or
mechanical vibrations.
•Appliance should not be used outdoors, placed near a hot gas or electrical burner or
placed in a heated oven.
•Do not install near any heat sources such as radiators, heat registers, stoves, or other
apparatus that produce heat.

Page 4 of 20
•Do not operate appliance underneath or near flammable or combustible materials (e.g.
curtains). Keep at least 300mm clearance around sides, back, front and top.
•Unplug this apparatus during lightning storms or when unused for long periods of time.
•If water is spilt on the floor, immediately wipe it up and dry the floor so as to prevent any
injury from slipping over etc.
•Be careful when using the fan with the mist function on some types of surfaces as
depending on the environmental conditions (i.e. Humid days) the mist may cause the
surface to become wet and slippery. Keep the surface dry at all times to prevent any
injury from slipping over etc.
•Do not block any ventilation openings.
•Turn off and unplug before cleaning or storing.
•Any type of servicing, apart from ordinary cleaning, must be carried out by qualified
electrical person only. There are no user serviceable parts in this appliance.
•If this appliance is used by a third party, please supply the instruction manual with it.
•Do not misuse the cord. Never carry the appliance by the cord or pull to disconnect it
from the outlet. Instead, grasp the plug and pull to disconnect.
•Do not insert or allow foreign objects to enter the grille openings as this may cause
damage to the appliance and/or injury to the user.
•No liability can be accepted for any damage caused by non-compliance with these
instructions or any other improper use or mishandling of appliance.
Additional Safety Instructions
If using an extension cord:
•The technical specifications of the extension cord must match or exceed the technical
specifications of this appliance.
•Do not allow the cord to hang over the edge of the work surface or to come into contact
with stoves or other hot surfaces.
•If the cord or plugs are worn or damaged, do not use.
•Unplug from the power socket by grasping the plug body - do not pull on the cord.
Read and Save These Instructions

Page 5 of 20
2 Components
Safety Grille
Fan Blade
Fan Control Panel
Base
Water tank
Tilt Adjustable Neck
Mist Head
Misting
Generator
Flexible Mist Hose
Remote
Controller
(Batteries not included)

Page 6 of 20
3 Assembly
Some Items of your Pedestal Fan have been boxed unassembled to minimise
packaging waste.
Each part is designed to fit together and to be disassembled easily for cleaning or
storage.
3.1 Base
•To Assemble the Posts to the Base, first place the Base on a flat level surface.
•Take the Two Metal Posts and remove the screws from the ends.
•Place the post ends (the ends which the screws were removed from) into the holes
in the base with the screw holes facing forward as shown below.
•Grasp the sides of the tubes and push down all the way.
•CAUTION: Do not push down on the top ends of the tubes with your hand as you
may cause an injury. If pushing down on the top ends of the tubes, use a block of
wood or similar but be very careful not to injure yourself and any bystander.

Page 7 of 20
•Rotate the base over to access the underneath.
•Take the screws that you removed from the metal tubes and screw them into the
holes as shown.
•With the base still upside down, take the Floor Weight and locate it over the four
screw posts as shown. Ensure the grooves in the Weight are facing towards the
Base. The smooth flat face is facing up as shown
Flip Over Like this
Insert 4 Screws and Tighten

Page 8 of 20
•When finished, turn the Base over and Stand upright on the floor.
3.2 Fan Head / Controller Assembly
•Take the Fan Head / Controller assembly and unscrew the two screws located on
the back. Do not fully unscrew otherwise the two nuts will fall off.
•Locate the two holes on the underneath of the Fan Head / Controller assembly onto
the two posts and push down until it stops.
•Tighten the two Screws until they are secure.

Page 9 of 20
3.3 Fan Blade and Safety Grille
•If Fitted, remove the clear Plastic Nut from the motor spindle and the black plastic
nut from the front of motor housing
Clear plastic nut unscrews Clockwise
Black plastic nut unscrews
Anticlockwise
•Place the Back Grille over the threaded section on the Fan Head, ensuring the wire
handle on the back of the grille it at the top.
•Take the plastic nut and screw on (Clockwise direction) to secure the grille

Page 10 of 20
•Place the Fan Blade onto the motor spindle.
Note: The groove in the rear centre of the fan blade aligns with a T-bar on the motor
spindle to ensure correct positioning.
•Fix the blade into place by gently hand tightening the Clear Plastic Nut
Anticlockwise onto the end of the motor spindle. The Clear Plastic nut is self-
tightening when the motor starts so do not force it, just nip it up.
•Remove the Small Nut and Bolt from the grille by unscrewing the nut anticlockwise.

Page 11 of 20
•Open up all locking clips on the front safety grille by rotating outward
•Fit locating tab (on the bottom of the front Grille) centrally over the Rim of the Rear
grille at the bottom.
•While holding in place, align the two holes at the top of both grilles and insert the
small Bolt through then screw on the small nut. Using a screwdriver, tighten the nut
and bolt.

Page 12 of 20
•With the Front safety grille in position and secured with the nut and bolt, close all the
clips over the outer rim.
3.4 Misting Generator and Water Tank
•Place the Misting Generator onto the Base ensuring it is seated properly in its
recess.
•Sit the water tank on top of the Misting Generator.
•Take the End of the flexible Mist Hose hanging from the front grille and take the
water tank connector and gently push and twist the hose onto the connector spigot
as far as possible. (Do not kink the hose)

Page 13 of 20
4 Filling the Water Tank
Warning: Unplug the appliance during filling and cleaning.
•To Fill the Water Tank, turn it upside down to access the filer cap.
•Unscrew the filler cap and lift it up to remove. Note the filler cap is tight so as to
prevent any water leaks. If needed, use a towel to grasp the cap and twist
anticlockwise to unlock.
•Fill the tank through the filler hole until the water level is within a few millimetres
from the filling hole.
•Refit the filler cap and turn clockwise to lock in place. Important: Ensure the filler
cap is fully rotated and locked in place.
DO NOT fill with any liquid other than clean
fresh cold water.
DO NOT add any additives to the water.
NOTE: There is a Valve in the filler cap which
releases the water when placed back on to the
Misting Generator. Do not tamper with this
valve.
•Place the Water Tank back on top of the Misting Generator.
Caution:
If water is spilled on the floor, immediately wipe it up and dry the floor so as
to prevent any injury from slipping over.

Page 14 of 20
•Fit the water tank / hose connector into the top of the water tank as shown
5 Setting the Fan Head Angle
The Fan Head can be adjusted Up and Down so as to blow
air at the required angle.
•Turn off and unplug prior to adjusting.
•To adjust, grasp the Fan Grills and tilt the head either forward
or backward to your desired angle.
6 Remote Control
The fan comes with a remote control for your convenience.
The remote control must be pointed towards the receiver, which is
located inside the display on the front of the fan control panel in order to
work.
Do not block the line of sight between the remote control and the
receiver.
Do not drop the remote control on the floor or bang it against hard objects.
To install the batteries, first slide the back battery cover off.
(Batteries not included)
Insert the batteries inside the battery compartment matching
polarity icons with those in the battery compartment and then refit
the cover.
Battery Type: “1.5V 2 x AAA” (Batteries not included)
Do not mix new and old batteries in the remote control.
To prevent corrosion, remove the batteries if the remote control will not be used
over a lengthy period.

Page 15 of 20
7 Operation
The fan and functions can be operated by the control panel on the front of the fan, or
by the supplied remote control.
Note: The modes “NAT” (Nature) and “SLEEP” can only be selected with the Remote
Control. They cannot be selected using the controller on the front of the fan.
7.1 Using the Fan
The Fan has a three speed selection being Low, Med and High.
•Ensuring the Fan has been assembled correctly, plug into the power point and
switch on. The POWER indicator light will illuminate.
•For Low Fan Speed, press the “ON/SPEED” button on the fan control panel or the
remote control once. The LOW light will illuminate as well as the “NOR” (Normal
Mode) Light and the fan will start to spin.
•For Medium Fan Speed, press the “ON/SPEED” button again.
The MED light will illuminate as well as the “NOR” (Normal Mode) Light and the fan
will speed up.
•For High Fan Speed, press the “ON/SPEED” button again.
The HIGH light will illuminate as well as the “NOR” (Normal Mode) Light and the fan
will speed up.
NOTE: Pressing the “ON/SPEED” button again will cycle the speed back to LOW,
and so on.
•To turn the fan off, press button “OFF” Button.
Fan Control Panel
Remote Control

Page 16 of 20
7.2 Oscillating Function
The fan is fitted with an Oscillating function where when activated, the fan head will
swing from side to side.
•To activate, the Fan must first be running in Speed Setting LOW, MED or HIGH.
•Press the “OSC” button on the fan control panel or the remote control once.
The OSC light will illuminate and the fan will start to swing from side to side.
•To stop the oscillating, press the “OSC” button again.
•Alternatively, to turn off the oscillating function and the fan, press the “OFF” button.
7.3 Fan Modes
The Fan has three modes being “NOR”, “NAT” and “SLEEP”
NOTE: Modes “NAT” and “SLEEP” can only be selected by the remote control by
pressing the “Mode” button.
With the Fan running in “NOR” (Normal) mode, press the “MODE” button on the
remote control and the mode will change to “NAT”.
Press the “MODE” button again and the mode will change to “SLEEP” mode.
Press the “MODE” button again, and it will cycle back around to the “NOR” mode.
7.3.1 Normal Mode
“NOR” The Normal Mode is set by default when the unit is first turned on. The wind
remains a constant flow.
7.3.2 Natural Mode
“NAT” The Natural mode creates variable Wind Patterns so as to simulate the
variable winds that you would experience outdoors.
In this mode the speed of the fan continually cycles through a mixed selection of
low, medium, high and off in set intervals.
Depending on which Fan Speed is selected, the wind pattern will be different
7.3.3 Sleep Mode
“SLEEP” The Sleep mode creates wind patterns that are the same as the Natural
Mode wind patterns, however, when the fan is set to either Medium or High Speed,
the pattern will drop a speed level after approximately 30 minutes.
For Example: If High Speed Fan and the Sleep Mode is selected, this will be the
same wind pattern as High Speed setting in Natural Mode. However, after

Page 17 of 20
approximately 30 minutes, the wind pattern will automatically drop down to the
same wind pattern as if Natural Mode was selected at Medium fan speed.
After approximately a further 30 minutes, the wind pattern will automatically drop
down to the same wind pattern as if Natural Mode was selected at low fan speed.
The fan will continue to run in the Low Speed Natural Mode until manually turned
off.
Note: To have the fan automatically turn off at your desired time in this mode, use
the “Timer” function to select the auto off timer.
7.4 Timer
This function sets the duration of operation before the fan automatically turns OFF.
Pressing the Timer button on the fan control panel or the remote control will
increase the time of operation in 0.5 hour increments to a maximum of 7.5 hours.
The total time selected is indicted by the display illuminating at 0.5H, 1H, 0.5 + 1H,
2H, 0.5 + 2H, 1H + 2H, 0.5H + 1H + 2H and so on up until all the lights are
illuminated adding up to 7.5H.
Note: Pressing the button once more after 0.5H + 1H + 2H + 4H is illuminated (at
the same time) will cycle around and cancel the auto off function. (no timer lights
illuminated)
The timer will count down until the time has expired then the fan will turn off
automatically.
To cancel the timer, either press the “OFF” button, which will turn the fan off as
well, or continue to press the “TIMER” button until it cycles back around to where
no timer lights are illuminated.
7.5 Using the Misting generator
Caution:
Be careful when using the fan with the mist function on some types of surfaces as
depending on the environmental conditions (i.e. humid days) the mist may cause
the surface to become wet and slippery. Keep the surface dry at all times to prevent
any injury from slipping over etc.
•To use the Misting Function, ensure the water tank has been filled with fresh clean
water and seated on the mist generator properly.
•Ensure the Mist hose connector has been inserted into the top of the water tank.
•Ensure the desired Fan speed and mode setting has been selected.

Page 18 of 20
•Ensure the Variable Mist Control Dial (located on the front of the Mist Generator)
has been set to Maximum (fully clockwise).
•Press the “MIST” button on the fan control panel or remote control.
•At this point, mist will start to be generated.
•When a steady flow of mist is being generated, adjust the Mist rate to your desired
level by rotating the Variable Dial. For less mist, rotate the knob anticlockwise. For
Maximum mist, rotate fully clockwise.
There is an indicator light to show when the Mist Generator has run out of water.
During Normal use and while generating mist, the light will illuminate “Green”
If the Mist Generator runs out of water, this light will illuminate “Red”
Note: Should the light turn Red during use when there is water still in the water tank,
there may be an air lock preventing the water entering the mist generator. If this
should happen, lift the water tank up and down just a little to allow the valve to open
and allow the water to flow.
There could also be mist escaping from the joint between the water tank and mist
generator. This is normal and will stop after a while.
8 Care and Cleaning
8.1 General Cleaning
•Ensure that the fan is switched off from the supply mains before removing the
guard (Grille).
•Unplug the appliance during filling and cleaning.
•To clean the blade and grille assembly, first remove the safety grille, unscrew
the locknut and remove the blade from the Misting Fan. Wipe them clean with a
slightly damp sponge.
•Clean the motor housing and body assembly with a clean, damp cloth and wipe
dry.
•To clean the water tank, rinse out with fresh clean cold water.

Page 19 of 20
•Never spray with liquids or submerge the Misting Fan in water or any other
liquid.
•Do not use flammable liquids, chemicals, abrasive creams, steel wool or
scouring pads for cleaning.
8.2 Descaling
In some areas, the water being used may be high in minerals (Hard Water) and over
time, there may be small deposits of scale build up in the water tank and on the mist
head.
To remove the scale deposits:
•Fill the water tank with one part of white vinegar and three parts of cold water
•Refit the Filler Cap ensuring it is tight, then shake the tank to mix the vinegar and
water thoroughly.
•Sit the water tank in the sink or on a bench top in the upright position and leave to
soak for 1 – 2 hours. Note: Do not sit the water tank back on the mist generator.
•After soaking for the required time, pour out the mixture.
Note: if necessary, repeat the process with a fresh vinegar / water mixture until no
more scale deposits are seen.
•Rinse out the water tank up with fresh clean water and repeat the rinsing process
with clean water until no more vinegar odour is left.
•To clean the Mist Head and Mist Generator, use a clean cloth that has been
soaked in a vinegar / water solution and wipe the areas affected.
•Clean the same area with a cloth soaked in fresh clean water to remove the
vinegar / water solution.
9 Storage
Switch off and unplug the fan.
Coil the cable loosely. Do not kink or pull the cable tight.
Store your fan in a cool, dry location.

Page 20 of 20
10 Warranty Against Defect
12 Month Warranty
Thank you for your purchase from Kmart.
Kmart Australia ltd warrants your new product to be free from defects in materials and
workmanship for the period stated above, from the date of purchase, provided that the
product is used in accordance with accompanying recommendations or instructions
where provided.
This warranty is in addition to your rights under the Australian Consumer Law.
Kmart will provide you with your choice of a refund, repair or exchange (where
possible) for this product if it becomes defective within the warranty period. Kmart will
bear the reasonable expense of claiming the warranty. This warranty will no longer
apply where the defect is a result of alteration, accident, misuse, abuse or neglect.
Please retain your receipt as proof of purchase and contact our Customer Service
Centre on 1800 124 125 (Australia) or 0800 945 995 (New Zealand) or alternatively,
via email at customer.satisfaction@kmart.com.au for any difficulties with your product.
Warranty claims and claims for expense incurred in returning this product can be
addressed to our Customer Service Centre at 690 Springvale Rd, Mulgrave Vic 3170.
Our goods come with guarantees that cannot be excluded under the Australian
Consumer Law. You are entitled to a replacement or refund for a major failure and
compensation for any other reasonably foreseeable loss or damage. You are also
entitled to have the goods repaired or replaced if the goods fail to be of acceptable
quality and the failure does not amount to a major failure.
For New Zealand customers, this warranty is in addition to statutory rights observed
under New Zealand legislation.
Table of contents
Other Homemaker Fan manuals