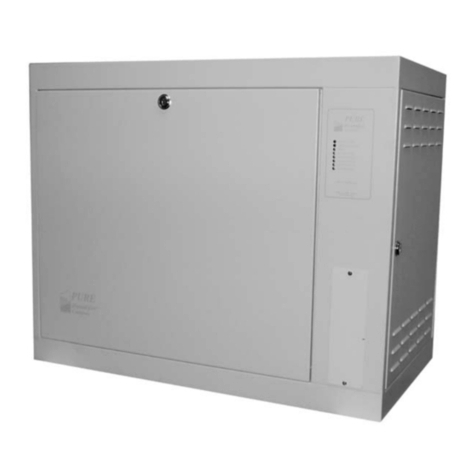
Honeywell Home HE100A1000 User manual

HOMEOWNER’S OPERATING MANUAL
Humidifier
69-2414EFS-01

Read before installing
SPECIFICATIONS
Models: HE100A1000, HE100C1001, HE150A1005, HE150C1014, HE200A1000,
HE200C1001, HE250A1005, HE250C1014, HE300A1005

Humidifier
NEED HELP? For assistance with this product please visit Resideo.com
Read and save these instructions.
?
Humidifier 69-2414EFS—01
EVERYDAY
OPERATION
INTRODUCTION SERVICE WARRANTY
CLEANING AND
MAINTENANCE
1
YOUR NEW
HUMIDIFIER
INTRODUCTION
Safety Definitions and Precautions ...............2
Welcome .........................................3
How is the humidifier different from other
flow-through humidifiers? .....................3
How should I get started?......................3
How does the humidifier work? ...................4
YOUR NEW HUMIDIFIER
Which humidifier model do I have?................5
How is my humidifier installed? ...................6
What humidifier parts do I need to know? .........7
What should I expect from my humidifier? ........8
EVERYDAY OPERATION
How do I operate the humidifier? .................9
How do I use the humidity control? ............9
What should my humidity setpoint be?.........9
What is a frost setting? ........................9
Humidifier lights and button....................10
CLEANING AND MAINTENANCE
Replace the humidifier pad .....................11
What should I do at the end of the season?......12
Troubleshooting ................................13
WARRANTY
5Year Limited Warranty ........................14

INTRODUCTION
Must be installed by a trained, experienced technician.
Read these instructions carefully. Failure to follow these instructions can damage the product or cause a
hazardous condition.
Please read this manual completely. It is important that you understand how the humidifier works, and how
to safely perform the require-d maintenance procedures. Read and understand all safety-related labels
found on and posted near the humidifier. These labels provide additional instructions and important safety
information.
Safety Definitions
These safety terms identify information you must read.
CAUTION: Indicates a hazardous situation which, if not avoided, could cause bodily injury or
property damage.
WARNING: Indicates a hazardous situation which, if not avoided, could result in death or serious injury.
Safety Precautions
WARNING: Electrocution Hazard.
The humidifier uses 120 volts AC, which can cause death or serious injury. Take precautions when
servicing the humidifier or when removing the cover. If in doubt, unplug the humidifier or disconnect
HVAC equipment power before servicing.
CAUTION: Heavy Equipment and Water Hazard.
Improper installation or misuse can cause death, blindness, and damage to home and HVAC equipment.
Be sure you know how to turn the humidifier off.
CAUTION: Condensation, Fire, and Freezing Water Hazard.
Can cause failure of fan or limit control, or result in water damage to home.
Safety Definitions and Precautions
Humidifier 69-2414EFS—01
2

INTRODUCTION
Congratulations on your new humidifier.
The Humidifier provides the comfort of humidified air, with easier maintenance than traditional humidifiers.
We are sure the humidifier will be a welcome addition to your home.
• How is the humidifier different from other flow-through humidifiers?
All Models:
- The humidifier operates automatically, just like a thermostat, to keep your home’s humidity at the desired
level.
- The humidifier is easier to maintain: just change the pad once a year. The pad is easily accessible and
does not require tools to change it.
- The humidifier can deliver humidity when it’s needed, not just when the heat is on. This allows you to
achieve ideal humidity levels in your home year-round.
Advanced Models:
- The humidifier wastes less water than other flow-through humidifiers.
• How should I get started? Your humidifier must be installed by an HVAC professional. If the humidifier has
just been installed, it should either be running and humidifying your home, or waiting for a humidity call
from the humidity control.
Once the humidifier is running, all you have to do is use the humidity control to change the humidity to
your desired comfort.
Welcome!
Please read this manual completely for tips on getting the most out of your humidifier.
Read your humidity control manual and make sure you know how to operate your system.
If you have questions, now or later, please refer to this manual or ask your installer.
Humidifier 69-2414EFS—01 3

INTRODUCTION
1. A call for humidity comes from the humidity
control provided with the humidifier. The humidity
control is connected to the humidifier with wires.
2. The solenoid turns on, allowing water to run
through the humidifier pad.
3. Air from your HVAC system flows through the pad,
picking up moisture from the humidifier pad.
4. Your HVAC system fan delivers the humidified air
throughout your home.
5. When humidity in your home reaches the setpoint,
the humidity call ends and the solenoid turns off
the water flowing across the pad.
H8908
10
OFFON
20
30 40
50
60
DRY AIR
HUMIDIFIED
AIR
MCR29923
How does the humidifier work?
1
2
3
4
5
Humidifier 69-2414EFS—01
4

YOUR NEW
HUMIDIFIER
The humidifier is available in five models with different sizes and/or features:
Some activities in your home may create longer operating times for the humidifier. Vented fireplaces, high
exhaust from fans, or driers can reduce humidity in your home and make the humidifier work harder.
Your professional installer or salesperson will have considered these and other factors when choosing the
best humidifier model for your unique situation.
MCR29924
This label displays the model number and date code
of your humidifier.
HE100 Delivers up to 12 gallons of humidity into your home. Suitable for homes up to 16,000 cubic
feet in size.
HE150 Delivers up to 12 gallons of humidity into your home. Suitable for homes up to 16,000 cubic
feet in size. Includes automatic damper, status, maintenance, service LEDs, and advanced
operation.
HE200 Delivers up to 17 gallons of humidity into your home. Suitable for homes up to 20,000 cubic
feet in size.
HE250 Delivers up to 17 gallons of humidity into your home. Suitable for homes up to 20,000 cubic
feet in size. Includes automatic damper, status, maintenance, service LEDs, and advanced
operation.
HE300 Delivers up to 18 gallons of humidity into your home. Suitable for homes up to 24,000 cubic
feet in size. Includes automatic damper, status, maintenance, service LEDs, and advanced
operation.
Which humidifier model do I have?
Humidifier 69-2414EFS—01 5

YOUR NEW
HUMIDIFIER
Your HVAC professional installer will install the humidifier in a proper location in your home, on either the Return
or Supply duct of your HVAC system.
The humidifier bypass model is installed directly
onto the Supply (hot) or Return (cool) air duct of
your HVAC system. Air flows through the humidifier
pad in the humidifier into the duct for distribution
throughout your home.
The humidifier fan model is commonly installed
directly onto the Supply (hot) air duct of your HVAC
system. The humidifier’s fan draws air through the
humidifier pad in the humidifier and back into the
duct for distribution throughout your home.
The fan model can be installed on the Return (cool)
air duct, if the location permits. If a return-side
installation is used, it is highly recommended to
plumb warm water since humidity is produced by
evaporation.
MCR29869
RETURN
SUPPLY
How is my humidifier installed?
RETORNO
SUMINISTRO
MCR29947
Humidifier 69-2414EFS—01
6

YOUR NEW
HUMIDIFIER
MCR29925
COVER OFF
Your humidifier installation includes the following parts and components that you should be familiar with:
A. Water Connection with Shutoff Valve
Provides the connection from your home water
supply to the humidifier. Your installer may
have used the saddle valve that came with the
humidifier, or may have chosen a different type
of connection. This connection must include a
shutoff valve for you to turn off water supply to
the humidifier, if necessary.
B. Water Supply Line
This 1/4-inch line brings water to the humidifier
from the water connection. Your installer may have
used plastic or copper supply line.
C. Water Drain Line
This 1/2-inch hose drains water from the
humidifier to a drain in your home.
D. LEDs (HE150/HE250/HE300 only)
The three lights indicate the humidifier’s
operational status and when service is required.
See “Humidifier lights and button” on page 10.
E. RESET Button (HE150/HE250/HE300 only)
The RESET button is the only user button located
on the humidifier. Use the RESET button to
manually reset the humidifier when the Change
Pad or Service LEDs are on. See “Humidifier lights
and button” on page 10.
Power
The Fan model is plugged into a 120 volt AC
household electrical outlet. Unplug the power cord
to turn off power.
The Bypass models are wired to a 15VA
transformer. To turn off power to these models, trip
the circuit to the junction box the transformer is
connected to.
MCR29880
A
B
C
D
E
What humidifier parts do I need to know?
Humidifier 69-2414EFS—01
7

YOUR NEW
HUMIDIFIER
Resideo wants to make sure you know what to expect from your humidifier. Feel free to discuss these items
with your installer:
• Achieving Humidity Setpoint. It may take up to a week of continuous operation to achieve the humidity
setpoint, especially if the home is dry when the humidifier is installed. This also depends on such factors
as weather, size of home, furnishings in the home, and insulation.
• Ideal Humidity. Home building industry experts cite 35% relative humidity as ideal for comfort and
safeguarding the home during the typical dry season. Adjust your humidity control to your comfort or until
there is condensation on the windows. Lower the setpoint if condensation appears.
• Unit Not Humidifying. If the humidifier is not running but the humidity is below the setpoint, the humidity
control may have a frost protection setting to prevent window condensation from appearing. See “What is a
frost setting?” on the next page.
• Home Ventilation. Excessive ventilation sends moist air outside and replaces it with dry air. If the home
is drafty or has mechanical ventilators installed, it may be hard to maintain the humidity setpoint.
If installing a ventilator, use a solution that retains moisture. An Energy Recovery Ventilator (ERV) is
recommended.
• Cleaning Requirements. The humidifier pad should be changed at least once a year. The water trays of the
humidifier should be cleaned at that time. See Cleaning and Maintenance section for details.
• Energy Consumption. You may notice a slight increase in overall energy consumption when operating
any humidifier. However, humidified air feels warmer than dry air. This allows you to lower the temperature
setting on the thermostat. Every degree lower on the thermostat can save up to 3% on heating costs.
What should I expect from my humidifier?
Humidifier 69-2414EFS—01
8

EVERYDAY
OPERATION
Once the humidifier is installed and running, operation is automatic. Use the humidity control provided to
make any changes to the setpoint.
If you have questions about how to operate the humidifier, ask your installer.
How do I operate the humidifier?
• What is a frost setting? Some humidity controls (such as Prestige, VisionPRO IAQ, and TrueIAQ) contain
a Window Frost Protection feature that limits humidity output based on outdoor conditions. For example,
on colder days, the air in your home can hold less humidity. The humidity control automatically lowers the
humidity setpoint accordingly, to prevent frost from appearing on the inside of your windows.
Lower the frost setting by one value each morning that you see frost or condensation on windows. Allow
24 hours for the new setting to take effect before re-adjusting. Once you have this set to a comfortable
level without condensation, you will not need to adjust further. You can adjust your humidity setpoint
without worrying about condensation.
Manual humidity controls (such as the H8908) do not have built-in frost settings. They require you to adjust
the humidity setpoint when the outdoor temperature changes. Use higher humidity setpoints when the
temperature is warmer, and lower setpoints when the temperature is cooler.
M27982
• How do I use the humidity control? When humidity
in the home is lower than the humidity control’s
setpoint, the control will call for humidity. Some
controls will also monitor outdoor conditions to
ensure indoor humidity does not condense on
windows and walls.
• What should my humidity setpoint be? The outdoor
air temperature affects how much humidity can be
retained by the air in your home. Use this table as a
starting point. Then adjust the humidity control to
your own comfort or until condensation appears on
the windows, at which point you should lower the
setpoint.
Outdoor Recommended Relative
Temperature Humidity Setting
20°F (29°C) 15%
10°F (23°C) 20%
0°F (18°C) 25%
10°F (12°C) 30%
20°F (7°C) 35%
>20°F (1°C) 35%
Humidifier 69-2414EFS—01 9

EVERYDAY
OPERATION
The three lights provide feedback on humidifier operation.
Humidifying
When this light is on, it indicates the humidifier is
running.
Service
When this light is on, it indicates an operational fault
has occurred. Call an HVAC professional for repair.
Change Pad
When this light is on, it indicates that it is time to
change the humidifier pad. The light should not
be reset without changing the pad. Resetting the
Change Pad light without changing the pad could
compromise the humidifier. See “Replace the
humidifier pad” on the next page.
M29926
RESET
The RESET button is under the cover. This button
resets the timer that tracks when the humidifier pad
needs changing. When you change the pad, press the
RESET button.
The RESET button also clears a Service light. If the
Service light comes back on after you press the
RESET button, call an HVAC professional for repair.
MCR29927
Humidifier lights and button (HE150/HE250/HE300 only)
Humidifier Model Replacement Pad Part Number
HE300
HE250
HE200
HC26E1004
HE150
HE100
HC22E1003
Humidifier 69-2414EFS—01
10

CLEANING AND
MAINTENANCE
The humidifier pad should be replaced at least once per year or whenever the Replace Pad light comes on.
This is critical for optimal performance of the unit. This can be done at the beginning or the end of the dry
season. The humidifier design makes this annual replacement quick and easy, providing one-step access to
Replace the humidifier pad
the pad.
2. Remove tray on top of the pad, and wipe free any sediment present within the tray.
3. Replace the old pad with the new, making sure pad is oriented correctly (see pad box). Wipe free any
sediment present inside the pad frame.
Humidifier Model Replacement Pad Part Number
HE300
HE250
HE200
HC26E1004
HE150
HE100
HC22E1003
4. Reseat the tray on top of the pad with the arrows inside the tray pointing into the duct. Then reinsert the
frame into the humidifier.
Bypass:
1a.Pad can be replaced from the side by
gripping the black handle and pulling out, or
from the front by removing the humidifier’s
top cover and rocking the pad forward and
out. Humidifier pad might remove from
other side of the humidifier, depending on
installation.
Fan:
1b.Pad can be replaced from the front by gripping
the black handle and pulling out.
MCR29886
MCR29885
25%
1
2
Humidifier 69-2414EFS—01 11

CLEANING AND
MAINTENANCE
What should I do at the end of the season?
At the end of the humidifying season:
1. Turn the humidistat to Off.
2. Shut off the water valve on the water supply line to the humidifier.
On Basic models HE100 and HE200:
3. Turn the Damper Position knob on the bypass outlet so that it is perpendicular to the bypass outlet.
4. Remember to turn the Damper Position knob on the bypass outlet back to its original (open) position at
the beginning of the next dry season.
Humidifier 69-2414EFS—01
12

CLEANING AND
MAINTENANCE
Troubleshooting
What if I am having a problem with the humidifier?
If you have difficulty with the humidifier, please try the following suggestions. Most problems can be corrected
quickly and easily.
Problem What To Look For What To Do
Low humidity Furnace blower not
operating
1. Reset circuit breaker or check for blown fuse.
2. Check that the furnace power is on.
3. Check the humidity control setting.
4. Call a professional heating contractor
Rapid air changes or
drafts
1. Keep doors and windows closed.
2. Close fireplace damper when not in use.
3. Keep exhaust fan running time to a minimum.
4. Seal around doors and windows.
High humidity Condensation on walls 1. Turn off humidity control and water until condensation is completely
evaporated.
Heavy condensation on
windows
1. Turn humidity control down low enough to eliminate condensation
caused by moisture. If moisture persists, more ventilation is needed.
Replace Pad
light is blinking
(HE150/HE250/
HE300)
This is the yearly
maintenance reminder to
replace the pad inside the
humidifier
1. Replace the pad for your humidifier model.
2. See “Replace the humidifier pad” section for details.
3. Once pad is replaced, press the RESET button under the wire cover.
Service light
is on (HE150/
HE250)
The damper inside the
bypass has failed to open
completely or the air
proving switch sensed a
lack of air movement
1. Press the RESET button under the wire cover.
2. If fault persists, call an HVAC professional.
Service light is
on (HE300)
The fan motor has failed
or the air proving switch
sensed a lack of air
movement
1. Press the RESET button under the wire cover.
2. If fault persists, call an HVAC professional.
Humidifier 69-2414EFS—01 13

Resideo warrants this product, excluding battery, to be free from defects in workmanship or materials, under normal use
and service, for a period of five (5) years from the date of first purchase by the original purchaser. If at any time during the
warranty period the product is determined to be defective due to workmanship or materials, Resideo shall repair or replace it
(at Resideo’s option).
If the product is defective,
(i) return it, with a bill of sale or other dated proof of purchase, to the place from which you purchased it; or
(ii) call Resideo Customer Care at 18006333991. Customer Care will make the determination whether the product
should be returned to the following address: Resideo Return Goods, 1985 Douglas Dr. N., Golden Valley, MN 55422, or
whether a replacement product can be sent to you.
This warranty does not cover removal or reinstallation costs. This warranty shall not apply if it is shown by Resideo that the
defect was caused by damage which occurred while the product was in the possession of a consumer.
Resideo’s sole responsibility shall be to repair or replace the product within the terms stated above. RESIDEO SHALL NOT
BE LIABLE FOR ANY LOSS OR DAMAGE OF ANY KIND, INCLUDING ANY INCIDENTAL OR CONSEQUENTIAL DAMAGES
RESULTING, DIRECTLY OR INDIRECTLY, FROM ANY BREACH OF ANY WARRANTY, EXPRESS OR IMPLIED, OR ANY OTHER
FAILURE OF THIS PRODUCT.
Some states do not allow the exclusion or limitation of incidental or consequential damages, so this limitation may not
apply to you.
THIS WARRANTY IS THE ONLY EXPRESS WARRANTY RESIDEO MAKES ON THIS PRODUCT. THE DURATION OF ANY
IMPLIED WARRANTIES, INCLUDING THE WARRANTIES OF MERCHANTABILITY AND FITNESS FOR A PARTICULAR
PURPOSE, IS HEREBY LIMITED TO THE FIVE YEAR DURATION OF THIS WARRANTY. Some states do not allow limitations
on how long an implied warranty lasts, so the above limitation may not apply to you.
This warranty gives you specific legal rights, and you may have other rights which vary from state to state. If you have any
questions concerning this warranty, please write Resideo Customer Care, 1985 Douglas Dr, Golden Valley, MN 55422 or call
18006333991.
5Year Limited Warranty
www.resideo.com
© 2020 Resideo Technologies, Inc. All rights reserved.
The Honeywell Home trademark is used under license from Honeywell International, Inc. This product is manufactured by Resideo Technologies, Inc. and its affiliates.
Tous droits réservés. La marque de commerce Honeywell Home est utilisée avec l’autorisation d’Honeywell International, Inc. Ce produit est fabriqué par Resideo Technologies, Inc. et ses sociétés affiliées.
Todos los derechos reservados. La marca comercial Honeywell Home se utiliza bajo licencia de Honeywell International, Inc. Este producto es fabricado por Resideo Technologies, Inc. y sus afiliados.
Resideo Technologies, Inc.
1985 Douglas Drive North, Golden Valley, MN 55422
1-800-633-3991
69-2414EFS—01 M.S. Rev. 07-20 | Printed in United States

GUIDE DE FONCTIONNEMENT POUR LE PROPRIÉTAIRE
Humidificateur

Lire avant l’installation
CARACTÉRISTIQUES
Modèles : HE100A1000, HE100C1001, HE150A1005, HE150C1014, HE200A1000,
HE200C1001, HE250A1005, HE250C1014, HE300A1005

Humidificateur
Lire et conserver ces instructions.
?
Humidificateur 69-2414EFS—01
FONCTIONNEMENT
QUOTIDIEN
INTRODUCTION SERVICE GARANTIE
NETTOYAGE ET
ENTRETIEN
1
VOTRE NOUVEAU
HUMIDIFICATEUR
BESOIN D’AIDE? Pour de l’assistance au sujet de ce produit, veuillez consulter le site
Resideo.com
INTRODUCTION
Définitions et précautions relatives à la sécurité ..2
Bienvenue........................................3
En quoi l’humidificateur est-il différent des
autres humidificateurs à circulation directe?...3
Par quoi dois-je commencer?..................3
Comment fonctionne l’humidificateur? ...........4
VOTRE NOUVEAU HUMIDIFICATEUR
Quel modèle d’humidificateur
ai-je en ma possession? .......................5
Comment mon humidificateur
est-il installé? .................................6
Quelles sont les pièces de l’humidificateur
qu’il importe de connaître? ....................7
Que dois-je attendre de l’humidificateur? .........8
FONCTIONNEMENT QUOTIDIEN
Comment fonctionne l’humidificateur? ...........9
Comment utiliser le régulateur d’humidité? ....9
Comment établir le point de
consigne d’humidité?.......................9
Qu’est-ce que le réglage de protection
contre le gel? ...............................9
Voyants et bouton de l’humidificateur ..........10
NETTOYAGE ET ENTRETIEN
Remplacement du tampon de l’humidificateur ..11
Que dois-je faire à la fin de la saison? ...........12
Dépannage.....................................13
GARANTIE
Garantie limitée de 5 ans .......................14

INTRODUCTION
L’installation doit être faite par un technicien d’expérience
ayant reçu la formation pertinente.
Lire attentivement ces instructions. Le fait de ne pas les suivre risque d’endommager le produit ou de
constituer un danger.
Veuillez lire ce manuel dans son intégralité. Il est important de comprendre le fonctionnement de
l’humidificateur et de savoir exécuter les procédures d’entretien requises en toute sécurité. Assurez-vous de
lire et de comprendre toutes les étiquettes faisant mention de consignes de sécurité qui sont apposées sur
l’humidificateur ou à proximité de ce dernier. Ces étiquettes fournissent des instructions supplémentaires et
des consignes de sécurité importantes.
Définitions relatives à la sécurité
L’information portant sur l’identification des termes de sécurité doit être lue.
MISE EN GARDE : Indique une situation dangereuse qui, si elle n’est pas évitée, risque d’endommager le
produit ou de causer des blessures corporelles.
AVERTISSEMENT : Indique une situation dangereuse qui, si elle n’est pas évitée, risque de causer des
blessures graves, voire mortelles.
Précautions relatives à la sécurité
AVERTISSEMENT : Risque d’électrocution.
L’humidificateur utilise une tension de 120 V c.a. qui peut causer des blessures graves, voire mortelles.
Prenez des précautions lors de l’entretien de l’humidificateur ou pour retirer son couvercle. En cas de
doute, débranchez l’humidificateur de même que l’équipement CVCA avant d’effectuer les travaux de
réparation.
MISE EN GARDE : Matériel lourd et risque de dégâts d’eau.
Une installation incorrecte ou une mauvaise utilisation peuvent causer la mort, la cécité, des
dégâts matériels et des défaillances de l’équipement de CVCA. Assurez-vous de bien savoir éteindre
l’humidificateur.
MISE EN GARDE : Risque de condensation, d’incendie et de gel de l’eau.
Peut causer la défaillance du ventilateur ou du limiteur, de même que des dégâts d’eau domestiques.
Définitions et précautions relatives à la sécurité
Humidificateur 69-2414EFS—01
2
This manual suits for next models
15
Table of contents
Languages:
Other Honeywell Home Humidifier manuals

Honeywell Home
Honeywell Home HE360 User manual

Honeywell Home
Honeywell Home HE105 User manual

Honeywell Home
Honeywell Home HE360 User manual

Honeywell Home
Honeywell Home HE365 User manual

Honeywell Home
Honeywell Home HE105 User manual

Honeywell Home
Honeywell Home HC18A User manual

Honeywell Home
Honeywell Home HE240 User manual

Honeywell Home
Honeywell Home HE400 User manual

Honeywell Home
Honeywell Home HE365 User manual

Honeywell Home
Honeywell Home HM750 User manual