manuals.online logo
Brands
  1. Home
  2. •
  3. Brands
  4. •
  5. Honeywell
  6. •
  7. Thermostat
  8. •
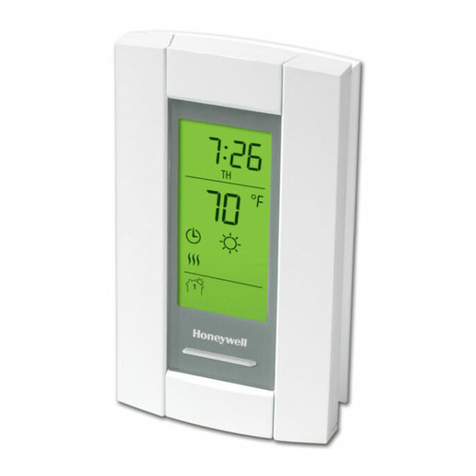
  9. Honeywell T8600 User manual

Honeywell T8600 User manual

Other manuals for T8600

1

This manual suits for next models

6

Other Honeywell Thermostat manuals

Honeywell v User manual

Honeywell

Honeywell v User manual

Honeywell T841A User manual

Honeywell

Honeywell T841A User manual

Honeywell PRO TH4110D User manual

Honeywell

Honeywell PRO TH4110D User manual

Honeywell LP916A Mounting instructions

Honeywell

Honeywell LP916A Mounting instructions

Honeywell RTH8500 Series User manual

Honeywell

Honeywell RTH8500 Series User manual

Honeywell RTH7600 Series User manual

Honeywell

Honeywell RTH7600 Series User manual

Honeywell Magic Stat MS3000 User manual

Honeywell

Honeywell Magic Stat MS3000 User manual

Honeywell Round CT87A User manual

Honeywell

Honeywell Round CT87A User manual

Honeywell T8132A User manual

Honeywell

Honeywell T8132A User manual

Honeywell CHRONOTERM IV T8624D User manual

Honeywell

Honeywell CHRONOTERM IV T8624D User manual

Honeywell THX9000 Prestige HD User manual

Honeywell

Honeywell THX9000 Prestige HD User manual

Honeywell CM707 User manual

Honeywell

Honeywell CM707 User manual

Honeywell Digital Round T8775A Operation manual

Honeywell

Honeywell Digital Round T8775A Operation manual

Honeywell RTH1100 series User manual

Honeywell

Honeywell RTH1100 series User manual

Honeywell CT54 User manual

Honeywell

Honeywell CT54 User manual

Honeywell TRUEZONE HZ322 User manual

Honeywell

Honeywell TRUEZONE HZ322 User manual

Honeywell RTH111 series User manual

Honeywell

Honeywell RTH111 series User manual

Honeywell INNCOM e7w User manual

Honeywell

Honeywell INNCOM e7w User manual

Honeywell Wi-Fi VisionPRO 8000 series User manual

Honeywell

Honeywell Wi-Fi VisionPRO 8000 series User manual

Honeywell T7512A User manual

Honeywell

Honeywell T7512A User manual

Honeywell DT92E User manual

Honeywell

Honeywell DT92E User manual

Honeywell RTH7500 Series User manual

Honeywell

Honeywell RTH7500 Series User manual

Honeywell B Mounting instructions

Honeywell

Honeywell B Mounting instructions

Honeywell WebStat T7350 User guide

Honeywell

Honeywell WebStat T7350 User guide

Popular Thermostat manuals by other brands

Full Gauge TIC-17C product manual

Full Gauge

Full Gauge TIC-17C product manual

Imit Chronomix S manual

Imit

Imit Chronomix S manual

ChiliTec ST-35 ana instruction manual

ChiliTec

ChiliTec ST-35 ana instruction manual

Salus VS05 Installer's/user's manual

Salus

Salus VS05 Installer's/user's manual

Azel D-500 user guide

Azel

Azel D-500 user guide

Charmeg MP-R user manual

Charmeg

Charmeg MP-R user manual

dixell WING XW40LS Installing and operating instructions

dixell

dixell WING XW40LS Installing and operating instructions

Network Thermostat NetX X7C-WIFI Installation and programming manual

Network Thermostat

Network Thermostat NetX X7C-WIFI Installation and programming manual

Radio Thermostat CT80 Operation guide

Radio Thermostat

Radio Thermostat CT80 Operation guide

HAI Omnistat RC-120 installation manual

HAI

HAI Omnistat RC-120 installation manual

Lennox iComfort E30 Installation and setup guide

Lennox

Lennox iComfort E30 Installation and setup guide

Lux Products PSD011Ba Installation and operating instructions

Lux Products

Lux Products PSD011Ba Installation and operating instructions

Computherm Q20 operating instructions

Computherm

Computherm Q20 operating instructions

Heatmiser neoStat user manual

Heatmiser

Heatmiser neoStat user manual

Mars HEAT CONTROLLER IR Wireless Thermostat user manual

Mars

Mars HEAT CONTROLLER IR Wireless Thermostat user manual

LUX LP0511D user manual

LUX

LUX LP0511D user manual

Saswell SAS920XWHB-7-S-RF User manual and warranty card

Saswell

Saswell SAS920XWHB-7-S-RF User manual and warranty card

Aircalo TFP1-ET85P2 operating manual

Aircalo

Aircalo TFP1-ET85P2 operating manual

manuals.online logo
manuals.online logoBrands
  • About & Mission
  • Contact us
  • Privacy Policy
  • Terms and Conditions

Copyright 2025 Manuals.Online. All Rights Reserved.

1 69-0575—1
TG586A
Locking Cover for
Chronotherm® III Thermostats
R. R. • Rev. 1-95 • ©Honeywell Inc. 1995 • Form Number 69-0575—1
One model provides all the display options shown in
Fig. 1. It also allows display of LEDs (light emitting
diodes) on thermostat models with subbase LEDs.
NOTE: System switches cannot be changed when locking
cover is secured.
Fig. 1—Locking cover display options.
ENRG. SAV.
SYSTEM
WARMER
COOLER
ENRG. SAV.
SYSTEM
TIME AND TEMPERATURE DISPLAY
AND PROGRAMMING
KEYS COVERED. VISIBLE TIME AND
TEMPERATURE
DISPLAY.
VISIBLE TIME AND TEMPERATURE
DISPLAY WITH ACCESS TO
PRESENT SETTING/
WARMER/COOLER
KEYS.
M9843
PRESENT
SETTING
Application
The TG586A Locking Cover protects T8600, T8601,
T8602, T8603, T8611 and T8621 Microelectronic
Chronotherm®IIIThermostatsagainsttamperinganddam-
age. It replaces the thermostat cover without removing or
adjusting the thermostat.
69-0575—1 2
Installation
WHE I STALLI G THIS PRODUCT…
1. Read these instructions carefully. Failure to follow
them could damage the product.
2. Check to make sure the product is suitable for your
application.
IMPORTANT: The TG586A is compatible only with the
T8600,T8601,T8602,T8603,T8611andT8621Micro-
electronic Chronotherm®III Thermostats. Other in-
stallations could damage both the locking cover and
the thermostat, and are not recommended.
REMOVE THERMOSTAT COVER (FIG. 2)
1. Openthermostatcover bypullingoutwardand swing-
ing down until cover is at a right angle to the thermostat.
2. Tightencornerscrewsonthermostattosecureittothe
base.
3. Grasp cover and pull away (Fig. 2) from thermostat
until cover snaps free.
4. Discard thermostat cover.
Fig. 2—Remove thermostat cover.
— For visible time and temperature display with access
toWARMER/COOLERkeys, use onlylockingcover
as shown in Fig. 5.
2. Installlockingcoverbyhangingupperhinged edge of
cover on thermostat and swinging down until cover engages
thermostat (Fig. 5). Locking mechanism automatically en-
gages and secures cover without use of key.
Fig. 3—Break locking cover insert at notch.
REMOVE LOCKI G COVER (FIG. 4)
1. Remove TG586A Locking Cover by inserting key
provided and rotating clockwise until locking mecha-
nism disengages with thermostat.
2. Swing locking cover outward away from thermostat
and lift off.
I STALL LOCKI G COVER
1. Install the locking cover with any one of three display
options using the locking cover insert. See Fig. 1 and 5.
— For covered time and temperature display and pro-
gramming keys, use both locking cover and locking
cover insert. Fit insert behind locking cover and press
together until the two pieces fit into place.
— For visible time and temperature display without ac-
cess to programming keys, use locking cover and
locking cover insert. Break locking cover insert into
twopiecesatnotch(seeFig.3).Fitsmallerinsertpiece
behind open space for PRESENT SETTING/
WARMER/COOLERkeysonlockingcoverandpress
togetheruntilthetwopiecesfitinplace.Discardlarger
insert piece.
NOTE:If option of visible time and temperature display
without access to programming keys is chosen, the time
and temperature display cannot be covered later.
ENRG. SAV.
SYSTEM
RUN
PROGRAM PERIOD TIME
TEMPERATURE
PRESENT
SETTING
SKIP
NEXT
PERIOD
CHANGE
TO LAST
PERIOD
SET
PRESENT
DAY/TIME
HOLD
TEMP
DAY WAKE
SET
HEAT/COOL SLEEP
LEAVE AHEAD WARMER
RETURN BACK COOLER
M1564
SUBBASE
THERMOSTAT
KEY
LOCKING COVER
M9835
Fig. 4—Unlock cover.
NOTCH
M9830
BACKVIEW
3 69-0575—1
Fig. 5—Install locking cover on thermostat.
Setting
WhentheTG586ALockingCoverfortheChronotherm®
III Thermostat insert is removed, you can raise or lower the
temperature by pressing the WARMER or COOLER keys.
IMPORTANT: Always pressthePRESENT SETTING key
before adjusting the temperature.
ADJUST TEMPERATURE
1.PressthePRESENTSETTINGkeytodetermineifthe
active mode is Heat or Cool.
2. If the Chronotherm®III Thermostat is in the Heat
mode, and you would like it warmer, press the WARMER
key. If you would like it cooler, press the COOLER key.
2. If the Chronotherm®III Thermostat is in the Cool
mode, and you would like it warmer, press the WARMER
key. If you would like it cooler, press the COOLER key.
4. In Auto Changeover Chronotherm®III models, you
mayneedtochange the Heat orCoolmode.Todo this, press
the PRESENT SETTING key to determine the mode being
used. To change to the other mode, press the PRESENT
SETTING key again.
ENRG.SAV.
SYSTEM
RUN
PROGRAM PERIOD TIME
TEMPERATURE
PRESENT
SETTING
SKIP
NEXT
PERIOD
CHANGE
TO LAST
PERIOD
SET
PRESENT
DAY/TIME
HOLD
TEMP
DAY WAKE
SET
HEAT/COOL SLEEP
LEAVE AHEAD WARMER
RETURN BACK COOLER
M9844
THERMOSTAT
LOCKING COVER
INSERT (IF DESIRED)
LOCKING COVER
LOCKING COVER
THERMOSTAT
SUBBASE
Home and Building Control Home and Building Control
Honeywell Inc. Honeywell Limited—Honeywell Limitée
1985 Douglas Drive North 740 Ellesmere Road
Golden Valley, MN 55422 Scarborough, Ontario
M1P 2V9
Printed in Taiwan R.O.C.