Horizon Technology SPE-DEX 4790 User manual

SPE-DEX 4790® Solid Phase
Extraction System
Service Manual

1
16 Northwestern Drive, Salem, NH 03079
Telephone: (603) 893-3663
Toll-Free: (800) 997-2997 USA Only
Website: www.horizontechinc.com
Copyright © 2015 by Horizon Technology, Inc.
All rights reserved. Horizon Technology, Inc. reserves the right to change the information in this document
without notice. No part of this work may be processed, reproduced, or transmitted in any form or by any
means, electronic or mechanical, including photocopying and recording, or by any information storage or
retrieval system, except as may be expressly permitted in writing by Horizon Technology, Inc.
SPE-DEX is a trademark of Horizon Technology, Inc.
All other product names herein are used for identification purposes only and are recognized as properties
(including trademarks, registered trademarks, and referenced copyrighted materials) of their respective
holders.
P/N: 29-3232 REV A
(August 2015)

2
Contents
Preface .....................................................................................................................................................4
Manual Audience and Intent................................................................................................................................. 4
Technical Support.................................................................................................................................................. 4
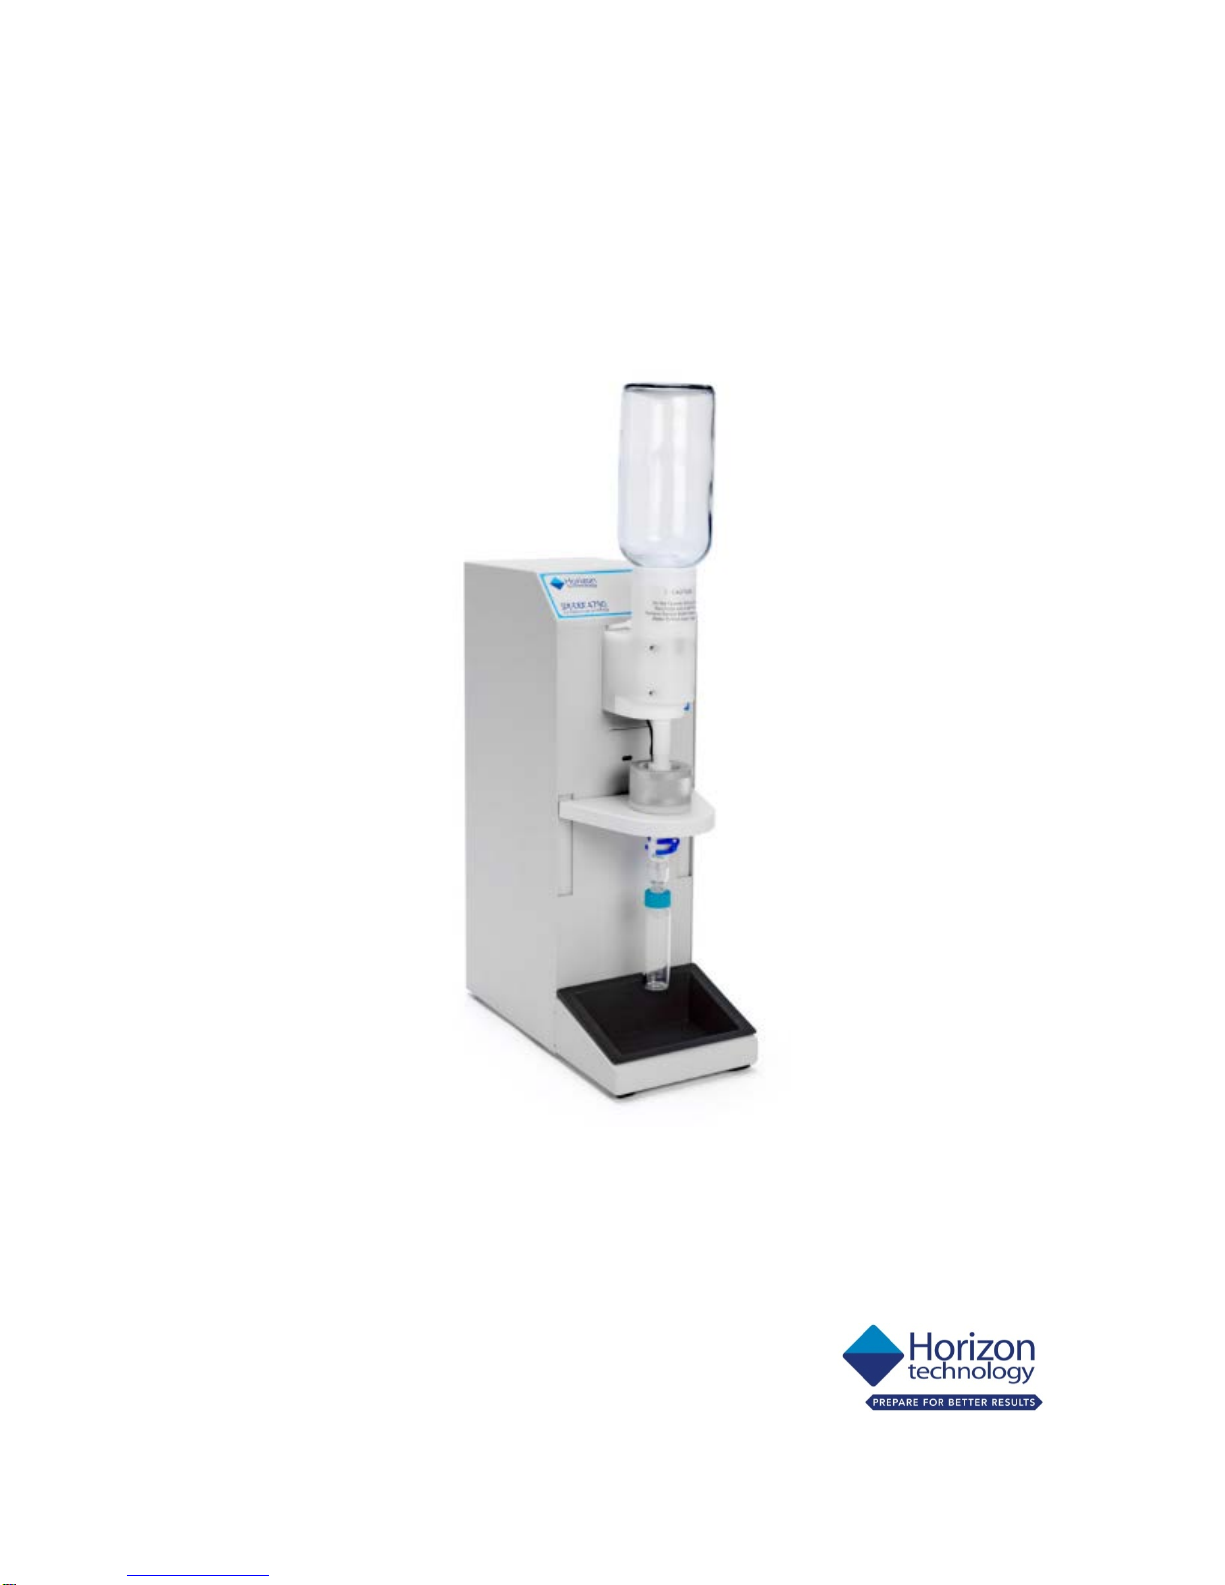
1. Nomenclature ...................................................................................................................................6
2. Recommended System Maintenance ................................................................................................. 7
2.1. Daily Maintenance .................................................................................................................................... 7
2.2. Weekly Maintenance ................................................................................................................................ 7
3. Troubleshooting ................................................................................................................................8
4. Preventative Maint. Kits/ Miscellaneous Accessories........................................................................ 14
5. Preventative Maintenance Procedures............................................................................................. 21
5.1. Pre-Maintenance Inspection................................................................................................................... 21
5.2. Preventative Maintenance: Module ....................................................................................................... 23
5.2.1. Replacing the Check Valve ...................................................................................................................... 23
5.2.2. Replacing the Thermistors ...................................................................................................................... 23
5.2.3. Replacing the Bottle Holder O-Ring ........................................................................................................ 24
5.2.4. Replacing the Rinse Needle..................................................................................................................... 24
5.2.5. Replacing the Collection Adapter Screws................................................................................................ 25
5.2.6. Replacing the Modified Water Plug ........................................................................................................ 25
5.2.7. Replacing the Module Feet ..................................................................................................................... 26
5.2.8. Replacing the Solvent and Water Waste Lines ....................................................................................... 26
5.3. Preventative Maintenance: System ........................................................................................................ 27
5.3.1. Check Valve Tool ..................................................................................................................................... 27
5.3.2. Thermistor Height Adjustment Tool ....................................................................................................... 27
5.3.3. Hydrophilic Solution................................................................................................................................ 28
5.3.4. Water-Waste Manifold ........................................................................................................................... 28
5.3.5. Vacuum Line Kit....................................................................................................................................... 29
5.4. Post-Maintenance Inspection ................................................................................................................. 30
6. Service Kits and Parts List................................................................................................................. 32
7. Service Replacement Procedures ..................................................................................................... 35
7.1. Replacing the Bottle Holder (PN 50-2457) .............................................................................................. 35
7.2. Replacing the Water Inlet Valve (PN 48-2607)........................................................................................ 36

3
7.3. Replacing the Downtube Assembly (PN 48-2606) .................................................................................. 37
7.4. Replacing the Sample Collect Valve (50-2498)........................................................................................ 39
7.5. Replacing the Solvent- or Sample-Waste Valve (50-2535) ..................................................................... 41
7.6. Replacing a Prewet or Rinse Valve (50-2536) ......................................................................................... 43
7.7. Replacing the Water Inlet Valve Actuator (25-0666) .............................................................................. 45
7.8. Replacing the Collection Adapter (02-0602) ........................................................................................... 47
7.9. Replacing the MAC Valve (50-2237)........................................................................................................ 48
7.10. Replacing the Exhaust Fan (PN 50-0629) ................................................................................................ 51
7.11. Replacing the Spring Motor (PN 50-2233) .............................................................................................. 52
7.12. Replacing the IR Photointerruptor (PN 16-0626).................................................................................... 54
7.13. Replacing the SPE-DEX 4790 Keypad (PN 18-0588-CE) ........................................................................... 55
7.14. Replacing the Control Circuit Board (PN 50-0145-CE) ............................................................................ 57
8. Schematics ...................................................................................................................................... 58
8.1. Nitrogen and Solvent Delivery System.................................................................................................... 58
8.2. Waste and Vacuum System..................................................................................................................... 59
8.3. Plumbing Schematics .............................................................................................................................. 60
8.3.1. MAC Valve and Water Inlet Valve Actuator ............................................................................................ 60
8.3.3. Prewet and Rinse Plumbing .................................................................................................................... 61
8.3.4. Vacuum Plumbing ................................................................................................................................... 62
8.4. Electrical Systems.................................................................................................................................... 63
8.4.1. Ribbon Cable ........................................................................................................................................... 63
8.4.2. Control Circuit Board Valve Indicators .................................................................................................... 65
8.5. Operation Code ....................................................................................................................................... 66
8.5.1. Prewet Cycle............................................................................................................................................ 66
8.5.2. Sample Processing Cycle ......................................................................................................................... 67
8.5.3. Wash Cycle .............................................................................................................................................. 68
8.5.4. Air Dry Cycle ............................................................................................................................................ 69
8.5.5. Rinse Cycle............................................................................................................................................... 70
9. Available Service Documents ........................................................................................................... 71

4
Preface
Manual Audience and Intent
This manual, which is intended for all service technicians with Horizon Technology product service
training, provides the information needed to perform maintenance on the SPE-DEX 4790. The
information may contain typographical errors or technical inaccuracies and is subject to change
without notice. Modifications or enhancements may also be made to the product at any time. For the
most current information, consult Horizon Technical Support.
Product Safety
The SPE-DEX 4790 is designed with operator safety in mind. However, the product use is at the
discretion and risk of the operator or laboratory supervisor/manager. Do not attempt to disassemble
or repair the unit before reviewing this guide. It is recommended that the SPE-DEX 4790 only be
serviced by trained service technicians and with factory approved components.
Electro-Static Discharge
To reduce the risk of electrical shock, an Electro-Static discharge mat should be used when
troubleshooting or repairing the SPE-DEX 4790.
Personal Protective Equipment
Due to the nature of use for the SPE-DEX 4790, it is recommended that proper Personal Protective
Equipment (PPE) be used when servicing it. This should include safety glasses and gloves, but may
include additional PPE based on your safety requirements.
Technical Support
Visit the Horizon website for technical information in addition to that provided in this guide:
www.horizontechinc.com. If you have questions about the SPE-DEX 4790 solid phase extraction
system that are not fully addressed in this guide or our website, please contact the Horizon
Technology Technical Customer Support Center:
Phone: (603) 893-3663
Fax: (603) 893-4994
E-mail: support-service@horizontechinc.com
Customer Support Center hours are Monday through Friday, 8:00 a.m. to 5:00 p.m. EST. The Center
provides expert technical support including troubleshooting, repair instructions, service and
installation scheduling, and replacement part information.

5
Notes:

6
1. Nomenclature
Throughout this document, the following terms will be used which require definition:
•Module: A single SPE-DEX 4790 position capable of running a single water sample and collecting an
extract.
•Controller: The control interface for the SPE-DEX 4790. This controller may be either the stand-alone
4700 Controller or a PC-connected Envision Controller. Both are capable of controlling up to eight
Modules.
•System: A collection of up to eight (8) SPE-DEX 4790 Modules connected to a single controller and
waste system.
•Preventative Maintenance (PM): A PM is preformed yearly and is designed to maintain a full System
and through the measurement of various conditions and the replacement of commonly wearable
parts.

7
2. Recommended System Maintenance
2.1. Daily Maintenance
On a daily basis when the instrument is in routine operation:
•Clean up any spills immediately using a soft, dry cloth. Follow that by wiping the area with a
cloth made damp with a mild nonabrasive general purpose laboratory cleaning solution. Do not
spray a cleaning solution directly onto the instrument.
•Flush the Water-Waste, Solvent-Waste, and Elution vacuum pathways using warm water.
•Clean accessory components like Disk Holders, Cap Adapters, and Collection Vessels using a mild
nonabrasive general purpose laboratory cleaning solution. Follow this cleaning with a rinse of
the final elution solvent for best results.
•Ensure that all gaskets are in place and in good condition.
•Verify that all Plastic-Coated Solvent Bottles are free from defects. If needed, replace them
prior to pressurizing.
2.2. Weekly Maintenance
At the end of the week when the instrument is in routine operation:
•Check the gas supply and tubing to ensure that all of the fittings are properly seated and that the
tube is not damaged in any way.
•Check the solvent tubing and ensure that all fittings are properly seated and there is no damage.
•Check the exhaust ducting, if needed, and ensure that the attachments at both ends are secure
and free of obstruction. Verify that the ducting is not crimped or crushed by other instruments
or heavy objects.
•Flush the Water-Waste, Solvent-Waste, and Elution vacuum pathways using acetone. Follow
this with warm water.

8
3. Troubleshooting
SYMPTOM
PROBABLE CAUSE
SOLUTION
Module not displayed on the
Envision Operation Page.
Data Cable not attached.
Ensure that the Data Cable is
properly seated on both the
Module’s and the Envision’s Data
Port.
Bad Data Cable.
Connect the Data Cable to a
different port on the Envision
and see if communication can be
established. Replace Cable if
necessary.
Connect the Data Cable to a
different extractor
Prewet solvent does not
dispense.
Unfamiliar method.
Confirm method steps to ensure
that the prewet is scheduled.
Confirm that the method has
been loaded onto the extractor
in use.
Low/No pressure.
Verify that nitrogen source is set
correctly.
Verify that the Solvent Bottle
Pressure is set correctly.
Verify that all nitrogen lines are
free from kinks.
Verify that the bottle cap is tight
and that both gaskets are
present and undamaged.
Low/No solvent in connected
bottle.
Verify that enough solvent is
contained within the solvent
bottle to cover the bottom of the
solvent filter.
Solvent Sip Tube not attached to
cap.
Ensure that the sip tube is
tightened into the cap.
Clogged Solvent Filter
Cut or pull Solvent Filter off and
verify that solvent is able to be
dispensed. Replace if needed.
Kinked Solvent Delivery line
Inspect all Solvent Delivery lines,
replace if needed.
Valve not actuating.
Ensure that the valve pins are
properly seated within the
Molex Connector.
Other valves not actuating;
replace the fuse on Control
Circuit Board
Fault 80: Extractor Fault: Prewet
Solvent Delivery Fault: Check
Extractor
Solvent does not reach the top
thermistor in under 1 min.
Refer to "Prewet solvent does
not dispense."

9
SYMPTOM
PROBABLE CAUSE
SOLUTION
Prewet solvent overflows.
Incorrectly set Thermistors
Use the Thermistor Height Tool
to ensure the recommended
height is set.
Pressure is set too high.
Verify the nitrogen source
pressure is set correctly.
Verify that the Solvent Bottle
Pressure is set correctly.
Bad Thermistors.
Replace the Top Thermistor.
Prewet solvent is not drained.
Insufficient vacuum.
Verify that the vacuum source is
set correctly.
Verify that the Water-Waste
Carboy Manifold is correctly
seated.
Close the Water-Waste Carboy
Drain.
Verify the Solvent Waste vacuum
is set correctly.
Solvent-Waste valve is not
opening.
Write a short method with only 1
prewet in it and run. Replace
valve if no actuation is seen.
Prewet solvent is drained
immediately.
Waste valve is stuck open.
Place DI Water into Disk Holder
attached to a module. Watch
the waste containers and
identify which one the water is
pulled into.
Check Valve is stuck open.
Use the Check Valve Tool to
cycle the Check Valve. Place DI
Water into a Disk Holder
attached to a Module. Replace
Check Valve if necessary.
Extractor continually drains after
first Prewet.
Incorrectly set Thermistor.
Use the Thermistor Height Tool
to ensure the recommended
height.
Thermistors heights reversed
Verify that the higher of the two
Thermistors is connected to J6
on the Control Circuit Board.
Bad lower Thermistor.
Replace Thermistor.
Prewet solvent drips from the
Downtube.
Prewet valve stuck open
Increase the Solvent Bottle
Pressure to 17 psi and run a
method that fires only the
affected valve. Replace the valve
if necessary.
Sample does not dispense.
Low/No pressure.
Verify that the nitrogen source is
set correctly.
Verify that the Extractor
Pressure is set correctly.
Water Inlet Valve Actuator is
Increase Extractor Pressure to

10
SYMPTOM
PROBABLE CAUSE
SOLUTION
stuck closed.
50-60 psi and run the Sample
Drain Method.
Actuate the Water Inlet Valve
manually.
Verify that the MAC valve is
firing by disconnecting the
nitrogen line on the top port of
the Actuator and running the
Sample Drain method (this is line
A at the MAC valve). If the line
does not pulse nitrogen, replace
the actuator.
Water Inlet valve needs to be
treated (shaking the extractor
allows sample to flow through
the valve for a limited time).
Treat the valve using Hydrophilic
Solution.
Sample overflows.
Air leak.
Ensure that all cap adapters
contain an appropriate gasket
which is undamaged.
Verify that the sample bottle
being used does not have
defects on the threads or the
rim.
Replace the Bottle Holder O-
Ring.
Replace the Cap Adapter.
Sample flows slowly or not at all.
Insufficient vacuum.
Verify that the vacuum source is
set correctly
Verify that the Water-Waste
Carboy Manifold is correctly
seated.
Close the Water-Waste Carboy
Drain.
Insufficient prefilters used.
Use additional prefilters to
increase the flow rate through
the SPE Disk.
Use the EZ Flow Holder for more
prefiltering surface area.
Disk Holder Support Screen is
off-center.
Open the disk holder and verify
that the imprint of the Support
Screen on the bottom of the SPE
disk is off-center.
Water-Waste valve is not
opening.
With no disk in the disk holder,
run DI Water using the Sample
Drain method to confirm that
the valve needs replacement.
Water Waste line is kinked
Verify that all waste lines are
free from kinks.

11
SYMPTOM
PROBABLE CAUSE
SOLUTION
System advances to Air Dry
without having processed the
entire sample.
Slow sample flow rate through
SPE disk.
Verify Thermistor heights using
the Thermistor Height Setting
Tool.
Investigate other prefiltering
options.
Bad Thermistor.
Verify Thermistor heights using
the Thermistor Height Setting
Tool.
Ensure that Thermistors are
connected to the Control Circuit
Board correctly. Replace if
necessary.
System does not advance to Air
Dry.
Thermistors remained covered.
Raise the Thermistor Clip so it is
not touching anything within the
Disk Holder.
System times out after 60
minutes.
Old version of Extractor Software
Code.
Upgrade the chip.
Water Inlet Valve (WIV) drips.
Damaged Water Inlet Valve.
Look down into the WIV and
confirm that there are scratches
on the Spool. Replace WIV.
Incorrectly set tension on WIV.
Look down into the WIV and run
the Sample Drain method. WIV
should open in 1 second.
Opening faster indicates the
tension may be insufficient.
Fluid leaking from Rinse Rod.
Rinse Valve is stuck open.
Increase the Solvent Bottle
Pressure to 17 psi and run a
method that fires only the
affected valve. If doing this does
not work, replace the valve.
Rinses not dispensed.
Unfamiliar method.
Confirm method steps
Confirm that the method has
been loaded onto the module in
use.
Low/No pressure.
Verify that nitrogen source is set
correctly.
Verify that the Solvent Bottle
Pressure is set correctly.
Verify that all nitrogen lines are
free from kinks.
Verify that the bottle cap is tight
and that both gaskets are
present and undamaged.
Low/No solvent in connected
bottle
Verify that enough solvent is
contained within the solvent
bottle to cover the bottom of the
solvent filter.

12
SYMPTOM
PROBABLE CAUSE
SOLUTION
Solvent Sip Tube not attached to
cap.
Ensure that the Sip Tube is
tightened into the cap.
Clogged Solvent Filter
Cut or pull Solvent Filter off and
verify that solvent is able to be
dispensed.
Kinked delivery line.
Inspect all lines.
Rinse Rod is blocked.
Pull the Rinse Rod out of the
Bottle Holder and examine by
holding it up to the light.
Sonicate or replace if necessary.
Valve not actuating.
Ensure that the valve pins are
properly seated within the
Molex Connector.
Other valves not actuating;
replace the fuse on Control
Circuit Board.
Rinses and Washes are 2 seconds
even though the 8-Second
Magnet is used.
IR Sensor had failed.
Replace the IR sensor.
Fluid drips into the Collection
Vessel.
Check Valve needs cleaning.
Use Check Valve Tool to free
Check Valve
Fill the Disk Holder with warm
water and press and hold Abort
then press Purge.
Check Valve needs to be
replaced.
Replace Check Valve.
Low/No Elution volume.
Unfamiliar method.
Confirm method steps.
Confirm that the method has
been loaded onto the extractor
in use.
Check Valve is stuck.
Rinse solvent was dispensed, but
not pulled into the Disk Holder.
Use Check Valve Tool to free
Check Valve.
Collection Vessel improperly
attached.
Attach Collection Vessel to
Collection Adapter using an
upwards-twisting motion to
ensure a good seal.
Insufficient vacuum.
Verify that the vacuum source is
set correctly.
Verify that the Water-Waste
Carboy Manifold is correctly
seated.
Close the Water-Waste Carboy
Drain.
Verify the Solvent Waste vacuum
is set correctly.

13
SYMPTOM
PROBABLE CAUSE
SOLUTION
Waste valve is stuck open.
With the extractor idle, fill a disk
holder with water and verify that
the fluid level does not decrease.
If it does, examine the Waste
vessels to determine which valve
is stuck open and replace that
valve.
Keypad lights have dimmed or
gone out.
LEDs in Keypad are burned out.
Replace Keypad.

14
4.Preventative Maint. Kits/ Miscellaneous
Accessories
This is a list of the standard preventative maintenance kits & accessories that can be purchased from Horizon
Technology.
To ease the process of performing a yearly preventative maintenance (PM), the parts required are bundled
into two Kits. A Module Kit allows for the maintenance of a single SPE-DEX 4790 module; Service Engineers
will need to have one kit for each extractor Module. The System Kit allows for the maintenance of the
external components and accessories of the System; only one kit is needed per waste container set. If a user
has a single controller, but multiple waste containers, an additional kit will be needed.
Some of the parts contained within the PM Kits are available by themselves if needed, however many of the
individual parts are not.
Part #
Description
02-0727
Check Valve Tool – 4790
49-1590
Thermistor Height Adjustment Tool
165-0712
Hydrophilic Solution

15
48-2605
Check Valve
48-2604
Thermistor
(set of two)
30-0628
Bottle Holder O-Ring
48-2608
Rinse Needle
(pack of two)
02-0692
Thermistor Clip
50-0043-02
Solvent-Waste Manifold
50-0051-02
Water-Waste Manifold

16
120-4001-EX-THRU
Solvent Manifold - Through Block
Includes:
•(1) Solvent Manifold: Through Block
•(18) Manifold Plugs
•(18) Solvent Manifold Delivery Lines
•(9) Manifold-to-Manifold Delivery Lines
120-4001-EX-END
Solvent Manifold - End Block
Includes:
•(1) Solvent Manifold: End Block
•(18) Manifold Plugs
•(18) Solvent Manifold Delivery Lines
•(9) Manifold-to-Manifold Delivery Lines
50-0173-04
Solvent Manifold Delivery Lines
50-0103-01
Solvent Bottle Delivery Lines
(includes eight solvent lines and one nitrogen line)
50-0172-01
Solvent Bottle Tops
(pack of eight)

17
48-2772
Solvent Stone
(includes ferrule)
50-2770
Manifold-to-Manifold Delivery Line
(single line only; nine needed for complete set)
02-0029-01
Solvent Manifold: End Block
02-0028-01
Solvent Manifold: Through Block

18
48-4501
SPE-DEX 4790 System PM Kit
This kit is designed to service the external components which are attached to a single
waste collection system or controller.
oCheck Valve Tool
oThermistor Height Adjustment Tool
oHydrophilic Solution
oWater-Waste Manifold
oVacuum Line Kit
48-4502
SPE-DEX 4790 Module PM Kit
This kit is designed to service a single SPE-DEX 4790 module. For systems containing
multiple modules, the same number of kits will be ordered.

19
oCheck Valve
oCheck Valve Screws
(3 Included)
oThermistors
(set of two)
oBottle Holder O-Ring
oSolvent and Water Waste Lines
oRinse Needle
oCollection Adapter Screws
(three Included)
oModified Water Plug
Table of contents
Popular Laboratory Equipment manuals by other brands

InnovaPrep
InnovaPrep FLUIDPREP Concentrating Pipette Select quick start

ELGA
ELGA MEDICA Pro EDI Quick start manual

Lumen Dynamics Group
Lumen Dynamics Group OmniCure R2000 user guide

WLD-TEC
WLD-TEC SteriMax basic 4.101.000 instruction manual

BIEMMEDUE
BIEMMEDUE CRYO Basic User and maintenance manual

Agilent Technologies
Agilent Technologies N2727A installation guide