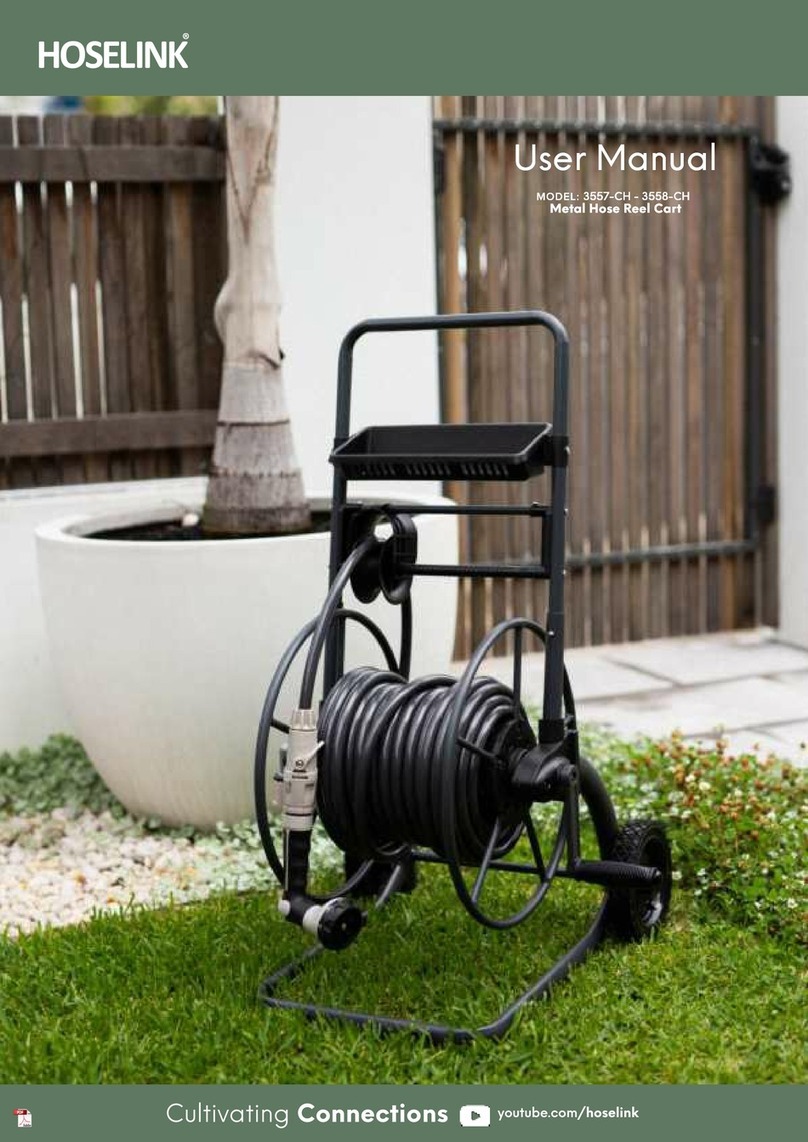
Hoselink 3570 User manual

Before you begin
This product has been packaged to ensure it arrives in the best possible condion. Please be careful when
unpacking. This kit contains parts that can be damaged if incorrectly assembled. Please follow instrucons.
For more informaon visit www.hoselink.com.au or call 1300 900 617
Heavy-Duty Hose Reel Cart | Models: 3570 / 3571
User Manual

Hoselink’s Heavy-Duty Hose Reel Cart has been
designed and manufactured using the highest
quality materials to take all the work out of
watering, gardening and cleaning.
Product Features:
• Cam-lever braking helps with the drag of the
hose when in use. When pulling the hose out
ensure the brake is in the ON posion then
ip the lever to the OFF posion to release
the brake for a drag-free rewind.
• Powder coat nish in our popular taupe
colour that will look great in any garden!
• Aluminum-alloy and stainless steel
construcon throughout provides a
rustproof, long-lasng watering soluon.
• Heavy-duty rubber tyres provide easy
movement on any terrain
• Impact resistant crank handle spins freely
ensuring a hassle-free rewind acon
• Push/Pull handles have been posioned at
915mm using rubber sleeves for an easy-grip
soluon.
• Smartly engineered to suit both le and
right handed people, simply decide which
direcon your reel will funcon when ng
your garden hose.
Box Contents
2 •Metal Hose Reel Cart (3357, 3358)
Before installaon, please make sure you have all
the parts as shown on the ‘Box Contents’ secon,
then you may start installaon from step 1.
Please note: paral assembly has been completed
during manufacturing for packing purposes.
Important!
Rear Drum Front Drum Wheels
1x 1x 2x
Handles Le Leg Frame
Right Leg Frame
2x 1x
1x
Spindle, Wheel
Brake, Cam
Lever
Hose Strap
2x
1x
1x
‘Y’ Frame Frame - Front
Cart Leader Hose
Fied
1x 1x 1x
Installaon Key
Drum Screws
1x
3x
Swivel Elbow
Joint Crank Handle
1x 1x
Hose Strap
Screw
Flat Washer
Universal Tap
Connector Accessory
Connector
with Swivel
Premium
7-Funcon
Spray Gun
1x
8x
1x 1x
1x
123
456
7 8 9
10 11 12
13 14 15
16 17 18
19 20

Step 4
Place crank handle into correct posion, secure included
screw in place using the Installaon key (9)
Step 5
Remove the Screws from the Wheel Spindle (12)
Step 6
Install the Wheels (3) to the Le and Right Cart Legs (8). Be
sure the raised secon of the wheel is against the cart leg.
9
12
Step 3
Remove the screw from the Handle.
Step 1
Place the Front Drum (2) on top of the Back Drum (1).
The correct alignment can be achieved once the pins and
sockets are secured in place.
Step 2
Fasten drums together using the three Drum Screws (14)
and put 3pcs washer (17) and the small hex end of the
installaon key (9).
Cart Assembly
For more informaon visit www.hoselink.com.au or call 1300 900 617 • 3
Heavy-Duty Hose Reel Cart | Models: 3570 / 3571
User Manual
1
2
9
14
17
8
3

4 •Metal Hose Reel Cart (3357, 3358)
7
Step 7
Remove the Screws, Flat Washer and Lock Nuts from each
of the Cart Legs (8).
Insert the Front Cart Frame (5) into each of the Le and
Right Cart Legs (8). Insert the Screws and Flat Washers (17).
Note: Do not install the nuts at this me.
Step 8
Remove the set of Screws, Flat Washers, Cart Leg Clamps
and Lock Nuts from the Cart ‘Y’ Frame Assembly (4).
Step 9
Slide the Cart ‘Y’ Frame Assembly (4) onto the Cart Legs (8).
Install the Screws, Flat Washers, Cart Leg Clamps and Lock
Nuts, ghten with the installaon key (9).
8
4
4
8
4
Step 10
Install the Serrated Lock Nuts onto the Screws. Tighten with
the installaon key (9).
Step 11
Install the Serrated Lock Nuts onto the Screws. Tighten with
the installaon key (9).
Step 12
Install the Cart Handles (7), with the hardware just
removed, ghten with the installaon key (9).
9
9

Heavy-Duty Hose Reel Cart | Models: 3570 / 3571
User Manual
Step 16
Aach the Swivel (10) to the leader hose.
Step 17
Screw the swivel rmly onto the axle. Ensure to hand
ghten only.
6
Step 13
Install the Flange Assembly onto the axle ensuring the crank
handle is on the outside.
Step 14
Install the Cam-lever Brake (13) onto the axle.
Note: Align the tab on the brake with the notch in the
ange.
Step 15
Thread the leader hose (6) through the axle unl it is
accessible from the other side.
For more informaon visit www.hoselink.com.au or call 1300 900 617 • 5
13

6 •Metal Hose Reel Cart (3357, 3358)
Brake o: Reeling the hose in.
As you pull the hose from the reel, our innovave cam-lever
brake will prevent the reel from “free-spinning”, unrolling
more hose than you want. The brake can be turned ON and
OFF using the lever.
Brake on: Pulling the Hose out.
How to use the Cam-Lever Brake
Step 1
If you are right handed: Install the hose as per images.
If you are le handed: Install the hose in the opposite
direcon. The hose will then wind up from the right hand
side.
Step 2
Posion the Hose strap (16) so the grommets pass through
the small slot in the ange.
Step 3
Tighten the hose strap. The Hose Strap Screw (15) will pass
through the 1/4 inch Flat Washer (17) and the two brass
grommets on the hose strap and then thread into the nut
on the reel ange assembly.
Step 4
Hand ghten your garden hose to the brass swivel.
Hose Installation
16

Warranty
Hoselink’s mission is to oer excellent products and
exceponal aer sales support. Your hose reel carries a
3 years warranty from the date of purchase. Should you
require trouble-shoong advice or aer sales care, please
contact us via telephone or email and our Customer Care
team will assist you.
Our goods come with guarantees that cannot be excluded
under the Australian Consumer Law. You are entled
to a replacement or refund for a major failure and for
compensaon for any other reasonably foreseeable loss or
damage. You are also entled to have the goods repaired or
replaced if the goods fail to be of acceptable quality and the
failure does not amount to a major failure.
If a Product has a minor defect, we will provide a repair
or oer you a replacement or a refund. If you think that a
Product is defecve you should contact our Customer Care
team within 14 days and a Customer Care representave
will assist you. A photo may be requested to assist with the
assessment of your claim.
Where a Product is defecve and needs to be replaced or
repaired, return shipping will be arranged at the expense
of Hoselink. This must be arranged with Customer Care
prior to the item being returned. If a Product is replaced,
your replacement Product becomes your property and the
returned Product becomes our property. When a refund is
given, the returned Product becomes our property.
Should you ever require any assistance with your Hoselink
product, please do not hesitate to contact us for a speedy
resoluon.
FOR ALL WARRANTY CLAIMS, PLEASE CONTACT CUSTOMER
CARE:
Tel: 1300 900 617
Email: [email protected]
For more informaon visit www.hoselink.com.au or call 1300 900 617 • 7
Heavy-Duty Hose Reel Cart | Models: 3570 / 3571
User Manual
Step 1
Place the Cam-Lever in the ‘ON’ posion.
Step 2
Pull enough hose o the reel to test the amount of drag
created by the Cam-Lever break.
Too lile drag: The reel will connue to unspool hose aer
you’ve stop pulling.
• Tighten the nut on the Cam-Lever Brake using a 3/8”
wrench.
• Adjust 1/4 turn of the wrench.
• Test again.
Too much drag: It will be dicult to pull hose o the reel.
• Loosen the nut on the Cam-Lever Brake using a 3/8”
wrench.
• Adjust 1/4 turn of the wrench.
• Test again.
How to adjust the Cam-Lever Brake

Website
www.hoselink.com.au
Email
Telephone
1300 900 617
Oce address
1/108 Old Piwater Rd, Brookvale NSW 2100, Australia
Mailing Address
PO Box 6671, Frenchs Forest NSW 2086
This manual suits for next models
1
Table of contents
Other Hoselink Outdoor Cart manuals