OPERATING MANUAL
Hö t-Steam® SGBSeries-Model No. SGB600, SGB700, SGB800 & SGB900
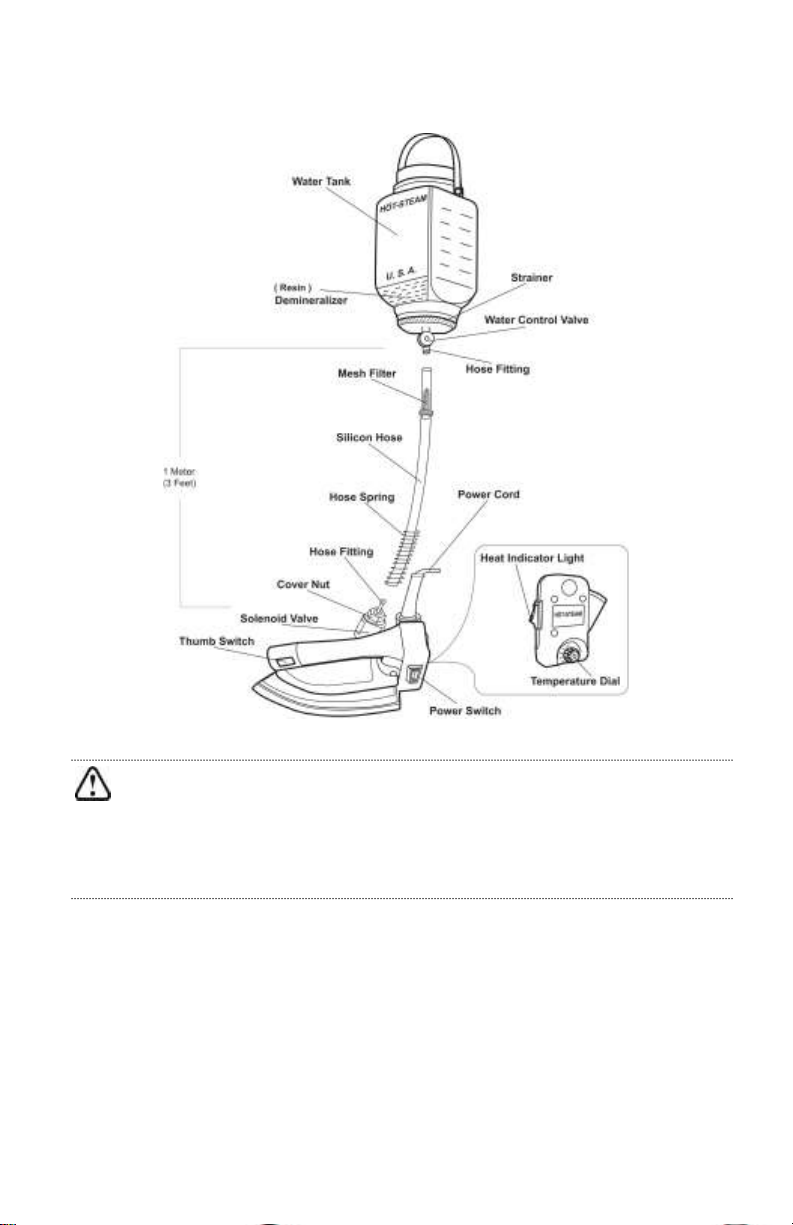
Check if water is flowing into the iron.
Close the Water Control Valve and unscrew the
Cover Nut in the Solenoid Valve (while keeping
the hose connected).
Open the Water Control Valve, if dripping or no
water is coming through the Hose Fitting, clean
the iron Hose Fitting (It may also require to clean
the water tank and the hose if necessary). Repeat
process until a stream line shooting out of the
hose fitting is obtained.
Problem: The iron keeps releasing steam when the Thumb Switch is not
pressed.
Solution:
The Plunger Packing tends to wear down after a certain period of use. Replace
the packing if there’s a deep impression marked on it or if you notice an uneven
surface (Included in the Repair Kit) by opening the Cover Nut in the Solenoid
Valve.
Inspect the Plunger Spring if bent or if out of place. Replace the spring by
opening the Cover Nut (Included in the Repair Kit).
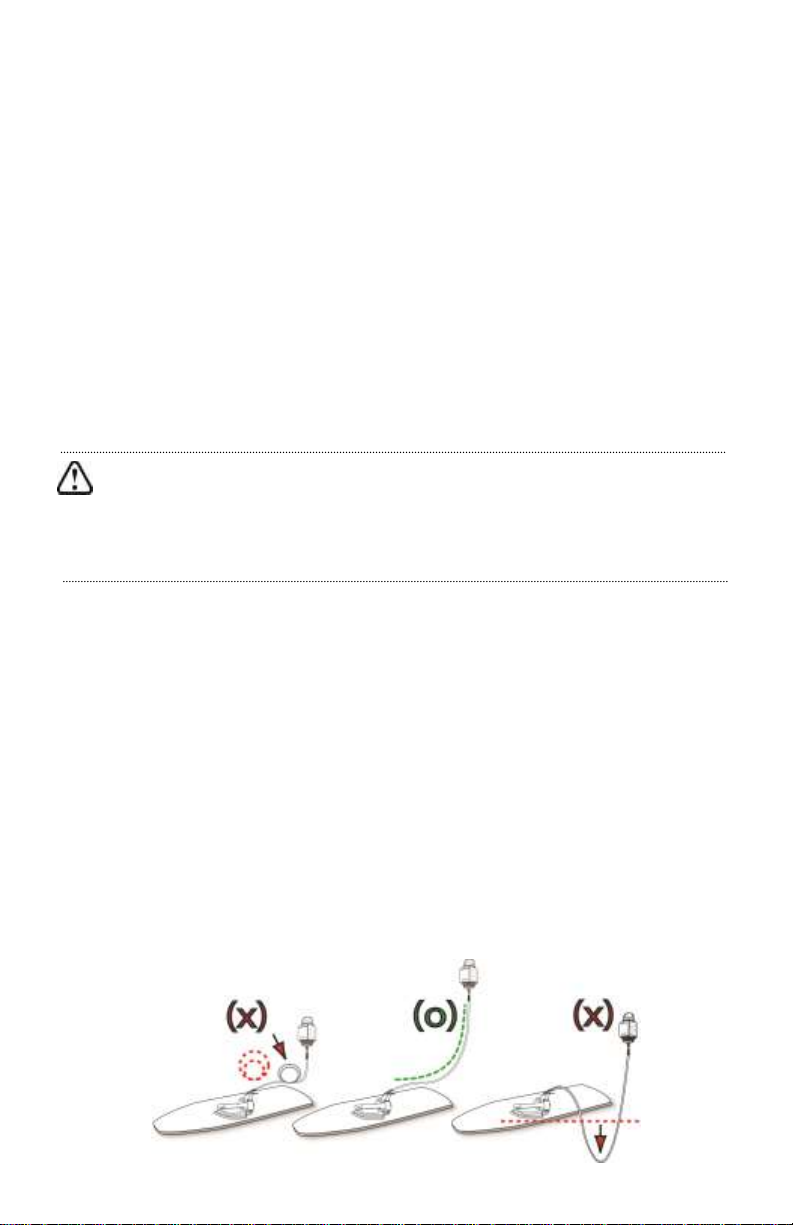
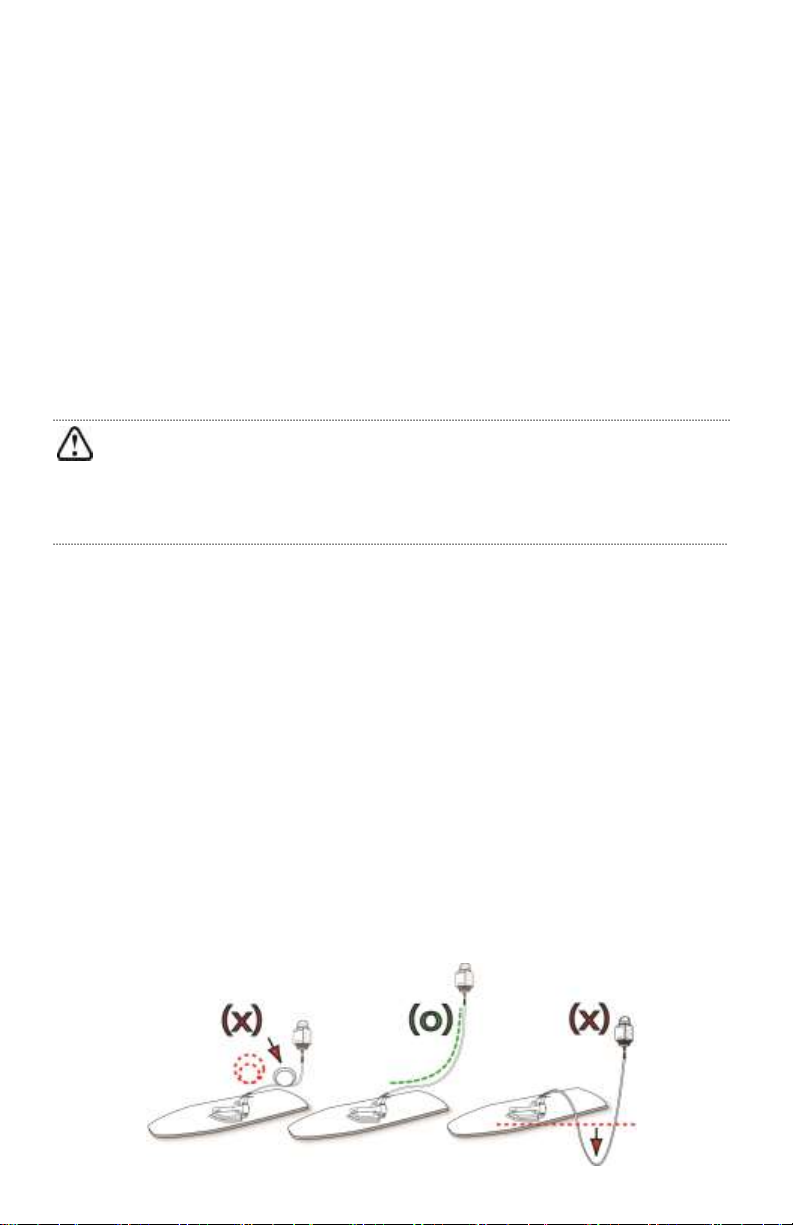
IMPORTANT
Make sure the plunger and the spring stays together all the time. Tilt the
iron to the right when putting them back inside the Solenoid Valve.
Problem: The iron is releasing a mix of water and steam.
Solution:
Use the Thumb Switch with a touch-and-release method
(Press 1 second and release) for best results.
Do not press the Thumb Switch for long period of time
while the Heat Indicator Light is ON.
Increase the Temperature Dial to a higher level.
Problem: The Heat Indicator Light is OFF and the iron does not heat.
Solution:
Increase the Temperature Dial to a higher level.
Verify that your electric outlet has power by pressing the Thumb Switch.
If you don’t hear the Solenoid Valve’s “Clack”:
oConnect the iron into another working electric outlet.
oVerify and reset the circuit breaker or surge protector if it went off. If the
breaker keeps shutting off, use another electric outlet.
If you hear the Solenoid Valve’s “Clack”:
oReplace the Thermal Fuse with genuine Hö t-Steam® parts.
** Make sure to unplug the iron when attempting this repair **