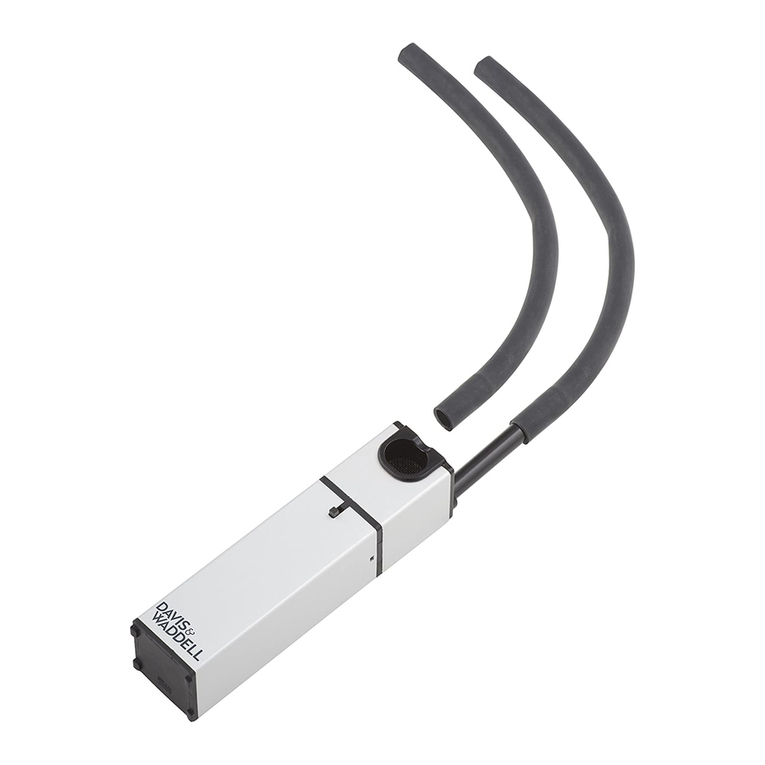
HotmixPRO Smoke User manual

1
INSTRUCTION MANUAL

2
CONTENTS
INTRODUCTION................................................................................................................................................. 3
GENERAL INFORMATION .................................................................................................................................. 5
FREIGHT, PACKAGE AND STORAGE .................................................................................................................. 7
INSTRUCTIONS FOR USE ................................................................................................................................... 7
DESCRIPTION..................................................................................................................................................... 8
APPLIANCE PARTS............................................................................................................................................. 9
GENERAL ADVISES FOR A CORRECT USE OF THE APPLIANCE........................................................................ 11
RECYCLING AND WASTE DISPOSAL ................................................................................................................ 12
TECNICHAL SPECIFICATIONS........................................................................................................................... 13
Please read carefully this manual prior to the first use of the appliance.
It is fundamental to get the best results out of the product and the highest level of safety.

3
INTRODUCTION
Congratulations! Thanks to the purchase of your HotmixPRO Smoke you may get inside the wonderful world of food
smoking.
Smoking ingredients is a technique as old as the human being.
In the old ages, it was primarily a conservation technique while today, with the introduction of the
refrigeration techniques, the conservation function has become obsolete, but despite this the demand of
smoking devices has never decreased.
The smoked food can be really delicious or truly disgusting, and some of the hints that you will find in this
manual will help you to avoid some mistakes that may occur while smoking meat and fish.
The vapors that come out of the burning wood contain a heterogeneous mix of aromas that form the flavors
the most typical when smoking. It is sufficient to lower the wood’s combustion temperature and some of the
flavors will be lost, while some less desirable ones will come out.
Both temperature and humidity of the smoke are very important, as the hot smoke delivers flavors
that are proportionally different compared to the cold smoke. To this purpose, the same ingredient has a
different flavor when smoked at hot or at cold. It is necessary to understand how to create a quality smoke,
and if the smoke basic chemistry is understood, its effect over flavor and shape of the smoked food will be
increased.
As it is well known, the smoke comes from the wood, that contains big quantities of lignin, this component
including most of the aromatic compounds generating the smoke flavor.
At temperatures over 300°C (570F,) the lignin molecules decompose and create a wide range of volatile
chemical products, named phenols. Furthermore, many of these phenols are very powerful antioxidants that
prevent the rancidity of foods, which is one of the reasons why smoke helps to preservation. Science has
discovered that the smoke produced from hardwoods at temperatures of 400 ° C (750F) enhances the smoky
taste of food.
This is the ideal temperature that enable the phenols and other aromatic compounds to enter the smoke
and the reason why the vaporized acids - which have an unpleasant taste - are unable to do it.
To check if the wood is burning at the correct temperature, you must adjust the airflow of the smoker: with
a lower passage of oxygen into the burning wood, the vapors will not burn, although they are close to the
deflagration level, but if the oxygen is scarce the desirable aromatic compounds will be missed, and it will be
conversely rich of polycyclic aromatic hydrocarbons (suspected carcinogens).
On the other hand the excess of oxygen produces unwanted flames. You will then need to have a minimum
of experience to master a fire without flames, which produces a fragrant and healthy smoke.
Smoking is much more than a simple gas; it is in fact a combination of three states of matter: a mixture of
solid particles, small liquid drops suspended in the air and vaporized chemical products. Only two of these
three phases are visible. A high concentration of black carbon generates a dense black smoke, while the
smoke components that are encountered in the vapor state cannot be seen. The invisible gases in the smoke
contain almost all the compounds that color, preserve and give flavor to smoked foods and, although they
are only 10% of the amount of smoking, these gases carry almost 90% of the work. The reason why these
gases are so important is that the more aromatic compounds are organic chemicals, that do not dissolve in
the water. The ingredients contain a large amount of water to which the liquid drops of the smoke will
convert into droplets on the surface. The conveying flavors do not penetrate in the food, but also contribute
to the texture and flavor of the superficial part. Conversely, the vaporized organic chemicals move in the
form of individual molecules, and when they land on foods that can absorb them, they adhere to themselves
and carry the flavors to the inside. If the food is too dry outside, the smoked flavor does not enter too much
into the food, as it can’t penetrate. On the other hand, if the foods are very wet, the components that come

4
from smoking in liquid form and gas tend to drip or evaporate immediately. If the food is hot and a little
sticky, it means that the external humidity is the correct one.
The capture of smoke flavors involves two challenges: ensuring that the desired flavor compounds are
gaseous and not liquid droplets - for that you need a precise control of the smoke in the chamber - and that
the moist food preservation to allow these volatile organic compounds adheres, forming a film on the
surface and spread deeply inside. For this reason, it is necessary to control the humidity within the smoker.
WOOD TYPE
INTENSITY OR
FLAVOUR
COLOR CREATED
NOTE
Vine
Light
Golden brown
One of the lightest smoking
Straw
Light
Yellow to golden brown
Excellent choice to give a light touch of
smoke to seafruits
Elm / Chestnut
Light
Yellow
Normally melted with other premium
woods
Tea leaves
Light or medium
Yellow to shining
brown
Very popular in Asia for light smokings
Oregano
Medium
Golden yellow to
brown
Excellent for seafruits
Apple tree
Medium
Yellow
Best of ordinary fruit trees
Cherry
Medium
Yellow
Can be melted with other premium
woods
Corn cob
Medium
Slightly yellow
Strong earthy aroma
Heather
Medium
Yellow to golden brown
Intense floral flavor, traditionally used in
Scandinavia for seafruits
Mahogany
Medium
Golden brown
Normally melted with other premium
woods
Marjoram or dry
sage
Medium
Weak
Recommended for light smokings only
Walnut
Medium
Intense yellow to
brown
Rapidly developing color with meat and
seafruits
Lime
Medium
Yellow
Typically used in Eastern Europe
Birch / Willow
Variable
Variable
Often melted with beech
Oak
Strong
Intense yellow to
brown
Sweet and pleasant aroma
Pecan
Strong
Intense yellow to
brown
Sweet and pleasant aroma
Laurel
Strong
Weak
Flavor recommended only for light
smokings
Dry rosemary
Strong
Weak
Slightly resinous flavor, recommended
only for light smokings
Beech
Strong
Shining yellow
Traditionally used with fish
Juniper
Strong
Matt brown
Intense flavor, recommended only for
very light smokings

5
GENERAL INFORMATION
About the manual
This manual contains information on installation, operation and maintenance of the equipment and must
be consulted as a reference guide.
Reading this book provides a safe and proper use of the appliance.
In addition to the information provided with this manual, you must comply with local regulations.
The instruction manual is an integral part of the product, and should be kept near the equipment and easily
accessible to anyone who makes the installation, care and cleaning.
Symbols
In this manual, symbols are used to highlight important safety instructions and any warning.
The instructions must be followed very carefully to avoid any risk of accidents, personal injury and / or
damage to things and people.
WARNING!
This symbol highlights the dangers that might cause injury and / or damage.
WARNING Electricity Danger!
This symbol points out potential electricity hazard.
CAUTION!
This symbol highlights instructions that must be followed to avoid risks, damage, malfunction, and/or
breaking of the appliance.
ATTENTION Hot surfaces: risk of burnings
This symbol highlights potential risks of burnings.
ATTENTION Free flames: risk of fire
This symbol highlights potential risks of fires.
This symbol highlights tips and information that must be followed for the efficient operation of
the appliance.
NOTE
Read the instruction manual carefully before using the appliance.
The manufacturer disclaims any liability resulting from non-compliance with these instructions for use. The
instruction manual must always be kept near the equipment and easily accessible for anyone wishing to
consult it. We reserve the right to make unannounced changes to improve the technical specifications and /
or the development of the product.

6
WARNINGS BEFORE USE
•Before using the appliance, please check that the voltage of the electricity grid corresponds to the one
indicated on the label of the device. Only connect the machine to an outlet that has a minimum
capacity of 10 A and an effective earthing system.
•The electrical safety of this equipment is guaranteed only if it is connected directly to an AC grounded
socket as required by the applicable electrical safety standards. The manufacturer cannot be held
responsible for any damage caused by a lack of connection to ground the appliance. In case of doubt,
contact a professionally qualified technician.
•After you’ve unwrapped the equipment, ensure the integrity of the unit. In case of doubt, do not use
the appliance and contact qualified personnel only.
•We do not recommend the use of adapters, multiple plugs and / or extension cords. If is absolutely
necessary use one of these devices, you must only use single or multiple adapters conform to current
safety standards, being careful not to exceed the power limit specified in the adapter.
•The elements of the packaging (plastic bags, etc..) should be kept out of reach of children, because they
are a potential source of danger.
•This equipment must be used solely for the use described in this manual. Any other use is considered
inappropriate and therefore dangerous.
•The manufacturer cannot be held responsible for any damage caused by the equipment when used
inappropriately, erroneous and irrational, and / or repaired by unqualified personnel.
•Do not touch the appliance with hands and / or feet if wet or damp.
•Do not remove the plug from pulling the power cord.
•Do not leave the unit exposed to the weather (rain, sun, frost, etc.).
•This appliance is not intended for use by people (including children) with reduced physical or mental
ability, or lack of experience and knowledge, unless they have been instructed on the use of the
equipment by personnel responsible for their security.
•Ensure that children do not play with the appliance.
•Before carrying out any cleaning or maintenance, disconnect the appliance from the mains supply by
removing the plug.
•Never immerse the appliance in the water to clean it.
•Never cover the intake slots and spill in the back and on the sides of the appliance.
•In case of breakdown or malfunctioning, turn it off and do not open it. For repairs, contact only a
service facility authorized by the manufacturer and ask the use of original spare parts. Failure to comply
with this rule may jeopardize the safety of the appliance.
•When you decide to permanently delete the device, after removing the plug from the socket, it is
recommended the cutting of the power cord.
•If the power cord is damaged, it must be replaced only at a service center authorized by the
manufacturer, so as to prevent any risk.
•When not using the unit, disconnect the plug from the mains and turn off the switch. Do not leave the
device connected to the mains if it is not necessary.
•The unit cannot be used after a fall or in case of imperfections or losses. Before returning to use it will
need to be brought to an authorized service center.
•Keep this instruction manual, because it may be necessary to consult it in the future.
•This device complies with European Community rules in relation to electromagnetic compatibility.

7
FREIGHT, PACKAGE AND STORAGE
Shipping control
Check shipping claims regarding damage caused by transport immediately after receipt.
In case of apparent damage, accept the shipment only under reserve. Please note the extent of the damage
on the transport document.
Packaging
Do not throw away the packaging of your appliance, because it could be useful for storage, when
transported or in case of damage for the return to center.
The inner and outer envelope must be completely removed from the equipment before installing it.
NOTE: In case you should bring the machine back to your dealer, please use exclusively the original
package, as any break or fault caused by transport damages due to lack of the original package could be
charged to you.
If you want to throw away the package, please consider the recycling regulations in your country.
Check the equipment and the presence of all components. In case of missing parts, please contact our
customer service immediately.
Storage
Keep the packaging closed till it will be installed, taking into account the marking on the packaging.
The packaging must be stored, taking into consideration the following:
- Do not store it outdoor.
- Keep in a dry place away from dust.
- Do not expose to corrosive elements.
- Do not expose to direct sunlight.
- Avoid mechanical shock and vibrations.
- In case of prolonged storage (> 3 months) make sure that the state of the package and all its parts are in
good condition. If necessary, renew the packaging.
INSTRUCTIONS FOR USE
•Before using the appliance for the first time, remove all the protections and thoroughly clean the inner
part, following the procedures described later.
•Place the unit on a horizontal work surface, away from edges and heat sources and out of reach of
children.

8
DESCRIPTION
1 –Burner cylinder with handle
2 –ON/OFF switch
3 –Flow regulator
4 –Tightening knobs for burner cylinder
5 –Upper body
6 –Carrying handle
7 –Smoke exit pipe
8 –Incoming supply 12 V
9 –Tank
10 –Hooking slots
11 –Lower body
12 –Hooking fins
13 –12 V power supply
OPTIONAL ACCESSORIES
Transparent glass with hose to use the HotmixPRO bowl as smoking chamber.

9
APPLIANCE PARTS
CONTROL PANEL
SWITCH (2): to operate the smoking suction fun.
FLOW HANDLE (3): to control the smoke flow.
TANK (9): it may be operated in three different conditions:
1 –empty, the smoke goes through it and exits the tube
2 –filled with a flavored liquid to create an aroma, so that smoke will exit enriched with the liquid’s aroma.
Attention please! Inside the tank, the maximum level not to be exceeded is being indicated.
3 –An ingredient to be smoked can be introduced inside the tank.

10
HOW TO OPERATE IT
1. Prepare the tank according to the wished operation (see above)
2. Lock the upper body (5) with the lower body (11) by the hooking fins (12), introducing the ends of
the slots of the upper part (10) and pushing the fins (12) to the inside with a light pressure, taking
care that the tank will be correctly positioned, and the black gasket will be cleaned and free from
other stuffs.
3. Introduce an end of the tube into the lateral exit of the HotmixPRO Smoke (7) and the opposite end
inside the tank where the smoke should be headed for.
4. Connect the power supply (13) to the HotmixPRO Smoke.
5. Lock well the knobs (4) in order to make sure that the burner will be properly fixed.
6. Fill the burner with some sawdust till mid-height, taking care to compact it well, in order that hard
lumps will not create obstacles to the air flow.
7. Switch on the wood moving the flame in a way that it may burn evenly.
8. Once the flame will be switched off, into the burner, please switch it on with the ON/OFF switch.
9. Introduce more sawdust till filling 2/3 of the burner.
As the compound gets burned, it is possible to add some fuel, always taking care not to exceed the 2/3 of
the burner.
Revive from time to time the fire inside the burner.
Once the proceedings will be over, or the burner is too filled, take it away from the appliance by slightly
unscrewing the two handles (4) placed in the upper part of the appliance, lifting it up slightly and turning it
to the right.
Pay attention as inside there can be incandescent materials, please do not throw them in the
dustbin till the inside has been cooled down completely.
ATTENTION: Hot surfaces: risk of burnings: while combusting the compound, the metallic surfaces
of the SMOKE get hot, please avoid any contact.
IMPORTANT NOTICE: at the end of any proceedings, please clean accurately the burner and the
pump following the instructions described further.
Clean the burner in a way that the filter in the lower part will be definitely clean.
To disassemble the pump for clearing, please proceed as follows (look at the image below):
1 –Remove the three screws (1).
2 –Disconnect the tube (2) pressing the ring and pulling the tube at the same time.
3 –Turn the pump shaft until the pump shaft (3) is facing the tube (2).
4 –Pull the pump (4) towards the tube (5).
5 –From the pump (4) remove the internal part (6).
Clean accurately with a degreaser and rinse with water.

11
Reassemble the pump by following the opposite sequence.
To verify that it works properly, put in the tank 1 liter of water, close the smoke and start it without the
burner.
You must feel inside the tank some bubbles.
If you don’t feel them, make sure the top and the bottom parts are properly closed and that there are no
foreign objects in the black gasket.
NOTE: The cleaning of the pump is very important, as a negligent attitude towards the clearing
proceedings could undermine the future use of the appliance.
HotmixPRO Smoke can also be used as a smoke generator if connected at the HotmixPRO Dry dehydrator
in its configuration as smoking chamber, linking the end of the HotmixPRO Smoke’s tube to the
connector placed behind the HotmixPRO Dry appliance.
In the same way, the HotmixPRO Smoke can be connected to any thermal mixer from the HotmixPRO
product range, by using the necessary small plastic beaker (optional accessory).
GENERAL ADVISES FOR A CORRECT USE OF THE APPLIANCE
•Do not place the appliance in the proximity of heat sources (range, oven, etc.).
•When you wish to shift the appliance it necessary to lift it up, and never dragging it on the working
table, let alone carrying it by the tube: the risk will be the damage of the appliance’s functionality.
•If the appliance will be used improperly, eg. overfilling the liquid tank, the correct proceedings of the
appliance will be undermined.

12
ATTENTION: The incorrect position of the gasket (5) placed inside the back body of the HotmixPRO
Smoke could allow the liquid overflow, or preventing the correct proceedings of the appliance.
ATTENTION: If some FLAMMABLE liquids (eg. spirits) will be introduced into the tank, please pay
attention to the backfires.
ATTENTION: Before starting the appliance, please always check that the two hooking fins (12) are
locked.
ATTENTION: Always disassemble and clean the pump.
ATTENTION: never wash the upper body of the of the HotmixPRO Smoke in the dishwasher: IT
CONTAINS ELECTRICAL PARTS!
ATTENTION: the maximum capacity of liquids inside the tank must never be overcome!
CLEANING
Clean the appliance with a damp cloth and neutral detergent, avoid cleaners that result in being too
aggressive or that make too much foam.
CAUTION: Disconnect the plug from the outlet before starting the cleaning operations.
CAUTION: Do not completely submerge the unit in water for cleaning.
CAUTION: Do not clean the appliance with a jet of water.
Clean the inner part of the tank’s housing with a sponge cloth slightly damp and non-abrasive. Make these
proceedings only and exclusively with the appliance switched off and cold.
CLEANING: The tank can be washed in the dishwasher.
RECYCLING AND WASTE DISPOSAL
When the device stops working and must be scrapped, you must ensure that its disposal will cause the least
environmental damage possible, in accordance with the following European legislation 2002/96/EC:
1. When a product is given the symbol of a garbage crossed out, it means that the product is covered
by the European Directive 2002/96/CE.
2. All electrical and electronic products should be disposed separately from the municipal waste
collection, and being collected within specific plants designated by the government or local
authorities.

13
3. The proper disposal of obsolete equipment helps to prevent possible negative consequences on
human health and the environment.
4. For more detailed information on the disposal of obsolete equipment, please contact the
municipality, the waste disposal service or the shop where you purchased the product.
TECNICHAL SPECIFICATIONS
Power supply: 12Vac 2A min
Maximum size (H. x W x D) 163mm x 276mm x 266mm
Weight: Kg. 5
VITAECO S.r.l.
Via Bazzini, 241
41122 Modena - Italy
Tel. +39 059 4924149
Fax +39 059 282735
www.hotmixpro.com
Table of contents