manuals.online logo
Brands
  1. Home
  2. •
  3. Brands
  4. •
  5. Hotpoint
  6. •
  7. Range
  8. •
  9. Hotpoint m524N Installation instructions

Hotpoint m524N Installation instructions

C..—
.—
—
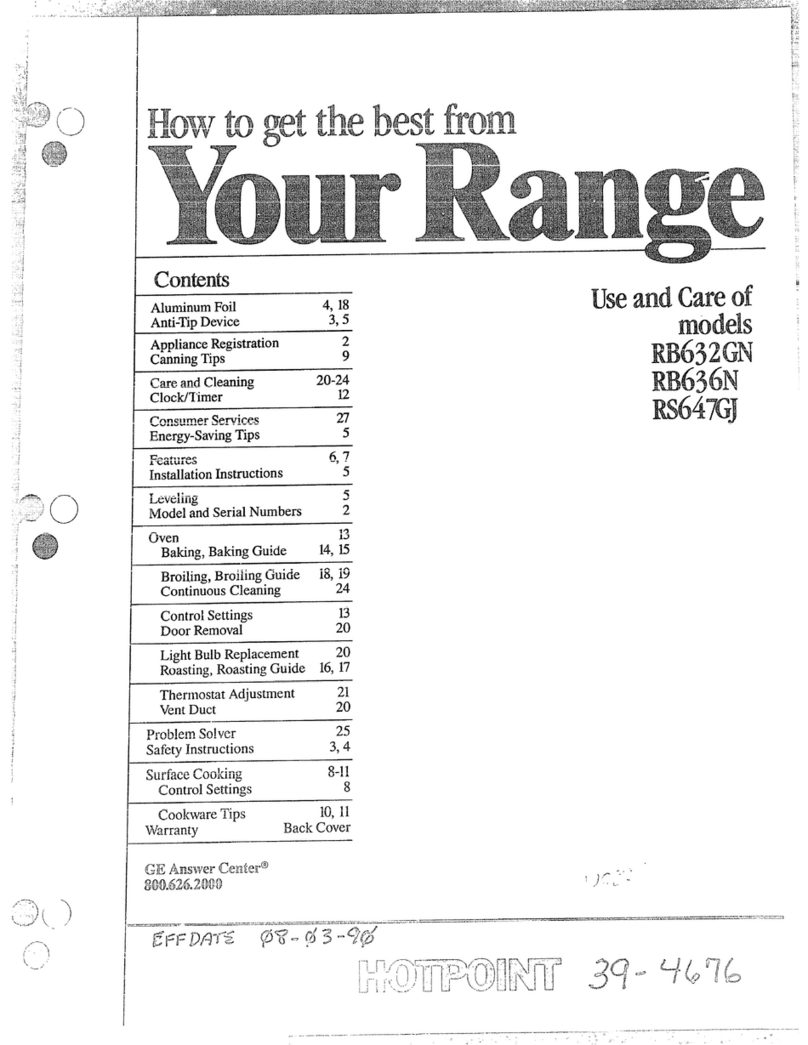
AluminumFoil 20 use and care of ““
Anti-TipDevice 3,5
ApplianceRegistration 2
CanningTips 11 models
m524N
W525N
W525GN
B532GN
Care and Cleaning 22-24
ClocWTimer 14
Consumer Services 27
Energy-SavingTips 5
Features 6-9
Ins@llationInstructions 5
Leveling 5
Model and SerialNumbers 2
Oven 15-21
BaKng, Bating Guide 16,17
I~roiling, BroilingGuide 20,21
Control Settings 15
Door Removal 22
Light; Bulb Replacement 15,22
Roasting,RoastingGuide 18,19
Thermostat Adjustment 23
VentDuct 22
Problem Solver 25
SafetyInstructions 3,4
Surface Cooking 10-13
Control Settings 10
Cookware Tips 12, 13
Vgarranty Back cover
iqead t13isbook Carefullye
Itisintendedtohelp youoperate
and maintainyournewrange
properly.
Keepithandyforanswersto your
questions.
Ifyoudon’tunderstandsomething
or needmorehelp, write (include
yourphonenumber):
ConsumerAffairs
Hotpoint
AppliancePark
Louisville,KY40225
write down the model
and serial Hulnbers.
You’llfind themon alabelon
thefrontof the range behindthe
ovendoor.
Thesenumbersare also on the
Consumer ProductOwnership
RegistrationCard that came with
yourrange. Beforesendingin this
card, pleasewrite these numbers
here:
Toobtainservice, seethe
ConsumerServicespageinthe
backofthisbook.
We’reproudofour serviceand
~lantyoutobe pleased. If for some
reasonyouare nothappywiththe
serviceyoureceive,here arethree
stepsto followforfurtherhelp.
FIRST,contactthepeoplewho
servicedyour appliance.Explain
whyyouare notpleased. In most
cases, this willsolvetheproblem.
NEXT, if youare stillnotpleased,
write allthe details—including
yourphone number—to:
Manager, ConsumerRelations
Hotpoint
AppJiancePark
Louisville,Kentucky40225
FINALLY,if yourproblemisstill
notresolved, write:
Major Appliance
Consumer ActionPanel
20 North WackerDrive
Chicago,Illinois 60606
i
Anti-Tip device supplied. To
check fi the device is installed
andengagedproperly,removethe
drawer(onmodels so equipped)
and inspectthe rear levelingleg.
Make sure it fitssecurelyinto
the slotin ihedevice.
For modelswithoutastorage
drawer,carefilly tip the range
forwardto check if theAnti-Tip
deviceisengagedwith the
levelingleg.
If youpullthe rangeout from the
wallfor any reason, make sure
the rear leg is returned to its
positionin the devicewhen you
push the rangeback.
~Never EVearIoose-fitting or
hanging garlnenfi while using
theappfiance,Flmable material
could be ignitedif brought in
contactwithhot heatingelements
and maycause severeburns.
Quse only dry pot holders—
nloistor damp pot holders on
hot surfaces may result in burns
fi-olmsteam.Do notletpotholders
touchhot heatingelements. Do
not use atowelor other bulky
Cloth.
0~~~y~~]~~afety9EleY’erl~se
:yourappIia13cefor %Jar”mRingor
keati~l.gtile rooB23o
~~i~r~ge ;.~j~~~]~~~~p]~~]~~~——
“i’ ~“dnotbe
Fla123-rna*bienlater]a.ss)oLI1
sto~-edin :Inovenor n(;arsurface
~L~l;*r
.Lo.
.?
.1
—— . . . . -. ———--- ----- —— --
orother nallkllla[llenlaterials
aect]mlRlate
in01” neartile
range.
@
Do notIISe water032 g~+ease
fires.Never pie]<upananlillg
pall. smothernamingpall on
surfacetlnit bycoveringpa~l
Conlpleteiywith well-fitting!id9
CookieSheet or flat tray.
R!aminggreaseOutiideapan
canbe putout by Coveringwith
bating soda or,if available, a
multi-purposedrychemical
or foamtype fireextinguished
@Do not touch heating
eiemenk orinteriorsurfaceof
oven.These surfacesmaybe hot
enoughto burn eventhoughthey
are dark in color.During and
after use, do nottouch, or let
clothingor other flammable
materialscontactsurfaceunits,
areas nearby surfaceunitsor any
interiorarea of the oven;allow
sufficienttime for cooling,first.
Potentiallyhot surfacesinclude
the cooktopand areas facingthe
cooktop,ovenventopeningand
surfacesnear the opening, and
crevicesaround the ovendoor.
Remember: The insides~~rface
ofthe ovenmaybe hot when the
door is opened.
@when Cookingporli9 follow
the directionsexactlyand a~ways
cook the meat to an internal
temperature of at least 170°F.
This assures that, in the remote
possibilitythat trichina maybe
present in the meat, it will be
killedand the ~neatwill be safe
to eat. ~— h,
\
-
-__-
—-—
_—
—---------
.....
———
.F-— .—.———— -— —...
.
~B~.~~
@Stallci awayfrolll rangewk~ell
Qpenillg ovendool-.Hot air or
Steanl which escapesCan Callse
bllrElsto IIi%llds,face and/or
eyes.
aDonytileat Unopenedfood
coIlbiner’sinthe Oven. Ressure
could buildupand theeontiiner
could burst9 causing aninjury.
@
Keep ovenventduct
unobstructed.
=Keep ovenfree from grease
buildup.
@
place oven shelf in desired
positionwhile ovenisCool.If
she~vesmustbe handIed when
hot, do not let pot holder contact
heating units in the oven.
@Puliing outshelf ~~~~~
sl~elfstop isaconvenience in
lifting heavy foods. It is also a
precautionagainstburns from
touchinghot surfaces of the
dooror ovenwails.
@when using cooking or
roastingbags in oven9follow
the manufacturer’sdirections.
=Do not use your Ovento dry
newspapers. If overheated, they
can catch fire.
SllrfaceCool<ingunits
@
Useproperpansixe—This
appliance is equipped with one
or more surface units of different
size. Select cookware having flat
bottoms large enough to cover
the surface unit heating element.
The use of undersized cookware
will expose aportion of the
heating element to di~ectcontact
and may result in ignition of
clothing. Proper relationship of
cookware to burner will also
improve efficiency.
@Never leavesurfaceuniti
unattendedat HI heatsettings.
Boilover causes smoking and
greasy Spillovers that may catch
on fire.
@Be sure drip pans andvent
duc~ arenot eo~~eredand are
in place.Their absence during
cooking could damage range
parts and wiring.
@Don~t Msealuminumfoilto
linedrip pans or anywherein
the ovenexceptas described in
this book. Misuse could result in
ashock, fire hazardor damage
to the range.
@Only eer~iII types of glass?
glass/eeramic9earthenwareor
other glazedco~ltainersare
@To avoid the possibility
of aburn oreleetrie ShocILT
always be Certainthat the
controls for‘ailsurfaceUlliti
areatOFF position and all
coilsa~+ecoolbefore attempting
tolift orFelllovethe unit.
~Dongtimmerseor soak
removablesurfaceu~~iti.Don’t
putthem inadishwasher.
@Whenflalningfoodsare
underthe Blood,turnthe fan
off. Thefan, if operati~3g9may
spreadthe flame.
~Foodsfor fryingshouldbe as
dryas possible.Frost on frozen
foodsor moistureon freshfoods
can cause hotfatto bubbleup
and oversides ofpan.
@~T~~]~~tlefat for effective
shallow or deep-fatfrying.
Filling the pan too fill of fat can
cause spillovers when food is
added.
~If a.conlbillationof oilsoR-
fatswill be usedi~lfrying, stir
togetherbeforeheating,or as fats
meltslowly. .—-
~AIWaySheat fat slowly?and ‘.
,..
+..
.- .
watchas it heats. :>..,
--”
~..
.
y.
t..>
L
I
—... ------.---———.-—---,—
—,—--.-—————--
“------
o
$!an settle intoSoitfloor :Overimgs
StlchasCushionedvinylor
carpeting.Whenmovingtherange
onthistype of flooring,usecare,
andit is recommendedthatthese
simpleandinexpensiveinstructions
~T~f~~~owled.
Therangeshouldbe installedon
asheetofplywood(or similar
material)as follows:men #he
floor covetingends ~~t~~f-~~~of
Fl?erange, tie areathat therange
willreston shouldbe builtup with
~l}~woodto the samelevelor higher
k;n the floor covering.This wfil
allowtherangetobe movedfor
cleaningor servicing.
evelingscrewsare located on
eachco~rnerofthebase ofthe
range.Removethebottom drawer
(onmodels so equipped) and you
can levelthe rangeon an uneven
floorwith the useofanutdriver.
ToremovedraYver,pull drawer
~~f~~~~~~way9 tilt up the front
and bke it out.T’ replace
drawer,
insert glides at back of
dr~werbeyondstopon range glides.
Lift drawer if necessary to insert
easily.Let front ofdrawer down,
tllcnpush in to close.
@Use cookwareofmediumweight
aluminum, with tight-fittingcovers,
and flatbottomswhichcompletely
coverthe l~eatedportionofthe
surfaceunit.
@Cook fresh vegetableswith a
minimumamountofwaterin a
coveredpan.
@Watchfoodswhen bringingthem
quicuy to cookingtemperaturesat
HIGH heat. When foodreaches
cookingtemperature, reduceheat
immediatelyto lowestsettingthat
willkeep it cooking.
@Use residual heat with surface
cookingwheneverpossible. For
example, when cookingeggsin the
shell, bring waterand eggsto boil,
then turn to OFF positionand
coverwith lid to completethe
cooking.
~Use correct heat for cookingtask:
HIGH—to start cooking (iftime
allows,do not use HIGH heat to
start).
MEDIUM HI—quickbrowning.
MEDIUM—slow frying.
LOW—finishcooking most
quantities, simmer—doubleboiler
heat, finish tooting, and special
for small quantities.
WARM—tomaintain serving
temperature of most foods.
e~hen boiling waterfor tea or
coffee, heat only amount needed.
It is not economical to boil a
container full of water for one
or two cups.
--..,>
./
--”
5
#
ovencooking
@Preheatovenonlywhen
necessary.Mostfoodswillcook
satisfactorilywithoutpreheating.
If youfindpreheatingisnecessary,
watchthe indicatorlight, andput
foodin ovenpromptlyafterthe
lightgoesout.
@Alwaysturn ovenOFF before
removingfood.
~Duringba~~ng~avoidfrequent
door openings.Keepdoor open as
shortatime as possibleif it is
opened.
@Cook completeovenreeds
insteadofjust onefooditem.
Potatoes,other vegetables,and
somedessertswillcook together
with amain-dishcasserole, meat
loaf, chicken or roast. Choose
foodsthat cook atthe same
temperature and in approximately
the sametime.
@Use residualheat in the oven
wheneverpossibleto finish
cookingcasseroles, ovenmeals,
etc. Also add rolls or precooked
desserts to warm oven,using
residualheat to warmthem.
.....,...———-—--
-.
.-5
Modelm524N MOd~Im53m
..
Model
RB532GN
—
@
ModeI
m536N
see
pdge
2
Model
R13524N
@
2surfaceunitcontrols @
13“ON” IndicatorLig13t/Ligh@
forsurface units
~OvenSetControl @
5OvenTempControl I
6OvenCyclingLight
Clock&
Min.Timer
36-in.
18-in.
7AutomaticOven Timer,
Clock and MinuteTimer
8Stay-UpCalrod@SurfaceUnit
(Mayberaisedbutnotremoved
whencleaningunderunit.)
9Plug-InCdrod” SurfaceUnit
(Mayberemovedwhencleaning
underunit.)
10 Anti-TipDevice
(SeeInstallationInstructions)
11 Chrome-PlatedTrimRingsand
AluminumDrip %s
36-in.
18-in.
36-ifi.
18-in.
26-in.
28-in.
23
3,5 ee
4
4
22 4
UOvenVentDuct (Locatedunder
rightrear surfaceunit.) 22
e
13 OvenInteriorLight(Comeson
automaticallywhendoorisopened.)
14 OvenLightSwitch
15 BroilUnit
16 BakeUnit(Maybe lifiedgently
forwipingovenfloor.)
17 OvenShelves
18 OvenShelfSupports(LettersA, E, Cand
Dindicatecookingpositionsforshelvesas
recommendedon cookingguides.)
19 BroilerRn and Mck
20 StorageDrawer
.—
22
15
20
16
12
2
15
15
20
24
.,”
7,
.-,.._..——_—..--,.-
---—
.-..— .
Model RS42J
(slide-In)
I3“ON”’IndicatorLight/Lights 10
forSurfaceUnits
I4OvenSetControl
I5OvenTempControl
!6Oven CyclingLight 15
I7AutomaticOven Timer, 14
Clock andMinute Timer @
36-in. 36-in.
18-in. 18-in. 36-in.
18-in.
4
I8Stay-UpCalrod@SurfaceUnit 23
I(Mayberaised butnotremoved
whencleaningunderunit.)
44
ee
ee
I9Chrome-Plated TrimRingsand 22
1AluminumDrip Pdns
10 Oven VentDuct (Locatedunder 22
right rear surface unit.)
I11 Oven Interior Light (Comes on 22
automaticallywhen door is opened.)i
I
e
13 Broil Unit 20
14 Bake Unit(May be liftedgently 16
for wipingoven floor.)
15 Over~Shelves 15
16 Oven ShelfSupports (Letters A. B, Cand 15
Dindicatecooking positions forshelves
as recommended on cooking guides.)
17 Broiler Pan and Rack 20
2I2
I18 Storage Drawer 24 Q
I19An(i-TipDevice 3,5
1(See Installation Instructions)
4,
.
surfaceCootingwith
InfifiteHeatControb
Yoursurfaceunitsand controls
aredesignedtogiveyouaninfinite
choiceofheat settingsforsurface
unitcooking.
Atboth OFF and HIGH positions,
thereisaslightnicheso control
“clicks”atthosepositions; “click”
on HIGH marksthe highestsetting;
the lowestsettingisbetweenthe
wordsWA~ and OFF. In aquiet
kitchenyoumayhear slight
“clicking”soundsduringcooking,
indicatingheat settingsselectedare
being maintained.
Switchingheatsto highersettings
alwaysshowsaquicker changethan
switchingto lower settings.
Step 1:Grasp controlknob and
push in. (Knob appearancevaries.)
Step 2: Turn either clockwise or
counterclockwise to desired heat
setting.
control mustbe pushedinto set
only fromOFF position.when
Controlisin any positionother
than OFF, it maybe romted
without pushing in.
Quickstartforcook;~;g;
bringwatertoboil.
Fastfry,pan broil;
maintainfastboilon large
amountoffood.
Sauteandbrown;
maintainslowboilon
largeamountoffood.
Cook after startingat
HIGH; cook withlittle
waterin coveredpan.
Steamrice, cereal;
maintainserving
temperatureofmostfoods.
NmE:
1. AtHIGH, MED HI, neverleave
foodunattended.Boiloverscause
smoking;greasySpilloversmaY .4.
catch fire.
2. AtWARM, LOW,melt -Ww.
chocolate,butter on smallunit.
Be sure you turn control to OFF
when you finish cooking. An ‘,
indicator light will glowwhen
g-
~~
ANY heat on any surface unit is on.
~
::
~
~-
i,
i.
1
,
~
~
,
~
t
designedforcafiningpurposes.
Checkthe manufacturer’s
instructionsand recipesfor
preservingfoods.Be surecanner
isflat-bottomedandfitsoverthe
centerofyoursurfaceunit. Since
canninggenerateslargeamountsof
steam,be carefulto avoidburns
fromsteamor heat. Canningshould
onlybe done on surfaceunits.
Q. can ICovermy drip pans tith
foil?
A. No. Clean as recommendedin
CleaningGuide.
Q. can Iuse specialcooking
equipment9likean Orienbl wok~
on any surface Unik?
A. Cookwarewithoutflatsurfaces
isnotrecommended.The lifeof
yoursurfaceunitcan be shortened
andthe rangetopcan be damaged.
fromthehighheatneededforthis
typeofcooking.
Q. why am Inot getting the heat
Ineed from my uni@ even though
Ihave the knobs on the right
setting?
A. Afterturningsurfaceunitoff
and makingsureitiscool, checkto
makesure that yourplug-inunits
are securelyfastenedintothe
surfaceconnection.
Q. %Vhy doesmy Cookware tilt
when Iplace it on the Solace dt?
A. Becausethe surfaceunitisnot
fiat. Makesurethat tie “feet” on
yoursurfaceunitsare sittingtightly
inthe rangetop indentationand the
reflectorring is fiaton therange
surface.
Q. why isthe porcelainfitish an
my cookware coming Ofn
A. If yousetyour surfaceunit
higherthan required for the
cookwarematerial, and leaveit,
the finishmaysmoke,crack, pop,
or burn dependingon the pot or
pan. Also, atoo highheat forlong
periods, and smallamountsofdry
food, maydamagethe finish.
o
‘:~;canningshouldbedone on
‘surfaceUnifionly.
Potsthat extendbeyond 1inch of
cookingelement’strim ring are not
recommended for most surface
cooking. However,when canning
with water-bathor pressure canner,
larger-diameter pots maybe used.
This is because boiling water
temperatures (evenunder pressure)
are not harmful to cooktop surfaces
surrounding the surface unit.
HOWEVER, Do Nm USE
LARGE DIAMETER CANNERS
OR ~HER LARGE DIAMETER
Pm FOR FR~NG OR BOE~G
FOODS USHER THANWATER.
]do~tSyrt]p or sauce mixtures—
:Indall types of frying—cook at
temperatures much higher than
~toilingwater. Such temperatures
could eve~]iua]lyharm coo~~op
--- SLII.faCeSstlrroundin~ surface units.
>
-.2
1-’
.. i
...-
incad%
1. Be sure thecanner fitsoverthe
center ofthe surfaceunit. If your
rangeor its location does not allow
the canner to be centered on the
surfaceunit, use smaller-diameter
pots forgood canningresults.
2. Flat-bottomedcanners must
be used. Do not use canners with
flangedor rippled bottoms (often
foundin enamelware) because they
don’tmake enough contact with the
surface unit and taketoolong to
boil water.
FJGHT
D
mQNG
3. When canning, use recipes and
procedures from reputable sources.
Reliablerecipes and procedures are
availablefrom the manufacturer of
your canner; manufacturers of
glassjars forcanning,suchasBall
andKerr;andtheUnitedStites
DepartmentofAgriculture
ExtensionService.
4. Rememberthatcanningis
aprocessthatgenerateslarge
amountsofsteam.Toavoidburns
fromsteamorheat,be careful
whencanning.
N~E: Ifyourrangeisbeing
operatedonlowpower(vol@ge),
canning may take longer than
expected, even though directions
havebeen carefilly followed. The
process time wi~lbe shotiened by:
(1)using apressurecanner,and
(2)startingwithHOTtapwaterfor
fastest heating of large quantities
of water.
....————.. ..—--——--—.
suE’facecookingGuide
2. Toconservethemostcooking 3. Deep l~atFrying.Do notoverfill --
energy,pansshouldbeilat on the kettlewith fatthatmay spillover -.
1.Usemedium-or heavy-weight
cookware.Aluminumcookware
conductsheat fasterthanother
metals.Cast iron and coatedcast
ironcookwareis slowtoabsorb
heat, butgenerallycooksevenlyat
LOWor ~ED settings.Steelpans
maycookunevenlyif notcombined
withother metals.
-.. -
bottom,havestraightsidesandtight whenaddingfood.Frosty foods
fittinglids.Matchthesizeofthe bubblevigorot.isly.WatchfoGJs
saucepanto the sizeof~hes~]rface fryingat hightemperaturesand
unit. Apan thatextendsmore than keeprangeand hoodcleanfrom
an inchbeyondtheedgeoftl]etrim accum~~latedgrease.
ringtrapsheatwhichcauses
discolorationrangingfrom blueto
dark grayon chrometrim rings.
SettingtoComplete
Cooking
Directionsand Setting
toStartCookingYood Cookware
Cereal
Cornmeal, grits,
oatmeal LOWor WARM,then addcereal.
Finishtimingaccording
topackagedirections.
MED, tocook 1or 2minutes
tocompletelyblendingredients.
Cerealsbubbleandexpandas
theycook; use largeenough
saucepanto Preventboilover.
Covered
Saucepan HIGH. In coveredpanbring
waterto boil beforeadding
cereal.
Milk boilsoverrapidly.Watchas
boilingpointapproaches.
Percolate8to 10minutesfor
8cups, less for fewercups.
Uncovered
Saucepan HIGH. Stir togetherwateror
milk, cocoaingredients.
Bring justtoaboil.
LOWto maintaingentlebut
steadyperk.
Coffee
Eggs
Cookedin shell
Percolator HIGH. Atfirst perk, switch
heatto LOW.
Covered
Saucepan HIGH. Covere~s withcool
water.Coverpan, cook
until steaming.
MED HI. Melt butter, add
e~s and coverskillet.
LOW.Cookonly3to 4
minutesfor softcooked;
15minutesforhard cooked.
Continuecookingat MED HI
until whitesarejust set, about
3to5more minutes.
Ifyoudonot coverskillet, baste
eggswith fattocook topsevenly.
Fried sunny-side-up Covered
Skillet
LOW,then add eggs.When
bottoms ofeggshavejust set,
carefullyturn overto cook other
side.
LOW.Carefullyaddeggs.
Cook uncoveredabout 5
min~tesat MED HI.
MED. Adde~gmixture.
Cook, stirring todesired
doneness.
Fried overeasy Uncovered
Skillet HIGH. Melt butter.
Removecookedeggswith slotted
.—
spoonor pancaketurner.
Poached Covered
Skillet HIGH. In coveredpanbring
waterto aboil.
Eggscontinuetoset slightly after
cooking. For omelet do not stir
last fewminutes. When set, fold ::
in half.
Fresh fruit: Use 1/4to 1/2cup :.
i
waterper poundof fruit. ;.
/:
Scrambledor omelets Uncovered
Skillet HIGH. Heat butter until light
goldenin color.
LOW.Stir occasionallyand
check for sticking.
Covered
Saucepan HIGH. In coveredpanbring
fruit and waterto boil. Dried fruit: Use water as package \
directs, Time dependson whether
fruit hasbeen presoaked. If not,
j:
allowmore cooking time, I
——
k
Meat can be seasonedand floured
beforeit is browned, if desired.
1
Liquid variations for flavorcould
~
be wine, fruit or tomatojuice or
i
meat broth.
!
\
Timing: Steaks 1to2-inches: 1to
(
2hours. BeefStew: 2to 3hours.
~
Pot Roast:2‘h to4hours.
(
(
LOW.Simmer until fork
tender.
iMeaL%,Poultry
Braised: Pot roasts of
beef, lamb or veal;
pork steaks and
chops
Covered
Skillet HIGH. Melt fat, then add meat.
Switch to MED HI tobrown
meat. Add water or other liquid.
Pan frying is best for thin steaks
(
{
and chops. If rare is desired, pre-
heat skillet before ~~ddi!lgmeat. ,<--,-.,,
(
.
-—=
[+IGH.Preheat skiilei, then
~reaselightly. MED HI or MED. Brown and
cook to desired doneness,
turning overas needed.
~in-fried: Tender
chops; thin steaks up
:03/4-inch; minute
steaks; hamburgers;
franksand saus:)ge;
thin fish fillets
uncovered
]killet
..—.—..— .....-——... /--.,
(1
-.-~
1,
DirectionsandSetting
toStartCooking
HIGH. Melt fat. Switchto
MED HI to brownchicken.
$etthlg toComplete
Cooking Comments
For crispdry chicken,coveronly
af@rswitchingto LOWfor 10
minutes.Uncoverandcook,turning
occasionally10to 20 minutes.
Amoreattention-freemethod
is tostartandcook at MED.
Cookware
LOW.Coverskilletand
cookuntiltender.
Uncoverlast fewminutes.
MED HI. Cook, turning
overas needed.
LOW.Coverandcook
until tender,
Fried Chicken Covered
Skillet
HIGH. In coldskillet, arrange
baconslices. Cookjust
untilstartingto sizzle.
HIGH, Melt fat, Switchto
iMEDtobrownslowly,
Panfried bacon Uncovered
Skillet
Covered
Skillet Meat maybe breadedor
marinatedin saucebeforefrying.
Sauteed:Less tender
thinsteaks (chuck,
round, etc.); liver;
thickor whole fish
Simmeredor stewed
meat; chicken; corned
beet smokedpork;
stewingbeet tongue;
etc.
HIGH. Covermeat with water
andcoverpanor kettle.
Cookuntil steaming.
LOW.Cookuntilfork
tender. (Watershould
slowlyboil). For very large
Addsalt or otherseasoning
beforecookingif meathas not
beensmokedor otherwise
cured.
Covered
DutchOven,
Kettleor
Large
Saucepan
Small
Uncovered
Iloads, mediumheat may
be needed.
When meltingmarshmallows,add
milkor water.
wm. Allow10to15minutesto
meltthrough. Stir to smooth.
Saucepan.
Use small
surfaceunit
Thick battertakes slightlylonger
time. fim overpancakeswhen
bubblesrise to surface.
MED HI. Heat skillet 8to
10minutes. Greaselightly. Cook2to3minutesperside.
Skilletor
Griddle
%Sta
Noodlesor spaghetti MED HI. Cook uncovered
until tender.For large
amounts, HIGH maybe
neededto keepwaterat
rollinghoi!throughout
entire cookingtime.
MED HI for foodscooking
10minutesor less.MED for
foodsover 10minutes.
LOW.Tofinishcooking.
Use largeenoughkettle to
preventboilover.Rsta doubles
in size wnencooked.
HIGH. In coveredkettle, bring
saltedwatertoaboil, uncover
andadd pasta slowlyso
boilingdoes not stop.
Covered
LargeKettle
or Pot
Cooker shouldjiggle 2to 3times
per minute.
HIGH. Heat until firstjiggle is
heard.
—Pressure
Cookeror
Canner
Uncovered
Saucepan Stir frequentlyto prevent
sticking.
Uncoveredpan requires more
water and longertime.
HIGH. Bringjust to boil.
Puddings, Sauces,
Candies, Yrostings
%kgetables
Fresh HIGH. Measure 1/2to 1inch
tvaterin saucepan. Add
;altand prepared vegetable.
ncoveredsaucepan bring
oboil.
+IGH. Measure water and salt
as above. Add frozenblock
ofvegetable. Incovered
saucepan bring toboil.
HIGH, In skillet melt fat.
MED. Cook 1pound 10
to 30 or more minutes,
dependingon tenderness
of vegetable.
Covered
Saucepan
Break up or stir as needed while
cooking.
LOW.Cook accordingto
time on package.
Covered
Saucepan
FSi)Zen
MED. Addvegetable.
Cook until desired
tenderness is reached.
~rn overor stir vegetableas
necessary for evenbrowning.
Soutced: Onions;
green peppers;
[iiUSh~!JnlS;celery;etc.
——.
I?;ce:3inf3Grits
Uncovered
Skillet
Triple in volumeafter cooking.
Time at WARM. Rice: 1cv.price
and 2cups water—25minutes.
Grits: 1cup grits and 4cups
water—40minutes.
—.—
HIGH. Bring salted water to a
boil. WARM. Coverand cook
according to time.
Covered
IAaucepan
., -
.. ... ..—.1
—. .— 4,-.
I
j3
Theautoma~ictimer and clockon
yourra]lgeare helpfuldevicesfiat
serveseveralpurposes. Theknob
locationson somerange models
mayvary and will look likeone of
thetwo setsoftimers below.
Models:w53m, HJ, wmJ
TosetCloclc
~SET’THE CLOCK, pushthe
center knob in andturn the clock
handsto thecorrect time. (The
MinuteTimerpointer willmove
aiso, let knobout, turn theTimer
pointer to OFF.)
To set Minute mmer
The Minute Timer has been
combined withthe range clock.
Use it to timeall your precise
cookingoperations. You’ll
recognizetheMinute Timer as the
pointer which is different in color
and shape than the clock hands.
~SET THE ~INUTE TI~E~,
turn the center knob, without
pushing in, untilpointer reaches
number of minutes you wish to
time. (Minutes are marked, up to
60, in the center ring on the clock.)
At the end ofthe set time, abuzzer
sounds to tellyou time is up. ~rn
~~nob,
withoutpushing in9until
pointerreachesOFF ar]dbuzzer
stops.
me Bakeuses
Automatic“her
UsingAutomaticTimer,youcan
TIME BAKEwith theovenstafiing
immediatelyand turningoffatthe
StopTimesetor setbothDELAY
START(somemodelsmaysay
START)and STQPdialsto
automaticallystartand stopoven
at alater timeofday.It takesthe
worry outofnot beinghometo
startor stoptheoven.
Settingthedials for TIME BAKE
is explainedin detailon page 16.
Model W532GN
clock and Mnute her
This modelhas atimeofdayclock
and minutetimer but does not have
STARTand S~P dialsneeded for
TIME BAKEfunction.
Quetiioma%ldhwem
Q.HowcanI8NQmyMinu@
mmerhmakemySwrface
aookfngemier?
A. YourMinuteTimerwillhelp
timetoti cookingwhich includes
timeto boil foodand change
tempra~reso Do notjudgecootig
timebyvisiblesteamonly.Food
wi~~cook in ~overedeon~iners
eventhoughyoucan’tseeany
steam.
Q. Must the cRockbe set on
Corrwt time of &y when Itish
to use the Automatic her for
bating?
A. Yes,ifyouwish to setthe
DELAYSTAR’ or S~P dialsto
turn on and off at settimes during
timed functions.
Q. can Iuse the Mnute mmex’
daring oven Cooting?
A. The MinuteTimercan be used
during anycookingfinction. The
AutomaticTimers(DELAYSTART
and S~P dids) are used with
T~~~ BA~ finction O~~y.
Q. can IChange the Clwk while
I’m me cooking in the oven?
A. No. Theclockcannotbe changed
during anyprogramthat uses the
oventimer. Youmusteither stop
those programs or waituntil they
are finishedbeforechanging time.
&*l 1. LOOkat thecontrols. Besure
‘S::~:;you understandhowto setthem
properly.Readoverthe directions
for the AutomaticOvenTimerso
youunderstanditsuse withthe
controls.
2, Check oveninterior.Lookat
tie shelves.Tdceapracticerun at
~~movingandreplacingthempmperly7
togivesure, sturdySUppOrt.
3. Readoverinformationandtips
thatfollow.
4. I<eepthisbook handy soyoucan
referto it, especiallyduringthe
firstweeksofgettingacquainted
withyour range.
The controls forthe ovenare
marked OVEN SET and OVEN
TEMP. (Knob appearance varies.)
OVEN SET has settingsfor BAKE,
TIME BAKE (on models so
equipped), B~OIL and OFF. When
you-turnthe knobto the desired
setting, the proper heating unitsare
thenactivated for that operation.
OVEIqTE~P maintainsthe
temperature youset, from WA~~
(150°1J.)to B~OIL (550°F.).
The oven cyclingLight glows
untilthe ovenreachesyourselected
temperature,then goesoffand on
with theovenunitduringcooking.
P~HEATING the oven,evento
hightemperaturesettings,is speedy
—rarelymore.thanabout10finutes.
Preheattheovenonlywhen
necessary.Most foodswill cook
satisfactorilywithoutpreheating.
If youfindpreheatingis necessary,
keep an eyeon the indicatorlight
and putfoodin the ovenpromptly
after lightgoesout.
The shelvesare designedwith
stop-lockssothat when placed
correctly on the shelf suppo~,
they (a)will stopbeforecoming
completely from the oven,and (b)
till not tiRtwhen removingfood
from or placing food on them.
TO ~~OVE shelves with.these
type of shelf supports from the
oven, lift up rear of shelf, pull
forward with stop-locks along top
of shelf supports. Be certain that
she]f iscool before touching.
TO ~PLACE ti]ese shelvesin the
oven, insert shelf with stop-locks
resting on shelf supports. Push
shelf toward rear of oven;it will fall
i~~~~~]a~e.VJhen shelf is in proper
position, stop-locks on shelf will
~ull\lnder shelf su~qpor:when shelf
is pulled forwa~d.
Models M524N, W525N,
M525GN, M532GN, W536N
~MMO~ shelvesfromovens
withthesetype ofshelfsupports,
pullthe shelf towardyou, tiltfront
end upwardand pullthe shelfout.
~W.PLACEthese shelvesin
oven,place shelfon sheIfsupport
with stop-locks(curvedextension
under shelf) facingup and toward
rear ofoven. T’fltup front and push
shelftowardback ofovenuntilit
goespast “stop” onthe ovenwall.
Then lowerthe frontof shelfand
push it dl the wayback.
Both stylesofovenshavefour shelf
suppo~ marked A(bottom), B, C
and D(top). Shelfpositionsfor
cookingfood are suggestedon
Baking,Roastingand Broiling
pages.
ovenLi*t
(onmodelssoequipped)
The lightcomesonautomatically
when tie door is opened. On mtiels
with ovenwindowuseswitchto mm
lightOn and off W~~~ ~00~ iS C~OS~.
..
VJhencookingafoodfor[hefirst
timeinyotlrnewoven,usetime
givenon recipesasaguide.Oven
theri~~ostats,overa-periodofyears,
may“drift” fromthefactorysetting
anddifferencesin timingbetween
anold andanewovenof5to 10
minutesare not unusualandyou
maybeinclind tothinkthattie new
ovenis notperformingcorrectly.
However,yournewovenhasbeen
setcorrectly at the factoryand is
moreapt to be accuratethanthe
ovenitreplaced.
Step 1:Place food in oven,being
certain to leaveabout 1inchof
spacebetween pansand wallsof
ovenfor goodcirculationofheat.
Closeovendoor. ‘Duringbaking,
avoidfrequentdoor openingsto
preventundesirableresults.
Step 2: Turn OVEN SET knobto
BAKEand OVEN TE~P knob to
temperature on recipe or on Baking
Guide.
Step 3: Check food for doneness
at minimum time on recipe, Cook
longerif necessary. Switch off heat
:lndremovefoods.
thatyouset. ExamplesofImmediate
Start(oventurnsonnowandyou
setit to turn offautomatically)or
DelayStartand Stop(settingthe
oventoturn on automaticallyat a
latertimeand turn offatapreset
stoptime)willbedescribed.
How bset tietik
SM* and Automatic stop
N~E: Beforebeginningmake
surethehands oftherangeclock
showthecorrect timeofday.
ImmediateStartissimplysetting
ovento startbakingnowand turning
offat alater time automatically.
~emernber, foodscontinuecooking
after controlsare off.
Step 1:Toset StopTime,push in
knobon STOP dialand ~~rnpointer
to timeyou wantovento turn offi
for example6:00. The DELAY
STARTdial (somemodels may say
START)should beat the same
positionas thetimeofdayon clock
Step 1:Tosetstarttime, push ill
knab on DELAYSTARTdialand
turn pointerto timeyouwantoven
toturn on, forexample3:30.
Step 2: Toset StopTime, push in
knobon STOPdialand turn pointer
totime youwantovento turn off,
for example6:00. This meansyour
recipe called fortwo and one-half
hoursof baking time.
N~E: Time on STOPdialmust
be later than time shownon range
clock and DELAYSTARTdial.
Step 3: Turn OVEN SET knob to
TIME BAKE. Turn OVENTE~P
knob to 250”F.or recommended
temperature.
Place food in oven, close the door
and automatically the ovenwill be
turned on and off at the times you
haveset. Turn OVEN SET to OFF
and remove food from oven.
OVEN INDICA~~ LIGHT(s) at
TIME BAKE setting may work
differently than they do at BAKE
setting. Carefully recheck the steps
given above. If all operations are
done as explained, ovenwill
operate as it should.
‘ion modelsequ.ip~~.edW’kl:
~~~~ ~~~(~.
I
——— ’
necessary,especiallyfor foods
whichcook longerthan 30to40
glasscookwaregen~rallyabsorb
heat, whichmayresultin dry,crisp
crusts. Reduceovenheat25”F.if minutes.For foodwith shofi
cookingtimes, preheatinggive~
bestappearanceandcrispness.
4. Openthe ovendoor to check
foodas littleaspossibletoprevent.
unevenheatingandto saveenergy.
uverbrowning.For-best‘b;owning ~ig~ter c~~Sts are desired. Rapid
results, we recornnlenddullbottom browningofsomefoodscartbe
sutiacesforcakepansandpieplates. achievedbypreheatingcast iron
.
cookware.
Shelf
Food Container Position Oven
Temperature
400°-4750
350°-4000
400°-4500
350°
400°-4250
375°
350°-3750
375°-4250
375°-4250
350°-3750
325°-3750
375°-4000
325°-3500
Time,
Minutes
15-20
20-30
20-40
45-55
20-30
45-60
45-60
45-60
10-25
20-30
Comments
ShinyCookieSheet B, c
Bread
Biscuits(U-in. thick)
Coffeecake
Corn bread or muffins
Gingerbread
Muffins
Popovers
Quickloaf bread
Yeastbread (2 loaves)
Plain rolls
Sweetrolls
Canned, refrigeratedbiscuitstake
2to4minuteslesstime.
B,AShinyMetal Pan with
satin-finishbottom
Cast Ironor Glass
ShinyMetalPanwith
satin-finishbottom
SninyMetalMuffinPans
DeepGlassor Cast Iron Cups
Preheatcast ironpan for crisp crust.
B
B
Decreaseabout5minutesfor muffin
mix, or bakeat 450”F.for25 minutes,
thenat 350”F.for 10to 15minutes.
A, B
B
Metalor Glass Loaf Pans IB
Metalor Glass Loaf Pans Dark metalor glassgivedeepest
browning.
For thin rolls, ShelfBmaybe used.
A, B
A, B
B, A
ShinyOblongor Muffin Pans
ShinyOblongor MuffinPans
,- ,1 Cakes
.(withoutshortening)
w’ Angelfood
Jelly roll
Sponge
Cakes
Bundtcakes
Two-piecepan is convenient.
Line pan with waxedpaper.
30-55
1O-M
45-60
45-65
20-25
2-4hrs.
20-35
25-30
40-60
A
B
A
Aluminumfibe Pan
MetalJelly Roll Pan
iMetalor Ceramic Pan
325°-3500
350°-3750
275°-3000
350°-3750
350°-3750
350°
325°-3500
350°-4000
400°-4250
375°-4000
A, B
B
A, B
B
B
B
Metal or Ceramic Pan
ShinyMetal Muffin Parts Paper liners producemore moist
crusts.
Use 300°F.andShelf Bfor small or
individualcakes.
ICupcakes
Fruit cakes
Layer
Layer,chocolate
Metalor Glass Loaf or
TubePan
ShinyMetal Panwith
satin-finishbottom
ShinyMetal Pan with
satin-finishbottom
Metalor Glass Loaf Pans
Cookies
Brownies
Drop
Refrigcrti[or
~(Jl]cd or sliced
25-35
10-20
6-12
7-12
30-60
30-60
50-90
45-70
15-25
40-60
40-60
12-15
Bar cookies from mix use sametime.
Use Shelf Cand increase temp.
25°F.to 50”F.for more browning.
Metulor Glass Pans
CookieSheet
CookieSheet
CookieSheet
B, C
B, C
B,C
B,C
A, B, C
B
B
Glassor Metal Rtn
GlassCustard Cups or Casserole
~sctin p;inof hoi water)
GlassCustard Cups or
~assero]c
350°-400”
300°-3500
325°
400°-425”
325°-3500
400°-4250
400°-4250
450°
325°-4000
325°-3750
300°-3500
—
Reducetemp. to 300°F.for large
custard. Cook bread or rice pudding
with custard base 80 to90 minutes.
Large pies use 400°F. and increase
time.
Toquickly brownmeringue, use
400°F. for 8to 10minutes.
Custard fillings require lower
temperature, longertime.
~oilPanon Cookie Sheet A
B, A
A, B
B
B
A, B, C
A. B, c
B..—
;prcad to crust edges
Increase time for large amount
or size.
60-90
30-60
30-75
—. —
Roasting is tooting bydry heat.
Tendermeator pouh~ canbe
roasteduncoveredin youroven.
Roastingtemperatures, which
shouldbelowand steady,keep
spatteringto aminimum. When
roasting,itis not necessaryto
sear, baste, coveror add water
to yourmeat.
Roastingis really abaking
procedureusedformeats.Therefore,
ovencontrolsare settoBAKE.
(Youmayhear aslightclicking
sound, indicatingthe ovenis
workingproperly.) Roastingis
easy;just followthese steps:
Step 1:Check weight ofrneat, and
place,fatsideup,onroastingrack
inashallowpan. (Broilerpanwith
rackis agoodpan forthis.)Line
broilerpanwithaluminumfodwhen
usingpanformarinating,cooking
withfruits,cookingheavilycured
meats,orforbastingfoodduring
cooking.Avoidspillingthese
materialsonovenlineror door.
Step 2: Place in ovenon shelf in
Aor Bposition. No preheating is
necessary.
Step3: TurnOVENSETtoBAI<E
andOVENTENIP‘to325”F.small
potlltrymaybecooked at 375”F.
f~~best browning.
II
Step 4: Most meatscontinueto
cookslightlywhilestanding,after
beingremovedfromtheoven.
Standingtime recommendedfor
roastsis 10to 20 minutesto allow
roastto firm up andmakeit easier
to carve. Internaltemperaturewill
riseabout5°to 10”F.;tocompensate
fortemperaturerise, ifdesired,
removeroastfromovenat5°to IOW.
less thantemperatureon guide.
NOTE: Youmaywishto useTIME
BA~, as described onpage 16,to
turn ovenon and off automatically.
~emember that foodwill continue
to cookin the hotovenandtherefore
shouldbe removedwhenthedesird
internaltemperature has been
reached.
For mozen Roask
@Frozen roasts ofbeef, pork,
lamb, etc., can be startedwithout
thawing,but allow 10to 25 minutes
per pound additionaltime (10
minutesper pound for roastsunder
5pounds, more time for larger
roasts).
oThaw most frozenpoultry before
roasting to ensure evendoneness.
Some commercial frozenpoultry
can becooked successfullywithout
thawing. Followdirections given
on packer’slabel.
Questiomand&weTs
A. Checkingthefinishedinternal
temperatureatthecompletionof
cookingtimeis recommended.
TemperaturesareshowninRomting
Guideon oppositepage. Forroasts
over8pounds,cookedat300”F.
withreducedtime, checkwith
thermometerathalf-hourintervals
afierhalfthetimehaspassed.
Q.why ismy roastcrumbling
whenItry toCarve it?
A. Roastsare easierto sliceif
allowedto cool 10to 20 minutes
afier removingfromoven.Be sure
to cut acrossthe grainofthe meat.
Q.DoIneedtopreheat my
oven eachtimeIcookaroast
or poultry?
A. It is rarely necessary topreheat
youroven,only forvery small
roasts, which cookashortlength
oftime.
Q.when buying aroast,are
there any special tipsthat would
helpme cookit more evenly?
A. Yes.Buy aroast as evenin
thickness as possible, or buy rolled
roasts.
I
laPositionovenshelfatBfor
srndl-sizeroasts(3 to 7lbs.)and
atAfor larger roasts.
2.Placemeat fat-sideup, or poultry
breast-sideup, orIbroilerpan or
ether shallowpan with trivet. Do
notcover.Do not stuffpoultryuntil
3. ~emGvefatand drippingsas
necessary.Basteas desired.
4. Shnding time recommendedfor
roastsis10to20rnim.ttestoWowroast
to firm up and makeiteasierto
carve. Internaltemperaturewillrise
about5°to 10°F.;to compensatefor
just beforeroasting. Use meat temperaturerise, if desired,remove
thermometerfor more accurate roast from ovenat 5°to 10”F.less
doneness. (Do notplace than temperatureonguide.
thermometerin stuffing.)
5.Wozenroast$canbe
conventionallyroastedbyadding
10to25 minutesper poundmore
timethan givenin guidefor
refrigeratedroasts.(10minutes
per~und forroastsunder5punds.)
Defrostpoultrybeforeroasting.
Oven ApproximateRoastingTime, Internal
Wp’e Temperature Doneness inMinutesper Wund TemyFature “F
Meat 3to 5-lbs. 6to$-lbs.
Tendercuts; rib, highquality sirloin tip, 325° Rare: 24-30 18-22 130°-140°
rumpor top round* Medium: 30-35 22-25 150°-1600
WellDone: 35-45 28-33 170°-1850 ,
Lamb Leg or bone-inshoulder* 325° Rare: 21-25 20-23 130°-1400 ,
Medium: 25-30 24-28 150°-1600
WellDone: 30-35 28-33 170°-185°
Vealshoulder, leg or loin* 325° WellDone: 35-45 30-40 1700-180°
Pork loin, rib orshoulder* 325° WellDone: 35-45 30-40 i70°-180°
Ham, precooked 325° ToWarm: 10minutesper pound (anyweight) 1259-1300
Under 10-lbs. 10to H-]bs.
Ham, raw 325° WellDone: 20-30 17-20 170°
*Forbonelessrolled roasts over 6-inchesthick, add 5to 10minutesper pound to times givenabove.
I
hultry 3to5-1?)s. Over 5-ibso
Chickenor Duck 325° WellDone: 35-40 30-35 185°-1!300
~hickenpieces 375° WellDone: 35-40 185°-1900
10to 15-lbs. OverE-lbs. In thigh:
~rkcy 325° WellDone: 20-25 15-20 185°-190°
‘-.
/
.
,“
-\ ‘.
.-
Broilingiscookingfoodbyintense
radiantheatfromtheupperunit in
theoven,Mostfishand tendercuts
ofmeatcan be broiled. Follow
thesestepsto keepspatteringand
smokingto aminimum.
Step 1:Ifmeathasfator gristlenear
edge,cutverticalslashesthrough
bothabout2“apart. If desired, fat
maybetrimmed, leavinglayer
about 1/8”thick.
Step 2: Place meaton broilerrack
inbroilerpan which comeswith
range.Alwaysuse rack so fatdrips
intobroiler pan; otherwisejuices
maybecomehotenoughtocatchfire.
Skp 3:Wsitionshelfonrecommended
shelfpositionassuggestedinBroiling
Guideon oppositepage. Most
broilingisdone on Cposition, but
ifyour rangeisconnectedto208
volts,youmaywish to usehigher
position.
Step 4: Leavedoor ajar afewinches
(exceptwhen broiling chicken).
The door staysopen by itself, yet
he propertemperatureismaintained
in theoven.
Step 6: Turn foodonlyonceduring
cooking.Timefoodsfor firstside
per BroilingGuide.
Turn food, then usetimesgivenfor
secondsideasaguidetopreferred
doneness.(Wheretwothicknesses
and timesare giventogether,use
firsttimesgivenforthinnestfood.)
Step %Turn OVENSET knob
to OFF. Servefoodimmediately,
and leavepan outsideovento cool
during meal foreasiestcleaning.
1. Ifdesired, broiler panmaybe
linedwith foilandbroiler rack may
becoveredwith foilforbroiling.
AL}VAYSBE CERTP.INTOMOLD
FOIL THOROUGHLY TO
BROILER RACK, AND SLIT
FOIL TOCONFORM WITH
SLITSIN RACK. Broiler racksare
designedto minimizesmokingand
spattering, andtokeepdrippings
coolduring broiling.Stoppingfat
and meatjuices fromdrainingto
thebroiler pan preventsrack from
serving itspurpose, andjuices may
become hotenoughtocatch fire.
2. DO NOT placeasheetof
aluminum foilon shelf. Todo so
mayresult inimproperly cooked
foods,damage toovenfinishand
increase in heaton outsidesurfaces
oftheoven.
Q. why shouldIleavethedoor
closedWhenbroilingfchic~~n~?
A. Chicke~~istheonly food ---
E
.=+i.
~jr-
,.-..
recommendedforclosed-door .>
y“=
broiling.This isbecausechickenis ~.
relativelythickerthan otherfoods
youbroil. Closingthe door holds
moreheat in theovenwhichallows
chickento cookevenlythroughout.
Q. when broiling,isitnecessary
toalwaysuse 2rackin the pan?
A. Yes.Usingtherack suspends
themeatovelthepan. Asthe meat
cooks,thejuices fallintothepan,
thuskeepingnleatdrier. JUiCeS
are protectedbythe rack and stay
cooler,thus preventingexcessive
spatterand smoking.
Q. Should 1saltthemeatbefore
broiling?
A. No. Saltdrawsout thejuices
and allowsthemto evaporate.
Alwayssaltafter cooking.Turn
meat with tongs;piercing meat
with afork alsoallowsjuices to
escape. When broilingpoultry
or fish, brush each side often
with butter.
Q.why are my mea@not$Urnillg
outasbrown astheyshoIRld?
A. In some areas, the power
(voltage)to the range maybe ~OW.
In these cases, preheat the broil
unit for 10minutesbefore placing
broiler pan with food in oven.
Check to see ifyou are using the
recommended shelfposition. Broil
for longestperiod oftime indicated
in the Broiling Guide.Turnfood
onlyonceduringbroiling.
—.-

This manual suits for next models

7

Other Hotpoint Range manuals

Hotpoint RGB532BEAAD Service manual

Hotpoint

Hotpoint RGB532BEAAD Service manual

Hotpoint RGB790DETBB User guide

Hotpoint

Hotpoint RGB790DETBB User guide

Hotpoint RA724KWH User instructions

Hotpoint

Hotpoint RA724KWH User instructions

Hotpoint RB790SRSA User instructions

Hotpoint

Hotpoint RB790SRSA User instructions

Hotpoint CE6IFA.1 X F/HA User manual

Hotpoint

Hotpoint CE6IFA.1 X F/HA User manual

Hotpoint RGB533WEW User manual

Hotpoint

Hotpoint RGB533WEW User manual

Hotpoint RB790SHSA User manual

Hotpoint

Hotpoint RB790SHSA User manual

Hotpoint RGA724EKWH - R 24 Inch Gas Range User manual

Hotpoint

Hotpoint RGA724EKWH - R 24 Inch Gas Range User manual

Hotpoint RB526HCC - 30 Inch Electric Range User manual

Hotpoint

Hotpoint RB526HCC - 30 Inch Electric Range User manual

Hotpoint RB525 Installation guide

Hotpoint

Hotpoint RB525 Installation guide

Hotpoint RGB845WEC Service manual

Hotpoint

Hotpoint RGB845WEC Service manual

Hotpoint RB787 User manual

Hotpoint

Hotpoint RB787 User manual

Hotpoint HH 50 IX/HA User manual

Hotpoint

Hotpoint HH 50 IX/HA User manual

Hotpoint RGB540SEP - 30 in. Gas Range User manual

Hotpoint

Hotpoint RGB540SEP - 30 in. Gas Range User manual

Hotpoint RGB530DEP User manual

Hotpoint

Hotpoint RGB530DEP User manual

Hotpoint RB790DT User instructions

Hotpoint

Hotpoint RB790DT User instructions

Hotpoint RGB530DEP - 30 in. Gas Range User guide

Hotpoint

Hotpoint RGB530DEP - 30 in. Gas Range User guide

Hotpoint RGA720PKWH - R 20 Inch Gas Range Manual

Hotpoint

Hotpoint RGA720PKWH - R 20 Inch Gas Range Manual

Hotpoint RGB524PR Installation guide

Hotpoint

Hotpoint RGB524PR Installation guide

Hotpoint RGB540SEHSA User manual

Hotpoint

Hotpoint RGB540SEHSA User manual

Hotpoint RGB740BEHCT Manual

Hotpoint

Hotpoint RGB740BEHCT Manual

Hotpoint RB757DPWH User manual

Hotpoint

Hotpoint RB757DPWH User manual

Hotpoint CI6IFA.1 SK/HA User manual

Hotpoint

Hotpoint CI6IFA.1 SK/HA User manual

Hotpoint RGB735DEP User manual

Hotpoint

Hotpoint RGB735DEP User manual

Popular Range manuals by other brands

Electrolux EW30GS65GS3 Use & care guide

Electrolux

Electrolux EW30GS65GS3 Use & care guide

Whirlpool RS696PXGB0 parts list

Whirlpool

Whirlpool RS696PXGB0 parts list

Amana AGR3311WDW0 Use & care guide

Amana

Amana AGR3311WDW0 Use & care guide

AGA MASTERCHEF DELUXE 90 DUAL FUEL User's guide & installation instructions

AGA

AGA MASTERCHEF DELUXE 90 DUAL FUEL User's guide & installation instructions

Cadco BIR-1C use and care manual

Cadco

Cadco BIR-1C use and care manual

LG LSE4616ST.BSTLLGA owner's manual

LG

LG LSE4616ST.BSTLLGA owner's manual

Sharp SSR3065JS installation manual

Sharp

Sharp SSR3065JS installation manual

Viking 30" W Specification sheet

Viking

Viking 30" W Specification sheet

Toastess THP-20 Instruction booklet

Toastess

Toastess THP-20 Instruction booklet

Frigidaire FGFB66ASD installation instructions

Frigidaire

Frigidaire FGFB66ASD installation instructions

Garland S284 Specifications

Garland

Garland S284 Specifications

Kenmore 790.99013 Use & care guide

Kenmore

Kenmore 790.99013 Use & care guide

Fisher & Paykel RDV3 Series user guide

Fisher & Paykel

Fisher & Paykel RDV3 Series user guide

GE JS660SLSS owner's manual

GE

GE JS660SLSS owner's manual

Whirlpool WFC340S0AB0 User instructions

Whirlpool

Whirlpool WFC340S0AB0 User instructions

GE RA511J Use and care

GE

GE RA511J Use and care

Frigidaire CPCS389DC3 installation instructions

Frigidaire

Frigidaire CPCS389DC3 installation instructions

Kenmore 790.95592 Use & care guide

Kenmore

Kenmore 790.95592 Use & care guide

manuals.online logo
manuals.online logoBrands
  • About & Mission
  • Contact us
  • Privacy Policy
  • Terms and Conditions

Copyright 2025 Manuals.Online. All Rights Reserved.