Household Essentials StowAway 18100 Series User manual

18100 series (White)
18200 series (Unfinished Oak)

2
Part A (1) Ironing Board Cabinet
Part B (1) Cabinet Door
Part C (1) Ironing Board Cover and Pad
The following hardware is wrapped up inside the cover (Part C) to protect the cabinet.
Part D (2) Door Hinges
Can be attached so the door opens left or right.
Part E (4) Phillips Drywall Screws – 1 5/8”
Part F (1) Garment Hook
Part G (10) Phillips Panhead Screws – 5/8”
Please read this entire instruction booklet before installing your StowAway® Ironing
Board.
For questions during installation or after, please contact us at Household Essentials at
1.800.922.5524/314.428.5657. Hardware is wrapped up in the cover inside the cabinet, but if you are
missing anything, please call and we will expedite replacement parts.
A B C
PARTS LIST
OTHER TOOLS NEEDED
View the INSTALLATION VIDEO at www.householdessential.com or on our YouTube channel.
Tape measure
Phillips screwdriver
Stud minder
Drywall saw
3/32” drill bit
Drill
Level

3
A. 16” on center studs (wood or metal*).
*Included hardware is for wood studs: please visit your local hardware store for the right hardware to use in metal studs.
B. Sufficient wall and floor space for operation (see clearance diagram below).
C. Cutout area (14.25” x 46.25”) free from all electrical or mechanical services.
D. A nearby outlet or 180 Light Kit with an electrical line run to the unit by a CERTIFIED ELECTRICIAN.
66”
Clearance
44”
Clearance
Wall
TOP VIEW
180 Light Kit - Kit includes an adjustable spotlight LED bulb, 3-prong electric outlet, and timer with
automatic shut-off (15 & 30 minute settings). Installs into the upper right corner of the cabinet.
(A CERTIFIED ELECTRICIAN should run the wiring for the light kit.)
Replacement Cover with Pad - Cotton covers with attached fiber pads are designed specifically for the
StowAway® ironing board’s 11 x 41 inch surface. Covers have elastic edging (better fit and easier to put
on) and stain and scorch resistance.
Available at www.householdessential.com and other online retailers.
SPACE REQUIREMENTS
OPTIONAL ACCESSORIES (sold separately)
28.5”
Clearance
MAX
MIN
44”

4
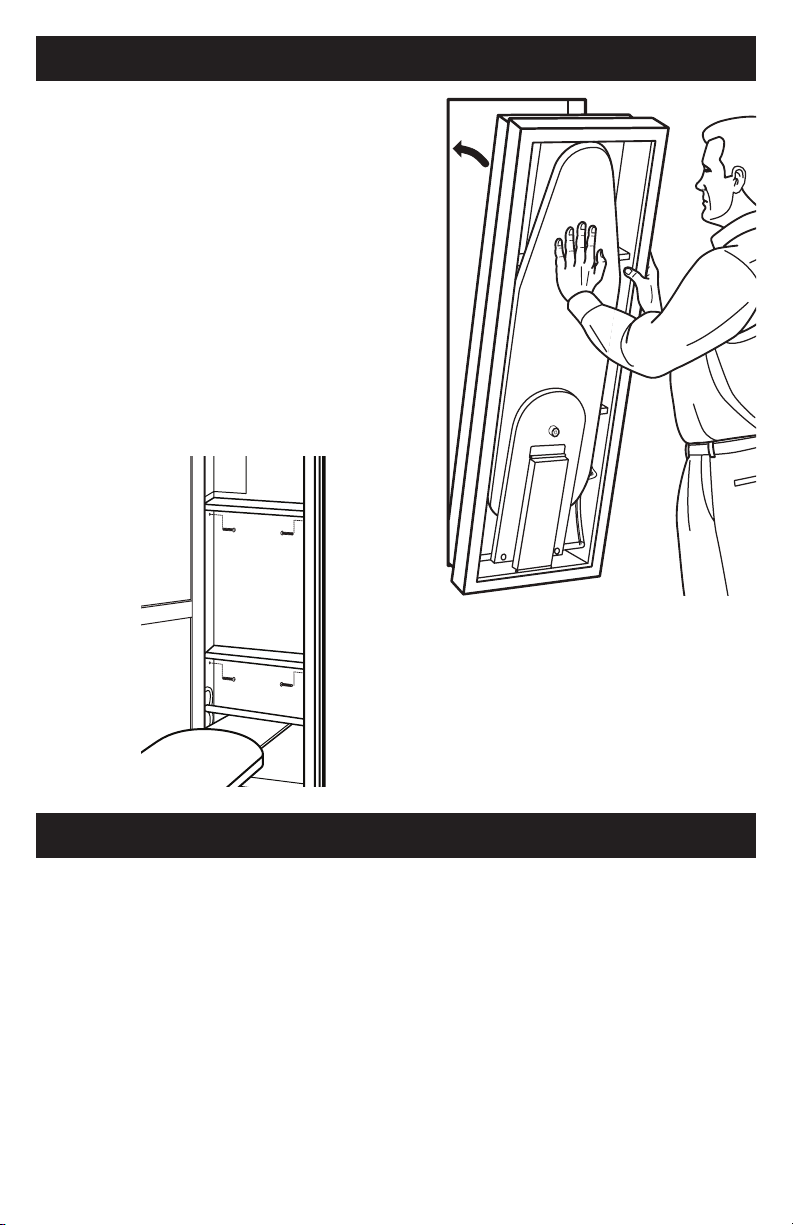
If your cutout is level,
your cabinet and ironing
board will be too!
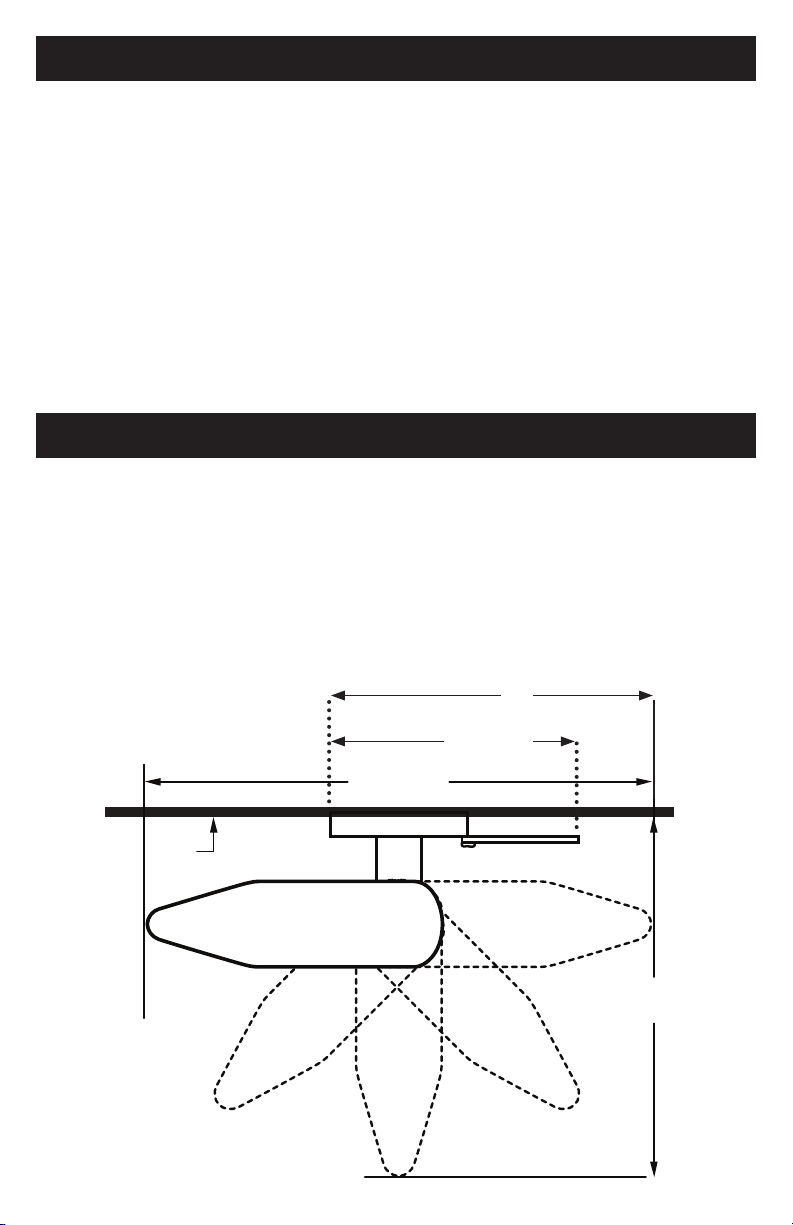
Adjust THIS height to set
the ironing board’s height:
ex. 25” cutout = 36-38” ironing board
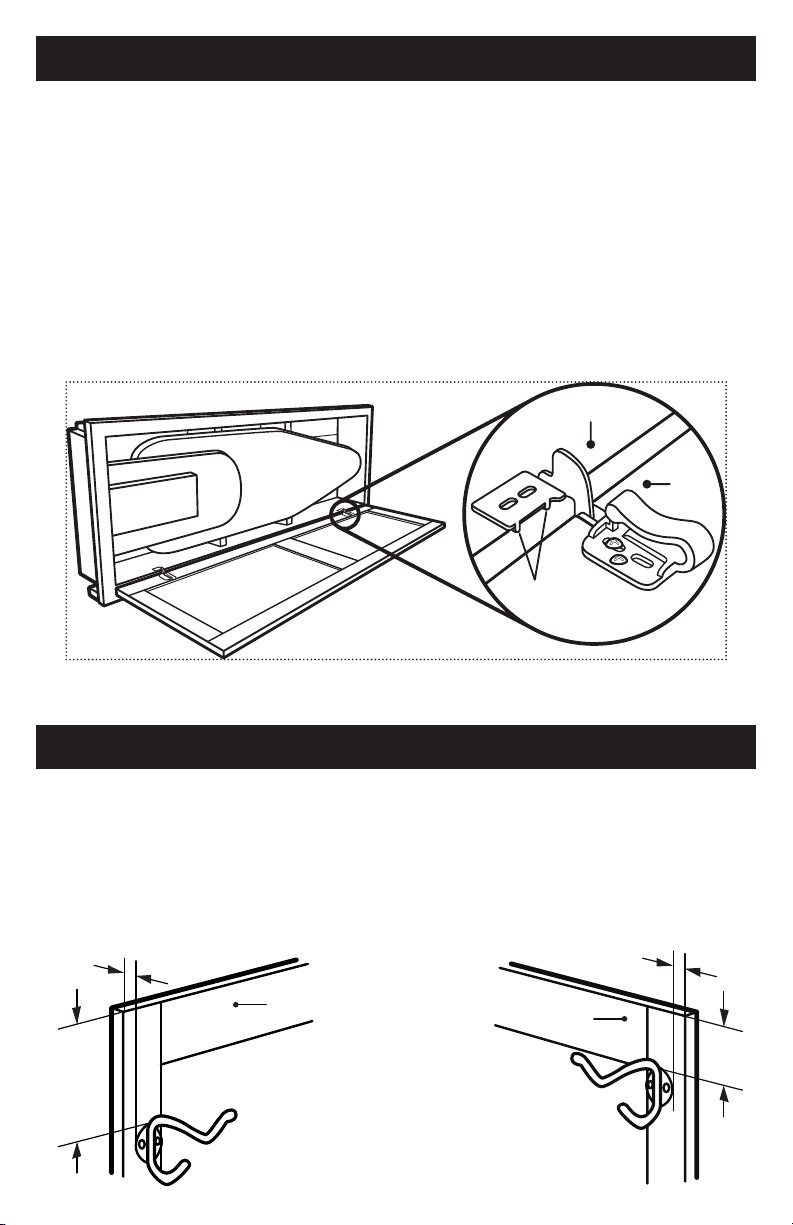
A. Find the marked holes and grooves on back side of the door (fig. 1).
B. Unfold a hinge (Part D) and slide its lower section into the groove,
laying the plastic part of the hinge flush against the back side of the door.
C. Attach the hinge to the door with 2-Phillips panhead screws (Part G).
D. Repeat with remaining hinge.
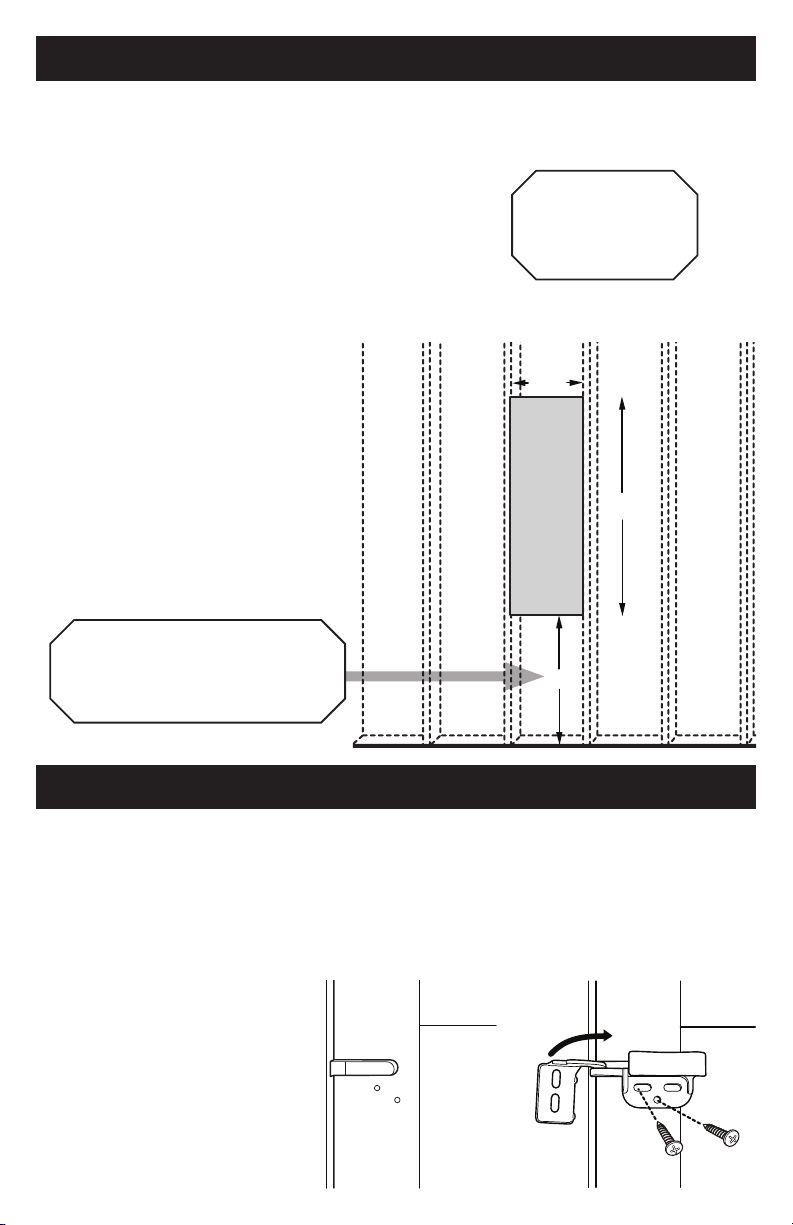
On a wall with 16” on center studs, in an area clear of all electrical and mechanical
services:
A. Find wall studs with a stud finder and mark their location.
B. Using a level, sketch the cutout dimensions onto the wall
between the studs, drawing a LEVEL rectangle
14.25” x 46.25” with its bottom 25” off the floor.
The ironing board will open 36” high and raise to 38” high.
Adjust the cutout’s height to change the ironing board’s height on opening.
C. Using a drywall saw, carefully cut out the sketched rectangle.
D. IF USING A 180 LIGHT KIT:
have a CERTIFIED ELECTRICIAN drop
an electrical line to the unit and install
the light kit in the StowAway® cabinet.
See instructions in light kit’s box.
Hinge folds
up!
1. CUTOUT THE DRYWALL
2. MOUNT THE DOOR HINGES
25”
14 ¼”
46 ¼”
Figure 1 Figure 2

5
1/2”
6”
Door
1/2”
2”
Door
Attach the garment hook to the back of the door as directed for your selected hinge side.
A. Left Hinged (see fig. 1): 6” from the top and ½” from the side of the top left corner of the door.
This leaves room to install the optional light kit.
B. Right Hinged (see fig. 2): 2” from the top and ½” from side of the top right corner of the door.
The door can open to the LEFT (LEFT HINGE) or to the RIGHT (RIGHT HINGE):
A. Lay the cabinet (Part A) on its side: left side down for left hinge / right side down for right hinge.
B. Lay the cabinet door (Part B) beside the ironing board cabinet (Part A) with both hinges open and
laying inside the cabinet.
C. Align the stop guides on the hinges with the edge of the cabinet (see circle below) and MARK THE
LOCATION of the hinge’s mounting holes on the cabinet frame with a pencil.
D. Using a 3/32” bit, drill pilot holes 1/2” deep into the cabinet frame for mounting hole mark.
DO NOT ATTACH DOOR THE DOOR. The door will be attached after the cabinet is secured to the
studs in the wall.
Right hinge: Door will open to the right.
Cabinet
Stop Guides
Door
4. ATTACH THE GARMENT HOOK
3. PREP THE CABINET FOR THE DOOR
Figure 1
Left Hinge
Figure 2
Right Hinge

6
A. Lift the cabinet and set its base into the cutout, then
tilt the cabinet into place (see figure 1).
B. Attach the cabinet to the wall studs with Phillips
drywall screws (Part E). Screw from inside the
cabinet into the wall studs, placing screws approx.
1” below the top and bottom shelves on both sides of
the cabinet (see figure 2).
C. Attach the door: Align door hinges with
drilled pilot holes and attach with 4-Phillips panhead
screws (Part G).
Figure 1
A. Lower the ironing board.
B. Fit the nose pocket over the nose of the board.
C. Stretch cover around sides and back over the end of the board.
NOTE: The board may swivel more stiffly after the cover is on. As the board is used, the cover will mold
to the board, making the board easier to move from side to side.
5. MOUNTING THE CABINET TO THE WALL
6. PUT ON THE COVER
Figure 2

7
HEIGHT ADJUST: Lift the board near the back end, guide it through the curved cutouts in the
cabinet, and glide it into place. Reverse to lower.
The board must be in the lower position to close.
CLEANING: Wipe cabinet with a damp cloth or mild cleanser as needed. Spot clean cover and air
dry on the ironing board.
STORING AN IRON: Unplug iron before stowing in the cabinet. Always store the iron with the sole
facing the cabinet’s heat-resistant plates. NEVER LEAVE A HOT IRON UNATTENDED.
Board does not slide up and down smoothly.
Lubricate the slide slots behind the metal tubing with wax or a bar of soap.
Wobbly ironing board.
Adjust the knob on the underside of the ironing board.
Stiff swivel.
If new, give the cover a little time to compress under the board; if older, check the knob on the
underside of the board and adjust as needed.
Visit our website for other FAQs or call our Customer Service (contact on reverse).
USE & CARE OF YOUR STOWAWAY®
TROUBLE SHOOTING

6/2017
This manual suits for next models
1
Table of contents
Other Household Essentials Iron manuals