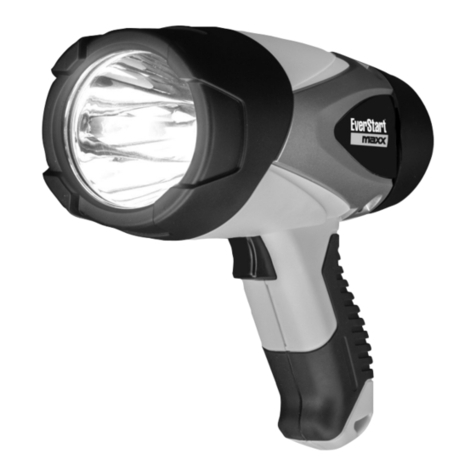
Housewatch 55-161 User manual

55-161 (White) 55-162 (Black)
2 x 10W SPOTLIGHT
INSTRUCTIONS
20W non-sensor instructions_A6_Feb22.qxp_Layout 1 16/3/22 4:40 pm Page 1

CONTENTS
INTRODUCTION .........................................................................................3
IMPORTANT SAFETY INSTRUCTIONS ......................................................3
INSTALLING THE SPOTLIGHT ................................................................4-6
COLOUR TEMPERATURE ADJUSTMENT ..................................................7
MAINTENANCE PROGRAM ........................................................................7
TROUBLESHOOTING..................................................................................8
SPECIFICATIONS........................................................................................8
WARRANTY INFORMATION .....................................................................10
2
INTRODUCTION
The Housewatch LED spotlight is a
The LED spotlight is suitable for in
locations including entrances, garde
IMPORTANT SAFETY I
Please follow these instructions c
operate this spotlight.
Ensure the voltage marked on
power supply to be used.
DO NOT direct the light into a
intensive light output, which if
WARNING: Risk of fire. Do not
within 1m.
Must be installed by a lic
AS3000:2007.
20W non-sensor instructions_A6_Feb22.qxp_Layout 1 16/3/22 4:40 pm Page 2

NTS
..................................................3
..................................................3
...............................................4-6
..................................................7
..................................................7
..................................................8
..................................................8
................................................10
3
INTRODUCTION
The Housewatch LED spotlight is a low-energy, high powered outdoor fitting.
The LED spotlight is suitable for installation on walls in a range of outdoor
locations including entrances, gardens, staircases, garages and parking areas.
IMPORTANT SAFETY INSTRUCTIONS
Please follow these instructions carefully before attempting to install and
operate this spotlight.
Ensure the voltage marked on the product is the same as the electrical
power supply to be used.
DO NOT direct the light into a person’s eyes. This spotlight has a very
intensive light output, which if incorrectly used could cause eye damage.
WARNING: Risk of fire. Do not aim the fitting at a combustible surface
within 1m.
Must be installed by a licensed electrician in accordance with
AS3000:2007.
20W non-sensor instructions_A6_Feb22.qxp_Layout 1 16/3/22 4:40 pm Page 3

4
INSTALLING THE SPOTLIGHT
1. REMOVE FRONT SPOTLIGHT HOUSING
Use a Phillips head screwdriver to remove the three screws on the front cover,
then open the rear Quick-Connect junction box.
INSTALLING THE SPO
2. FIX THE SPOTLIGHT QUICK-CONNECT JUNCTION BOX TO THE WALL
Using the screws and screw plugs provided, secure the spotlight's junction
box horizontally to the wall.
3. CONNECTION
Connect the cable to the terminal b
NEUTRAL (Blue)
LIVE (Brown)
EARTH (Green/Yellow)
20W non-sensor instructions_A6_Feb22.qxp_Layout 1 16/3/22 4:40 pm Page 4

5
GHT
NG
the three screws on the front cover,
n box.
INSTALLING THE SPOTLIGHT
T JUNCTION BOX TO THE WALL
ded, secure the spotlight's junction
3. CONNECTION
Connect the cable to the terminal block on the wall plate as above.
NEUTRAL (Blue)
LIVE (Brown)
EARTH (Green/Yellow)
20W non-sensor instructions_A6_Feb22.qxp_Layout 1 16/3/22 4:40 pm Page 5

6
INSTALLING THE SPOTLIGHT COLOUR TEMPERATU
4. REPLACE SPOTLIGHT HOUSING
Return and fasten the spotlight housing in place with three screws.
Adjust the colour temperature by
Pressing the button cycles through
OUTDOOR WALL INSTALLATION REQUIREMENT
TOP
BOTTOM
TOP
BOTTOM
MAINTENANCE PROG
1. After a period of time the lamp a
and debris. This accumulation of
performance of lamps and fitting
for lamps and lanterns should b
2. During the regular cleaning main
that all parts are in good conditio
3. During the cleaning process it is
liquids. The use of corrosive o
reaction and may influence the p
damp cleaning cloth.
20W non-sensor instructions_A6_Feb22.qxp_Layout 1 16/3/22 4:40 pm Page 6

7
GHT COLOUR TEMPERATURE ADJUSTMENT
n place with three screws.
Adjust the colour temperature by pressing the button as shown below.
Pressing the button cycles through 3000K, 4000K and 5000K.
ATION REQUIREMENT
MAINTENANCE PROGRAM
1. After a period of time the lamp and lantern surfaces can accumulate dust
and debris. This accumulation of dust and debris can directly influence the
performance of lamps and fitting. A regular cleaning maintenance program
for lamps and lanterns should be run on a 6 monthly cycle.
2. During the regular cleaning maintenance program it is important to check
that all parts are in good condition and any loose screws are tightened.
3. During the cleaning process it is important to not use corrosive or volatile
liquids. The use of corrosive or volatile liquids may cause a chemical
reaction and may influence the performance. It is recommended to use a
damp cleaning cloth.
20W non-sensor instructions_A6_Feb22.qxp_Layout 1 16/3/22 4:40 pm Page 7

8
TROUBLESHOOTING
Problem
Lights do not turn on
Recommended Action
1) Check light switch is on
2) Check wiring
SPECIFICATIONS
Model Description: 10W Light 2 x 10W Light
55-153 55-157
55-154 55-158
Power Supply: AC 100-240V (50Hz)
Max. Switchable Load: LED 10W LED 2 x 10W
Lamp Type: 10W high power LED
Environmental Protection: IP54 (suitable for outdoor use)
*Specifications are subject to change without prior notice.
NOTES
20W non-sensor instructions_A6_Feb22.qxp_Layout 1 16/3/22 4:40 pm Page 8

9
Action
switch is on
g
2 x 10W Light
55-157
55-158
V (50Hz)
LED 2 x 10W
wer LED
e for outdoor use)
hout prior notice.
NOTES
20W non-sensor instructions_A6_Feb22.qxp_Layout 1 16/3/22 4:40 pm Page 9

MANUFACTURER’S WARRANTY
This Housewatch product is guaranteed for a period of 2 (Two) years from date
of purchase, provided the product has been installed in accordance with this
instruction manual and local electrical wiring regulations and codes of practice.
This guarantee shall become invalid if this product has been incorrectly
installed, misused, tampered with or accidentally damaged.
If the goods are defective, we undertake to repair or replace the goods or any
part of them that is defective; or provide again or rectify any services or part of
them that are defective; or wholly or partly recompense you if they are defective.
This guarantee is in addition to other rights and remedies available to
consumers, all of which are given by us to you if you are a consumer. Our
Goods come with guarantees that cannot be excluded under the Australian
Consumer Law. You are entitled to a replacement or refund for a major failure
and for compensation for any other reasonably foreseeable loss or damage.
You are also entitled to have the goods repaired or replaced if the goods fail to
be of acceptable quality and the failure does not amount to a major failure. If
you wish to make a warranty claim, please return this product to the original
place of purchase together with your purchase receipt, or contact us using the
below details.
Proudly Distributed by Repelec (Aust)
Locked Bag 45
Plumpton NSW 2761
Ph: 1300 555 586 Fax: 1300 666 066
Email: [email protected]
20W non-sensor instructions_A6_Feb22.qxp_Layout 1 16/3/22 4:40 pm Page 10
This manual suits for next models
1
Table of contents
Other Housewatch Spotlight manuals