manuals.online logo
Brands
  1. Home
  2. •
  3. Brands
  4. •
  5. Howard Miller
  6. •
  7. Clock
  8. •
  9. Howard Miller 611319 Installation manual

Howard Miller 611319 Installation manual

1
FLOOR CLOCK SETUP
and OPERATING INSTRUCTIONS
CLOCK SETUP INSTRUCTIONS
1. Move the clock close to its nal location for assembly and setup. Make sure the clock is positioned rmly on the oor.
Levelers are provided on the bottom of the clock (Figure 1). Adjust levelers for maximum stability and proper alignment.
WARNING: ENSURE CLOCK IS POSITIONED SQUARE AND FIRM ON THE FLOOR SO THAT IT WILL NOT FALL OVER. KEEP
CHILDREN AWAY FROM THE CLOCK.
WARNING: KEEP PLASTIC BAGS AND SMALL PARTS AWAY FROM CHILDREN
Figure 1
Floor Leveler
Figure 2 Figure 3
2. Locate the Power Supply (Figure 2) and connect it to the Lamp Cord located at the back of the clock base (Figure 3).
3. Move the clock to the nal location and plug. See page 4 for Safety Strap installation instructions.
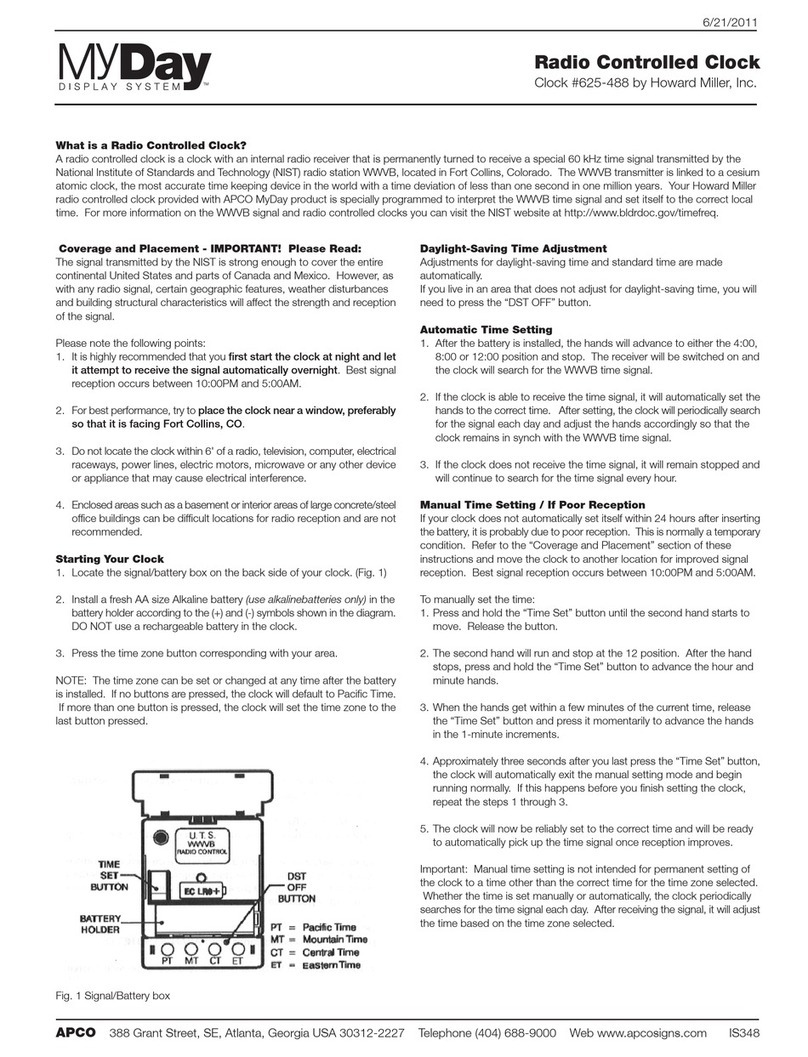
4. Plug the Power Supply into an electrical outlet. Turn the Lamp on by touching the Round Metal Touch Plate on the back of the clock base (gure 4).
There are four levels of lighting: low, medium, high, and off.
5. The direction of the light may be adjusted by pushing gently with your nger on the Lamp (gure 5).
Figure 4 Figure 5
Power
Supply
Lamp
Cord
Power
Supply
Cord
Round Metal
Touch Plate
Lamp
Appearance may vary.
2
Battery
Housing
Transport
Locking
Pin
Figure 8
Pendulum
Guide
10. Release the Pendulum Guide from the Transport-Locking Pin (Figure 8) by gently pushing it sideways, allowing the Pendulum Guide to hang freely.
11. Install two new “C” size alkaline batteries according to the +/- symbols in the Battery Housing. (Figure 8)
9. Locate the Pendulum Driver and Battery Housing inside the Head Assembly (Figure 7).
Figure 7
Head Assembly
Battery Housing
Pendulum Driver
6. Locate the clock’s quartz movement on the back of the dial.
7. Install one new “AA” size alkaline battery according to the +/- symbols in the battery holder (Figure 6).
8. Set the time by using the Time Setting Knob (Figure 6) to rotate the hands to the correct time.
Time Setting Knob
Figure 6
AA Alkaline Battery
3
12. Install the Head Assembly to the back of the dial by placing the at edge of the Head Assembly over the Metal Bracket and carefully pulling the Head
Assembly down until it rests completely level at the bottom of the Metal Bracket (Figures 9 & 10).
NOTE: Make sure the Head Assembly is secure before installing the Pendulum.
13. Hang the Pendulum by the Pendulum Hook on the Pendulum Guide. (Figure 11 & 12).
14. The Pendulum hook must t snug on the Pendulum Guide to prevent wobbling and erratic movement. If the Pendulum fails to continue swinging or
wobbles, the Pendulum Hook can be tightened to t snug to the Pendulum Guide by squeezing the Pendulum Hook with pliers as shown (Figure 12).
NOTE: Make sure the pendulum is secure before operating.
15. Start the Pendulum by moving it to the far left of center and release it to swing. The Pendulum should swing freely.
BATTERY REPLACEMENT
If the clock begins to lose time or the pendulum does not swing, this is a sign of weak or exhausted batteries. Replace with new alkaline batteries.
Head
Assembly
Metal
Bracket
Figure 9 Figure 10
Figure 12Figure 11
Pendulum Hook
Pendulum
Guide
Pendulum
4
SAFETY STRAP
A safety strap has been included with your clock. Due to the variety of oor coverings (i.e. plush carpets, linoleum, etc.), it is important that the clock be
positioned square and rm on the oor. Adjustable levelers have been assembled to the bottom of the clock for this purpose. To help ensure the clock
will not tip over, attach the wall Safety Strap.
MOUNTING OPTIONS:
The preferred option would be to secure the Safety Strap to a wall stud by using a #8 screw (not included). The length of the screw depends on the wall
thickness.
Second option would be to secure the Safety Strap to a wall anchor (not included) in the wall at the appropriate location. Follow the wall anchor’s
instructions for assembly.
MOUNTING INSTRUCTIONS:
A) Remove one Metal Cap with Threaded Stud from the upper back side of the clock. Keep the large white spacer in place.
B) Remove the Clear Rubber Washer from the Threaded Stud.
C) Place the Large Eyelet of the Safety Strap over the Metal Cap with Threaded Stud.
D) Install the Clear Rubber Washer onto the Metal Cap with Threaded Stud. Thread the Metal Cap back into the clock and nger tighten.
E) Determine the location for the mounting screw or wall anchor and complete installation.
F) Move the clock to its nal location and attach the Small Eyelet of the Safety Strap to the mounting screw or wall anchor.
Metal Cap with
Threaded Stud
Safety Strap
Small Eyelet
(attaches to wall)
Figure 13
Large Eyelet
Clear Rubber
Washer
497263
03/2021

This manual suits for next models

3

Other Howard Miller Clock manuals

Howard Miller 615010 User manual

Howard Miller

Howard Miller 615010 User manual

Howard Miller 615-069 User manual

Howard Miller

Howard Miller 615-069 User manual

Howard Miller 615114 Installation manual

Howard Miller

Howard Miller 615114 Installation manual

Howard Miller 615088 Installation manual

Howard Miller

Howard Miller 615088 Installation manual

Howard Miller 615096 Installation manual

Howard Miller

Howard Miller 615096 Installation manual

Howard Miller Seville User manual

Howard Miller

Howard Miller Seville User manual

Howard Miller WALL AND MANTEL CLOCK User manual

Howard Miller

Howard Miller WALL AND MANTEL CLOCK User manual

Howard Miller 61123 User manual

Howard Miller

Howard Miller 61123 User manual

Howard Miller 615100 Installation manual

Howard Miller

Howard Miller 615100 Installation manual

Howard Miller 615116 Installation manual

Howard Miller

Howard Miller 615116 Installation manual

Howard Miller MYDay 625-488 User manual

Howard Miller

Howard Miller MYDay 625-488 User manual

Howard Miller 615-052 User manual

Howard Miller

Howard Miller 615-052 User manual

Howard Miller 611274 Installation manual

Howard Miller

Howard Miller 611274 Installation manual

Howard Miller LEWISBURG User manual

Howard Miller

Howard Miller LEWISBURG User manual

Howard Miller BEDFORD PARK Installation manual

Howard Miller

Howard Miller BEDFORD PARK Installation manual

Popular Clock manuals by other brands

Ambient Weather RC-1400WB user manual

Ambient Weather

Ambient Weather RC-1400WB user manual

Velleman WC30D user manual

Velleman

Velleman WC30D user manual

Perel WC208 user manual

Perel

Perel WC208 user manual

vlahova SB3618 instruction manual

vlahova

vlahova SB3618 instruction manual

Amano PIX-15 Operation manual

Amano

Amano PIX-15 Operation manual

La Crosse Technology 83247-BHG quick start guide

La Crosse Technology

La Crosse Technology 83247-BHG quick start guide

Velleman WC50D user manual

Velleman

Velleman WC50D user manual

uPunch HN3000 product manual

uPunch

uPunch HN3000 product manual

Apogee BIG BEN user guide

Apogee

Apogee BIG BEN user guide

ST M41T00AUD manual

ST

ST M41T00AUD manual

American Time SQA461RSxE owner's manual

American Time

American Time SQA461RSxE owner's manual

Geemarc Viso 5 user manual

Geemarc

Geemarc Viso 5 user manual

Home & Comfort OP 011742 instruction manual

Home & Comfort

Home & Comfort OP 011742 instruction manual

Explore Scientific RDC8002 instruction manual

Explore Scientific

Explore Scientific RDC8002 instruction manual

Conrad Electronic 2521755 operating instructions

Conrad Electronic

Conrad Electronic 2521755 operating instructions

La Crosse Technology WS-8117U-AL instruction manual

La Crosse Technology

La Crosse Technology WS-8117U-AL instruction manual

ECG DH 010 instruction manual

ECG

ECG DH 010 instruction manual

RÖSLE ba19101 manual

RÖSLE

RÖSLE ba19101 manual

manuals.online logo
manuals.online logoBrands
  • About & Mission
  • Contact us
  • Privacy Policy
  • Terms and Conditions

Copyright 2025 Manuals.Online. All Rights Reserved.