HP M3815 User manual

990065 Users Guide - Hewlett Packard
7.0 Instruction Manual
Attached is a draft instruction manual for the device. Note the required FCC warning
information on the second to last page.

990065 Users Guide - Hewlett Packard
♥♥
USER
GUIDE
♥♥
HP© Home Blood Pressure Unit
Model M3815
Professional-quality instruments for home health care
♥NOTICE
The information contained in this document is subject to change without notice.
Hewlett-Packard makes no warranty of any kind with regard to this material, including,
but not limited to, the implied warranties of merchantability and fitness for a particular
purpose. Hewlett-Packard shall not be liable for errors contained herein or for incidental
or consequential damages in connection with the furnishing, performance, or use of this
material.
Hewlett-Packard assumes no responsibility for the use or reliability of its software on
equipment that is not furnished by Hewlett-Packard.
This document contains proprietary information that is protected by copyright. All rights
are reserved. No part of this document may be photocopied, reproduced, or translated
to another language without the prior written consent of Hewlett-Packard Company.
©1999 Hewlett-Packard Company. All rights reserved.

990065 Users Guide - Hewlett Packard
♥TABLE OF CONTENTS
INTRODUCTION iv
PRECAUTIONS v
BP UNIT COMPONENTS 1
BEFORE YOU START 2
WHAT DISPLAY SYMBOLS MEAN 8
HOW TO TAKE YOUR BLOOD PRESSURE 9
MAINTENANCE 17
TROUBLESHOOTING 18
SPECIFICATIONS 24
FCC REGULATIONS 25
CONCLUSION 26
WARNING!: Failure on the part of the responsible Health Care Provider
prescribing the use of this equipment to implement satisfactory training for
installation, use, and maintenance may cause undue equipment failure and
possible health hazards.

990065 Users Guide - Hewlett Packard
♥♥INTRODUCTION
Welcome to Hewlett-Packard’sline of professional-quality instruments for home health
care. HPand your Health Care Provider have joined together to provide medical
monitoring instruments that allow you to take your vital statistics from the convenience
and comfort of your own home.
In less than a minute, the HP Home Blood Pressure Unit measures and displays your
blood pressure and pulse rate. Then the BP Unit transmits the blood pressure (BP)
measurement to your Health Care Provider, who records and interprets your vital
statistics.
Your Health Care Provider will assist you in learning how to install, operate, and
maintain your BP Unit. Afterwards, please refer to this guide when using the BP Unit.
Take your blood pressure daily or as instructed by the Health Care Provider.

990065 Users Guide - Hewlett Packard
♥PRECAUTIONS
•Use this BP Unit only as directed by your Health Care Provider. Use of this medical
instrument is not a substitute for medical care. Only your Health Care Provider is qualified to
interpret the results.
•If you feel unwell, contact your Health Care Provider or call 911.
•Because this BP Unit is intended for your personal medical history, please do not allow
others to use this unit.
•Do not attempt to service or repair the BP Unit yourself. If a mechanical problem occurs,
contact your Health Care Provider and replace the BP unit, as required.
•Avoid exposing the BP unit to extremes in temperature, humidity, direct sunlight, shock, and
dust
•Clean the BP Unit with a dry, soft cloth or a cloth dampened with tap water and mild
detergent, if desired. Never use alcohol, benzene, thinner, or other harsh chemicals to
clean the BP Unit.
•Avoid storing the cuff or hose tightly folded or twisted.

990065 Users Guide - Hewlett Packard
♥BP UNIT COMPONENTS
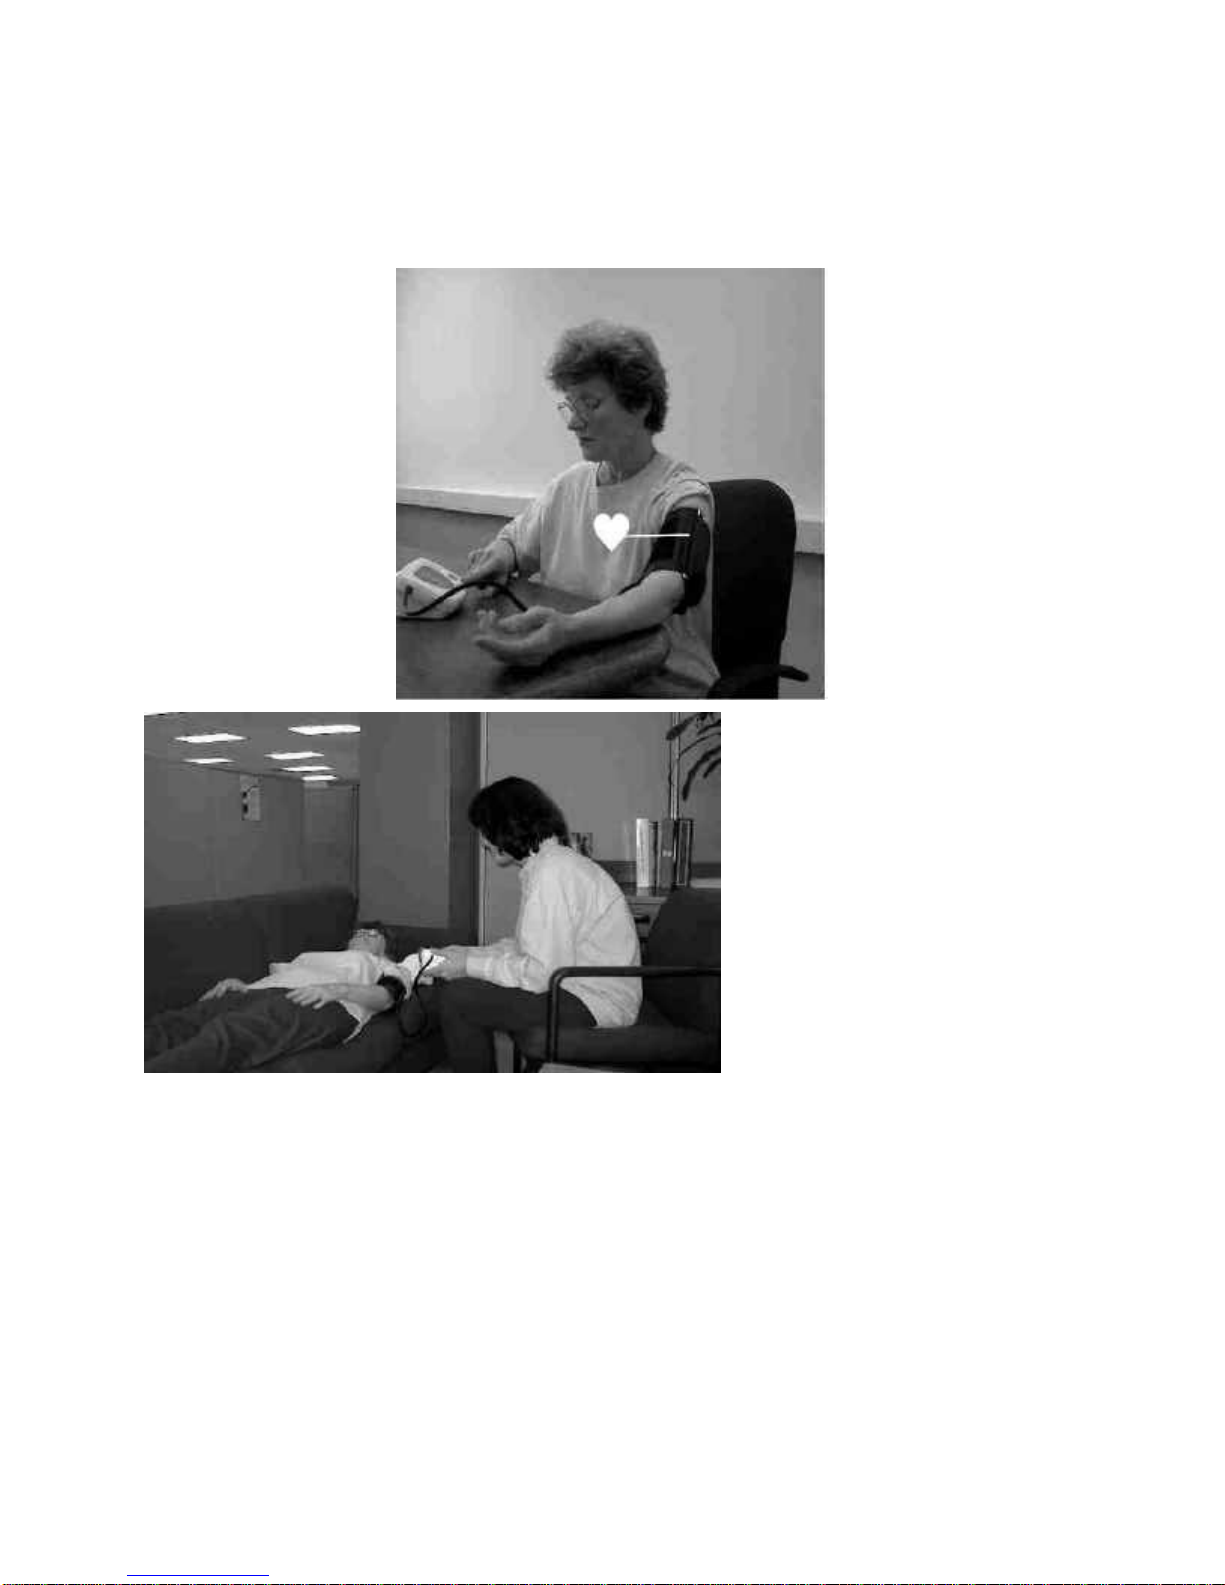
The BP Unit is made up of a monitor and a cuff assembly. The monitor face has a
START button, a display window, and a Radio Test button. The monitor back has a
battery compartment and an adjustment screw. An air socket is on one side of the
monitor. The cuff assembly has a cuff and an air hose with air connector.
♥BEFORE YOU START
The only setup required is to insert alkaline batteries, perform the Radio Test, and
prepare the cuff assembly. Upon each installation of batteries, you must perform the
Radio Test (as described on page 4).
Insert four type AA (1.5 volt) alkaline batteries
CAUTION: Use alkaline batteries only. Replace all four batteries at the same time. Do
not replace them individually. Always follow instructions on the battery package
when handling batteries.
1. Remove the battery compartment cover on the back of the monitor by gently pushing
down on the arrow symbol (∆) and popping the cover off.
2. Place the batteries in the compartment with the positive (+) and negative (-)
terminals matching those shown in the compartment. Be sure that the battery
terminals make contact with the compartment terminals.
3. Replace the cover by sliding it into the compartment and gently pressing it into
place.
Perform a Radio Test
Perform a Radio Test when you change batteries or change the testing location.

990065 Users Guide - Hewlett Packard
1. The Radio Test button appears as a shadowy dot to the left of the STANDSTILL and
STEP OFF lights on the front of the BP Unit’s monitor. Press and hold the Radio
Test button for at least two seconds until the Hub starts beeping (at a rate of one
beep per second). The display shows rF.
a. If the Hub does not beep, determine if there are any obstacles (such as large metal
objects) between the BP Unit and the Hub.
b. If no obstacles are present, move the BP Unit closer to the Hub.
c. Press the Radio Test button again. If the Hub beeps, the BP Unit is operating
properly. If the Hub does not beep, replace the BP Unit as instructed by your Health
Care Provider.
NOTE: If you accidentally press the Radio Test button, there are no negative
results.
Prepare the cuff assembly
1. Insert the air connector at the end of the cuff hose into the air socket on the side of
the monitor. Gently rotate the connector as you insert it into the socket; the
connector snaps into place.
2. If the cuff has not been threaded through the metal ring, thread the cuff end through
now. Then fold the cuff end back over the ring so that the end fastens to the
VELCRO® closures.

990065 Users Guide - Hewlett Packard
NOTE: If you require a Small or Large cuff, you must perform an adjustment to the
exhaust rate, as described on page 21 in TROUBLESHOOTING.
The Home Blood Pressure Unit is now ready for use!
♥WHAT DISPLAY SYMBOLS MEAN
While using the BP Unit, you will see symbols and numbers appear in the display window.
Display Symbol Explanation
Appears during the BP
measurement; blinks and beeps
with each detected pulse beat
Appears when the batteries need
to be replaced
NOTE: When an ERROR
message appears, check
your equipment and
retake your BP before
contacting your Health
Care Provider. You may

990065 Users Guide - Hewlett Packard
be able to troubleshoot
these ERROR messages
as described in
TROUBLESHOOTING.
♥HOW TO TAKE BLOOD PRESSURE
Before you take your BP measurement, do the following:
•Sit within 20 feet of the Hub.
•Relax for about 15 minutes.
•Remove restrictive clothing or roll up a loose garment sleeve.
•Use the left arm for the measurement unless instructed otherwise by your Health Care
Provider.
•Do not eat, drink, smoke, or talk during the measurement.
Take your blood pressure

990065 Users Guide - Hewlett Packard
1. Sit comfortably with your left forearm resting on a flat surface so that the center of your
upper arm is at about the same height as your heart. If desired, you may lie down while
someone else takes your BP measurement.
2. Loosen the cuff so that you can slide the cuff over your arm.

990065 Users Guide - Hewlett Packard
3. As you slide the cuff on, position the cuff so that it is on your upper arm and about one inch
above the elbow crease; make sure that the hose dangles on the inside of your arm.

990065 Users Guide - Hewlett Packard
4. Pull on the cuff end to tighten it, fold the cuff end back over the metal ring, and fasten the
cuff end to the Velcroclosure.

990065 Users Guide - Hewlett Packard
NOTE: The cuff does not have to be pulled very tight. For comfort, you can leave room for
two fingers to fit under the cuff.
5. Press the START button.

990065 Users Guide - Hewlett Packard
6. The monitor emits a long beep and displays the Measurement In Progress symbol, as well as
large ZERO numbers.
7. The monitor displays a blank ZERO and emits three short beeps. The cuff begins inflating.
The Measurement In Progress symbol disappears. The monitor displays diastolic numbers
that change and increase up to 150 mmHg.
NOTE: If you wish to stop inflation at any time, press the START button again.
(*I noticed that the measurement went over 150 – do we need to mention this number?)
8. The Measurement In Progress symbol appears in the display window, and the monitor beeps
at every detected pulse beat. As cuff pressure automatically decreases, the monitor displays
diastolic numbers that decline as your BP measurement is being taken.

990065 Users Guide - Hewlett Packard
9. As the cuff pressure automatically decreases, watch the display screen. Notice that the
diastolic numbers decline in increments of two to five mmHg. The increment is called the
exhaust rate. The monitor emits a series of beeps while the diastolic pressure decreases.
NOTE: You may need to use the exhaust rate to troubleshoot Error messages or when you
change cuff size.
10. A long beep signals the end of the BP measurement and the cuff deflates. The Measurement
In Progress symbol disappears. The display window shows your final BP measurement and
pulse rate.
NOTE: If you detected an ERROR message, stopped the BP measurement while in
progress, or feel that the reading might be in error, wait 15 minutes before taking
your blood pressure again.
HINT: After you take the first BP measurement, just slide the cuff off of your arm. Next
time, you will not need to adjust the cuff – just slide it back on your arm and begin
the BP measurement!
♥MAINTENANCE
Store the BP Unit so that the cuff assembly is not twisted or folded
tightly.
Replace the batteries when instructed by your Health Care Provider.
NOTE: It is important to take your blood pressure as instructed by your Health Care
Provider. Your Health Care Provider may contact you if they do not receive
measurements as scheduled.

990065 Users Guide - Hewlett Packard
TROUBLESHOOTING
You may be able to perform minor troubleshooting when ERROR
messages appear on the display. Here are some causes and
corrective actions:
Display Symbol Condition/Cause Corrective Action
Appears when the
systolic and
diastolic
measurements are
within 10 mmHg
of each other
Check for air
leakage; make sure
the cuff hose is
properly connected
to the monitor and
that the exhaust
rate is between two
and five mmHg.
WARNING!: If you check for air leakage and retake the
BP measurement, and the measurement is still so
low that it registers this ERROR 1 message – you
may have a medical emergency.
You may want to verify the reading with a conventional BP
monitor. Handle as instructed by your Health Care
Provider.
Appears if the
pressure value is
unstable due to
movement during
reading
Take your blood
pressure again and
remain very still.

990065 Users Guide - Hewlett Packard
Appears if the
pressure value did
not increase during
cuff inflation, the
cuff is not fastened,
incorrect air
connector is used,
or the air connector
is not inserted into
the correct ends of
the hose and
monitor
Make sure the cuff
hose is properly
connected to the
monitor, the cuff is
securely fastened,
and the exhaust
rate is between two
and five mmHg.
Check for the
correct air
connector. Make
sure that the air
connector is
inserted into the
hose and monitor.
Appears when the
battery voltage is
too low for the
monitor to work
properly
Normally, your
Health Care
Provider notifies
you that batteries
need to be
replaced. However,
if you see a Low
Battery symbol,
replace batteries
immediately and
perform a Radio
Test.

990065 Users Guide - Hewlett Packard
If you are unable to troubleshoot the ERROR messages by following these corrective actions,
replace the BP Unit as instructed by your Health Care Provider.
NOTE: If you do not take a daily BP measurement, your Health Care Provider may
contact you to determine why.
Replace Cuff and Adjust Cuff Velocity
If you replace a standard cuff with a Small or Large cuff, you must check and adjust the cuff
velocity.
Replace the cuff and adjust the cuff velocity as follows:
1. Install the new cuff and take a blood pressure reading. If the exhaust rate is not between two
and five mmHg, turn off the BP unit and continue with the following steps. If the exhaust
rate is within the range, do nothing.
NOTE: Refer to step 9 of How To Take Blood Pressure for information on the exhaust
rate.
2. Locate the adjustment screw cover on the back, upper right-hand corner of the monitor. Use
the end of a large, straightened paperclip to pry off the black-circle cover of the adjustment
screw.
NOTE: This cover is very thin. Do not push the paperclip end in very far. Push the end in
just enough to pry off the cover.
3. With a small Flathead screwdriver, rotate the adjustment screw about 1/8 turn clockwise to
raise the exhaust rate; or turn the screw counterclockwise to lower the rate.

990065 Users Guide - Hewlett Packard
4. Take another BP measurement, and continue adjusting the screw until the exhaust rate is
between two and five mmHg.
5. Replace the adjustment screw cover.
Further adjustments are not required unless you change the cuff again.
♥SPECIFICATIONS
Model M3815A
Type Oscillometric
Display Digital, 16 mm character
height
Pressure/pulse displayed
simultaneously
Measurement range Pressure: 10 to 280 mmHg
Pulse: 40 to 200 pulses per
minute
Accuracy Pressure : ±±3 mmHg or 2%,
whichever is greater
Pulse: ±5%
Pressurization Automatic, using micropump
Depressurization Constant-air release-valve
system
Deflation Automatic exhaust
Power source Four type AA (1.5 volt) alkaline
batteries (not included)
Battery life Approximately 4 months with
only 1 daily measurement
Operating environment 50°° to 104°°F (-10°° to 60°°C)
Less than 85% relative
humidity
Storage environment 14°° to 140°° F (-10º to 60ºC)
Less than 95% relative
humidity
Dimension (approx.) Length: 6.5” (163.7 mm)
Width: 4.4” (111 mm)
Height: 2.7” (66.7 mm)
Weight (approx.) 15.65 oz. (<500 g) without
batteries

990065 Users Guide - Hewlett Packard
FCC REGULATIONS
This equipment has been tested and found to comply with the limits for a Class B digital device,
pursuant to Part 15 of the FCC rules. These limits are designed to provide reasonable protection
against harmful interference in a residential installation. This equipment generates, uses, and can
radiate radio frequency energy. If it is not installed and used in accordance with the instructions,
it might cause harmful interference to radio communications. However, there is no guarantee that
interference will not occur in a particular installation. If this equipment does cause harmful
interference to radio or television reception, which can be determined by turning the equipment
off and on, the user is encouraged to try to correct the interference by one or more of the
following measures:
•Reorient or relocate the receiving antenna.
•Increase separation between equipment and receiver.
•Connect equipment to an outlet on a circuit different from that to which the receiver is
located.
•Consult your reseller or an experienced radio/TV technician.
NOTE: Any changes or modifications to the equipment that are not expressly approved by
HP could void the user’s authority to operate this equipment.
♥CONCLUSION
HP and your Health Care Provider appreciate your efforts to participate in your home health care
plan. By learning about and using the HP Home Blood Pressure Unit as directed, you actively
participate in your Health Care Provider’s plan to monitor your vital statistics.
If you have any problems or questions, please contact your Health Care Provider.
Place Health Care Provider label here
Table of contents