Step 3—Configuring the cabling
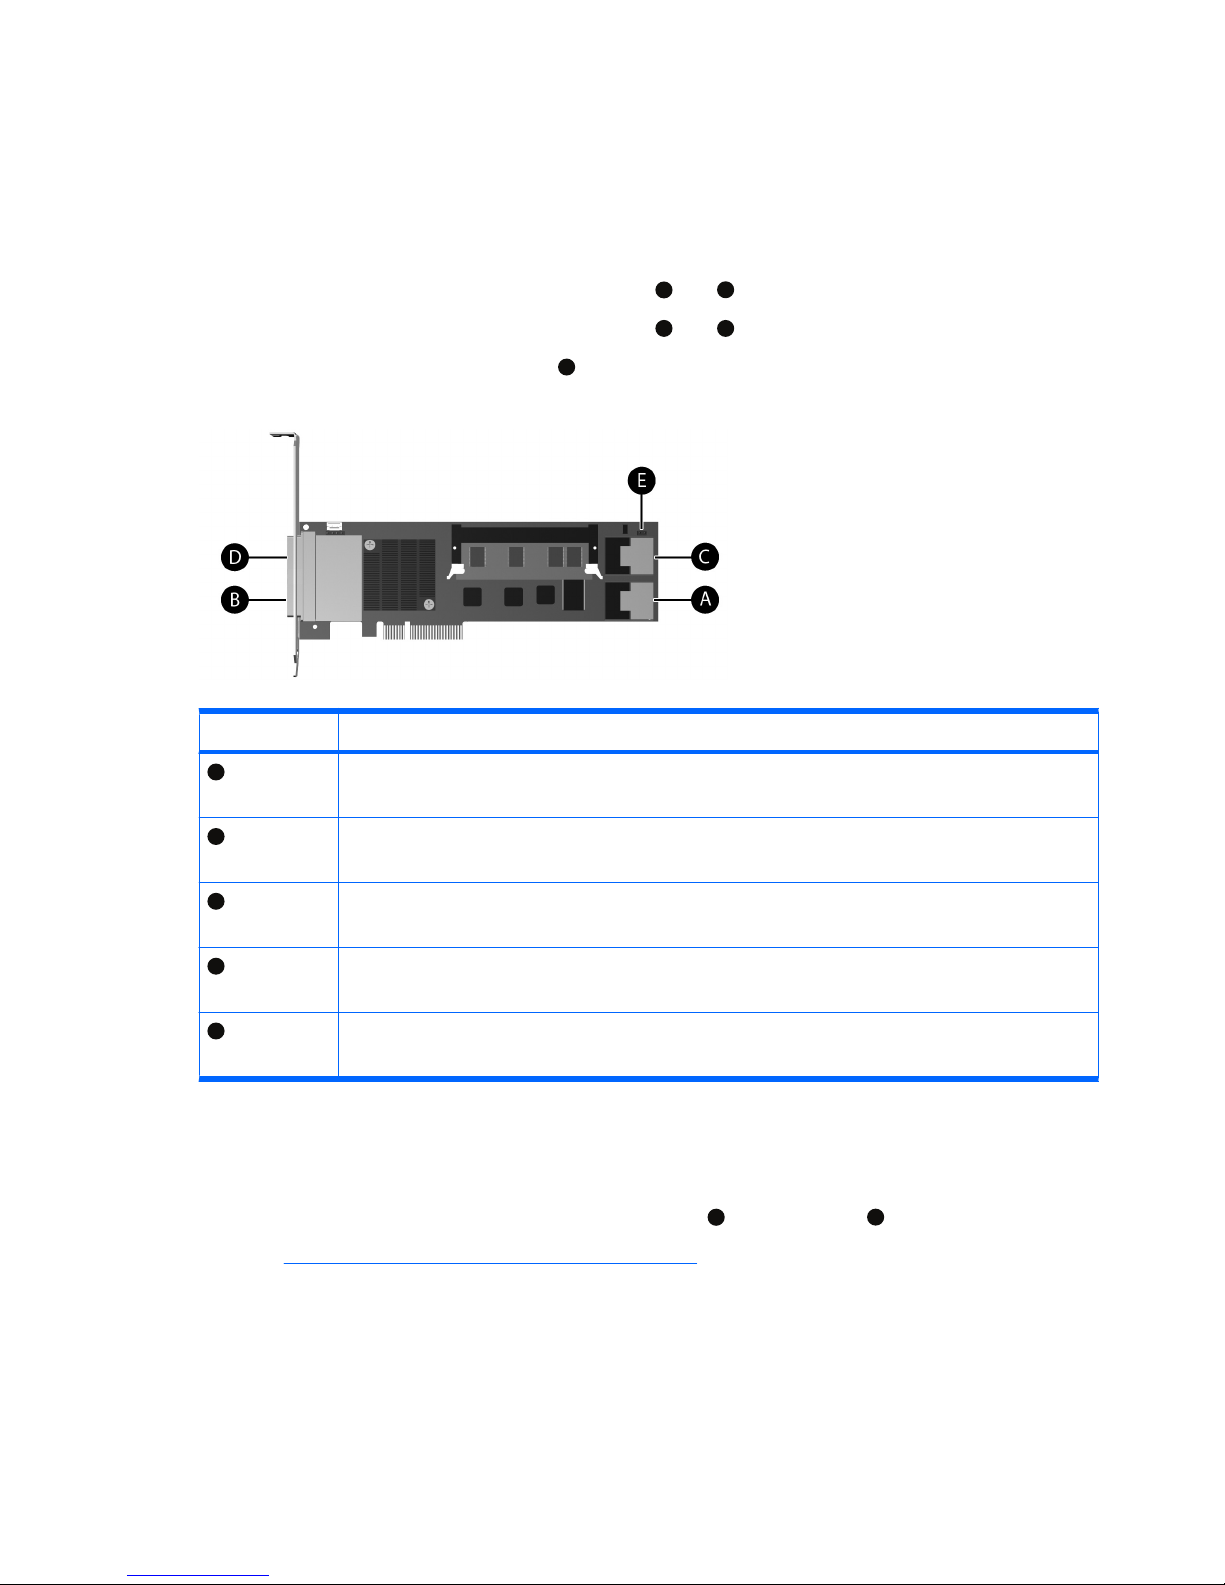
The RAID controller card can be used to control SAS hard drives located in the internal hard drive bays,
SAS hard drives located in the optical bays, and SAS hard drives external to the workstation.
The data cable connections for RAID differ between workstation models. To determine the correct
connection for your hard drives, identify the applicable HP workstation model and the location of the
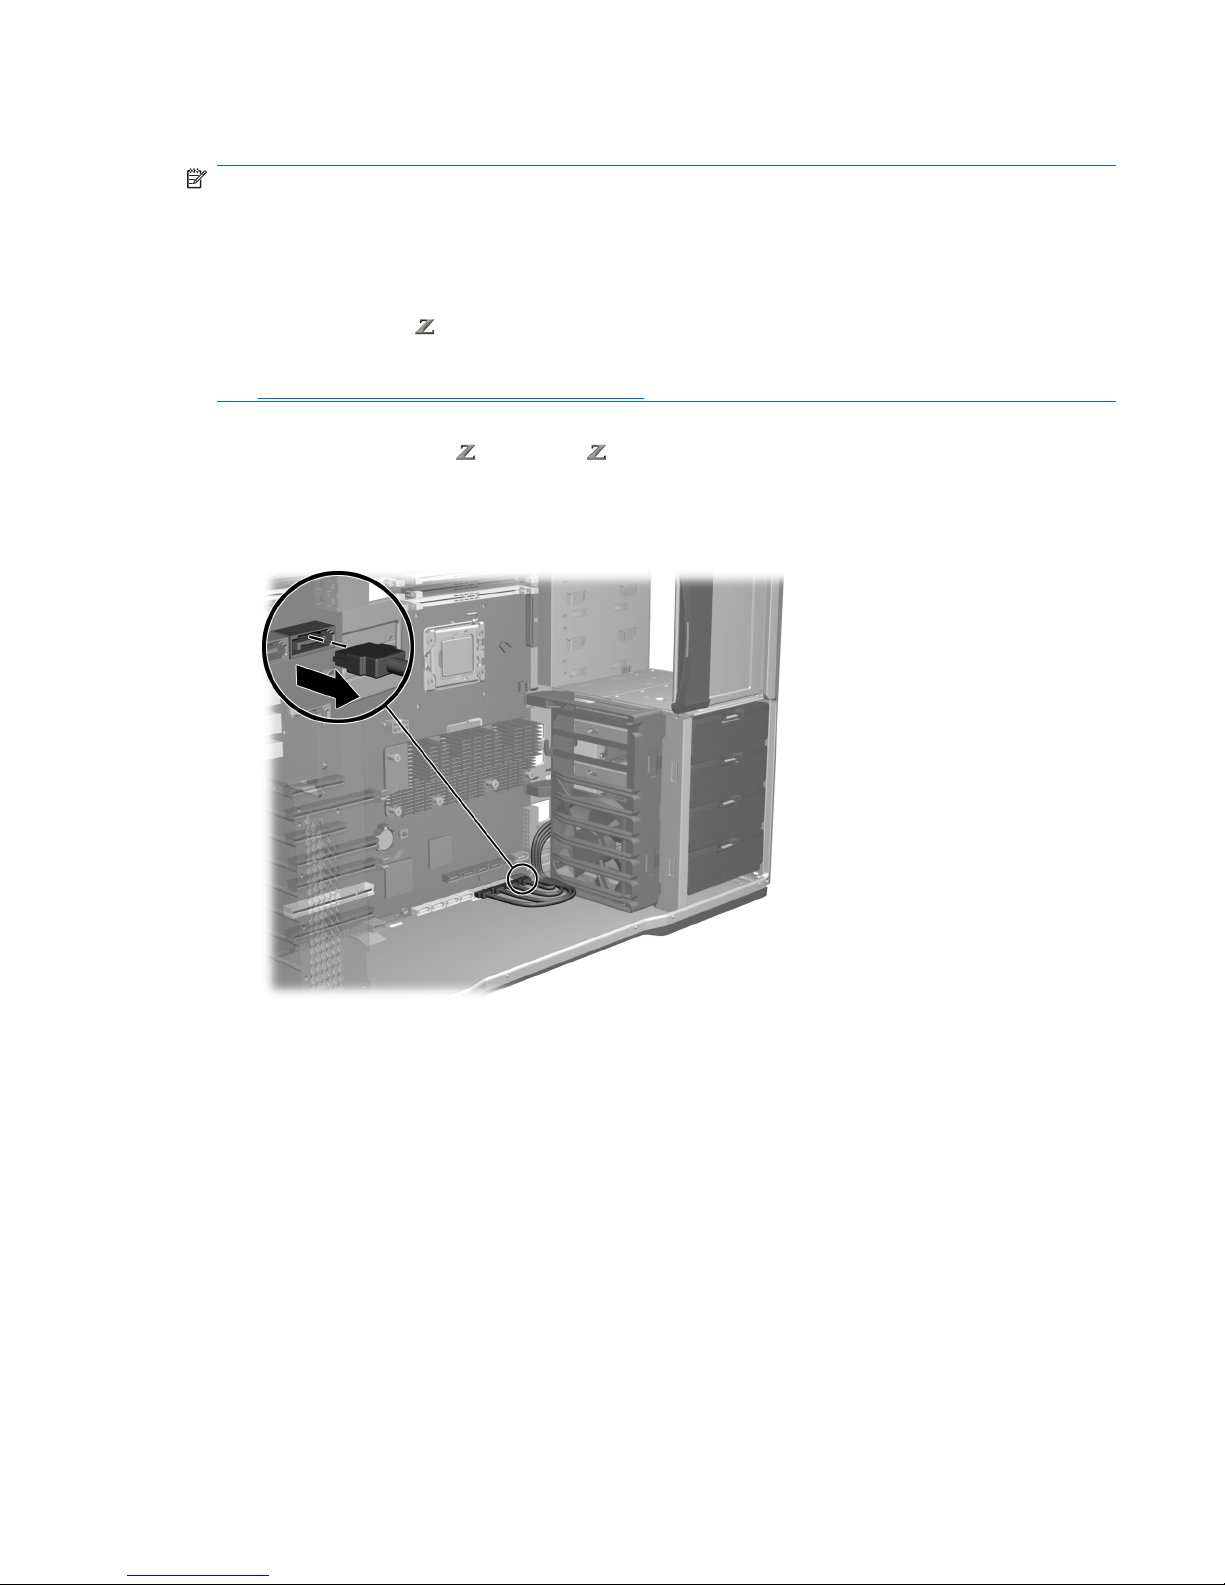
hard drive being connected in the following table. To connect existing hard drives, disconnect the existing
single data cables from the system board, and then choose the correct connection type.
The LED cable connection is similar for all HP Workstation models.
Table 1 Data cable configuration guide
HP workstation model Location of hard drive Connection type Description
HP xw Workstations
HP 400 Workstations
Internal hard drive bay Standard data cable
connections on page 9
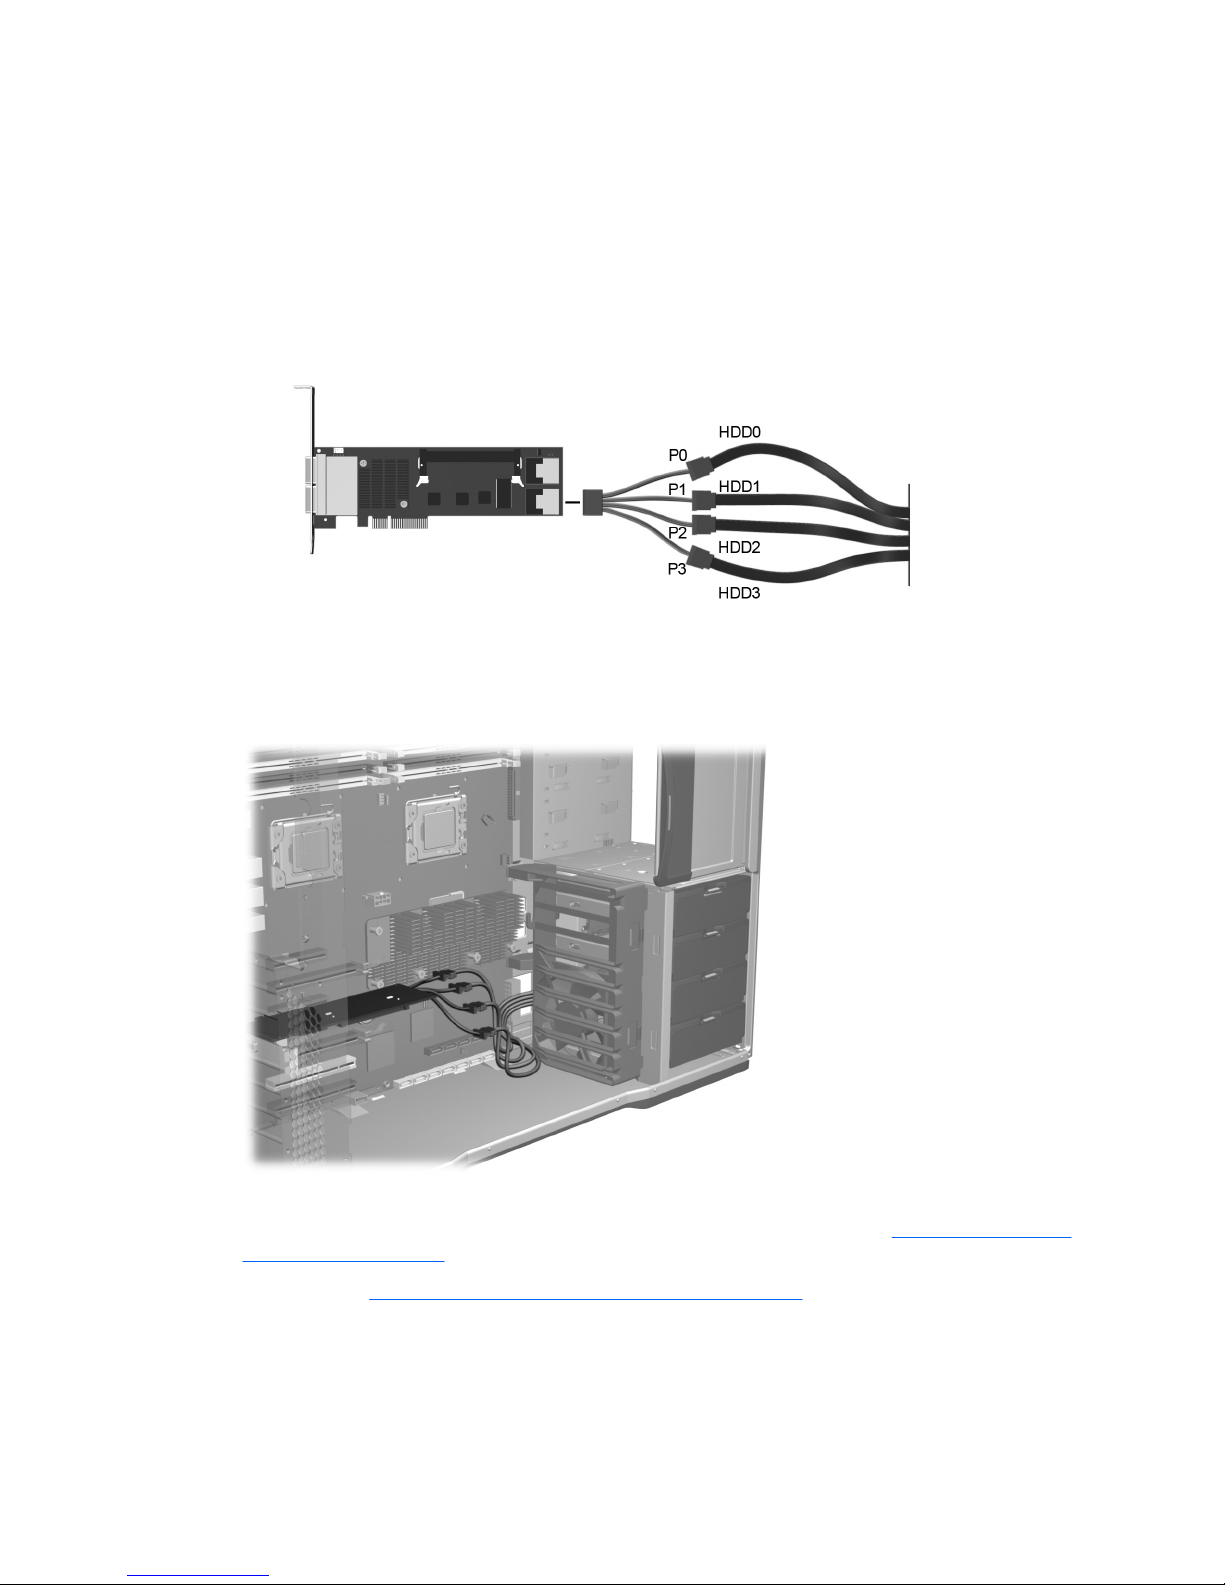
Use the long 4-port data cable
with 90-degree connectors
provided in this kit to connect the
hard drives to the RAID controller
card.
HP xw Workstations
HP 400 Workstations
Optical bay Standard data cable
connections on page 9
Use the long 4-port data cable
with straight connectors provided
in this kit to connect the hard drives
to the RAID controller card.
HP 600 Workstations
HP 800 Workstations
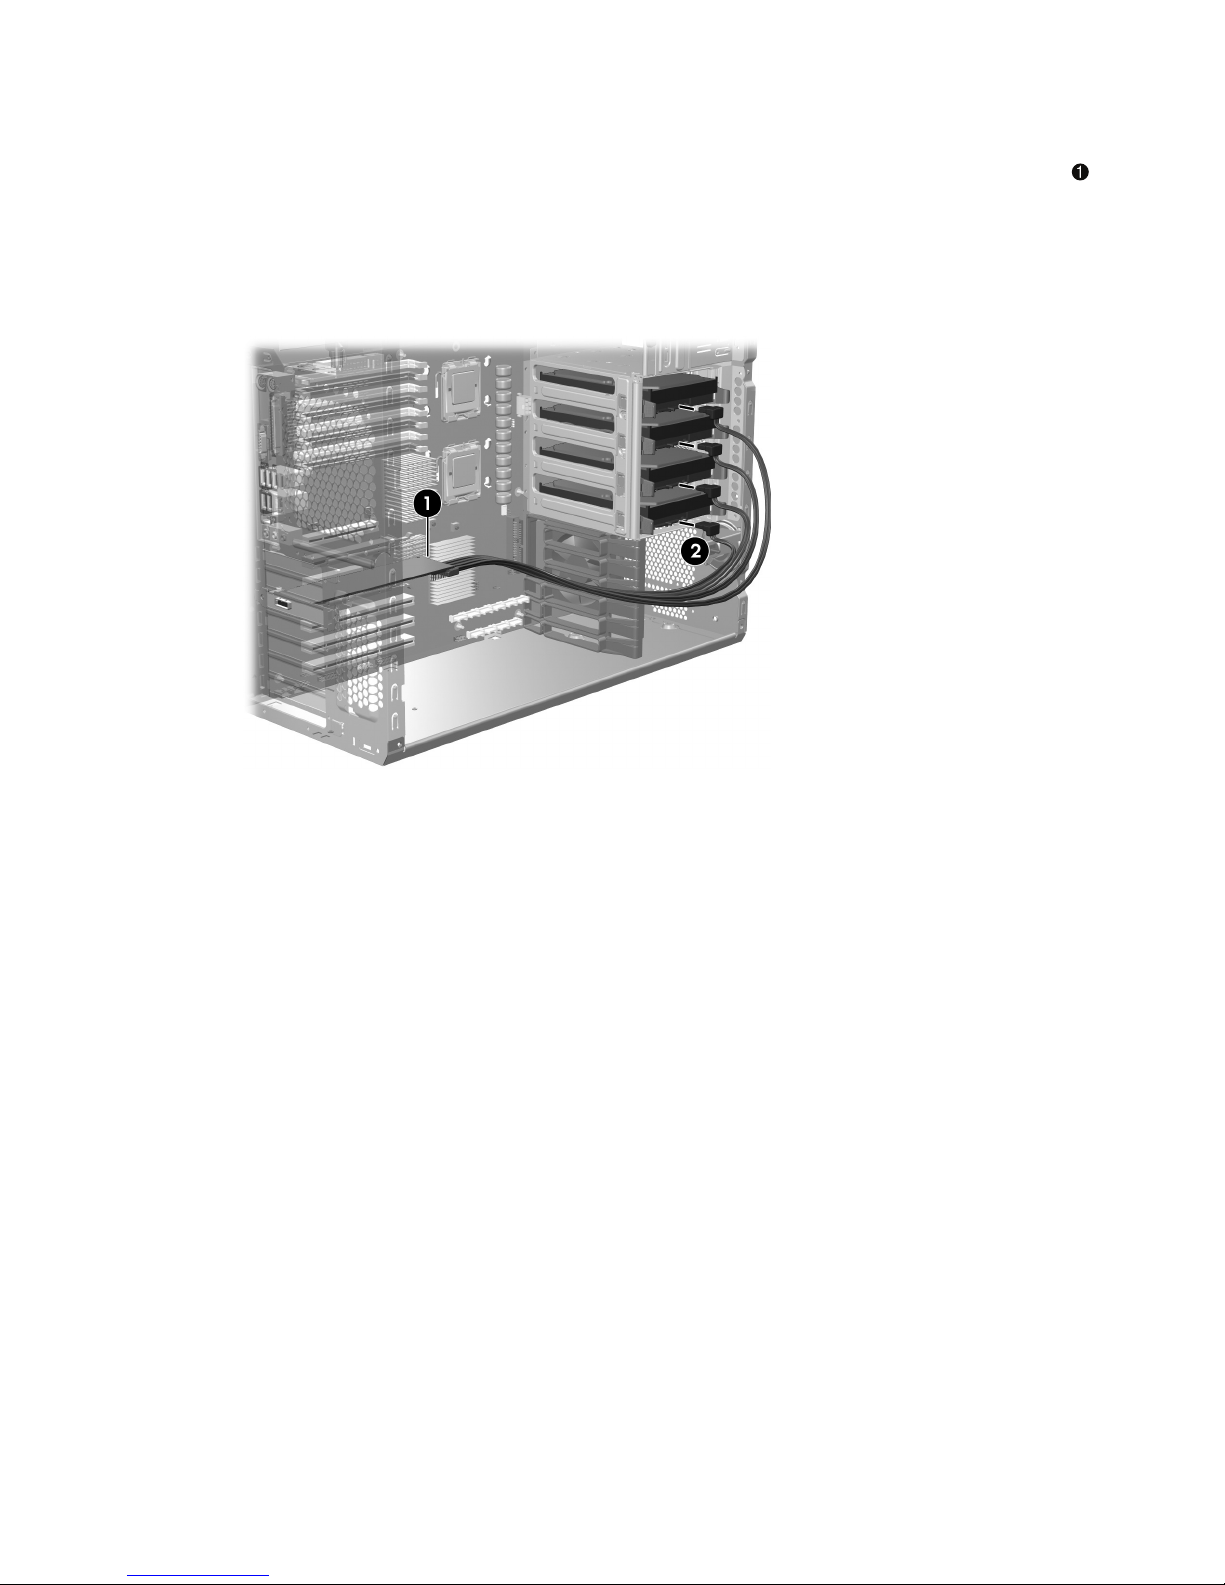
Internal hard drive bay Blind-mate data cable
connections on page 7
The blind-mate data cable from the
applicable internal hard drive is
disconnected from the system
board and connected to the
appropriate port connector on the
short MiniSAS adapter cable. The
MiniSAS adapter is then connected
to the RAID controller card.
HP 600 Workstations
HP 800 Workstations
Optical bay Standard data cable
connections on page 9
Use the long 4-port data cable
with straight connectors provided
in this kit to connect the hard drives
to the RAID controller card.
HP xw Workstations
HP Workstations
External External Connections
on page 11
To connect external hard drives to
the RAID controller card, see the
user documentation for your
preferred device.
ENWW Step 3—Configuring the cabling 5