Warnings and cautions
WARNING! Any surface or area of the equipment marked with this symbol indicates the presence
of an electrical shock hazard. To reduce the risk of injury from electrical shock, do not open any enclosed
area marked with this symbol.
WARNING! To reduce the risk of electric shock or damage to your equipment:
— Do not disable the power cord grounding plug. The grounding plug is an important safety feature.
— Plug the power cord in a grounded (earthed) outlet that is easily accessible at all times.
— Disconnect power from the equipment by unplugging the power cord from the electrical outlet.
WARNING! Any surface or area of the equipment marked with this symbol indicates the presence
of a hot surface or hot component. If this surface is contacted, the potential for injury exists. To reduce
the risk of injury from a hot component, enable the surface to cool before touching.
WARNING! If a product is shipped in packaging marked with this symbol, , the product must always
be lifted by two persons to avoid personal injury due to product weight.
WARNING! To reduce the risk of serious injury, read the Safety & Comfort Guide. It describes proper
workstation setup, posture, health, and work habits for computer users, and provides important electrical
and mechanical safety information. This guide is located at http://www.hp.com/ergo and on the
documentation CD (if one is included with the product).
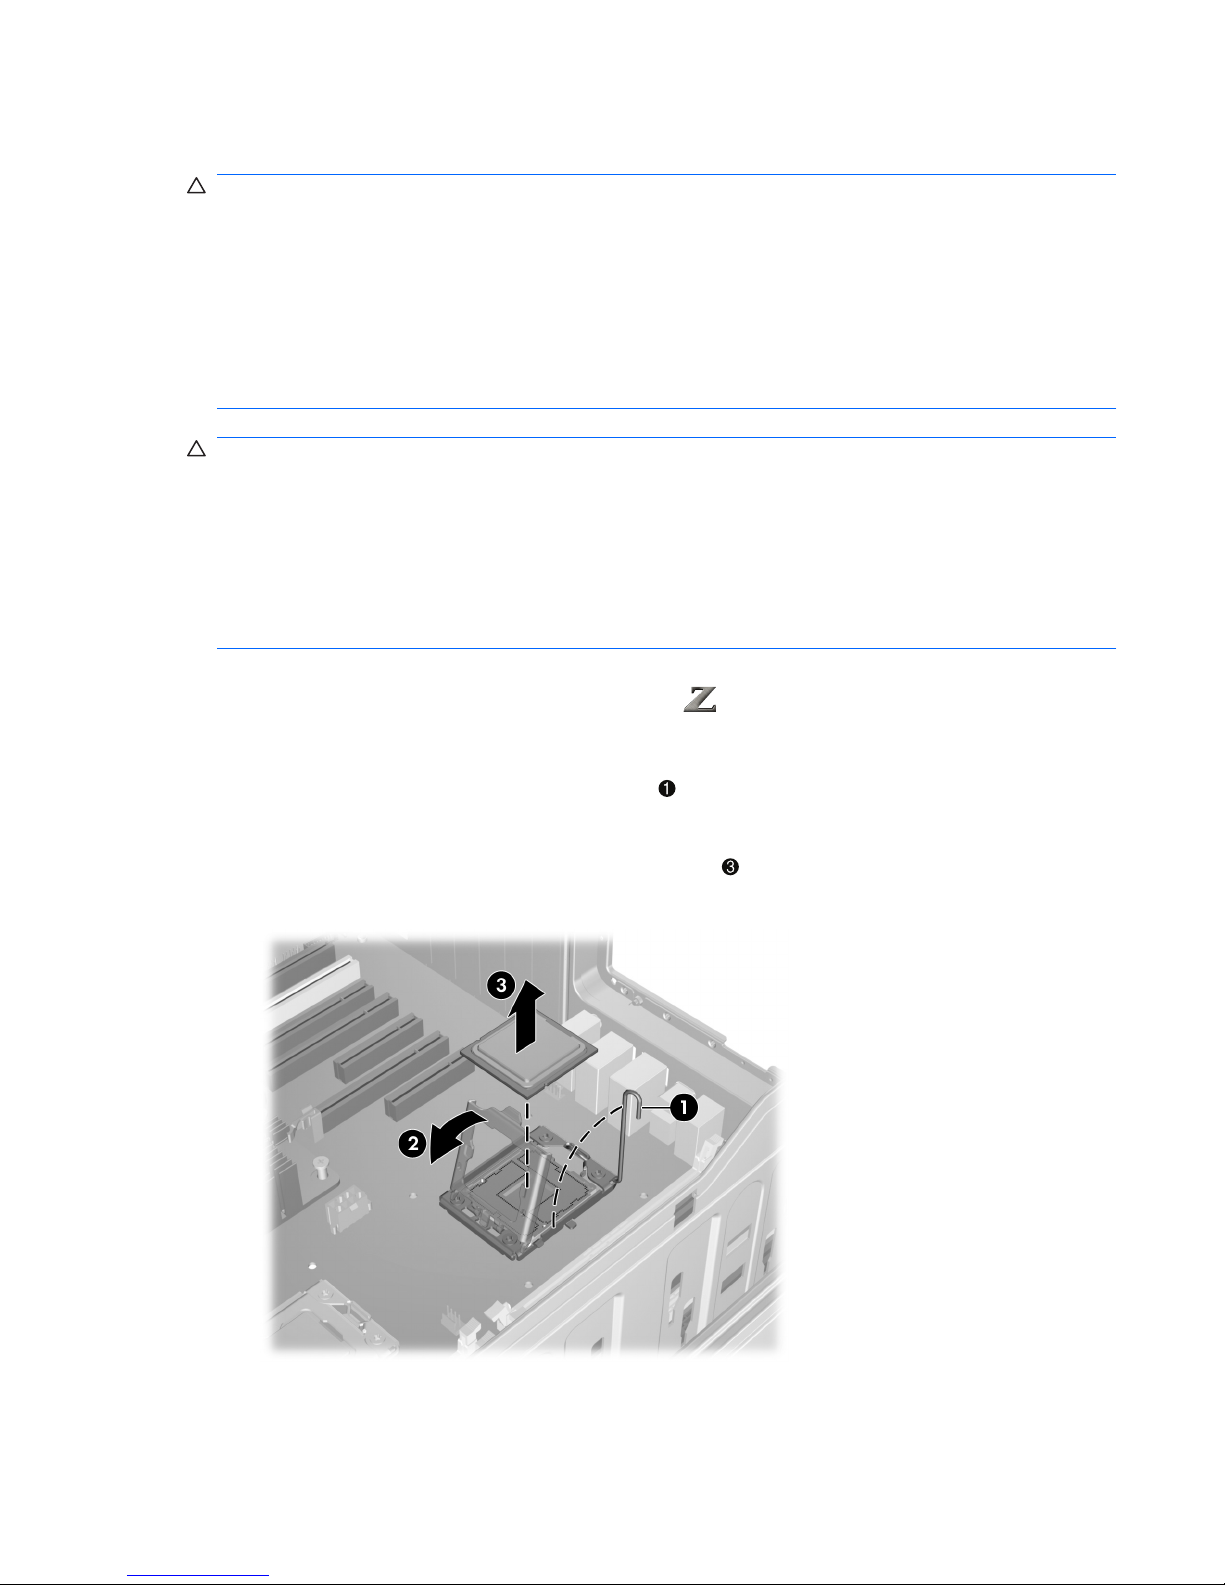
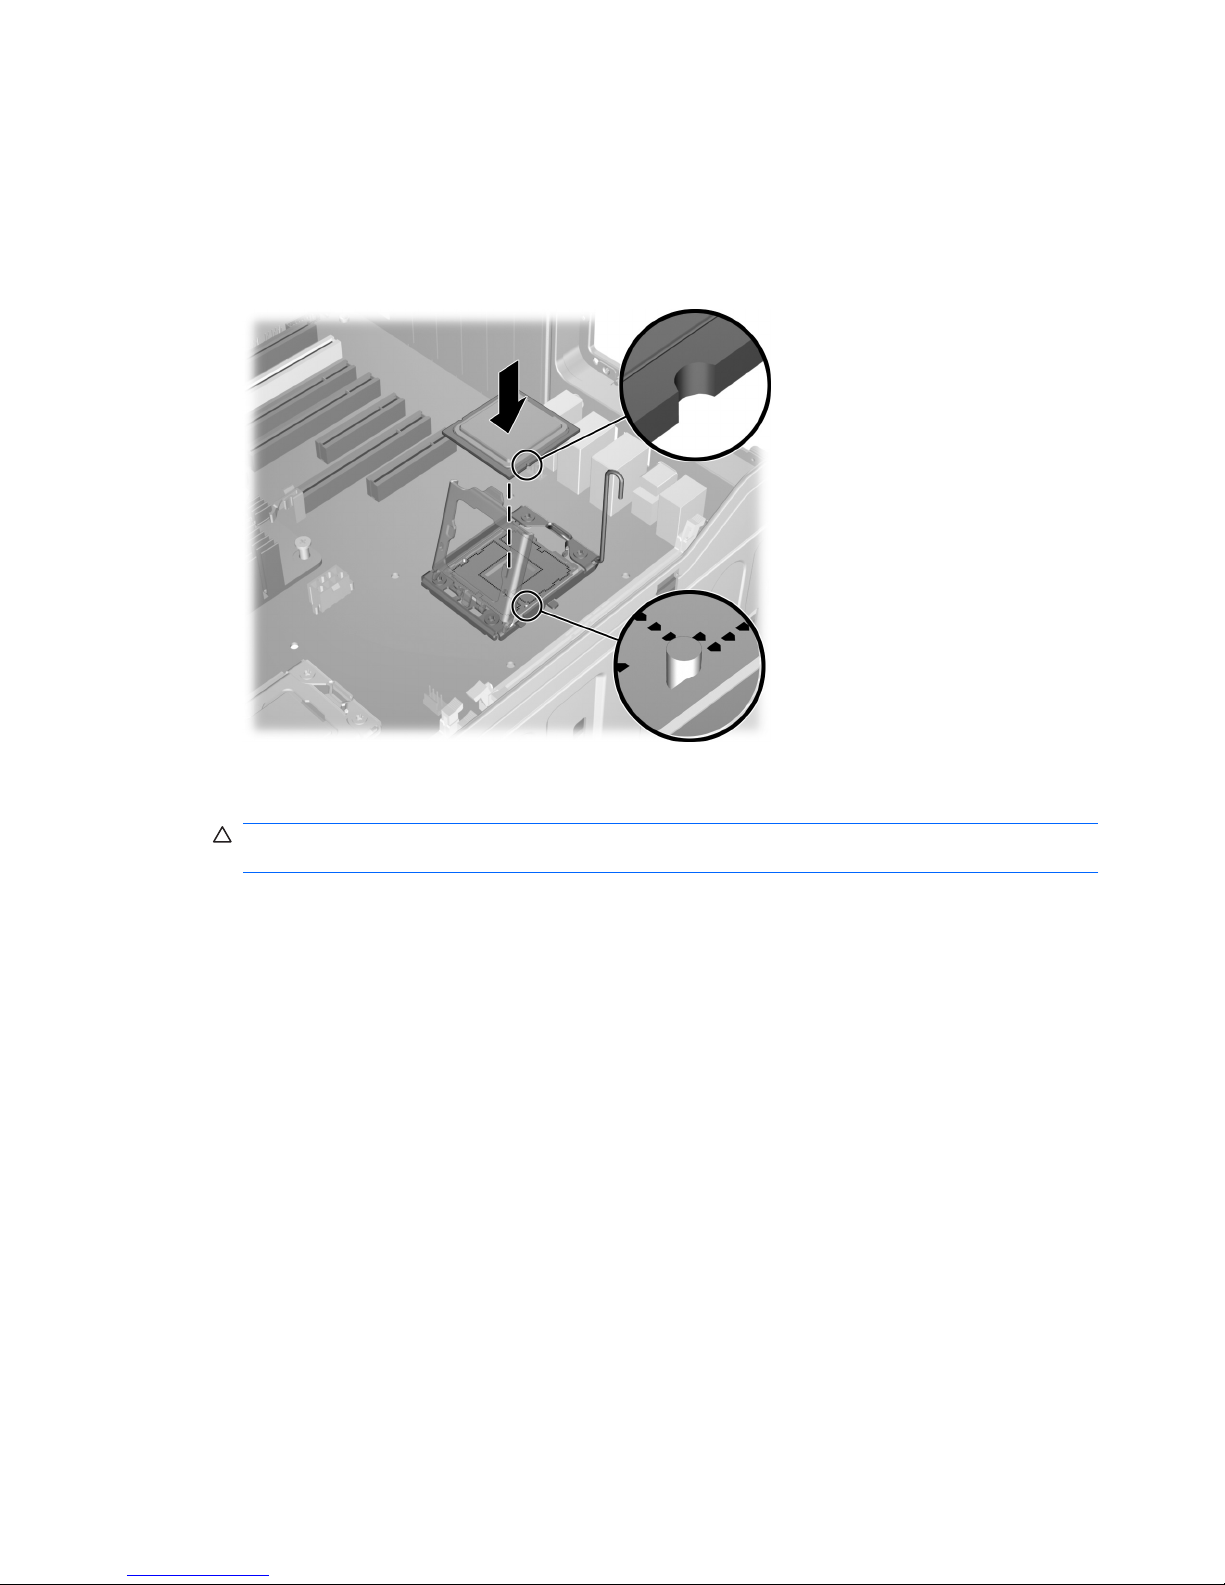
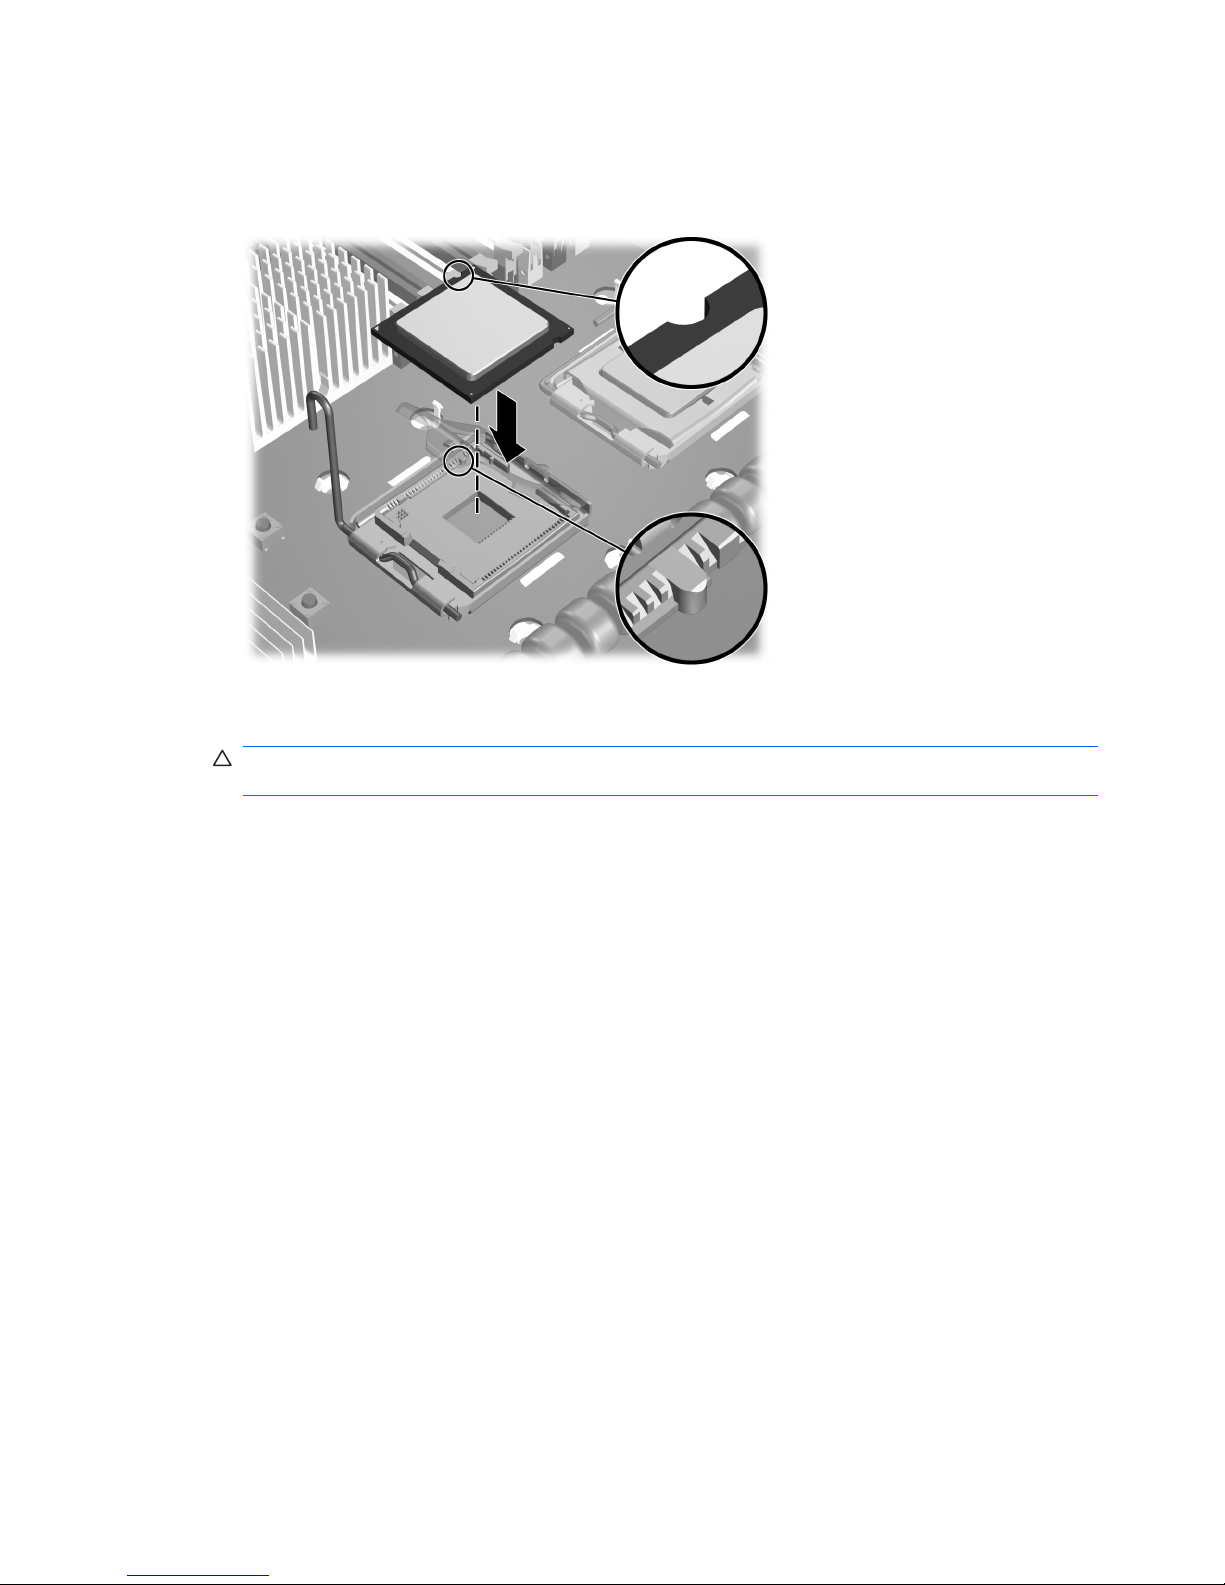
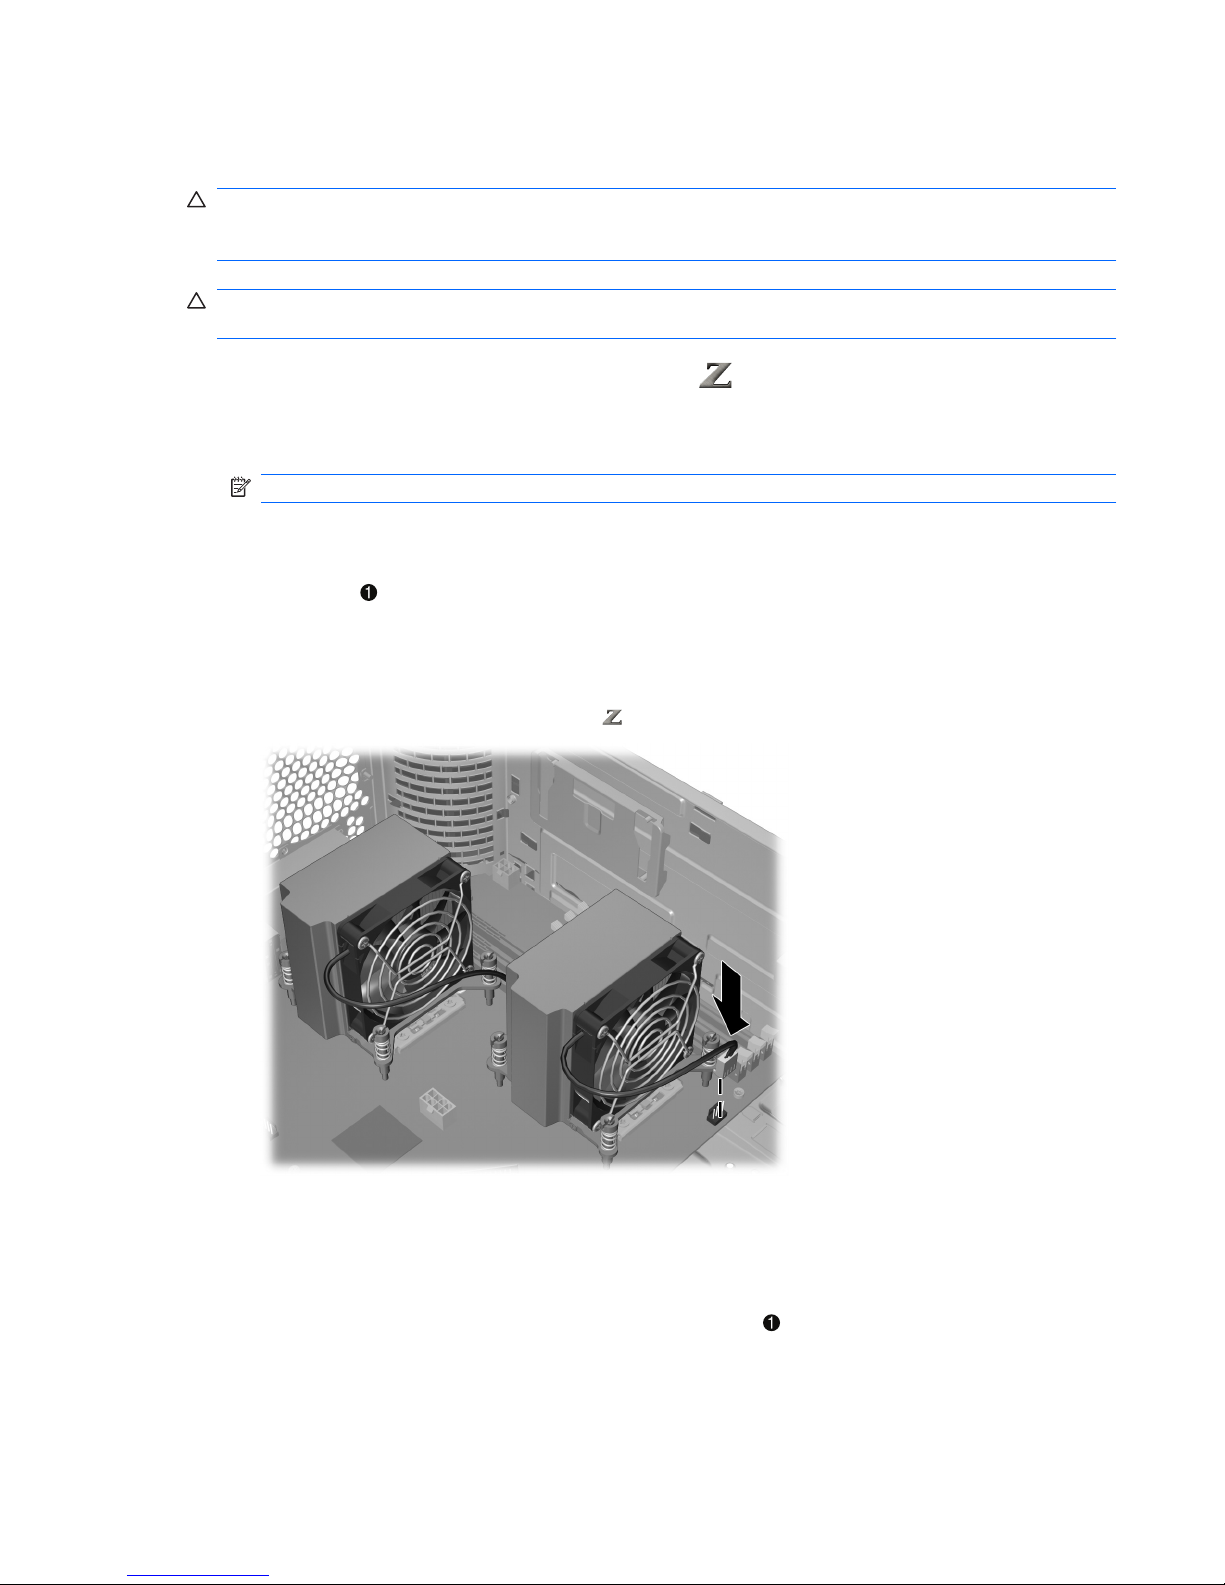
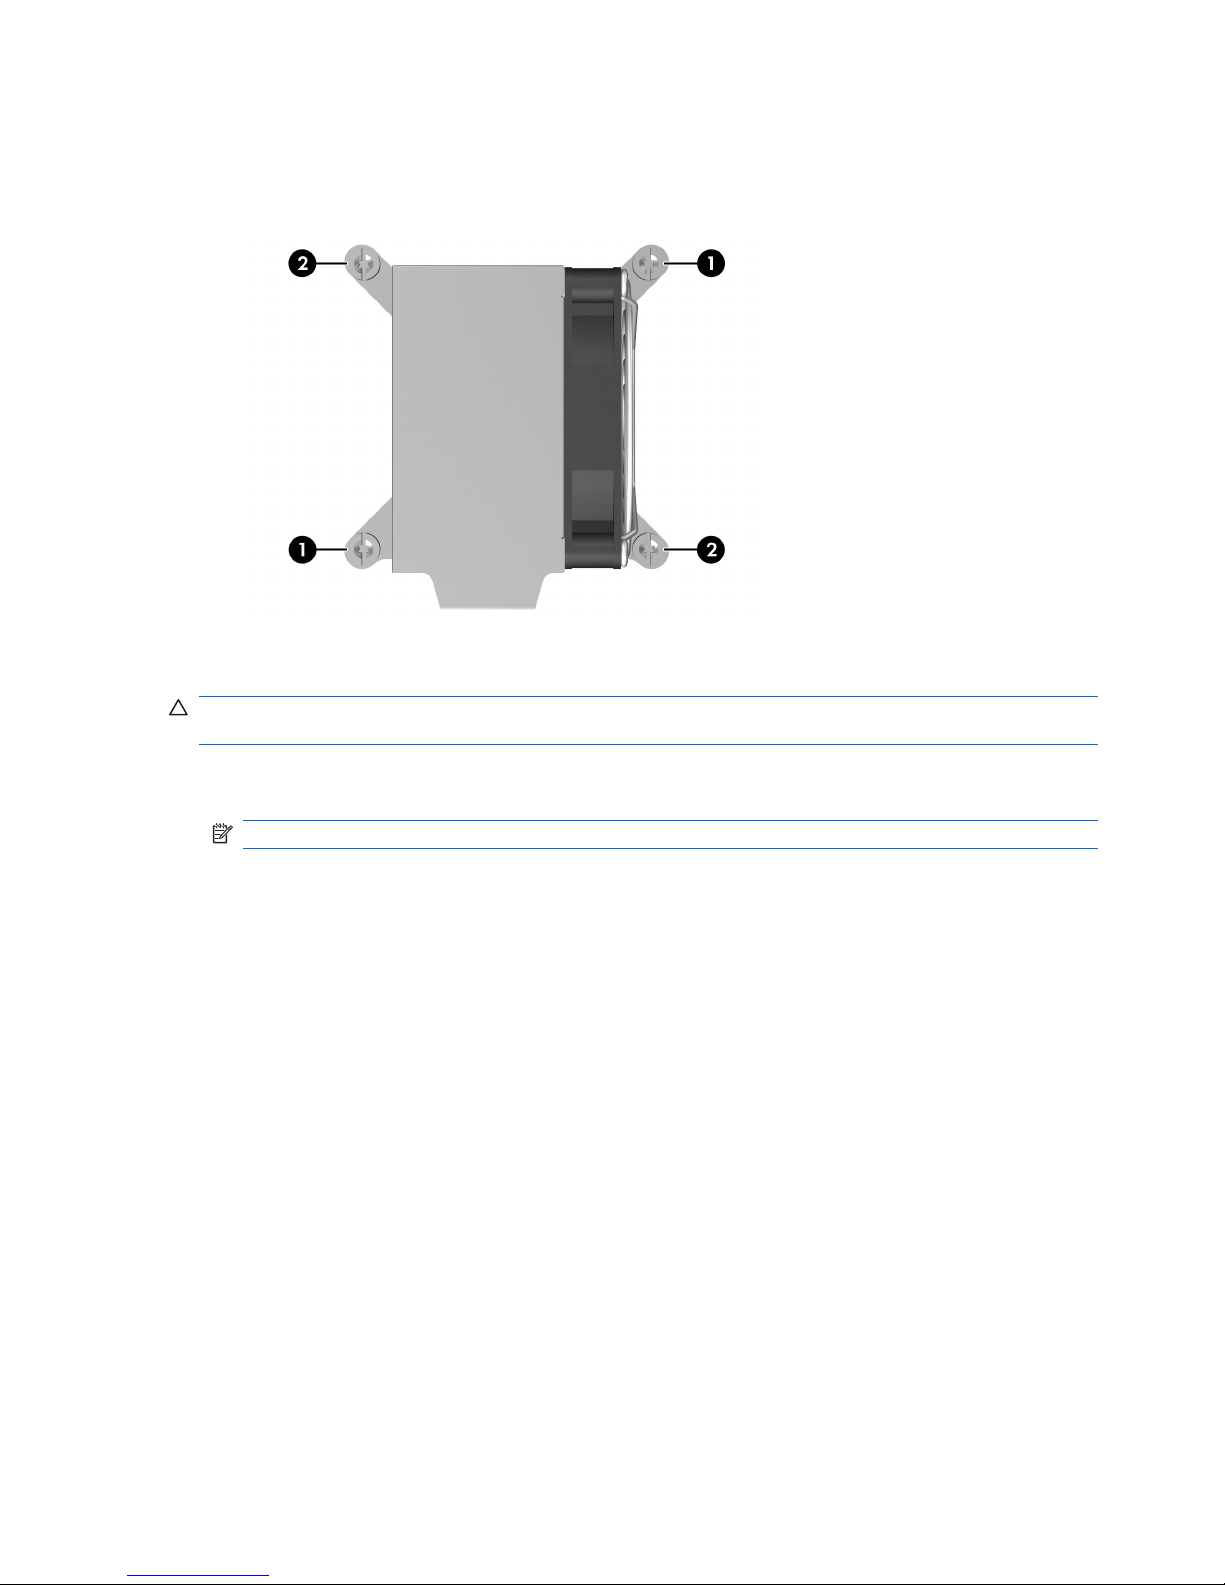
CAUTION: Observe the following cautions when removing or replacing a processor:
— Installing a processor incorrectly can damage the system board. Contact an HP authorized reseller
or service provider to install the processor. If you plan to install the processor yourself, read all of the
instructions carefully before you begin.
— Failure to follow the workstation preparation instructions can result in an improperly installed
processor, causing extensive workstation damage.
— Processor socket pins are delicate and bend easily. Use extreme care when placing the processor
in the socket.
CAUTION: Static electricity can damage the electronic components of the workstation. Before
beginning these procedures, be sure you discharge static electricity by briefly touching a grounded metal
object.
CAUTION: To prevent damage to the workstation, observe the following Electrostatic Discharge
(ESD) precautions while performing the system parts removal and replacement procedures:
— Work on a static-free mat.
— Wear a static strap to ensure that any accumulated electrostatic charge is discharged from your body
to the ground.
— Create a common ground for the equipment you are working on by connecting the static-free mat,
static strap, and peripheral units to that piece of equipment.
NOTE: HP accessories are for use in HP Workstation products. They have been extensively tested
for reliability and are manufactured to high quality standards.
2 Second Intel® Xeon® processor installation ENWW