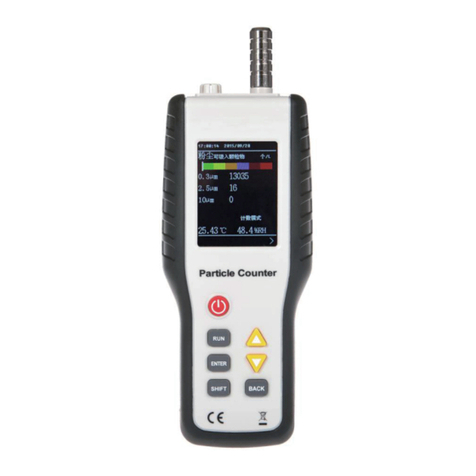
HTI HT-501 User manual

www.hytechcn.com.cn
Carbon dioxide detector
Instruction Manual
HT-501

1
www.hytechcn.com.cn
------------------------------1
-------------------------------------1
----------------------------------------2
--------------------------------3
--------------------------------5
-------------7
-------------------------------8
-----------------------------9
able of content
Product introduction-
Considerations
Key function
Display description
Use of the product
Carbon dioxide grading guidance
Product parameters
Software installation
Software application-
-----------------------------12

Product introduction
11 www.xintest.com.cn www.hytechcn.com.cn 2
Considerations
This product is a type of multiple-function tester for testing
carbon dioxide concentration, temperature and humidity and
is widely used for environmental quality detection in industrial
production, hotels and department stores, offices and meeting
rooms, libraries, warehouses, hospitals and other sites.
1.
The product adopts imported electronic sensors and micro
processors that belong to precision electronic elements.
The product should be kept away from places with water,
fire, and combustible gasoline and strong electromagnetic
interference, etc to prevent the device from influence on or
damage.
2.
Don’t block. Avoid strong wind and hot wind blowing towards
the air sampling inlet of the device at the same time.
3.
Wet cotton cloth or 95% alcohol should be used to wipe or
clean the instrument at the time of cleaning. Don’t use
abrasive agents or corrosive liquid for cleaning to avoid
damage to the instrument.
4.
Don’t dismantle or remodel the product without permission.
Key function
°C/°F
Key: press to power on/off the device
Key: 1. when change is made to setting of the product,
used as “+1” function to increase the value. 2. Unit
switching between Fahrenheit degree and degree
centigrade.

Display description
CO22
PPM
℃ ℉ %RH
YEAR
HOUR
MON-DAY
MIN-SEC
REC
1
23
13 www.xintest.com.cn www.hytechcn.com.cn 4
REC
MODE
ALM Key: 1. At the display state of main interface, open
or close CO2 concentration alarm; 2. when setting
the function, move leftwards to change the item.
Key: when setting is made for the product, move
rightwards to change the item.
Key: 1. when change is made for setting of the
product, used as “-1” function to decrease the
value. 2. At the manual mode, the button to start
record.
Key: Hold down to enter setting function interface.
1. Carbon dioxide display area
℃/℉ : degree centigrade,Fahrenheit degree
YEAR : year
HOUR: hour
:Sound alarm enabled
2. Temperature display area
3. Humidity display area
%RH: humidity unit
: Battery level indicator
PPM: Carbon dioxide concentration unit
CO2: Chemical formula of CO2
MON: month
DAY: day
MIN: minute
SEC: seconds
REC: record starts

15 www.xintest.com.cn www.hytechcn.com.cn 6
Use of the product
1. Power on
Press the power key to power on. The instrument begins
preheating. LCD displays the count down of 30 seconds (at
the moment, operation of any key is invalid). After end of count
down, the instrument enters the normal measurement interface.
2. Power off
Press the power key to power off at the measurement state.
3. Alarm value and time setting
Hold down “MODE” key for two seconds to enter setting of
carbon dioxide alarm value. Press the left and right key to
select the position to be changed. The selected figure will be
flashed. Press up and down keys to adjust value of flashed
position. After completion of setting, press “MODE” key to
save and enter setting for the next item. The same method
is used for setting of “year, month, day” and “hour, minute,
second”. After completing time setting, press “MODE” key to
save and return to the measurement interface.
Note:
*
The factory default carbon dioxide concentration alarm
value is 2000PPM.
*
To check the time, it is necessary to hold down “MODE” key
to enter the setting function.
*Above setting can also be completed with use of software
in computer. Please refer to introduction to “software
application”.
4. Alarm information
After the alarm function is opened, when the concentration of
carbon dioxide reaches the alarm value, the buzzer give out
sound for alarm. When users get to know the alarm information,
press the left key to close the alarm sound. To open again,
press the left key again.
5. Charging:
The product has built-in chargeable lithium battery. When the
screen displays low battery, please charge the product in time
with use of the attached power adaptor (micro USB mobile
phone charger may also be used). Computer USB port may
also be connected to charge the product.

17 www.xintest.com.cn www.hytechcn.com.cn 8
Carbon dioxide grading guidance
Non mandatory reference grading
a) 250-350ppm---general outdoor air level;
b) 350-1,000ppm---the typical value for resident
space with good ventilation;
c) 1,000-2,000ppm---the air grade insufficient oxygen,
sleepy, it is enough to cause complaint.
d) 2,000—5,000ppm---
the air grade of stasis, obsolescence
and sweltering air grade; make people
headache, sleepy accompanied with
loss of concentration, attention distracted,
quick heart beat and slight nausea.
e) >5,000ppm---
serious anoxia may be resulted in if exposed
into it, lead to permanent brain damage,
coma or even death.
Product parameters
Power supply: 3.7V lithium battery
Record mode: manual measurement, immediate measurement
Record storage: 12700
Response time: 1 second
Carbon dioxide measurement scope: 0~9999PPM
Accuracy: ±70ppm±3%readings (0~5000)
Resolution: 1PPM
Temperature measurement scope: -10~70℃(14~158℉)
Resolution: 0.1℃/℉
Temperature measurement accuracy: ±0.3℃(10~55℃)
Others are ±1.2℃
Humidity measurement scope: 0% RH~99.9%RH
Resolution: 0.1%
Accuracy: ±3 %( 10~90%)
Work condition: 0~50℃, 0~85%RH (no condensation)
Storage condition: -20~60℃, 0~90%RH (no condensation)

19 www.xintest.com.cn www.hytechcn.com.cn 10
Software installation
Open the CD ROM, Select “Setup" file to install as shown in
the figure blow:
Next, we may select the installation location by with use of
“Browse” to install the software to your desired location as
shown in the figure below:
Then click “next” after confirmation to skip to the next interface.
Click “next” again and it enters the installation state as shown
in the figure below:
We will enter the installation page. Please click “next” shown
in the figure below:

111 www.xintest.com.cn www.hytechcn.com.cn 12
After completion of installation, click “close” and the software
is installed.
Software application
1.Connect/disconnect
We use data transmission line to connect the computer and
the instrument. Click connection. Appearance with
the following prompt indicates successful connection.
Click to disconnect.
2. Adjust the clock
Is it troublesome to set the time on the instrument? After
connecting with the computer, we can carry out adjustment
only by clicking “Set Time”. It is synchronous with the
computer as shown in the figure below:

113 www.xintest.com.cn www.hytechcn.com.cn 14
3. Method Ⅰfor recording and receiving data
Ensure to click “set param” before making record. After the
setting interface pops out, please set correct parameters as
appropriate. You may refer to “carbon dioxide grading guidance”
for setting. The measurement mode is “Immediately”. Then
click “OK” after completion. If it is not necessary to change
the parameters, click “OK” directly.
We see that “REC” on the display screen flashes (the flashing
frequency is the same as record interval), indicating that
measurement of the instrument is carried out with record
synchronously. The data obtained through record can only
be checked only it is received. Click “Data Download” and the
following window pops out.
Save the received data as shown in the figure:

115 www.xintest.com.cn www.hytechcn.com.cn 16
After completion of saving, the data can be checked, as is
shown in the figure:
4. Method Ⅱfor recording and receiving data
We need to go out for measurement at many occasions. It is
very troublesome to connect with a computer at the site. At
such condition, we only need to use manual measurement
and take back the recorded data that will be check after
connection with a computer as shown in the figure below:
We need to connect the instrument with a computer first for
setting the data. After connection is completed, click “set
param” to enter the parameter setting interface as shown in
the figure below:

117 www.xintest.com.cn www.hytechcn.com.cn 18
The parameter setting is the same as mentioned above. The
difference is that we will select manual measurement. After
completion of the setting, exit and plug off the data line and
take the instrument to the destination. Press “REC” key on
the instrument to begin recording the data. After we bring the
instrument back and connect it with a computer, click “ Data
Download”. The data we received is the data we measured
and record outdoors.
Note: the data stacking is not allowed for record. Click on
“Set Param” every time will overwrite previously recorded
data. Therefore, please save measurement data in time.
Table of contents
Other HTI Security Sensor manuals