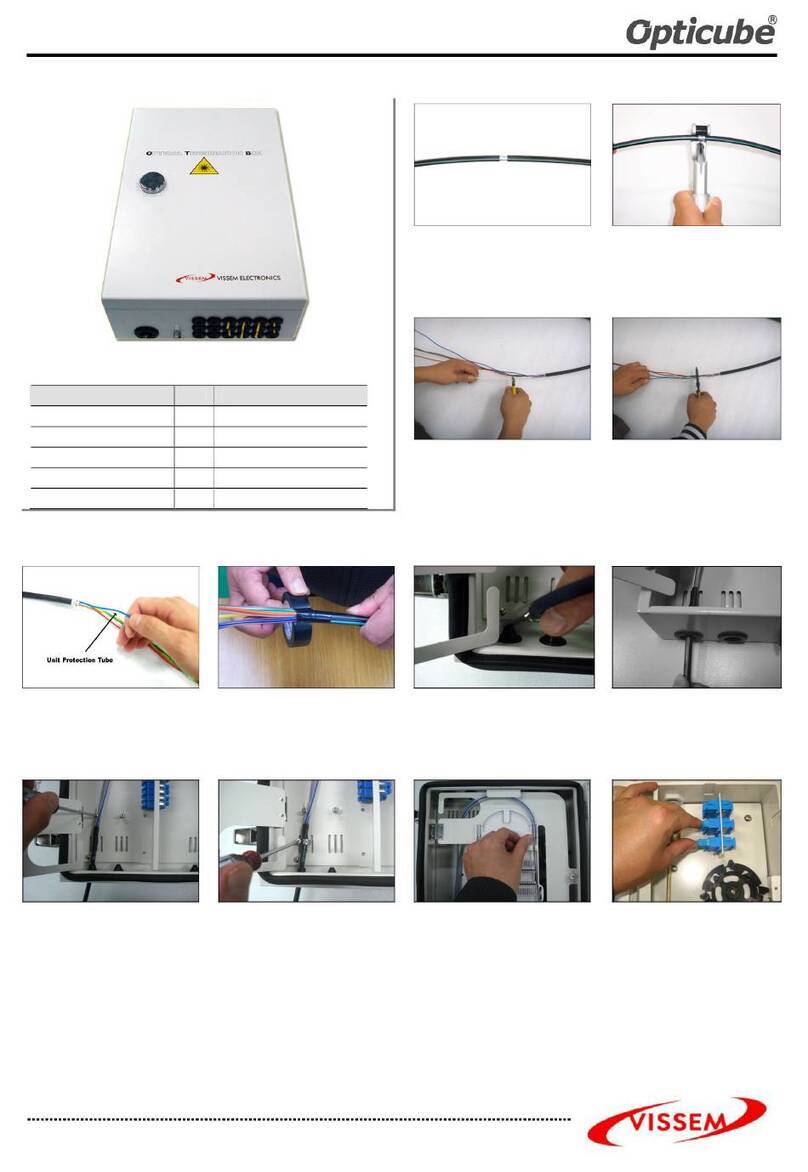
Huawei FAT9102SD-32G User manual

1
FAT9102SD-32G
Quick Installation Guide
Issue: 01
Date: 2019-01-10
CAUTION
Following All Safety Precautions
Before any operation, read the instructions and precautions in this document carefully to minimize the possibility
of accidents. The Danger, Caution, and Note items in the documents do not cover all the safety precautions that
must be followed. They only provide the generic safety precautions for operations. When operating Huawei
products and equipment, you must comply with safety precautions and special safety instructions related to
corresponding equipment provided by Huawei. The safety precautions in the document are related to only
Huawei products. Huawei is not liable for any consequence that results from the violation of universal
regulations for safety operations and safety codes on design, production, and equipment use.
Complying with the Local Safety Regulations
When operating the device, comply with the local safety regulations.
Qualified Personnel Only
The personnel in charge of installation and maintenance must be trained and master the correct operating
methods and safety precautions before beginning work.
Symbols
■
Indicates a potentially hazardous situation, which if not avoided, could result in
equipment damage, data loss, performance degradation, or unexpected results.
Provides additional information to emphasize or supplement important points of the
main text.
NOTE
■
■
■
Safety Information
Safety of Personnel
When handling optical fibers, do not stand close to, or look into the optical fiber outlet with unaided eyes.
Protect yourself when drilling holes. Flying dust may hurt your eyes or you may inhale the dust.
When working at a height, be cautious about falling objects.
■
Copyright © Huawei Technologies Co., Ltd. 2019. All rights reserved.
Product Structure
Termination area
2:32 SPL9105
Input end of the optical splitter
Output end of the optical splitter
Lock
Buckle
Drop cable holes Distribution cable hole

Installation Tools
Long measuring tape
Level Screw drivers
Scissors & Diagonal pliers
Stripping tool Socket w rench
Gloves
Marker
Φ10 mm drill bit Hammer drill
Installation Procedure
Start
End
Drilling Installation Holes
Sealing the Case
Leading in, Stripping, Securing and Coiling the
Distribution Cable
Installing, Splicing Pigtail and Drop Cable
Checking After the Installation
Splicing the Optical Fiber and Pre-installed Pigtail
Installing the Case
Rubber mallet
a
1 Drilling InstallationHoles
a
Splicing tool (splicing machine/
incision knife/cleaning agent)
2
aDrilling Holes on the Wall
Place the FAT against the w all and align it horizontally
using a level. Then, mark the installation holes.
Drill Φ10 mm holes using a hammer drill. Af ter drilling the
holes, clean up the dust using a vacuum cleaner.
Φ10 mm
drill bit
40 mm
a
Level
Wall
Installation holes
Marker

3
1 Drilling the Installation Holes
a
2Leadingin, Stripping, Securingand Coiling Distribution Cable
Remove the velcro strap and transparent cover on the splicing tray, then turn over the splicing trays and fiber distribution
panel.
•The maximum turnover angle of fiber distribution panel is 120°.
•The maximum turnover angle of splicing tray is 90°.
Velcro strap Transparent cover
Open the cap, use the key to unlock the FAT, hold the key, open the buckle w ith your hands, unbuckle the FAT, and open
the FAT cover.
Opening the Case
b
Splicing trays Fiber distribution panel
Lead in the distribution cable through the cable hole on the sealing block.
Determine the length to be stripped from the optical cable, mark the position to be stripped, and strip the optical cable.
Cap Key
Unit: mm
70 to 100
Aramid fiber
1800
Distribution cable
Bare f iber
Loose tube
210

4
2 Leadingin, Stripping, Securingand Coiling Distribution Cable
Adjust the position of the distribution cable so that the stripping point is 60 mm aw ay from the sealing block. Secure the aramid
fiber and then secure the distribution cable on the binding slot using cable ties.
Cable ties
60 mm
Tube End
The strippingpoint of the loose tube cannot exceedthe line correspondingto the Tu b e En d on the fiber spool board.
Cable tie
•When securing the aramid fiber, wind it
around the fastener by at least one turn.
•After securing the aramid fiber, cut off
the extra aramidfiber.
Turn over the fiber distribution panel back and secure the loose tube on the binding slot using the cable tie. Route the bare
fibers of optical cable into splicing tray 1 and coil fibers according to the routing in the follow ing figure. Only tw o coresare
spliced w ith the pigtailscorresponding to the input pigtails of the SPL.
Splicing tray 1 Fiber spool
board

5
Install the splice protection tube.
Strip the optical fiber to the fiber core and clean.
Strip the pigtail.
Ф0.25 optical fiber (pigtail) Ф0.125 fiber core
Ф0.125 fiber core
Ф0.25 optical fiber
(distribution cable)
Splice the tw o fiber cores:
a) Splice the tw o fiber cores w ith fusion splicer.
b) Af ter the splicing is complete and passes the check,
move the splice protection tube to the splicing point for heat
shrinking.
Splice protection tube
Make sure bare fibers are loose after
splicing and fixing so that they do not
snap.
Set tw o splice protection
tubes in each slot
Insert the splice protection tube into the fixing base of the splicing tray to protect the splicing
point. Coiling-store optical fiber according to the pre-stored routing.
3 Splicing the Optical Fiber and Pre-installed Pigtail
Distribution fiber Pigtail f iber
Tight buffer fiber Pigtail
40 mm
Table of contents