Humans ClockClock 24 User manual

ClockClock 24 by Humans since 1982
User Manual

Humans since 1982
Founded by Per Emanuelsson and Bastian Bischo, Humans since 1982 is a pioneering
creative studio responsible for a host of mesmerising and playful kinetic works, shown
to critical acclaim at eminent venues including the Saatchi Gallery, London and Cooper
Hewitt Museum, New York. The pair were later joined by engineer David Cox who
collaborated on the projects ClockClock and A million Times. Today, the studio is com-
prised of a larger group of specialists who bring together a unique blend of expertise and
intellectual curiosity, exploring the interplay of design, art and engineering.

ClockClock 24 by Humans since
1982 re-contextualises time
through an ingenious marriage
of analog and digital. Twenty-four
clocks come together to tell a
collective story in one singular
digital display. Each individual
clock hand is choreographed in
line with the others, so that these
clocks tell the time as a collective,
rather than individually.
The clock can be programmed in
12-or 24-hour time format and can
display three dierent modes of
movement between each minute:
minimal, medium or elaborate.

4
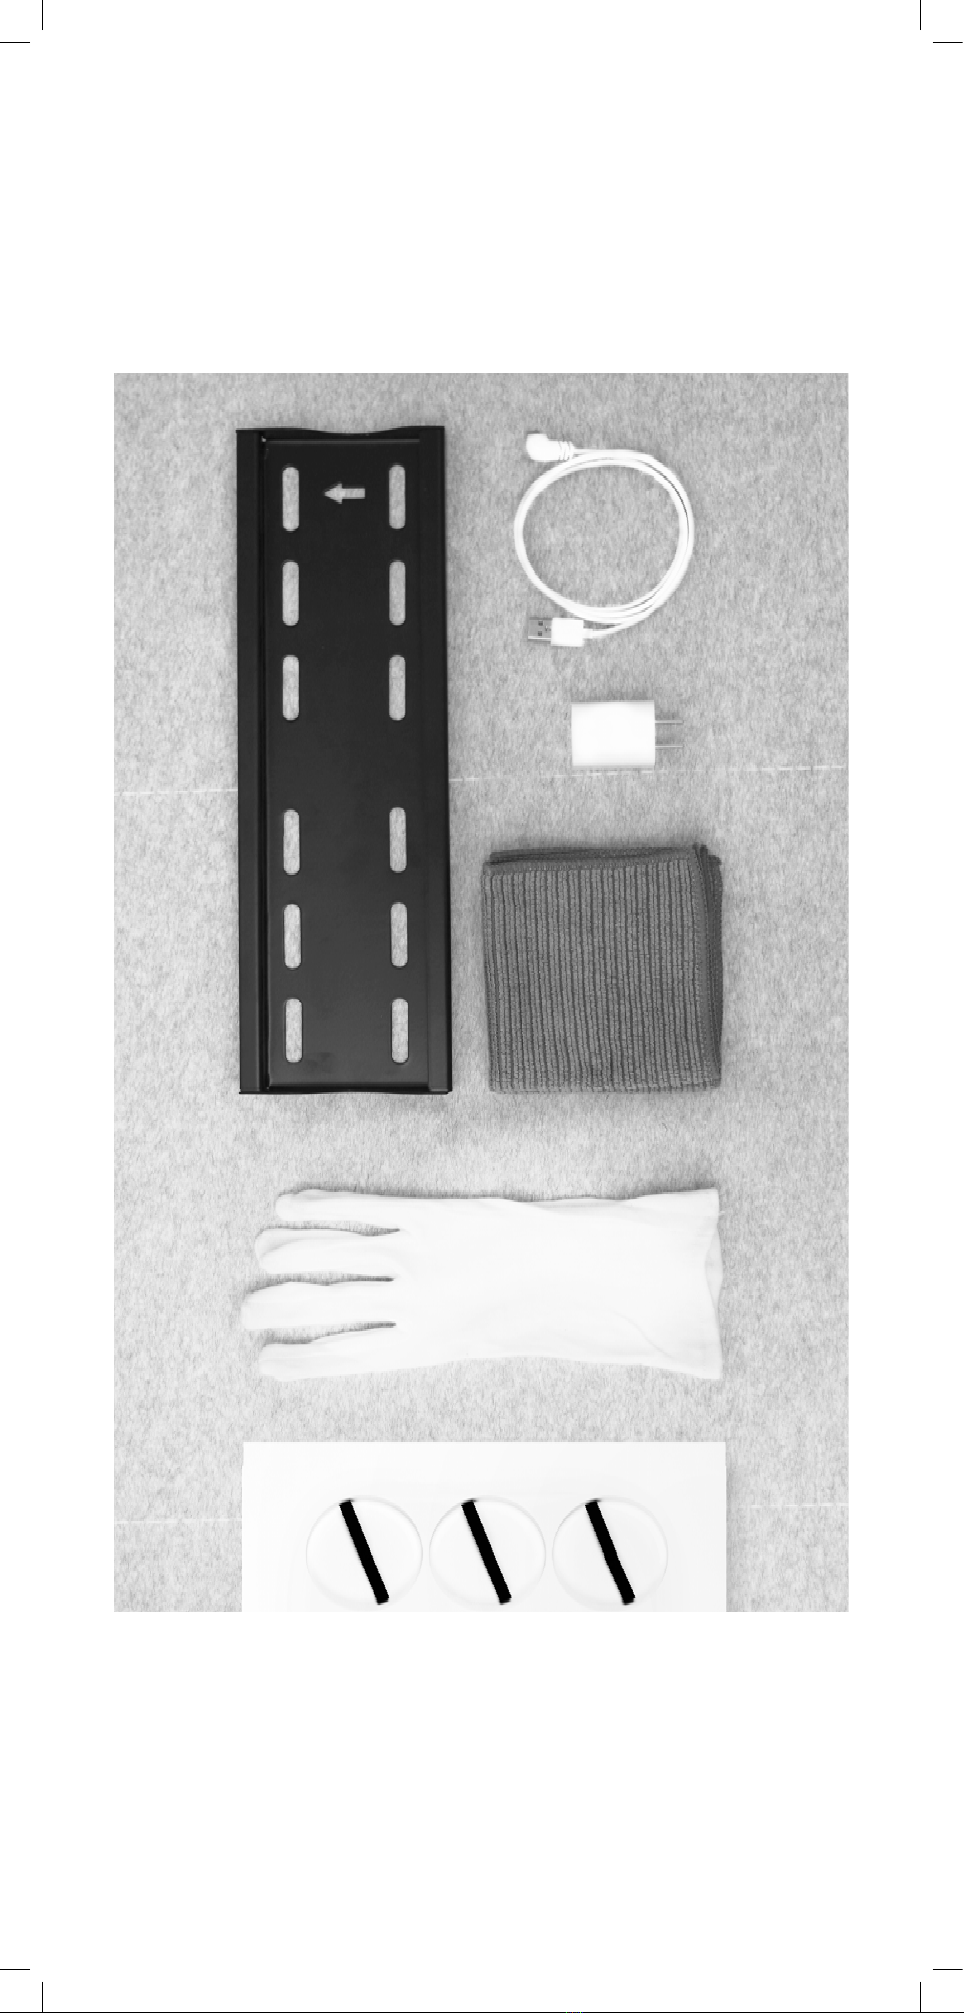
Package
Contents
ClockClock 24
5
Hanging Plate
USB Cable
USB Plug
Cleaning Cloth
Gloves
Hanging Template
User Manual

6
Tools Recommended for
Wall Mounting
Spirit Level
Power drill
Pen
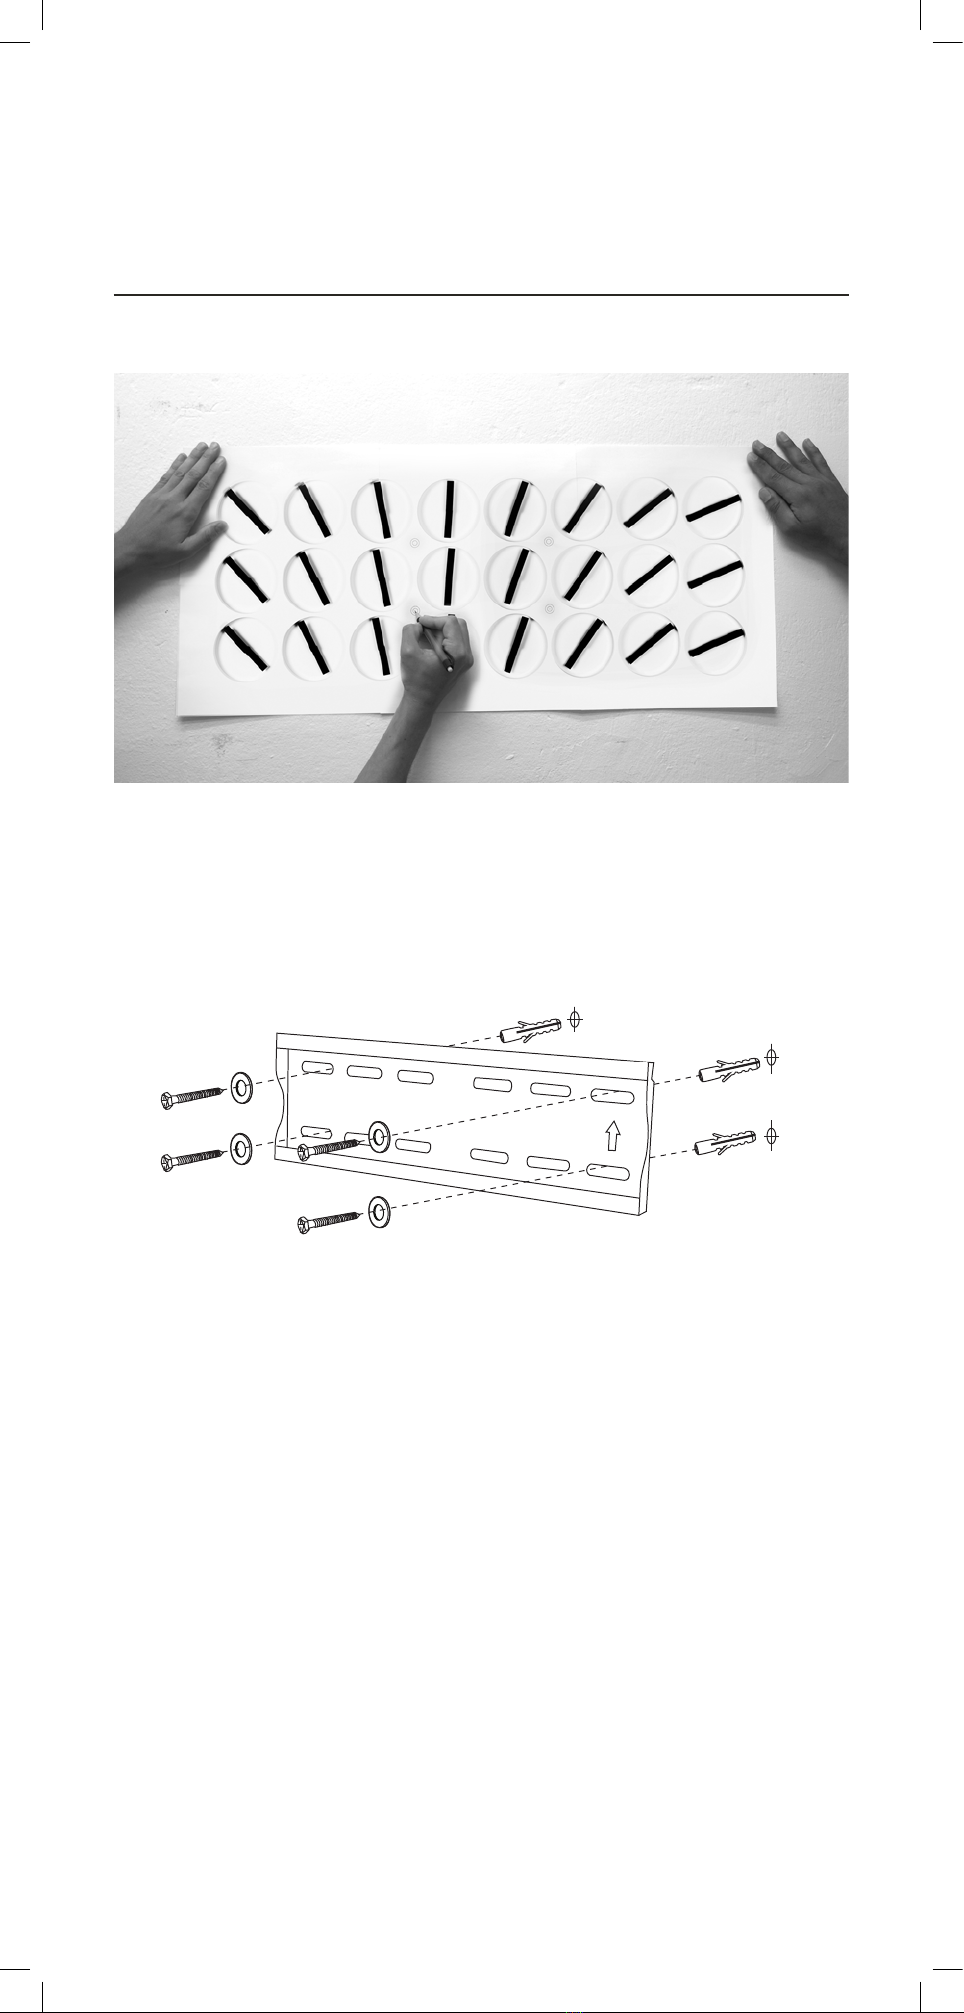
Screws x4:
Max. diameter 8 mm (5/16’’)
Min. length 30 mm (1 3/16’)
Anchors x4:
Size according to screws
Type according to wall material
Washers x4:
Max. diameter 24 mm (15/16’’)
Two persons are required to hang the clock.
USB socket
Only use the
provided cable
ClockClock 24
Identication symbols
Mode
Backside view Hour
Minute
7
1. Mark the position of the mounting
holes using the hanging template. Use
a spirit level to check the alignment.
See image a.
2. Drill the anchor holes into the wall.
3. Place the anchors properly and screw
the hanging plate onto the wall.
See image b.
a.
b.
Step 1
Mounting the Hanging Plate

8
1. Before hanging the clock on the wall,
place the clock face down on a
protective surface.
2. Carefully plug the cable into the socket
on the backside of the clock.
(See image c.)
3. Hang the clock on the hanging plate.
Make sure the brackets hook on both
the top and the bottom of the plate.
Center the clock on the plate.
(See images d and e.)
Step 2
Hanging the Clock
c. d.
e.

9
1. Use the provided gloves. Move all
clock-hands manually to position six.
(See image f.)
2. Plug the adapter into the wall socket.
3. To start the clock, press any of the
three buttons on the back of the clock.
You will hear a beeping sound and the
clock hands will start to move and the
time will be set on 12:00.
(See image g.)
Step 3
Starting the Clock
f.
g.

10
Step 4
Setting the Mode
1. Once you push the mode button, the
clock-hands will show you the current
mode for 20 seconds.
2. As long as the mode is displayed on the
clock, you can change it to another by
pressing the mode button again.
Mode button
Table of contents
Popular Clock manuals by other brands

Silicon Laboratories
Silicon Laboratories SI5324 manual

Heathkit
Heathkit GC-1005 Assembly manual

Oregon Scientific
Oregon Scientific PRYSMA RMR221P manual

Andrew O'Malley
Andrew O'Malley DOTKLOK Assembly instructions

ALGE-Timing
ALGE-Timing ASC3 manual

Bodet
Bodet Profil 960 Installation and operating instructions


Progetti
Progetti KALIMERO Directions

La Crosse Technology
La Crosse Technology WT-3141b Quick setup instructions

La Crosse Technology
La Crosse Technology W86531 owner's manual

Sharp
Sharp SPC900 instruction manual

La Crosse Technology
La Crosse Technology 404-50447 quick start guide

Datexx
Datexx DF0063 quick guide