HydroQuip Outdoor Series User manual

To ensure that the system is installed
properly, provide your electrician with
these instructions.
Outdoor Series
8700 Series
INSTALLATION
& OPERATIONS
MANUAL

TABLE OF CONTENTS
Getting Started 1
Terms / Glossary 2-3
System Requirements & Considerations 4-5
NEC Guidelines & Gas/Electric Combination Systems 6-7
Electrical System Sizing 8
GFCI Breaker Wiring 9
Connecting Power to the System 11-13
Wiring Individual Components 14
Gas Heater Options 15
Pump Cord Connections 16
Air Blower Installation & Programming 17
Spa Light Wiring 18
Spaside Control Installation 19
Programming Options & Instructions 20-21
Starting up the System 22-23
Spaside Control Operation 24-25
User Preferences 26
Troubleshooting the System 27-32
Required Maintenance 32
System Data Label 33
Warranty Information 34

GETTING STARTED
1
For the best installation possible, review all the provided instruction materials,
and share with your electrician/installer for advanced planning. A complete
understanding of what's needed before starting work will make things go
smoothly, and at the lowest possible cost.
This manual includes complete instructions for electrical and plumbing connections, the
addition of pumps, gas heaters, lights, system startup, troubleshooting, and your
warranty guidelines.
First identify the Equipment System (ES) or Control System (CS) from your product
label. Refer to this code when using the GFCI breaker sizing matrix, and wiring diagrams
in this manual
ES series controls include a factory mounting base, and main system pump. The
separate quick –start sheet #85-0115-4 has detailed instructions for pack assembly, and
pump cord installation guide is inside this manual
CS series controls are designed for a wall mount application. Your electrician must follow
all local codes and restriction pertaining to placement of an accessible electrical service.
* Copies of this manual are available online at www.hydroquip.com
Your Hydro-Quip 8000 series control has a factory pre set program. Details for changing
system behavior and/or adding new components will be found in this manual.
Warning! Make no attempt to modify, disconnect, damage or adjust the safety
devices contained in this equipment system. Alteration of safety devices can
cause serious component damage, and/or result in unsafe operation leading to
personal injury or death
Save a copy of this manual

AC Connection Alternating Current connection point (typically high voltage)
Additional Panel Button Refers to HQ PT# 34-0224. Required for 3rd pump operation
Amperage Requirement The accumulated total amperage of all items to be placed on a
single breaker
AUX PCB Smaller daughter board connected to main PCB
Auxiliary Pump A pump that has been added to the original equipment system (ie Aux pump #2)
Blower Appliance providing compressed air for the purpose of massage therapy
Bonding Wire Continuous bare copper wire connecting all metallic object and electrical
components to the equipment & ground rod
™
BWA APP Downloadable Balboa Water Application for wireless system control
Copper Conductors Electrical wires made from copper alloy materials
Dedicated Circuit An electrical supply to a remote location, having breaker protection and no
additional branch or service connections
Default Programming The standard position or programming in which the system is tested
and leaves the factory
Dip Switch Movable programming switch located within a switch-bank (on PCB)
Dip Switch Banks Set of switches used to change operational logic and system behavior (on PCB)
Discharge Pump exit side (piping placed on pressure side of pump)
Dual Source Wiring Electrical power supplied by two individual wiring sources (two
breakers)
Gas Heater Control Circuit Wiring provided inside gas heaters, that can be connected to 8000
systems for operational control. Commonly called a fireman circuit
GFCI Breaker Ground Fault Circuit Interrupter. Specialty breaker with a detection and
reaction device to interrupt power when current leaking is detected to ground
GFCI breaker #1 Main 8000 system breaker, required 4 wires with incorporated “Neutral”
GFCI breaker #2 Optional breaker for independent heater operation. Required 3-wire
connection, without “Neutral”
Heater Input Leads Provided wires for connection of heaters in the dual source configuration
Jumper Pins Circuit board electrical posts for logic changes.
Dual source power supply
2
TERMS / GLOSSARY

Jumper Wire Movable wires used for changing voltage or operation
KW Kilowatt. Heater resistance rating used for identifying energy consumption.
Line of Sight A clear and unobstructed path, in which an object or item can be spotted from
or near the spas edge.
Logic Jumper Movable coupling located on the jumper pins for changing operational behavior
Liquid Tight Conduit Tubing that resists water and debris penetration, made specifically for
wiring
Main Control In reference to the 8000 series control box, with factory provided components
Main Pump or Pump #1 System provided pump used for heating and filtration
NEC National Electrical Code. Regulations for design and materials on electrical
installation.
Ozone/Ozonator Appliance designed for spa water sanitation
PCB Printed Circuit Board (refers to main board)
Persistent Memory Programming that remains unchanged, until the power is turned off and back on
Priming Initial pump operation until the air is evacuated from the pump and supply lines
Pump Amperage The highest amperage measured, when the pump is under full load
condition
Pump Pot/Basket Reservoir mounted to the pump with removable lid and strainer basket
Single Source Wiring Electrical power supplied by a single wiring source and breaker
(one breaker)
Sub Panel An electrical service box mounted remotely from the main house power panel
Suction Pump front inlet side (piping between spa suctions and pump pot)
System Data Label Label placed on control box providing serial identification, and vital data
System Disconnect An easy and safe means of 100% electrical disconnection, without obstruction
or the need for tools. See NEC and UL qualifications for approved devices.
Terminal Strip Electrical connection point for components within the PCB Box
Total System Amps Highest amperage measured when all components are operating simultaneously
Wi-Fi Enabled Having the capacity to control using a wireless connection
Light Jumper
3
Max Pump Amperage
Single source power supply
TERMS / GLOSSARY

4
The Hydro-Quip 8000 Series Solid-State Systems were designed for indoor or outdoor installations.
This equipment may be used for both inground and above ground spas/hot tubs.
SYSTEM INSTALLATION REQUIREMENTS
lThe Equipment System must be installed on a firm, level surface
(ie: concrete or plastic base)
lThe area where the system is installed must have adequate
drainage to prevent flooding of the equipment under all
circumstances.
lFor performance reasons locate the system as close to the spa/hot
tub as practical. (Consult local codes for minimum distance
between equipment and spa)
lProvide adequate access around and above the System for service
and maintenance. Three (3’) of clearance around the equipment is
recommended.
lThe pump(s) provided with the system may or may not be self-
priming. Pumps that are NOT self priming must be installed
BELOW water level or they will not prime.
lThe Spaside control has a 50’ cord length. Plan routing distance
between the equipment and vessel to be less than 44ft.
PLUMBING INSTALLATION INSTRUCTIONS
To assure adequate performance, the use of 2” piping is recommended.
There may be 3 or 4 separate plumbing systems in the spa. Verify the function of each pipe.
1) Suction System Plumbing - this plumbing will connect to the spa’s skimmer, main drain and suction fittings.
This plumbing connects to the front end of each pump.
2) Discharge System Plumbing - this plumbing will go to the spa’s hydrotherapy jet and massage fittings. This
plumbing connects to the open end of the heater on your Equipment System.
3) Air Blower Plumbing - this plumbing will go to an air channel under the floor, or to an air distribution
manifold of the spa. This plumbing connects only to an air blower.
4) Aux Pump Plumbing - When more pumps are added, this piping will not interconnect with the heater control
system. Follow the spa/hot tub manufactures instruction for connection, and safety suction requirement
To allow for safe operation of the spa/hot tub, the suction fittings must be agency approved and rated Max
Flow capacity.
After plumbing is complete, secure the Hydro-Quip Equipment System with the appropriate hardware.
Suction Discharge
Water Level
Below Water Level
(Flooded Suction)
8000
RHS SERIES
REMOTE HEATER SYSTEM
8000
RHS SERIES
REMOTE HEATER SYSTEM
Above Water Level
Refer to plumbing schematic Fig.1 on page 15

The Hydro-Quip 8000 series incorporates the most advanced controls in the industry, and
are designed for years of trouble free operation. However, for year round success, review
these design recommendations for extreme weather areas.
*For best results, review this manual completely before starting your project.
Hot weather conditions
Water temperatures can be elevated from high outside “ambient” temperatures. If this
occurs, remove the insulating cover and add cool water until the heat has dissipated to a
safe level
Hot temperatures and/or direct sunlight to the equipment system can cause temporary
operational problems.
Pumps are equipped with special overload devises to self protect when encountering
extreme heat conditions. All motors are equipt with an automatic reset device, and will
resume operation when they become cool. Pumps can be enclosed, but require adequate
ventilation
Direct sunlight on equipment can bring temperatures beyond the allowable point for
circuits to function correctly. The system will shut off into a protection mode (see
troubleshooting guide.) To prevent this condition, plan an equipment cover that
incorporates shade, access and ventilation
Freezing weather conditions
If you wish to utilize/operate your system during seasons that may experience freezing
temperatures, please incorporate pipe insulation, draining capabilities and incorporate
an equipment cover that protects from snow and freezing rain. In all cases standing water,
and snow should not be allowed to accumulate in or around the equipment.
If you wish to winterize your spa/hot tub, please contact your spa/hot tub manufacturer or
local area pool/spa/hot tub professional for details.
In all cases make a plan for system draining in case of a power loss. Where possible,
design plumbing drains and disconnects to evacuate water before it becomes frozen and
does system damage.
Note the 8000 systems incorporate a freeze sensing technology, that will automatically
operate the pumps when temperatures drop below 43F. Moving the water will not allow
pipes and equipment to form ice.
INSTALLATION CONSIDERATIONS
5

6
ELECTRICAL INSTALLATION
NOTICE! Before attempting installation of this equipment system, read all the
information contained in this manual, and confirm the installing electrician
understands and follows all national and local codes and safety instructions.
All connections must be made by a qualified and licensed electrician in accordance with
the National Electrical Code (NEC article 680 Canadian Electric Code, and with any local
codes in effect at the time of installation.
All connections must be made according to the electrical installation label on the outside
of the system box (see page 33) Follow all instructions provided in this manual, and at
labeled connections. If your electrician in unclear on how to correctly connect this
equipment, call your system supplier. Note that damage caused by mistakes can be
costly, and invalidate your warranty.
A GFCI (Ground fault circuit interrupter) breaker is a mandatory electrical device required
for installation on all pool/spa applications as specified in the National Electrical Code
Article 680-42.
The GFCI must be properly sized, and be connected with the appropriate sized wire per
NEC Code Table 310-16. All ground wires must be connected per NEC Table 250-122
Follow the instructions provided in this manual (see pages 7-9) for proper location and
connection of this safety device
This equipment requires a dedicated electrical supply circuit, with no other appliances or
lights connected.
IMPORTANT – The NEC and most local codes require that an electrical
“disconnect” be installed within “line of site” of the spa
Use copper conductors only, with grounding wire properly sized per the National Electric
Code table 250-95.
A bonding lug has been provided on the control box, allowing connection to local ground
points. To reduce the risk of electrical shock, use only a properly sized copper bonding
wire from this lug to all metal ladders, water pipes and other metallic objects within 5 feet
of the spa/hot tubs edge.

7
ELECTRICAL INSTALLATION
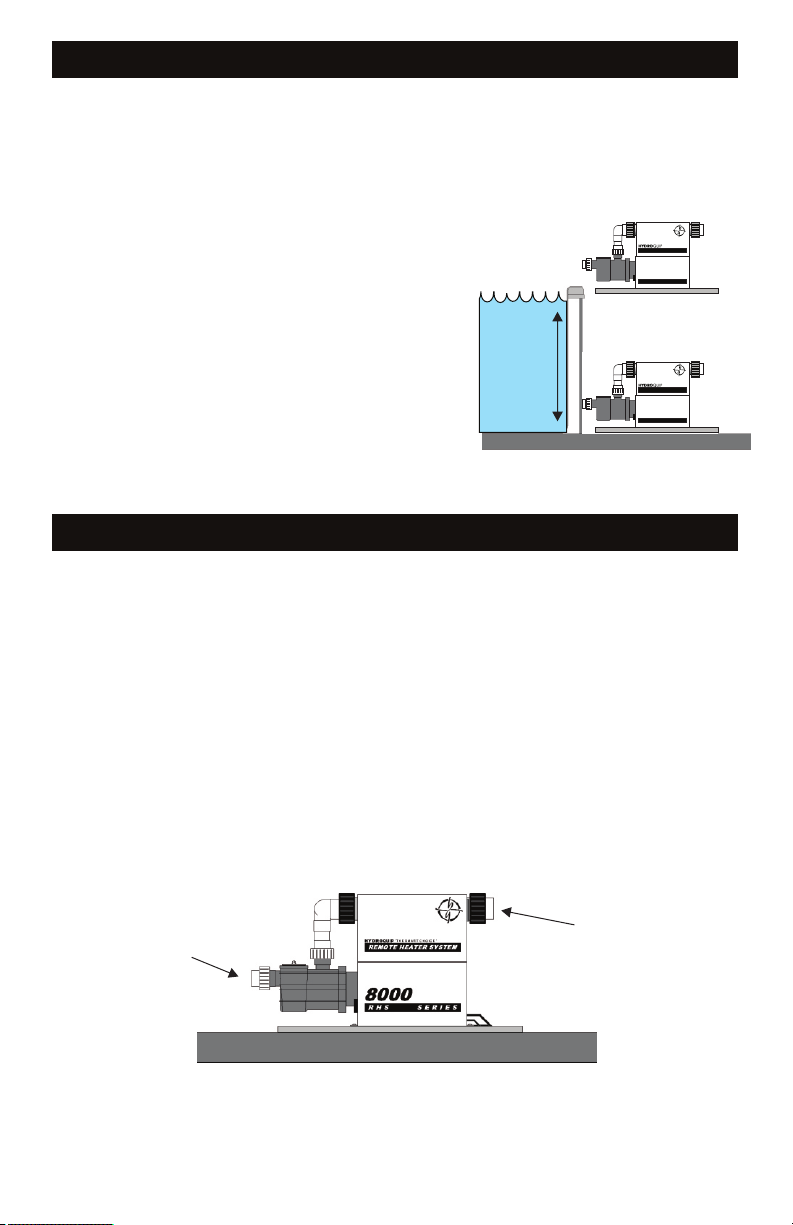
This equipment system has been100% factory tested for quality and reliability prior to
shipping. Care should be taken on all electrical connections to avoid damage to the system
circuit board, and added components. Damaged caused by accidents, improper wiring
configurations and/or abuse voids your warranty.
Start by having your electrician select a wiring configuration that best fits your total system
needs, from the GFCI breaker sizing matrix on page 8.
Due to the availability of GFCI breaker sizes, and your electrical supply requirement, some
systems require a second independent or “dual” power source, to supply the electric heater
separately. Diagrams for independent heater wiring is provided in this manual.
Note; 5.5kw systems using a single source power supply will not allow electric heater
operation, when pumps are in high speed. See system programming to change operation if
available.
System Type Heater size Connection type
Gas heat none Single source power supply
Electrical heat 5.5kw Single source power supply
Electrical heat 5.5kw Dual source power supply
Electrical heat 11.0kw Dual source power supply
Gas/Electric Combo 5.5 or 11kw/Gas Single Source power supply
All Hydro-Quip 8000 series control systems require a 4 wire electrical supply, incorporating
a “Neutral” wire for operation. Electric heaters being powered independently in the “dual”
circuit configuration does not require a neutral wire supply. This is clearly explained in the
wiring diagrams.
For gas heaters electrical connection, consult your gas heaters supplier manual, and note
in this manual contains important wiring instructions for control and operation of the gas
heaters fireman circuit.
Gas and electric heater combination
When faster heat recovery is desired, or a redundant heat source is a priority, it’s possible
to install both a gas and electric heater on the same 8000 series system.
Default programming allows both the gas heater control circuit (page 15) and electric
heater circuit to operate simultaneously. Input from both heat sources will speed up heating
times, and also provide an operating alternate if one source becomes disabled. You must
follow all installations instructions for both the gas heater, and electric heater plumbing and
wiring requirements to successfully connect. No PCB programming change is required.

240V Dual source wiring with separate heater electrical supply
(Two breakers required)
240V Single source wiring (One breaker required)
GFCI BREAKER SIZING MATRIX
8
System order code
on label
System
heater type
Pump 1 &
System 17A
Max
Aux. pump-2
12A max
Aux. pump-3
12A max
Total system
Amps GFCI Breaker Page
ES8748D, E x x x 43amp system 50 amp #1
ES8750D, E, F 5.5kw _ _ _ 24amp heater 30 amp #2
CS8700B
ES8748A, B, C x _ _ 17amp system 20 amp #1
ES8750A, B, C 11kw _ _ 46amp heater 60 amp #2
CS8700A
ES8748A, B, C x x _ 30amp system 40 amp #1
ES8750A, B, C 11kw _ _ _ 46amp heater 60 amp #2
CS8700A
ES8748A, B, C x x x 43amp system 50 amp #1
ES8750A, B, C 11kw _ _ _ 46amp heater 60 amp #2
CS8700A
10
10
10
11
System order code
on label
System
heater type
Pump 1 &
System 17A
Max
Aux. pump-2
12A max
Aux. pump-3
12A max
Total system
Amps GFCI Breaker Page
ES8748G, H, J
ES8750G, H, J
CS8700C
ES8748G, H, J
ES8750G, H, J
CS8700C
ES8748G, H, J
ES8750G, H, J
CS8700C
ES8748D, E
ES8750D, E
CS8700B
ES8748D, E
ES8750D, E
CS8700B
41 50 amp #1 12
54 60 amp #1 12
Gas x _ _ 17 20 amp #1 13
5.5kw x _ _
Gas x x _ 30 30 amp #1 13
Gas x x x 43 50 amp #1 13
5.5kw x x _

9
GFCI WIRING DETAIL
GFCI
TEST
(Ground Fault Circuit Interrupter)
CIRCUIT BREAKER
NEUTRAL PIGTAIL
NEUTRAL BUS BAR
LOAD
NEUTRAL
LOAD
GROUND
GROUND BUS BAR
LINE LUG #1 LINE LUG #2
LINE 1
LINE 2
INCOMING
SERVICE
CONDUCTORS
FROM
MAIN
PANEL
NEUTRAL
GROUND
LO A D
Improperly wired GFCI breakers are the leading cause of immediate GFCI tripping. It
is important that your system be wired properly, reference the illustrations below for
guidelines.
WARNING: Refer to the circuit breaker manufacturer’s installation instructions.
This illustration is meant to be a guideline, and not meant to override or
substitute the instructions supplied by the breaker manufacturer
GFCI BREAKER #1
(240v 4-wire with neutral)
GFCI BREAKER #2
(240v 3-Wire)
For Independent Heater GFCI
TEST
(Ground Fault Circuit Interrupter)
CIRCUIT BREAKER
LOAD LOAD
GROUND
GROUND BUS BAR
LINE LUG #1 LINE LUG #2
LINE 1
LINE 2
INCOMING
SERVICE
CONDUCTORS
FROM
MAIN
PANEL
GROUND
LO A D
TO SPA EQUIPMENT
TO SPA EQUIPMENT

10
H L C L C L L L C
L C
PUMP 1 PUMP 2 BLOWER
H C
OZONE 120V
LIGHT
FIREMANS
SWITCH
GROUNDGROUND
L C
PUMP 3
NEUHOTHOT
BLK
RED
BLK AC WHT AC
RED AC
HEATER
LIGHT
FUSE 30A
FUSE 30A
Switchbank B
AUX
AUX
MAIN
MAIN
REMOTE
MAIN
APCM
SENS. A SENS. B
FUSE 10A
FUSE 0.3A
FUSE 1A
11KW ELECTRICAL CONNECTIONS
GROUND
Heater main wires
11KW electric heat “Main” control with independent heater wiring
(Dual source wire connection)
For correct GFCI breaker sizing, see electrical requirements matrix on page 8
Factory programming allows heater and high speed pumps to operate simultaneously
FOR SYSTEM MODEL CODES (Label located on outside of box)
ES8748A ES8748B ES8748C CS8700A
ES8750A ES8750B ES8750C
Ground Line 1 Line 2
GFCI BREAKER #1
(240v 4-Wire only)
Neutral Line 1 Line 2 Ground
see page 8 for breaker sizing
GFCI BREAKER #2
(240v 60Amp 3-Wire only)
see page 8 for breaker sizing
Aux option for gas

11
H L C L C L L L C
L C
PUMP 1 PUMP 2 BLOWER
H C
OZONE 120V
LIGHT
FIREMANS
SWITCH
GROUNDGROUND
L C
PUMP 3
NEUHOTHOT
BLK
RED
BLK AC WHT AC
RED AC
HEATER
LIGHT
FUSE 30A
FUSE 30A
Switchbank B
AUX
AUX
MAIN
MAIN
REMOTE
MAIN
APCM
SENS. A SENS. B
FUSE 10A
FUSE 0.3A
FUSE 1A
5.5KW ELECTRICAL CONNECTIONS
GROUND
Heater main wires
5.5KW electric heat “Main” control with independent heater wiring
(Dual source wire connection)
For correct wire and GFCI breaker sizing, see electrical requirements matrix on page 8
Factory programming allows heater and high speed pumps to operate simultaneously
FOR SYSTEM MODEL CODES (Label located on outside of box)
ES8748D ES8748E ES8750F
ES8750D ES8750E CS8700B
Ground Line 1 Line 2
GFCI BREAKER #1
(240v 4-Wire only)
Neutral Line 1 Line 2 Ground
see page 8 for breaker sizing
GFCI BREAKER #2
(240v 3-Wire only)
see page 8 for breaker sizing
Aux option for gas

12
5.5KW ELECTRICAL CONNECTIONS
5.5KW electric heat “Main” control system wiring diagram
(Single source wire connection)
For correct wire and GFCI breaker sizing, see electrical requirements matrix on page 8
Programming allowing heater and high speed pump operation simultaneously
requires “dip switch” change on board (see figure below)
FOR SYSTEM MODEL CODES (Label located on outside of box)
ES8748D ES8748E ES8750F
ES8750D ES8750E CS8700B
Neutral Line 1 Line 2 Ground
H L C L C L L L C
L C
PUMP 1 PUMP 2 BLOWER
H C
OZONE 120V
LIGHT
FIREMANS
SWITCH
GROUNDGROUND
L C
PUMP 3
NEUHOTHOT
BLK
RED
BLK AC WHT AC
RED AC
HEATER
LIGHT
FUSE 30A
FUSE 30A
Switchbank B
AUX
AUX
MAIN
MAIN
REMOTE
MAIN
APCM
SENS. A SENS. B
FUSE 10A
FUSE 0.3A
FUSE 1A
GROUND 48 MAX AMPS
HEATER INPUT
HEATER MAIN WIRES
Switchbank A
A2 - ON=High Current, No Heater Restriction
OFF=Low Current, Heat on Low Speed Only
Fig. A
Move dip switch #2 to the OFF position.
GFCI BREAKER #1
(240v 4-Wire only)
see page 8 for breaker sizing
Aux option for gas

13
H L C L C L L L C
L C
PUMP 1 PUMP 2 BLOWER
H C
OZONE 120V
LIGHT
FIREMANS
SWITCH
GROUNDGROUND
L C
PUMP 3
NEUHOTHOT
BLK
RED
BLK AC WHT AC
RED AC
HEATER
LIGHT
FUSE 30A
FUSE 30A
Switchbank B
AUX
AUX
MAIN
MAIN
REMOTE
MAIN
APCM
SENS. A SENS. B
FUSE 10A
FUSE 0.3A
FUSE 1A
GAS ELECTRICAL CONNECTIONS
GROUND
Gas heater
internal control
see page 15
(Single source wire connection)
For correct wire and GFCI breaker sizing, see electrical requirements matrix on page 8
FOR SYSTEM MODEL CODES (Label located on outside of box)
ES8748G ES8748H ES8748J CS8700C
ES8750G ES8750H ES8750J
Neutral Line 1 Line 2 Ground
GFCI BREAKER #1
(240v 4-Wire only)
see page 8 for breaker sizing

14
NEW COMPONENT CONNECTION
Connecting additional pumps, blowers, gas heaters and light
Addition of any new component to the system, requires wiring installation accordance to the NEC
guidelines for outdoor appliances, and using only materials suitable for outdoor applications
Wiring locations for all components are called out below, and are clearly marked inside the system
control box.
* When a pump or blower is added to a control, it's required you check the power output for correct
supply voltage, and change the “dip switch” programming to recognize the newly added item.
Configuration guides for adding items are found in the following pages
Pumps pages 16, 20, 21
Blowers pages 17, 20, 21
Gas heater pages 13, 15
Light page 18
LOWER BOX
LIQUID-TIGHT
CONDUIT
TO EXTERNAL
COMPONENT
BLOWER (Optional)
NEU
HOT
HOT
BLK
RED
BLK AC WHT AC
RED AC
HEATER
LIGHT
FUSE 30A
FUSE 30A
Switchbank B
AUX
AUX
MAIN
MAIN
REMOTE
MAIN
APCM
SENS. A SENS. B
FUSE 10A
FUSE 0.3A
FUSE 1A
GROUNDGROUND
GROUND
Lighting
Sanitation
Air Blower
Aux. Pump
Primary Pump
H L C L C L L L C
L C
PUMP 1 PUMP 2 BLOWER
H C
OZONE 120V
LIGHT
FIREMANS
SWITCH
L C
PUMP 3
Aux. Pump
The system is set up to have components hardwired to a terminal strip inside the enclosure. Liquid
tight conduit must be used on all externally added field connections exposed to the weather. Route
and connect the conduit to the knock-outs in the back of the lower box. The wires will then enter the
bottom of the box through another set of knock-outs. Connect the component(s) accordingly to the
corresponding position on the terminal strip and tighten securely. Refer to the included wiring
diagram as needed. All components not included with the system are set at the factory for 120V.
Verify the voltage of the additional component(s) and adjust supply voltage if necessary by referring
to System Configuration on pages 17.
UPPER BOX
Gas Heater Control

Switchbank B
AUX
AUX
MAIN
MAIN
REMOTE
MAIN
APCM
SENS. A SENS. B
FUSE 10A
H L C L C L L L C
L C
PUMP 1 PUMP 2 BLOWER
H C
OZONE 120V
LIGHT
FIREMANS
SWITCH
GROUNDGROUND
L C
PUMP 3
GAS HEATER CONNECTION
Gas Heater Control Circuit
IMPORTANT: Applying line voltage to Gas Heater Control Circuit voids all
warranty.
Warning: Gas heaters MUST be installed in the plumbing AFTER the control system as
shown below. Fig.1
Warning: Do not install a spa that utilizes a natural gas or propane heater without proper
venting. These heaters require adequate ventilation and must be installed according to the
heater manufacturers instructions and to local building codes.
Note: Many gas heaters require a separate electrical service for proper
operation, the Hydro-Quip “Gas Heater Control Circuit” does NOT
provide voltage to any gas heater circuits. Always refer to the manual
included with your gas heater for proper installation.
Your control system contains a Gas Heater Control Circuit Fig.2. This circuit is a passive
or “dry contact” circuit, do not apply line voltage to this circuit. Connect this circuit to the
gas heater’s Fireman Switch or Fireman Circuit. Refer to the instructions provided with
your gas heater to identify the circuit / switch and correct wiring connection. Additional
programming may be required to the gas heater to utilize an auxiliary control system.
Fig.1
Inside control box
Terminal connection. Fig.2
8000
RHS SERIES
REMOTE HEATER SYSTEM
Pressure Filter
Equipment System
Spa/Hot Tub
Gas Heater
Flow
Flow
Flow
Flow
15
Pump 2 Pump 3 Blower
Jets Jets
TYPICAL PLUMBING LAYOUT
To Gas Heater
Internal Control Circuit
Flow
Flow
Flow

PUMP CORD INSTALLATION
The equipment system has been provided with a pump power cord and liquid-tight
conduit assembly. This is to be used on the main 2-speed pump supplied with the
system. Any other components or accessories attached to the equipment system
should be attached in a similar manner.
Follow the simple instructions below to quickly attach the cord assy to the pump:
Cord Assy included for Pump 1
1) Remove the terminal cover off the
back off the pump
2) Remove the conduit hole cover
3) Route the power wires through the conduit hole and pull
toward you to allow for the cord assy to be rotated for tightening.
4) While holding the wires as shown
thread the liquid-tight connector into the
pump until secure then connect the
power wires to the pump per the label
on the pump.
5) Route the other end of the conduit
through and empty knock-out and
secure with lock-nut. The cord inside will
route up to the terminal strip inside the
upper portion of the enclosure.
WIRING NOTE:
RED = LOW
BLACK = HIGH
WHITE = COMMON
GREEN = GROUND
16

17
The control circuits for components not included with the system have been pre-configured for
120V at the factory. This is to prevent accidental damage to equipment. A 240V component
connected momentarily to a 120V power supply will not be damaged. A 120V component
connected to a 240V power supply can be damaged immediately. For this reason Hydro-Quip
cannot be held responsible for damage caused due to mis-wire.
SYSTEM CONFIGURATION
NEUHOTHOT
WHT
BLK
RED
BLK AC WHT AC
RED AC
HEATER
LIGHT
FUSE 30A
FUSE 30A
Below are illustrations and instructions for converting the universal circuits of your control.
Hydro-Quip utilizes color coded connectors to help identify each circuit. Simply locate the
colored connector on the Neutral (white) wire from each component receptacle on the PCB.
Using the wiring diagram provided with each control (located inside of cover), remove the Neutral
connector from its WHT AC / Neutral position and reconnect to an empty position at the RED AC
/ Line 2 connection block. Once accomplished the conversion is complete, repeat these steps
for each component that operates on 240V.
(2) Reinstall connector onto RED AC connection
(1) Remove connector from WHT AC connection
18” Above
Maximum Water
Level
Check Valve*
Water
Level
Below
Water
Level
Above
Check*
Valve
To
Blower
CAUTION: The air blower must be connected ONLY to the
spa’s air distribution plumbing. Connecting the air blower to the
air piping associated with the hydrotherapy jets will create a
hazzard by providing a path for high-pressure water to be
forced into the blower motor. This will result in damage to the air
blower, and create an electrical shock hazzard.
ŸThe air blower must be installed to ensure that water
cannot enter the air blower motor. This can be
accomplished by installing a single or double air loop that
incorporates a check valve.
AIR BLOWER INSTALLATION (Optional)
PUMP 1 RED
PUMP 2 VIOLET
BLOWER BLUE
OZONE YELLOW
120V
WHT AC
240V
RED AC
COMPONENT COLOR CODE
*

AUX
AUX
MAIN
L C L L L C
L C
BLOW OZONE 120V
LIGHT
FIREMANS
SWITCH
GROUNDGROUND
L C
PUMP 3
18
SPA LIGHT WIRING
Light
Jumper
J46
Light Jumper J46
120Volts (default)
Jumper covering pins 1&2
12Volts
Jumper covering pins 2&3
W9
J48
J45
Jumper Wire W9
120Volts (default)
12Volts
J48
J45
120Volts (default)
Neutral
Line 1
Ground
The Hydro-Quip 8000 system comes with a standard 120V spa light connection. This
electrical supply can also be configured for a 12V power supply by following the steps
for 12V conversion below.
12V conversion steps required for converting the light circuit to 12V.
1) Power off spa utilizing the circuit breaker.
2) Remove Light Jumper J46 from pins 1&2 and place the Light Jumper J46 on pins 2&3.
3) Jumper wire W9 is connected to J48 by default. Remove the jumper wire from J48 and place
on J45.
4) Power on spa.
Note that some custom systems are factory set to 12V. Check power supply before
connecting light wires.
Other manuals for Outdoor Series
1
This manual suits for next models
2
Table of contents
Other HydroQuip Water Pump manuals
Popular Water Pump manuals by other brands

Waterous
Waterous PB18 Series Operation instructions

DAB
DAB NKM-G Instruction for installation and maintenance

Grundfos
Grundfos SP Installation and operating instructions

Dover
Dover PSG WILDEN PR860 Operation & maintenance manual

BLACKMER
BLACKMER V Series Installation, operation and maintenance instructions

KSB
KSB Calio S BMS Installation & operating manual