Hypertech POWER PROGRAMMER III User manual

HYPERTECH®
POWER PROGRAMMER III™
FOR 5.7L LT1/LT4 CAMARO/FIREBIRD/CORVETTE
IMPALA SS/CAPRICE/ROADMASTER
STEP-BY-STEP INSTALLATION
INSTRUCTIONS
PP2
Part #895
© 2006 Hypertech, Inc.
7.7.06

TABLE OF CONTENTS
Important Information . . . . . . . . . . . . . . . . . . . . . . . . . . . . . . 2
Overview . . . . . . . . . . . . . . . . . . . . . . . . . . . . . . . . . . . . . . . 3
Section 1: PowerStat™Installation . . . . . . . . . . . . . . . . . . . . .4
Section 2: Programming Instructions . . . . . . . . . . . . . . . . . . 6
Engine Tuning . . . . . . . . . . . . . . . . . . . . . . . . . . . 8
Rev Limiter . . . . . . . . . . . . . . . . . . . . . . . . . . . . . 8
Electric Cooling Fan Operating Range . . . . . . . . 9
Top-Speed Limiter . . . . . . . . . . . . . . . . . . . . . . . 10
Tire Size . . . . . . . . . . . . . . . . . . . . . . . . . . . . . . 10
Rear Gear Ratio . . . . . . . . . . . . . . . . . . . . . . . . 11
Transmission Shift Point MPH & RPM . . . . . . 12
Transmission Shift Firmness . . . . . . . . . . . . . . . 15
Report . . . . . . . . . . . . . . . . . . . . . . . . . . . . . . . . . 15
Programming . . . . . . . . . . . . . . . . . . . . . . . . . . . 16
Section 3:
Programming Back To Stock/Changing Options
18
Section 4: Troubleshooting Guide . . . . . . . . . . . . . . . . . . . . 19

IMPORTANT
• The Power Programmer for GM LT1/LT4 vehicles is legal
for sale or
use on California pollution-controlled motor vehicles according
to the
CARB Executive Order process. In the interest of improved air quality,
the California Air Resources Board (CARB) requires new vehicle and
manufacturers of aftermarket parts to develop engine and emissions
equipment that either reduce or maintain specific air pollutants affected
by vehicle use. Both the California Vehicle Code (section 27156) and
Federal Clean Air Act (administered by the Environmental Protection
Agency) prohibit modifications that increase vehicle emissions.
Aftermarket parts manufacturers, particularly in the high-performance
segment, are required to obtain CARB approval in the form of executive
Orders (E.O.s) for any product not qualifying as a direct replacement
for an original equipment part. Hypertech includes meeting all E.O.
requirements in its product development process. This guarantees
that users of Hypertech “Power Tuning” products will meet certification
requirements when registering, selling, or needing to pass various
emissions tests or Inspection and Maintenance (I&M) programs
administered by state or local enforcement agencies. Make sure
that any emissions-related product you buy and install carries an E.O.
number or is pending an E.O. Without this verification you are at
risk, in potential violation of regulations and may incur unnecessary
financial obligations during vehicle inspections or emissions tests.
A CARB E.O. sticker is supplied. Keep this sticker in your vehicle or
attach it inside the door jam as proof that the Power Programmer is
street legal.
• Your vehicle’scomputer will not be programmed at the end
of the programming menus until you select “PRESS ‘Y’ TO
BEGIN PROGRAMMING” on page 15. Feel free to experiment
with the programming choices without the fear of accidentally
programming the wrong thing into your vehicle computer.
You can make any choice that you want to, change it again
and again, without programming it into your vehicle computer
until you are absolutely ready.
•While the programmer is programming:
*DO NOT leave the vehicle while programming is in process.
*DO NOT program your vehicle without a fully charged battery.
If after you have programmed your vehicle’s computer with the
Hypertech Power Programmer, you decide to change the tuning,
It is recommended that you recharge your vehicle’sbattery.
You may either drive the vehicle to charge the batteryor use a
batterycharger.But either way,MAKE surethat the battery
holds a full charge.
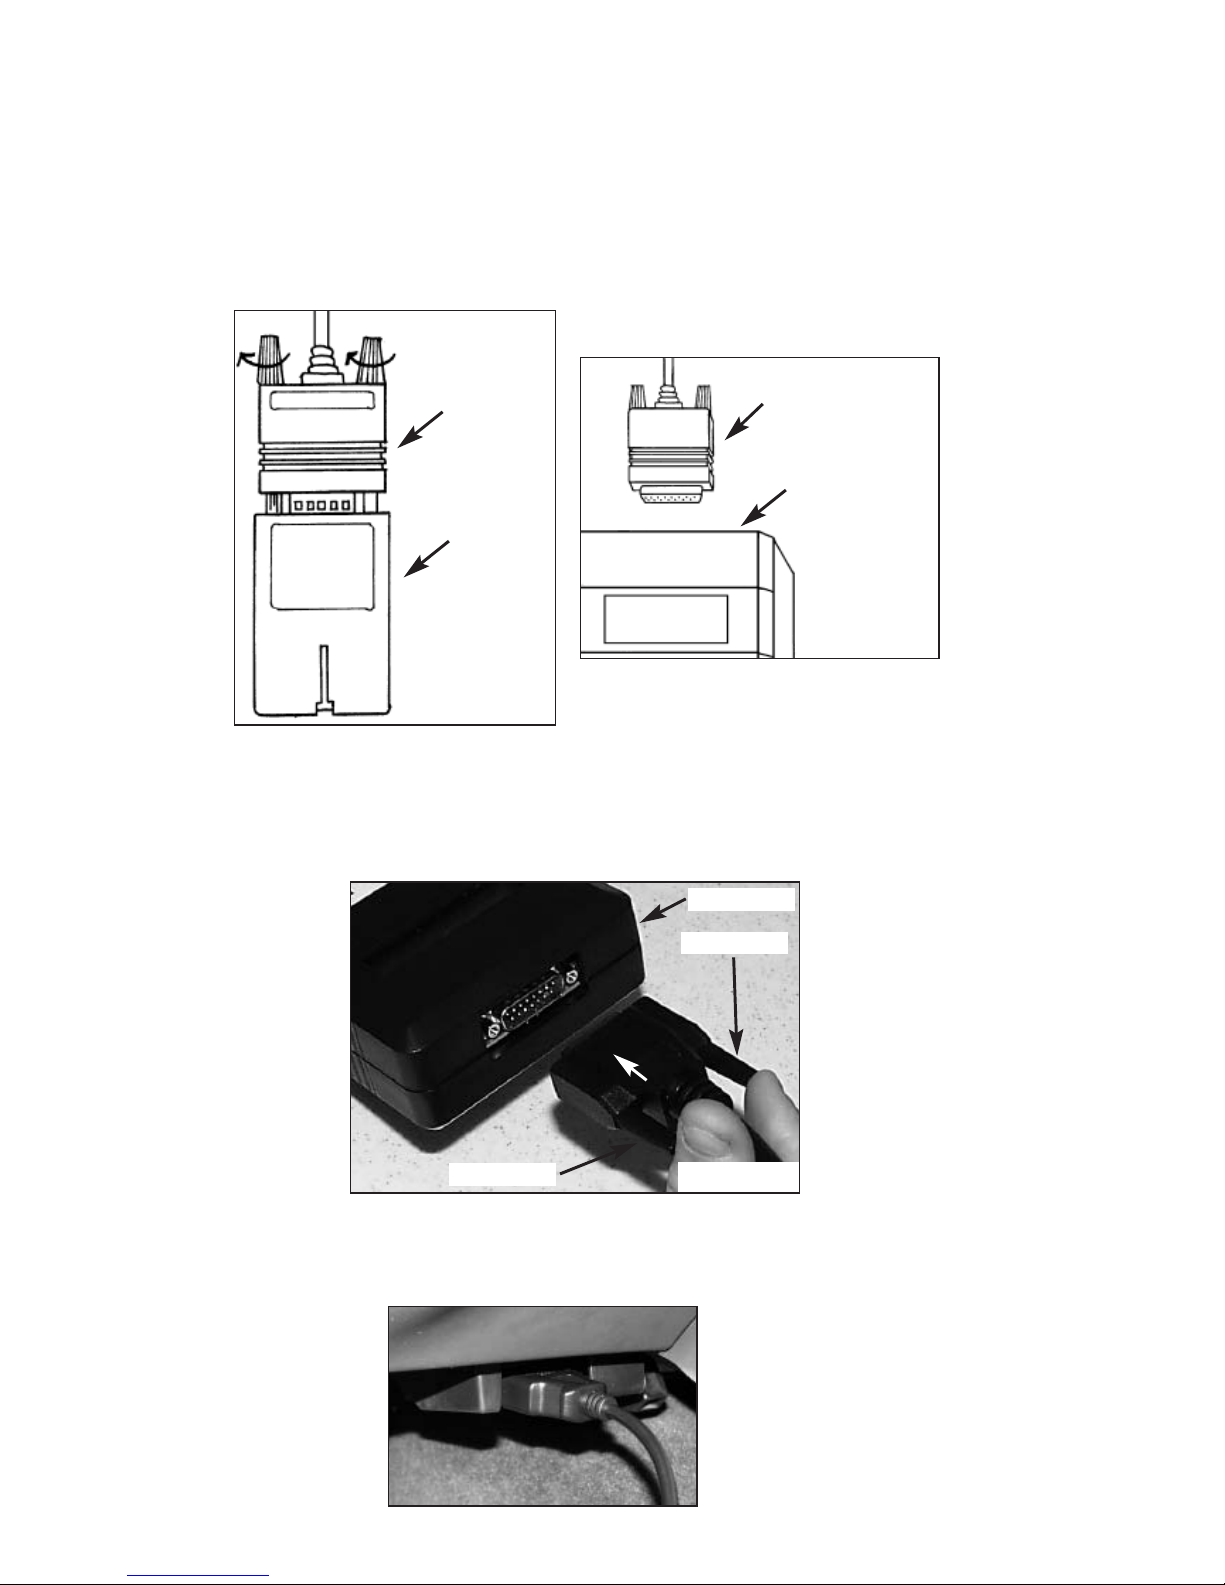
*DO NOT disturb the cable while programming.
*The ONLYtime you may remove the programmer cable from
the DLC safely is PRIOR to pressing ‘Y’ to program your
entries. However, any programming choices you have made
WILL NOT be saved. NOTE: It is NOT safe to unplug the
programmer cable any time AFTER you have pressed ‘Y’ to
program.
*DO NOT turn the key off UNLESS
instructed by the programmer.
*DO NOT start the engine.
2

Any of these actions will interrupt the programming process.
The programmer is designed to recover from these conditions,
but they should be avoided.
• You will achieve best performance if you replace your
stock thermostat with a Hypertech 160° or 180° PowerStat.
The programmer will work with a stock thermostat but our
best performance tuning was specifically developed for a
cooler running engine.
• Hypertech Power Tuning was developed for premium grade
gasoline (the highest octane rating available in your area).
Make sure you have premium gasoline in your vehicle
before installing Hypertech’s engine Power Tuning.
HYPERTECH POWER PROGRAMMER III
INSTALLATION INSTRUCTIONS OVERVIEW
Congratulations! You are the owner of the Power Programmer III,
the latest in high-performance tuning technology. Now you can optimize
your engine’s tuning, as well as adjust other vehicle parameters
(see table of contents), all at the touch of a button.
Your vehicle has an onboard computer that controls the engine
and transmission. Inside your vehicle’scomputer is a FLASH
memory chip which contains the vehicle’s programming. The
programmer actually reprograms this FLASH computer chip,
according to your specifications, with Hypertech’s Power Tuning.
This is the only way an individual can reprogram some 1994-1995
and all 1996 and newer vehicles sold in the United States.
To reprogram your vehicle’s computer, simply plug the
programmer cable into the vehicle’s diagnostic connector
located under the dash panel on the driver’s side. Set the parking
brake. Next, turn the ignition key to RUN but do not start the
engine. Press the sarrow on the programmer.It will then identify
your vehicle and display a series of options on its screen. When
completed, turn the key to OFF and disconnect the cable from the
diagnostic connector.Now you’re ready to Feel the Power!
Hypertech’s Power Tuning can be stored in only one (1)
vehicle at a time. The Power Programmer can be reconnected
to remove the Power Tuning and return the vehicle to the factory
programming at any time. After you have performed this step,
your vehicle will be in its stock configuration.
You may also reconnect your programmer at any time to change
the programming. For example, if you have replaced your factory
tires with different diameter tires, you will want to correct your
speedometer, odometer, and automatic transmission shift points.
Simply reconnect your programmer, answer the necessary option(s),
and reprogram your vehicle. You do not have to return to stock first.
3

SECTION 1: POWERSTAT INSTALLATION
Tools and supplies required
8mm socket and ratchet
1/4” flathead screwdriver
DEX-COOL anti-freeze coolant (GM part #1234-6290)
Part#1008 - 160° PowerStat
Part #1022 - 180° PowerStat
1.
See Figures A or B. Disconnect the intake air temperature sensor
connector located in the air intake duct between the mass air
flow sensor and the throttle body.
2. Use a flathead screwdriver to loosen the clamps on the air
intake duct and remove the duct.
3. With the radiator cap on, remove the two (2) thermostat
housing bolts. Remove the thermostat housing leaving the
radiator hose attached to expose the stock thermostat. A small
amount of coolant may be lost at this point.
4. Lift out the stock thermostat. Use a screwdriver to gently pry,
if necessary. Clean all the sealing surfaces.
5. Make sure that the rubber “O” ring is positioned flat side
down on the PowerStat. Next, install the PowerStat, making
sure that it’s positioned correctly (spring end facing down into
intake manifold).
6. Reinstall the thermostat housing and bolts. Torque the bolts to
7ft.-lbs.
7. Remove the radiator cap (or coolant reservoir cap on
Corvette). Place a rag or towel under the pressure side bleed
screw on the thermostat housing to prevent coolant from
splashing on the distributor. Open the pressure side bleed
screw while watching the coolant level in the radiator (or
coolant reservoir on Corvette). The coolant level will drop
when the bleed screw is fully opened.
8. Slowly fill the radiator with the DEX-COOL coolant. Close
the bleed screw when the bubbles disappear and only coolant
is escaping from the bleed screw.At this point, finish filling
the radiator and reinstall the radiator cap.
IMPORTANT:
NEVER MIX ORDINARYANTI-FREEZE (GREEN)
WITH THE DEX-COOL ANTI-FREEZE (ORANGE)
OR YOU MAYDAMAGE THE COOLING SYSTEM.
4
•
WARNING: NEVER ATTEMPT TO CHANGE
A THERMOSTAT ON A HOT ENGINE
•
SERIOUS INJURY CAN OCCUR IF THE
RADIATOR CAP IS REMOVED WHILE THE
COOLING SYSTEM IS HOT
•
THE ENGINE SHOULD ALWAYS BE COLD
WHEN INSTALLING THE POWERSTAT
NOTE: After installing the
PowerStat, if any coolant
needs to be added to the
vehicle, make sure you
put the same color coolant
back into the vehicle. If
your vehicle has orange
coolant, replace with orange
coolant. If green, replace
with green.

9. Reinstall the mass air flow sensor side of the air intake duct.
To install the throttle body side of the duct, use the flathead
screwdriver to secure the lower side of the duct onto the
underside of the throttle body, then work the sides and the top
of the duct onto the throttle body assembly.
10. Tighten the hose clamp using the flathead screwdriver.
11. Reconnect the intake air temperature sensor connector.
12. Start the vehicle and allow it to warm up to normal operating
temperature.
13. Check the coolant level in the radiator overflow/fill reservoir
and fill as needed.
5
Figure A
Throttle
body
Thermostat
housing
Pressure side
bleed screw
Mass air
flow sensor
CAMARO/FIREBIRD/IMPALA SS/CAPRICE/
ROADMASTER POWERSTAT INSTALLATION
CORVETTE POWERSTAT INSTALLATION
Figure B
Throttle
body
Thermostat
housing
Mass air
flow sensor
Pressure side
bleed screw

SECTION 2: PROGRAMMING INSTRUCTIONS
• Connect one (1) end of the provided cable to the black plastic
adapter using the thumbscrews as in Figure C. Connect the
other end of the cable to the programmer as shown in Figure D,
and tighten the thumbscrews.
•Connect one (1) end of the provided cable to the programmer
as in Figure E and tighten the two (2) thumbscrews.
• See Figure F. Locate the Data Link Connector (DLC) under the
driver’s side of the dash panel near the driver’s right knee.
6
Figure F
Figure E
Programmer
FOR 1994 CAMARO/FIREBIRD AND
1994-1995 IMPALA SS/CAPRICE/ROADMASTER:
FOR ALL OTHER LT1/LT4 VEHICLES:
Data link cable
Data link
adapter
Programmer
cable
Programmer
Figure D
Figure C
Thumbscrew
Thumbscrew

•
Plug the programmer cable (or adapter) into the DLC. Make sure
the cable is plugged in completely to ensure a good connection.
• Set the parking brake and turn the ignition key to the RUN
position but do not start the engine.
IMPORTANT:
-DO NOT leave the vehicle while programming is in process.
-Make sure the vehicle battery is fully charged before programming.
-The key must remain in the RUN position, without the engine
running, during the entire programming process..
-DO NOT operate electrical accessories
(radio, windows, wipers, etc.) while programming.
-DO NOT attempt programming while the
vehicle is connected to a batterycharger.
• Press the sarrow on the programmer. The following displays
should appear immediately on the LCD screen (where X.X.X.X
is the version number):
•If these screens do not appear, for 1994-1997 LT1/LT4 vehicles
make sure that both ends of the cable are securely attached
and press the sarrow again. For 1994-1995 LT1 vehicles,
check and/or replace the battery as described in #6 of the
Troubleshooting Guide.
• Next, the programmer will show applications and copyright
information. Then, a screen similar to this should appear with
adescription of your vehicle:
•If this screen does not appear, make sure that the key is in the
RUN position with the engine NOT running.
7
YOUR VEHICLE IS:
1996 CHEVROLET CAMARO 5.7L LT1
VERSION
X.X.X.X
HYPERTECH
POWER PROGRAMMER
SYSTEM TEST
WAIT
FOR XXXX-XXXX
LT1/LT4 VEHICLES

• The programmer will display a series of options. For each
option, press the ‘Y’ button to make a change. Press the ‘N’
button to make no change and proceed to the next option. For
some options, you will use the sand tarrows to point to a
particular option. Pressing the ‘Y’ button will then lock in your
selection. For example, use the sand tarrows to select your
top-speed limiter, then press the ‘Y’ button to lock in your choice.
A. ENGINE TUNING
• Press the ‘Y’ button to install engine tuning. Press ‘N’ to keep
the stock vehicle tuning.
B. REV LIMITER
• Press ‘N’ to keep the stock engine rev limiter. Making this
choice will skip to the next option.
• Press ‘Y’ to adjust the engine rev limiter to a value other than
stock. The stock rev limiter may vary depending on year and
engine size of the vehicle. Please refer to the owner’s manual
for the stock engine rev limiter.
• Press the sand tarrows to increase or decrease the engine
rev limiter.The rev limiter can be increased or decreased in
100 RPM increments. Press ‘Y’ to lock in the desired value.
NOTE: At any time, you may press ‘N’ to allow you to either
try again or skip to the next option.
8
PRESS Y TO INSTALL HYPERTECH POWER TUNING
PRESS N TO KEEP FACTORY ENGINE TUNING
PRESS Y TO ADJUST ENGINE REV LIMITER
PRESS N TO KEEP STOCK ENGINE REV LIMIT
USE UP/DOWN ARROWS TO ADJUST ENGINE REV LIMITER, THEN PRESS Y TO SELECT OR N TO EXIT.
_ _ _ _RPM

C. ELECTRIC COOLING FAN OPERATING RANGE
•Press ‘N’ if you do not wish to change the temperature at which
the electric cooling fans turn on and turn off.
• Press ‘Y’ if you want to lower the temperature at which the
electric cooling fans turn on and turn off, even with the stock
thermostat. A cooler combustion chamber will produce more
power. By making this selection, you will now go to the next
screen to pick the operating temperature range of the cooling
fans. This screen will appear:
• Use the sand tarrows to select between optimizing the
cooling fan temperature settings for:
180°Hypertech PowerStat
Fans on/off at: 213°F/205°
160° Hypertech PowerStat
Fans on/off at: 192°F/185°F
Stock Cooling Fan Temperatures:
Fans on/offat: 240°F/225°F
9
USE UP/DOWN ARROWS TO SELECT THERMOSTAT TEMP, THEN PRESS Y TO SELECT OR N TO EXIT.
_ _ _F
PRESS Y TO PROGRAM ENGINE COOLING FAN TEMPERATURE RANGE
PRESS N TO LEAVE COOLING FAN TEMPERATURE UNALTERED

D. TOP-SPEED LIMITER
•Press the ‘N’ button to keep your vehicle’s stock top-speed
limiter and skip to the next option.
•If you have installed factory-approved high-performance
tires, press the ‘Y’ button to change your vehicle’s top-speed
limiter to match the speed rating of those tires. The speed
rating or speed symbol will be found on the sidewall of your
tires. Here are the corresponding symbols and maximum
top-speed limits that can be programmed into your vehicle:
E. TIRE SIZE
NOTE: If you select ‘Y’, you will automatically be asked to
enter a gear ratio AFTER you have selected your tire
height. You will not be allowed to enter ‘N’ for stock
gear ratio. If you have not changed the tire height,
you should select ‘N’ for tire height.
• Press ‘N’ if the original size tires are being used.
• Press ‘Y’ if you have installed tires with an overall height
that is different than the original factory tires. This feature will
recalibrate your speedometer/odometer readings and part-throttle
shifting for automatic transmissions for the new tire height.
The sand tarrows will allow adjustments of 1/4” increments
between 24”-30”. Press the ‘Y’ button to lock in the desired
value. At any time you may press ‘N’ to allow you to either
try again or skip to the next option.
10
PRESS Y TO ADJUST TOP SPEED LIMIT TO MATCH SPEED RATING OF HIGH-PERFORMANCE TIRES
PRESS N TO KEEP STOCK TOP SPEED LIMIT
USE UP/DOWN ARROWS TO ADJUST TOP SPEED LIMIT, THEN PRESS Y TO SELECT OR N TO EXIT.
_––_ _ _ MPH
S- 110 MPH
T - 116 MPH
U- 122 MPH
H- 128 MPH
V - 147 MPH
W- 166 MPH
Y - 184 MPH
ZR - 255 MPH
PRESS Y IF TIRE HEIGHT HAS BEEN CHANGED
PRESS N TO KEEP STOCK TIRE HEIGHT
USE UP/DOWN ARROWS TO CHOOSE CORRECT TIRE HEIGHT, THEN PRESS Y TO SELECT OR N TO EXIT.
__._ _”

If you do not know your tire height, ask your tire dealer or
measure a tire as follows:
1. Place a chalk mark on the tire where it contacts the pave-
ment and also mark the pavement. These marks should be
at the center of the tire footprint pointing straight down to
the pavement.
2. Roll the vehicle in a straight line until the chalk mark
makes one revolution and is pointing straight down at the
pavement again. Mark the pavement again at this new spot.
3. Measure (in inches) the distance between the two (2) marks
on the pavement. Divide the measurement by 3.1416. This
will give you the tire height in inches.
F. REAR GEAR RATIO
•Press ‘N’ if the rear gear ratio has not been changed from the
factory installed gear. Making this choice will skip to the next
option.
•Press ‘Y’ if you have installed a rear gear with a ratio that
is different than the original factory gear. This feature will
recalibrate your speedometer/odometer readings and
part-throttle shifting for automatic transmissions for the
new gear ratio. Press the sand tarrows to see all of
the gear ratios available for your vehicle. Press ‘Y’ to
lock in the gear ratio that you have installed.
• Your factory rear gear code can be found on a sticker inside
your glove box or the underside of the trunk lid.
NOTE: For automatic transmissions, a selection of any of
the available rear gear ratios will automatically set
wide-open throttle shifts similar to original factory
RPM settings for the new rear gear ratio.
11
PRESS Y IF REAR AXLE RATIO HAS BEEN CHANGED
PRESS N TO KEEP STOCK REAR AXLE RATIO
USE UP/DOWN ARROWS TO CHOOSE REAR AXLE RATIO, THEN PRESS Y TOSELECT OR N TO EXIT.
___––_._ _:1
HOW TO DETERMINE TIRE HEIGHT

G. TRANSMISSION SHIFT POINT MPH & RPM
(AUTOMATICS ONLY)
Be sure to read and understand this entire section before
attempting to re-program your shift points.
The shift point option allows you to change the RPM at which
your transmission shifts at wide-open throttle to find the very best
shift points for maximum acceleration. You can try optimizing the
shift points using the seat-of-your-pants technique, but how will
you know if your e.t.’s improved or not? The only accurate
method for this optimization is at the track with timing slips as
the measuring device.
In order to optimize the performance of any vehicle, consis-
tent test results are necessary. If a vehicle varies plus or minus
1/10th of a second in the quarter,run to run, with no changes, it is
impossible to test any product (shift point, starting line RPM, etc.)
that has the potential to gain 1/10th or 2/10ths of a second,
because the gains or losses on any one (1) run could be due to
inconsistency rather than the variable being tested. Therefore,
before testing anything, make the vehicle consistent.
Wheel-spin, if present, is the overwhelming cause of incon-
sistency. You must develop a starting line technique that gives
you the best repeatable elapsed times. Tires are the most impor-
tant product you need to cure wheel-spin. For street driven
vehicles, we recommend D.O.T. approved street slicks as large as
you can fit under the wheel wells of your vehicle. In any case,
before testing shift points, arrive at the starting line technique that
gives you the best repeatable results, with or without slicks.
Throw out any run with excessive wheel-spin, and try to get at
least three (3) runs that are within 4 or 5 hundredths of a second.
Then average them and use this average value (not just your
best run) for all testing comparisons. Your best e.t.’swill occur
when you leave as hard as you can without wheel-spin. Confirm
this by practicing and observing the results.
And finally,averyimportant point for any and all high-
performance testing...always test only one (1) variable at a
time until it is optimized. For shift point optimization, this
means test only one (1) shift point at a time until the best RPM is
found, leaving all other shift points alone. Once the best 1-2 shift
point is found, program it in and leave it. Then repeat the same
optimization procedure for the 2-3 shift point.
It is not usually necessary to optimize the 3-4 shift point
(unless the gearing in the vehicle causes the shift to occur during
the 1/4-mile run) because it will occur at a speed so high that it is
out of range, even on a race track. However, if gearing is causing
either the 2-3 or the 3-4 shift to occur just before the end of the
1/4,you should try raising the shift point enough to allow the
12

vehicle to cross the finish line without making that last shift.
The highest shift point RPM you can use must always be
less than the rev limiter RPM. If you do hit the rev limiter, the
computer will shut the fuel off until RPMs drop sufficiently, so let
off the throttle and abort that test run. The rev limiter is there to
protect your valve-train and the engine from damage. Even if you
went quicker every time you raised the shift point RPM, stop at
100 RPM below the rev limiter. That’s the most RPM you can use
safely for that shift point.
This is the first screen you will see:
If you press ‘Y’, you will see the following screen:
The automatic transmission shift point adjustment range is:
1-2 shift: +/-6 MPH (In 1 MPH increments)
2-3 shift: +/-12 MPH (In 1 MPH increments)
3-4 shift: +/-18 MPH (In 1 MPH increments)
Press the sarrow once for 1 MPH, twice for 2 MPH, etc.
and then press the ‘Y’ button to enter your 1-2 shift point choice.
If you don’t want to change the 1-2 shift point, enter a zero (0),
and press ‘Y’.
After downloading the 1-2 shift point you want to test,
disconnect the programmer and make your test runs (At least
three (3), but as many as needed to get three (3) good runs for
averaging.). If you’ve seen a gain, continue moving in that direc-
tion until you begin to slow down or until you are within 100
RPM of the rev limiter. You can now review all of your test
results, select the best 1-2 shift point for your vehicle, and pro-
gram it in. If two (2) different shift points run the same average
e.t.’s, use the lower MPH and RPM to save wear and tear on the vehicle.
13
NOTE: These tables are for general reference ONLY.
Vehicles will vary slightly depending on tire
height and accuracy of the tachometer.
PRESS Y TO ADJUST TRANSMISSION SHIFT POINTS
PRESS N TO KEEP STOCK SHIFT POINTS
USE UP/DOWN ARROWS TO ADJUST SHIFT POINTS, THEN PRESS Y TO SELECT OR N TO EXIT.
1-2 SHIFT +0 MPH
Camaro/Firebird/Corvette
1-2 upshift: 5700 RPM
2-3 upshift: 5700 RPM
3-4 upshift: 5500 RPM
Stock Shift Points At Wide Open Throttle
Impala SS/Caprice/Roadmaster
1-2 upshift: 5400 RPM
2-3 upshift: 5400 RPM
3-4 upshift: 5400 RPM

Once optimized, repeat the same procedure for the 2-3 shift
and the 3-4 shift.
NOTE: These tables are for general reference ONLY.
Vehicles will vary slightly depending on tire height
and accuracy of the tachometer.
14
Camaro/Firebird/Corvette automatic transmission shift tables*
Rear gear ratios 2.59:1 & 2.73:1 1-2 shift 1 mph = 110 rpm
2-3 shift 1 mph = 55 rpm
3-4 shift 1 mph = 35 rpm
Rear gear ratios 3.07:1 & 3.23:1 1-2 shift 1 mph = 130 rpm
2-3 shift 1 mph = 70 rpm
3-4 shift 1 mph = 40 rpm
Rear gear ratios 3.42:1 & 3.45:1 1-2 shift 1 mph = 135 rpm
2-3 shift 1 mph = 70 rpm
3-4 shift 1 mph = 40 rpm
Rear gear ratios 3.70:1 & 3.73:1 1-2 shift 1 mph = 150 rpm
2-3 shift 1 mph = 80 rpm
3-4 shift 1 mph = 50 rpm
Rear gear ratios 4.09:1 & 4.10:1 1-2 shift 1 mph = 165 rpm
2-3 shift 1 mph = 90 rpm
3-4 shift 1 mph = 55 rpm
Rear gear ratio 4.56:1 1-2 shift 1 mph = 185 rpm
2-3 shift 1 mph = 100 rpm
3-4 shift 1 mph = 60 rpm
Impala SS/Caprice/Roadmaster automatic transmission shift tables*
Rear gear ratios 2.93:1 & 3.08:1 1-2 shift 1 mph = 120 rpm
2-3 shift 1 mph = 65 rpm
3-4 shift 1 mph = 40 rpm
Rear gear ratio 3.23:1 1-2 shift 1 mph = 125 rpm
2-3 shift 1 mph = 65 rpm
3-4 shift 1 mph = 40 rpm
Rear gear ratio 3.42:1 1-2 shift 1 mph = 135 rpm
2-3 shift 1 mph = 70 rpm
3-4 shift 1 mph = 45 rpm
Rear gear ratio 3.73:1 1-2 shift 1 mph = 145 rpm
2-3 shift 1 mph = 75 rpm
3-4 shift 1 mph = 50 rpm
Rear gear ratio 4.10:1 1-2 shift 1 mph = 160 rpm
2-3 shift 1 mph = 85 rpm
3-4 shift 1 mph = 55 rpm
*Shift tables based on stock tireheight

H.
TRANSMISSION SHIFT FIRMNESS (AUTOMATICS ONLY)
•Press ‘Y’ if you have installed an aftermarket shift kit into your
automatic transmission. The shift kit has already firmed up
your shifts. You do not want your programmer to make them
even firmer because transmission damage may occur.
NOTE: Pressing ‘Y’ lets your programmer know that it is not
to program shift firmness and you will skip to the
final Report.
• Press ‘N’ if you have not installed an aftermarket shift kit into
your automatic transmission. Pressing ‘N’ will give you the
following choice:
•
Press ‘N’ to keep the stock shift firmness and skip to the Report.
•Press ‘Y’ to increase the firmness of shifts. Firmer and quicker
shifts reduce the loss of power to friction as the clutch packs
“lock-up” during shifts, allowing more power to the rear wheels.
I. REPORT
•After your last choice has been made, this screen will appear
and list all of your choices:
• Watch the screen as your choices scroll by on the bottom line.
Now these two (2) alternating screens will appear:
• If all choices are satisfactory, press ‘Y’ to start programming.
If you want to make a change to your choices, press the ‘N’
button to start over from the beginning.
15
PRESS Y TO INCREASE TRANSMISSION SHIFT FIRMNESS
PRESS N TO KEEP STOCK SHIFT FIRMNESS
PRESS Y IF YOU HAVE INSTALLED AN AFTERMARKET SHIFT KIT
PRESS N TO CONTINUE
YOU HAVE CHOSEN
..........
PRESS Y TO BEGIN
PROGRAMMING
PRESS N TO
CHANGE OPTIONS

J. PROGRAMMING
IMPORTANT NOTE: On certain applications, the dash
message center may display random code information such
as REDUCED ENGINE POWER. This is a NORMAL step
during the programming process for certain applications.
•
First, the programmer will read out your vehicle’s stock program.
• When the programmer has finished this, it will wait a few
seconds and then begin programming the changes into your vehicle.
• This display will show percentage completion while the
programming is taking place. While the unit is programming,
the following is EXTREMELY IMPORTANT:
*DO NOT LEAVE THE VEHICLE WHILE
PROGRAMMING IS IN PROCESS.
*DO NOT DISTURB THE CABLE.
*DO NOT TURN THE KEY OFF.
*DO NOT START THE ENGINE.
*IF THE UNIT STOPS PROGRAMMING OR IS
INTERRUPTED, PLEASE MAKE A NOTE OFANY
MESSAGE(S) THAT APPEAR ON THE PROGRAMMER
SCREEN. THIS WILL BE HELPFUL TO OUR
TECHNICAL DEPARTMENT.
• Any one of these actions will disturb the programming process.
The programmer is designed to recover from these conditions,
but they should be avoided.
16
READING COMPUTER
XX%
WRITING COMPUTER
XX%
IMPORTANT NOTE: If during the reading and/or programming stage, the
Power Programmer does not show an increase in percentage for at least five
(5) minutes, LEAVE THE KEY IN THE ‘ON’POSITION and unplug the
Power Programmer
from the diagnostic port. Then, reinsert the cable
into
the diagnostic port and press the sbutton. This will allow the programming
to continue. If the problem continues, call Hypertech at 901-382-8888.

• Programming is complete when the unit reaches 100%.
(Programming takes approximately 5 minutes)
The following screens will appear:
• Turn the ignition key to OFF for at least thirty (30) seconds.
Press the ‘Y’ button and remove the programmer cable from
the DLC under the dash panel.
• Start the engine and make sure the Service Engine Soon light
on your instrument cluster goes out (If it stays on or flashes,
call Hypertech at 901-382-8888). Warm the engine up and
make sure it is running smoothly.
•CHECK FOR DETONATION.Whether you have selected
Power Tuning for premium (the highest octane rating available
in your area) or regular octane gasoline, you need to check for
detonation. This is a “pinging” sound heard during heavy
throttle acceleration, indicating the presence of detonation.
Make certain you are using gasoline intended for the Power
Tuning you have installed. If any “pinging” sound is heard,
you should immediately back off the throttle. To discuss,
call Hypertech at 901-385-1888
.
17
TURN KEY OFF
FOR 30 SECONDS
HYPERTECH POWER
TUNING INSTALLED
TO END, PRESS Y
AND UNPLUG CABLE

SECTION 3: PROGRAMMING BACK TO STOCK
OR CHANGING OPTIONS
You may return your vehicle’s computer back to stock
programming at any time after using your programmer. Follow
these steps to return your vehicle back to the stock tuning or
change your option settings.
• Reconnect the programmer to the DLC. Next, turn the ignition
key to run but do not start the engine. Press the sarrow and
wait for the programmer to identify your vehicle just as before.
Since the programmer has programmed your vehicle’s computer,
this screen will appear:
• Then this screen will appear:
• Press ‘Y’ to return to the original factory program.
• Press ‘N’ to allow you to see the options in Section 2.
• If the ‘Y’ button is pressed, programming back to stock will
begin. These screens will appear:
• Turn the key off for thirty (30) seconds, press the ‘Y’ button,
and remove the cable as before. Your vehicle’s computer will
now be in a completely stock configuration.
18
HYPERTECH POWER
TUNING INSTALLED
PRESS Y TO RETURN VEHICLE TO FACTORY SETTINGS
PRESS N TO ACCESS POWER PROGRAMMER FEATURES
TURN KEY OFF
FOR 30 SECONDS
FACTORY PROGRAM
IS NOW INSTALLED
TO END, PRESS Y
AND UNPLUG CABLE
WRITING COMPUTER
XX%

SECTION 4: TROUBLESHOOTING GUIDE
The programmer will notify you of incidents that are out of the
ordinary. Here are some of the screens that may be encountered.
1. LOSS OF COMMUNICATION
• This screen will appear if the programmer is unable to
communicate with your vehicle’s computer. If the problem
is corrected, the programmer will automatically restart the
programming process. Take these steps to correct the problem:
1. Make sure that the ignition key is in the RUN position and
that the engine is not running.
2. Make sure that both ends of the cable are securely attached.
3.
Wait at least five (5) minutes for the programmer to re-establish
communication and program the vehicle.
4. If the three (3) steps above do not correct the problem,
call Hypertech at 901-382-8888.
2. CABLE REMOVED WHILE PROGRAMMING
• The programmer will lose power during programming if
the cable is removed for any reason. If this happens, simply
reconnect the cable and press the sarrow. The programmer
will identify your vehicle and then display:
• The programmer will then continue programming from where
it was interrupted.
NOTE: If the programmer was interrupted during the
Reading stage, programming will NOT be considered
interrupted, and the programmer will proceed to
Section 2 on page 7.
19
COMMUNICATION LOST:
RETRYING
PROGRAMMING WAS
INTERRUPTED...
PROGRAMMING WILL
CONTINUE NOW
Other manuals for POWER PROGRAMMER III
1
Table of contents
Other Hypertech Automobile Accessories manuals
Popular Automobile Accessories manuals by other brands

True
True 10RStager Installation and operational manual

ELEVATE
ELEVATE CS RACK SYSTEMS owner's manual

Flash Cover
Flash Cover MN008 installation manual

Dakota Digital
Dakota Digital VFD3-52F Installation

BMW
BMW E65 installation instructions

Safe Fleet
Safe Fleet REAR VIEW SAFETY RVS-776718-DOS instruction manual

Go Rhino
Go Rhino Dominator Series Assembly/installation instructions

ASA Electronics
ASA Electronics Voyager VCCS150B quick start guide

TOP VEHICLE TECH
TOP VEHICLE TECH GRKST02 installation manual

Warn
Warn 108760 installation instructions

Tellur
Tellur TLL151171 user manual

SMARTFLOOR
SMARTFLOOR Dryback Installation and Maintenance