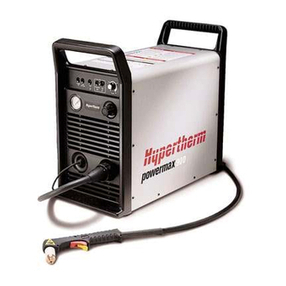
Hypertherm Powermax45 XP Reference manual

Powermax45 XP®Machine Interface
Receptacle with Voltage Divider PCB
Powermax45 XP®Port d’interface de machine
avec panneau diviseur de tension
Field Service Bulletin
Bulletin de service sur le terrain
809940 | Revision 2 | July 2020
| Révision 2 | Juillet 2020

Hypertherm Europe B.V.
Vaartveld 9, 4704 SE
Roosendaal, Nederland
31 165 596907 Tel
31 165 596901 Fax
31 165 596908 Tel (Marketing)
31 (0) 165 596900 Tel (Technical Service)
00 800 4973 7843 Tel (Technical Service)
(Technical Service Email)
Hypertherm (Shanghai) Trading Co., Ltd.
B301, 495 ShangZhong Road
Shanghai, 200231
PR China
86-21-80231122 Tel
86-21-80231120 Fax
86-21-80231128 Tel (Technical Service)
(Technical Service Email)
South America & Central America: Hypertherm Brasil Ltda.
Rua Bras Cubas, 231 – Jardim Maia
Guarulhos, SP – Brasil
CEP 07115-030
55 11 2409 2636 Tel
Hypertherm Korea Branch
#3904. APEC-ro 17. Heaundae-gu. Busan.
Korea 48060
82 (0)51 747 0358 Tel
82 (0)51 701 0358 Fax
TechSupportAP[email protected]
(Technical Service Email)
Hypertherm Pty Limited
GPO Box 4836
Sydney NSW 2001, Australia
61 (0) 437 606 995 Tel
61 7 3219 9010 Fax
TechSupportAP[email protected]
(Technical Service Email)
Hypertherm (India) Thermal Cutting Pvt. Ltd
A-18 / B-1 Extension,
Mohan Co-Operative Industrial Estate,
Mathura Road, New Delhi 110044, India
91-11-40521201/ 2/ 3 Tel
91-11 40521204 Fax
HTIndia.info@hypertherm.com (Main Office Email)
TechSupportAP[email protected]
(Technical Service Email)
Hypertherm, Inc.
Etna Road, P.O. Box 5010
Hanover, NH 03755 USA
603-643-3441 Tel (Main Office)
603-643-5352 Fax (All Departments)
800-643-9878 Tel (Technical Service)
800-737-2978 Tel (Customer Service)
customer.service@hypertherm.com (Customer Service Email)
866-643-7711 Tel (Return Materials Authorization)
877-371-2876 Fax (Return Materials Authorization)
Hypertherm México, S.A. de C.V.
Avenida Toluca No. 444, Anexo 1,
Colonia Olivar de los Padres
Delegación Álvaro Obregón
México, D.F. C.P. 01780
52 55 5681 8109 Tel
52 55 5683 2127 Fax
Hypertherm Plasmatechnik GmbH
Sophie-Scholl-Platz 5
63452 Hanau
Germany
00 800 33 24 97 37 Tel
00 800 49 73 73 29 Fax
31 (0) 165 596900 Tel (Technical Service)
00 800 4973 7843 Tel (Technical Service)
Hypertherm (Singapore) Pte Ltd.
82 Genting Lane
Media Centre
Annexe Block #A01-01
Singapore 349567, Republic of Singapore
65 6841 2489 Tel
65 6841 2490 Fax
Hypertherm Japan Ltd.
Level 9, Edobori Center Building
2-1-1 Edobori, Nishi-ku
Osaka 550-0002 Japan
81 6 6225 1183 Tel
81 6 6225 1184 Fax
HTJapan.info@hypertherm.com (Main Office Email)
© 2018 – 2020 Hypertherm Inc. All rights reserved. Tous droits réservés.
Powermax and Hypertherm are trademarks of Hypertherm, Inc. and may be registered in the United States and/or other countries. All other trademarks are the property of
their respective holders.
Environmental stewardship is one of Hypertherm’s core values. www.hypertherm.com/environment
100% Associate-owned
Powermax et Hypertherm sont des marques d’Hypertherm, Inc. qui peuvent être déposées aux États-Unis et/ou dans d’autres pays. Toutes les autres marques de commerce
sont la propriété de leurs détenteurs respectifs.
Une bonne gestion environnementale est l’une des valeurs fondamentales d’Hypertherm et est essentielle à notre réussite et à celle de nos clients. Nous travaillons sans
relâche pour réduire l’incidence sur l’environnement de toutes nos activités. Pour en savoir plus : www.hypertherm.com/environment.
Détenue à 100 % par les associés

Machine Interface Receptacle with Voltage Divider Board
Powermax45 XP Field Service Bulletin 809940 3
Introduction
This Field Service Bulletin gives the procedure for installing an internal machine interface
receptacle, cables, and voltage divider printed circuit board (PCB).
Tools and materials
Assorted Phillips®, TORX®, and blade screwdrivers
Grounded wrist strap (or similar grounding accessory)
Kit 428653 contents
WARNING
ELECTRIC SHOCK CAN KILL
Disconnect electrical power before doing installation or maintenance.
All work requiring removal of the plasma power supply outer cover or panels
must be done by a qualified technician.
See the Safety and Compliance Manual (80669C) for more safety
precautions.
NOTICE
Static electricity can cause damage to printed circuit boards (PCBs). Use correct
precautions when you touch PCBs.
Keep PCBs in antistatic containers.
Put on a grounded wrist strap when you touch PCBs.
Part number Description Quantity
075534 Plastite #6 X 5/16 pan head screw 2
223476 Machine interface receptacle with cables and voltage divider PCB 1
074391 Cable holder 2

Machine Interface Receptacle with Voltage Divider Board
4809940 Field Service Bulletin Powermax45 XP
Figure 1 – Machine interface receptacle with cables and voltage divider PCB
Disconnect the power and gas supply
1. At the front of the plasma power supply, set
the power switch to OFF (O).
2. Disconnect the power cord from the
power source.
3. Disconnect the gas supply.
1
2
3
6
7
4
8
95
1Machine interface receptacle
2Ground wire for machine interface receptacle
3Voltage divider PCB cable
4Voltage divider PCB
5Ground wire for voltage divider PCB
6Power PCB 4-pin connector (J21)
7Power PCB 2-pin connector (J17)
8Screws (2)
9Cable holders (2)
200 – 240 V 400 V, 480 V
1
2
3

Machine Interface Receptacle with Voltage Divider Board
Powermax45 XP Field Service Bulletin 809940 5
Remove the external components
1. Remove the 2 screws from the plasma power supply handle .
2. Remove the 2 screws from the bottoms of the front and rear panels.
3. Carefully tilt the tops of the front and rear panels away from the plasma power supply, and
pull the handle out.
4. Lift the cover off of the plasma power supply.
1
4
2
3
4
1
2
3
4
1
2
3

Machine Interface Receptacle with Voltage Divider Board
6809940 Field Service Bulletin Powermax45 XP
5. Remove the 2 plastic pins that attach the component barrier to the power PCB.
6. Lift the component barrier off of the plasma power supply.
7. Disconnect the front and rear panels. Use a blade screwdriver to push in the 2 tabs at the
bottom of each of the panels until the panels disconnect from the base.
5
6
6
5

Machine Interface Receptacle with Voltage Divider Board
Powermax45 XP Field Service Bulletin 809940 7
Disconnect the internal components
1. Remove the protective cover from the rear panel. Push on the tabs on the inside of the
protective cover to remove it.
2. Remove the gas supply hose from the
push-to-disconnect fitting on the right
side of the solenoid valve.
3. Remove the looped gas supply hose
from the push-to-disconnect fitting on the
air filter.
4. Move the ground clip off of the rear
panel. Keep the ground wire connected to the
ground clip.
1
2
1
2
4
3
3
4
5
5

Machine Interface Receptacle with Voltage Divider Board
8809940 Field Service Bulletin Powermax45 XP
Install the cable holders
The cable holders help prevent electrical interference by keeping the 4-pin connector cable
away from other electrical components. Make sure that you install the cable holders
correctly.
If the plasma power supply already has cable holders installed, continue to Install the machine
interface receptacle with voltage divider PCB on page 9.
1. Turn the plasma power supply so that the power PCB is facing you.
2. Bond the cable holders to the middle panel with the openings of the cable holders pointing up.
The 4-pin connector cable is shown for reference.
a. Remove the adhesive cover on 1 of the cable holders and bond the cable holder 25 mm
(1 inch) to the left of the middle grommet and 2 mm (1/16 inch) below the edge of the
middle panel.
b. Remove the adhesive cover on the other cable holder and bond the cable holder
between the warning label and the middle panel screw, and 2 mm (1/16 inch) below the
edge of the middle panel.
1
2
3
25 mm (1 inch)
2mm(1/16inch)
2mm(1/16inch)
1
2
3

Machine Interface Receptacle with Voltage Divider Board
Powermax45 XP Field Service Bulletin 809940 9
Install the machine interface receptacle with voltage divider PCB
1. Put the machine interface receptacle in the opening in the rear panel. Make sure that the green
and yellow ground wire is at the bottom of the opening.
Pin 1 and Pin 2 are wired but not used.
2. Put 2 screws in opposite corners of the machine interface receptacle. Tighten the screws to
1.1 N·m (10 in·lb).
Plasma
start
3
Arc transfer
14
13
12
Arc transfer
65
4
Arc voltage (+) Arc voltage (-)
Plasma
start
Ground

Machine Interface Receptacle with Voltage Divider Board
10 809940 Field Service Bulletin Powermax45 XP
3. Install the voltage divider PCB as follows. Refer to Figure 2 on page 11.
a. Put the voltage divider PCB cable through the slot in the middle panel that is labeled
CPC.
b. If an RS-485 serial interface PCB is installed, disconnect the J2 connector from the top
of the RS-485 PCB.
c. Push the voltage divider PCB into position on the middle panel. If necessary, gently lift
the plastic tabs . The voltage divider PCB makes a click when the PCB is in position.
d. Put the voltage divider PCB cable above the fan. Make sure that the routing of the voltage
divider PCB cable is as shown in Figure 2.
4. Install the 2 ground wires as follows. Refer to Figure 2.
a. On the fan side of the plasma power supply, remove the screw from the ground stud .
b. From the power PCB side, put the green and yellow ground wire for the machine
interface receptacle through the power cord grommet.
c. Put the machine interface receptacle ground wire on the ground stud . Do not install the
ground stud screw at this time.
d. Put the green voltage divider PCB ground wire above the voltage divider PCB and above
the fan. Make sure that the routing of the ground wire is as shown in Figure 2.
e. Put the voltage divider PCB ground wire on the ground stud .
f. Install the screw loosely on the ground stud with your fingers.
g. Rotate the ground wire terminals on the stud so that each wire points in a different direction.
Make sure that all of the other ground wires stay connected to the ground stud. Refer to
Figure 2.
h. Tighten the screw to 1.7 N·m (15 in·lb).
5. Install the 2-pin connector cable as follows. Refer to Figure 2.
a. Put the 2-pin connector cable from the voltage divider PCB through the power switch
grommet and the slot in the middle panel .
b. Connect the 2-pin connector to the power PCB at J17 . The black wire is at the top of the
connector and the red wire is at the bottom.
6. Install the 4-pin connector cable as follows. Refer to Figure 2. To help prevent electrical
interference, install the cable holders correctly.
a. Put the 4-pin connector cable above the black plastic mounting posts , into the cable
holders , and below the middle grommet and cables .
b. Make sure that the 4-pin connector cable is perpendicular to the cables that are in the
middle grommet. Keep to a minimum the distance that the cables are parallel.
c. Connect the 4-pin connector to the power PCB at J21 .

1
2
3
4
5
6
5
7
5
8
9
10
11
12
13
14
15
16

Machine Interface Receptacle with Voltage Divider Board
Powermax45 XP Field Service Bulletin 809940 11
Figure 2 – Machine interface receptacle cable routing (some internal components removed for clarity)
Black
Red
J21
J17
J17
J21
Orange
4
5
6
8
1
J2
3
6
7
10
9
10
8
9
12
13
14
15
16
16
11
1
2

Machine Interface Receptacle with Voltage Divider Board
12 809940 Field Service Bulletin Powermax45 XP
Set the voltage divider PCB
The factory setting on the voltage divider PCB is 50:1.
To change the voltage divider to a different setting, set the DIP switches to one of the following:
NOTICE
The voltage divider PCB is a simple resistive divider of raw arc voltage. To prevent ground loops and
electrical interference, you must isolate the divided arc signal.
NOTICE
The factory-installed voltage divider PCB supplies a voltage that is in proportion to the arc voltage. The
DIP switch settings on the voltage divider PCB control the output in open circuit conditions, to a
maximum output of 16 V. This output is an impedance-protected, functional extra-low voltage (ELV)
output. This type of output prevents shock, energy, and fire under normal conditions at the machine
interface receptacle and in single-fault conditions with the machine interface wiring. The voltage divider
PCB is not fault tolerant and ELV outputs do not comply with safety extra-low voltage (SELV)
requirements for direct connection to electrical devices.
L1
X12 R1
R2
R3
R7
R5
R6
R4
C3
C2
C1 C4
L1
BLK
RED
J1
J3 J4
RED
BLK
J2
21.1 30 40 50
GRN
S1
ALL DOWN = 20
D1
J5
20:1 21.1:1 30:1 40:1 50:1

Machine Interface Receptacle with Voltage Divider Board
Powermax45 XP Field Service Bulletin 809940 13
Connect the internal components
1. If the RS-485 serial interface receptacle is installed, connect the serial interface cable to the
J2 connector on the RS-485 serial interface PCB.
2. Put the gas supply hose in the push-to-connect fitting on the right side of the solenoid valve .
3. Push the gas supply hose into the plastic chassis divider guides .
4. Put the looped gas supply hose in the push-to-connect fitting on the air filter . Make sure of
the following:
The hose is fully inserted into the air filter and the solenoid valve.
The bottom of the loop is on the plastic shelf .
The hose does not have kinks. Kinks in the hose can cause damage. If the hose has kinks,
replace it.
5. Push in the front and rear panels until they move into position with a click. Make sure that
none of the cables are pinched.
1
2
3
4
5
6
1
2
3
4
5
6
6

Machine Interface Receptacle with Voltage Divider Board
14 809940 Field Service Bulletin Powermax45 XP
6. Make sure that the ground clip is connected
to the ground wire.
7. Put the ground clip into position to align with the
screw from the handle.
Install the external components
1. Attach the component barrier to the power PCB with the 2 plastic pins .
2. Put the extended piece of the component barrier above the power cord connection points
and behind the gas hose .
7
7
1
1
2
3
2
3

Machine Interface Receptacle with Voltage Divider Board
Powermax45 XP Field Service Bulletin 809940 15
3. Put the cover on the plasma power
supply. Align the louvers in the cover with
the fan . Make sure that none of the
cables are pinched.
4. Install the handle as follows:
a. Align the handle with the holes in
the cover.
b. Put the ends of the handle below the
edges of the front and rear panels .
c. Install the 2 screws that attach the
handle and cover to the plasma
power supply.
5. Install the 2 screws that attach the
bottoms of the front and rear panels to
the plasma power supply.
6. Connect the gas supply.
7. Connect the power cord to the
power source.
4
5
6
7
7
8
8
9
9
4
5
6
7
8
9

Machine Interface Receptacle with Voltage Divider Board
16 809940 Field Service Bulletin Powermax45 XP

Câble d’interface de machine avec diviseur de tension
Powermax45 XP Bulletin de service sur le terrain 809940 17
Introduction
Le présent Bulletin de service sur le terrain décrit la procédure d’installation d’un câble d’interface
de machine interne, d’autres câbles ainsi que du panneau diviseur de tension à circuit imprimé (CI).
Outils et matériel
Tournevis Phillips®, TORX®et à lame plate assortis
Bracelet antistatique (ou accessoire de mise à la terre similaire)
Contenu du kit 428653
AVERTISSEMENT
UN CHOC ÉLECTRIQUE PEUT ÊTRE MORTEL
Débrancher l’alimentation électrique avant toute installation et tout entretien.
Tous les travaux nécessitant le retrait du couvercle ou des panneaux de la
source de courant plasma doivent être effectués par un technicien qualifié.
Se reporter au Safety and Compliance Manual (Manuel de conformité et de
sécurité) (80669C) pour connaître les mesures de sécurité supplémentaires.
AV I S
L’électricité statique peut endommager les cartes à circuits imprimés. Prendre les bonnes
précautions lors de la manipulation des circuits imprimés.
Conserver les circuits imprimés dans des récipients antistatiques.
Porter un bracelet antistatique avant de manipuler les cartes à circuits imprimés.
Numéro de
référence Description Quantité
075534 Vis à tête cylindrique bombée Plastite n° 6 x 5/16 2
223476 Câble d’interface de machine avec câbles et panneau diviseur de tension 1
074391 Serre-câble 2

Câble d’interface de machine avec diviseur de tension
18 809940 Bulletin de service sur le terrain Powermax45 XP
Figure 1 – Câble d’interface de machine avec câbles et panneau diviseur de tension
Coupure de l’alimentation électrique et en gaz
1. Placer l’interrupteur d’alimentation sur
le devant de la source de courant plasma
àlapositiond’arrêt(OFF)(O).
2. Débrancher le cordon d’alimentation
de la source de courant.
3. Débrancher l’alimentation en gaz.
1
2
3
6
7
4
8
95
1Câble d’interface de machine
2Fil de terre pour câble d’interface de machine
3Câble du panneau diviseur de tension
4Panneau diviseur de tension
5Fil de terre pour panneau diviseur de tension
6Connecteur à 4 contacts de la carte à circuits
imprimés de la source de courant (J21)
7Connecteur à 2 contacts de la carte à circuits
imprimés de la source de courant (J17)
8Vis (2)
9Serre-câbles (2)
200 – 240 V 400 V, 480 V
1
2
3

Câble d’interface de machine avec diviseur de tension
Powermax45 XP Bulletin de service sur le terrain 809940 19
Retrait des composants extérieurs
1. Retirer les 2 vis de la poignée de la source de courant plasma .
2. Retirer les 2 vis qui se trouvent en dessous des panneaux avant et arrière.
3. Éloigner délicatement la partie supérieure des panneaux avant et arrière de la source
de courant plasma, puis tirer sur la poignée .
4. Soulever le couvercle de la source de courant plasma pour le retirer.
1
4
2
3
4
1
2
3
4
1
2
3

Câble d’interface de machine avec diviseur de tension
20 809940 Bulletin de service sur le terrain Powermax45 XP
5. Retirer les 2 goupilles en plastique qui fixent la barrière de composants à la carte à circuits
imprimés de la source de courant.
6. Soulever la barrière de composants pour la séparer de la source de courant plasma.
7. Enlever les panneaux avant et arrière. À l’aide d’un tournevis plat, écarter les 2 languettes
situées au bas de chacun des panneaux jusqu’à ce que ceux-ci se détachent du socle.
5
6
6
5
Other manuals for Powermax45 XP
14
Table of contents
Languages:
Other Hypertherm Industrial Equipment manuals

Hypertherm
Hypertherm RS-485 Series Reference manual

Hypertherm
Hypertherm SENSOR OHC User manual

Hypertherm
Hypertherm Abrasive pot User manual

Hypertherm
Hypertherm powermax900 Reference manual

Hypertherm
Hypertherm EDGE Ti Lifter Repair Reference manual

Hypertherm
Hypertherm Voyager III Reference manual

Hypertherm
Hypertherm XPR170 Troubleshooting guide

Hypertherm
Hypertherm EcoSift User manual