manuals.online logo
Brands
  1. Home
  2. •
  3. Brands
  4. •
  5. i-PRO
  6. •
  7. Camera Accessories
  8. •
  9. i-PRO WV-QSR505 User manual

i-PRO WV-QSR505 User manual

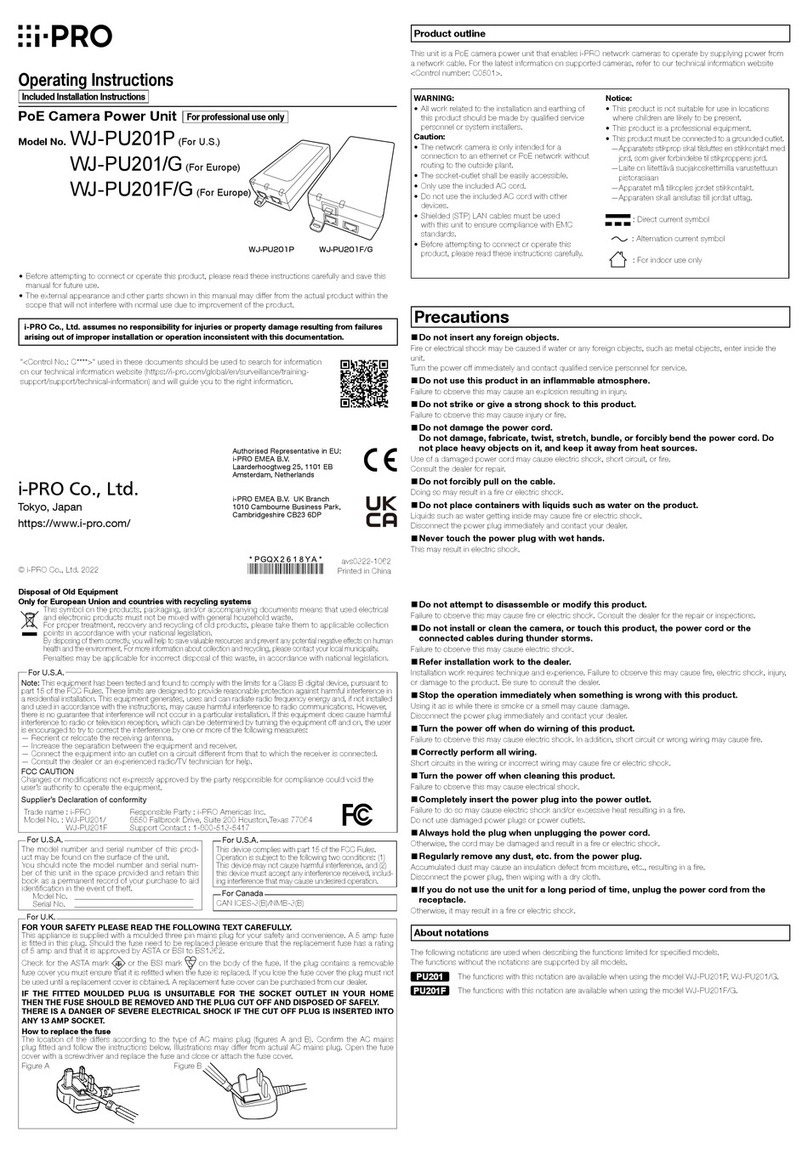
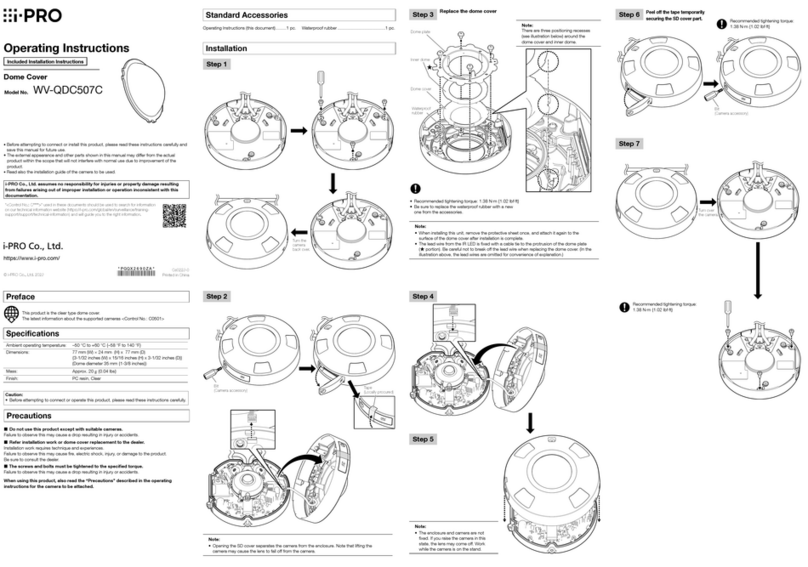
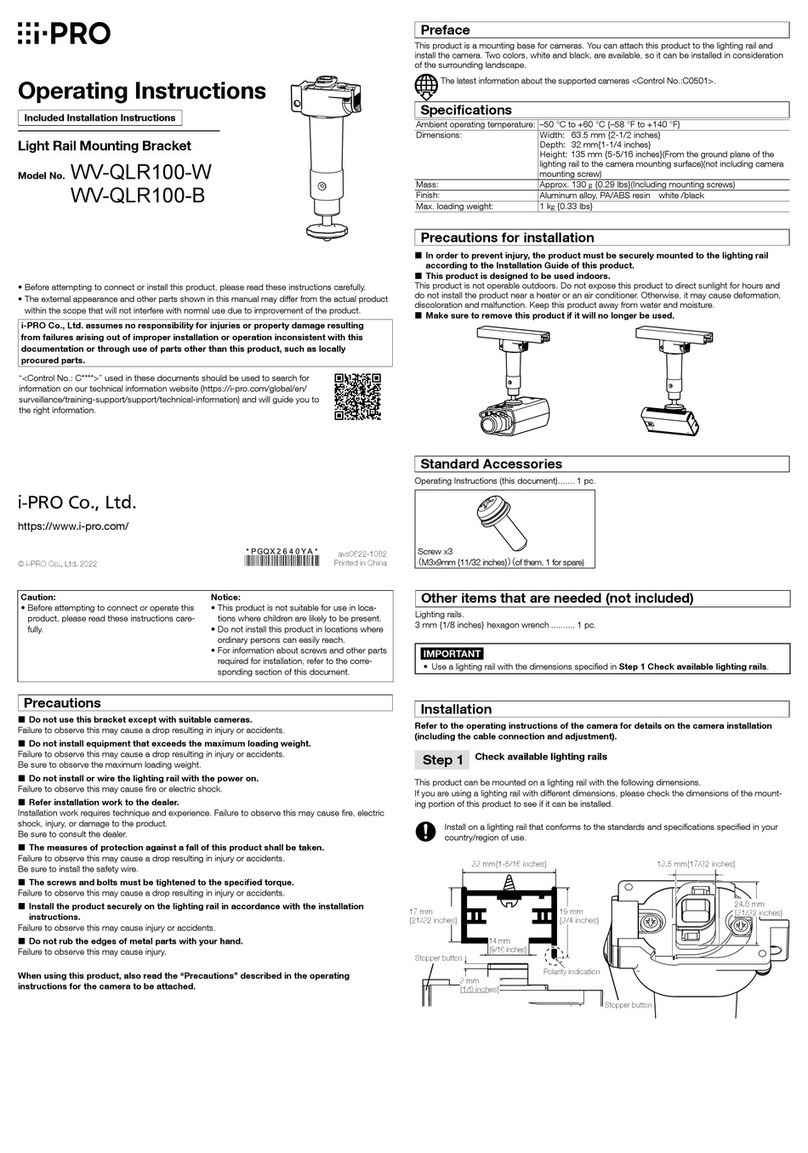
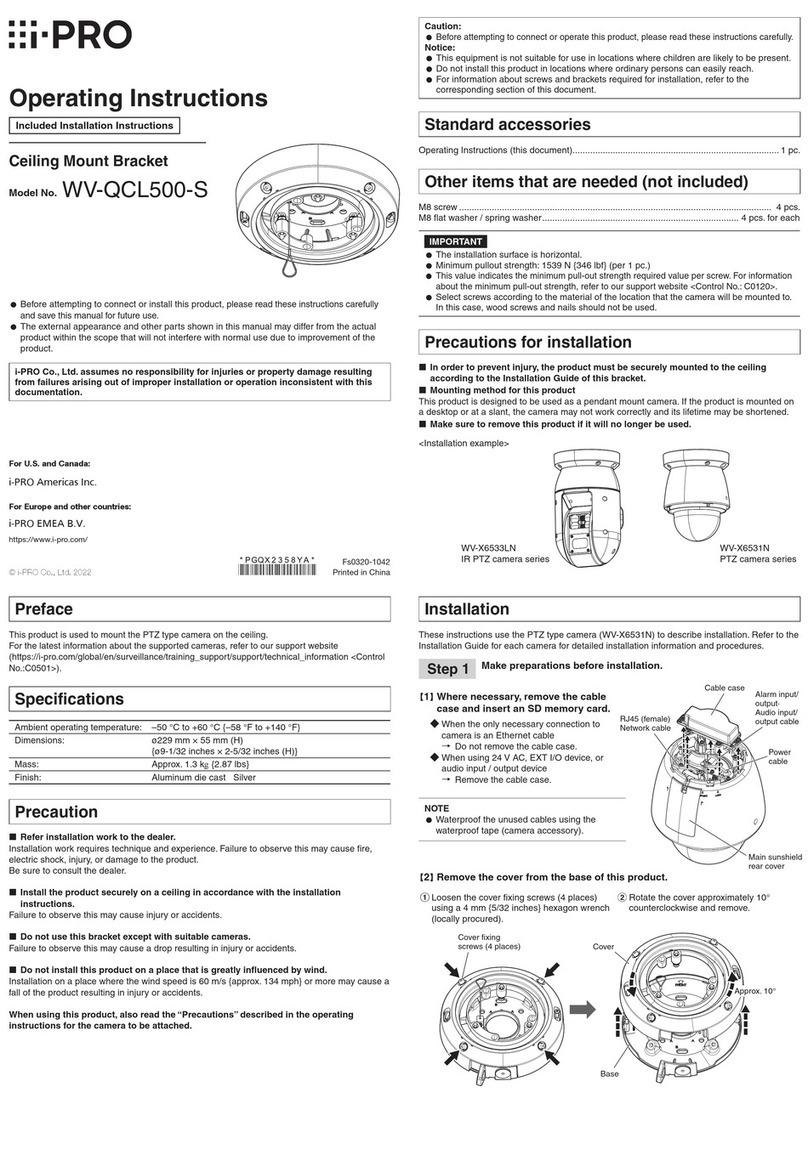
Other items that are needed (not included)
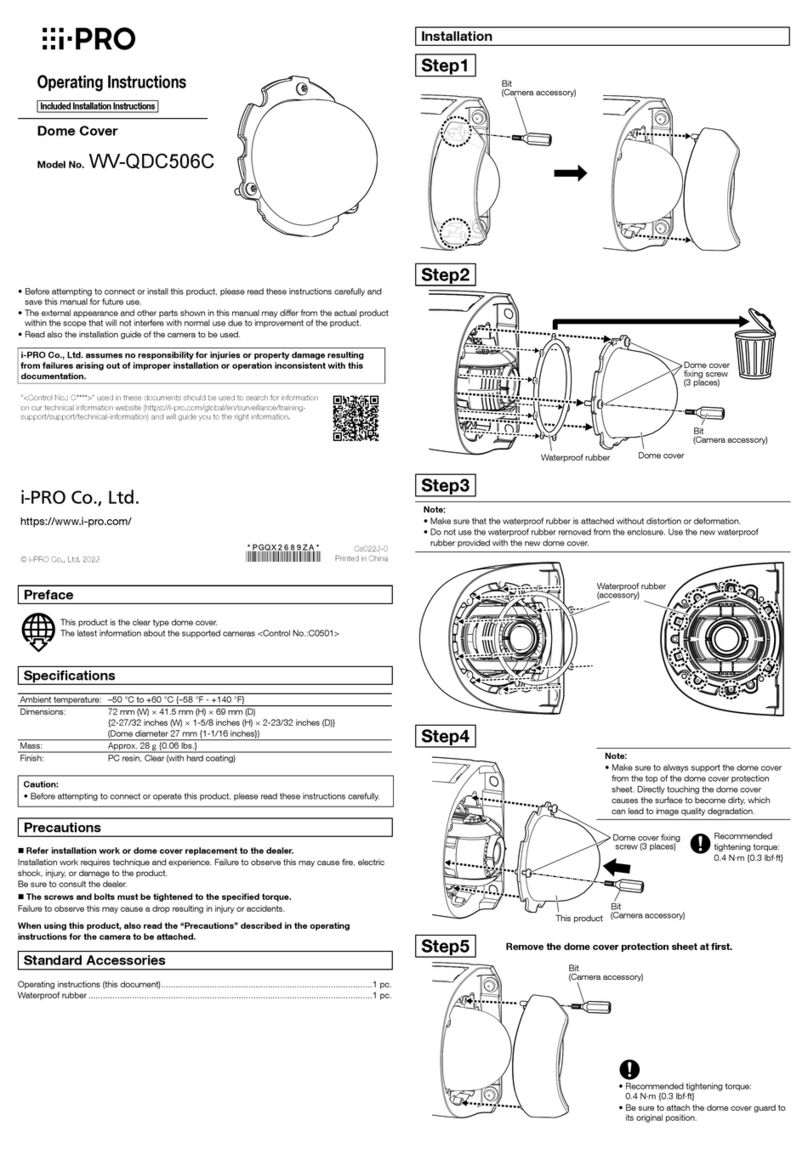
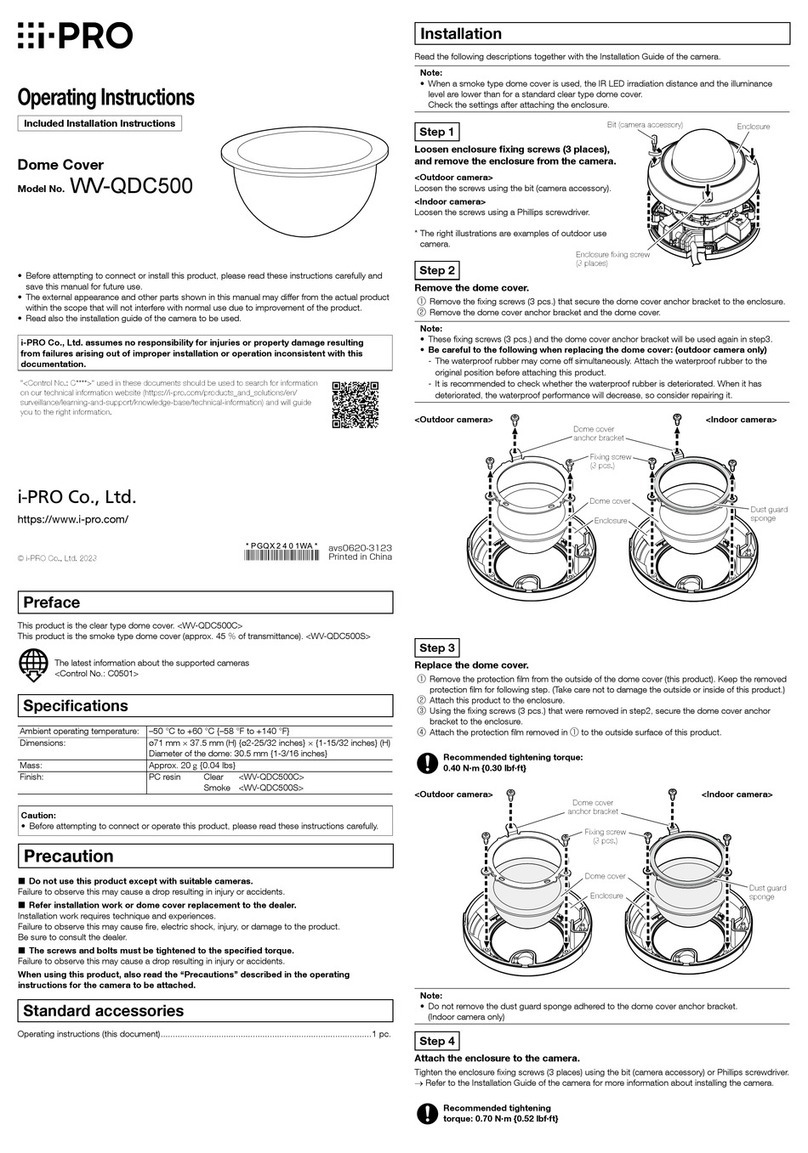
Installation
Step 1 Remove the enclosure part from the camera.
For removal instructions, please refer to the Installation Guide or preparation section of the
Installation Guide leaflet for each camera.
Step 2 Check installation direction.
• If this product is attached to a camera, it should be installed on a wall only.
• This product can be mounted in four directions on the camera. Determine the posi-
tion to install the product according to the direction of the wiring.
• This product is used to reduce the effect of ambient light on the lower part of the
screen. Therefore, the shadow of this product will appear on the upper part of the
screen.
avs0822-1092
Printed in China
Sunshade
Model No. WV-QSR505
Operating Instructions
• Before attempting to connect or install this product, please read these instructions carefully.
• The external appearance and other parts shown in this manual may differ from the actual product
within the scope that will not interfere with normal use due to improvement of the product.
 Do not use this product except with suitable cameras.
Failure to observe this may cause a drop resulting in injury or accidents.
 Refer installation work to the dealer.
Installation work requires technique and experience. Failure to observe this may cause fire, electric
shock, injury, or damage to the product.
Be sure to consult the dealer.
When using this product, also read the “Precautions” described in the operating
instructions for the camera to be attached.
Precautions
i-PRO Co., Ltd. assumes no responsibility for injuries or property damage resulting
from failures arising out of improper installation or operation inconsistent with this
documentation.
Caution:
• Before attempting to connect or operate this
product, please read these instructions care-
fully.
Notice:
• This product is not suitable for use in loca-
tions where children are likely to be present.
• Do not install this product in locations where
ordinary persons can easily reach.
Included Installation Instructions
Standard Accessories
Operating Instructions (this document)....... 1 pc.
“<Control No.: C****>” used in these documents should be used to search for
information on our technical information website (https://i-pro.com/global/en/
surveillance/training-support/support/technical-information) and will guide you to
the right information.
© i-PRO Co., Ltd. 2022
i-PRO Co., Ltd.
https://www.i-pro.com/
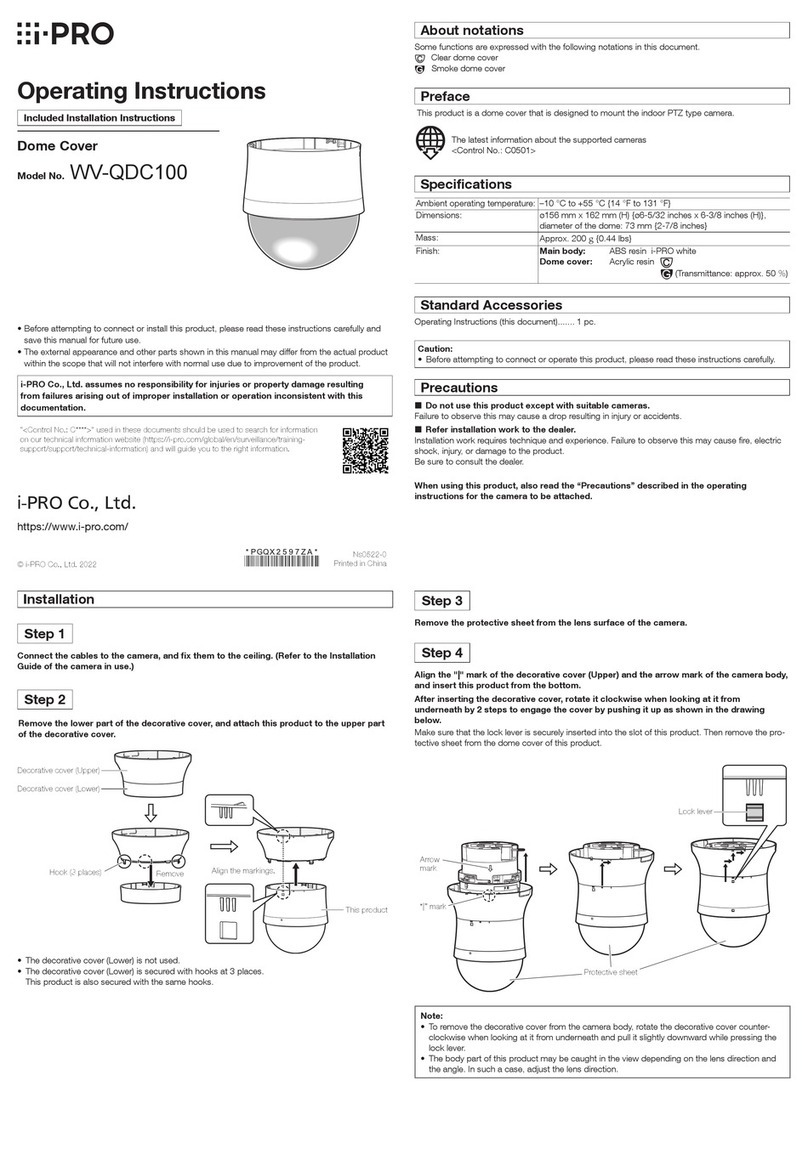
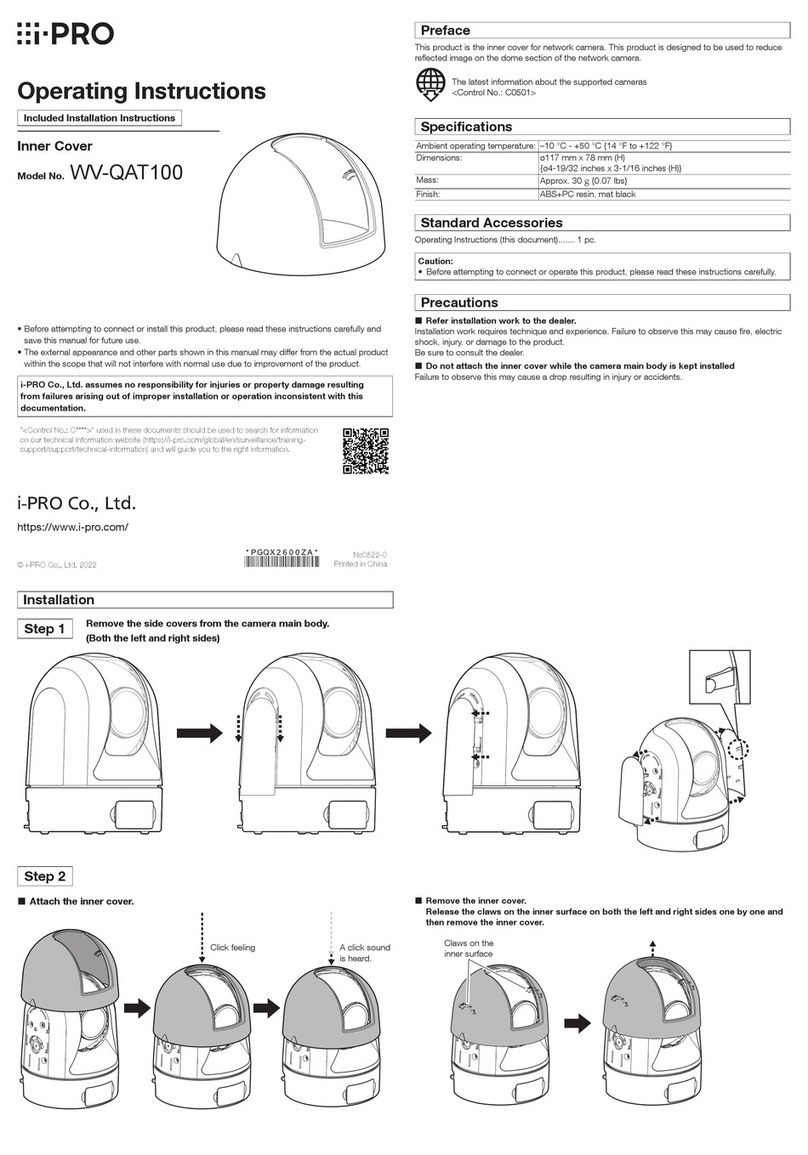
Preface
This unit is a sunshade to be attached to an
outdoor dome-type camera.
The latest information about the supported
cameras
<Control No.:C0501>.
Specifications
Ambient operating temperature: –40 °C to +60 °C {–40 °F to +140 °F}
Dimensions: 194 mm (W) x 153 mm (H) x 83 mm (D)
{7-5/8 inches(W) x 6-1/32 inches(H) x 3-9/32 inches (D)}
Mass: Approx. 120 g{0.24 lbs}
Finish: PC resin i-PRO white(WV-QSR505-W)
Black (WV-QSR505-B)
 In order to prevent injury, the product must be securely mounted to the camera
according to the Installation Guide of this product.
 Make sure to remove this product if it will no longer be used.
Precautions for installation
Wiring direction
Wiring direction
Step 3 Remove the two enclosure fixing screws from the enclosure.
①Press the enclosure fixing screws (2 of 4 locations)
from the inside with a thin screwdriver (locally pro-
cured).
②While performing ①, use a screwdriver from the
outside of the enclosure to rotate the enclosure fixing
screw counterclockwise and remove it.
Step 4 Fasten the unit to the enclosure.
③Temporarily secure the unit to the enclosure and
rotate the long enclosure fixing screw attached to
this product clockwise to penetrate the enclosure of
the camera.
Technical information website
Infrared Illumination effects and reflections
on the screen when using sunshades
<Control No.:C0511>.
For tightening torques, please refer to the camera
Installation Guide or the Installation Guide leaflet.
⇒Back to the camera installation procedure
①②
Bit (Camera accessories)
③
Bit (Camera accessories)
①②
③
Thin screwdriver ......................................... 1 pc Bit (Camera accessories) ............................ 1 pc
警告
■ 専用のカメラ以外は取り付けない
 (落下によるけがや事故の原因となります。)
■ 工事は販売店に依頼する

(工事には技術と経験が必要です。火災、感電、けが、器物損壊の原因となります。)
 ⇒必ず販売店に依頼してください。
安全上のご注意 必ずお守りください
■ お守りいただく内容を次の図記号で説明しています。(次は図記号の例です)
人への危害、財産の損害を防止するため、必ずお守りいただくことを説明しています。
■ 誤った使い方をしたときに生じる危害や損害の程度を区分して、説明しています。
「死亡や重傷を負うおそ
れがある内容」です。
警告
してはいけない内容で
す。
実行しなければならない内容
です。
注意:
󱾀取扱説明書をよくお読みのうえ、正しく
安全にお使いください。
注記:
󱾀本機は子供がいる可能性のある場所での
使用には適していません。
󱾀一般の人が容易に触れることができる場
所への設置はしないでください。
取扱説明書
工事説明付き
サンシェード
品番 WV-QSR505
このたびは、弊社製品をお買い上げいただき、まことにありがとうございます。
󱾀 取扱説明書をよくお読みのうえ、正しく安全にお使いください。
󱾀 ご使用前に「安全上のご注意」を必ずお読みください。
󱾀 製品の改良などにより、ご使用上影響のない範囲で、記載されている外観などが実際の製
品と異なる場合があります。
取扱説明書に記載されていない方法や、指定の部品を使用しない方法で施工されたことによ
り事故や損害が生じたときには、当社では責任を負えません。また、その施工が原因で故障
が生じた場合は、製品保証の対象外となります。
i-PRO製品の「お問い合わせ」については、以下の弊社サポートウェブサイト
を参照してください。
https://i-pro.com/jp/ja/supportportal
※「日本エリア」でお使いの場合に限ります。日本以外でお使いの場合のサービスは
いたしかねます。
ㄊノヱンヰጋ೙Ή᰷
https://www.i-pro.com/
設置上のお願い
■傷害防止のため、本機は設置の説明に従ってカメラにしっかりと取り付ける必要が
あります。
■ 本機を使用しなくなった場合は放置せず、必ず撤去してください。
付属品をご確認ください
取扱説明書(本書)........................................1冊
付属品以外に必要なもの
ドライバー(小)............................................1本 ビット(カメラ付属品)................................1本
設置する
Step1 カメラからエンクロージャー部分を取り外す。
取り外し方法は、各カメラの設置編または設置手順チラシの前準備部分をご参照ください。
Step2 取り付け方向を確認する。
󱾀カメラに本機を取り付けて使用する場合は壁設置専用となります。
󱾀本機はカメラに対して4方向に取り付け可能です。配線の方向に合わせて、本
機の取り付け位置を決めて下さい。
󱾀本機は画面下部への外光の影響を軽減するために使用します。そのため、画面
上部に本機の影が映り込みます。
Step3 エンクロージャーから取付位置のエンクロージャー固定ねじ2本を取り
外す。
①エンクロージャー固定ねじ(4か所中2か所)をド
ライバー(小)(現地調達)で内側から押さえる。
②①を実施しながらエンクロージャーの外側より
ドライバーを使い、エンクロージャー固定ねじ
を反時計回りに回転させ取り外す。
Step4 本機をエンクロージャーに固定する。
③本機をエンクロージャーに仮固定し、本機に装
着されている長いエンクロージャー固定ねじ
を時計回りに回転させ、カメラのエンクロー
ジャーを貫通させる。
技術情報ウェブサイト
「サンシェード使用時の赤外線照明の
影響と画面への映り込みについて」
<管理番号:C0511 >
締め付けトルクについては、カメラの設置編、
もしくは設置手順チラシを参照してください。
⇒カメラの設置手順へ戻る
商品概要
本機は屋外ドームタイプカメラに取り付けるサ
ンシェードです。
取り付け可能なカメラの最新情報
<管理番号:C0501 >
仕様
使用温度範囲 −40℃〜+ 60℃
寸法 幅:φ194mm /高さ:153mm /奥行:83mm
質量 約120g
仕上げ 本体:PC樹脂 i-PROホワイト(WV-QSR505-W)
ブラック   (WV-QSR505-B)
配線方向
配線方向
①②
③
ビット
(カメラ付属品)
ビット(カメラ付属品)
①②
③
本機をご使用の際は、取り付けるカメラの取扱説明書に記載された「安全上のご注意」
とあわせてお読みください。
取扱説明書に記載されている「<管理番号:Cxxxx>」は、以下の弊社技術情
報ウェブサイト内で該当する情報を検索する際に使用する番号です。
https://i-pro.com/jp/ja/supportportal/technicalinformation

Other i-PRO Camera Accessories manuals

i-PRO WV-QDC500 User manual

i-PRO

i-PRO WV-QDC500 User manual

i-PRO WV-CF5SA User manual

i-PRO

i-PRO WV-CF5SA User manual

i-PRO WV-QCL500-S User manual

i-PRO

i-PRO WV-QCL500-S User manual

i-PRO WV-QDC500 User manual

i-PRO

i-PRO WV-QDC500 User manual

i-PRO WV-QDC507C User manual

i-PRO

i-PRO WV-QDC507C User manual

i-PRO WV-QLR100-W User manual

i-PRO

i-PRO WV-QLR100-W User manual

i-PRO WV-QAT100 User manual

i-PRO

i-PRO WV-QAT100 User manual

i-PRO WV-QDC102C User manual

i-PRO

i-PRO WV-QDC102C User manual

i-PRO WV-QDC506C User manual

i-PRO

i-PRO WV-QDC506C User manual

i-PRO WJ-PU201 User manual

i-PRO

i-PRO WJ-PU201 User manual

i-PRO WV-QDC100 User manual

i-PRO

i-PRO WV-QDC100 User manual

i-PRO WV-QDC504C User manual

i-PRO

i-PRO WV-QDC504C User manual

i-PRO WV-QDC101C User manual

i-PRO

i-PRO WV-QDC101C User manual

i-PRO WV-QDC101C User manual

i-PRO

i-PRO WV-QDC101C User manual

i-PRO WV-QDC502 User manual

i-PRO

i-PRO WV-QDC502 User manual

Popular Camera Accessories manuals by other brands

Luxli orc-cello-10 quick start guide

Luxli

Luxli orc-cello-10 quick start guide

Nauticam NA-5dsr instruction manual

Nauticam

Nauticam NA-5dsr instruction manual

Insignia NS-DACMSFK user guide

Insignia

Insignia NS-DACMSFK user guide

MRMC Pan Bars quick start guide

MRMC

MRMC Pan Bars quick start guide

Tamron A056 owner's manual

Tamron

Tamron A056 owner's manual

GGP BT 48 Li 2.0 Operator's manual

GGP

GGP BT 48 Li 2.0 Operator's manual

Visceral Psyche Films Leeming LUT Pro Setup guide

Visceral Psyche Films

Visceral Psyche Films Leeming LUT Pro Setup guide

Digital Juice Shoulder Mount Stabilizer Getting started guide

Digital Juice

Digital Juice Shoulder Mount Stabilizer Getting started guide

Tektronix TEKBAT Series instructions

Tektronix

Tektronix TEKBAT Series instructions

Sony FDA-ECF05 operating instructions

Sony

Sony FDA-ECF05 operating instructions

ACP-EP Memory EPCF/128 brochure

ACP-EP Memory

ACP-EP Memory EPCF/128 brochure

Panasonic WV-VF65B instructions

Panasonic

Panasonic WV-VF65B instructions

Sanyo KR-CH(2.0) Cadnica Specifications

Sanyo

Sanyo KR-CH(2.0) Cadnica Specifications

Philips SJB4162/37 datasheet

Philips

Philips SJB4162/37 datasheet

Flycam DSLR Camvest Assembly manual

Flycam

Flycam DSLR Camvest Assembly manual

Philips LR03PS12C Specifications

Philips

Philips LR03PS12C Specifications

Ikan ELE-A7S-C quick start guide

Ikan

Ikan ELE-A7S-C quick start guide

SONLUX LightmaXX instruction manual

SONLUX

SONLUX LightmaXX instruction manual

manuals.online logo
manuals.online logoBrands
  • About & Mission
  • Contact us
  • Privacy Policy
  • Terms and Conditions

Copyright 2025 Manuals.Online. All Rights Reserved.