manuals.online logo
Brands
  1. Home
  2. •
  3. Brands
  4. •
  5. I-Tech
  6. •
  7. Network Hardware
  8. •
  9. I-Tech YPM2010P User manual

I-Tech YPM2010P User manual

User Manual
Model: YPM2010P
Product Specification
Important safety insturctions
01. Please read these instructions carefully before using the product and save for later reference.
02. Follow all warnings and instructions marked on the product.
03. Unplug this product from the wall outlet before cleaning. Clean the product with a damp soft
cloth. Do not use liquid or aerosol cleaners as it may cause permanent damage to the screen.
04. Do not use this product near water.
05. Do not place this product on an unstable cart, stand, or table.
The product may fall, causing serious damage to the product.
06. Slots and openings in the cabinet and the back or bottom are provided for ventilation; to ensure
reliable operation of the product and to protect it from overheating, these openings must not be
blocked or covered.
The openings should never be placed near or over a radiator or heat register, or in a built-in
installation unless proper ventilation is provided.
07. This product should be operated from the type of power indicated on the marking label.
If you are not sure of the type of power available, consult your dealer or local power company.
08. This is a safety feature. If you are unable to insert the plug into the outlet, contact your
electrician to replace your obsolete outlet.
Do not defeat the purpose of the grounding-type plug.
09. Never push objects of any kind into this product through cabinet slots as they may touch
dangerous voltage points or short out parts that could result in a risk of fire or electric shock.
Never spill liquid of any kind on the product.
10. Do not attempt to service this product yourself, as opening or removing covers may expose you to
dangerous voltage points or other risks and will void the warranty.
11. Refer all servicing to qualified service personnel.
12. Unplug this product from the wall outlet and refer servicing to qualified service personnel under
the following conditions:
a. When the power cord or plug is damaged or frayed.
b. If liquid has been spilled into the product.
c. If the product has been exposed to rain or water.
d. If the product does not operate normally when the operating instructions are followed.
Adjust only those controls that are covered by the operating instructions since improper
adjustment of other controls may result in damage and will often require extensive work
by a qualified technician to restore the product to normal operation.
Modified: 10-04-21
e. If the product has been dropped or the cabinet has been damaged.
f. If the product exhibits a distinct change in performance, indicating a need for service.
1. Instroduction
1.1 Features
High contrast color TFT-LCD Monitor support resolution up to 1600*1200.
Power input : DC 9-36V
1.2 Notice
Do not touch the LCD panel surface with sharp or hard objects.
Do not use abrasive cleaners, waxes or solvents for cleaning, use only a dry or damp, soft cloth.
Use only with a high quality, safety-approved power source ( DC 9-36V ).
1.3 Check List
a. LCD monitor x1
b. Terminal Block x1
c. VGA Cable,L=2.0m x1
d. DVI Cable,L=2.0m x1
If any items are missing or damaged, please contact your dealer immediately.
2. Installing the Monitor
The procedures for setting up your TFT LCD monitor are as followings:
2.1 Power & Signal connections
2.1.1 Power
DC 9-36V input
2.1.2 VGA cable ( or DVI cable ) connection
Plug 15-pin VGA signal cable ( or DVI cable ) to the VGA ( or DVI ) connector in the rear of PC system, and plug
the other end to the monitor. Secure cable connectors with screws.
i-Tech Company LLC
TOLL FREE: (888) 483-2418 • EMAIL: [email protected] • WEB: www.iTechLCD.com Modified: 10-04-21
2.2 Optional cable connections
The LCD monitor is designed to work with a variety of compatible video sources. Due to possible deviations
between these video sources, you may have to make adjustments to the monitor settings from the OSD menu
when switching between these sources.
These adjustments are made from the OSD menu.
3. Using VGA LCD Monitor
3.1 Key Definition
OSD KEY
Function
Auto
Auto Adjust
Menu
Menu Select
Power
Power ON / OFF
Increase
Up
Decrease
Down
i-Tech Company LLC
TOLL FREE: (888) 483-2418 • EMAIL: [email protected] • WEB: www.iTechLCD.com Modified: 10-04-21
3.2 Setup for Operation
OSDMENU
Description
Picture
Backlight
Adjust the Backlight of the screen.
Brightness
Adjust the Brightness of the screen.
Contrast
Adjust the Contrast of the screen.
Sharpness
This function allows the user to optimize the sharpness of the
image.
Display
Auto Adjustment
HPosition
Adjust the horizontal position of the screen’s image.
VPosition
Adjust the vertical position of the screen’s image.
Pixel Clock
Adjust frequency to fill display.
Phase
Adjust the phase control of the image.
Color
Gamma
Set the Gamma to 2.0/2.2/2.4 and off.
Color Temp
Set the color to 6500k/9300k/User.
Hue
Adjust the Hue of the screen.
Saturation
Adjust the Saturation of the screen.
Auto color
Advance
Aspect Ratio
Set Aspect Ratio to 4:3/5:4/16:9/Full.
Overscan
Set Overscan to on/off.
Ultra Vivid
Set Ultra Vivid to L/M/H/Off.
Input
Auto Select
VGA
VGA Input.
HDMI
HDMI Input.
DVI
DVI Input.
Audio
Volume
Adjust the Volume.
Mute
Set the Mute on/off.
Auto Source
Set the Audio Source Analog/Digital.
Other
Reset
Menu Time
Adjust the Menu Time.
OSD HPosition
Adjust the horizntal position of the OSD Menu screen’s image.
OSD VPosition
Adjust the vertical position of the OSD Menu screen’s image.
Language
Set the Language English/繁體中文
Transparency
Adjust the OSD Transparency.
i-Tech Company LLC
TOLL FREE: (888) 483-2418 • EMAIL: [email protected] • WEB: www.iTechLCD.com Modified: 10-04-21
4. Cleaning the monitor
a. Make sure the monitor is turned off.
b. Never spray or pour any liquid directly onto the screen or case.
c. Wipe the screen with a clean, soft, lint-free cloth. This removes dust and other particles.
d. The display area is highly prone to be scratched. Do not use ketone-type material
(ex. Acetone), Ethyl alcohol, toluene, ethyl acid or Methyl chloride to clean the panel.
It may permanently damage the panel and void the warranty.
e. If it is still not clean enough, apply a small amount of non-ammonia, non-alcohol based
glass cleaner onto a clean, soft, lint-free cloth, and wipe the screen.
f. Don't use water or oil directly on the monitor.
If droplets are allowed to dry on the monitor, permanent staining or discoloration may occur.
g. Cleaning Touch Screen: please use dry cloth or soft cloth with neutral detergent
(after wring dry) or one with ethanol at cleaning.
Do not use any organic solvent, acid or alkali solution.
5. Disclaimer
We do not recommend using any ammonia or alcohol-based cleaners on the monitor screen
or case. Some chemical cleaners have been reported to damage the screen and/or case of the
monitor.
i-Tech Company LLC
TOLL FREE: (888) 483-2418 • EMAIL: [email protected] • WEB: www.iTechLCD.com Modified: 10-04-21

Other I-Tech Network Hardware manuals

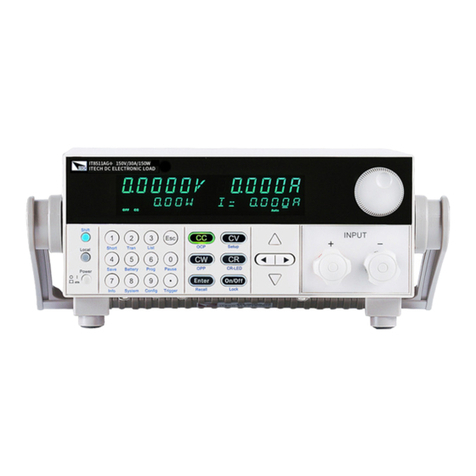
I-Tech IT8500G+ Series User manual

I-Tech

I-Tech IT8500G+ Series User manual

I-Tech ASKW2400SX User manual

I-Tech

I-Tech ASKW2400SX User manual

I-Tech DA001 Instruction Manual

I-Tech

I-Tech DA001 Instruction Manual

I-Tech IT-N2100 Series User manual

I-Tech

I-Tech IT-N2100 Series User manual

I-Tech IT-M3300 Series User manual

I-Tech

I-Tech IT-M3300 Series User manual

I-Tech NW117HD-8Ke User manual

I-Tech

I-Tech NW117HD-8Ke User manual

Popular Network Hardware manuals by other brands

Honeywell HDCD8TP user manual

Honeywell

Honeywell HDCD8TP user manual

NETGEAR UTM5 - ProSecure Unified Threat Management... Installationsanleitung

NETGEAR

NETGEAR UTM5 - ProSecure Unified Threat Management... Installationsanleitung

ProSoft MVI56-PDPMV1 user manual

ProSoft

ProSoft MVI56-PDPMV1 user manual

Extreme Networks WM-4T1i WAN Installation and user guide

Extreme Networks

Extreme Networks WM-4T1i WAN Installation and user guide

Wiznet W7100A Guide

Wiznet

Wiznet W7100A Guide

hilscher netRAPID Chip Carrier Getting started

hilscher

hilscher netRAPID Chip Carrier Getting started

EnerSys Alpha Cordex 48-650W Technical guide

EnerSys

EnerSys Alpha Cordex 48-650W Technical guide

Huawei OptiX RTN 600 ODU manual

Huawei

Huawei OptiX RTN 600 ODU manual

Esu ECoSDetector instruction manual

Esu

Esu ECoSDetector instruction manual

XtendLan 1U Series quick start guide

XtendLan

XtendLan 1U Series quick start guide

FieldServer Modbus Daniels FS-8700-15 Driver manual

FieldServer

FieldServer Modbus Daniels FS-8700-15 Driver manual

Panasonic Transistors 2SC2480 Specifications

Panasonic

Panasonic Transistors 2SC2480 Specifications

Paradyne Application Module 9109 OCU-DP installation instructions

Paradyne

Paradyne Application Module 9109 OCU-DP installation instructions

SkyPilot SkyConnector Outdoor installation guide

SkyPilot

SkyPilot SkyConnector Outdoor installation guide

Amphenol LINC-1RUK-48LCA1-100F installation guide

Amphenol

Amphenol LINC-1RUK-48LCA1-100F installation guide

Gridstore GS-1000-2 user guide

Gridstore

Gridstore GS-1000-2 user guide

CoreTigo TigoBridge B1 user manual

CoreTigo

CoreTigo TigoBridge B1 user manual

Arista CloudVision DCA-100-CV quick start guide

Arista

Arista CloudVision DCA-100-CV quick start guide

manuals.online logo
manuals.online logoBrands
  • About & Mission
  • Contact us
  • Privacy Policy
  • Terms and Conditions

Copyright 2025 Manuals.Online. All Rights Reserved.